Instructions for Philips PW1830.pdf
Instructions for Philips PW1830.pdf
Instructions for Philips PW1830.pdf
You also want an ePaper? Increase the reach of your titles
YUMPU automatically turns print PDFs into web optimized ePapers that Google loves.
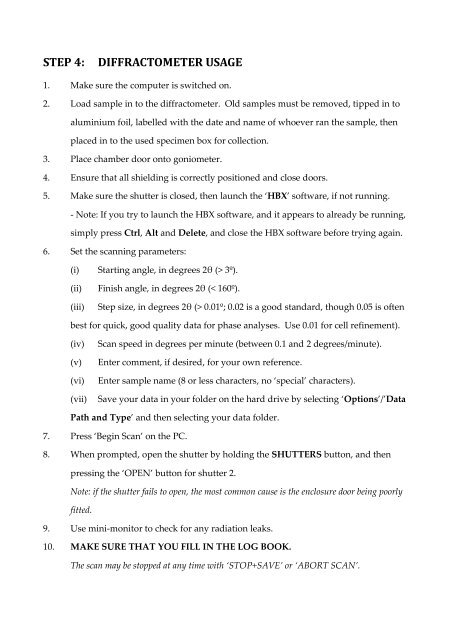
STEP 4: DIFFRACTOMETER USAGE<br />
1. Make sure the computer is switched on.<br />
2. Load sample in to the diffractometer. Old samples must be removed, tipped in to<br />
aluminium foil, labelled with the date and name of whoever ran the sample, then<br />
placed in to the used specimen box <strong>for</strong> collection.<br />
3. Place chamber door onto goniometer.<br />
4. Ensure that all shielding is correctly positioned and close doors.<br />
5. Make sure the shutter is closed, then launch the ‘HBX’ software, if not running.<br />
- Note: If you try to launch the HBX software, and it appears to already be running,<br />
simply press Ctrl, Alt and Delete, and close the HBX software be<strong>for</strong>e trying again.<br />
6. Set the scanning parameters:<br />
(i) Starting angle, in degrees 2θ (> 3º).<br />
(ii) Finish angle, in degrees 2θ (< 160º).<br />
(iii) Step size, in degrees 2θ (> 0.01º; 0.02 is a good standard, though 0.05 is often<br />
best <strong>for</strong> quick, good quality data <strong>for</strong> phase analyses. Use 0.01 <strong>for</strong> cell refinement).<br />
(iv) Scan speed in degrees per minute (between 0.1 and 2 degrees/minute).<br />
(v) Enter comment, if desired, <strong>for</strong> your own reference.<br />
(vi) Enter sample name (8 or less characters, no ‘special’ characters).<br />
(vii) Save your data in your folder on the hard drive by selecting ‘Options’/’Data<br />
Path and Type’ and then selecting your data folder.<br />
7. Press ‘Begin Scan’ on the PC.<br />
8. When prompted, open the shutter by holding the SHUTTERS button, and then<br />
pressing the ‘OPEN’ button <strong>for</strong> shutter 2.<br />
Note: if the shutter fails to open, the most common cause is the enclosure door being poorly<br />
fitted.<br />
9. Use mini-monitor to check <strong>for</strong> any radiation leaks.<br />
10. MAKE SURE THAT YOU FILL IN THE LOG BOOK.<br />
The scan may be stopped at any time with ‘STOP+SAVE’ or ‘ABORT SCAN’.


