operation - Victor Technologies
operation - Victor Technologies
operation - Victor Technologies
You also want an ePaper? Increase the reach of your titles
YUMPU automatically turns print PDFs into web optimized ePapers that Google loves.
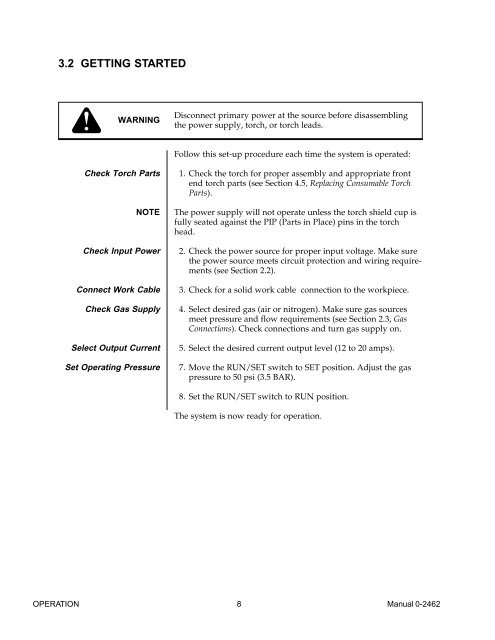
3.2 GETTING STARTED<br />
WARNING<br />
Check Torch Parts<br />
NOTE<br />
Check Input Power<br />
Connect Work Cable<br />
Check Gas Supply<br />
Select Output Current<br />
Set Operating Pressure<br />
Disconnect primary power at the source before disassembling<br />
the power supply, torch, or torch leads.<br />
Follow this set-up procedure each time the system is operated:<br />
1. Check the torch for proper assembly and appropriate front<br />
end torch parts (see Section 4.5, Replacing Consumable Torch<br />
Parts).<br />
The power supply will not operate unless the torch shield cup is<br />
fully seated against the PIP (Parts in Place) pins in the torch<br />
head.<br />
2. Check the power source for proper input voltage. Make sure<br />
the power source meets circuit protection and wiring requirements<br />
(see Section 2.2).<br />
3. Check for a solid work cable connection to the workpiece.<br />
4. Select desired gas (air or nitrogen). Make sure gas sources<br />
meet pressure and flow requirements (see Section 2.3, Gas<br />
Connections). Check connections and turn gas supply on.<br />
5. Select the desired current output level (12 to 20 amps).<br />
7. Move the RUN/SET switch to SET position. Adjust the gas<br />
pressure to 50 psi (3.5 BAR).<br />
8. Set the RUN/SET switch to RUN position.<br />
The system is now ready for <strong>operation</strong>.<br />
OPERATION 8 Manual 0-2462


