ER-200D Personal Noise Dosimeter with Data Logging User Manual
ER-200D Personal Noise Dosimeter with Data Logging User Manual
ER-200D Personal Noise Dosimeter with Data Logging User Manual

Create successful ePaper yourself
Turn your PDF publications into a flip-book with our unique Google optimized e-Paper software.
<strong>Personal</strong> <strong>Noise</strong> <strong>Dosimeter</strong><br />
1<br />
<strong>User</strong> <strong>Manual</strong><br />
<strong>ER</strong>-<strong>200D</strong>
Operating Instructions<br />
Introduction . . . . . . . . . . . . . . . . . . . . . . . . . . . . . . . .5<br />
Getting Started<br />
Package Contents . . . . . . . . . . . . . . . . . . . . . . . . .6<br />
Identifi cation of Parts . . . . . . . . . . . . . . . . . . . . . . .7<br />
Using the Windscreen . . . . . . . . . . . . . . . . . . . . . 8-9<br />
Operating Instructions<br />
Battery Insertion . . . . . . . . . . . . . . . . . . . . . . . . . .10<br />
Power Button Functions . . . . . . . . . . . . . . . . . . . .10<br />
Status Check . . . . . . . . . . . . . . . . . . . . . . . . . . . .11<br />
Normal Mode . . . . . . . . . . . . . . . . . . . . . . . . . . . .12<br />
Interpreting Results . . . . . . . . . . . . . . . . . . . . .13<br />
QuickCheck Mode . . . . . . . . . . . . . . . . . . . . . . . .14<br />
Interpreting Results . . . . . . . . . . . . . . . . . . . . .15<br />
Reading the Display: LEDs . . . . . . . . . . . . . . . . . .16<br />
What Dose % Means . . . . . . . . . . . . . . . . . . . . . .17<br />
NIOSH vs. OSHA Criteria . . . . . . . . . . . . . . . . . . . .18<br />
<strong>Data</strong> <strong>Logging</strong> . . . . . . . . . . . . . . . . . . . . . . . . . . . .19<br />
Memory Capacity . . . . . . . . . . . . . . . . . . . . . . 19-20<br />
Clearing the Memory . . . . . . . . . . . . . . . . . . . . . .20<br />
Calibration . . . . . . . . . . . . . . . . . . . . . . . . . . . . . .20<br />
Specifi cations . . . . . . . . . . . . . . . . . . . . . . . . . . . .21<br />
Care and Maintenance . . . . . . . . . . . . . . . . . . . . .22<br />
Warranty . . . . . . . . . . . . . . . . . . . . . . . . . . . . . . .22<br />
Risk Factors for Hearing Loss . . . . . . . . . . . . . . . .23<br />
2
Introduction<br />
Hearing loss from loud sound affects millions of people.<br />
<strong>Noise</strong>-induced hearing loss is preventable, but most people<br />
don’t know how long they can listen to loud sound <strong>with</strong>out<br />
risking hearing damage. A single noise exposure may not<br />
result in hearing loss, but permanent damage to the inner<br />
ear from noise adds up over time. The accumulation of too<br />
much noise day by day, year after year, is the determining<br />
factor in hearing loss risk. A sound level meter is a device<br />
that measures noise at a particular point in time, while<br />
a dosimeter measures sound levels for many hours and<br />
calculates the cumulative noise dose in percent.<br />
Daily noise dose is determined by both the intensity of the<br />
sound and the amount of exposure time. A 100% dose<br />
means that a person has reached the maximum noise<br />
exposure for the day, and continued exposure to loud sound<br />
could lead to hearing loss. Ideally, hearing protection should<br />
be used before the dose reaches 100% since dose limits are<br />
based on averages, and some ears are more susceptible to<br />
noise damage than others. When the noise dose exceeds<br />
50% a person has reached half the maximum noise exposure<br />
for the day and it’s a good idea to use hearing protection to<br />
prevent over-exposure, particularly if a 50% dose reading is<br />
reached early in the day.<br />
5
Getting Started<br />
The <strong>ER</strong>-<strong>200D</strong> <strong>Personal</strong> <strong>Noise</strong> <strong>Dosimeter</strong> is an inexpensive,<br />
easy-to-use device that provides a good estimate of noise<br />
dose and alerts the user to the risk of over exposure.<br />
In cases of gunfire and other impulse noise, no conventional<br />
dosimeter measures the risk accurately. More specialized<br />
equipment is required to measure impulse noise.<br />
The <strong>ER</strong>-<strong>200D</strong> has three modes of operation:<br />
· Status: displays the previously measured results, indicates<br />
when batteries need to be replaced, and indicates when<br />
the device memory is full.<br />
· Normal: measures and displays noise dose continuously<br />
for up to 7 days; provides an early warning for<br />
over-exposure and the need for hearing protection.<br />
· QuickCheck: measures noise for two minutes then<br />
calculates and displays the estimated dose per hour.<br />
QuickCheck provides a quick way to measure a specific<br />
noise source to determine if permissible exposure levels<br />
will be exceeded and hearing protection is needed (e.g.,<br />
loud equipment, vehicles, power tools, concerts or sporting<br />
events).<br />
Package Contents<br />
· <strong>ER</strong>-<strong>200D</strong> <strong>Personal</strong> <strong>Noise</strong> <strong>Dosimeter</strong><br />
· USB Cable<br />
· PC Interface Software CD<br />
· Windscreen<br />
· Batteries: Three AAAA Alkaline*<br />
· <strong>User</strong> Guide<br />
*AAAA batteries are available at electronics retailers<br />
such as Radio Shack<br />
6
Identification of Parts<br />
A Microphone<br />
B Auxiliary Input Jack<br />
C LEDs<br />
D Power Button<br />
E Clip<br />
F Battery Compartment<br />
G USB Socket<br />
A<br />
A<br />
B<br />
C<br />
D<br />
B<br />
G<br />
7<br />
E<br />
F<br />
G
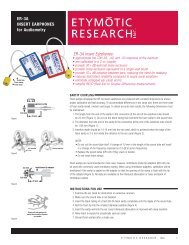
Using the Windscreen<br />
For accurate measurements, the 35 mm (1.4”) windscreen<br />
included <strong>with</strong> the <strong>ER</strong>-<strong>200D</strong> should be used when noise is<br />
measured outdoors or near any turbulence, e.g., from a<br />
fan. The foam windscreen allows accurate measurement in<br />
winds up to 15 to 20 mph.<br />
Note: Blowing across the microphone opening on<br />
the dosimeter can cause the same turbulence as a<br />
50 mph wind.<br />
The windscreen contains a plastic pin on the interior to<br />
anchor it to the <strong>ER</strong>-<strong>200D</strong>. To attach the windscreen,<br />
carefully pull the foam back to visualize the pin. Place<br />
the pin in the large auxiliary input jack at the top of the<br />
<strong>ER</strong>-<strong>200D</strong>. Gently pull the foam down over the top of the<br />
dosimeter case. To remove the windscreen, grasp the<br />
windscreen and pin and pull straight out.<br />
8
Windscreen<br />
Windscreen fits on top<br />
of the dosimeter<br />
Pull up the foam and<br />
line up the windscreen<br />
pin <strong>with</strong> the auxiliary<br />
input jack on top of the<br />
dosimeter<br />
Push firmly into the<br />
opening until you hear<br />
it snap in<br />
Gently pull foam down<br />
over top of dosimeter<br />
case. <strong>Dosimeter</strong> is<br />
ready to operate<br />
9
Operating<br />
Instructions<br />
Battery Insertion<br />
On the back side of the dosimeter, locate the arrow on the<br />
battery compartment.<br />
· Press down and slide<br />
the cover off.<br />
· Insert three AAAA<br />
batteries (supplied)<br />
positive side down<br />
as shown.<br />
· Replace cover.<br />
Power Button Functions<br />
The Power button is used to select the type of run.<br />
This sequence cannot be changed.<br />
· One press: Displays Status<br />
· Two presses: Starts a Normal run<br />
·<br />
Three presses: Starts a QuickCheck run<br />
10
Status Check<br />
Power ON<br />
· Press and release the power button one time.<br />
The 12.5% green LED illuminates briefly.<br />
· The previously measured noise dose is displayed<br />
(flashing LED).<br />
Device status is displayed<br />
· Two Green LEDs<br />
Battery is good; memory capacity is acceptable<br />
· Two Green and one Yellow LED<br />
Battery is low or memory capacity is low<br />
· Two Red LEDs — 3 Possibilities<br />
- Battery is dead<br />
- Device memory is full<br />
- Hardware failure<br />
Good<br />
2 Green<br />
Caution<br />
2 Green and<br />
1 Yellow<br />
Warning<br />
2 Red<br />
11
Normal Mode<br />
Run Length: Programmable<br />
(16 hours; 3 days; 5 days; 7 days)<br />
Power ON<br />
· Press and release the power button two times.<br />
-<br />
The 12.5% (green) LED illuminates on the first press<br />
- The 25% (green) LED illuminates on the second press<br />
· Three LEDs (green, yellow and red) flash twice. Then<br />
the 12.5% LED flashes, indicating the dosimeter is now<br />
measuring and integrating sound levels.<br />
Measurement Window<br />
In Normal mode, dose values are obtained every 220 msec,<br />
summed over a 3.75 minute interval and saved in<br />
non-volatile memory every 3.75 minutes (16 times<br />
per hour).<br />
Measurement Period<br />
The default measurement period is 16 hours. The current<br />
dose is continually displayed by a flashing LED. At the<br />
end of the measurement period three LEDs (green, yellow<br />
and red) flash twice, indicating the measurement is<br />
complete. The dosimeter automatically shuts off.<br />
Dose is stored in the device memory and will be displayed<br />
when the device is powered on in Status mode. Stored data<br />
can also be downloaded to a PC.<br />
Power OFF<br />
· To shut off prior to automatic shutdown: press and hold<br />
the power button for two seconds.<br />
· Three LEDs (green, yellow and red) flash twice and the<br />
device shuts off.<br />
12
Interpreting Results<br />
Normal Mode (Based on NIOSH Criteria)<br />
LED Dose% Risk Factor<br />
green 12.5%<br />
(slow flash)<br />
green 12.5%<br />
(regular flash)<br />
< 12.5%<br />
12.5 - 24%<br />
green 25% 25 - 49%<br />
yellow 50% 50 - 99%<br />
red 100% 100 - 199%<br />
red 2x 200 - 399%<br />
red 4x 400 - 799%<br />
red 8, 16, 32x<br />
(regular flash)<br />
red 8, 16, 32x<br />
(double flash)<br />
red 8, 16, 32x<br />
(fast flash)<br />
8x<br />
16x<br />
32x<br />
No risk of hearing<br />
loss<br />
No risk of hearing<br />
loss<br />
No risk of hearing<br />
loss<br />
13<br />
1/2 or more of<br />
daily dose<br />
Exposure limit<br />
exceeded<br />
> 2x allowable<br />
daily dose<br />
> 4x allowable<br />
daily dose<br />
> 8x allowable<br />
daily dose<br />
> 16x allowable<br />
daily dose<br />
> 32x allowable<br />
daily dose<br />
Hearing<br />
Protection<br />
Needed<br />
No<br />
No<br />
No<br />
Yes<br />
(conservatively)<br />
Yes<br />
Yes<br />
Yes<br />
Yes<br />
Yes<br />
Yes
QuickCheck Mode<br />
(Estimated Dose per Hour) Test Time: 2 minutes<br />
Power ON<br />
· Press and release the power button three times.<br />
- The 12.5% (green) LED illuminates on the first press.<br />
- The 25% (green) LED illuminates on the second press<br />
- The 50% (yellow) LED illuminates on the third press.<br />
·<br />
The LEDs sweep twice from bottom to top.<br />
· The bottom LED flashes green throughout the<br />
measurement, indicating QuickCheck mode.<br />
· The solid LED indicates the predicted dose per hour.<br />
After 2 minutes the LEDs sweep twice from bottom to top,<br />
indicating the measurement is complete.<br />
· The solid LED (predicted dose per hour) displays<br />
for 7 seconds while the bottom LED flashes green<br />
(indicating QuickCheck). The dosimeter then shuts off.<br />
· Result is stored in the device memory and is displayed<br />
when the device is turned on again in Status mode.<br />
Stored data can also be downloaded to a PC.<br />
Power OFF<br />
To power off prior to QuickCheck’s automatic shutdown<br />
you must wait at least 15 seconds into the measurement.<br />
· Press and hold the power button for 2 seconds. The LEDs<br />
will sweep twice, bottom to top.<br />
· The estimated dose per hour (solid LED) is displayed<br />
for 7 seconds while the bottom LED flashes green<br />
(indicating QuickCheck). The dosimeter shuts off.<br />
NOTE: If the dosimeter is shut off prior to its automatic shutdown, it<br />
will still calculate the predicted hourly dose based on the sound level<br />
and duration of the measurement.<br />
14
Interpreting Results<br />
QuickCheck Mode (Based on NIOSH Criteria)<br />
Solid LED is<br />
Est. Dose per<br />
hour<br />
15<br />
Est. Dose per<br />
8 hours<br />
No LED lit < 12.5% 8x alternating<br />
flash red/green<br />
>800% >6400%
Reading the Display:<br />
What the LEDs Mean<br />
LED Color<br />
The dosimeter uses color-coded LEDs to display noise dose<br />
in percent.<br />
Green (Safe): <strong>Noise</strong> dose is below 50%<br />
Yellow (Borderline): <strong>Noise</strong> dose is<br />
greater than 50% and less than 100%<br />
Red (High Risk): <strong>Noise</strong> dose is greater<br />
than 100%<br />
LED Flash Rate In Normal mode:<br />
· A slow flashing LED at 12.5% means that the noise dose<br />
is at or below 12.5% (i.e., between 0% and 12.5%). A<br />
fast flash at 12.5% indicates the dose exceeds 12.5%<br />
(i.e., dose is between 12.5 and 25%)<br />
· LEDs 25% to 4x flash rapidly when that dose level is<br />
exceeded<br />
· For the bottom LED (8, 16, 32x):<br />
- Regular flash: dose exceeds 8x<br />
- Double flash: dose exceeds 16x<br />
- Fast continuous flash: dose exceeds 32x<br />
In QuickCheck mode:<br />
· All LEDs are solid except the bottom LED, which flashes<br />
green to indicate QuickCheck mode.<br />
· If dose per hour exceeds 8x the bottom LED flashes<br />
alternately red and green.<br />
16
What Dose % Means<br />
<strong>Noise</strong> dose is a measurement of noise exposure. It is the<br />
combination of the amount of sound and the amount of<br />
exposure time. While sound levels may fluctuate over time,<br />
noise dose never decreases over time; it either remains<br />
stable or increases. Think of 100% dose as the exposure<br />
limit for an entire day; 200% as two times the exposure<br />
limit for a day or two days’ worth of noise exposure,<br />
400% as four times the limit or four days’ worth of noise<br />
exposure, etc. The risk of hearing impairment grows <strong>with</strong><br />
increasing noise dose.<br />
The limits of safe exposure to high sound levels are not<br />
absolute, since people differ in their degree of susceptibility<br />
to noise-induced hearing loss. Dose limits are based on<br />
average susceptibility. A small fraction of the population<br />
is more susceptible than average, and for these people<br />
a 100% dose may be enough noise exposure to cause<br />
hearing loss over time. Likewise, a small fraction of the<br />
population is less susceptible than average, and these<br />
people may be able to tolerate noise exposures exceeding<br />
100% <strong>with</strong>out developing significant hearing problems.<br />
Most people will fall somewhere between the two<br />
extremes. Since noise-induced hearing loss is irreversible<br />
and there is no way to determine individual susceptibility<br />
beforehand, a conservative approach would be to monitor<br />
the noise dose and use hearing protection whenever the<br />
noise dose exceeds 50%.<br />
17
NIOSH vs. OSHA Criteria<br />
for Estimating Allowable<br />
<strong>Noise</strong> Dose<br />
In the United States two standards are used to define how<br />
noise dose is calculated: National Institute for Occupational<br />
Safety and Health (NIOSH) Criteria for a Recommended<br />
Standard (NIOSH, 1998) and Occupational Safety and<br />
Health Administration (OSHA) Occupational <strong>Noise</strong> Standard<br />
(OSHA, 1983).<br />
When deciding which standard to use it is important<br />
to note that the differences in these standards have<br />
a significant impact on hearing loss risk. The more<br />
conservative NIOSH criteria are based on scientific data<br />
relating noise levels to risk of hearing damage, and are<br />
more protective of hearing than the OSHA criteria. OSHA<br />
criteria allow for higher exposure levels and/or longer<br />
exposure times as compared to the NIOSH criteria, and are<br />
therefore less protective of hearing.<br />
ExAMPLE:<br />
NIOSH 100% dose = 85 dB for 8 hrs or 88 dB for 4 hrs<br />
OSHA 100% dose = 90 dB for 8 hrs or 95 dB for 4 hrs<br />
Allowable daily exposures (hrs per day)<br />
based on OSHA and NIOSH<br />
<strong>Noise</strong> level dBA 85 88 90 92 94 95 97 100<br />
OSHA 16 8 6 4 3 2<br />
NIOSH 8 4 1 ¾ ½ ¼<br />
18
<strong>Data</strong> <strong>Logging</strong><br />
Normal and QuickCheck results are stored in the dosimeter<br />
and can be downloaded, saved and printed using the<br />
<strong>ER</strong>-<strong>200D</strong> Utility Suite. See Utility Suite <strong>User</strong> Guide for<br />
instructions and information.<br />
Memory Capacity<br />
The <strong>ER</strong>-<strong>200D</strong> has a non-volatile memory. <strong>Data</strong> stored in<br />
the device are retained even if the batteries are removed<br />
after a completed run. <strong>Data</strong> can be downloaded and saved<br />
to a PC after each run or after multiple runs. The <strong>ER</strong>-<strong>200D</strong><br />
can be set to overwrite data when its memory is full; in this<br />
case, the oldest run is the first to be overwritten. If the <strong>ER</strong>-<br />
<strong>200D</strong> is set so that data is not overwritten, data must be<br />
downloaded and/or removed from the device to clear the<br />
memory for further data runs.<br />
There are 48 blocks of data storage available in the<br />
instrument. The number of “runs” the device can store<br />
depends on the type and length of each run.<br />
QuickCheck: 2 blocks<br />
Normal (1 hr): 2 blocks<br />
Normal (16 hr): 5 blocks<br />
Normal (3 days): 19 blocks<br />
Normal (5 days): 31 blocks<br />
Normal (7 days): 43 blocks<br />
19
Any combination of runs can be used up to the memory<br />
capacity of the device.<br />
Examples:<br />
a. 24 QuickCheck runs<br />
[24 * 2 blocks each = 48 total]<br />
b. Nine 16-hour runs + One QuickCheck run<br />
[9 * 5 blocks each + 2 = 47 total]<br />
c. Two 3-day runs + Two 16-hour runs<br />
[2 * 19 blocks each + 2 * 5 blocks each = 48 total]<br />
d. One 5-day run + Three 16-hour runs + 1 QuickCheck run<br />
[31 blocks + 3 * 5 blocks each + 2 = 48 total]<br />
e. One 7-day run + One 16-hour run<br />
[43 blocks + 5 blocks = 48 total]<br />
When the memory is full the Status indicator (accessed<br />
<strong>with</strong> one press of the power button) shows two red LEDs:<br />
Clearing the Memory<br />
When the <strong>ER</strong>-<strong>200D</strong> memory is full and the dosimeter is set<br />
not to overwrite the data, then data must be removed from<br />
the device before additional data runs can be obtained. See<br />
page 50 for more information.<br />
Calibration<br />
The <strong>ER</strong>-<strong>200D</strong> dosimeter is factory calibrated. Advanced<br />
users can verify calibration using the <strong>ER</strong>-<strong>200D</strong> Utility Suite.<br />
See page 39 for more information.<br />
20
Specifications<br />
The default settings used by the <strong>ER</strong>-<strong>200D</strong> for calculation of<br />
noise dose are consistent <strong>with</strong> ANSI S1.25–1991 (R2002)<br />
Specification for <strong>Personal</strong> <strong>Noise</strong> <strong>Dosimeter</strong>s and NIOSH<br />
Criteria for a Recommended Standard (NIOSH, 1998).<br />
Default settings are:<br />
· Exchange rate: 3 dB<br />
· Criterion level: 85 dB<br />
· Threshold level: 75 dB<br />
Run Length: 16 hours*<br />
Calibration Accuracy: ± 2.5 dB<br />
Frequency Weighting: A<br />
Response: Slow<br />
Temperature Range of Operation:<br />
-10°C to 45°C (14°F to 113°F)<br />
Omni-directional Microphone:<br />
Flat from 100 Hz to 15 kHz<br />
Power Supply: Three AAAA batteries<br />
RMS Detector: Dynamic range 60 dB (70 to 130 dB)<br />
Battery Life: > 200 hours continuous use<br />
*Note: to make an 8-hour measurement, the dosimeter should be set<br />
to measure for 16 hours. This timeframe allows for an adequate time<br />
window around the measurement and accommodates overtime and<br />
swing-shift scheduling.<br />
Flexibility in the dosimeter design allows programmable<br />
control of dosimeter settings using the PC interface.<br />
Choices include:<br />
· Exchange rate: 3, 4 or 5 dB<br />
· Criterion level: 70 to 95 dB, in 1-dB steps<br />
· Threshold level: 65 to 90 dB, in 1-dB steps<br />
· Measurement time (Run Length) in Normal Mode:<br />
16 hours; 3 days; 5 days; 7 days<br />
21
Care and Maintenance<br />
·<br />
·<br />
·<br />
·<br />
Do not expose to extreme temperatures<br />
Do not immerse in any liquids<br />
Clean <strong>with</strong> a soft dry cloth<br />
Avoid dropping and hard knocks to the unit<br />
Warranty<br />
Etymotic Research, Inc. warrants this product against<br />
defects in material or workmanship for a period of one<br />
year from the date of original purchase. Etymotic will repair<br />
or replace the defective product at its option if returned<br />
<strong>with</strong>in the warranty period to our service facility. This<br />
warranty is in lieu of all other warranties, expressed or<br />
implied, including, but not limited to, any implied warranty<br />
of merchantability or fitness for a particular purpose.<br />
FCC / Industry Canada Statements<br />
This device complies <strong>with</strong> Part 15 of the FCC Rules.<br />
Operation is subject to the following two conditions:<br />
(1) this device may not cause harmful interference, and<br />
(2) this device must accept any interference received,<br />
including interference that may cause undesired operation.<br />
This class B digital apparatus complies <strong>with</strong> Canadian<br />
ICES-003.<br />
Cet appareil numérique de la classe B est conforme à la<br />
norme NMB-003 du Canada.<br />
22
Risk Factors for Hearing Loss<br />
Health risks from excessive noise exposure include<br />
permanent hearing loss and tinnitus (ringing in the ears).<br />
Other factors such as genetics, exposure to smoke,<br />
pesticides, chemical solvents and certain medications<br />
increase the risk of hearing loss. Some of these factors<br />
make noise exposure more damaging to hearing than noise<br />
exposure alone. The dosimeter predicts average risk, not<br />
individual risk.<br />
23
Utility Suite Installation<br />
About the Utility Suite . . . . . . . . . . . . . . . . . . . . . . .27<br />
Installation . . . . . . . . . . . . . . . . . . . . . . . . . . . . . 27-29<br />
Connecting to the PC . . . . . . . . . . . . . . . . . . . . . 30-31<br />
Initializing the <strong>Dosimeter</strong> . . . . . . . . . . . . . . . . . . 32-33<br />
24
About the<br />
Utility Suite<br />
The <strong>ER</strong>-<strong>200D</strong> Utility Suite allows you to:<br />
· Download, view, save, and print data from the <strong>ER</strong>-<strong>200D</strong><br />
<strong>Personal</strong> <strong>Noise</strong> <strong>Dosimeter</strong><br />
· Change measurement settings on the <strong>ER</strong>-<strong>200D</strong> <strong>Personal</strong><br />
<strong>Noise</strong> <strong>Dosimeter</strong><br />
System Requirements<br />
Windows xP Service Pack 2 or later<br />
(not compatible <strong>with</strong> Windows Vista or Windows 7)<br />
Microsoft Excel 2002 or later<br />
512 MB RAM<br />
USB Port<br />
A screen resolution of 1024 x 768 (or better) is<br />
recommended. The size of the Utility Suite window cannot<br />
be adjusted; lower resolution values will result in an<br />
inability to view the full screen.<br />
Installation<br />
Important: Do not connect the dosimeter to your PC<br />
until the Utility Suite software has been installed.<br />
· The <strong>ER</strong>-<strong>200D</strong> Utility Suite must be installed on each<br />
PC on which data will be downloaded and stored.<br />
27
Insert the Utility Suite installation CD into the PC.<br />
The following screen will appear and the installation<br />
process will begin automatically.<br />
Two locations will appear for the Destination Directory.<br />
Important: Do not change the installation directories from<br />
the default locations.<br />
Click Next >><br />
28
Accept all licensing agreements.<br />
Click Next >> Click Finish<br />
An ETYMOTIC RESEARCH Logo<br />
for the Utility Suite will be on your<br />
computer desktop.<br />
After installation is complete you will be prompted to<br />
restart the PC.<br />
After restarting your PC, you can now connect the<br />
dosimeter to the PC <strong>with</strong> the cable provided.<br />
29
Connecting<br />
to the PC<br />
Important: Plug the cable directly into a PC USB port.<br />
Do not plug it into a USB hub.<br />
Remove the battery cover of the <strong>ER</strong>-<strong>200D</strong><br />
30
Connect the USB cable to the <strong>ER</strong>-<strong>200D</strong><br />
Connect the USB cable to the computer<br />
31
Initializing the<br />
<strong>Dosimeter</strong><br />
The first time the dosimeter is connected to the PC, it must<br />
be initialized. After connecting the dosimeter “Found New<br />
Hardware Wizard” will appear.<br />
Select “No, not this time” then click Next ><br />
Notes:<br />
· Each dosimeter has a unique serial number. Multiple<br />
dosimeters can be interfaced <strong>with</strong> a single PC;<br />
however, only one dosimeter at a time can be<br />
connected to the PC.<br />
· When more than one dosimeter will be used <strong>with</strong> a<br />
single PC, “Found New Hardware” Wizard will appear<br />
the first time each dosimeter is connected to the PC.<br />
· After each dosimeter is taken through this process<br />
once, the interface will recognize the dosimeter’s<br />
unique serial number each time the dosimeter is<br />
connected.<br />
32
Select “Install the software automatically”and click Next ><br />
If the following screen appears, click “Continue Anyway.”<br />
When the “Found New Hardware Wizard” is complete,<br />
click Finish.<br />
The dosimeter’s unique serial number is now recognized by<br />
the Utility Suite.<br />
33
Using the Utility Suite<br />
Utility Suite Screens . . . . . . . . . . . . . . . . . . . . . . . . .37<br />
Menus . . . . . . . . . . . . . . . . . . . . . . . . . . . . . . . . 38-39<br />
Setup Screen . . . . . . . . . . . . . . . . . . . . . . . . . . . . . .40<br />
Measurement Mode . . . . . . . . . . . . . . . . . . . . . . .41<br />
Run Length . . . . . . . . . . . . . . . . . . . . . . . . . . . . .42<br />
Power Button Functions . . . . . . . . . . . . . . . . . . . .43<br />
Writing Settings to the <strong>Dosimeter</strong> . . . . . . . . . . . . .44<br />
Restore Default Settings . . . . . . . . . . . . . . . . . . . .45<br />
<strong>Data</strong> Screen . . . . . . . . . . . . . . . . . . . . . . . . . . . . . . .46<br />
Downloading Stored <strong>Data</strong> . . . . . . . . . . . . . . . . . .46<br />
<strong>Data</strong> Table . . . . . . . . . . . . . . . . . . . . . . . . . . . . . .47<br />
<strong>Data</strong> Graphs . . . . . . . . . . . . . . . . . . . . . . . . . . . . .48<br />
Normal Runs . . . . . . . . . . . . . . . . . . . . . . . . . .48<br />
QuickCheck Runs . . . . . . . . . . . . . . . . . . . . . .49<br />
Predictive <strong>Data</strong> Feature . . . . . . . . . . . . . . . 49-50<br />
Clearing the Memory . . . . . . . . . . . . . . . . . . . . . .50<br />
Saving <strong>Data</strong> . . . . . . . . . . . . . . . . . . . . . . . . . . . . . . .51<br />
Printing Reports . . . . . . . . . . . . . . . . . . . . . . . . . . . .52<br />
Previously Saved Reports . . . . . . . . . . . . . . . . . . .52<br />
Excel Reports and <strong>Data</strong> Files . . . . . . . . . . . . . . 53-54<br />
34
Utility Suite<br />
Screens<br />
Open the <strong>ER</strong>-<strong>200D</strong> Utility Suite by<br />
double-clicking the icon.<br />
There are 3 main screens in the Utility Suite:<br />
Home, Setup, and <strong>Data</strong>.<br />
Home Screen<br />
Status bar<br />
Serial number of connected dosimeter<br />
37<br />
Screen Identifi er
Menus<br />
File<br />
· Open:<br />
Opens saved reports<br />
· Save:<br />
Creates and saves a report for the currently<br />
selected data run<br />
· Save All: Creates and saves reports for all displayed<br />
data runs<br />
· Print:<br />
Prints a report for the currently selected data run<br />
· Print Preview: Generates a print preview for the<br />
currently selected data run<br />
· Exit:<br />
Closes the software<br />
Setup<br />
· View Setup Window: Displays Setup information for<br />
the connected <strong>ER</strong>-<strong>200D</strong><br />
· Read <strong>ER</strong>-<strong>200D</strong> Setup: Reads setup information stored<br />
on the connected <strong>ER</strong>-<strong>200D</strong><br />
· Write From Setup Panel: Writes the displayed setup<br />
information to the connected <strong>ER</strong>-<strong>200D</strong><br />
· Restore Factory Defaults: Restores Setup to factory<br />
default settings<br />
<strong>Data</strong><br />
· View <strong>Data</strong> Window: Displays data screen<br />
· Read <strong>ER</strong>-<strong>200D</strong> <strong>Data</strong>: Reads data from the connected<br />
<strong>ER</strong>-<strong>200D</strong><br />
Delete <strong>ER</strong>-<strong>200D</strong> <strong>Data</strong>:<br />
· Deletes data from the<br />
connected <strong>ER</strong>-<strong>200D</strong><br />
38
· Describe Highlighted Run: Opens a text box for the<br />
user to enter details for the highlighted data run<br />
· Describe All Runs: Opens a text box for each<br />
displayed run<br />
· Clear Screen: Clears the data screen. <strong>Data</strong> remain on<br />
the <strong>ER</strong>-<strong>200D</strong> until removed (see <strong>Data</strong> – Delete above).<br />
Tools<br />
Check Calibration<br />
· Microphone:<br />
Allows user to check microphone<br />
calibration<br />
· Direct Input (special uses only): Allows user to<br />
check calibration of direct input<br />
The <strong>ER</strong>-<strong>200D</strong> is factory calibrated. Calibration values affect<br />
the calculated noise dose. Only expert users should change<br />
calibration settings. <strong>User</strong>s who wish to check microphone<br />
calibration need a signal source that generates a 94 dB<br />
SPL, 1-kHz signal at the microphone. Calibration of the<br />
direct input feature (special use only) can be checked <strong>with</strong><br />
a 10mV, 1-kHz signal. Contact customer service at Etymotic<br />
Research for additional information on Advanced Features.<br />
Log In For Advanced Features<br />
Access to Advanced Features lets expert users change<br />
calibration settings, update firmware and save and upload<br />
setup images. If performed incorrectly, changing these<br />
settings can result in serious measurement errors. Access to<br />
Advanced Features requires a user name and password.<br />
About<br />
· About: Displays the software version.<br />
39
Setup Screen<br />
The Setup Screen is used to customize the dosimeter.<br />
Changes made on the setup screen must be written to<br />
the dosimeter (see “Writing settings to the <strong>Dosimeter</strong>” on<br />
page 44). Any changes not written to the dosimeter will<br />
be lost and the device will revert to its default or previously<br />
stored settings.<br />
From the menu bar click “Setup.“<br />
Click “Read <strong>ER</strong><strong>200D</strong> Setup.”<br />
The Status Bar will display “Reading <strong>ER</strong>-<strong>200D</strong> Setup”<br />
followed by “Ready.”<br />
40
The Setup Screen displays the factory default settings the<br />
first time the dosimeter is used. Thereafter, stored settings<br />
are displayed.<br />
Measurement Mode<br />
NOTE: Exchange rate, criterion level and threshold level<br />
determine how noise dose is defined and computed, and<br />
will impact the dose results. The default settings correspond<br />
to NIOSH (1998) recommendations, which are more<br />
conservative (more protective) than the OSHA criteria.<br />
NIOSH (default)<br />
Exchange rate: 3 dB<br />
Criterion level: 85 dB<br />
Threshold level: 75 dB<br />
OSHA<br />
Exchange rate: 5 dB<br />
Criterion level: 90 dB<br />
Threshold level: 80 dB<br />
Custom<br />
Exchange rate: 3, 4 or 5 dB<br />
Criterion level: 70 to 95 dB, in 1-dB increments<br />
Threshold level: 65 to 90 dB, in 1-dB increments<br />
41
Run Length<br />
Normal Run Length<br />
16 Hours (default)<br />
Allows for adequate run time before<br />
and after a typical 8-hour work<br />
shift, as well as any overtime that<br />
may occur.<br />
Alternate Options<br />
3 Days, 5 Days and 7 Days<br />
Run-Time Clock<br />
The <strong>ER</strong>-<strong>200D</strong> has a run-time clock, but not a real-time<br />
clock. For run lengths over 16 hours, the dose continues to<br />
accumulate the entire measurement time. Dose does not<br />
“auto-zero” every 24 hours. <strong>User</strong>s requiring the average dose<br />
per day will need to download and view the data in Excel<br />
and calculate the average dose per day.<br />
NOTE: For extended run lengths (3, 5 or 7 days) it is<br />
recommended you disable the “Allow <strong>Manual</strong> Shutdown”<br />
feature and install new batteries prior to starting.<br />
Display Results During Run<br />
This ensures the LEDs are lit during all measurements.<br />
Unchecked: The top (12.5%) LED flashes to indicate the<br />
dosimeter is functioning, but the dose value is not displayed.<br />
Allow <strong>Manual</strong> Shutdown<br />
Allows user to manually power OFF before the end of a<br />
Normal or QuickCheck run.<br />
Unchecked: <strong>Dosimeter</strong> remains ON until the end of the<br />
Normal or QuickCheck run, after which it automatically<br />
powers OFF. This prevents intentional or unintentional<br />
shutdown of the device.<br />
42
Allow Previous Results to Be Overwritten<br />
The dosimeter automatically overwrites the oldest data<br />
when the device memory is full <strong>with</strong>out signaling the user.<br />
For more information on memory capacity and the number<br />
of data runs that can be stored, see pages 19-20.<br />
Unchecked: Ensures that new data do not overwrite<br />
older saved data in the device. LEDs indicate when the<br />
device memory is full (see pages 19-20). <strong>Data</strong> must be<br />
downloaded and/or removed from the device to clear the<br />
memory for more runs.<br />
Power Button Functions<br />
(see page 10)<br />
The Power Button is used to select the type<br />
of run. This sequence cannot be changed.<br />
About Your <strong>ER</strong>-<strong>200D</strong><br />
Displays identifying information about the connected<br />
dosimeter, which is useful to the factory if troubleshooting<br />
a specific device is necessary.<br />
From the Setup screen, click “About Your <strong>ER</strong>-<strong>200D</strong>”<br />
Information on the “About Your <strong>ER</strong>-<strong>200D</strong>” screen cannot<br />
be changed by the user.<br />
43
Writing Settings to the <strong>Dosimeter</strong><br />
When settings are changed on the Setup screen, “Unsaved<br />
setup information” flashes until the setting are written to<br />
the dosimeter.<br />
To save settings<br />
·<br />
·<br />
·<br />
Click “Setup” on the menu bar<br />
Click “Write from Setup Panel” from the dropdown menu<br />
Status bar indicates “Updating <strong>ER</strong>-<strong>200D</strong> Setup”<br />
· After changes are programmed, status bar<br />
displays “Ready”<br />
44
Restore Default Settings<br />
·<br />
·<br />
·<br />
·<br />
Click “Setup” from the menu bar<br />
Click “Restore Factory Defaults”<br />
Click “Yes”<br />
Status bar indicates “Restoring Factory Defaults”<br />
· After changes are programmed, status bar<br />
displays “Ready”<br />
45
<strong>Data</strong> Screen<br />
Downloading Stored <strong>Data</strong><br />
· From either the Home screen or Setup screen,<br />
click “<strong>Data</strong>” on the menu bar.<br />
·<br />
Click “Read <strong>ER</strong>-<strong>200D</strong> <strong>Data</strong>.”<br />
The blue status bar indicates “Reading <strong>ER</strong>-<strong>200D</strong> data”<br />
46
<strong>Data</strong> Table<br />
All data runs are displayed in the <strong>Data</strong> Table, <strong>with</strong> the most<br />
recent run at the top of the list.<br />
· Serial Number: Device serial number<br />
· Run: Sequential, beginning <strong>with</strong> 001<br />
· Run Type:<br />
Normal or QuickCheck<br />
· Final Dose %: Dose at end of run<br />
· Overall Leq: A-weighted continuous equivalent sound level<br />
· Run Description: This is a textbox in which the user can enter data<br />
describing the run<br />
ExAMPLE:<br />
“Jane Smith, Packing Line 1, Full Capacity, First Shift, 5-18-2009.”<br />
To Enter A Run Description<br />
· Double-click on the desired run or click the blue “Describe Run”<br />
box on the screen.<br />
· Type information into dialogue box and click OK.<br />
· Run description will be immediately updated.<br />
Note: Once a report is created, the Run Description cannot be<br />
altered in the report. A new report can be made, but it must be<br />
saved using a different file name.<br />
· Run Length: Actual run time, displayed as<br />
Days-Hours-Minutes-Seconds<br />
· Max Run Length: Maximum time the dosimeter could run<br />
· Exchange Rate, Criterion and Threshold:<br />
As selected from the Setup Screen<br />
· Signal Source: internal microphone (default) or direct input<br />
· Calibration: Calibration value used at the time of the run<br />
· Run Termination: Completed normally; manual<br />
shutdown; or sudden power loss<br />
· Warnings: Any warnings that occurred during the run<br />
· Software Version: software version at the time<br />
of the run<br />
47
<strong>Data</strong> Graphs<br />
· The data graph displays dose data from the run<br />
highlighted in the <strong>Data</strong> Table.<br />
· To display graphs for other runs, select the run by<br />
clicking on the line in the <strong>Data</strong> Table that contains the<br />
run data.<br />
· Dose is displayed by blue fill on the graph and indicated<br />
numerically on the right side of the graph.<br />
Normal Runs<br />
Leq (red) Dose % (blue)<br />
· Leq (Equivalent Continuous Level) is displayed on the<br />
left side of the graph and indicated <strong>with</strong> a red line on<br />
the graph when the Leq box is checked. Leq is only<br />
available for Real-Time <strong>Data</strong>.<br />
· For Normal runs, only Real-Time <strong>Data</strong> are available.<br />
· In Normal Mode, dose values are obtained every<br />
220 msec and summed over a 3.75 minute interval.<br />
48
QuickCheck Runs<br />
·<br />
·<br />
QuickCheck run time is approximately 2 minutes.<br />
Estimated dose per hour is displayed in the data table.<br />
Predictive <strong>Data</strong> Feature<br />
Runs can be viewed as Real-Time <strong>Data</strong> or Predictive <strong>Data</strong>.<br />
Selecting Predictive <strong>Data</strong> allows the user to see<br />
estimated dose for various time periods.<br />
Prediction Length (in Hours)<br />
is adjustable by the user.<br />
Here, “1” was entered.<br />
49<br />
Real-time data<br />
are displayed<br />
Dose % is<br />
160% for 1 hour<br />
Predictive <strong>Data</strong> can be<br />
displayed in Days, Hours,<br />
Minutes or Seconds.
When “8” (hours) is entered,<br />
the estimated dose is over 1200%<br />
Note Only dose per hour data are displayed on the<br />
printed report.<br />
Clearing the Memory<br />
Important: Download and save data from the dosimeter<br />
prior to clearing the memory.<br />
· Click “<strong>Data</strong>” on the menu bar<br />
· Click “Delete <strong>ER</strong>-<strong>200D</strong> <strong>Data</strong>”<br />
· A dialog box appears to<br />
confirm data deletion<br />
· Click “Yes”<br />
When the <strong>ER</strong>-<strong>200D</strong> memory<br />
is full and the dosimeter<br />
is set not to overwrite the<br />
data, then data must be removed from the device before<br />
additional data runs can be obtained.<br />
50
Saving <strong>Data</strong><br />
Reports are created and saved in Microsoft Excel.<br />
<strong>Data</strong> are saved when a report is created.<br />
· Prior to saving a report enter a run description.<br />
· Reports are write-protected and can’t be changed after<br />
they are saved.<br />
Disconnect <strong>with</strong>out saving<br />
·<br />
If user reads and displays data and then disconnects<br />
-<br />
<strong>Data</strong> are not saved.<br />
- <strong>Data</strong> will disappear from the <strong>Data</strong> screen but are still in<br />
the dosimeter.<br />
To Save a Highlighted Run<br />
·<br />
·<br />
Click “File” on the menu bar.<br />
Click “Save” on the dropdown menu.<br />
· A default name is assigned using the dosimeter serial<br />
number and run number (e.g., SN20056 Run 010).<br />
· The file can be renamed using any combination of letters<br />
and numbers.<br />
· A dialog box appears asking if you want to print the report.<br />
To Save All Runs<br />
· Click “File” on the menu bar.<br />
·<br />
Click “Save All” on the dropdown menu.<br />
51
Printing Reports<br />
To Save and Print<br />
· Save the selected report as described above. A dialog box<br />
appears asking if you would like to print.<br />
To Print <strong>with</strong>out Saving<br />
· From the menu bar Click “File.” Click “Print.” The file will<br />
print but it will not be saved.<br />
Previously Saved Reports<br />
Previously saved reports can be uploaded, viewed and printed<br />
from <strong>with</strong>in the Utility Suite or Microsoft Excel. The dosimeter<br />
does not have to be connected to the PC. To view reports<br />
from <strong>with</strong>in the Utility Suite:<br />
· Click “File” on the menu bar<br />
· Click “Open”<br />
· Select a previously saved file<br />
To Enter a Run Description for a Previously Saved File<br />
· Open the desired file<br />
· Enter a run description<br />
·<br />
Save the file using a different filename than the original<br />
52
Excel Reports and <strong>Data</strong> Files<br />
The default location for reports is C:\Etymotic Research\<br />
<strong>ER</strong><strong>200D</strong> Utility Suite\Reports. The user can set up a file in<br />
which to save reports at a different location if desired.<br />
The Excel report file has three tabs<br />
Tab 1: Summary Contains the report (text box and graphs)<br />
Tabs<br />
53
Tab 2: <strong>Data</strong> Shows dose and Leq values for each 3.75<br />
minute time block. These data can be used to create graphs<br />
in Excel if desired.<br />
<strong>Data</strong> are recorded as fractions of an hour, e.g., the data<br />
at 3.75 minutes is written as 0.062 (3.75 minutes ÷ 60<br />
minutes = 0.062).<br />
Tab 3: Raw <strong>Data</strong> Ignore this tab. <strong>Data</strong> are used by the PC<br />
Interface Program for calculations.<br />
54
Important Points (in alphabetical order)<br />
Disconnect <strong>with</strong>out saving (p.51)<br />
·<br />
If user reads and displays data and then disconnects<br />
-<br />
<strong>Data</strong> are not saved.<br />
- <strong>Data</strong> will disappear from the <strong>Data</strong> screen but are still in<br />
the dosimeter.<br />
Displaying and printing results (pp. 46-52)<br />
· Normal Runs: The Utility Suite displays and prints<br />
real-time data.<br />
· QuickCheck Runs: The Utility Suite displays either real-time<br />
data or predictive data.<br />
- <strong>User</strong> can select length of exposure time for predictive<br />
data to view the corresponding dose %.<br />
- Only the default (1-Hr) predicted dose per hour is<br />
shown on the printed report.<br />
Initializing new dosimeters (p. 32)<br />
· Initialization is necessary the first time a dosimeter is used<br />
<strong>with</strong> a specific PC.<br />
· Once a dosimeter is initialized, the software will always<br />
recognize it by serial number.<br />
Measurement Window (p. 12)<br />
· In Normal mode, dose values are obtained every 220 msec,<br />
summed over a 3.75 minute interval and saved in nonvolatile<br />
memory every 3.75 minutes (16 times per hour).<br />
Overwriting <strong>Data</strong> (p.43)<br />
· When memory is full, data will be written over the<br />
oldest saved data unless “Allow previous results to be<br />
overwritten” is unchecked in the setup screen.<br />
· Download or remove data if you want to clear the memory<br />
for additional runs.<br />
Reading <strong>Data</strong> (p. 46)<br />
· Each time a dosimeter is connected its data must first be<br />
READ to be displayed.
Run-Time Clock (p. 42)<br />
· The dosimeter has a run-time clock, but not a<br />
real-time clock.<br />
· For run lengths greater than 16 hours (e.g., 3, 5 or<br />
7 days) the dose continues to accumulate for the entire<br />
run length.<br />
- Dose does not “auto-zero” every 24 hours.<br />
- To calculate average dose per day, download and view<br />
the data in Excel<br />
Saving Reports (p. 51)<br />
· Displaying dosimeter runs in the <strong>Data</strong> Screen does not<br />
save them.<br />
· You must save run(s) to the PC as Excel files. This is done<br />
by Clicking File/Save or File/Save All.<br />
· Reports are write-protected and can’t be changed after<br />
they’re saved (although the report can be edited and<br />
then saved using a different filename than the original).<br />
Test Mode Selection (p. 10)<br />
· One press: Status<br />
· Two presses: Normal Mode<br />
· Three presses: QuickCheck Mode<br />
Unsaved Setup Information (p. 44)<br />
When the status bar is flashing:<br />
· Any change to setup settings activates the warning to<br />
save before proceeding.<br />
· Changes not written to the dosimeter will be lost and<br />
settings revert to default or previously stored settings.<br />
58
61 Martin Lane • Elk Grove Village, IL 60007<br />
www.etymotic.com • 1-888-389-6684 • 1-847-228-0006<br />
©2010 <strong>ER</strong>078111