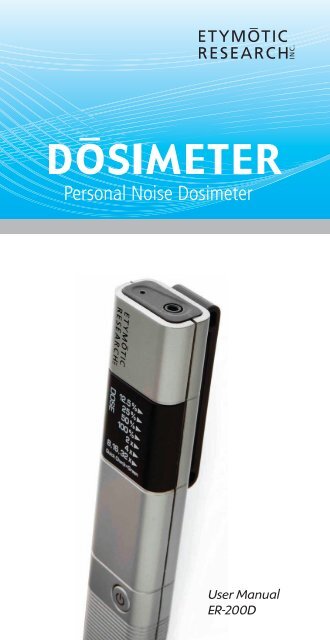
ER-200D Personal Noise Dosimeter with Data Logging User Manual
ER-200D Personal Noise Dosimeter with Data Logging User Manual
ER-200D Personal Noise Dosimeter with Data Logging User Manual
You also want an ePaper? Increase the reach of your titles
YUMPU automatically turns print PDFs into web optimized ePapers that Google loves.
<strong>Personal</strong> <strong>Noise</strong> <strong>Dosimeter</strong><br />
1<br />
<strong>User</strong> <strong>Manual</strong><br />
<strong>ER</strong>-<strong>200D</strong>
Operating Instructions<br />
Introduction . . . . . . . . . . . . . . . . . . . . . . . . . . . . . . . .5<br />
Getting Started<br />
Package Contents . . . . . . . . . . . . . . . . . . . . . . . . .6<br />
Identifi cation of Parts . . . . . . . . . . . . . . . . . . . . . . .7<br />
Using the Windscreen . . . . . . . . . . . . . . . . . . . . . 8-9<br />
Operating Instructions<br />
Battery Insertion . . . . . . . . . . . . . . . . . . . . . . . . . .10<br />
Power Button Functions . . . . . . . . . . . . . . . . . . . .10<br />
Status Check . . . . . . . . . . . . . . . . . . . . . . . . . . . .11<br />
Normal Mode . . . . . . . . . . . . . . . . . . . . . . . . . . . .12<br />
Interpreting Results . . . . . . . . . . . . . . . . . . . . .13<br />
QuickCheck Mode . . . . . . . . . . . . . . . . . . . . . . . .14<br />
Interpreting Results . . . . . . . . . . . . . . . . . . . . .15<br />
Reading the Display: LEDs . . . . . . . . . . . . . . . . . .16<br />
What Dose % Means . . . . . . . . . . . . . . . . . . . . . .17<br />
NIOSH vs. OSHA Criteria . . . . . . . . . . . . . . . . . . . .18<br />
<strong>Data</strong> <strong>Logging</strong> . . . . . . . . . . . . . . . . . . . . . . . . . . . .19<br />
Memory Capacity . . . . . . . . . . . . . . . . . . . . . . 19-20<br />
Clearing the Memory . . . . . . . . . . . . . . . . . . . . . .20<br />
Calibration . . . . . . . . . . . . . . . . . . . . . . . . . . . . . .20<br />
Specifi cations . . . . . . . . . . . . . . . . . . . . . . . . . . . .21<br />
Care and Maintenance . . . . . . . . . . . . . . . . . . . . .22<br />
Warranty . . . . . . . . . . . . . . . . . . . . . . . . . . . . . . .22<br />
Risk Factors for Hearing Loss . . . . . . . . . . . . . . . .23<br />
2
Introduction<br />
Hearing loss from loud sound affects millions of people.<br />
<strong>Noise</strong>-induced hearing loss is preventable, but most people<br />
don’t know how long they can listen to loud sound <strong>with</strong>out<br />
risking hearing damage. A single noise exposure may not<br />
result in hearing loss, but permanent damage to the inner<br />
ear from noise adds up over time. The accumulation of too<br />
much noise day by day, year after year, is the determining<br />
factor in hearing loss risk. A sound level meter is a device<br />
that measures noise at a particular point in time, while<br />
a dosimeter measures sound levels for many hours and<br />
calculates the cumulative noise dose in percent.<br />
Daily noise dose is determined by both the intensity of the<br />
sound and the amount of exposure time. A 100% dose<br />
means that a person has reached the maximum noise<br />
exposure for the day, and continued exposure to loud sound<br />
could lead to hearing loss. Ideally, hearing protection should<br />
be used before the dose reaches 100% since dose limits are<br />
based on averages, and some ears are more susceptible to<br />
noise damage than others. When the noise dose exceeds<br />
50% a person has reached half the maximum noise exposure<br />
for the day and it’s a good idea to use hearing protection to<br />
prevent over-exposure, particularly if a 50% dose reading is<br />
reached early in the day.<br />
5
Getting Started<br />
The <strong>ER</strong>-<strong>200D</strong> <strong>Personal</strong> <strong>Noise</strong> <strong>Dosimeter</strong> is an inexpensive,<br />
easy-to-use device that provides a good estimate of noise<br />
dose and alerts the user to the risk of over exposure.<br />
In cases of gunfire and other impulse noise, no conventional<br />
dosimeter measures the risk accurately. More specialized<br />
equipment is required to measure impulse noise.<br />
The <strong>ER</strong>-<strong>200D</strong> has three modes of operation:<br />
· Status: displays the previously measured results, indicates<br />
when batteries need to be replaced, and indicates when<br />
the device memory is full.<br />
· Normal: measures and displays noise dose continuously<br />
for up to 7 days; provides an early warning for<br />
over-exposure and the need for hearing protection.<br />
· QuickCheck: measures noise for two minutes then<br />
calculates and displays the estimated dose per hour.<br />
QuickCheck provides a quick way to measure a specific<br />
noise source to determine if permissible exposure levels<br />
will be exceeded and hearing protection is needed (e.g.,<br />
loud equipment, vehicles, power tools, concerts or sporting<br />
events).<br />
Package Contents<br />
· <strong>ER</strong>-<strong>200D</strong> <strong>Personal</strong> <strong>Noise</strong> <strong>Dosimeter</strong><br />
· USB Cable<br />
· PC Interface Software CD<br />
· Windscreen<br />
· Batteries: Three AAAA Alkaline*<br />
· <strong>User</strong> Guide<br />
*AAAA batteries are available at electronics retailers<br />
such as Radio Shack<br />
6
Identification of Parts<br />
A Microphone<br />
B Auxiliary Input Jack<br />
C LEDs<br />
D Power Button<br />
E Clip<br />
F Battery Compartment<br />
G USB Socket<br />
A<br />
A<br />
B<br />
C<br />
D<br />
B<br />
G<br />
7<br />
E<br />
F<br />
G
Using the Windscreen<br />
For accurate measurements, the 35 mm (1.4”) windscreen<br />
included <strong>with</strong> the <strong>ER</strong>-<strong>200D</strong> should be used when noise is<br />
measured outdoors or near any turbulence, e.g., from a<br />
fan. The foam windscreen allows accurate measurement in<br />
winds up to 15 to 20 mph.<br />
Note: Blowing across the microphone opening on<br />
the dosimeter can cause the same turbulence as a<br />
50 mph wind.<br />
The windscreen contains a plastic pin on the interior to<br />
anchor it to the <strong>ER</strong>-<strong>200D</strong>. To attach the windscreen,<br />
carefully pull the foam back to visualize the pin. Place<br />
the pin in the large auxiliary input jack at the top of the<br />
<strong>ER</strong>-<strong>200D</strong>. Gently pull the foam down over the top of the<br />
dosimeter case. To remove the windscreen, grasp the<br />
windscreen and pin and pull straight out.<br />
8
Windscreen<br />
Windscreen fits on top<br />
of the dosimeter<br />
Pull up the foam and<br />
line up the windscreen<br />
pin <strong>with</strong> the auxiliary<br />
input jack on top of the<br />
dosimeter<br />
Push firmly into the<br />
opening until you hear<br />
it snap in<br />
Gently pull foam down<br />
over top of dosimeter<br />
case. <strong>Dosimeter</strong> is<br />
ready to operate<br />
9
Operating<br />
Instructions<br />
Battery Insertion<br />
On the back side of the dosimeter, locate the arrow on the<br />
battery compartment.<br />
· Press down and slide<br />
the cover off.<br />
· Insert three AAAA<br />
batteries (supplied)<br />
positive side down<br />
as shown.<br />
· Replace cover.<br />
Power Button Functions<br />
The Power button is used to select the type of run.<br />
This sequence cannot be changed.<br />
· One press: Displays Status<br />
· Two presses: Starts a Normal run<br />
·<br />
Three presses: Starts a QuickCheck run<br />
10
Status Check<br />
Power ON<br />
· Press and release the power button one time.<br />
The 12.5% green LED illuminates briefly.<br />
· The previously measured noise dose is displayed<br />
(flashing LED).<br />
Device status is displayed<br />
· Two Green LEDs<br />
Battery is good; memory capacity is acceptable<br />
· Two Green and one Yellow LED<br />
Battery is low or memory capacity is low<br />
· Two Red LEDs — 3 Possibilities<br />
- Battery is dead<br />
- Device memory is full<br />
- Hardware failure<br />
Good<br />
2 Green<br />
Caution<br />
2 Green and<br />
1 Yellow<br />
Warning<br />
2 Red<br />
11
Normal Mode<br />
Run Length: Programmable<br />
(16 hours; 3 days; 5 days; 7 days)<br />
Power ON<br />
· Press and release the power button two times.<br />
-<br />
The 12.5% (green) LED illuminates on the first press<br />
- The 25% (green) LED illuminates on the second press<br />
· Three LEDs (green, yellow and red) flash twice. Then<br />
the 12.5% LED flashes, indicating the dosimeter is now<br />
measuring and integrating sound levels.<br />
Measurement Window<br />
In Normal mode, dose values are obtained every 220 msec,<br />
summed over a 3.75 minute interval and saved in<br />
non-volatile memory every 3.75 minutes (16 times<br />
per hour).<br />
Measurement Period<br />
The default measurement period is 16 hours. The current<br />
dose is continually displayed by a flashing LED. At the<br />
end of the measurement period three LEDs (green, yellow<br />
and red) flash twice, indicating the measurement is<br />
complete. The dosimeter automatically shuts off.<br />
Dose is stored in the device memory and will be displayed<br />
when the device is powered on in Status mode. Stored data<br />
can also be downloaded to a PC.<br />
Power OFF<br />
· To shut off prior to automatic shutdown: press and hold<br />
the power button for two seconds.<br />
· Three LEDs (green, yellow and red) flash twice and the<br />
device shuts off.<br />
12
Interpreting Results<br />
Normal Mode (Based on NIOSH Criteria)<br />
LED Dose% Risk Factor<br />
green 12.5%<br />
(slow flash)<br />
green 12.5%<br />
(regular flash)<br />
< 12.5%<br />
12.5 - 24%<br />
green 25% 25 - 49%<br />
yellow 50% 50 - 99%<br />
red 100% 100 - 199%<br />
red 2x 200 - 399%<br />
red 4x 400 - 799%<br />
red 8, 16, 32x<br />
(regular flash)<br />
red 8, 16, 32x<br />
(double flash)<br />
red 8, 16, 32x<br />
(fast flash)<br />
8x<br />
16x<br />
32x<br />
No risk of hearing<br />
loss<br />
No risk of hearing<br />
loss<br />
No risk of hearing<br />
loss<br />
13<br />
1/2 or more of<br />
daily dose<br />
Exposure limit<br />
exceeded<br />
> 2x allowable<br />
daily dose<br />
> 4x allowable<br />
daily dose<br />
> 8x allowable<br />
daily dose<br />
> 16x allowable<br />
daily dose<br />
> 32x allowable<br />
daily dose<br />
Hearing<br />
Protection<br />
Needed<br />
No<br />
No<br />
No<br />
Yes<br />
(conservatively)<br />
Yes<br />
Yes<br />
Yes<br />
Yes<br />
Yes<br />
Yes
QuickCheck Mode<br />
(Estimated Dose per Hour) Test Time: 2 minutes<br />
Power ON<br />
· Press and release the power button three times.<br />
- The 12.5% (green) LED illuminates on the first press.<br />
- The 25% (green) LED illuminates on the second press<br />
- The 50% (yellow) LED illuminates on the third press.<br />
·<br />
The LEDs sweep twice from bottom to top.<br />
· The bottom LED flashes green throughout the<br />
measurement, indicating QuickCheck mode.<br />
· The solid LED indicates the predicted dose per hour.<br />
After 2 minutes the LEDs sweep twice from bottom to top,<br />
indicating the measurement is complete.<br />
· The solid LED (predicted dose per hour) displays<br />
for 7 seconds while the bottom LED flashes green<br />
(indicating QuickCheck). The dosimeter then shuts off.<br />
· Result is stored in the device memory and is displayed<br />
when the device is turned on again in Status mode.<br />
Stored data can also be downloaded to a PC.<br />
Power OFF<br />
To power off prior to QuickCheck’s automatic shutdown<br />
you must wait at least 15 seconds into the measurement.<br />
· Press and hold the power button for 2 seconds. The LEDs<br />
will sweep twice, bottom to top.<br />
· The estimated dose per hour (solid LED) is displayed<br />
for 7 seconds while the bottom LED flashes green<br />
(indicating QuickCheck). The dosimeter shuts off.<br />
NOTE: If the dosimeter is shut off prior to its automatic shutdown, it<br />
will still calculate the predicted hourly dose based on the sound level<br />
and duration of the measurement.<br />
14
Interpreting Results<br />
QuickCheck Mode (Based on NIOSH Criteria)<br />
Solid LED is<br />
Est. Dose per<br />
hour<br />
15<br />
Est. Dose per<br />
8 hours<br />
No LED lit < 12.5% 8x alternating<br />
flash red/green<br />
>800% >6400%
Reading the Display:<br />
What the LEDs Mean<br />
LED Color<br />
The dosimeter uses color-coded LEDs to display noise dose<br />
in percent.<br />
Green (Safe): <strong>Noise</strong> dose is below 50%<br />
Yellow (Borderline): <strong>Noise</strong> dose is<br />
greater than 50% and less than 100%<br />
Red (High Risk): <strong>Noise</strong> dose is greater<br />
than 100%<br />
LED Flash Rate In Normal mode:<br />
· A slow flashing LED at 12.5% means that the noise dose<br />
is at or below 12.5% (i.e., between 0% and 12.5%). A<br />
fast flash at 12.5% indicates the dose exceeds 12.5%<br />
(i.e., dose is between 12.5 and 25%)<br />
· LEDs 25% to 4x flash rapidly when that dose level is<br />
exceeded<br />
· For the bottom LED (8, 16, 32x):<br />
- Regular flash: dose exceeds 8x<br />
- Double flash: dose exceeds 16x<br />
- Fast continuous flash: dose exceeds 32x<br />
In QuickCheck mode:<br />
· All LEDs are solid except the bottom LED, which flashes<br />
green to indicate QuickCheck mode.<br />
· If dose per hour exceeds 8x the bottom LED flashes<br />
alternately red and green.<br />
16
What Dose % Means<br />
<strong>Noise</strong> dose is a measurement of noise exposure. It is the<br />
combination of the amount of sound and the amount of<br />
exposure time. While sound levels may fluctuate over time,<br />
noise dose never decreases over time; it either remains<br />
stable or increases. Think of 100% dose as the exposure<br />
limit for an entire day; 200% as two times the exposure<br />
limit for a day or two days’ worth of noise exposure,<br />
400% as four times the limit or four days’ worth of noise<br />
exposure, etc. The risk of hearing impairment grows <strong>with</strong><br />
increasing noise dose.<br />
The limits of safe exposure to high sound levels are not<br />
absolute, since people differ in their degree of susceptibility<br />
to noise-induced hearing loss. Dose limits are based on<br />
average susceptibility. A small fraction of the population<br />
is more susceptible than average, and for these people<br />
a 100% dose may be enough noise exposure to cause<br />
hearing loss over time. Likewise, a small fraction of the<br />
population is less susceptible than average, and these<br />
people may be able to tolerate noise exposures exceeding<br />
100% <strong>with</strong>out developing significant hearing problems.<br />
Most people will fall somewhere between the two<br />
extremes. Since noise-induced hearing loss is irreversible<br />
and there is no way to determine individual susceptibility<br />
beforehand, a conservative approach would be to monitor<br />
the noise dose and use hearing protection whenever the<br />
noise dose exceeds 50%.<br />
17
NIOSH vs. OSHA Criteria<br />
for Estimating Allowable<br />
<strong>Noise</strong> Dose<br />
In the United States two standards are used to define how<br />
noise dose is calculated: National Institute for Occupational<br />
Safety and Health (NIOSH) Criteria for a Recommended<br />
Standard (NIOSH, 1998) and Occupational Safety and<br />
Health Administration (OSHA) Occupational <strong>Noise</strong> Standard<br />
(OSHA, 1983).<br />
When deciding which standard to use it is important<br />
to note that the differences in these standards have<br />
a significant impact on hearing loss risk. The more<br />
conservative NIOSH criteria are based on scientific data<br />
relating noise levels to risk of hearing damage, and are<br />
more protective of hearing than the OSHA criteria. OSHA<br />
criteria allow for higher exposure levels and/or longer<br />
exposure times as compared to the NIOSH criteria, and are<br />
therefore less protective of hearing.<br />
ExAMPLE:<br />
NIOSH 100% dose = 85 dB for 8 hrs or 88 dB for 4 hrs<br />
OSHA 100% dose = 90 dB for 8 hrs or 95 dB for 4 hrs<br />
Allowable daily exposures (hrs per day)<br />
based on OSHA and NIOSH<br />
<strong>Noise</strong> level dBA 85 88 90 92 94 95 97 100<br />
OSHA 16 8 6 4 3 2<br />
NIOSH 8 4 1 ¾ ½ ¼<br />
18
<strong>Data</strong> <strong>Logging</strong><br />
Normal and QuickCheck results are stored in the dosimeter<br />
and can be downloaded, saved and printed using the<br />
<strong>ER</strong>-<strong>200D</strong> Utility Suite. See Utility Suite <strong>User</strong> Guide for<br />
instructions and information.<br />
Memory Capacity<br />
The <strong>ER</strong>-<strong>200D</strong> has a non-volatile memory. <strong>Data</strong> stored in<br />
the device are retained even if the batteries are removed<br />
after a completed run. <strong>Data</strong> can be downloaded and saved<br />
to a PC after each run or after multiple runs. The <strong>ER</strong>-<strong>200D</strong><br />
can be set to overwrite data when its memory is full; in this<br />
case, the oldest run is the first to be overwritten. If the <strong>ER</strong>-<br />
<strong>200D</strong> is set so that data is not overwritten, data must be<br />
downloaded and/or removed from the device to clear the<br />
memory for further data runs.<br />
There are 48 blocks of data storage available in the<br />
instrument. The number of “runs” the device can store<br />
depends on the type and length of each run.<br />
QuickCheck: 2 blocks<br />
Normal (1 hr): 2 blocks<br />
Normal (16 hr): 5 blocks<br />
Normal (3 days): 19 blocks<br />
Normal (5 days): 31 blocks<br />
Normal (7 days): 43 blocks<br />
19
Any combination of runs can be used up to the memory<br />
capacity of the device.<br />
Examples:<br />
a. 24 QuickCheck runs<br />
[24 * 2 blocks each = 48 total]<br />
b. Nine 16-hour runs + One QuickCheck run<br />
[9 * 5 blocks each + 2 = 47 total]<br />
c. Two 3-day runs + Two 16-hour runs<br />
[2 * 19 blocks each + 2 * 5 blocks each = 48 total]<br />
d. One 5-day run + Three 16-hour runs + 1 QuickCheck run<br />
[31 blocks + 3 * 5 blocks each + 2 = 48 total]<br />
e. One 7-day run + One 16-hour run<br />
[43 blocks + 5 blocks = 48 total]<br />
When the memory is full the Status indicator (accessed<br />
<strong>with</strong> one press of the power button) shows two red LEDs:<br />
Clearing the Memory<br />
When the <strong>ER</strong>-<strong>200D</strong> memory is full and the dosimeter is set<br />
not to overwrite the data, then data must be removed from<br />
the device before additional data runs can be obtained. See<br />
page 50 for more information.<br />
Calibration<br />
The <strong>ER</strong>-<strong>200D</strong> dosimeter is factory calibrated. Advanced<br />
users can verify calibration using the <strong>ER</strong>-<strong>200D</strong> Utility Suite.<br />
See page 39 for more information.<br />
20
Specifications<br />
The default settings used by the <strong>ER</strong>-<strong>200D</strong> for calculation of<br />
noise dose are consistent <strong>with</strong> ANSI S1.25–1991 (R2002)<br />
Specification for <strong>Personal</strong> <strong>Noise</strong> <strong>Dosimeter</strong>s and NIOSH<br />
Criteria for a Recommended Standard (NIOSH, 1998).<br />
Default settings are:<br />
· Exchange rate: 3 dB<br />
· Criterion level: 85 dB<br />
· Threshold level: 75 dB<br />
Run Length: 16 hours*<br />
Calibration Accuracy: ± 2.5 dB<br />
Frequency Weighting: A<br />
Response: Slow<br />
Temperature Range of Operation:<br />
-10°C to 45°C (14°F to 113°F)<br />
Omni-directional Microphone:<br />
Flat from 100 Hz to 15 kHz<br />
Power Supply: Three AAAA batteries<br />
RMS Detector: Dynamic range 60 dB (70 to 130 dB)<br />
Battery Life: > 200 hours continuous use<br />
*Note: to make an 8-hour measurement, the dosimeter should be set<br />
to measure for 16 hours. This timeframe allows for an adequate time<br />
window around the measurement and accommodates overtime and<br />
swing-shift scheduling.<br />
Flexibility in the dosimeter design allows programmable<br />
control of dosimeter settings using the PC interface.<br />
Choices include:<br />
· Exchange rate: 3, 4 or 5 dB<br />
· Criterion level: 70 to 95 dB, in 1-dB steps<br />
· Threshold level: 65 to 90 dB, in 1-dB steps<br />
· Measurement time (Run Length) in Normal Mode:<br />
16 hours; 3 days; 5 days; 7 days<br />
21
Care and Maintenance<br />
·<br />
·<br />
·<br />
·<br />
Do not expose to extreme temperatures<br />
Do not immerse in any liquids<br />
Clean <strong>with</strong> a soft dry cloth<br />
Avoid dropping and hard knocks to the unit<br />
Warranty<br />
Etymotic Research, Inc. warrants this product against<br />
defects in material or workmanship for a period of one<br />
year from the date of original purchase. Etymotic will repair<br />
or replace the defective product at its option if returned<br />
<strong>with</strong>in the warranty period to our service facility. This<br />
warranty is in lieu of all other warranties, expressed or<br />
implied, including, but not limited to, any implied warranty<br />
of merchantability or fitness for a particular purpose.<br />
FCC / Industry Canada Statements<br />
This device complies <strong>with</strong> Part 15 of the FCC Rules.<br />
Operation is subject to the following two conditions:<br />
(1) this device may not cause harmful interference, and<br />
(2) this device must accept any interference received,<br />
including interference that may cause undesired operation.<br />
This class B digital apparatus complies <strong>with</strong> Canadian<br />
ICES-003.<br />
Cet appareil numérique de la classe B est conforme à la<br />
norme NMB-003 du Canada.<br />
22
Risk Factors for Hearing Loss<br />
Health risks from excessive noise exposure include<br />
permanent hearing loss and tinnitus (ringing in the ears).<br />
Other factors such as genetics, exposure to smoke,<br />
pesticides, chemical solvents and certain medications<br />
increase the risk of hearing loss. Some of these factors<br />
make noise exposure more damaging to hearing than noise<br />
exposure alone. The dosimeter predicts average risk, not<br />
individual risk.<br />
23
Utility Suite Installation<br />
About the Utility Suite . . . . . . . . . . . . . . . . . . . . . . .27<br />
Installation . . . . . . . . . . . . . . . . . . . . . . . . . . . . . 27-29<br />
Connecting to the PC . . . . . . . . . . . . . . . . . . . . . 30-31<br />
Initializing the <strong>Dosimeter</strong> . . . . . . . . . . . . . . . . . . 32-33<br />
24
About the<br />
Utility Suite<br />
The <strong>ER</strong>-<strong>200D</strong> Utility Suite allows you to:<br />
· Download, view, save, and print data from the <strong>ER</strong>-<strong>200D</strong><br />
<strong>Personal</strong> <strong>Noise</strong> <strong>Dosimeter</strong><br />
· Change measurement settings on the <strong>ER</strong>-<strong>200D</strong> <strong>Personal</strong><br />
<strong>Noise</strong> <strong>Dosimeter</strong><br />
System Requirements<br />
Windows xP Service Pack 2 or later<br />
(not compatible <strong>with</strong> Windows Vista or Windows 7)<br />
Microsoft Excel 2003 or later<br />
512 MB RAM<br />
USB Port<br />
A screen resolution of 1024 x 768 (or better) is<br />
recommended. The size of the Utility Suite window cannot<br />
be adjusted; lower resolution values will result in an<br />
inability to view the full screen.<br />
Installation<br />
Important: Do not connect the dosimeter to your PC<br />
until the Utility Suite software has been installed.<br />
· The <strong>ER</strong>-<strong>200D</strong> Utility Suite must be installed on each<br />
PC on which data will be downloaded and stored.<br />
27
Insert the Utility Suite installation CD into the PC.<br />
The following screen will appear and the installation<br />
process will begin automatically.<br />
Two locations will appear for the Destination Directory.<br />
Important: Do not change the installation directories from<br />
the default locations.<br />
Click Next >><br />
28
Accept all licensing agreements.<br />
Click Next >> Click Finish<br />
An ETYMOTIC RESEARCH Logo<br />
for the Utility Suite will be on your<br />
computer desktop.<br />
After installation is complete you will be prompted to<br />
restart the PC.<br />
After restarting your PC, you can now connect the<br />
dosimeter to the PC <strong>with</strong> the cable provided.<br />
29
Connecting<br />
to the PC<br />
Important: Plug the cable directly into a PC USB port.<br />
Do not plug it into a USB hub.<br />
Remove the battery cover of the <strong>ER</strong>-<strong>200D</strong><br />
30
Connect the USB cable to the <strong>ER</strong>-<strong>200D</strong><br />
Connect the USB cable to the computer<br />
31
Initializing the<br />
<strong>Dosimeter</strong><br />
The first time the dosimeter is connected to the PC, it must<br />
be initialized. After connecting the dosimeter “Found New<br />
Hardware Wizard” will appear.<br />
Select “No, not this time” then click Next ><br />
Notes:<br />
· Each dosimeter has a unique serial number. Multiple<br />
dosimeters can be interfaced <strong>with</strong> a single PC;<br />
however, only one dosimeter at a time can be<br />
connected to the PC.<br />
· When more than one dosimeter will be used <strong>with</strong> a<br />
single PC, “Found New Hardware” Wizard will appear<br />
the first time each dosimeter is connected to the PC.<br />
· After each dosimeter is taken through this process<br />
once, the interface will recognize the dosimeter’s<br />
unique serial number each time the dosimeter is<br />
connected.<br />
32
Select “Install the software automatically”and click Next ><br />
If the following screen appears, click “Continue Anyway.”<br />
When the “Found New Hardware Wizard” is complete,<br />
click Finish.<br />
The dosimeter’s unique serial number is now recognized by<br />
the Utility Suite.<br />
33
Using the Utility Suite<br />
Utility Suite Screens . . . . . . . . . . . . . . . . . . . . . . . . .37<br />
Menus . . . . . . . . . . . . . . . . . . . . . . . . . . . . . . . . 38-39<br />
Setup Screen . . . . . . . . . . . . . . . . . . . . . . . . . . . . . .40<br />
Measurement Mode . . . . . . . . . . . . . . . . . . . . . . .41<br />
Run Length . . . . . . . . . . . . . . . . . . . . . . . . . . . . .42<br />
Power Button Functions . . . . . . . . . . . . . . . . . . . .43<br />
Writing Settings to the <strong>Dosimeter</strong> . . . . . . . . . . . . .44<br />
Restore Default Settings . . . . . . . . . . . . . . . . . . . .45<br />
<strong>Data</strong> Screen . . . . . . . . . . . . . . . . . . . . . . . . . . . . . . .46<br />
Downloading Stored <strong>Data</strong> . . . . . . . . . . . . . . . . . .46<br />
<strong>Data</strong> Table . . . . . . . . . . . . . . . . . . . . . . . . . . . . . .47<br />
<strong>Data</strong> Graphs . . . . . . . . . . . . . . . . . . . . . . . . . . . . .48<br />
Normal Runs . . . . . . . . . . . . . . . . . . . . . . . . . .48<br />
QuickCheck Runs . . . . . . . . . . . . . . . . . . . . . .49<br />
Predictive <strong>Data</strong> Feature . . . . . . . . . . . . . . . 49-50<br />
Clearing the Memory . . . . . . . . . . . . . . . . . . . . . .50<br />
Saving <strong>Data</strong> . . . . . . . . . . . . . . . . . . . . . . . . . . . . . . .51<br />
Printing Reports . . . . . . . . . . . . . . . . . . . . . . . . . . . .52<br />
Previously Saved Reports . . . . . . . . . . . . . . . . . . .52<br />
Excel Reports and <strong>Data</strong> Files . . . . . . . . . . . . . . 53-54<br />
34
Utility Suite<br />
Screens<br />
Open the <strong>ER</strong>-<strong>200D</strong> Utility Suite by<br />
double-clicking the icon.<br />
There are 3 main screens in the Utility Suite:<br />
Home, Setup, and <strong>Data</strong>.<br />
Home Screen<br />
Status bar<br />
Serial number of connected dosimeter<br />
37<br />
Screen Identifi er
Menus<br />
File<br />
· Open:<br />
Opens saved reports<br />
· Save:<br />
Creates and saves a report for the currently<br />
selected data run<br />
· Save All: Creates and saves reports for all displayed<br />
data runs<br />
· Print:<br />
Prints a report for the currently selected data run<br />
· Print Preview: Generates a print preview for the<br />
currently selected data run<br />
· Exit:<br />
Closes the software<br />
Setup<br />
· View Setup Window: Displays Setup information for<br />
the connected <strong>ER</strong>-<strong>200D</strong><br />
· Read <strong>ER</strong>-<strong>200D</strong> Setup: Reads setup information stored<br />
on the connected <strong>ER</strong>-<strong>200D</strong><br />
· Write From Setup Panel: Writes the displayed setup<br />
information to the connected <strong>ER</strong>-<strong>200D</strong><br />
· Restore Factory Defaults: Restores Setup to factory<br />
default settings<br />
<strong>Data</strong><br />
· View <strong>Data</strong> Window: Displays data screen<br />
· Read <strong>ER</strong>-<strong>200D</strong> <strong>Data</strong>: Reads data from the connected<br />
<strong>ER</strong>-<strong>200D</strong><br />
Delete <strong>ER</strong>-<strong>200D</strong> <strong>Data</strong>:<br />
· Deletes data from the<br />
connected <strong>ER</strong>-<strong>200D</strong><br />
38
· Describe Highlighted Run: Opens a text box for the<br />
user to enter details for the highlighted data run<br />
· Describe All Runs: Opens a text box for each<br />
displayed run<br />
· Clear Screen: Clears the data screen. <strong>Data</strong> remain on<br />
the <strong>ER</strong>-<strong>200D</strong> until removed (see <strong>Data</strong> – Delete above).<br />
Tools<br />
Check Calibration<br />
· Microphone:<br />
Allows user to check microphone<br />
calibration<br />
· Direct Input (special uses only): Allows user to<br />
check calibration of direct input<br />
The <strong>ER</strong>-<strong>200D</strong> is factory calibrated. Calibration values affect<br />
the calculated noise dose. Only expert users should change<br />
calibration settings. <strong>User</strong>s who wish to check microphone<br />
calibration need a signal source that generates a 94 dB<br />
SPL, 1-kHz signal at the microphone. Calibration of the<br />
direct input feature (special use only) can be checked <strong>with</strong><br />
a 10mV, 1-kHz signal. Contact customer service at Etymotic<br />
Research for additional information on Advanced Features.<br />
Log In For Advanced Features<br />
Access to Advanced Features lets expert users change<br />
calibration settings, update firmware and save and upload<br />
setup images. If performed incorrectly, changing these<br />
settings can result in serious measurement errors. Access to<br />
Advanced Features requires a user name and password.<br />
About<br />
· About: Displays the software version.<br />
39
Setup Screen<br />
The Setup Screen is used to customize the dosimeter.<br />
Changes made on the setup screen must be written to<br />
the dosimeter (see “Writing settings to the <strong>Dosimeter</strong>” on<br />
page 44). Any changes not written to the dosimeter will<br />
be lost and the device will revert to its default or previously<br />
stored settings.<br />
From the menu bar click “Setup.“<br />
Click “Read <strong>ER</strong><strong>200D</strong> Setup.”<br />
The Status Bar will display “Reading <strong>ER</strong>-<strong>200D</strong> Setup”<br />
followed by “Ready.”<br />
40
The Setup Screen displays the factory default settings the<br />
first time the dosimeter is used. Thereafter, stored settings<br />
are displayed.<br />
Measurement Mode<br />
NOTE: Exchange rate, criterion level and threshold level<br />
determine how noise dose is defined and computed, and<br />
will impact the dose results. The default settings correspond<br />
to NIOSH (1998) recommendations, which are more<br />
conservative (more protective) than the OSHA criteria.<br />
NIOSH (default)<br />
Exchange rate: 3 dB<br />
Criterion level: 85 dB<br />
Threshold level: 75 dB<br />
OSHA<br />
Exchange rate: 5 dB<br />
Criterion level: 90 dB<br />
Threshold level: 80 dB<br />
Custom<br />
Exchange rate: 3, 4 or 5 dB<br />
Criterion level: 70 to 95 dB, in 1-dB increments<br />
Threshold level: 65 to 90 dB, in 1-dB increments<br />
41
Run Length<br />
Normal Run Length<br />
16 Hours (default)<br />
Allows for adequate run time before<br />
and after a typical 8-hour work<br />
shift, as well as any overtime that<br />
may occur.<br />
Alternate Options<br />
3 Days, 5 Days and 7 Days<br />
Run-Time Clock<br />
The <strong>ER</strong>-<strong>200D</strong> has a run-time clock, but not a real-time<br />
clock. For run lengths over 16 hours, the dose continues to<br />
accumulate the entire measurement time. Dose does not<br />
“auto-zero” every 24 hours. <strong>User</strong>s requiring the average dose<br />
per day will need to download and view the data in Excel<br />
and calculate the average dose per day.<br />
NOTE: For extended run lengths (3, 5 or 7 days) it is<br />
recommended you disable the “Allow <strong>Manual</strong> Shutdown”<br />
feature and install new batteries prior to starting.<br />
Display Results During Run<br />
This ensures the LEDs are lit during all measurements.<br />
Unchecked: The top (12.5%) LED flashes to indicate the<br />
dosimeter is functioning, but the dose value is not displayed.<br />
Allow <strong>Manual</strong> Shutdown<br />
Allows user to manually power OFF before the end of a<br />
Normal or QuickCheck run.<br />
Unchecked: <strong>Dosimeter</strong> remains ON until the end of the<br />
Normal or QuickCheck run, after which it automatically<br />
powers OFF. This prevents intentional or unintentional<br />
shutdown of the device.<br />
42
Allow Previous Results to Be Overwritten<br />
The dosimeter automatically overwrites the oldest data<br />
when the device memory is full <strong>with</strong>out signaling the user.<br />
For more information on memory capacity and the number<br />
of data runs that can be stored, see pages 19-20.<br />
Unchecked: Ensures that new data do not overwrite<br />
older saved data in the device. LEDs indicate when the<br />
device memory is full (see pages 19-20). <strong>Data</strong> must be<br />
downloaded and/or removed from the device to clear the<br />
memory for more runs.<br />
Power Button Functions<br />
(see page 10)<br />
The Power Button is used to select the type<br />
of run. This sequence cannot be changed.<br />
About Your <strong>ER</strong>-<strong>200D</strong><br />
Displays identifying information about the connected<br />
dosimeter, which is useful to the factory if troubleshooting<br />
a specific device is necessary.<br />
From the Setup screen, click “About Your <strong>ER</strong>-<strong>200D</strong>”<br />
Information on the “About Your <strong>ER</strong>-<strong>200D</strong>” screen cannot<br />
be changed by the user.<br />
43
Writing Settings to the <strong>Dosimeter</strong><br />
When settings are changed on the Setup screen, “Unsaved<br />
setup information” flashes until the setting are written to<br />
the dosimeter.<br />
To save settings<br />
·<br />
·<br />
·<br />
Click “Setup” on the menu bar<br />
Click “Write from Setup Panel” from the dropdown menu<br />
Status bar indicates “Updating <strong>ER</strong>-<strong>200D</strong> Setup”<br />
· After changes are programmed, status bar<br />
displays “Ready”<br />
44
Restore Default Settings<br />
·<br />
·<br />
·<br />
·<br />
Click “Setup” from the menu bar<br />
Click “Restore Factory Defaults”<br />
Click “Yes”<br />
Status bar indicates “Restoring Factory Defaults”<br />
· After changes are programmed, status bar<br />
displays “Ready”<br />
45
<strong>Data</strong> Screen<br />
Downloading Stored <strong>Data</strong><br />
· From either the Home screen or Setup screen,<br />
click “<strong>Data</strong>” on the menu bar.<br />
·<br />
Click “Read <strong>ER</strong>-<strong>200D</strong> <strong>Data</strong>.”<br />
The blue status bar indicates “Reading <strong>ER</strong>-<strong>200D</strong> data”<br />
46
<strong>Data</strong> Table<br />
All data runs are displayed in the <strong>Data</strong> Table, <strong>with</strong> the most<br />
recent run at the top of the list.<br />
· Serial Number: Device serial number<br />
· Run: Sequential, beginning <strong>with</strong> 001<br />
· Run Type:<br />
Normal or QuickCheck<br />
· Final Dose %: Dose at end of run<br />
· Overall Leq: A-weighted continuous equivalent sound level<br />
· Run Description: This is a textbox in which the user can enter data<br />
describing the run<br />
ExAMPLE:<br />
“Jane Smith, Packing Line 1, Full Capacity, First Shift, 5-18-2009.”<br />
To Enter A Run Description<br />
· Double-click on the desired run or click the blue “Describe Run”<br />
box on the screen.<br />
· Type information into dialogue box and click OK.<br />
· Run description will be immediately updated.<br />
Note: Once a report is created, the Run Description cannot be<br />
altered in the report. A new report can be made, but it must be<br />
saved using a different file name.<br />
· Run Length: Actual run time, displayed as<br />
Days-Hours-Minutes-Seconds<br />
· Max Run Length: Maximum time the dosimeter could run<br />
· Exchange Rate, Criterion and Threshold:<br />
As selected from the Setup Screen<br />
· Signal Source: internal microphone (default) or direct input<br />
· Calibration: Calibration value used at the time of the run<br />
· Run Termination: Completed normally; manual<br />
shutdown; or sudden power loss<br />
· Warnings: Any warnings that occurred during the run<br />
· Software Version: software version at the time<br />
of the run<br />
47
<strong>Data</strong> Graphs<br />
· The data graph displays dose data from the run<br />
highlighted in the <strong>Data</strong> Table.<br />
· To display graphs for other runs, select the run by<br />
clicking on the line in the <strong>Data</strong> Table that contains the<br />
run data.<br />
· Dose is displayed by blue fill on the graph and indicated<br />
numerically on the right side of the graph.<br />
Normal Runs<br />
Leq (red) Dose % (blue)<br />
· Leq (Equivalent Continuous Level) is displayed on the<br />
left side of the graph and indicated <strong>with</strong> a red line on<br />
the graph when the Leq box is checked. Leq is only<br />
available for Real-Time <strong>Data</strong>.<br />
· For Normal runs, only Real-Time <strong>Data</strong> are available.<br />
· In Normal Mode, dose values are obtained every<br />
220 msec and summed over a 3.75 minute interval.<br />
48
QuickCheck Runs<br />
·<br />
·<br />
QuickCheck run time is approximately 2 minutes.<br />
Estimated dose per hour is displayed in the data table.<br />
Predictive <strong>Data</strong> Feature<br />
Runs can be viewed as Real-Time <strong>Data</strong> or Predictive <strong>Data</strong>.<br />
Selecting Predictive <strong>Data</strong> allows the user to see<br />
estimated dose for various time periods.<br />
Prediction Length (in Hours)<br />
is adjustable by the user.<br />
Here, “1” was entered.<br />
49<br />
Real-time data<br />
are displayed<br />
Dose % is<br />
160% for 1 hour<br />
Predictive <strong>Data</strong> can be<br />
displayed in Days, Hours,<br />
Minutes or Seconds.
When “8” (hours) is entered,<br />
the estimated dose is over 1200%<br />
Note Only dose per hour data are displayed on the<br />
printed report.<br />
Clearing the Memory<br />
Important: Download and save data from the dosimeter<br />
prior to clearing the memory.<br />
· Click “<strong>Data</strong>” on the menu bar<br />
· Click “Delete <strong>ER</strong>-<strong>200D</strong> <strong>Data</strong>”<br />
· A dialog box appears to<br />
confirm data deletion<br />
· Click “Yes”<br />
When the <strong>ER</strong>-<strong>200D</strong> memory<br />
is full and the dosimeter<br />
is set not to overwrite the<br />
data, then data must be removed from the device before<br />
additional data runs can be obtained.<br />
50
Saving <strong>Data</strong><br />
Reports are created and saved in Microsoft Excel.<br />
<strong>Data</strong> are saved when a report is created.<br />
· Prior to saving a report enter a run description.<br />
· Reports are write-protected and can’t be changed after<br />
they are saved.<br />
Disconnect <strong>with</strong>out saving<br />
·<br />
If user reads and displays data and then disconnects<br />
-<br />
<strong>Data</strong> are not saved.<br />
- <strong>Data</strong> will disappear from the <strong>Data</strong> screen but are still in<br />
the dosimeter.<br />
To Save a Highlighted Run<br />
·<br />
·<br />
Click “File” on the menu bar.<br />
Click “Save” on the dropdown menu.<br />
· A default name is assigned using the dosimeter serial<br />
number and run number (e.g., SN20056 Run 010).<br />
· The file can be renamed using any combination of letters<br />
and numbers.<br />
· A dialog box appears asking if you want to print the report.<br />
To Save All Runs<br />
· Click “File” on the menu bar.<br />
·<br />
Click “Save All” on the dropdown menu.<br />
51
Printing Reports<br />
To Save and Print<br />
· Save the selected report as described above. A dialog box<br />
appears asking if you would like to print.<br />
To Print <strong>with</strong>out Saving<br />
· From the menu bar Click “File.” Click “Print.” The file will<br />
print but it will not be saved.<br />
Previously Saved Reports<br />
Previously saved reports can be uploaded, viewed and printed<br />
from <strong>with</strong>in the Utility Suite or Microsoft Excel. The dosimeter<br />
does not have to be connected to the PC. To view reports<br />
from <strong>with</strong>in the Utility Suite:<br />
· Click “File” on the menu bar<br />
· Click “Open”<br />
· Select a previously saved file<br />
To Enter a Run Description for a Previously Saved File<br />
· Open the desired file<br />
· Enter a run description<br />
·<br />
Save the file using a different filename than the original<br />
52
Excel Reports and <strong>Data</strong> Files<br />
The default location for reports is C:\Etymotic Research\<br />
<strong>ER</strong><strong>200D</strong> Utility Suite\Reports. The user can set up a file in<br />
which to save reports at a different location if desired.<br />
The Excel report file has three tabs<br />
Tab 1: Summary Contains the report (text box and graphs)<br />
Tabs<br />
53
Tab 2: <strong>Data</strong> Shows dose and Leq values for each 3.75<br />
minute time block. These data can be used to create graphs<br />
in Excel if desired.<br />
<strong>Data</strong> are recorded as fractions of an hour, e.g., the data<br />
at 3.75 minutes is written as 0.062 (3.75 minutes ÷ 60<br />
minutes = 0.062).<br />
Tab 3: Raw <strong>Data</strong> Ignore this tab. <strong>Data</strong> are used by the PC<br />
Interface Program for calculations.<br />
54
Important Points (in alphabetical order)<br />
Disconnect <strong>with</strong>out saving (p.51)<br />
·<br />
If user reads and displays data and then disconnects<br />
-<br />
<strong>Data</strong> are not saved.<br />
- <strong>Data</strong> will disappear from the <strong>Data</strong> screen but are still in<br />
the dosimeter.<br />
Displaying and printing results (pp. 46-52)<br />
· Normal Runs: The Utility Suite displays and prints<br />
real-time data.<br />
· QuickCheck Runs: The Utility Suite displays either real-time<br />
data or predictive data.<br />
- <strong>User</strong> can select length of exposure time for predictive<br />
data to view the corresponding dose %.<br />
- Only the default (1-Hr) predicted dose per hour is<br />
shown on the printed report.<br />
Initializing new dosimeters (p. 32)<br />
· Initialization is necessary the first time a dosimeter is used<br />
<strong>with</strong> a specific PC.<br />
· Once a dosimeter is initialized, the software will always<br />
recognize it by serial number.<br />
Measurement Window (p. 12)<br />
· In Normal mode, dose values are obtained every 220 msec,<br />
summed over a 3.75 minute interval and saved in nonvolatile<br />
memory every 3.75 minutes (16 times per hour).<br />
Overwriting <strong>Data</strong> (p.43)<br />
· When memory is full, data will be written over the<br />
oldest saved data unless “Allow previous results to be<br />
overwritten” is unchecked in the setup screen.<br />
· Download or remove data if you want to clear the memory<br />
for additional runs.<br />
Reading <strong>Data</strong> (p. 46)<br />
· Each time a dosimeter is connected its data must first be<br />
READ to be displayed.
Run-Time Clock (p. 42)<br />
· The dosimeter has a run-time clock, but not a<br />
real-time clock.<br />
· For run lengths greater than 16 hours (e.g., 3, 5 or<br />
7 days) the dose continues to accumulate for the entire<br />
run length.<br />
- Dose does not “auto-zero” every 24 hours.<br />
- To calculate average dose per day, download and view<br />
the data in Excel<br />
Saving Reports (p. 51)<br />
· Displaying dosimeter runs in the <strong>Data</strong> Screen does not<br />
save them.<br />
· You must save run(s) to the PC as Excel files. This is done<br />
by Clicking File/Save or File/Save All.<br />
· Reports are write-protected and can’t be changed after<br />
they’re saved (although the report can be edited and<br />
then saved using a different filename than the original).<br />
Test Mode Selection (p. 10)<br />
· One press: Status<br />
· Two presses: Normal Mode<br />
· Three presses: QuickCheck Mode<br />
Unsaved Setup Information (p. 44)<br />
When the status bar is flashing:<br />
· Any change to setup settings activates the warning to<br />
save before proceeding.<br />
· Changes not written to the dosimeter will be lost and<br />
settings revert to default or previously stored settings.<br />
58
61 Martin Lane • Elk Grove Village, IL 60007<br />
www.etymotic.com • 1-888-389-6684 • 1-847-228-0006<br />
©2010 <strong>ER</strong>078111


