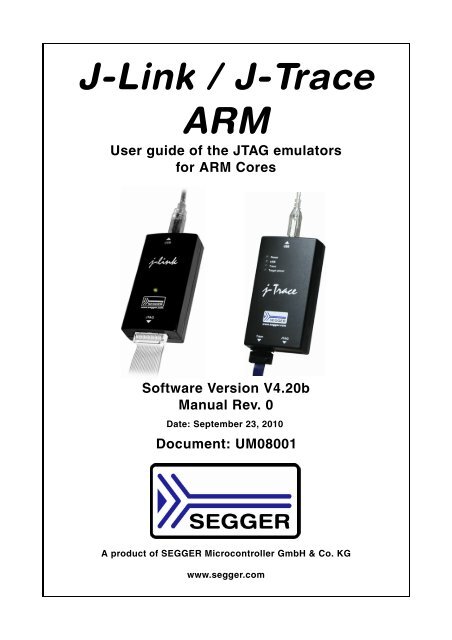
J-Link / J-Trace User Guide (UM08001) - Microcontrollers
J-Link / J-Trace User Guide (UM08001) - Microcontrollers
J-Link / J-Trace User Guide (UM08001) - Microcontrollers

Create successful ePaper yourself
Turn your PDF publications into a flip-book with our unique Google optimized e-Paper software.
J-<strong>Link</strong> / J-<strong>Trace</strong><br />
ARM<br />
<strong>User</strong> guide of the JTAG emulators<br />
for ARM Cores<br />
Software Version V4.20b<br />
Manual Rev. 0<br />
Date: September 23, 2010<br />
Document: <strong>UM08001</strong><br />
A product of SEGGER Microcontroller GmbH & Co. KG<br />
www.segger.com
2<br />
Disclaimer<br />
Specifications written in this document are believed to be accurate, but are not guaranteed<br />
to be entirely free of error. The information in this manual is subject to<br />
change for functional or performance improvements without notice. Please make sure<br />
your manual is the latest edition. While the information herein is assumed to be<br />
accurate, SEGGER Microcontroller GmbH & Co. KG (the manufacturer) assumes no<br />
responsibility for any errors or omissions. The manufacturer makes and you receive<br />
no warranties or conditions, express, implied, statutory or in any communication with<br />
you. The manufacturer specifically disclaims any implied warranty of merchantability<br />
or fitness for a particular purpose.<br />
Copyright notice<br />
You may not extract portions of this manual or modify the PDF file in any way without<br />
the prior written permission of the manufacturer. The software described in this document<br />
is furnished under a license and may only be used or copied in accordance<br />
with the terms of such a license.<br />
© 2010 SEGGER Microcontroller GmbH & Co. KG, Hilden / Germany<br />
Trademarks<br />
Names mentioned in this manual may be trademarks of their respective companies.<br />
Brand and product names are trademarks or registered trademarks of their respective<br />
holders.<br />
Contact address<br />
SEGGER Microcontroller GmbH & Co. KG<br />
In den Weiden 11<br />
D-40721 Hilden<br />
Germany<br />
Tel.+49 2103-2878-0<br />
Fax.+49 2103-2878-28<br />
Email: support@segger.com<br />
Internet: http://www.segger.com<br />
Revisions<br />
This manual describes the J-<strong>Link</strong> and J-<strong>Trace</strong> device.<br />
For further information on topics or routines not yet specified, please contact us.<br />
Revision Date By Explanation<br />
V4.20b 100923 AG<br />
Chapter "Working with J-<strong>Link</strong>"<br />
* Section "Reset strategies" updated.<br />
Chapter "Working with J-<strong>Link</strong>"<br />
* Section "J-<strong>Link</strong> script files" updated.<br />
* Section "Command strings" upadted.<br />
90 100818 AG<br />
Chapter "Target interfaces and adapters"<br />
* Section "19-pin JTAG/SWD and <strong>Trace</strong><br />
connector" corrected.<br />
Chapter "Setup"<br />
* Section "J-<strong>Link</strong> configurator added."<br />
89 100630 AG Several corrections.<br />
88 100622 AG<br />
Chapter "J-<strong>Link</strong> and J-<strong>Trace</strong> related software"<br />
* Section "SWO Analyzer" added.<br />
87 100617 AG Several corrections.<br />
J-<strong>Link</strong> / J-<strong>Trace</strong> (<strong>UM08001</strong>) © 2004-2010 SEGGER Microcontroller GmbH & Co. KG
Revision Date By Explanation<br />
86 100504 AG<br />
85 100428 AG<br />
84 100324 KN<br />
83 100223 KN<br />
82 100215 AG<br />
81 100202 KN<br />
80 100104 KN<br />
79 091201 AG<br />
78 091023 AG<br />
77 090910 AG<br />
76 090828 KN<br />
75 090729 AG<br />
74 090722 KN<br />
73 090701 KN<br />
Chapter "Introduction"<br />
* Section "J-<strong>Link</strong> / J-<strong>Trace</strong> models" updated.<br />
Chapter "Target interfaces and adapters"<br />
* Section "Adapters" updated.<br />
Chapter "Introduction"<br />
* Section "J-<strong>Link</strong> / J-<strong>Trace</strong> models" updated.<br />
Chapter "Working with J-<strong>Link</strong> and J-<strong>Trace</strong>"<br />
* Several corrections<br />
Chapter Flash download & flash breakpoints<br />
* Section "Supported devices" updated<br />
Chapter "Introduction"<br />
* Section "J-<strong>Link</strong> / J-<strong>Trace</strong> models" updated.<br />
Chapter "Working with J-<strong>Link</strong>"<br />
* Section "J-<strong>Link</strong> script files" added.<br />
Chapter "Device Specifics"<br />
* Section "Luminary Micro" updated.<br />
Chapter "Flash download and flash breakpoints"<br />
* Section "Supported devices" updated.<br />
Chapter "Flash download and flash breakpoints<br />
* Section "Supported devices" updated<br />
Chapter "Working with J-<strong>Link</strong> and J-<strong>Trace</strong>"<br />
* Section "Reset strategies" updated.<br />
Chapter "Licensing"<br />
* Section "J-<strong>Link</strong> OEM versions" updated.<br />
Chapter "Licensing"<br />
* Section "J-<strong>Link</strong> OEM versions" updated.<br />
Chapter "Introduction"<br />
* Section "J-<strong>Link</strong> / J-<strong>Trace</strong> models" updated.<br />
Chapter "Introduction"<br />
* Section" Specifications" updated<br />
* Section "Hardware versions" updated<br />
* Section "Common features of the J-<strong>Link</strong> product<br />
family" updated<br />
Chapter "Target interfaces and adapters"<br />
* Section "5 Volt adapter" updated<br />
Chapter "Introduction"<br />
* Section "J-<strong>Link</strong> / J-<strong>Trace</strong> models" updated.<br />
Chapter "Working with J-<strong>Link</strong> and J-<strong>Trace</strong>"<br />
* Section "SWD interface" updated.<br />
Chapter "Introduction"<br />
* Section "Supported IDEs" added<br />
* Section "Supported CPU cores" updated<br />
* Section "Model comparison chart" renamed to<br />
"Model comparison"<br />
* Section "J-<strong>Link</strong> bundle comparison chart"<br />
removed<br />
Chapter "Introduction"<br />
* Section "J-<strong>Link</strong> and J-<strong>Trace</strong> models" added<br />
* Sections "Model comparison chart" &<br />
"J-<strong>Link</strong> bundle comparison chart"added<br />
Chapter "J-<strong>Link</strong> and J-<strong>Trace</strong> models" removed<br />
Chapter "Hardware" renamed to<br />
"Target interfaces & adapters"<br />
* Section "JTAG Isolator" added<br />
Chapter "Target interfaces and adapters"<br />
* Section "Target board design" updated<br />
Several corrections<br />
J-<strong>Link</strong> / J-<strong>Trace</strong> (<strong>UM08001</strong>) © 2004-2010 SEGGER Microcontroller GmbH & Co. KG<br />
3
4<br />
Revision Date By Explanation<br />
72 090618 AG<br />
Chapter "Working with J-<strong>Link</strong>"<br />
* Section "J-<strong>Link</strong> control panel" updated.<br />
Chapter "Flash download and flash breakpoints"<br />
* Section "Supported devices" updated.<br />
Chapter "Device specifics"<br />
* Section "NXP" updated.<br />
71 090616 AG<br />
Chapter "Device specifics"<br />
* Section "NXP" updated.<br />
Chapter "Introduction"<br />
70 090605 AG * Section "Common features of the J-<strong>Link</strong><br />
product family" updated.<br />
Chapter "Working with J-<strong>Link</strong>"<br />
* Section "Reset strategies" updated.<br />
69 090515 AG * Section "Indicators" updated.<br />
Chapter "Flash download and flash breakpoints"<br />
* Section "Supported devices" updated.<br />
Chapter "J-<strong>Link</strong> and J-<strong>Trace</strong> related software"<br />
68 090428 AG<br />
* Section "J-<strong>Link</strong> STM32 Commander" added.<br />
Chapter "Working with J-<strong>Link</strong>"<br />
* Section "Reset strategies" updated.<br />
67 090402 AG<br />
Chapter "Working with J-<strong>Link</strong>"<br />
* Section "Reset strategies" updated.<br />
Chapter "Background information"<br />
* Section "Embedded <strong>Trace</strong> Macrocell (ETM)"<br />
66 090327 AG<br />
updated.<br />
Chapter "J-<strong>Link</strong> and J-<strong>Trace</strong> related software"<br />
* Section "Dedicated flash programming<br />
utilities for J-<strong>Link</strong>" updated.<br />
65 090320 AG Several changes in the manual structure.<br />
64 090313 AG<br />
Chapter "Working with J-<strong>Link</strong>"<br />
* Section "Indicators" added.<br />
Chapter "Hardware"<br />
63 090212 AG * Several corrections.<br />
* Section "Hardware Versions" Version 8.0 added.<br />
Chapter "Working with J-<strong>Link</strong> and J-<strong>Trace</strong>"<br />
* Section "Reset strategies" updated.<br />
Chapter J-<strong>Link</strong> and J-<strong>Trace</strong> related software<br />
62 090211 AG<br />
* Section "J-<strong>Link</strong> STR91x Commander<br />
(Command line tool)" updated.<br />
Chapter "Device specifics"<br />
* Section "ST Microelectronics" updated.<br />
Chapter "Hardware" updated.<br />
61 090120 TQ<br />
Chapter "Working with J-<strong>Link</strong>"<br />
* Section "Cortex-M3 specific reset strategies"<br />
60 090114 AG<br />
Chapter "Working with J-<strong>Link</strong>"<br />
* Section "Cortex-M3 specific reset strategies"<br />
Chapter Hardware<br />
59 090108 KN<br />
* Section "Target board design for JTAG"<br />
updated.<br />
* Section "Target board design for SWD" added.<br />
Chapter "Working with J-<strong>Link</strong> Pro"<br />
58 090105 AG * Section "Connecting J-<strong>Link</strong> Pro the first time"<br />
updated.<br />
J-<strong>Link</strong> / J-<strong>Trace</strong> (<strong>UM08001</strong>) © 2004-2010 SEGGER Microcontroller GmbH & Co. KG
Revision Date By Explanation<br />
57 081222 AG<br />
Chapter "Working with J-<strong>Link</strong> Pro"<br />
* Section "Introduction" updated.<br />
* Section "Configuring J-<strong>Link</strong> Pro<br />
via web interface" updated.<br />
Chapter "Introduction"<br />
* Section "J-<strong>Link</strong> Pro overview" updated.<br />
Chapter "Working with J-<strong>Link</strong> Pro"<br />
56 081219 AG<br />
* Section "FAQs" added.<br />
Chapter "Support and FAQs"<br />
* Section "Frequently Asked Questions" updated.<br />
55 081218 AG Chapter "Hardware" updated.<br />
54 081217 AG<br />
Chapter "Working with J-<strong>Link</strong> and J-<strong>Trace</strong>"<br />
* Section "Command strings" updated.<br />
53 081216 AG Chapter "Working with J-<strong>Link</strong> Pro" updated.<br />
Chapter "Working with J-<strong>Link</strong> Pro" added.<br />
52 081212 AG Chapter "Licensing"<br />
* Section "Original SEGGER products" updated.<br />
51 081202 KN Several corrections.<br />
50 081030 AG<br />
Chapter "Flash download and flash breakpoints"<br />
* Section "Supported devices" corrected.<br />
49 081029 AG Several corrections.<br />
Chapter "Working with J-<strong>Link</strong> and J-<strong>Trace</strong>"<br />
48 080916 AG * Section "Connecting multiple J-<strong>Link</strong>s /<br />
J-<strong>Trace</strong>s to your PC" updated.<br />
47 080910 AG Chapter "Licensing" updated.<br />
Chapter "Licensing" added.<br />
46 080904 AG<br />
Chapter "Hardware"<br />
Section "J-<strong>Link</strong> OEM versions" moved to chapter<br />
"Licensing"<br />
Chapter "Hardware"<br />
45 080902 AG<br />
Section "JTAG+<strong>Trace</strong> connector" JTAG+<strong>Trace</strong><br />
connector pinout corrected.<br />
Section "J-<strong>Link</strong> OEM versions" updated.<br />
Chapter "J-<strong>Link</strong> control panel" moved to chapter<br />
44 080827 AG "Working with J-<strong>Link</strong>".<br />
Several corrections.<br />
43 080826 AG<br />
Chapter "Flash download and flash breakpoints"<br />
Section "Supported devices" updated.<br />
42 080820 AG<br />
Chapter "Flash download and flash breakpoints"<br />
Section "Supported devices" updated.<br />
Chapter "Flash download and flash breakpoints"<br />
41 080811 AG<br />
updated.<br />
Chapter "Flash download and flash breakpoints",<br />
section "Supported devices" updated.<br />
Chapter "Flash download and flash breakpoints"<br />
updated.<br />
40 080630 AG Chapter "J-<strong>Link</strong> status window" renamed to "J-<strong>Link</strong><br />
control panel"<br />
Various corrections.<br />
Chapter "Flash download and flash breakpoints"<br />
Section "Licensing" updated.<br />
39 080627 AG Section "Using flash download and flash<br />
breakpoints with different debuggers" updated.<br />
Chapter "J-<strong>Link</strong> status window" added.<br />
J-<strong>Link</strong> / J-<strong>Trace</strong> (<strong>UM08001</strong>) © 2004-2010 SEGGER Microcontroller GmbH & Co. KG<br />
5
6<br />
Revision Date By Explanation<br />
38 080618 AG<br />
37 080617 AG<br />
36 080530 AG<br />
35 080215 AG<br />
34 080212 AG<br />
33 080207 AG<br />
32 0080129 SK<br />
31 0080103 SK<br />
30 071211 AG<br />
29 070912 SK<br />
28 070912 SK<br />
Chapter "Support and FAQs"<br />
Section "Frequently Asked Questions" updated<br />
Chapter "Reset strategies"<br />
Section "Cortex-M3 specific reset strategies"<br />
updated.<br />
Chapter "Reset strategies"<br />
Section "Cortex-M3 specific reset strategies"<br />
updated.<br />
Chapter "Hardware"<br />
Section "Differences between different versions"<br />
updated.<br />
Chapter "Working with J-<strong>Link</strong> and J-<strong>Trace</strong>"<br />
Section "Cortex-M3 specific reset strategies"<br />
added.<br />
Chapter "J-<strong>Link</strong> and J-<strong>Trace</strong> related software"<br />
Section "J-<strong>Link</strong> software and documentation<br />
package in detail" updated.<br />
Chapter "J-<strong>Link</strong> and J-<strong>Trace</strong> related software"<br />
Section "J-<strong>Link</strong> TCP/IP Server (Remote J-<strong>Link</strong> /<br />
J-<strong>Trace</strong> use)" updated.<br />
Chapter "Working with J-<strong>Link</strong> and J-<strong>Trace</strong>"<br />
Section "Command strings" updated.<br />
Chapter "Flash download and flash breakpoints"<br />
Section "Introduction" updated.<br />
Section "Licensing" updated.<br />
Section "Using flash download and flash<br />
breakpoints with different debuggers" updated.<br />
Chapter "Flash download and flash breakpoints"<br />
added<br />
Chapter "Device specifics:"<br />
Section "ATMEL - AT91SAM7 - Recommended init<br />
sequence" added.<br />
Chapter "Device specifics":<br />
Section "NXP - LPC - Fast GPIO bug" list of<br />
device enhanced.<br />
Chapter "Device specifics":<br />
Section "NXP - LPC - Fast GPIO bug" updated.<br />
Chapter "Device specifics":<br />
Section "Analog Devices" updated.<br />
Section "ATMEL" updated.<br />
Section "Freescale" added.<br />
Section "Luminary Micro" added.<br />
Section "NXP" updated.<br />
Section "OKI" added.<br />
Section "ST Microelectronics" updated.<br />
Section "Texas Instruments" updated.<br />
Chapter "Related software":<br />
Section "J-<strong>Link</strong> STR91x Commander" updated<br />
Chapter "Hardware", section "Target board design"<br />
updated.<br />
Chapter "Related software":<br />
Section "J-<strong>Link</strong>STR91x Commander" added.<br />
Chapter "Device specifics":<br />
Section "ST Microelectronics" added.<br />
Section "Texas Instruments" added.<br />
Subsection "AT91SAM9" added.<br />
J-<strong>Link</strong> / J-<strong>Trace</strong> (<strong>UM08001</strong>) © 2004-2010 SEGGER Microcontroller GmbH & Co. KG
Revision Date By Explanation<br />
28 070912 AG<br />
27 070827 TQ<br />
26 070710 SK<br />
25 070516 SK<br />
24 070323 SK<br />
23 070320 SK<br />
22 070316 SK<br />
21 070312 SK<br />
20 070307 SK<br />
19 070226 SK<br />
18 070221 SK<br />
17 070131 SK<br />
16 061222 SK<br />
15 060914 OO<br />
14 060818 TQ<br />
13 060711 OO<br />
12 060628 OO<br />
Chapter "Working with J-<strong>Link</strong>/J-<strong>Trace</strong>":<br />
Section "Command strings" updated.<br />
Chapter "Working with J-<strong>Link</strong>/J-<strong>Trace</strong>":<br />
Section "Command strings" updated.<br />
Chapter "Introduction":<br />
Section "Features of J-<strong>Link</strong>" updated.<br />
Chapter "Background Information":<br />
Section "Embedded <strong>Trace</strong> Macrocell" added.<br />
Section "Embedded <strong>Trace</strong> Buffer" added.<br />
Chapter "Working with J-<strong>Link</strong>/J-<strong>Trace</strong>":<br />
Section "Reset strategies in detail"<br />
- "Software, for Analog Devices ADuC7xxx<br />
MCUs" updated<br />
- "Software, for ATMEL AT91SAM7 MCUs"<br />
added.<br />
Chapter "Device specifics"<br />
Section "Analog Devices" added.<br />
Section "ATMEL" added.<br />
Chapter "Setup":<br />
"Uninstalling the J-<strong>Link</strong> driver" updated.<br />
"Supported ARM cores" updated.<br />
Chapter "Hardware":<br />
"Using the JTAG connector with SWD" updated.<br />
Chapter "Hardware":<br />
"Using the JTAG connector with SWD" added.<br />
Chapter "Hardware":<br />
"Differences between different versions"<br />
supplemented.<br />
Chapter "J-<strong>Link</strong> / J-<strong>Trace</strong> related software":<br />
"J-<strong>Link</strong> GDB Server" licensing updated.<br />
Chapter "J-<strong>Link</strong> / J-<strong>Trace</strong> related software" updated<br />
and reorganized.<br />
Chapter "Hardware"<br />
"List of OEM products" updated<br />
Chapter "Device specifics" added<br />
Subchapter "Command strings" added<br />
Chapter "Hardware":<br />
"Version 5.3": Current limits added<br />
"Version 5.4" added<br />
Chapter "Setup":<br />
"Installating the J-<strong>Link</strong> USB driver" removed.<br />
"Installing the J-<strong>Link</strong> software and documentation<br />
pack" added.<br />
Subchapter "List of OEM products" updated.<br />
"OS support" updated<br />
Chapter "Preface": "Company description" added.<br />
J-<strong>Link</strong> picture changed.<br />
Subchapter 1.5.1: Added target supply voltage and<br />
target supply current to specifications.<br />
Subchapter 5.2.1: Pictures of ways to connect J-<br />
<strong>Trace</strong>.<br />
Subchapter 4.7 "Using DCC for memory reads"<br />
added.<br />
Subchapter 5.2.2: Corrected JTAG+<strong>Trace</strong> connector<br />
pinout table.<br />
Subchapter 4.1: Added ARM966E-S to List of supported<br />
ARM cores.<br />
J-<strong>Link</strong> / J-<strong>Trace</strong> (<strong>UM08001</strong>) © 2004-2010 SEGGER Microcontroller GmbH & Co. KG<br />
7
8<br />
Revision Date By Explanation<br />
11 060607 SK<br />
Subchapter 5.5.2.2 changed.<br />
Subchapter 5.5.2.3 added.<br />
ARM9 download speed updated.<br />
Subchapter 8.2.1: Screenshot "Start sequence"<br />
10 060526 SK<br />
updated.<br />
Subchapter 8.2.2 "ID sequence" removed.<br />
Chapter "Support" and "FAQ" merged.<br />
Various improvements<br />
Chapter "Literature and references" added.<br />
Chapter "Hardware":<br />
9 060324 OO<br />
Added common information trace signals.<br />
Added timing diagram for trace.<br />
Chapter "Designing the target board for trace"<br />
added.<br />
8 060117 OO<br />
Chapter "Related Software": Added J<strong>Link</strong>ARM.dll.<br />
Screenshots updated.<br />
7 051208 OO Chapter Working with J-<strong>Link</strong>: Sketch added.<br />
Chapter Working with J-<strong>Link</strong>: "Connecting multiple<br />
J-<strong>Link</strong>s to your PC" added.<br />
6 051118 OO<br />
Chapter Working with J-<strong>Link</strong>: "Multi core debugging"<br />
added.<br />
Chapter Background information: "J-<strong>Link</strong> firmware"<br />
added.<br />
5 051103 TQ Chapter Setup: "JTAG Speed" added.<br />
Chapter Background information: "Flash program-<br />
4 051025 OO<br />
ming" added.<br />
Chapter Setup: "Scan chain configuration" added.<br />
Some smaller changes.<br />
3 051021 TQ Performance values updated.<br />
2 051011 TQ Chapter "Working with J-<strong>Link</strong>" added.<br />
1 050818 TW Initial version.<br />
J-<strong>Link</strong> / J-<strong>Trace</strong> (<strong>UM08001</strong>) © 2004-2010 SEGGER Microcontroller GmbH & Co. KG
About this document<br />
This document describes J-<strong>Link</strong> and J-<strong>Trace</strong>. It provides an overview over the major<br />
features of J-<strong>Link</strong> and J-<strong>Trace</strong>, gives you some background information about JTAG,<br />
ARM and Tracing in general and describes J-<strong>Link</strong> and J-<strong>Trace</strong> related software packages<br />
available from Segger. Finally, the chapter Support and FAQs on page 203 helps<br />
to troubleshoot common problems.<br />
For simplicity, we will refer to J-<strong>Link</strong> ARM as J-<strong>Link</strong> in this manual.<br />
For simplicity, we will refer to J-<strong>Link</strong> ARM Pro as J-<strong>Link</strong> Pro in this manual.<br />
Typographic conventions<br />
This manual uses the following typographic conventions:<br />
Style Used for<br />
Body Body text.<br />
Keyword<br />
Text that you enter at the command-prompt or that appears on the<br />
display (that is system functions, file- or pathnames).<br />
Reference Reference to chapters, tables and figures or other documents.<br />
GUIElement Buttons, dialog boxes, menu names, menu commands.<br />
Table 1.1: Typographic conventions<br />
J-<strong>Link</strong> / J-<strong>Trace</strong> (<strong>UM08001</strong>) © 2004-2010 SEGGER Microcontroller GmbH & Co. KG<br />
9
10<br />
SEGGER Microcontroller GmbH & Co. KG develops<br />
and distributes software development tools and ANSI<br />
C software components (middleware) for embedded<br />
systems in several industries such as telecom, medical<br />
technology, consumer electronics, automotive<br />
industry and industrial automation.<br />
SEGGER’s intention is to cut software developmenttime<br />
for embedded applications by offering compact flexible and easy to use middleware,<br />
allowing developers to concentrate on their application.<br />
Our most popular products are emWin, a universal graphic software package for embedded<br />
applications, and embOS, a small yet efficient real-time kernel. emWin, written<br />
entirely in ANSI C, can easily be used on any CPU and most any display. It is complemented<br />
by the available PC tools: Bitmap Converter, Font Converter, Simulator and<br />
Viewer. embOS supports most 8/16/32-bit CPUs. Its small memory footprint makes it<br />
suitable for single-chip applications.<br />
Apart from its main focus on software tools, SEGGER develops and produces programming<br />
tools for flash microcontrollers, as well as J-<strong>Link</strong>, a JTAG emulator to assist in development,<br />
debugging and production, which has rapidly become the industry standard for<br />
debug access to ARM cores.<br />
Corporate Office:<br />
http://www.segger.com<br />
EMBEDDED SOFTWARE<br />
(Middleware)<br />
emWin<br />
Graphics software and GUI<br />
emWin is designed to provide an efficient,<br />
processor- and display controller-independent<br />
graphical user<br />
interface (GUI) for any application that<br />
operates with a graphical display.<br />
Starterkits, eval- and trial-versions are<br />
available.<br />
embOS<br />
Real Time Operating System<br />
embOS is an RTOS designed to offer<br />
the benefits of a complete multitasking<br />
system for hard real time applications<br />
with minimal resources. The profiling<br />
PC tool embOSView is included.<br />
emFile<br />
File system<br />
emFile is an embedded file system with<br />
FAT12, FAT16 and FAT32 support.<br />
emFile has been optimized for minimum<br />
memory consumption in RAM and<br />
ROM while maintaining high speed.<br />
Various Device drivers, e.g. for NAND<br />
and NOR flashes, SD/MMC and CompactFlash<br />
cards, are available.<br />
emUSB<br />
USB device stack<br />
A USB stack designed to work on any<br />
embedded system with a USB client<br />
controller. Bulk communication and<br />
most standard device classes are supported.<br />
United States Office:<br />
http://www.segger-us.com<br />
SEGGER TOOLS<br />
Flasher<br />
Flash programmer<br />
Flash Programming tool primarily for microcontrollers.<br />
J-<strong>Link</strong><br />
JTAG emulator for ARM cores<br />
USB driven JTAG interface for ARM cores.<br />
J-<strong>Trace</strong><br />
JTAG emulator with trace<br />
USB driven JTAG interface for ARM cores with<br />
<strong>Trace</strong> memory. supporting the ARM ETM (Embedded<br />
<strong>Trace</strong> Macrocell).<br />
J-<strong>Link</strong> / J-<strong>Trace</strong> Related Software<br />
Add-on software to be used with SEGGER’s industry<br />
standard JTAG emulator, this includes flash<br />
programming software and flash breakpoints.<br />
J-<strong>Link</strong> / J-<strong>Trace</strong> (<strong>UM08001</strong>) © 2004-2010 SEGGER Microcontroller GmbH & Co. KG
11<br />
Table of Contents<br />
1 Introduction ....................................................................................................................17<br />
1.1 Requirements..........................................................................................18<br />
1.2 Supported OS .........................................................................................19<br />
1.3 J-<strong>Link</strong> / J-<strong>Trace</strong> models ............................................................................20<br />
1.3.1 Model comparison....................................................................................21<br />
1.3.2 J-<strong>Link</strong> ARM .............................................................................................22<br />
1.3.3 J-<strong>Link</strong> Ultra .............................................................................................25<br />
1.3.4 J-<strong>Link</strong> ARM Pro ........................................................................................26<br />
1.3.5 J-<strong>Link</strong> ARM Lite .......................................................................................27<br />
1.3.6 J-<strong>Trace</strong> ARM ...........................................................................................29<br />
1.3.7 J-<strong>Trace</strong> for Cortex-M3 ..............................................................................31<br />
1.3.8 Flasher ARM............................................................................................33<br />
1.3.9 J-<strong>Link</strong> ColdFire ........................................................................................34<br />
1.4 Common features of the J-<strong>Link</strong> product family .............................................35<br />
1.5 Supported CPU cores ...............................................................................36<br />
1.5.1 Upcoming supported cores........................................................................36<br />
1.6 Supported IDEs .......................................................................................37<br />
2 Licensing........................................................................................................................39<br />
2.1 Introduction............................................................................................40<br />
2.2 Software components requiring a license ....................................................41<br />
2.3 License types ..........................................................................................42<br />
2.3.1 Built-in license ........................................................................................42<br />
2.3.2 Key-based license....................................................................................42<br />
2.3.3 Device-based license................................................................................43<br />
2.4 Legal use of SEGGER J-<strong>Link</strong> software..........................................................45<br />
2.4.1 Use of the software with 3rd party tools......................................................45<br />
2.5 Original SEGGER products.........................................................................46<br />
2.5.1 J-<strong>Link</strong> ....................................................................................................46<br />
2.5.2 J-<strong>Link</strong> Ultra .............................................................................................46<br />
2.5.3 J-<strong>Link</strong> Pro ...............................................................................................47<br />
2.5.4 J-<strong>Trace</strong>...................................................................................................47<br />
2.5.5 J-<strong>Trace</strong> for Cortex-M3 ..............................................................................48<br />
2.5.6 Flasher ARM............................................................................................48<br />
2.6 J-<strong>Link</strong> OEM versions .................................................................................49<br />
2.6.1 Analog Devices: mIDAS<strong>Link</strong> ......................................................................49<br />
2.6.2 Atmel: SAM-ICE ......................................................................................49<br />
2.6.3 Digi: JTAG <strong>Link</strong>........................................................................................50<br />
2.6.4 IAR: J-<strong>Link</strong> / J-<strong>Link</strong> KS .............................................................................50<br />
2.6.5 IAR: J-<strong>Link</strong> Lite .......................................................................................50<br />
2.6.6 IAR: J-<strong>Trace</strong> ...........................................................................................51<br />
2.6.7 NXP: J-<strong>Link</strong> Lite LPC Edition ......................................................................51<br />
2.6.8 SEGGER: J-<strong>Link</strong> Lite.................................................................................51<br />
2.7 J-<strong>Link</strong> OBs ..............................................................................................52<br />
2.8 Illegal Clones ..........................................................................................53<br />
3 Setup..............................................................................................................................55<br />
3.1 Installing the J-<strong>Link</strong> ARM software and documentation pack ..........................56<br />
3.1.1 Setup procedure......................................................................................56<br />
3.2 Setting up the USB interface .....................................................................59<br />
J-<strong>Link</strong> / J-<strong>Trace</strong> (<strong>UM08001</strong>) © 2004-2010 SEGGER Microcontroller GmbH & Co. KG
12<br />
3.2.1 Verifying correct driver installation ............................................................ 59<br />
3.3 Uninstalling the J-<strong>Link</strong> USB driver.............................................................. 61<br />
3.4 Setting up the IP interface........................................................................ 62<br />
3.4.1 Connecting the first time .......................................................................... 62<br />
3.4.2 Configuring the J-<strong>Link</strong>.............................................................................. 63<br />
3.4.3 FAQs ..................................................................................................... 65<br />
3.5 J-<strong>Link</strong> configurator .................................................................................. 66<br />
3.5.1 J-<strong>Link</strong> identification methods .................................................................... 66<br />
3.5.2 Using the J-<strong>Link</strong> configurator .................................................................... 67<br />
3.5.3 Connecting to different J-<strong>Link</strong>s via USB ...................................................... 68<br />
4 J-<strong>Link</strong> and J-<strong>Trace</strong> related software...............................................................................69<br />
4.1 J-<strong>Link</strong> related software............................................................................. 70<br />
4.1.1 J-<strong>Link</strong> software and documentation package ............................................... 70<br />
4.1.2 List of additional software packages........................................................... 71<br />
4.2 J-<strong>Link</strong> software and documentation package in detail ................................... 72<br />
4.2.1 J-<strong>Link</strong> Commander (Command line tool)..................................................... 72<br />
4.2.2 SWO Analyzer......................................................................................... 73<br />
4.2.3 J-<strong>Link</strong> STR91x Commander (Command line tool) ......................................... 73<br />
4.2.4 J-<strong>Link</strong> STM32 Commander (Command line tool) .......................................... 75<br />
4.2.5 J-<strong>Link</strong> TCP/IP Server (Remote J-<strong>Link</strong> / J-<strong>Trace</strong> use) ..................................... 76<br />
4.2.6 J-Mem Memory Viewer............................................................................. 77<br />
4.2.7 J-Flash ARM (Program flash memory via JTAG) ........................................... 78<br />
4.2.8 J-<strong>Link</strong> RDI (Remote Debug Interface)......................................................... 79<br />
4.2.9 J-<strong>Link</strong> GDB Server ................................................................................... 80<br />
4.3 Dedicated flash programming utilities for J-<strong>Link</strong>........................................... 81<br />
4.3.1 Introduction ........................................................................................... 81<br />
4.3.2 Supported Eval boards ............................................................................. 81<br />
4.3.3 Supported flash memories........................................................................ 82<br />
4.3.4 How to use the dedicated flash programming utilities ................................... 82<br />
4.3.5 Using the dedicated flash programming utilities for production and commercial<br />
purposes 82<br />
4.3.6 F.A.Q..................................................................................................... 83<br />
4.4 Additional software packages in detail ........................................................ 84<br />
4.4.1 JTAGLoad (Command line tool) ................................................................. 84<br />
4.4.2 J-<strong>Link</strong> Software Developer Kit (SDK).......................................................... 84<br />
4.4.3 J-<strong>Link</strong> Flash Software Developer Kit (SDK).................................................. 84<br />
4.5 Using the J-<strong>Link</strong>ARM.dll............................................................................ 85<br />
4.5.1 What is the J<strong>Link</strong>ARM.dll?......................................................................... 85<br />
4.5.2 Updating the DLL in third-party programs................................................... 85<br />
4.5.3 Determining the version of J<strong>Link</strong>ARM.dll ..................................................... 86<br />
4.5.4 Determining which DLL is used by a program .............................................. 86<br />
5 Working with J-<strong>Link</strong> and J-<strong>Trace</strong>....................................................................................87<br />
5.1 Connecting the target system ................................................................... 88<br />
5.1.1 Power-on sequence ................................................................................. 88<br />
5.1.2 Verifying target device connection ............................................................. 88<br />
5.1.3 Problems................................................................................................ 88<br />
5.2 Indicators .............................................................................................. 89<br />
5.2.1 Main indicator......................................................................................... 89<br />
5.2.2 Input indicator ........................................................................................ 91<br />
5.2.3 Output indicator...................................................................................... 91<br />
5.3 JTAG interface ........................................................................................ 92<br />
5.3.1 Multiple devices in the scan chain .............................................................. 92<br />
5.3.2 Sample configuration dialog boxes............................................................. 92<br />
5.3.3 Determining values for scan chain configuration .......................................... 95<br />
5.3.4 JTAG Speed............................................................................................ 96<br />
5.4 SWD interface ........................................................................................ 97<br />
5.4.1 SWD speed ............................................................................................ 97<br />
5.4.2 SWO ..................................................................................................... 97<br />
J-<strong>Link</strong> / J-<strong>Trace</strong> (<strong>UM08001</strong>) © 2004-2010 SEGGER Microcontroller GmbH & Co. KG
5.5 Multi-core debugging ...............................................................................99<br />
5.5.1 How multi-core debugging works ...............................................................99<br />
5.5.2 Using multi-core debugging in detail ........................................................ 100<br />
5.5.3 Things you should be aware of ................................................................ 101<br />
5.6 Connecting multiple J-<strong>Link</strong>s / J-<strong>Trace</strong>s to your PC ...................................... 103<br />
5.6.1 How does it work? ................................................................................. 103<br />
5.6.2 Configuring multiple J-<strong>Link</strong>s / J-<strong>Trace</strong>s ..................................................... 104<br />
5.6.3 Connecting to a J-<strong>Link</strong> / J-<strong>Trace</strong> with non default USB-Address .................... 105<br />
5.7 J-<strong>Link</strong> control panel................................................................................ 106<br />
5.7.1 Tabs .................................................................................................... 106<br />
5.8 Reset strategies .................................................................................... 112<br />
5.8.1 Strategies for ARM 7/9 devices ................................................................ 112<br />
5.8.2 Strategies for Cortex-M devices ............................................................... 114<br />
5.9 Using DCC for memory access ................................................................. 116<br />
5.9.1 What is required? .................................................................................. 116<br />
5.9.2 Target DCC handler ............................................................................... 116<br />
5.9.3 Target DCC abort handler ....................................................................... 116<br />
5.10 J-<strong>Link</strong> script files ................................................................................... 117<br />
5.10.1 Actions that can be customized ............................................................... 117<br />
5.10.2 Script file API functions .......................................................................... 117<br />
5.10.3 Global DLL variables .............................................................................. 120<br />
5.10.4 Global DLL constants.............................................................................. 122<br />
5.10.5 Script file language ................................................................................ 123<br />
5.10.6 Executing J-<strong>Link</strong> script files ..................................................................... 124<br />
5.11 Command strings .................................................................................. 125<br />
5.11.1 List of available commands ..................................................................... 125<br />
5.11.2 Using command strings .......................................................................... 131<br />
5.12 Switching off CPU clock during debug ....................................................... 133<br />
5.13 Cache handling...................................................................................... 134<br />
5.13.1 Cache coherency ................................................................................... 134<br />
5.13.2 Cache clean area ................................................................................... 134<br />
5.13.3 Cache handling of ARM7 cores................................................................. 134<br />
5.13.4 Cache handling of ARM9 cores................................................................. 134<br />
6 Flash download and flash breakpoints.........................................................................135<br />
6.1 Introduction.......................................................................................... 136<br />
6.2 Licensing .............................................................................................. 137<br />
6.3 Supported devices ................................................................................. 139<br />
6.4 Setup for different debuggers (internal flash) ............................................ 147<br />
6.4.1 IAR Embedded Workbench...................................................................... 147<br />
6.4.2 Keil MDK .............................................................................................. 148<br />
6.4.3 J-<strong>Link</strong> GDB Server ................................................................................. 150<br />
6.4.4 J-<strong>Link</strong> RDI ............................................................................................ 150<br />
6.5 Setup for different debuggers (CFI flash) .................................................. 151<br />
6.5.1 IAR Embedded Workbench / Keil MDK ...................................................... 151<br />
6.5.2 J-<strong>Link</strong> GDB Server ................................................................................. 152<br />
6.5.3 J-<strong>Link</strong> RDI ............................................................................................ 152<br />
7 Device specifics ...........................................................................................................153<br />
7.1 Analog Devices...................................................................................... 154<br />
7.1.1 ADuC7xxx ............................................................................................ 154<br />
7.2 ATMEL ................................................................................................. 156<br />
7.2.1 AT91SAM7............................................................................................ 156<br />
7.2.2 AT91SAM9............................................................................................ 158<br />
7.3 Freescale.............................................................................................. 159<br />
7.3.1 MAC71x ............................................................................................... 159<br />
7.4 Luminary Micro ..................................................................................... 160<br />
7.4.1 Unlocking LM3Sxxx devices..................................................................... 161<br />
7.4.2 Stellaris LM3S100 Series ........................................................................ 161<br />
7.4.3 Stellaris LM3S300 Series ........................................................................ 161<br />
J-<strong>Link</strong> / J-<strong>Trace</strong> (<strong>UM08001</strong>) © 2004-2010 SEGGER Microcontroller GmbH & Co. KG<br />
13
14<br />
7.4.4 Stellaris LM3S600 Series .........................................................................161<br />
7.4.5 Stellaris LM3S800 Series .........................................................................161<br />
7.4.6 Stellaris LM3S2000 Series .......................................................................161<br />
7.4.7 Stellaris LM3S6100 Series .......................................................................161<br />
7.4.8 Stellaris LM3S6400 Series .......................................................................161<br />
7.4.9 Stellaris LM3S6700 Series .......................................................................161<br />
7.4.10 Stellaris LM3S6900 Series .......................................................................161<br />
7.5 NXP......................................................................................................162<br />
7.5.1 LPC ......................................................................................................163<br />
7.6 OKI ......................................................................................................165<br />
7.6.1 ML67Q40x.............................................................................................165<br />
7.7 ST Microelectronics.................................................................................166<br />
7.7.1 STR 71x................................................................................................167<br />
7.7.2 STR 73x................................................................................................167<br />
7.7.3 STR 75x................................................................................................167<br />
7.7.4 STR91x.................................................................................................167<br />
7.7.5 STM32 ..................................................................................................167<br />
7.8 Texas Instruments .................................................................................169<br />
7.8.1 TMS470 ................................................................................................169<br />
8 Target interfaces and adapters ....................................................................................171<br />
8.1 20-pin JTAG/SWD connector ....................................................................172<br />
8.1.1 Pinout for JTAG ......................................................................................172<br />
8.1.2 Pinout for SWD ......................................................................................174<br />
8.2 38-pin Mictor JTAG and <strong>Trace</strong> connector....................................................177<br />
8.2.1 Connecting the target board ....................................................................177<br />
8.2.2 Pinout...................................................................................................178<br />
8.2.3 Assignment of trace information pins between ETM architecture versions .......180<br />
8.2.4 <strong>Trace</strong> signals .........................................................................................180<br />
8.3 19-pin JTAG/SWD and <strong>Trace</strong> connector .....................................................182<br />
8.3.1 Target power supply ...............................................................................183<br />
8.4 Adapters ...............................................................................................184<br />
9 Background information ...............................................................................................185<br />
9.1 JTAG ....................................................................................................186<br />
9.1.1 Test access port (TAP) ............................................................................186<br />
9.1.2 Data registers........................................................................................186<br />
9.1.3 Instruction register.................................................................................186<br />
9.1.4 The TAP controller ..................................................................................187<br />
9.2 Embedded <strong>Trace</strong> Macrocell (ETM) .............................................................189<br />
9.2.1 Trigger condition ....................................................................................189<br />
9.2.2 Code tracing and data tracing ..................................................................189<br />
9.2.3 J-<strong>Trace</strong> integration example - IAR EWARM .................................................189<br />
9.3 Embedded <strong>Trace</strong> Buffer (ETB) ..................................................................193<br />
9.4 Flash programming ................................................................................194<br />
9.4.1 How does flash programming via J-<strong>Link</strong> / J-<strong>Trace</strong> work? ..............................194<br />
9.4.2 Data download to RAM............................................................................194<br />
9.4.3 Data download via DCC...........................................................................194<br />
9.4.4 Available options for flash programming ....................................................194<br />
9.5 J-<strong>Link</strong> / J-<strong>Trace</strong> firmware.........................................................................196<br />
9.5.1 Firmware update....................................................................................196<br />
9.5.2 Invalidating the firmware ........................................................................196<br />
10 Designing the target board for trace ..........................................................................199<br />
10.1 Overview of high-speed board design........................................................200<br />
10.1.1 Avoiding stubs .......................................................................................200<br />
10.1.2 Minimizing Signal Skew (Balancing PCB Track Lengths) ...............................200<br />
10.1.3 Minimizing Crosstalk ...............................................................................200<br />
10.1.4 Using impedance matching and termination ...............................................200<br />
10.2 Terminating the trace signal ....................................................................201<br />
J-<strong>Link</strong> / J-<strong>Trace</strong> (<strong>UM08001</strong>) © 2004-2010 SEGGER Microcontroller GmbH & Co. KG
10.2.1 Rules for series terminators .................................................................... 201<br />
10.3 Signal requirements............................................................................... 202<br />
11 Support and FAQs .....................................................................................................203<br />
11.1 Measuring download speed ..................................................................... 204<br />
11.1.1 Test environment .................................................................................. 204<br />
11.2 Troubleshooting .................................................................................... 205<br />
11.2.1 General procedure ................................................................................. 205<br />
11.2.2 Typical problem scenarios....................................................................... 205<br />
11.3 Signal analysis ...................................................................................... 207<br />
11.3.1 Start sequence...................................................................................... 207<br />
11.3.2 Troubleshooting .................................................................................... 207<br />
11.4 Contacting support ................................................................................ 208<br />
11.5 Frequently Asked Questions .................................................................... 209<br />
12 Glossary.....................................................................................................................211<br />
13 Literature and references...........................................................................................217<br />
J-<strong>Link</strong> / J-<strong>Trace</strong> (<strong>UM08001</strong>) © 2004-2010 SEGGER Microcontroller GmbH & Co. KG<br />
15
16<br />
J-<strong>Link</strong> / J-<strong>Trace</strong> (<strong>UM08001</strong>) © 2004-2010 SEGGER Microcontroller GmbH & Co. KG
Chapter 1<br />
Introduction<br />
This chapter gives a short overview about J-<strong>Link</strong> and J-<strong>Trace</strong>.<br />
J-<strong>Link</strong> / J-<strong>Trace</strong> (<strong>UM08001</strong>) © 2004-2010 SEGGER Microcontroller GmbH & Co. KG<br />
17
18 CHAPTER 1 Introduction<br />
1.1 Requirements<br />
Host System<br />
To use J-<strong>Link</strong> or J-<strong>Trace</strong> you need a host system running Windows 2000 or later. For a<br />
list of all operating systems which are supported by J-<strong>Link</strong>, please refer to Supported<br />
OS on page 19.<br />
Target System<br />
A target system with a supported CPU is required.<br />
You should make sure that the emulator you are looking at supports your target CPU.<br />
For more information about which J-<strong>Link</strong> features are supported by each emulator,<br />
please refer to Model comparison on page 21.<br />
J-<strong>Link</strong> / J-<strong>Trace</strong> (<strong>UM08001</strong>) © 2004-2010 SEGGER Microcontroller GmbH & Co. KG
1.2 Supported OS<br />
J-<strong>Link</strong>/J-<strong>Trace</strong> can be used on the following operating systems:<br />
• Microsoft Windows 2000<br />
• Microsoft Windows XP<br />
• Microsoft Windows XP x64<br />
• Microsoft Windows 2003<br />
• Microsoft Windows 2003 x64<br />
• Microsoft Windows Vista<br />
• Microsoft Windows Vista x64<br />
• Windows 7<br />
• Windows 7 x64<br />
J-<strong>Link</strong> / J-<strong>Trace</strong> (<strong>UM08001</strong>) © 2004-2010 SEGGER Microcontroller GmbH & Co. KG<br />
19
20 CHAPTER 1 Introduction<br />
1.3 J-<strong>Link</strong> / J-<strong>Trace</strong> models<br />
J-<strong>Link</strong> / J-<strong>Trace</strong> is available in different variations, each designed for different purposes<br />
/ target devices. Currently, the following models of J-<strong>Link</strong> / J-<strong>Trace</strong> are available:<br />
• J-<strong>Link</strong> ARM<br />
• J-<strong>Link</strong> Ultra<br />
• J-<strong>Link</strong> ARM Pro<br />
• J-<strong>Trace</strong> ARM<br />
• J-<strong>Trace</strong> for Cortex-M3<br />
In the following, the different J-<strong>Link</strong> / J-<strong>Trace</strong> models are described and the changes<br />
between the different hardware versions of each model are listed. To determine the<br />
hardware version of your J-<strong>Link</strong> / J-<strong>Trace</strong>, the first step should be to look at the label<br />
at the bottom side of the unit. J-<strong>Link</strong>s / J-<strong>Trace</strong>s have the hardware version printed<br />
on the back label.<br />
If this is not the case with your J-<strong>Link</strong> / J-<strong>Trace</strong>, start J<strong>Link</strong>.exe. As part of the initial<br />
message, the hardware version is displayed.<br />
J-<strong>Link</strong> / J-<strong>Trace</strong> (<strong>UM08001</strong>) © 2004-2010 SEGGER Microcontroller GmbH & Co. KG
1.3.1 Model comparison<br />
The following tables show the features which are included in each J-<strong>Link</strong> / J-<strong>Trace</strong><br />
model.<br />
Hardware features<br />
J-<strong>Link</strong> J-<strong>Link</strong> Pro J-<strong>Trace</strong> CM-3 J-<strong>Trace</strong><br />
USB yes yes yes yes<br />
Ethernet no yes no no<br />
Supported cores<br />
ARM7/9/11,<br />
Cortex-M0/M1/<br />
M3<br />
ARM7/9/11,<br />
Cortex-M0/M1/<br />
M3<br />
ARM 7/9 (no<br />
tracing), Cortex-M3<br />
JTAG yes yes yes yes<br />
SWD yes yes yes no<br />
SWO yes yes yes no<br />
ETM <strong>Trace</strong> no no yes yes<br />
ARM 7/9<br />
Software features<br />
Software features are features implemented in the software primarily on the host.<br />
Software features can either come with the J-<strong>Link</strong> or be added later using a license<br />
string from Segger.<br />
J-<strong>Link</strong> J-<strong>Link</strong> Pro J-<strong>Trace</strong> CM-3 J-<strong>Trace</strong><br />
J-Flash yes(opt) yes yes(opt) yes(opt)<br />
Flash breakpoints2 yes(opt) yes yes(opt) yes(opt)<br />
Flash download1 yes(opt) yes yes(opt) yes(opt)<br />
GDB Server yes(opt) yes yes(opt) yes(opt)<br />
RDI yes(opt) yes yes(opt) yes(opt)<br />
1 Most IDEs come with its own flashloaders, so in most cases this feature is not<br />
essential for debugging your applications in flash. The J-<strong>Link</strong> flash download<br />
(FlashDL) feature is mainly used in debug environments where the debugger does<br />
not come with an own flashloader (for example, the GNU Debugger). For more information<br />
about how flash download via FlashDL works, please refer to Flash download<br />
and flash breakpoints on page 135.<br />
2 In order to use the flash breakpoints with J-<strong>Link</strong> no additional license for flash<br />
download is required. The flash breakpoint feature allows setting an unlimited number<br />
of breakpoints even if the application program is not located in RAM, but in flash<br />
memory. Without this feature, the number of breakpoints which can be set in flash is<br />
limited to the number of hardware breakpoints (typically two for ARM 7/9, six for<br />
Cortex-M3) For more information about flash breakpoints, please refer to Flash<br />
download and flash breakpoints on page 135.<br />
J-<strong>Link</strong> / J-<strong>Trace</strong> (<strong>UM08001</strong>) © 2004-2010 SEGGER Microcontroller GmbH & Co. KG<br />
21
22 CHAPTER 1 Introduction<br />
1.3.2 J-<strong>Link</strong> ARM<br />
J-<strong>Link</strong> is a JTAG emulator designed for ARM cores. It connects<br />
via USB to a PC running Microsoft Windows 2000 or later. For a<br />
complete list of all operating systems which are supported,<br />
please refer to Supported OS on page 19. J-<strong>Link</strong> has a built-in<br />
20-pin JTAG connector, which is compatible with the standard<br />
20-pin connector defined by ARM.<br />
1.3.2.1 Additional features<br />
• Direct download into flash memory of most popular microcontrollers<br />
supported<br />
• Full-speed USB 2.0 interface<br />
• Serial Wire Debug supported *<br />
• Serial Wire Viewer supported *<br />
• Download speed up to 720 KBytes/second **<br />
• JTAG speed up to 12 MHz<br />
• RDI interface available, which allows using J-<strong>Link</strong> with RDI<br />
compliant software<br />
* = Supported since J-<strong>Link</strong> hardware version 6<br />
** = Measured with J-<strong>Link</strong> Rev.5, ARM7 @ 50 MHz, 12MHz JTAG<br />
speed.<br />
1.3.2.2 Specifications<br />
The following table gives an overview about the specifications (general, mechanical,<br />
electrical) for J-<strong>Link</strong> ARM. All values are valid for J-<strong>Link</strong> ARM hardware version 8.<br />
General<br />
Supported OS<br />
For a complete list of all operating systems<br />
which are supported, please refer<br />
to Supported OS on page 19.<br />
Electromagnetic compatibility (EMC) EN 55022, EN 55024<br />
Operating temperature +5°C ... +60°C<br />
Storage temperature -20°C ... +65 °C<br />
Relative humidity (non-condensing) Max. 90% rH<br />
Mechanical<br />
Size (without cables) 100mm x 53mm x 27mm<br />
Weight (without cables) 70g<br />
USB interface<br />
Available interfaces<br />
USB 2.0, full speed<br />
Target interface<br />
JTAG 20-pin<br />
(14-pin adapter available)<br />
JTAG/SWD Interface, Electrical<br />
Power supply<br />
USB powered<br />
Max. 50mA + Target Supply current.<br />
Target interface voltage (VIF ) 1.2V ... 5V<br />
Target supply voltage 4.5V ... 5V (if powered with 5V on USB)<br />
Target supply current Max. 300mA<br />
Reset Type<br />
Open drain. Can be pulled low or<br />
tristated.<br />
Reset low level output voltage (VOL ) VOL
LOW level input voltage (V IL ) V IL = 60% of V IF<br />
For 1.8V
24 CHAPTER 1 Introduction<br />
5.333 MHz (n = 9)<br />
4.800 MHz (n = 10)<br />
• Supports adaptive clocking.<br />
Version 5.2<br />
Identical to version 5.0 with the following exception:<br />
• Target interface: RESET is open drain<br />
Version 5.3<br />
Identical to version 5.2 with the following exception:<br />
• 5V target supply current limited<br />
5V target supply (pin 19) of Kick-Start versions of J-<strong>Link</strong> is current monitored<br />
and limited. J-<strong>Link</strong> automatically switches off 5V supply in case of over-current to<br />
protect both J-<strong>Link</strong> and host computer. Peak current (
1.3.3 J-<strong>Link</strong> Ultra<br />
J-<strong>Link</strong> Ultra is a JTAG/SWD emulator designed for ARM/Cortex<br />
and other supported CPUs. It is fully compatible to the standard<br />
J-<strong>Link</strong> and works with the same PC software. Based on the<br />
highly optimized and proven J-<strong>Link</strong>, it offers even higher speed<br />
as well as target power measurement capabilities due to the<br />
faster CPU, built-in FPGA and High speed USB interface. It connects<br />
via USB to a PC running Microsoft Windows 2000 or later.<br />
For a complete list of all operating systems which are supported,<br />
please refer to Supported OS on page 19.. J-<strong>Link</strong> Ultra<br />
has a built-in 20-pin JTAG/SWD connector.<br />
1.3.3.1 Additional features<br />
• Fully compatible to the standard J-<strong>Link</strong><br />
• Very high performance for all supported CPU cores<br />
• Hi-Speed USB 2.0 interface<br />
• JTAG speed up to 25 MHz<br />
• Serial Wire Debug (SWD) supported<br />
• Serial Wire Viewer (SWV) supported<br />
• SWV: UART and Manchester encoding supported<br />
• SWO sampling frequencies up to 25 MHz<br />
• Target power can be supplied<br />
• Target power consumption can be measured with high accuracy. External ADC<br />
can be connected via SPI<br />
1.3.3.2 Specifications<br />
The following table gives an overview about the specifications (general, mechanical,<br />
electrical) for J-<strong>Link</strong> Ultra. All values are valid for J-<strong>Link</strong> Ultra hardware version 1.<br />
Note: Some specifications, especially speed, are likely to be improved in the<br />
future with newer versions of the J-<strong>Link</strong> software (freely available).<br />
General<br />
Supported OS<br />
For a complete list of all operating systems<br />
which are supported, please refer<br />
to Supported OS on page 19.<br />
Electromagnetic compatibility (EMC) EN 55022, EN 55024<br />
Operating temperature +5°C ... +60°C<br />
Storage temperature -20°C ... +65 °C<br />
Relative humidity (non-condensing) Max. 90% rH<br />
Mechanical<br />
Size (without cables) 100mm x 53mm x 27mm<br />
Weight (without cables) 73g<br />
USB interface<br />
Available interfaces<br />
USB 2.0, Hi-Speed<br />
Target interface JTAG/SWD 20-pin<br />
External (SPI) analog power measurement<br />
interface<br />
4-pin (Pins 14, 16, 18 and 20 of the 20pin<br />
JTAG/SWD interface)<br />
JTAG/SWD Interface, Electrical<br />
Target interface voltage (VIF ) 1.8V ... 5V<br />
Target supply voltage 4.5V ... 5V<br />
Target supply current Max. 300mA<br />
Reset Type<br />
Table 1.3: J-<strong>Link</strong> Ultra specifications<br />
Open drain. Can be pulled low or<br />
tristated.<br />
J-<strong>Link</strong> / J-<strong>Trace</strong> (<strong>UM08001</strong>) © 2004-2010 SEGGER Microcontroller GmbH & Co. KG<br />
25
26 CHAPTER 1 Introduction<br />
Reset low level output voltage (V OL ) V OL
• Serial Wire Viewer supported<br />
• Download speed up to 720 KBytes/second ** (higher download speeds will be<br />
available in the near future)<br />
• DCC speed up to 800 Kbytes/second **<br />
• Comes with licenses for: J-<strong>Link</strong> ARM RDI, J-<strong>Link</strong> ARM FlashBP, J-<strong>Link</strong> ARM<br />
FlashDL, J-<strong>Link</strong> ARM GDB Server and J-Flash ARM.<br />
• Embedded <strong>Trace</strong> Buffer (ETB) support<br />
• Galvanic isolation from host via Ethernet<br />
• RDI interface available, which allows using J-<strong>Link</strong> with RDI compliant software<br />
** = Measured with J-<strong>Link</strong> Pro Rev. 1.1, ARM7 @ 50 MHz, 12MHz JTAG speed.<br />
1.3.4.2 Download speed<br />
The following table lists performance values (Kbytes/s) for writing to memory (RAM):<br />
Hardware<br />
Rev. 1 via USB<br />
Rev. 1 via TCP/IP<br />
All tests have been performed in the testing environment which is described on Measuring<br />
download speed on page 204.<br />
The actual speed depends on various factors, such as JTAG/SWD, clock speed, host<br />
CPU core etc.<br />
1.3.4.3 Hardware versions<br />
Version 1.1<br />
Compatible to J-<strong>Link</strong> ARM.<br />
• Provides an additional Ethernet interface which allows to communicate with J-<br />
<strong>Link</strong> via TCP/IP.<br />
1.3.5 J-<strong>Link</strong> ARM Lite<br />
J-<strong>Link</strong> ARM Lite is a fully functional OEM-version of J-<strong>Link</strong> ARM.<br />
If you are selling evaluation-boards, J-<strong>Link</strong> ARM Lite is an inexpensive<br />
emulator solution for you. Your customer receives a<br />
widely acknowledged JTAG-emulator which allows him to start<br />
right away with his development.<br />
1.3.5.1 Additional features<br />
ARM7<br />
via JTAG<br />
720 Kbytes/s<br />
(12 MHz JTAG)<br />
720 Kbytes/s<br />
(12 MHz JTAG)<br />
ARM9<br />
via JTAG<br />
550 Kbytes/s<br />
(12 MHz JTAG)<br />
550 Kbytes/s<br />
(12 MHz JTAG)<br />
Table 1.4: Download speed differences between hardware revisions<br />
• Very small form factor<br />
• Fully software compatible to J-<strong>Link</strong> ARM<br />
• Any ARM7/ARM9/ARM11, Cortex-M0/M1/M3 core supported<br />
• JTAG clock up to 4 MHz<br />
• SWD, SWO supported for Cortex-M devices<br />
• Flash download into supported MCUs<br />
• Standard 20-pin 0.1 inch JTAG connector (compatible to J-<strong>Link</strong> ARM)<br />
Cortex-M3<br />
via SWD<br />
190 Kbytes/s<br />
(12 MHz SWD)<br />
190 Kbytes<br />
(12 MHz SWD)<br />
J-<strong>Link</strong> / J-<strong>Trace</strong> (<strong>UM08001</strong>) © 2004-2010 SEGGER Microcontroller GmbH & Co. KG<br />
27
28 CHAPTER 1 Introduction<br />
1.3.5.2 Specifications<br />
The following table gives an overview about the specifications (general, mechanical,<br />
electrical) for J-<strong>Link</strong> ARM Lite. All values are valid for J-<strong>Link</strong> ARM hardware version 8.<br />
General<br />
Supported OS<br />
For a complete list of all operating systems<br />
which are supported, please refer<br />
to Supported OS on page 19.<br />
Electromagnetic compatibility (EMC) EN 55022, EN 55024<br />
Operating temperature +5°C ... +60°C<br />
Storage temperature -20°C ... +65 °C<br />
Relative humidity (non-condensing) Max. 90% rH<br />
Size (without cables) 28mm x 26mm x 7mm<br />
Weight (without cables) 6g<br />
Mechanical<br />
USB interface USB 2.0, full speed<br />
Target interface<br />
JTAG 20-pin<br />
(14-pin adapter available)<br />
JTAG/SWD Interface, Electrical<br />
Power supply<br />
USB powered<br />
Max. 50mA + Target Supply current.<br />
Target interface voltage (VIF ) 3.3V (5V tolerant)<br />
Target supply voltage 4.5V ... 5V (if powered with 5V on USB)<br />
Target supply current Max. 300mA<br />
LOW level input voltage (VIL) Max. 40% of VIF HIGH level input voltage (VIH) Min. 60% of VIF Data input rise time (Trdi )<br />
JTAG/SWD Interface, Timing<br />
Max. 20ns<br />
Data input fall time (Tfdi ) Max. 20ns<br />
Data output rise time (Trdo ) Max. 10ns<br />
Data output fall time (Tfdo ) Max. 10ns<br />
Clock rise time (Trc ) Max. 10ns<br />
Clock fall time (Tfc ) Max. 10ns<br />
Table 1.5: J-<strong>Link</strong> ARM Lite specifications<br />
J-<strong>Link</strong> / J-<strong>Trace</strong> (<strong>UM08001</strong>) © 2004-2010 SEGGER Microcontroller GmbH & Co. KG
1.3.6 J-<strong>Trace</strong> ARM<br />
J-<strong>Trace</strong> is a JTAG emulator designed for ARM cores which<br />
includes trace (ETM) support. It connects via USB to a PC running<br />
Microsoft Windows 2000 or later. For a complete list of all<br />
operating systems which are supported, please refer to Supported<br />
OS on page 19. J-<strong>Trace</strong> has a built-in 20-pin JTAG connector<br />
and a built in 38-pin JTAG+<strong>Trace</strong> connector, which are<br />
compatible to the standard 20-pin connector and 38-pin connector<br />
defined by ARM.<br />
1.3.6.1 Additional features<br />
• Supports tracing on ARM7/9 targets<br />
• JTAG speed up to 12 MHz<br />
• Download speed up to 420 Kbytes/second *<br />
• DCC speed up to 600 Kbytes/second *<br />
* = Measured with J-<strong>Trace</strong>, ARM7 @ 50 MHz, 12MHz JTAG<br />
speed.<br />
1.3.6.2 Specifications for J-<strong>Trace</strong><br />
General<br />
Supported OS<br />
For a complete list of all operating systems<br />
which are supported, please refer<br />
to Supported OS on page 19.<br />
Electromagnetic Compatibility (EMC) EN 55022, EN 55024<br />
Operating Temperature +5°C ... +40°C<br />
Storage Temperature -20°C ... +65 °C<br />
Relative Humidity (non-condensing)
30 CHAPTER 1 Introduction<br />
1.3.6.3 Download speed<br />
The following table lists performance values (Kbytes/s) for writing to memory (RAM):<br />
All tests have been performed in the testing environment which is described on Measuring<br />
download speed on page 204.<br />
The actual speed depends on various factors, such as JTAG, clock speed, host CPU<br />
core etc.<br />
1.3.6.4 Hardware versions<br />
Version 1<br />
Hardware ARM7 via JTAG ARM9 via JTAG<br />
J-<strong>Trace</strong> Rev. 1<br />
420.0 Kbytes/s<br />
(12MHz JTAG)<br />
280.0 Kbytes/s<br />
(12MHz JTAG)<br />
Table 1.7: Download speed differences between hardware revisions<br />
This J-<strong>Trace</strong> uses a 32-bit RISC CPU. Maximum download speed is approximately 420<br />
KBytes/second (600 KBytes/second using DCC).<br />
J-<strong>Link</strong> / J-<strong>Trace</strong> (<strong>UM08001</strong>) © 2004-2010 SEGGER Microcontroller GmbH & Co. KG
1.3.7 J-<strong>Trace</strong> for Cortex-M3<br />
J-<strong>Trace</strong> for Cortex-M3 is a JTAG/SWD emulator designed for<br />
Cortex-M3 cores which includes trace (ETM) support. J-<strong>Trace</strong> for<br />
Cortex-M3 can also be used as a J-<strong>Link</strong> and it also supports<br />
ARM7/9 cores. Tracing on ARM7/9 targets is not supported.<br />
1.3.7.1 Additional features<br />
• Has all the J-<strong>Link</strong> functionality<br />
• Supports tracing on Cortex-M3 targets<br />
1.3.7.2 Specifications<br />
The following table gives an overview about the specifications (general, mechanical,<br />
electrical) for J-<strong>Trace</strong> for Cortex-M3. All values are valid for the latest hardware version<br />
of J-<strong>Trace</strong> for Cortex-M3.<br />
General<br />
Supported OS<br />
For a complete list of all operating systems<br />
which are supported, please refer<br />
to Supported OS on page 19.<br />
Electromagnetic compatibility (EMC) EN 55022, EN 55024<br />
Operating temperature +5°C ... +60°C<br />
Storage temperature -20°C ... +65 °C<br />
Relative humidity (non-condensing) Max. 90% rH<br />
Size (without cables) 123mm x 68mm x 30mm<br />
Weight (without cables) 120g<br />
Mechanical<br />
USB interface USB 2.0, full speed<br />
Target interface<br />
JTAG 20-pin<br />
(14-pin adapter available)<br />
JTAG/SWD Interface, Electrical<br />
Power supply<br />
USB powered<br />
Max. 50mA + Target Supply current.<br />
Target interface voltage (VIF ) 1.2V ... 5V<br />
Target supply voltage 4.5V ... 5V (if powered with 5V on USB)<br />
Target supply current Max. 300mA<br />
LOW level input voltage (VIL ) Max. 40% of VIF HIGH level input voltage (VIH ) Min. 60% of VIF Data input rise time (Trdi )<br />
JTAG/SWD Interface, Timing<br />
Max. 20ns<br />
Data input fall time (Tfdi ) Max. 20ns<br />
Data output rise time (Trdo ) Max. 10ns<br />
Data output fall time (Tfdo ) Max. 10ns<br />
Clock rise time (Trc ) Max. 10ns<br />
Table 1.8: J-<strong>Trace</strong> for Cortex-M3 specifications<br />
J-<strong>Link</strong> / J-<strong>Trace</strong> (<strong>UM08001</strong>) © 2004-2010 SEGGER Microcontroller GmbH & Co. KG<br />
31
32 CHAPTER 1 Introduction<br />
Clock fall time (T fc ) Max. 10ns<br />
1.3.7.3 Download speed<br />
The following table lists performance values (Kbytes/s) for writing to memory (RAM):<br />
The actual speed depends on various factors, such as JTAG, clock speed, host CPU<br />
core etc.<br />
1.3.7.4 Hardware versions<br />
Version 2<br />
Obsolete.<br />
Version 3.1<br />
<strong>Trace</strong> Interface, Electrical<br />
Power supply<br />
USB powered<br />
Max. 50mA + Target Supply current.<br />
Target interface voltage (VIF ) 1.2V ... 5V<br />
Voltage interface low pulse (VIL ) Max. 40% of VIF Voltage interface high pulse (VIH ) Min. 60% of VIF <strong>Trace</strong> Interface, Timing<br />
TRACECLK low pulse width (Twl ) Min. 2ns<br />
TRACECLK high pulse width (Twh ) Min. 2ns<br />
Data rise time (Trd ) Max. 3ns<br />
Data fall time (Tfd ) Max. 3ns<br />
Clock rise time (Trc) Max. 3ns<br />
Clock fall time (Tfc) Max. 3ns<br />
Data setup time (Ts) Min. 3ns<br />
Data hold time (Th ) Min. 2ns<br />
Table 1.8: J-<strong>Trace</strong> for Cortex-M3 specifications<br />
Hardware Cortex-M3<br />
J-<strong>Trace</strong> for Cortex-M3 V2<br />
190 Kbytes/s (12MHz SWD)<br />
760 KB/s (12 MHz JTAG)<br />
J-<strong>Trace</strong> for Cortex-M3 V3.1<br />
190 Kbytes/s (12MHz SWD)<br />
1440 KB/s (25 MHz JTAG)<br />
Table 1.9: Download speed differences between hardware revisions<br />
Identical to version 2.0 with the following exceptions:<br />
• Hi-Speed USB<br />
• Voltage range for trace signals extended to 1.2 - 3.3 V<br />
• Higher download speed<br />
J-<strong>Link</strong> / J-<strong>Trace</strong> (<strong>UM08001</strong>) © 2004-2010 SEGGER Microcontroller GmbH & Co. KG
1.3.8 Flasher ARM<br />
Flasher ARM is a programming tool for microcontrollers with onchip<br />
or external Flash memory and ARM core. Flasher ARM is<br />
designed for programming flash targets with the J-Flash software<br />
or stand-alone. In addition to that Flasher ARM has all of<br />
the J-<strong>Link</strong> functionality. For more information about Flasher<br />
ARM, please refer to UM08007, Flasher ARM <strong>User</strong>’s <strong>Guide</strong>.<br />
1.3.8.1 Specifications<br />
The following table gives an overview about the specifications<br />
(general, mechanical, electrical) for Flasher ARM.<br />
General<br />
For a complete list of all operating sys-<br />
Supported OS<br />
tems which are supported, please refer<br />
to Supported OS on page 19.<br />
Mechanical<br />
USB interface USB 2.0, full speed<br />
Target interface JTAG/SWD 20-pin<br />
JTAG Interface, Electrical<br />
Power supply<br />
USB powered<br />
Max. 50mA + Target Supply current.<br />
Target interface voltage (VIF ) 1.2V ... 5V<br />
Target supply voltage 4.5V ... 5V (if powered with 5V on USB)<br />
Target supply current Max. 300mA<br />
For the whole target voltage range (1.8V
34 CHAPTER 1 Introduction<br />
Target supply current Max. 300mA<br />
LOW level input voltage (VIL) Max. 0.8V<br />
HIGH level input voltage (VIH ) Min. 2.0V<br />
LOW level output voltage (VOL ) with a<br />
load of 10 kOhm<br />
Max. 0.5V<br />
HIGH level output voltage (VOH ) with a<br />
load of 10 kOhm<br />
Table 1.10: Flasher ARM specifications<br />
Min. 2.85V<br />
1.3.9 J-<strong>Link</strong> ColdFire<br />
J-<strong>Link</strong> ColdFire is a BDM emulator designed for ColdFire® cores.<br />
It connects via USB to a PC running Microsoft Windows 2000,<br />
Windows XP, Windows 2003, or Windows Vista. J-<strong>Link</strong> ColdFire<br />
has a built-in 26-pin BDM connector, which is compatible to the<br />
standard 26-pin connector defined by Freescale. For more information<br />
about J-<strong>Link</strong> ColdFire BDM 26, please refer to UM08009,<br />
J-<strong>Link</strong> ColdFire BDM26 <strong>User</strong>’s <strong>Guide</strong>.<br />
J-<strong>Link</strong> / J-<strong>Trace</strong> (<strong>UM08001</strong>) © 2004-2010 SEGGER Microcontroller GmbH & Co. KG
1.4 Common features of the J-<strong>Link</strong> product family<br />
• USB 2.0 interface (Full-Speed/Hi-Speed, depends on J-<strong>Link</strong> model)<br />
• Any ARM7/9/11 (including thumb mode), Cortex-M0/M1/M3 core supported<br />
• Automatic core recognition<br />
• Maximum JTAG speed 12/25 MHz (depends on J-<strong>Link</strong> model)<br />
• Seamless integration into the IAR Embedded Workbench® IDE<br />
• No power supply required, powered through USB<br />
• Support for adaptive clocking<br />
• All JTAG signals can be monitored, target voltage can be measured<br />
• Support for multiple devices<br />
• Fully plug and play compatible<br />
• Standard 20-pin JTAG connector, standard 38-pin JTAG+<strong>Trace</strong> connector<br />
• USB and 20-pin ribbon cable included<br />
• Memory viewer (J-Mem) included<br />
• TCP/IP server included, which allows using J-<strong>Trace</strong> via TCP/IP networks<br />
• RDI interface available, which allows using J-<strong>Link</strong> with RDI compliant software<br />
• Flash programming software (J-Flash) available<br />
• Flash DLL available, which allows using flash functionality in custom applications<br />
• Software Developer Kit (SDK) available<br />
• Full integration with the IAR C-SPY® debugger; advanced debugging features<br />
available from IAR C-SPY debugger.<br />
• 14-pin JTAG adapter available<br />
• J-<strong>Link</strong> 19-pin Cortex-M Adapter available<br />
• J-<strong>Link</strong> 9-pin Cortex-M Adapter available<br />
• Adapter for 5V JTAG targets available for hardware revisions up to 5.3<br />
• Optical isolation adapter for JTAG/SWD interface available<br />
• Target power supply via pin 19 of the JTAG/SWD interface (up to 300 mA to target<br />
with overload protection)<br />
J-<strong>Link</strong> / J-<strong>Trace</strong> (<strong>UM08001</strong>) © 2004-2010 SEGGER Microcontroller GmbH & Co. KG<br />
35
36 CHAPTER 1 Introduction<br />
1.5 Supported CPU cores<br />
J-<strong>Link</strong> / J-<strong>Trace</strong> has been tested with the following cores, but should work with any<br />
ARM7/9/11 and Cortex-M0/M1/M3 core. If you experience problems with a particular<br />
core, do not hesitate to contact Segger.<br />
• ARM7TDMI (Rev 1)<br />
• ARM7TDMI (Rev 3)<br />
• ARM7TDMI-S (Rev 4)<br />
• ARM720T<br />
• ARM920T<br />
• ARM922T<br />
• ARM926EJ-S<br />
• ARM946E-S<br />
• ARM966E-S<br />
• ARM1136JF-S<br />
• ARM1136J-S<br />
• ARM1156T2-S<br />
• ARM1156T2F-S<br />
• ARM1176JZ-S<br />
• ARM1176JZF<br />
• ARM1176JZF-S<br />
• Cortex-M0<br />
• Cortex-M1<br />
• Cortex-M3<br />
• Cortex-R4<br />
1.5.1 Upcoming supported cores<br />
• Cortex-A8/A9<br />
• X-Scale<br />
If you need support for any of these cores you should get in touch with us (info@segger.com).<br />
J-<strong>Link</strong> / J-<strong>Trace</strong> (<strong>UM08001</strong>) © 2004-2010 SEGGER Microcontroller GmbH & Co. KG
1.6 Supported IDEs<br />
J-<strong>Link</strong> / J-<strong>Trace</strong> can be used with different IDEs. Some IDEs support J-<strong>Link</strong> directly,<br />
for other ones additional software (such as J-<strong>Link</strong> RDI) is necessary in order to use J-<br />
<strong>Link</strong>. The following tables list which features of J-<strong>Link</strong> / J-<strong>Trace</strong> can be used with the<br />
different IDEs.<br />
ARM7/9<br />
ARM Cortex-M3<br />
ARM11<br />
IDE<br />
Debug<br />
support 4<br />
Flash<br />
download<br />
ARM11 has currently been tested with IAR EWARM only.<br />
Flash<br />
breakpoints<br />
IAR EWARM yes yes yes yes<br />
Keil MDK yes yes yes no<br />
Rowley yes yes no no<br />
CodeSourcery yes no no no<br />
Yargato (GDB)<br />
RDI compliant<br />
yes yes yes no<br />
toolchains such as<br />
RVDS/ADS<br />
yes1 yes1 yes1 no<br />
IDE<br />
Debug<br />
support 4<br />
Flash<br />
download<br />
Flash<br />
breakpoints<br />
<strong>Trace</strong><br />
support 3<br />
IAR EWARM yes yes yes yes yes<br />
Keil MDK yes yes yes no 2 yes<br />
Rowley yes yes no no no<br />
CodeSourcery yes no no no no<br />
Yargato (GDB) yes yes yes no no<br />
IDE<br />
Debug<br />
support 4<br />
Flash<br />
download<br />
Flash<br />
breakpoints<br />
IAR EWARM yes no 2<br />
no 2 no<br />
Rowley yes no 2 no no<br />
Yargato (GDB) yes no 2<br />
no 2 no<br />
1 Requires J-<strong>Link</strong> RDI license for download of more than 32KBytes<br />
2 Coming soon<br />
<strong>Trace</strong><br />
support 3<br />
SWO<br />
support<br />
<strong>Trace</strong><br />
support 3<br />
3<br />
Requires emulator with trace support<br />
4 Debug support includes the following: Download to RAM, memory read/write, CPU<br />
register read/write, Run control (go, step, halt), software breakpoints in RAM and<br />
hardware breakpoints in flash memory.<br />
J-<strong>Link</strong> / J-<strong>Trace</strong> (<strong>UM08001</strong>) © 2004-2010 SEGGER Microcontroller GmbH & Co. KG<br />
37
38 CHAPTER 1 Introduction<br />
J-<strong>Link</strong> / J-<strong>Trace</strong> (<strong>UM08001</strong>) © 2004-2010 SEGGER Microcontroller GmbH & Co. KG
Chapter 2<br />
Licensing<br />
This chapter describes the different license types of J-<strong>Link</strong> related software and the<br />
legal use of the J-<strong>Link</strong> software with original SEGGER and OEM products.<br />
J-<strong>Link</strong> / J-<strong>Trace</strong> (<strong>UM08001</strong>) © 2004-2010 SEGGER Microcontroller GmbH & Co. KG<br />
39
40 CHAPTER 2 Licensing<br />
2.1 Introduction<br />
J-<strong>Link</strong> functionality can be enhanced by the features J-Flash, RDI, flash download and<br />
flash breakpoints (FlashBP). The flash breakpoint feature does not come with J-<strong>Link</strong><br />
and need an additional license. In the following the licensing options of the software<br />
will be explained.<br />
J-<strong>Link</strong> / J-<strong>Trace</strong> (<strong>UM08001</strong>) © 2004-2010 SEGGER Microcontroller GmbH & Co. KG
2.2 Software components requiring a license<br />
There are different software components which need an additional license:<br />
• J-Flash<br />
• J-<strong>Link</strong> RDI<br />
• Flash breakpoints (FlashBP)<br />
For more information about J-<strong>Link</strong> RDI licensing procedure / license types, please<br />
refer to the J-<strong>Link</strong> RDI <strong>User</strong> <strong>Guide</strong> (UM08004), chapter Licensing.<br />
For more information about J-Flash licensing procedure / license types, please refer<br />
to the J-Flash <strong>User</strong> <strong>Guide</strong> (UM08003), chapter Licensing.<br />
In the following the licensing procedure and license types of the flash breakpoint feature<br />
are explained.<br />
J-<strong>Link</strong> / J-<strong>Trace</strong> (<strong>UM08001</strong>) © 2004-2010 SEGGER Microcontroller GmbH & Co. KG<br />
41
42 CHAPTER 2 Licensing<br />
2.3 License types<br />
For each of the software components which require an additional license, there are<br />
three types of licenses:<br />
Built-in License<br />
This type of license is easiest to use. The customer does not need to deal with a<br />
license key. The software automatically finds out that the connected J-<strong>Link</strong> contains<br />
the built-in license(s). This is the type of license you get if you order J-<strong>Link</strong> and the<br />
license at the same time, typically in a bundle.<br />
Key-based license<br />
This type of license is used if you already have a J-<strong>Link</strong>, but want to enhance its functionality<br />
by using flash breakpoints. In addition to that, the key-based license is used<br />
for trial licenses. To enable this type of license you need to obtain a license key from<br />
SEGGER. Free trial licenses are available upon request from www.segger.com. This<br />
license key has to be added to the J-<strong>Link</strong> license management. How to enter a license<br />
key is described in detail in Licensing on page 137. Every license can be used on different<br />
PCs, but only with the J-<strong>Link</strong> the license is for. This means that if you want to<br />
use flash breakpoints with other J-<strong>Link</strong>s, every J-<strong>Link</strong> needs a license.<br />
Device-based license<br />
The device-based license comes with the J-<strong>Link</strong> software and is available for some<br />
devices. For a complete list of devices which have built-in licenses, please refer to<br />
Device list on page 43. The device-based license has to be activated via the debugger.<br />
How to activate a device-based license is described in detail in the section Activating<br />
a device-based license on page 43.<br />
2.3.1 Built-in license<br />
This type of license is easiest to use. The customer does not need to deal with a<br />
license key. The software automatically finds out that the connected J-<strong>Link</strong> contains<br />
the built-in license(s). To check what licenses the used J-<strong>Link</strong> have, simply open the<br />
J-<strong>Link</strong> commander (J<strong>Link</strong>.exe). The J-<strong>Link</strong> commander finds and lists all of the J-<br />
<strong>Link</strong>’s licenses automatically, as can be seen in the screenshot below.<br />
This J-<strong>Link</strong> for example, has built-in licenses for RDI, J-<strong>Link</strong> ARM FlashDL and<br />
FlashBP.<br />
2.3.2 Key-based license<br />
When using a key-based license, a license key is required in order to enable the J-<br />
<strong>Link</strong> flash breakpoint feature. License keys can be added via the license manager.<br />
How to enter a license via the license manager is described in Licensing on page 137.<br />
Like the built-in license, the key-based license is only valid for one J-<strong>Link</strong>, so if<br />
another J-<strong>Link</strong> is used it needs a separate license.<br />
J-<strong>Link</strong> / J-<strong>Trace</strong> (<strong>UM08001</strong>) © 2004-2010 SEGGER Microcontroller GmbH & Co. KG
2.3.3 Device-based license<br />
The device-based license is a free license, available for some devices. It’s already<br />
included in J-<strong>Link</strong>, so no keys are necessary to enable this license type. To activate a<br />
device based license, the debugger needs to select a supported device.<br />
2.3.3.1 Activating a device-based license<br />
In order to activate a device-based license, the debugger needs to select a supported<br />
device. To check if the debugger has selected the right device, simply open the J-<strong>Link</strong><br />
control panel and check the device section in the General tab.<br />
2.3.3.2 Device list<br />
The following list contains all devices which are supported by the device-based<br />
license<br />
Manufacturer Name Licenses<br />
NXP LPC2101<br />
NXP LPC2102<br />
NXP LPC2103<br />
NXP LPC2104<br />
NXP LPC2105<br />
NXP LPC2106<br />
NXP LPC2109<br />
NXP LPC2114<br />
NXP LPC2119<br />
NXP LPC2124<br />
NXP LPC2129<br />
NXP LPC2131<br />
Table 2.1: Device list<br />
RDI, J-<strong>Link</strong> ARM FlashDL, J-<br />
<strong>Link</strong> ARM FlashBP<br />
RDI, J-<strong>Link</strong> ARM FlashDL, J-<br />
<strong>Link</strong> ARM FlashBP<br />
RDI, J-<strong>Link</strong> ARM FlashDL, J-<br />
<strong>Link</strong> ARM FlashBP<br />
RDI, J-<strong>Link</strong> ARM FlashDL, J-<br />
<strong>Link</strong> ARM FlashBP<br />
RDI, J-<strong>Link</strong> ARM FlashDL, J-<br />
<strong>Link</strong> ARM FlashBP<br />
RDI, J-<strong>Link</strong> ARM FlashDL, J-<br />
<strong>Link</strong> ARM FlashBP<br />
RDI, J-<strong>Link</strong> ARM FlashDL, J-<br />
<strong>Link</strong> ARM FlashBP<br />
RDI, J-<strong>Link</strong> ARM FlashDL, J-<br />
<strong>Link</strong> ARM FlashBP<br />
RDI, J-<strong>Link</strong> ARM FlashDL, J-<br />
<strong>Link</strong> ARM FlashBP<br />
RDI, J-<strong>Link</strong> ARM FlashDL, J-<br />
<strong>Link</strong> ARM FlashBP<br />
RDI, J-<strong>Link</strong> ARM FlashDL, J-<br />
<strong>Link</strong> ARM FlashBP<br />
RDI, J-<strong>Link</strong> ARM FlashDL, J-<br />
<strong>Link</strong> ARM FlashBP<br />
J-<strong>Link</strong> / J-<strong>Trace</strong> (<strong>UM08001</strong>) © 2004-2010 SEGGER Microcontroller GmbH & Co. KG<br />
43
44 CHAPTER 2 Licensing<br />
Manufacturer Name Licenses<br />
NXP LPC2132<br />
NXP LPC2134<br />
NXP LPC2136<br />
NXP LPC2138<br />
NXP LPC2141<br />
NXP LPC2142<br />
NXP LPC2144<br />
NXP LPC2146<br />
NXP LPC2148<br />
NXP LPC2194<br />
NXP LPC2212<br />
NXP LPC2214<br />
NXP LPC2292<br />
NXP LPC2294<br />
NXP LPC2364<br />
NXP LPC2366<br />
NXP LPC2368<br />
NXP LPC2378<br />
NXP LPC2468<br />
NXP LPC2478<br />
Table 2.1: Device list<br />
RDI, J-<strong>Link</strong> ARM FlashDL, J-<br />
<strong>Link</strong> ARM FlashBP<br />
RDI, J-<strong>Link</strong> ARM FlashDL, J-<br />
<strong>Link</strong> ARM FlashBP<br />
RDI, J-<strong>Link</strong> ARM FlashDL, J-<br />
<strong>Link</strong> ARM FlashBP<br />
RDI, J-<strong>Link</strong> ARM FlashDL, J-<br />
<strong>Link</strong> ARM FlashBP<br />
RDI, J-<strong>Link</strong> ARM FlashDL, J-<br />
<strong>Link</strong> ARM FlashBP<br />
RDI, J-<strong>Link</strong> ARM FlashDL, J-<br />
<strong>Link</strong> ARM FlashBP<br />
RDI, J-<strong>Link</strong> ARM FlashDL, J-<br />
<strong>Link</strong> ARM FlashBP<br />
RDI, J-<strong>Link</strong> ARM FlashDL, J-<br />
<strong>Link</strong> ARM FlashBP<br />
RDI, J-<strong>Link</strong> ARM FlashDL, J-<br />
<strong>Link</strong> ARM FlashBP<br />
RDI, J-<strong>Link</strong> ARM FlashDL, J-<br />
<strong>Link</strong> ARM FlashBP<br />
RDI, J-<strong>Link</strong> ARM FlashDL, J-<br />
<strong>Link</strong> ARM FlashBP<br />
RDI, J-<strong>Link</strong> ARM FlashDL, J-<br />
<strong>Link</strong> ARM FlashBP<br />
RDI, J-<strong>Link</strong> ARM FlashDL, J-<br />
<strong>Link</strong> ARM FlashBP<br />
RDI, J-<strong>Link</strong> ARM FlashDL, J-<br />
<strong>Link</strong> ARM FlashBP<br />
RDI, J-<strong>Link</strong> ARM FlashDL, J-<br />
<strong>Link</strong> ARM FlashBP<br />
RDI, J-<strong>Link</strong> ARM FlashDL, J-<br />
<strong>Link</strong> ARM FlashBP<br />
RDI, J-<strong>Link</strong> ARM FlashDL, J-<br />
<strong>Link</strong> ARM FlashBP<br />
RDI, J-<strong>Link</strong> ARM FlashDL, J-<br />
<strong>Link</strong> ARM FlashBP<br />
RDI, J-<strong>Link</strong> ARM FlashDL, J-<br />
<strong>Link</strong> ARM FlashBP<br />
RDI, J-<strong>Link</strong> ARM FlashDL, J-<br />
<strong>Link</strong> ARM FlashBP<br />
J-<strong>Link</strong> / J-<strong>Trace</strong> (<strong>UM08001</strong>) © 2004-2010 SEGGER Microcontroller GmbH & Co. KG
2.4 Legal use of SEGGER J-<strong>Link</strong> software<br />
The software consists of proprietary programs of SEGGER, protected under copyright<br />
and trade secret laws. All rights, title and interest in the software are and shall<br />
remain with SEGGER. For details, please refer to the license agreement which needs<br />
to be accepted when installing the software. The text of the license agreement is also<br />
available as entry in the start menu after installing the software.<br />
Use of software<br />
SEGGER J-<strong>Link</strong> software may only be used with original SEGGER products and authorized<br />
OEM products. The use of the licensed software to operate SEGGER product<br />
clones is prohibited and illegal.<br />
2.4.1 Use of the software with 3rd party tools<br />
For simplicity, some components of the J-<strong>Link</strong> software are also distributed from<br />
partners with software tools designed to use J-<strong>Link</strong>. These tools are primarily debugging<br />
tools, but also memory viewers, flash programming utilities but also software<br />
for other purposes. Distribution of the software components is legal for our partners,<br />
but the same rules as described above apply for their usage: They may only be used<br />
with original SEGGER products and authorized OEM products. The use of the licensed<br />
software to operate SEGGER product clones is prohibited and illegal.<br />
J-<strong>Link</strong> / J-<strong>Trace</strong> (<strong>UM08001</strong>) © 2004-2010 SEGGER Microcontroller GmbH & Co. KG<br />
45
46 CHAPTER 2 Licensing<br />
2.5 Original SEGGER products<br />
The following products are original SEGGER products for which the use of the J-<strong>Link</strong><br />
software is allowed:<br />
2.5.1 J-<strong>Link</strong><br />
J-<strong>Link</strong> is a JTAG emulator designed for ARM cores. It connects<br />
via USB to a PC running Microsoft Windows 2000, Windows XP,<br />
Windows 2003 or Windows Vista. J-<strong>Link</strong> has a built-in 20-pin<br />
JTAG connector, which is compatible with the standard 20-pin<br />
connector defined by ARM.<br />
Licenses<br />
Comes with built-in licenses for flash download and flash breakpoints<br />
for some devices. For a complete list of devices which<br />
are supported by the built-in licenses, please refer to Device<br />
list on page 43.<br />
2.5.2 J-<strong>Link</strong> Ultra<br />
J-<strong>Link</strong> Ultra is a JTAG/SWD emulator designed for ARM/Cortex<br />
and other supported CPUs. It is fully compatible to the standard<br />
J-<strong>Link</strong> and works with the same PC software. Based on the<br />
highly optimized and proven J-<strong>Link</strong>, it offers even higher speed<br />
as well as target power measurement capabilities due to the<br />
faster CPU, built-in FPGA and High speed USB interface.<br />
It connects via USB to a PC running Microsoft Windows 2000,<br />
Windows XP, Windows 2003, Windows Vista or Windows 7.<br />
J-<strong>Link</strong> Ultra has a built-in 20-pin JTAG/SWD connector.<br />
Licenses<br />
Comes with built-in licenses for flash download and flash breakpoints<br />
for some devices. For a complete list of devices which are<br />
supported by the built-in licenses, please refer to Device list on<br />
page 43.<br />
J-<strong>Link</strong> / J-<strong>Trace</strong> (<strong>UM08001</strong>) © 2004-2010 SEGGER Microcontroller GmbH & Co. KG
2.5.3 J-<strong>Link</strong> Pro<br />
J-<strong>Link</strong> Pro is a JTAG emulator designed for ARM cores. It connects<br />
via USB or Ethernet to a PC running Microsoft Windows<br />
2000, Windows XP, Windows 2003 or Windows Vista. J-<strong>Link</strong> has<br />
a built-in 20-pin JTAG connector, which is compatible with the<br />
standard 20-pin connector defined by ARM.<br />
Licenses<br />
Comes with built-in licenses for all J-<strong>Link</strong> related software products:<br />
J-<strong>Link</strong> ARM FlashDL, FlashBP, RDI, J-<strong>Link</strong> GDB Server and<br />
J-Flash.<br />
2.5.4 J-<strong>Trace</strong><br />
J-<strong>Trace</strong> is a JTAG emulator designed for ARM cores which<br />
includes trace (ETM) support. It connects via USB to a PC running<br />
Microsoft Windows 2000, Windows XP, Windows 2003 or<br />
Windows Vista. J-<strong>Trace</strong> has a built-in 20-pin JTAG connector and<br />
a built in 38-pin JTAG+<strong>Trace</strong> connector, which is compatible<br />
with the standard 20-pin connector and 38-pin connector<br />
defined by ARM.<br />
Licenses<br />
Comes with built-in licenses for flash download and flash breakpoints<br />
for some devices. For a complete list of devices which<br />
are supported by the built-in licenses, please refer to Device list<br />
on page 43.<br />
J-<strong>Link</strong> / J-<strong>Trace</strong> (<strong>UM08001</strong>) © 2004-2010 SEGGER Microcontroller GmbH & Co. KG<br />
47
48 CHAPTER 2 Licensing<br />
2.5.5 J-<strong>Trace</strong> for Cortex-M3<br />
J-<strong>Trace</strong> for Cortex-M3 is a JTAG/SWD emulator designed for<br />
Cortex-M3 cores which include trace (ETM) support. J-<strong>Trace</strong> for<br />
Cortex-M3 can also be used as a regular J-<strong>Link</strong> and it also supports<br />
ARM7/9 cores. Please note that tracing on ARM7/9 targets<br />
is not supported by J-<strong>Trace</strong> for Cortex-M3. In order to use<br />
ETM trace on ARM7/9 targets, an J-<strong>Trace</strong> is needed.<br />
Licenses<br />
Comes with built-in licenses for flash download and flash<br />
breakpoints for some devices. For a complete list of devices<br />
which are supported by the built-in licenses, please refer to<br />
Device list on page 43.<br />
2.5.6 Flasher ARM<br />
Flasher ARM is a programming tool for microcontrollers with onchip<br />
or external Flash memory and ARM core. Flasher ARM is<br />
designed for programming flash targets with the J-Flash software<br />
or stand-alone. In addition to that Flasher ARM has all of<br />
the J- <strong>Link</strong> functionality. Flasher ARM connects via USB or via<br />
RS232 interface to a PC, running Microsoft Windows 2000, Windows<br />
XP, Windows 2003 or Windows Vista. Flasher ARM has a<br />
built-in 20-pin JTAG connector, which is compatible with the<br />
standard 20-pin connector defined by ARM.<br />
J-<strong>Link</strong> / J-<strong>Trace</strong> (<strong>UM08001</strong>) © 2004-2010 SEGGER Microcontroller GmbH & Co. KG
2.6 J-<strong>Link</strong> OEM versions<br />
There are several different OEM versions of J-<strong>Link</strong> on the market. The OEM versions<br />
look different, but use basically identical hardware. Some of these OEM versions are<br />
limited in speed, some of these can only be used with certain chips and some of<br />
these have certain add-on features enabled, which normally requires license. In any<br />
case, it should be possible to use the J-<strong>Link</strong> software with these OEM versions. However,<br />
proper function cannot be guaranteed for OEM versions. SEGGER Microcontroller<br />
does not support OEM versions; support is provided by the respective OEM.<br />
2.6.1 Analog Devices: mIDAS<strong>Link</strong><br />
mIDAS<strong>Link</strong> is an OEM version of J-<strong>Link</strong>, sold by Analog Devices.<br />
Limitations<br />
mIDAS<strong>Link</strong> works with Analog Devices chips only. This limitation<br />
can NOT be lifted; if you would like to use J-<strong>Link</strong> with a device<br />
from an other manufacturer, you need to buy a separate J-<strong>Link</strong>.<br />
Licenses<br />
Licenses for RDI, J-<strong>Link</strong> ARM FlashDL and FlashBP are included.<br />
Other licenses can be added.<br />
2.6.2 Atmel: SAM-ICE<br />
SAM-ICE is an OEM version of J-<strong>Link</strong>, sold by Atmel.<br />
Limitations<br />
SAM-ICE works with Atmel devices only. This limitation can NOT<br />
be lifted; if you would like to use J-<strong>Link</strong> with a device from an<br />
other manufacturer, you need to buy a separate J-<strong>Link</strong>.<br />
Licenses<br />
Licenses for RDI and GDB Server are included. Other licenses can<br />
be added.<br />
J-<strong>Link</strong> / J-<strong>Trace</strong> (<strong>UM08001</strong>) © 2004-2010 SEGGER Microcontroller GmbH & Co. KG<br />
49
50 CHAPTER 2 Licensing<br />
2.6.3 Digi: JTAG <strong>Link</strong><br />
Digi JTAG <strong>Link</strong> is an OEM version of J-<strong>Link</strong>, sold by Digi International.<br />
Limitations<br />
Digi JTAG <strong>Link</strong> works with Digi devices only. This limitation can<br />
NOT be lifted; if you would like to use J-<strong>Link</strong> with a device from an<br />
other manufacturer, you need to buy a separate J-<strong>Link</strong>.<br />
Licenses<br />
License for GDB Server is included. Other licenses can be added.<br />
2.6.4 IAR: J-<strong>Link</strong> / J-<strong>Link</strong> KS<br />
IAR J-<strong>Link</strong> / IAR J-<strong>Link</strong> KS are OEM versions of J-<strong>Link</strong>, sold by IAR.<br />
Limitations<br />
IAR J-<strong>Link</strong> / IAR J-<strong>Link</strong> KS can not be used with Keil MDK. This limitation<br />
can NOT be lifted; if you would like to use J-<strong>Link</strong> with Keil<br />
MDK, you need to buy a separate J-<strong>Link</strong>. IAR J-<strong>Link</strong> does not support<br />
kickstart power.<br />
Licenses<br />
No licenses are included. All licenses can be added.<br />
2.6.5 IAR: J-<strong>Link</strong> Lite<br />
IAR J-<strong>Link</strong> Lite is an OEM version of J-<strong>Link</strong>, sold by IAR.<br />
Limitations<br />
IAR J-<strong>Link</strong> Lite can not be used with Keil MDK. This limitation can<br />
NOT be lifted; if you would like to use J-<strong>Link</strong> with Keil MDK, you<br />
need to buy a separate J-<strong>Link</strong>.<br />
JTAG speed is limited to 4 MHz.<br />
Licenses<br />
No licenses are included. All licenses can be added.<br />
Note: IAR J-<strong>Link</strong> is only delivered and supported as part of Starter-Kits. It is not<br />
sold to end customer directly and not guaranteed to work with custom hardware.<br />
J-<strong>Link</strong> / J-<strong>Trace</strong> (<strong>UM08001</strong>) © 2004-2010 SEGGER Microcontroller GmbH & Co. KG
2.6.6 IAR: J-<strong>Trace</strong><br />
IAR J-<strong>Trace</strong> is an OEM version of J-<strong>Trace</strong>, sold by IAR.<br />
Limitations<br />
IAR J-<strong>Trace</strong> can not be used with Keil MDK. This limitation can NOT<br />
be lifted; if you would like to use J-<strong>Trace</strong> with Keil MDK, you need<br />
to buy a separate J-<strong>Trace</strong>.<br />
Licenses<br />
No licenses are included. All licenses can be added.<br />
2.6.7 NXP: J-<strong>Link</strong> Lite LPC Edition<br />
J-<strong>Link</strong> Lite LPC Edition is an OEM version of J-<strong>Link</strong>, sold by NXP.<br />
Limitations<br />
J-<strong>Link</strong> Lite LPC Edition only works with NXP devices. This limitation<br />
can NOT be lifted; if you would like to use J-<strong>Link</strong> with a<br />
device from an other manufacturer, you need to buy a separate<br />
J-<strong>Link</strong>.<br />
Licenses<br />
No licenses are included.<br />
2.6.8 SEGGER: J-<strong>Link</strong> Lite<br />
J-<strong>Link</strong> ARM Lite is a fully functional OEM-version of SEGGER J-<strong>Link</strong><br />
ARM. If you are selling evaluation-boards, J-<strong>Link</strong> ARM Lite is an<br />
inexpensive emulator solution for you. Your customer receives a<br />
widely acknowledged JTAG-emulator which allows him to start<br />
right away with his development.<br />
Limitations<br />
JTAG speed is limited to 4 MHz<br />
Licenses<br />
No licenses are included. All licenses can be added.<br />
Note<br />
J-<strong>Link</strong> ARM Lite is only delivered and supported as part of Starter Kits. It is not sold<br />
to end customer and not guaranteed to work with custom hardware.<br />
J-<strong>Link</strong> / J-<strong>Trace</strong> (<strong>UM08001</strong>) © 2004-2010 SEGGER Microcontroller GmbH & Co. KG<br />
51
52 CHAPTER 2 Licensing<br />
2.7 J-<strong>Link</strong> OBs<br />
J-<strong>Link</strong> OBs (J-<strong>Link</strong> On Board) are single chip versions of J-<strong>Link</strong> which are used on various<br />
eval boards. It is legal to use J-<strong>Link</strong> software with these boards, provided that<br />
the eval board manufacturer has obtained a license from SEGGER. The following list<br />
shows the eval board manufacturer which are allowed to use J-<strong>Link</strong> OBs:<br />
• IAR Systems<br />
• Embedded Artists<br />
J-<strong>Link</strong> / J-<strong>Trace</strong> (<strong>UM08001</strong>) © 2004-2010 SEGGER Microcontroller GmbH & Co. KG
2.8 Illegal Clones<br />
Clones are copies of SEGGER products which use the copyrighted SEGGER Firmware<br />
without a license. It is strictly prohibited to use SEGGER J-<strong>Link</strong> software with illegal<br />
clones of SEGGER products. Manufacturing and selling these clones is an illegal act<br />
for various reasons, amongst them trademark, copyright and unfair business practise<br />
issues.<br />
The use of illegal J-<strong>Link</strong> clones with this software is a violation of US, European and<br />
other international laws and is prohibited.<br />
If you are in doubt if your unit may be legally used with SEGGER J-<strong>Link</strong> software,<br />
please get in touch with us.<br />
End users may be liable for illegal use of J-<strong>Link</strong> software with clones.<br />
J-<strong>Link</strong> / J-<strong>Trace</strong> (<strong>UM08001</strong>) © 2004-2010 SEGGER Microcontroller GmbH & Co. KG<br />
53
54 CHAPTER 2 Licensing<br />
J-<strong>Link</strong> / J-<strong>Trace</strong> (<strong>UM08001</strong>) © 2004-2010 SEGGER Microcontroller GmbH & Co. KG
Chapter 3<br />
Setup<br />
This chapter describes the setup procedure required in order to work with J-<strong>Link</strong> / J-<br />
<strong>Trace</strong>. Primarily this includes the installation of the J-<strong>Link</strong> software and documentation<br />
package, which also includes a kernel mode J-<strong>Link</strong> USB driver in your host system.<br />
J-<strong>Link</strong> / J-<strong>Trace</strong> (<strong>UM08001</strong>) © 2004-2010 SEGGER Microcontroller GmbH & Co. KG<br />
55
56 CHAPTER 3 Setup<br />
3.1 Installing the J-<strong>Link</strong> ARM software and documentation<br />
pack<br />
J-<strong>Link</strong> is shipped with a bundle of applications, corresponding manuals and some<br />
example projects and the kernel mode J-<strong>Link</strong> USB driver. Some of the applications<br />
require an additional license, free trial licenses are available upon request from<br />
www.segger.com.<br />
Refer to chapter J-<strong>Link</strong> and J-<strong>Trace</strong> related software on page 69 for an overview<br />
about the J-<strong>Link</strong> software and documentation pack.<br />
3.1.1 Setup procedure<br />
To install the J-<strong>Link</strong> ARM software and documentation pack, follow this procedure:<br />
Note: We recommend to check if a newer version of the J-<strong>Link</strong> software and documentation<br />
pack is available for download before starting the installation. Check<br />
therefore the J-<strong>Link</strong> related download section of our website:<br />
http://www.segger.com/download_jlink.html<br />
1. Before you plug your J-<strong>Link</strong> / J-<strong>Trace</strong> into your computer's USB port, extract the<br />
setup tool Setup_J<strong>Link</strong>ARM_V.zip. The setup wizard will<br />
install the software and documentation pack that also includes the certified J-<br />
<strong>Link</strong> USB driver. Start the setup by double clicking Setup_J<strong>Link</strong>ARM_V.exe. The license Agreement dialog box will be opened. Accept the<br />
terms with the Yes button.<br />
J-<strong>Link</strong> / J-<strong>Trace</strong> (<strong>UM08001</strong>) © 2004-2010 SEGGER Microcontroller GmbH & Co. KG
2. The Welcome dialog box is opened. Click Next > to open the Choose Destination<br />
Location dialog box.<br />
3. Accept the default installation path C:\Program Files\SEG-<br />
GER\J<strong>Link</strong>ARM_V or choose an alternative location. Confirm<br />
your choice with the Next > button.<br />
4. The Choose options dialog is opened. The Create entry in start menu and the<br />
Add shortcuts to desktop option are preselected. Accept or deselect the<br />
options and confirm the selection with the Next > button.<br />
J-<strong>Link</strong> / J-<strong>Trace</strong> (<strong>UM08001</strong>) © 2004-2010 SEGGER Microcontroller GmbH & Co. KG<br />
57
58 CHAPTER 3 Setup<br />
5. The installation process will be started.<br />
6. The Installation Complete dialog box appears after the copy process. Close the<br />
installation wizard with the Finish > button.<br />
The J-<strong>Link</strong> software and documentation pack is successfully installed on your PC.<br />
7. Connect your J-<strong>Link</strong> via USB with your PC. The J-<strong>Link</strong> will be identified and after<br />
a short period the J-<strong>Link</strong> LED stops rapidly flashing and stays on permanently.<br />
J-<strong>Link</strong> / J-<strong>Trace</strong> (<strong>UM08001</strong>) © 2004-2010 SEGGER Microcontroller GmbH & Co. KG
3.2 Setting up the USB interface<br />
After installing the J-<strong>Link</strong> ARM software and documentation package it should not be<br />
necessary to perform any additional setup sequences in order to configure the USB<br />
interface of J-<strong>Link</strong>.<br />
3.2.1 Verifying correct driver installation<br />
To verify the correct installation of the driver, disconnect and reconnect J-<strong>Link</strong> / J-<br />
<strong>Trace</strong> to the USB port. During the enumeration process which takes about 2 seconds,<br />
the LED on J-<strong>Link</strong> / J-<strong>Trace</strong> is flashing. After successful enumeration, the LED stays<br />
on permanently.<br />
Start the provided sample application J<strong>Link</strong>.exe, which should display the compilation<br />
time of the J-<strong>Link</strong> firmware, the serial number, a target voltage of 0.000V, a<br />
complementary error message, which says that the supply voltage is too low if no<br />
target is connected to J-<strong>Link</strong> / J-<strong>Trace</strong>, and the speed selection. The screenshot below<br />
shows an example.<br />
In addition you can verify the driver installation by consulting the Windows device<br />
manager. If the driver is installed and your J-<strong>Link</strong> / J-<strong>Trace</strong> is connected to your computer,<br />
the device manager should list the J-<strong>Link</strong> USB driver as a node below "Universal<br />
Serial Bus controllers" as shown in the following screenshot:<br />
J-<strong>Link</strong> / J-<strong>Trace</strong> (<strong>UM08001</strong>) © 2004-2010 SEGGER Microcontroller GmbH & Co. KG<br />
59
60 CHAPTER 3 Setup<br />
Right-click on the driver to open a context menu which contains the command Properties.<br />
If you select this command, a J-<strong>Link</strong> driver Properties dialog box is opened<br />
and should report: This device is working properly.<br />
If you experience problems, refer to the chapter Support and FAQs on page 203 for<br />
help. You can select the Driver tab for detailed information about driver provider,<br />
version, date and digital signer.<br />
J-<strong>Link</strong> / J-<strong>Trace</strong> (<strong>UM08001</strong>) © 2004-2010 SEGGER Microcontroller GmbH & Co. KG
3.3 Uninstalling the J-<strong>Link</strong> USB driver<br />
If J-<strong>Link</strong> / J-<strong>Trace</strong> is not properly recognized by Windows and therefore does not enumerate,<br />
it makes sense to uninstall the J-<strong>Link</strong> USB driver.<br />
This might be the case when:<br />
• The LED on the J-<strong>Link</strong> / J-<strong>Trace</strong> is rapidly flashing.<br />
• The J-<strong>Link</strong> / J-<strong>Trace</strong> is recognized as Unknown Device by Windows.<br />
To have a clean system and help Windows to reinstall the J-<strong>Link</strong> driver, follow this<br />
procedure:<br />
1. Disconnect J-<strong>Link</strong> / J-<strong>Trace</strong> from your PC.<br />
2. Open the Add/Remove Programs dialog (Start > Settings > Control Panel<br />
> Add/Remove Programs) and select Windows Driver Package - Segger<br />
(jlink) USB and click the Change/Remove button.<br />
3. Confirm the uninstallation process.<br />
J-<strong>Link</strong> / J-<strong>Trace</strong> (<strong>UM08001</strong>) © 2004-2010 SEGGER Microcontroller GmbH & Co. KG<br />
61
62 CHAPTER 3 Setup<br />
3.4 Setting up the IP interface<br />
Some emulators of the J-<strong>Link</strong> family have (or future members will have) an additional<br />
Ethernet interface, to communicate with the host system. These emulators will also<br />
come with a built-in web server which allows configuration of the emulator via web<br />
interface. In addition to that, you can set a default gateway for the emulator which<br />
allows using it even in large intranets. For simplicity the setup process of J-<strong>Link</strong> Pro<br />
(referred to as J-<strong>Link</strong>) is described in this section.<br />
3.4.1 Connecting the first time<br />
When connecting J-<strong>Link</strong> the first time, it attempts to acquire an IP address via DHCP.<br />
To get information about which IP address is acquired, you have to possibilities:<br />
• Connecting J-<strong>Link</strong> via USB and via Ethernet and read out the IP address via<br />
J<strong>Link</strong>.exe.<br />
• Connecting J-<strong>Link</strong> only via Ethernet and read out the IP via the DHCP IP Assignment<br />
table of your DHCP Server.<br />
In the following, both ways to get the IP address assigned to J-<strong>Link</strong> via DHCP, are<br />
explained.<br />
3.4.1.1 Connecting via USB and Ethernet<br />
When using J<strong>Link</strong>.exe in order to read out the IP address, J-<strong>Link</strong> has to be connected<br />
to your host system via Ethernet and via USB. When starting J<strong>Link</strong>.exe, it<br />
will show information about the IP address (static / dynamic) when connecting to J-<br />
<strong>Link</strong>.<br />
To get more detailed information about the current configuration of the J-<strong>Link</strong> (such<br />
as subnet mask and MAC address), you can use the conf command in J<strong>Link</strong>.exe.<br />
After reading out the IP address you can connect to J-<strong>Link</strong> via Ethernet, using the IP<br />
address.<br />
J-<strong>Link</strong> / J-<strong>Trace</strong> (<strong>UM08001</strong>) © 2004-2010 SEGGER Microcontroller GmbH & Co. KG
3.4.1.2 Connecting via Ethernet only<br />
This way of reading out the IP address of J-<strong>Link</strong> can be used for example if you do<br />
not have administrator rights on the host system in order to install the USB driver<br />
which is necessary to connect to J-<strong>Link</strong> via USB. To get the IP address which has<br />
been assigned to J-<strong>Link</strong> via DHCP, you have to read it out from the DHCP IP Assignment<br />
table of your DHCP Server:<br />
You can easily identify your J-<strong>Link</strong> by its host ID (in this case JLINK23) and by its<br />
MAC addr which always starts with: 00-22-C7-01-XX-XX where XX depends on the<br />
serial number of your J-<strong>Link</strong>. In this case the serial number of the connected J-<strong>Link</strong> is<br />
23 (0x0017), so its IP address is: 00-22-C7-01-00-17.<br />
3.4.2 Configuring the J-<strong>Link</strong><br />
By default, J-<strong>Link</strong> is configured to receive an IP address and a subnet mask via DHCP.<br />
It is also possible to assign a fixed IP address to it. Setting up J-<strong>Link</strong> can be done via<br />
J<strong>Link</strong>.exe or via web interface. In the following, both configuration methods are<br />
described.<br />
3.4.2.1 Configuring J-<strong>Link</strong> via J<strong>Link</strong>.exe<br />
Configuring J-<strong>Link</strong> via J<strong>Link</strong>.exe is very simple because only one command (in different<br />
variations) is necessary to choose between automatic IP address and dynamic<br />
IP address assignment.<br />
Note: If you want to configure J-<strong>Link</strong> via J<strong>Link</strong>.exe and J-<strong>Link</strong> is connected to<br />
your host-system via Ethernet only, you have to type in the ip command.<br />
Example<br />
ip 192.168.199.29<br />
Assigning an IP address via DHCP<br />
By default, J-<strong>Link</strong> is configured to acquire an IP address via DHCP, so it should not be<br />
necessary to configure this. But, if you change the IP address to a fixed one, DHCP is<br />
disabled from this point. To re-enable DHCP you should use the ipaddr DHCP command<br />
in J<strong>Link</strong>.exe. The ipaddr command will be explained in the following.<br />
J-<strong>Link</strong> / J-<strong>Trace</strong> (<strong>UM08001</strong>) © 2004-2010 SEGGER Microcontroller GmbH & Co. KG<br />
63
64 CHAPTER 3 Setup<br />
Assigning an IP address manually<br />
If you do not want J-<strong>Link</strong> to be configured via DHCP, you can assign an IP address<br />
and a subnet mask (optional) manually. This is done via the ipaddr command in<br />
J<strong>Link</strong>.exe. This command can be used in four different ways, which are explained in<br />
the table below:<br />
Example ipaddr<br />
J-<strong>Link</strong>>ipaddr<br />
DHCP assigned network configuration<br />
IP-Addr: 192.168.199.29<br />
Subnetmask: 255.255.0.0<br />
Example ipaddr <br />
Command Explanation<br />
If no additional parameter is specified, the current<br />
ipaddr<br />
IP and subnet mask of J-<strong>Link</strong> are shown.<br />
If an IP is given as an additional parameter the<br />
given IP address is set as the IP address for J-<strong>Link</strong>.<br />
ipaddr <br />
A default 16-bit subnet mask (255.255.0.0) is used.<br />
From this time J-<strong>Link</strong> uses this static IP, DHCP is<br />
disabled from this point.<br />
If an IP and a subnet mask is given as an additional<br />
parameter, the given IP and the given subnet mask<br />
ipaddr <br />
are used. From this time J-<strong>Link</strong> uses this static IP<br />
and subnet mask, DHCP is disabled from this point.<br />
If DHCP is given as an additional parameter the use<br />
of DHCP is enabled the next time J-<strong>Link</strong> boots up.<br />
ipaddr DHCP<br />
This especially makes sense if a static IP address<br />
was previously used and now an IP address given<br />
by the DHCP Server shall be used.<br />
Table 3.1: ipaddr command description<br />
J-<strong>Link</strong>>ipaddr 192.168.87.115<br />
IP address successfully changed to '192.168.87.115'.<br />
Subnetmask successfully changed to '255.255.0.0'.<br />
Example ipaddr <br />
J-<strong>Link</strong>>ipaddr 192.168.87.116 255.255.0.0<br />
IP address successfully changed to '192.168.87.116'.<br />
Subnetmask successfully changed to '255.255.0.0'.<br />
Example ipaddr DHCP<br />
J-<strong>Link</strong>>ipaddr DHCP<br />
Configuration successfully changed to DHCP.<br />
J-<strong>Link</strong> / J-<strong>Trace</strong> (<strong>UM08001</strong>) © 2004-2010 SEGGER Microcontroller GmbH & Co. KG
3.4.2.2 Configuring J-<strong>Link</strong> via web interface<br />
J-<strong>Link</strong> comes with a web server, which provides a web interface for configuration.<br />
This enables you to configure J-<strong>Link</strong> without additional tools, just with a simple web<br />
browser. The Home page of the web interface shows the serial number, the current<br />
IP address and the MAC address of the J-<strong>Link</strong>.<br />
The Network configuration page allows you to configure the IP address, the subnet<br />
mask and the default gateway of J-<strong>Link</strong>. You can choose between automatic IP<br />
assignment and manual IP assignment by selecting the appropriate radio button. If<br />
you choose manual, you can change the IP address, the subnet mask and the<br />
default gateway by entering the desired values in the appropriate fields and clicking<br />
change. So, you do not have to care about any command syntax in order to change<br />
the IP address/subnet mask/default gateway.<br />
3.4.3 FAQs<br />
Q: How can I use J-<strong>Link</strong> with GDB and Ethernet?<br />
A: You have to use the J-<strong>Link</strong> ARM GDB Server in order to connect to J-<strong>Link</strong> via GDB<br />
and Ethernet.<br />
J-<strong>Link</strong> / J-<strong>Trace</strong> (<strong>UM08001</strong>) © 2004-2010 SEGGER Microcontroller GmbH & Co. KG<br />
65
66 CHAPTER 3 Setup<br />
3.5 J-<strong>Link</strong> configurator<br />
In general, there are two interfaces which can be used by J-<strong>Link</strong>, to connect to a<br />
host: USB Full/Hi-Speed and Ethernet. When using USB, there are different ways in<br />
which a J-<strong>Link</strong> can be identified on a host. The J-<strong>Link</strong> software and documentation<br />
package comes with a configurator (J<strong>Link</strong>Config.exe) which allows you to configure<br />
how a J-<strong>Link</strong> is identified on the host system when using USB.<br />
3.5.1 J-<strong>Link</strong> identification methods<br />
In general, when using USB, there are three different ways in which a J-<strong>Link</strong> can be<br />
identified:<br />
• By USB address<br />
• By serial number<br />
Default configuration of J-<strong>Link</strong> is: Identification by serial number. Identification via<br />
USB address is used for compatiblity and not recommended.<br />
Background information<br />
"USB address" really means changing the USB-Product Id (PID).<br />
The following table shows how J-<strong>Link</strong>s enumerate in the different identification<br />
modes.<br />
Identification PID Serial number<br />
USB address 0 0x0101 123456<br />
USB address 1 0x0102 123456<br />
USB address 2 0x0103 123456<br />
USB address 3 0x0104 123456<br />
Serial number 0x0101<br />
Serial number is real serial number of the J-LInk or<br />
user assigned.<br />
Table 3.2: J-<strong>Link</strong> enumeration in different identification modes<br />
J-<strong>Link</strong> / J-<strong>Trace</strong> (<strong>UM08001</strong>) © 2004-2010 SEGGER Microcontroller GmbH & Co. KG
3.5.2 Using the J-<strong>Link</strong> configurator<br />
When starting the J-<strong>Link</strong> configurator a dialog pops up which shows a list of all emulators<br />
which are currently connected to the PC by USB. The list is automatically<br />
upadted, so if you start the configurator first an then connect your J-<strong>Link</strong> to your PC,<br />
the configurator will recognize this and updates the list of emulators.<br />
To configure an emulator simply select it from the list and click the configure button<br />
or simply double-click the emulator-entry.<br />
Note: Do not connect multiple J-<strong>Link</strong>s with identical USB identification to one PC<br />
at the same time. If you have 2 or more J-<strong>Link</strong>s with identical USB identification,<br />
please connect them one at a time, then reconfigure the first one before connecting<br />
the second one.<br />
A second dialog pops up which shows you specific information of the selected emulator,<br />
like the Product name, its serial number and its Nickname. Moreover, this dialog<br />
enables you to select the USB identification method of the emulator.<br />
J-<strong>Link</strong> / J-<strong>Trace</strong> (<strong>UM08001</strong>) © 2004-2010 SEGGER Microcontroller GmbH & Co. KG<br />
67
68 CHAPTER 3 Setup<br />
If you choose the USB identification method "<strong>User</strong> assigned SN", you must also enter<br />
a valid, customized serial number which is used to identify the selected emulator.<br />
Please note that the serial number 123456 is not valid. Moreover, the maximum<br />
value for a valid serial number is 4294901759 (0xFFFEFFFF).<br />
3.5.3 Connecting to different J-<strong>Link</strong>s via USB<br />
When connecting to a J-<strong>Link</strong> it is not necessary to pre-select the J-<strong>Link</strong>, since when<br />
connecting via USB without specifying to which J-<strong>Link</strong> you want connect to, the DLL<br />
searches for available J-<strong>Link</strong>s. If more than one J-<strong>Link</strong> has been found, a emulator<br />
selection dialog is shown, which enables you to select the correct one.<br />
So even in IDEs which do not have an selection option for the J-<strong>Link</strong>, it is possible to<br />
connect to different J-<strong>Link</strong>s.<br />
J-<strong>Link</strong> / J-<strong>Trace</strong> (<strong>UM08001</strong>) © 2004-2010 SEGGER Microcontroller GmbH & Co. KG
Chapter 4<br />
J-<strong>Link</strong> and J-<strong>Trace</strong> related software<br />
This chapter describes Segger’s J-<strong>Link</strong> / J-<strong>Trace</strong> related software portfolio, which covers<br />
nearly all phases of the development of embedded applications. The support of<br />
the remote debug interface (RDI) and the J-<strong>Link</strong> GDBServer allows an easy J-<strong>Link</strong><br />
integration in all relevant toolchains.<br />
J-<strong>Link</strong> / J-<strong>Trace</strong> (<strong>UM08001</strong>) © 2004-2010 SEGGER Microcontroller GmbH & Co. KG<br />
69
70 CHAPTER 4 J-<strong>Link</strong> and J-<strong>Trace</strong> related software<br />
4.1 J-<strong>Link</strong> related software<br />
4.1.1 J-<strong>Link</strong> software and documentation package<br />
J-<strong>Link</strong> is shipped with a bundle of applications. Some of the applications require an<br />
additional license, free trial licenses are available upon request from www.segger.com.<br />
Software Description<br />
J<strong>Link</strong>ARM.dll DLL for using J-<strong>Link</strong> / J-<strong>Trace</strong> with third-party programs.<br />
J<strong>Link</strong>.exe<br />
J<strong>Link</strong>STR91x<br />
J<strong>Link</strong>STM32<br />
J-<strong>Link</strong> TCP/IP<br />
Server<br />
J-Mem memory<br />
viewer<br />
J-Flash<br />
RDI support<br />
Flash download<br />
Flash breakpoints<br />
J-<strong>Link</strong> GDB Server<br />
Dedicated flash<br />
programming utilities<br />
Table 4.1: J-<strong>Link</strong> / J-<strong>Trace</strong> related software<br />
Free command-line tool with basic functionality for target analysis.<br />
Free command-line tool to configure the ST STR91x cores. For<br />
more information please refer to J-<strong>Link</strong> STR91x Commander<br />
(Command line tool) on page 73<br />
Free command-line tool for STM32 devices. Can be used to disable<br />
the hardware watchdog and to unsecure STM32 devices<br />
(override read-protection).<br />
Free utility which provides the possibility to use J-<strong>Link</strong> / J-<strong>Trace</strong><br />
remotely via TCP/IP.<br />
Free target memory viewer. Shows the memory content of a<br />
running target and allows editing as well.<br />
Stand-alone flash programming application. Requires an additional<br />
license. For more information about J-Flash please refer<br />
to J-Flash ARM <strong>User</strong>’s <strong>Guide</strong> (UM08003).<br />
Provides Remote Debug Interface (RDI) support. This allows<br />
the user to use J-<strong>Link</strong> with any RDI-compliant debugger. (Additional<br />
license required)<br />
Flash download allows an arbitrary debugger to write into flash<br />
memory, using the J-<strong>Link</strong> flashloaders.<br />
Flash breakpoints provide the ability to set an unlimited number<br />
of software breakpoints in flash memory areas. (Additional<br />
license required)<br />
The J-<strong>Link</strong> GDB Server is a remote server for the GNU Debugger<br />
(GDB). Requires an additional license. For more information<br />
about J-<strong>Link</strong> GDB Server, please refer to J-<strong>Link</strong> GDB Server<br />
<strong>User</strong>’s <strong>Guide</strong> (UM08005).<br />
Free dedicated flash programming utilities for the following<br />
eval boards: Cogent CSB737, ST MB525, Toshiba TOPAS 910.<br />
J-<strong>Link</strong> / J-<strong>Trace</strong> (<strong>UM08001</strong>) © 2004-2010 SEGGER Microcontroller GmbH & Co. KG
4.1.2 List of additional software packages<br />
The software packages listed below are available upon request from www.segger.com.<br />
JTAGLoad<br />
Software Description<br />
J-<strong>Link</strong> Software<br />
Developer Kit<br />
(SDK)<br />
J-<strong>Link</strong> Flash Software<br />
Developer Kit<br />
(SDK)<br />
Command line tool that opens an svf file and sends the data in<br />
it via J-<strong>Link</strong> / J-<strong>Trace</strong> to the target.<br />
The J-<strong>Link</strong> Software Developer Kit is needed if you want to<br />
write your own program with J-<strong>Link</strong> / J-<strong>Trace</strong>.<br />
An enhanced version of the J<strong>Link</strong>ARM.DLL, which contains<br />
additional API functions for flash programming.<br />
Table 4.2: J-<strong>Link</strong> / J-<strong>Trace</strong> additional software packages<br />
J-<strong>Link</strong> / J-<strong>Trace</strong> (<strong>UM08001</strong>) © 2004-2010 SEGGER Microcontroller GmbH & Co. KG<br />
71
72 CHAPTER 4 J-<strong>Link</strong> and J-<strong>Trace</strong> related software<br />
4.2 J-<strong>Link</strong> software and documentation package in<br />
detail<br />
The J-<strong>Link</strong> / J-<strong>Trace</strong> software documentation package is supplied together with J-<strong>Link</strong><br />
/ J-<strong>Trace</strong> and may also be downloaded from www.segger.com.<br />
4.2.1 J-<strong>Link</strong> Commander (Command line tool)<br />
J-<strong>Link</strong> Commander (J<strong>Link</strong>.exe) is a tool that can be used for verifying proper installation<br />
of the USB driver and to verify the connection to the ARM chip, as well as for<br />
simple analysis of the target system. It permits some simple commands, such as<br />
memory dump, halt, step, go and ID-check, as well as some more in-depths analysis<br />
of the state of the ARM core and the ICE breaker module.<br />
J-<strong>Link</strong> / J-<strong>Trace</strong> (<strong>UM08001</strong>) © 2004-2010 SEGGER Microcontroller GmbH & Co. KG
4.2.2 SWO Analyzer<br />
SWO Analyzer (SWOAnalyzer.exe) is a tool that analyzes SWO output. Status and<br />
summary of the analysis are output to standard out, the details of the analysis are<br />
stored in a file.<br />
Usage<br />
SWOAnalyzer.exe <br />
This can be achieved by simply dragging the SWO output file created by the J-<strong>Link</strong><br />
DLL onto the executable.<br />
Creating an SWO output file<br />
In order to create the SWO output file, which is th input file for the SWO Analyzer,<br />
the J-<strong>Link</strong> config file needs to be modified.<br />
It should contain the following lines:<br />
[SWO]<br />
SWOLogFile="C:\TestSWO.dat"<br />
4.2.3 J-<strong>Link</strong> STR91x Commander (Command line tool)<br />
J-<strong>Link</strong> STR91x Commander (J<strong>Link</strong>STR91x.exe) is a tool that can be used to configure<br />
STR91x cores. It permits some STR9 specific commands like:<br />
• Set the configuration register to boot from bank 0 or 1<br />
• Erase flash sectors<br />
• Read and write the OTP sector of the flash<br />
• Write-protect single flash sectors by setting the sector protection bits<br />
• Prevent flash from communicate via JTAG by setting the security bit<br />
J-<strong>Link</strong> / J-<strong>Trace</strong> (<strong>UM08001</strong>) © 2004-2010 SEGGER Microcontroller GmbH & Co. KG<br />
73
74 CHAPTER 4 J-<strong>Link</strong> and J-<strong>Trace</strong> related software<br />
All of the actions performed by the commands, excluding writing the OTP sector and<br />
erasing the flash, can be undone. This tool can be used to erase the flash of the controller<br />
even if a program is in flash which causes the ARM core to stall.<br />
When starting the STR91x commander, a command sequence will be performed<br />
which brings MCU into Turbo Mode.<br />
"While enabling the Turbo Mode, a dedicated test mode signal is set and controls the<br />
GPIOs in output. The IOs are maintained in this state until a next JTAG instruction is<br />
send." (ST Microelectronics)<br />
Enabling Turbo Mode is necessary to guarantee proper function of all commands in<br />
the STR91x Commander.<br />
J-<strong>Link</strong> / J-<strong>Trace</strong> (<strong>UM08001</strong>) © 2004-2010 SEGGER Microcontroller GmbH & Co. KG
4.2.4 J-<strong>Link</strong> STM32 Commander (Command line tool)<br />
J-<strong>Link</strong> STM32 Commander (J<strong>Link</strong>STM32.exe) is a free command line tool which can<br />
be used to disable the hardware watchdog of STM32 devices which can be activated<br />
by programming the option bytes. Moreover the J-<strong>Link</strong> STM32 Commander unsecures<br />
a read-protected STM32 device by re-programming the option bytes.<br />
Note: Unprotecting a secured device or will cause a mass erase of the flash<br />
memory.<br />
J-<strong>Link</strong> / J-<strong>Trace</strong> (<strong>UM08001</strong>) © 2004-2010 SEGGER Microcontroller GmbH & Co. KG<br />
75
76 CHAPTER 4 J-<strong>Link</strong> and J-<strong>Trace</strong> related software<br />
4.2.5 J-<strong>Link</strong> TCP/IP Server (Remote J-<strong>Link</strong> / J-<strong>Trace</strong> use)<br />
The J-<strong>Link</strong> TCP/IP Server allows using J-<strong>Link</strong> / J-<strong>Trace</strong> remotely via TCP/IP. This<br />
enables you to connect to and fully use a J-<strong>Link</strong> / J-<strong>Trace</strong> from another computer.<br />
Performance is just slightly (about 10%) lower than with direct USB connection.<br />
The J-<strong>Link</strong> TCP/IP Server also accepts commands which are passed to the J-<strong>Link</strong> TCP/<br />
IP Server via the command line.<br />
4.2.5.1 List of available commands<br />
The table below lists the commands accepted by the J-<strong>Link</strong> TCP/IP Server<br />
4.2.5.2 port<br />
Syntax<br />
-port <br />
Example<br />
To start the J-<strong>Link</strong> TCP/IP Server listening on port 19021 the command should look<br />
as follows:<br />
-port 19021<br />
4.2.5.3 usb<br />
Syntax<br />
-usb <br />
Example<br />
Currently usb 0-3 are supported, so if the J-<strong>Link</strong> TCP/IP Server should connect to the<br />
J-<strong>Link</strong> on usb port 2 the command should look as follows:<br />
-usb 2<br />
Command Description<br />
port<br />
Selects the IP port on which the J-<strong>Link</strong> TCP/IP Server is<br />
listening.<br />
usb<br />
Table 4.3: Available commands<br />
Selects a usb port for communication with J-<strong>Link</strong>.<br />
J-<strong>Link</strong> / J-<strong>Trace</strong> (<strong>UM08001</strong>) © 2004-2010 SEGGER Microcontroller GmbH & Co. KG
4.2.6 J-Mem Memory Viewer<br />
J-Mem displays memory contents of ARM-systems and allows modifications of RAM<br />
and SFRs (Special Function Registers) while the target is running. This makes it possible<br />
to look into the memory of an ARM chip at run-time; RAM can be modified and<br />
SFRs can be written. You can choose between 8/16/32-bit size for read and write<br />
accesses. J-Mem works nicely when modifying SFRs, especially because it writes the<br />
SFR only after the complete value has been entered.<br />
J-<strong>Link</strong> / J-<strong>Trace</strong> (<strong>UM08001</strong>) © 2004-2010 SEGGER Microcontroller GmbH & Co. KG<br />
77
78 CHAPTER 4 J-<strong>Link</strong> and J-<strong>Trace</strong> related software<br />
4.2.7 J-Flash ARM (Program flash memory via JTAG)<br />
J-Flash ARM is a software running on Windows 2000, Windows XP, Windows 2003 or<br />
Windows Vista systems and enables you to program your flash EEPROM devices via<br />
the JTAG connector on your target system.<br />
J-Flash ARM works with any ARM7/9 system and supports all common external<br />
flashes, as well as the programming of internal flash of ARM microcontrollers. It<br />
allows you to erase, fill, program, blank check, upload flash content, and view memory<br />
functions of the software with your flash devices.<br />
J-Flash requires a additional license from Segger. Even without a license key you can<br />
still use J-Flash ARM to open project files, read from connected devices, blank check<br />
target memory, verify data files and so on. However, to actually program devices via<br />
J-Flash ARM and J-<strong>Link</strong> / J-<strong>Trace</strong> you are required to obtain a license key from us.<br />
Evaluation licenses are available free of charge. For further information go to our<br />
website or contact us directly.<br />
Features<br />
• Works with any ARM7/ARM9 chip<br />
• ARM microcontrollers (internal flash) supported<br />
• Most external flash chips can be programmed<br />
• High-speed programming: up to 300 Kbytes/second (depends on flash device)<br />
• Very high-speed blank check: Up to 16 Mbytes/sec (depends on target)<br />
• Smart read-back: Only non-blank portions of flash transferred and saved<br />
• Easy to use, comes with projects for standard eval boards.<br />
J-<strong>Link</strong> / J-<strong>Trace</strong> (<strong>UM08001</strong>) © 2004-2010 SEGGER Microcontroller GmbH & Co. KG
4.2.8 J-<strong>Link</strong> RDI (Remote Debug Interface)<br />
The J-<strong>Link</strong> RDI software is an remote debug interface for J-<strong>Link</strong>. It makes it possible<br />
to use J-<strong>Link</strong> with any RDI compliant debugger. The main part of the software is an<br />
RDI-compliant DLL, which needs to be selected in the debugger. There are two additional<br />
features available which build on the RDI software foundation. Each additional<br />
features requires an RDI license in addition to its own license. Evaluation licenses are<br />
available free of charge. For further information go to our website or contact us<br />
directly.<br />
Note: The RDI software (as well as flash breakpoints and flash downloads) do<br />
not require a license if the target device is an LPC2xxx. In this case the software verifies<br />
that the target device is actually an LPC 2xxx and have a device-based license.<br />
4.2.8.1 Flash download and flash breakpoints<br />
Flash download and flash breakpoints are supported by J-<strong>Link</strong> RDI. For more information<br />
about flash download and flash breakpoints, please refer to J-<strong>Link</strong> RDI <strong>User</strong>’s<br />
<strong>Guide</strong> (UM08004), chapter Flash download and chapter Breakpoints in flash memory.<br />
J-<strong>Link</strong> / J-<strong>Trace</strong> (<strong>UM08001</strong>) © 2004-2010 SEGGER Microcontroller GmbH & Co. KG<br />
79
80 CHAPTER 4 J-<strong>Link</strong> and J-<strong>Trace</strong> related software<br />
4.2.9 J-<strong>Link</strong> GDB Server<br />
GDB Server is a remote server for the GNU Debugger GDB. GDB and GDB Server<br />
communicate via a TCP/IP connection, using the standard GDB remote serial protocol.<br />
The GDB Server translates the GDB monitor commands into J-<strong>Link</strong> commands.<br />
The GNU Project Debugger (GDB) is a freely available debugger, distributed under<br />
the terms of the GPL. It connects to an emulator via a TCP/IP connection. It can connect<br />
to every emulator for which a GDB Server software is available. The latest Unix<br />
version of the GDB is freely available from the GNU committee under:<br />
http://www.gnu.org/software/gdb/download/<br />
J-<strong>Link</strong> GDB Server is distributed as "free for evaluation and non commercial use". The<br />
software can be used free of charge for educational and nonprofit purposes without<br />
additional license. Without additional license, only 32 KBytes may be downloaded. To<br />
download bigger programs or to use the software for other, especially commercial<br />
purposes, a license is required. With such a license, the download size is not limited.<br />
Free 30 days limited license are available upon request. For further information go to<br />
our website or contact us directly.<br />
J-<strong>Link</strong> / J-<strong>Trace</strong> (<strong>UM08001</strong>) © 2004-2010 SEGGER Microcontroller GmbH & Co. KG
4.3 Dedicated flash programming utilities for J-<strong>Link</strong><br />
The SEGGER J-<strong>Link</strong> comes with dedicated flash programming utilities (DFPU) for a<br />
number of popular Eval boards. These utilities are designed to program a .bin file into<br />
the flash memory of the target hardware, with J-<strong>Link</strong>. Each dedicated flash programming<br />
utility works only with the Eval board it was designed for.<br />
4.3.1 Introduction<br />
Using the dedicated flash programming utilities which come with J-<strong>Link</strong>, is permitted<br />
for development purposes only. As long as the dedicated flash programming tools are<br />
used for development purposes only, no additional license is required. If you want to<br />
use the dedicated flash programming utilities for commercial and production purposes,<br />
you need to obtain a license from SEGGER. SEGGER also offers to create dedicated<br />
flash programming utilities for custom hardware. When starting a dedicated<br />
flash programming utility, a message box appears which tells the user about the purpose<br />
of the dedicated flash programming utility:<br />
4.3.2 Supported Eval boards<br />
The list below shows the Eval boards for which dedicated flash programming utilities<br />
have been already developed. Simple flash programming utilities for other, popular<br />
Eval boards are on the schedule.<br />
CPU / MCU<br />
Eval board<br />
manufacturer<br />
Eval board<br />
name<br />
Atmel AT91SAM9263 Cogent CSB737<br />
ST STM32F103RBT6<br />
Toshiba<br />
TMPA910CRXBG<br />
ST Microelectronics<br />
MB525<br />
Toshiba TOPAS910<br />
NXP LPC3250 Phytec PCM-967<br />
Table 4.4:<br />
Data<br />
File<br />
PC<br />
J-<strong>Link</strong><br />
USB JTAG<br />
CPU<br />
Target<br />
Flash<br />
Memory<br />
Flash memory<br />
Typically 65 MB external<br />
NOR flash<br />
Typically 128 KB internal<br />
flash<br />
Typically 32 MB external<br />
NOR flash<br />
Typically 32 MB external<br />
NAND flash (ST<br />
NAND256R3A)<br />
J-<strong>Link</strong> / J-<strong>Trace</strong> (<strong>UM08001</strong>) © 2004-2010 SEGGER Microcontroller GmbH & Co. KG<br />
81
82 CHAPTER 4 J-<strong>Link</strong> and J-<strong>Trace</strong> related software<br />
4.3.3 Supported flash memories<br />
The dedicated flash programming utilities for J-<strong>Link</strong> can be created for the following<br />
flash memories:<br />
• External NOR flash<br />
• Internal flash<br />
• NAND flash<br />
• Data flash<br />
• SPI flash<br />
In order to use external NOR flash, a CFI compliant flash memory has to be used<br />
because the flash programming utilities use the CFI information to detect the flash<br />
size and sectorization.<br />
4.3.4 How to use the dedicated flash programming utilities<br />
The dedicated flash programming utilities are very simple to use. Every tool expects<br />
a path to a data file (*.bin) passed as a command line parameter, on startup. If no<br />
path is passed the flash programming utility searches for a data in the Samples\<br />
directory. This .bin file has to be named as shown in the table above. For example,<br />
for the Cogent CSB737 Eval board this file is named: CogentCSB737.bin.<br />
4.3.5 Using the dedicated flash programming utilities for production<br />
and commercial purposes<br />
If you want to use dedicated flash programming utilities for production and commercial<br />
purposes you need to obtain a license from SEGGER. In order to obtain a license<br />
for a dedicated flash programming utility, there are two options:<br />
• Purchasing the source code of an existing dedicated flash programming utility<br />
• Purchasing the source code of a dedicated flash programming utility for custom<br />
hardware<br />
The source code can be compiled using a Microsoft Visual C++ V6 or newer compiler.<br />
It contains code which is executed on the target device (RAMCODE). This RAMCODE<br />
may not be used with debug probes other than J-<strong>Link</strong>.<br />
4.3.5.1 Purchasing the source code of an existing dedicated flash programming<br />
utility<br />
Purchasing the source code of an existing dedicated flash programming utility<br />
(described above) allows you to use the dedicated flash programming utility for production<br />
and commercial purposes. Making the resulting executable publicly available<br />
is not permitted.<br />
For more information about the pricing for the source code of existing dedicated flash<br />
programming utilities, please refer to the price list on our website<br />
http://www.segger.com/pricelist_jlink.html#8.20.01.<br />
J-<strong>Link</strong> / J-<strong>Trace</strong> (<strong>UM08001</strong>) © 2004-2010 SEGGER Microcontroller GmbH & Co. KG
4.3.5.2 Purchasing the source code of a dedicated flash programming<br />
utility for custom hardware<br />
SEGGER also offers to design dedicated flash programming utilities for custom hardware<br />
for which you will also need to obtain a license. The resulting executable may<br />
be used for organization internal purposes only.<br />
4.3.6 F.A.Q.<br />
Q: Q: Can the dedicated flash programming utilities be used for commercial purposes?<br />
A: A: Yes, you can buy the source code of one or more of the flash programming utilities<br />
which makes it possible to use them for commercial and production purposes.<br />
Q: Q: I want to use the dedicated flash programming utilities with my own hardware.<br />
Is that possible?<br />
A: A: The free dedicated flash programming utilities which come with J-<strong>Link</strong> do not<br />
support custom hardware.mIn order to use your own hardware with a dedicated<br />
flash programming utility, SEGGER offers to create dedicated flash programming<br />
utilities for custom hardware<br />
Q: Q: Do I need a license to use the dedicated flash programming utilities?<br />
A: A: As long as you use the dedicated flash programming utilities, which come with<br />
J-<strong>Link</strong>, for development purposes only, you do not need an additional license. In<br />
order to use them for commercial and/or production purposes you need to obtain a<br />
license from SEGGER.<br />
Q: Q: Which file types are supported by the dedicated flash programming utilities?<br />
A: A: Currently, the dedicated flash programming utilities support *.bin files.<br />
Q: Q: Can I use the dedicated flash programming utilities with other debug probes<br />
than J-<strong>Link</strong>?<br />
A: A: No, the dedicated flash programming utilities only work with J-<strong>Link</strong><br />
J-<strong>Link</strong> / J-<strong>Trace</strong> (<strong>UM08001</strong>) © 2004-2010 SEGGER Microcontroller GmbH & Co. KG<br />
83
84 CHAPTER 4 J-<strong>Link</strong> and J-<strong>Trace</strong> related software<br />
4.4 Additional software packages in detail<br />
The packages described in this section are not available for download. If you wish to<br />
use one of them, contact SEGGER Microcontroller Systeme directly.<br />
4.4.1 JTAGLoad (Command line tool)<br />
JTAGLoad is a tool that can be used to open an svf (Serial vector format) file. The<br />
data in the file will be sent to the target via J-<strong>Link</strong> / J-<strong>Trace</strong>.<br />
4.4.2 J-<strong>Link</strong> Software Developer Kit (SDK)<br />
The J-<strong>Link</strong> Software Developer Kit is needed if you want to write your own program<br />
with J-<strong>Link</strong> / J-<strong>Trace</strong>. The J-<strong>Link</strong> DLL is a standard Windows DLL typically used from C<br />
programs (Visual Basic or Delphi projects are also possible). It makes the entire<br />
functionality of J-<strong>Link</strong> / J-<strong>Trace</strong> available through its exported functions, such as halting/stepping<br />
the ARM core, reading/writing CPU and ICE registers and reading/writing<br />
memory. Therefore it can be used in any kind of application accessing an ARM<br />
core. The standard DLL does not have API functions for flash programming. However,<br />
the functionality offered can be used to program flash. In this case, a flash loader is<br />
required. The table below lists some of the included files and their respective purpose.<br />
Files Contents<br />
GLOBAL.h<br />
J<strong>Link</strong>ARMDLL.h<br />
Header files that must be included to use the DLL functions.<br />
These files contain the defines, typedef names, and function declarations.<br />
J<strong>Link</strong>ARM.lib A Library that contains the exports of the J<strong>Link</strong> DLL.<br />
J<strong>Link</strong>ARM.dll The DLL itself.<br />
Main.c Sample application, which calls some J<strong>Link</strong>ARM DLL functions.<br />
J<strong>Link</strong>.dsp<br />
J<strong>Link</strong>.dsw<br />
Project files of the sample application. Double click J<strong>Link</strong>.dsw to<br />
open the project.<br />
J<strong>Link</strong>ARMDLL.pdf Extensive documentation (API, sample projects etc.).<br />
Table 4.5: J-<strong>Link</strong> SDK<br />
4.4.3 J-<strong>Link</strong> Flash Software Developer Kit (SDK)<br />
This is an enhanced version of the J<strong>Link</strong>ARM.DLL which contains additional API functions<br />
for flash programming. The additional API functions (prefixed<br />
JLINKARM_FLASH_) allow erasing and programming of flash memory. This DLL comes<br />
with a sample executable, as well as with source code of this executable and a<br />
Microsoft Visual C/C++ project file. It can be an interesting option if you want to<br />
write your own programs for production purposes.<br />
J-<strong>Link</strong> / J-<strong>Trace</strong> (<strong>UM08001</strong>) © 2004-2010 SEGGER Microcontroller GmbH & Co. KG
4.5 Using the J-<strong>Link</strong>ARM.dll<br />
4.5.1 What is the J<strong>Link</strong>ARM.dll?<br />
The J-<strong>Link</strong>ARM.dll is a standard Windows DLL typically used from C or C++, but<br />
also Visual Basic or Delphi projects. It makes the entire functionality of the J-<strong>Link</strong> / J-<br />
<strong>Trace</strong> available through the exported functions.<br />
The functionality includes things such as halting/stepping the ARM core, reading/<br />
writing CPU and ICE registers and reading/writing memory. Therefore, it can be used<br />
in any kind of application accessing an ARM core.<br />
4.5.2 Updating the DLL in third-party programs<br />
The J<strong>Link</strong>ARM.dll can be used by any debugger that is designed to work with it. Some<br />
debuggers, like the IAR C-SPY ® debugger, are usually shipped with the J<strong>Link</strong>ARM.dll<br />
already installed. Anyhow it may make sense to replace the included DLL with the<br />
latest one available, to take advantage of improvements in the newer version.<br />
4.5.2.1 Updating the J<strong>Link</strong>ARM.dll in the IAR Embedded Workbench<br />
(EWARM)<br />
It’s recommended to use the J-<strong>Link</strong> DLL updater to update the J<strong>Link</strong>ARM.dll in the<br />
IAR Embedded Workbench. The IAR Embedded Workbench IDE is a high-performance<br />
integrated development environment with an editor, compiler, linker, debugger. The<br />
compiler generates very efficient code and is widely used. It comes with the J-<br />
<strong>Link</strong>ARM.dll in the arm\bin subdirectory of the installation directory. To update this<br />
DLL, you should backup your original DLL and then replace it with the new one.<br />
Typically, the DLL is located in C:\Program Files\IAR Systems\Embedded Workbench<br />
5.n\arm\bin\.<br />
After updating the DLL, it is recommended to verify that the new DLL is loaded as<br />
described in Determining which DLL is used by a program on page 86.<br />
J-<strong>Link</strong> DLL updater<br />
The J-<strong>Link</strong> DLL updater is a tool which comes with the J-<strong>Link</strong> software and allows the<br />
user to update the J<strong>Link</strong>ARM.dll in all installations of the IAR Embedded Workbench,<br />
in a simple way. The updater is automatically started after the installation of a<br />
J-<strong>Link</strong> software version and asks for updating old DLLs used by IAR. The J-<strong>Link</strong> DLL<br />
updater can also be started manually. Simply enable the checkbox left to the IAR<br />
installation which has been found. Click Ok in order to update the J<strong>Link</strong>ARM.dll<br />
used by the IAR installation.<br />
J-<strong>Link</strong> / J-<strong>Trace</strong> (<strong>UM08001</strong>) © 2004-2010 SEGGER Microcontroller GmbH & Co. KG<br />
85
86 CHAPTER 4 J-<strong>Link</strong> and J-<strong>Trace</strong> related software<br />
4.5.3 Determining the version of J<strong>Link</strong>ARM.dll<br />
To determine which version of the J<strong>Link</strong>ARM.dll you are facing, the DLL version can<br />
be viewed by right clicking the DLL in explorer and choosing Properties from the<br />
context menu. Click the Version tab to display information about the product version.<br />
4.5.4 Determining which DLL is used by a program<br />
To verify that the program you are working with is using the DLL you expect it to use,<br />
you can investigate which DLLs are loaded by your program with tools like Sysinternals’<br />
Process Explorer. It shows you details about the DLLs, used by your program,<br />
such as manufacturer and version.<br />
Process Explorer is - at the time of writing - a free utility which can be downloaded<br />
from www.sysinternals.com.<br />
J-<strong>Link</strong> / J-<strong>Trace</strong> (<strong>UM08001</strong>) © 2004-2010 SEGGER Microcontroller GmbH & Co. KG
Chapter 5<br />
Working with J-<strong>Link</strong> and J-<strong>Trace</strong><br />
This chapter describes functionality and how to use J-<strong>Link</strong> and J-<strong>Trace</strong>.<br />
J-<strong>Link</strong> / J-<strong>Trace</strong> (<strong>UM08001</strong>) © 2004-2010 SEGGER Microcontroller GmbH & Co. KG<br />
87
88 CHAPTER 5 Working with J-<strong>Link</strong> and J-<strong>Trace</strong><br />
5.1 Connecting the target system<br />
5.1.1 Power-on sequence<br />
In general, J-<strong>Link</strong> / J-<strong>Trace</strong> should be powered on before connecting it with the target<br />
device. That means you should first connect J-<strong>Link</strong> / J-<strong>Trace</strong> with the host system via<br />
USB and then connect J-<strong>Link</strong> / J-<strong>Trace</strong> with the target device via JTAG. Power-on the<br />
device after you connected J-<strong>Link</strong> / J-<strong>Trace</strong> to it.<br />
5.1.2 Verifying target device connection<br />
If the USB driver is working properly and your J-<strong>Link</strong> / J-<strong>Trace</strong> is connected with the<br />
host system, you may connect J-<strong>Link</strong> / J-<strong>Trace</strong> to your target hardware. Then start<br />
J<strong>Link</strong>.exe which should now display the normal J-<strong>Link</strong> / J-<strong>Trace</strong> related information<br />
and in addition to that it should report that it found a JTAG target and the target’s<br />
core ID. The screenshot below shows the output of J<strong>Link</strong>.exe. As can be seen, it<br />
reports a J-<strong>Link</strong> with one JTAG device connected.<br />
5.1.3 Problems<br />
If you experience problems with any of the steps described above, read the chapter<br />
Support and FAQs on page 203 for troubleshooting tips. If you still do not find appropriate<br />
help there and your J-<strong>Link</strong> / J-<strong>Trace</strong> is an original SEGGER product, you can<br />
contact SEGGER support via e-mail. Provide the necessary information about your<br />
target processor, board etc. and we will try to solve your problem. A checklist of the<br />
required information together with the contact information can be found in chapter<br />
Support and FAQs on page 203 as well.<br />
J-<strong>Link</strong> / J-<strong>Trace</strong> (<strong>UM08001</strong>) © 2004-2010 SEGGER Microcontroller GmbH & Co. KG
5.2 Indicators<br />
J-<strong>Link</strong> uses indicators (LEDs) to give the user some information about the current<br />
status of the connected J-<strong>Link</strong>. All J-<strong>Link</strong>s feature the main indicator. Some newer J-<br />
<strong>Link</strong>s such as the J-<strong>Link</strong> Pro / Ultra come with additional input/output Indicators. In<br />
the following, the meaning of these indicators will be explained.<br />
5.2.1 Main indicator<br />
For J-<strong>Link</strong>s up to V7, the main indicator is single color (Green). J-<strong>Link</strong> V8 comes with<br />
a bi-color indicator (Green & Red LED), which can show multiple colors: green, red<br />
and orange.<br />
J-<strong>Link</strong> / J-<strong>Trace</strong> (<strong>UM08001</strong>) © 2004-2010 SEGGER Microcontroller GmbH & Co. KG<br />
89
90 CHAPTER 5 Working with J-<strong>Link</strong> and J-<strong>Trace</strong><br />
5.2.1.1 Single color indicator (J-<strong>Link</strong> V7 and earlier)<br />
Indicator status Meaning<br />
GREEN, flashing at 10 Hz Emulator enumerates.<br />
GREEN, flickering<br />
5.2.1.2 Bi-color indicator (J-<strong>Link</strong> V8)<br />
Emulator is in operation. Whenever the emulator is executing<br />
a command, the LED is switched off temporarily.<br />
Flickering speed depends on target interface speed. At<br />
low interface speeds, operations typically take longer and<br />
the "OFF" periods are typically longer than at fast<br />
speeds.<br />
GREEN, constant Emulator has enumerated and is in Idle mode.<br />
GREEN, switched off for<br />
10ms once per second<br />
GREEN, flashing at 1 Hz<br />
Table 5.1: J-<strong>Link</strong> single color main indicator<br />
J-<strong>Link</strong> heart beat. Will be activated after the emulator<br />
has been in idle mode for at least 7 seconds.<br />
Emulator has a fatal error. This should not normally happen.<br />
Indicator status Meaning<br />
GREEN, flashing at 10 Hz Emulator enumerates.<br />
GREEN, flickering<br />
Emulator is in operation. Whenever the emulator is executing<br />
a command, the LED is switched off temporarily.<br />
Flickering speed depends on target interface speed. At<br />
low interface speeds, operations typically take longer and<br />
the "OFF" periods are typically longer than at fast<br />
speeds.<br />
GREEN, constant Emulator has enumerated and is in Idle mode.<br />
GREEN, switched off for<br />
10ms once per second<br />
ORANGE Reset is active on target.<br />
RED, flashing at 1 Hz<br />
Table 5.2: J-<strong>Link</strong> single color LED main color indicator<br />
J-<strong>Link</strong> heart beat. Will be activated after the emulator<br />
has been in idle mode for at least 7 seconds.<br />
Emulator has a fatal error. This should not normally happen.<br />
J-<strong>Link</strong> / J-<strong>Trace</strong> (<strong>UM08001</strong>) © 2004-2010 SEGGER Microcontroller GmbH & Co. KG
5.2.2 Input indicator<br />
Some newer J-<strong>Link</strong>s such as the J-<strong>Link</strong> Pro/Ultra come with additional input/output<br />
Indicators. The input indicator is used to give the user some information about the<br />
status of the target hardware.<br />
5.2.2.1 Bi-color input indicator<br />
Indicator status Meaning<br />
GREEN Target voltage could be measured. Target is connected.<br />
ORANGE<br />
RED<br />
Table 5.3: J-<strong>Link</strong> bi-color input indicator<br />
5.2.3 Output indicator<br />
Some newer J-<strong>Link</strong>s such as the J-<strong>Link</strong> Pro/Ultra come with additional input/output<br />
Indicators. The output indicator is used to give the user some information about the<br />
emulator-to-target connection.<br />
5.2.3.1 Bi-color output indicator<br />
Target voltage could be measured. RESET is pulled low<br />
(active) on target side.<br />
RESET is pulled low (active) on target side. If no target is<br />
connected, reset will be also active on target side.<br />
Indicator status Meaning<br />
OFF Target power supply via Pin 19 is not active.<br />
GREEN Target power supply via Pin 19 is active.<br />
ORANGE<br />
Target power supply via Pin 19 is active. Emulator pulls<br />
RESET low (active).<br />
RED Emulator pulls RESET low (active).<br />
Table 5.4: J-<strong>Link</strong> bi-color output indicator<br />
J-<strong>Link</strong> / J-<strong>Trace</strong> (<strong>UM08001</strong>) © 2004-2010 SEGGER Microcontroller GmbH & Co. KG<br />
91
92 CHAPTER 5 Working with J-<strong>Link</strong> and J-<strong>Trace</strong><br />
5.3 JTAG interface<br />
By default, only one ARM device is assumed to be in the JTAG scan chain. If you have<br />
multiple devices in the scan chain, you must properly configure it. To do so, you have<br />
to specify the exact position of the ARM device that should be addressed. Configuration of<br />
the scan is done by the target application. A target application can be a debugger<br />
such as the IAR C-SPY® debugger, ARM’s AXD using RDI, a flash programming application<br />
such as SEGGER’s J-Flash, or any other application using J-<strong>Link</strong> / J-<strong>Trace</strong>. It is<br />
the application’s responsibility to supply a way to configure the scan chain. Most<br />
applications offer a dialog box for this purpose.<br />
5.3.1 Multiple devices in the scan chain<br />
J-<strong>Link</strong> / J-<strong>Trace</strong> can handle multiple devices in the scan chain. This applies to hardware<br />
where multiple chips are connected to the same JTAG connector. As can be seen<br />
in the following figure, the TCK and TMS lines of all JTAG device are connected, while<br />
the TDI and TDO lines form a bus.<br />
Currently, up to 8 devices in the scan chain are supported. One or more of these<br />
devices can be ARM cores; the other devices can be of any other type but need to<br />
comply with the JTAG standard.<br />
5.3.1.1 Configuration<br />
TDI Device 1 TDO TDI Device 0 TDO<br />
TCK<br />
TMS<br />
TRST<br />
TDI TDO<br />
JTAG<br />
The configuration of the scan chain depends on the application used. Read JTAG<br />
interface on page 92 for further instructions and configuration examples.<br />
5.3.2 Sample configuration dialog boxes<br />
TCK<br />
As explained before, it is responsibility of the application to allow the user to configure<br />
the scan chain. This is typically done in a dialog box; some sample dialog boxes<br />
are shown below.<br />
J-<strong>Link</strong> / J-<strong>Trace</strong> (<strong>UM08001</strong>) © 2004-2010 SEGGER Microcontroller GmbH & Co. KG<br />
TMS<br />
TRST<br />
TCK<br />
TMS<br />
TRST
SEGGER J-Flash configuration dialog<br />
This dialog box can be found at Options|Project settings.<br />
J-<strong>Link</strong> / J-<strong>Trace</strong> (<strong>UM08001</strong>) © 2004-2010 SEGGER Microcontroller GmbH & Co. KG<br />
93
94 CHAPTER 5 Working with J-<strong>Link</strong> and J-<strong>Trace</strong><br />
SEGGER J-<strong>Link</strong> RDI configuration dialog box<br />
This dialog can be found under RDI|Configure for example in IAR Embedded Workbench®.<br />
For detailed information check the IAR Embedded Workbench user guide.<br />
IAR J-<strong>Link</strong> configuration dialog box<br />
This dialog box can be found under Project|Options.<br />
J-<strong>Link</strong> / J-<strong>Trace</strong> (<strong>UM08001</strong>) © 2004-2010 SEGGER Microcontroller GmbH & Co. KG
5.3.3 Determining values for scan chain configuration<br />
When do I need to configure the scan chain?<br />
If only one device is connected to the scan chain, the default configuration can be<br />
used. In other cases, J-<strong>Link</strong> / J-<strong>Trace</strong> may succeed in automatically recognizing the<br />
devices on the scan chain, but whether this is possible depends on the devices<br />
present on the scan chain.<br />
How do I configure the scan chain?<br />
2 values need to be known:<br />
• The position of the target device in the scan chain<br />
• The total number of bits in the instruction registers of the devices before the target<br />
device (IR len).<br />
The position can usually be seen in the schematic; the IR len can be found in the<br />
manual supplied by the manufacturers of the others devices.<br />
ARM7/ARM9 have an IR len of four.<br />
Sample configurations<br />
The diagram below shows a scan chain configuration sample with 2 devices connected<br />
to the JTAG port.<br />
Examples<br />
The following table shows a few sample configurations with 1,2 and 3 devices in different<br />
configurations.<br />
Device 0<br />
Chip(IR len)<br />
TDI Device 1 TDO TDI Device 0 TDO<br />
TCK<br />
TMS<br />
TRST<br />
Device 1<br />
Chip(IR len)<br />
TDI TDO<br />
Device 2<br />
Chip(IR len)<br />
JTAG<br />
Position IR len<br />
ARM(4) - - 0 0<br />
ARM(4) Xilinx(8) - 0 0<br />
Xilinx(8) ARM(4) - 1 8<br />
Xilinx(8) Xilinx(8) ARM(4) 2 16<br />
Table 5.5: Example scan chain configurations<br />
TCK<br />
J-<strong>Link</strong> / J-<strong>Trace</strong> (<strong>UM08001</strong>) © 2004-2010 SEGGER Microcontroller GmbH & Co. KG<br />
TMS<br />
TRST<br />
TCK<br />
TMS<br />
TRST<br />
95
96 CHAPTER 5 Working with J-<strong>Link</strong> and J-<strong>Trace</strong><br />
Device 0<br />
Chip(IR len)<br />
Device 1<br />
Chip(IR len)<br />
ARM(4) Xilinx(8) ARM(4) 0 0<br />
ARM(4) Xilinx(8) ARM(4) 2 12<br />
Xilinx(8) ARM(4) Xilinx(8) 1 8<br />
Table 5.5: Example scan chain configurations<br />
The target device is marked in blue.<br />
5.3.4 JTAG Speed<br />
There are basically three types of speed settings:<br />
• Fixed JTAG speed<br />
• Automatic JTAG speed<br />
• Adaptive clocking.<br />
These are explained below.<br />
5.3.4.1 Fixed JTAG speed<br />
The target is clocked at a fixed clock speed. The maximum JTAG speed the target can<br />
handle depends on the target itself. In general ARM cores without JTAG synchronization<br />
logic (such as ARM7-TDMI) can handle JTAG speeds up to the CPU speed, ARM<br />
cores with JTAG synchronization logic (such as ARM7-TDMI-S, ARM946E-S,<br />
ARM966EJ-S) can handle JTAG speeds up to 1/6 of the CPU speed.<br />
JTAG speeds of more than 10 MHz are not recommended.<br />
5.3.4.2 Automatic JTAG speed<br />
Selects the maximum JTAG speed handled by the TAP controller.<br />
Note: On ARM cores without synchronization logic, this may not work reliably,<br />
because the CPU core may be clocked slower than the maximum JTAG speed.<br />
5.3.4.3 Adaptive clocking<br />
Device 2<br />
Chip(IR len)<br />
Position IR len<br />
If the target provides the RTCK signal, select the adaptive clocking function to synchronize<br />
the clock to the processor clock outside the core. This ensures there are no<br />
synchronization problems over the JTAG interface.<br />
If you use the adaptive clocking feature, transmission delays, gate delays, and synchronization<br />
requirements result in a lower maximum clock frequency than with nonadaptive<br />
clocking.<br />
J-<strong>Link</strong> / J-<strong>Trace</strong> (<strong>UM08001</strong>) © 2004-2010 SEGGER Microcontroller GmbH & Co. KG
5.4 SWD interface<br />
The J-<strong>Link</strong> support ARMs Serial Wire Debug (SWD). SWD replaces the 5-pin JTAG port<br />
with a clock (SWDCLK) and a single bi-directional data pin (SWDIO), providing all the<br />
normal JTAG debug and test functionality. SWDIO and SWCLK are overlaid on the<br />
TMS and TCK pins. In order to communicate with a SWD device, J-<strong>Link</strong> sends out<br />
data on SWDIO, synchronous to the SWCLK. With every rising edge of SWCLK, one<br />
bit of data is transmitted or received on the SWDIO.<br />
5.4.1 SWD speed<br />
Currently only fixed SWD speed is supported by J-<strong>Link</strong>. The target is clocked at a<br />
fixed clock speed. The SWD speed which is used for target communication should not<br />
exceed target CPU speed * 10. The maximum SWD speed which is supported by J-<br />
<strong>Link</strong> depends on the hardware version and model of J-<strong>Link</strong>. For more information<br />
about the maximum SWD speed for each J-<strong>Link</strong> / J-<strong>Trace</strong> model, please refer to J-<br />
<strong>Link</strong> / J-<strong>Trace</strong> models on page 20.<br />
5.4.2 SWO<br />
Serial Wire Output (SWO) support means support for a single pin output signal from<br />
the core. The Instrumentation <strong>Trace</strong> Macrocell (ITM) and Serial Wire Output (SWO)<br />
can be used to form a Serial Wire Viewer (SWV). The Serial Wire Viewer provides a<br />
low cost method of obtaining information from inside the MCU.<br />
Usually it should not be necessary to configure the SWO speed because this is usually<br />
done by the debugger.<br />
5.4.2.1 Max. SWO speeds<br />
The supported SWO speeds depend on the connected emulator. They can be retrieved<br />
from the emulator. Currently, the following are supported:<br />
Emulator Speed formula Resulting max. speed<br />
J-<strong>Link</strong> V6 6MHz/n, n >= 12 500kHz<br />
J-<strong>Link</strong> V7/V8 6MHz/n, n >= 1 6MHz<br />
J-<strong>Link</strong> Pro 6MHz/n, n >= 1 6MHz<br />
Table 5.6: J-<strong>Link</strong> supported SWO input speeds<br />
5.4.2.2 Configuring SWO speeds<br />
The max. SWO speed in practice is the max. speed which both, target and J-<strong>Link</strong> can<br />
handle. J-<strong>Link</strong> can handle the frequencies described in SWO on page 97 whereas the<br />
max. deviation between the target and the J-<strong>Link</strong> speed is about 3%.<br />
The computation of possible SWO speeds is typically done in the debugger. The SWO<br />
output speed of the CPU is determined by TRACECLKIN, which is normally the same<br />
as the CPU clock.<br />
Example1<br />
Target CPU running at 72 MHz. n is be between 1 and 8192.<br />
Possible SWO output speeds are:<br />
72MHz, 36MHz, 24MHz, ...<br />
J-<strong>Link</strong> V7: Supported SWO input speeds are: 6MHz / n, n>= 1:<br />
6MHz, 3MHz, 2MHz, 1.5MHz, ...<br />
J-<strong>Link</strong> / J-<strong>Trace</strong> (<strong>UM08001</strong>) © 2004-2010 SEGGER Microcontroller GmbH & Co. KG<br />
97
98 CHAPTER 5 Working with J-<strong>Link</strong> and J-<strong>Trace</strong><br />
Permitted combinations are:<br />
SWO output SWO input Deviation percent<br />
6MHz, n = 12 6MHz, n = 1 0<br />
3MHz, n = 24 3MHz, n = 2 0<br />
... ... = 1:<br />
6MHz, 3MHz, 2MHz, 1.5MHz, ...<br />
Permitted combinations are:<br />
SWO output SWO input Deviation percent<br />
2MHz, n = 5 2MHz, n = 3 0<br />
1MHz, n = 10 1MHz, n = 6 0<br />
769kHz, n = 13 750kHz, n = 8 2.53<br />
... ... ...<br />
Table 5.8: Permitted SWO speed combinations<br />
J-<strong>Link</strong> / J-<strong>Trace</strong> (<strong>UM08001</strong>) © 2004-2010 SEGGER Microcontroller GmbH & Co. KG
5.5 Multi-core debugging<br />
J-<strong>Link</strong> / J-<strong>Trace</strong> is able to debug multiple cores on one target system connected to the<br />
same scan chain. Configuring and using this feature is described in this section.<br />
5.5.1 How multi-core debugging works<br />
Multi-core debugging requires multiple debuggers or multiple instances of the same<br />
debugger. Two or more debuggers can use the same J-<strong>Link</strong> / J-<strong>Trace</strong> simultaneously.<br />
Configuring a debugger to work with a core in a multi-core environment does not<br />
require special settings. All that is required is proper setup of the scan chain for each<br />
debugger. This enables J-<strong>Link</strong> / J-<strong>Trace</strong> to debug more than one core on a target at<br />
the same time.<br />
The following figure shows a host, debugging two ARM cores with two instances of<br />
the same debugger.<br />
Debugger<br />
Instance 1<br />
ARM1<br />
Host (PC)<br />
USB<br />
J-<strong>Link</strong><br />
JTAG<br />
Debugger<br />
Instance 2<br />
Target hardware ARM2<br />
Both debuggers share the same physical connection. The core to debug is selected<br />
through the JTAG-settings as described below.<br />
J-<strong>Link</strong> / J-<strong>Trace</strong> (<strong>UM08001</strong>) © 2004-2010 SEGGER Microcontroller GmbH & Co. KG<br />
99
100 CHAPTER 5 Working with J-<strong>Link</strong> and J-<strong>Trace</strong><br />
5.5.2 Using multi-core debugging in detail<br />
1. Connect your target to J-<strong>Link</strong> / J-<strong>Trace</strong>.<br />
2. Start your debugger, for example IAR Embedded Workbench for ARM.<br />
3. Choose Project|Options and configure your scan chain. The picture below<br />
shows the configuration for the first ARM core on your target.<br />
4. Start debugging the first core.<br />
5. Start another debugger, for example another instance of IAR Embedded Workbench<br />
for ARM.<br />
J-<strong>Link</strong> / J-<strong>Trace</strong> (<strong>UM08001</strong>) © 2004-2010 SEGGER Microcontroller GmbH & Co. KG
6. Choose Project|Options and configure your second scan chain. The following<br />
dialog box shows the configuration for the second ARM core on your target.<br />
7. Start debugging your second core.<br />
Example:<br />
Core #1 Core #2 Core #3<br />
Cores to debug are marked in blue.<br />
5.5.3 Things you should be aware of<br />
Multi-core debugging is more difficult than single-core debugging. You should be<br />
aware of the pitfalls related to JTAG speed and resetting the target.<br />
5.5.3.1 JTAG speed<br />
TAP number<br />
debugger #1<br />
ARM7TDMI ARM7TDMI-S ARM7TDMI 0 1<br />
ARM7TDMI ARM7TDMI ARM7TDMI 0 2<br />
ARM7TDM<br />
I-S<br />
ARM7TDMI-S ARM7TDMI-S 1 2<br />
Table 5.9: Multicore debugging<br />
TAP number<br />
debugger #2<br />
Each core has its own maximum JTAG speed. The maximum JTAG speed of all cores<br />
in the same chain is the minimum of the maximum JTAG speeds.<br />
For example:<br />
Core #1: 2MHz maximum JTAG speed<br />
Core #2: 4MHz maximum JTAG speed<br />
Scan chain: 2MHz maximum JTAG speed<br />
J-<strong>Link</strong> / J-<strong>Trace</strong> (<strong>UM08001</strong>) © 2004-2010 SEGGER Microcontroller GmbH & Co. KG<br />
101
102 CHAPTER 5 Working with J-<strong>Link</strong> and J-<strong>Trace</strong><br />
5.5.3.2 Resetting the target<br />
All cores share the same RESET line. You should be aware that resetting one core<br />
through the RESET line means resetting all cores which have their RESET pins connected<br />
to the RESET line on the target.<br />
J-<strong>Link</strong> / J-<strong>Trace</strong> (<strong>UM08001</strong>) © 2004-2010 SEGGER Microcontroller GmbH & Co. KG
5.6 Connecting multiple J-<strong>Link</strong>s / J-<strong>Trace</strong>s to your PC<br />
You can connect up to 4 J-<strong>Link</strong>s / J-<strong>Trace</strong>s to your PC. In this case, all J-<strong>Link</strong>s / J-<br />
<strong>Trace</strong>s must have different USB-addresses. The default USB-address is 0.<br />
In order to do this, 3 J-<strong>Link</strong>s / J-<strong>Trace</strong>s must be configured as described below. Every<br />
J-<strong>Link</strong> / J-<strong>Trace</strong> need its own J-<strong>Link</strong> USB driver which can be downloaded from<br />
www.segger.com.<br />
This feature is supported by J-<strong>Link</strong> Rev. 5.0 and up and by J-<strong>Trace</strong>.<br />
5.6.1 How does it work?<br />
USB devices are identified by the OS by their product id, vendor id and serial number.<br />
The serial number reported by J-<strong>Link</strong>s / J-<strong>Trace</strong>s is always the same. The product id<br />
depends on the configured USB-address.<br />
• The vendor id (VID) representing SEGGER is always 1366<br />
• The product id (PID) for J-<strong>Link</strong> / J-<strong>Trace</strong> #1 is 101<br />
• The product id (PID) for J-<strong>Link</strong> / J-<strong>Trace</strong> #2 is 102 and so on.<br />
A different PID means that J-<strong>Link</strong> / J-<strong>Trace</strong> is identified as a different device, requiring<br />
a new driver. The driver for a new J-<strong>Link</strong> device will be installed automatically.<br />
The sketch below shows a host, running two application programs. Each application<br />
communicates with one ARM core via a separate J-<strong>Link</strong>.<br />
Application<br />
Instance 1<br />
USB<br />
J-<strong>Link</strong><br />
1<br />
JTAG<br />
ARM1<br />
Target hardware 1<br />
Host (PC)<br />
Application<br />
Instance 2<br />
ARM2<br />
J-<strong>Link</strong> / J-<strong>Trace</strong> (<strong>UM08001</strong>) © 2004-2010 SEGGER Microcontroller GmbH & Co. KG<br />
USB<br />
J-<strong>Link</strong><br />
2<br />
JTAG<br />
Target hardware 2<br />
103
104 CHAPTER 5 Working with J-<strong>Link</strong> and J-<strong>Trace</strong><br />
5.6.2 Configuring multiple J-<strong>Link</strong>s / J-<strong>Trace</strong>s<br />
8. Start J<strong>Link</strong>.exe to view your hardware version. Your J-<strong>Link</strong> needs to be V5.0 or<br />
up to continue. For J-<strong>Trace</strong> the Version does not matter.<br />
9. Type usbaddr = 1 to set the J-<strong>Link</strong> / J-<strong>Trace</strong> #1.<br />
10. Unplug J-<strong>Link</strong> / J-<strong>Trace</strong> and then plug it back in.<br />
11. The system will recognize and automatically install a new J-<strong>Link</strong> / J-<strong>Trace</strong>.<br />
12. you can verify the driver installation by consulting the Windows device manager.<br />
If the driver is installed and your J-<strong>Link</strong> / J-<strong>Trace</strong> is connected to your computer,<br />
the device manager should list the J-<strong>Link</strong> USB drivers as a node below "Universal<br />
Serial Bus controllers" as shown in the following screenshot:<br />
J-<strong>Link</strong> / J-<strong>Trace</strong> (<strong>UM08001</strong>) © 2004-2010 SEGGER Microcontroller GmbH & Co. KG
5.6.3 Connecting to a J-<strong>Link</strong> / J-<strong>Trace</strong> with non default USB-<br />
Address<br />
Restart J<strong>Link</strong>.exe and type usb 1 to connect to J-<strong>Link</strong> / J-<strong>Trace</strong> #1.<br />
You may connect other J-<strong>Link</strong>s / J-<strong>Trace</strong>s to your PC and connect to them as well. To<br />
connect to an unconfigured J-<strong>Link</strong> / J-<strong>Trace</strong> (with default address "0"), restart<br />
J<strong>Link</strong>.exe or type usb 0.<br />
J-<strong>Link</strong> / J-<strong>Trace</strong> (<strong>UM08001</strong>) © 2004-2010 SEGGER Microcontroller GmbH & Co. KG<br />
105
106 CHAPTER 5 Working with J-<strong>Link</strong> and J-<strong>Trace</strong><br />
5.7 J-<strong>Link</strong> control panel<br />
Since software version V3.86 J-<strong>Link</strong> the J-<strong>Link</strong> control panel window allows the user<br />
to monitor the J-<strong>Link</strong> status and the target status information in real-time. It also<br />
allows the user to configure the use of some J-<strong>Link</strong> features such as flash download,<br />
flash breakpoints and ARM instruction set simulation. The J-<strong>Link</strong> control panel window<br />
can be accessed via the J-<strong>Link</strong> tray icon in the tray icon list. This icon is available<br />
when the debug session is started.<br />
To open the status window, simply click on the tray icon.<br />
5.7.1 Tabs<br />
The J-<strong>Link</strong> status window supports different features which are grouped in tabs. The<br />
organization of each tab and the functionality which is behind these groups will be<br />
explained in this section<br />
5.7.1.1 General<br />
In the General section, general information about J-<strong>Link</strong> and the target hardware<br />
are shown. Moreover the following general settings can be configured:<br />
• Show tray icon: If this checkbox is disabled the tray icon will not show from the<br />
next time the DLL is loaded.<br />
• Start minimized: If this checkbox is disabled the J-<strong>Link</strong> status window will show<br />
up automatically each time the DLL is loaded.<br />
• Always on top: if this checkbox is enabled the J-<strong>Link</strong> status window is always<br />
visible even if other windows will be opened.<br />
The general information about target hardware and J-<strong>Link</strong> which are shown in this<br />
section, are:<br />
• Process: Shows the path of the file which loaded the DLL.<br />
• J-<strong>Link</strong>: Shows OEM of the connected J-<strong>Link</strong>, the hardware version and the Serial<br />
number. If no J-<strong>Link</strong> is connected it shows "not connected" and the color indicator<br />
is red.<br />
• Target interface: Shows the selected target interface (JTAG/SWD) and the current<br />
JTAG speed. The target current is also shown. (Only visible if J-<strong>Link</strong> is connected)<br />
• Endian: Shows the target endianess (Only visible if J-<strong>Link</strong> is connected)<br />
• Device: Shows the selected device for the current debug session.<br />
• License: Opens the J-<strong>Link</strong> license manager.<br />
• About: Opens the about dialog.<br />
J-<strong>Link</strong> / J-<strong>Trace</strong> (<strong>UM08001</strong>) © 2004-2010 SEGGER Microcontroller GmbH & Co. KG
5.7.1.2 Settings<br />
In the Settings section project- and debug-specific settings can be set. It allows the<br />
configuration of the use of flash download and flash breakpoints and some other target<br />
specific settings which will be explained in this topic. Settings are saved in the<br />
configuration file. This configuration file needs to be set by the debugger. If the<br />
debugger does not set it, settings can not be saved. All settings can only the changed<br />
by the user himself. All settings which are modified during the debug session have to<br />
be saved by pressing Save settings, otherwise they are lost when the debug session<br />
is closed.<br />
Section: Flash download<br />
In this section, settings for the use of the J-<strong>Link</strong> ARM FlashDL feature and related<br />
settings can be configured. When a license for J-<strong>Link</strong> ARM FlashDL is found, the<br />
color indicator is green and "License found" appears right to the J-<strong>Link</strong> ARM<br />
FlashDL usage settings.<br />
• Auto: This is the default setting of J-<strong>Link</strong> ARM FlashDL usage. If a license is<br />
found J-<strong>Link</strong> ARM FlashDL is enabled. Otherwise J-<strong>Link</strong> ARM FlashDL will be<br />
disabled internally.<br />
• On: Enables the J-<strong>Link</strong> ARM FlashDL feature. If no license has been found an<br />
error message appears.<br />
• Off: Disables the J-<strong>Link</strong> ARM FlashDL feature.<br />
• Skip download on CRC match: J-<strong>Link</strong> checks the CRC of the flash content to<br />
determine if the current application has already been downloaded to the flash. If<br />
a CRC match occurs, the flash download is not necessary and skipped. (Only<br />
available if J-<strong>Link</strong> ARM FlashDL usage is configured as Auto or On)<br />
• Verify download: If this checkbox is enabled J-<strong>Link</strong> verifies the flash content<br />
after the download. (Only available if J-<strong>Link</strong> ARM FlashDL usage is configured<br />
as Auto or On)<br />
Section: Flash breakpoints:<br />
In this section, settings for the use of the FlashBP feature and related settings can<br />
be configured. When a license for FlashBP is found, the color indicator is green and<br />
"License found" appears right to the FlashBP usage settings.<br />
• Auto: This is the default setting of FlashBP usage. If a license has been found<br />
the FlashBP feature will be enabled. Otherwise FlashBP will be disabled internally.<br />
• On: Enables the FlashBP feature. If no license has been found an error message<br />
appears.<br />
• Off: Disables the FlashBP feature.<br />
• Show window during program: When this checkbox is enabled the "Programming<br />
flash" window is shown when flash is re-programmed in order to set/clear<br />
flash breakpoints.<br />
J-<strong>Link</strong> / J-<strong>Trace</strong> (<strong>UM08001</strong>) © 2004-2010 SEGGER Microcontroller GmbH & Co. KG<br />
107
108 CHAPTER 5 Working with J-<strong>Link</strong> and J-<strong>Trace</strong><br />
Flash download and flash breakpoints independent settings<br />
These settings do not belong to the J-<strong>Link</strong> flash download and flash breakpoints settings<br />
section. They can be configured without any license needed.<br />
• Log file: Shows the path where the J-<strong>Link</strong> log file is placed. It is possible to<br />
override the selection manually by enabling the Override checkbox. If the Override<br />
checkbox is enabled a button appears which let the user choose the new<br />
location of the log file.<br />
• Settings file: Shows the path where the configuration file is placed. This configuration<br />
file contains all the settings which can be configured in the Settings tab.<br />
• Override device selection: If this checkbox is enabled, a dropdown list<br />
appears, which allows the user to set a device manually. This especially makes<br />
sense when J-<strong>Link</strong> can not identify the device name given by the debugger or if a<br />
particular device is not yet known to the debugger, but to the J-<strong>Link</strong> software.<br />
• Allow caching of flash contents: If this checkbox is enabled, the flash contents<br />
are cached by J-<strong>Link</strong> to avoid reading data twice. This speeds up the transfer<br />
between debugger and target.<br />
• Allow instruction set simulation: If this checkbox is enabled, ARM instructions<br />
will be simulated as far as possible. This speeds up single stepping, especially<br />
when FlashBPs are used.<br />
• Save settings: When this button is pushed, the current settings in the Settings<br />
tab will be saved in a configuration file. This file is created by J-<strong>Link</strong> and will be<br />
created for each project and each project configuration (e.g. Debug_RAM,<br />
Debug_Flash). If no settings file is given, this button is not visible.<br />
• Modify breakpoints during execution: This dropdown box allows the user to<br />
change the behavior of the DLL when setting breakpoints if the CPU is running.<br />
The following options are available:<br />
Allow: Allows settings breakpoints while the CPU is running. If the CPU needs to<br />
be halted in order to set the breakpoint, the DLL halts the CPU, sets the breakpoints<br />
and restarts the CPU.<br />
Allow if CPU does not need to be halted: Allows setting breakpoints while the<br />
CPU is running, if it does not need to be halted in order to set the breakpoint. If<br />
the CPU has to be halted the breakpoint is not set.<br />
Ask user if CPU needs to be halted: If the user tries to set a breakpoint while<br />
the CPU is running and the CPU needs to be halted in order to set the breakpoint,<br />
the user is asked if the breakpoint should be set. If the breakpoint can be set<br />
without halting the CPU, the breakpoint is set without explicitly confirmation by<br />
the user.<br />
Do not allow: It is not allowed to set breakpoints while the CPU is running.<br />
J-<strong>Link</strong> / J-<strong>Trace</strong> (<strong>UM08001</strong>) © 2004-2010 SEGGER Microcontroller GmbH & Co. KG
5.7.1.3 Break/Watch<br />
In the Break/Watch section all breakpoints and watchpoints which are in the DLL<br />
internal breakpoint and watchpoint list are shown.<br />
Section: Code<br />
Lists all breakpoints which are in the DLL internal breakpoint list are shown.<br />
• Handle: Shows the handle of the breakpoint.<br />
• Address: Shows the address where the breakpoint is set.<br />
• Mode: Describes the breakpoint type (ARM/THUMB)<br />
• Permission: Describes the breakpoint implementation flags.<br />
• Implementation: Describes the breakpoint implementation type. The breakpoint<br />
types are: RAM, Flash, Hard. An additional TBC (to be cleared) or TBS (to<br />
be set) gives information about if the breakpoint is (still) written to the target or<br />
if it’s just in the breakpoint list to be written/cleared.<br />
Note: It is possible for the debugger to bypass the breakpoint functionality of<br />
the J-<strong>Link</strong> software by writing to the debug registers directly. This means for ARM7/<br />
ARM9 cores write accesses to the ICE registers, for Cortex-M3 devices write accesses<br />
to the memory mapped flash breakpoint registers and in general simple write<br />
accesses for software breakpoints (if the program is located in RAM). In these cases,<br />
the J-<strong>Link</strong> software can not determine the breakpoints set and the list is empty.<br />
Section: Data<br />
In this section, all data breakpoints which are listed in the DLL internal breakpoint<br />
list are shown.<br />
• Handle: Shows the handle of the data breakpoint.<br />
• Address: Shows the address where the data breakpoint is set.<br />
• AddrMask: Specifies which bits of Address are disregarded during the comparison<br />
for a data breakpoint match. (A 1 in the mask means: disregard this bit)<br />
• Data: Shows on which data to be monitored at the address where the data<br />
breakpoint is set.<br />
• Data Mask: Specifies which bits of Data are disregarded during the comparison<br />
• for a data breakpoint match. (A 1 in the mask means: disregard this bit)<br />
• Ctrl: Specifies the access type of the data breakpoint (read/write).<br />
• CtrlMask: Specifies which bits of Ctrl are disregarded during the comparison for<br />
a data breakpoint match.<br />
5.7.1.4 Log<br />
In this section the log output of the DLL is shown. The user can determine which<br />
function calls should be shown in the log window.<br />
J-<strong>Link</strong> / J-<strong>Trace</strong> (<strong>UM08001</strong>) © 2004-2010 SEGGER Microcontroller GmbH & Co. KG<br />
109
110 CHAPTER 5 Working with J-<strong>Link</strong> and J-<strong>Trace</strong><br />
Available function calls to log: Register read/write, Memory read/write, set/clear<br />
breakpoint, step, go, halt, is halted.<br />
5.7.1.5 CPU Regs<br />
In this section the name and the value of the CPU registers are shown.<br />
5.7.1.6 Target Power<br />
In this section currently just the power consumption of the target hardware is shown.<br />
J-<strong>Link</strong> / J-<strong>Trace</strong> (<strong>UM08001</strong>) © 2004-2010 SEGGER Microcontroller GmbH & Co. KG
5.7.1.7 SWV<br />
In this section SWV information are shown.<br />
• Status: Shows the encoding and the baudrate of the SWV data received by the<br />
target (Manchester/UART, currently J-<strong>Link</strong> only supports UART encoding).<br />
• Bytes in buffer: Shows how many bytes are in the DLL SWV data buffer.<br />
• Bytes transferred: Shows how many bytes have been transferred via SWV,<br />
since the debug session has been started.<br />
• Refresh counter: Shows how often the SWV information in this section has<br />
been updated since the debug session has been started.<br />
• Host buffer: Shows the reserved buffer size for SWV data, on the host side.<br />
• Emulator buffer: Shows the reserved buffer size for SWV data, on the emulator<br />
side.<br />
J-<strong>Link</strong> / J-<strong>Trace</strong> (<strong>UM08001</strong>) © 2004-2010 SEGGER Microcontroller GmbH & Co. KG<br />
111
112 CHAPTER 5 Working with J-<strong>Link</strong> and J-<strong>Trace</strong><br />
5.8 Reset strategies<br />
J-<strong>Link</strong> / J-<strong>Trace</strong> supports different reset strategies. This is necessary because there is<br />
no single way of resetting and halting an ARM core before it starts to execute instructions.<br />
For example reset strategies which use the reset pin can not succeed on targets<br />
where the reset pin of the CPU is not connected to the reset pin of the JTAG<br />
connector. Reset strategy 0 is always the recommended one because it has been<br />
adapted to work on every target even if the reset pin (Pin 15) is not connected.<br />
What is the problem if the core executes some instructions after RESET?<br />
The instructions executed can cause various problems. Some cores can be completely<br />
"confused", which means they can not be switched into debug mode (CPU can not be<br />
halted). In other cases, the CPU may already have initialized some hardware components,<br />
causing unexpected interrupts or worse, the hardware may have been initialized<br />
with illegal values. In some of these cases, such as illegal PLL settings, the CPU<br />
may be operated beyond specification, possibly locking the CPU.<br />
5.8.1 Strategies for ARM 7/9 devices<br />
5.8.1.1 Type 0: Hardware, halt after reset (normal)<br />
The hardware reset pin is used to reset the CPU. After reset release, J-<strong>Link</strong> continuously<br />
tries to halt the CPU. This typically halts the CPU shortly after reset release;<br />
the CPU can in most systems execute some instructions before it is halted. The number<br />
of instructions executed depends primarily on the JTAG speed: the higher the<br />
JTAG speed, the faster the CPU can be halted.<br />
Some CPUs can actually be halted before executing any instruction, because the start<br />
of the CPU is delayed after reset release. If a pause has been specified, J-<strong>Link</strong> waits<br />
for the specified time before trying to halt the CPU. This can be useful if a bootloader<br />
which resides in flash or ROM needs to be started after reset.<br />
This reset strategy is typically used if nRESET and nTRST are coupled. If nRESET and<br />
nTRST are coupled, either on the board or the CPU itself, reset clears the breakpoint,<br />
which means that the CPU can not be stopped after reset with the BP@0 reset strategy.<br />
5.8.1.2 Type 1: Hardware, halt with BP@0<br />
The hardware reset pin is used to reset the CPU. Before doing so, the ICE breaker is<br />
programmed to halt program execution at address 0; effectively, a breakpoint is set<br />
at address 0. If this strategy works, the CPU is actually halted before executing a single<br />
instruction.<br />
This reset strategy does not work on all systems for two reasons:<br />
• If nRESET and nTRST are coupled, either on the board or the CPU itself, reset<br />
clears the breakpoint, which means the CPU is not stopped after reset.<br />
• Some MCUs contain a bootloader program (sometimes called kernel), which<br />
needs to be executed to enable JTAG access.<br />
5.8.1.3 Type 2: Software, for Analog Devices ADuC7xxx MCUs<br />
This reset strategy is a software strategy. The CPU is halted and performs a sequence<br />
which causes a peripheral reset. The following sequence is executed:<br />
• The CPU is halted<br />
• A software reset sequence is downloaded to RAM<br />
• A breakpoint at address 0 is set<br />
• The software reset sequence is executed.<br />
This sequence performs a reset of CPU and peripherals and halts the CPU before executing<br />
instructions of the user program. It is the recommended reset sequence for<br />
Analog Devices ADuC7xxx MCUs and works with these chips only.<br />
J-<strong>Link</strong> / J-<strong>Trace</strong> (<strong>UM08001</strong>) © 2004-2010 SEGGER Microcontroller GmbH & Co. KG
5.8.1.4 Type 3: No reset<br />
No reset is performed. Nothing happens.<br />
5.8.1.5 Type 4: Hardware, halt with WP<br />
The hardware RESET pin is used to reset the CPU. After reset release, J-<strong>Link</strong> continuously<br />
tries to halt the CPU using a watchpoint. This typically halts the CPU shortly<br />
after reset release; the CPU can in most systems execute some instructions before it<br />
is halted.<br />
The number of instructions executed depends primarily on the JTAG speed: the<br />
higher the JTAG speed, the faster the CPU can be halted. Some CPUs can actually be<br />
halted before executing any instruction, because the start of the CPU is delayed after<br />
reset release<br />
5.8.1.6 Type 5: Hardware, halt with DBGRQ<br />
The hardware RESET pin is used to reset the CPU. After reset release, J-<strong>Link</strong> continuously<br />
tries to halt the CPU using the DBGRQ. This typically halts the CPU shortly after<br />
reset release; the CPU can in most systems execute some instructions before it is<br />
halted.<br />
The number of instructions executed depends primarily on the JTAG speed: the<br />
higher the JTAG speed, the faster the CPU can be halted. Some CPUs can actually be<br />
halted before executing any instruction, because the start of the CPU is delayed after<br />
reset release.<br />
5.8.1.7 Type 6: Software<br />
This reset strategy is only a software reset. "Software reset" means basically no<br />
reset, just changing the CPU registers such as PC and CPSR. This reset strategy sets<br />
the CPU registers to their after-Reset values:<br />
• PC = 0<br />
• CPSR = 0xD3 (Supervisor mode, ARM, IRQ / FIQ disabled)<br />
• All SPSR registers = 0x10<br />
• All other registers (which are unpredictable after reset) are set to 0.<br />
• The hardware RESET pin is not affected.<br />
5.8.1.8 Type 7: Reserved<br />
Reserved reset type.<br />
5.8.1.9 Type 8: Software, for ATMEL AT91SAM7 MCUs<br />
The reset pin of the device is disabled by default. This means that the reset strategies<br />
which rely on the reset pin (low pulse on reset) do not work by default. For this<br />
reason a special reset strategy has been made available.<br />
It is recommended to use this reset strategy. This special reset strategy resets the<br />
peripherals by writing to the RSTC_CR register. Resetting the peripherals puts all<br />
peripherals in the defined reset state. This includes memory mapping register, which<br />
means that after reset flash is mapped to address 0. It is also possible to achieve the<br />
same effect by writing 0x4 to the RSTC_CR register located at address 0xfffffd00.<br />
5.8.1.10 Type 9: Hardware, for NXP LPC MCUs<br />
After reset a bootloader is mapped at address 0 on ARM 7 LPC devices. This reset<br />
strategy performs a reset via reset strategy Type 1 in order to reset the CPU. It also<br />
ensures that flash is mapped to address 0 by writing the MEMMAP register of the LPC.<br />
This reset strategy is the recommended one for all ARM 7 LPC devices.<br />
J-<strong>Link</strong> / J-<strong>Trace</strong> (<strong>UM08001</strong>) © 2004-2010 SEGGER Microcontroller GmbH & Co. KG<br />
113
114 CHAPTER 5 Working with J-<strong>Link</strong> and J-<strong>Trace</strong><br />
5.8.2 Strategies for Cortex-M devices<br />
J-<strong>Link</strong> supports different specific reset strategies for the Cortex-M cores. All of the<br />
following reset strategies are available in JTAG and in SWD mode. All of them halt the<br />
CPU after the reset.<br />
5.8.2.1 Type 0: Normal<br />
This is the default strategy. It works well for most Cortex-M devices. J-<strong>Link</strong> tries to<br />
reset both, core and peripherals by setting the SYSRESETREQ & VECTRESET bits in<br />
the AIRCR. The VC_CORERESET bit is used to halt the CPU before it executes a single<br />
instruction.<br />
On devices that are known to have a bootloader, this bootloader is started after the<br />
core & peripherals have been reset and stopped before trying to start the application<br />
program, thus ensuring that the bootloader (which may perform important initialisations)<br />
has a chance to do so.<br />
This type of RESET can fail:<br />
One reason is that the CPU is in power down state. In this case, the reset pin is used<br />
to reset the device. If this fails as well, then Connect-under-Reset is executed.<br />
Other reasons why the initial reset may not work are typically shortcomings in the<br />
silicon (sometimes only in Beta silicon). Some of these reasons are:<br />
• Watchdog continues to run when CPU is halted<br />
• SYSRESETREQ also reset debug unit<br />
5.8.2.2 Type 1: Core<br />
Only the core is reset via the VECTRESET bit. The peripherals are not affected. After<br />
setting the VECTRESET bit, J-<strong>Link</strong> waits for the S_RESET_ST bit in the Debug Halting<br />
Control and Status Register (DHCSR) to first become high and then low afterwards.<br />
The CPU does not start execution of the program because J-<strong>Link</strong> sets the<br />
VC_CORERESET bit before reset, which causes the CPU to halt before execution of<br />
the first instruction.<br />
5.8.2.3 Type 2: ResetPin<br />
J-<strong>Link</strong> pulls its RESET pin low to reset the core and the peripherals. This normally<br />
causes the CPU RESET pin of the target device to go low as well, resulting in a reset<br />
of both CPU and peripherals. This reset strategy will fail if the RESET pin of the target<br />
device is not pulled low. The CPU does not start execution of the program because J-<br />
<strong>Link</strong> sets the VC_CORERESET bit before reset, which causes the CPU to halt before<br />
execution of the first instruction.<br />
5.8.2.4 Type 3: Connect under Reset<br />
J-<strong>Link</strong> connects to the target while keeping Reset active (reset is pulled low and<br />
remains low while connecting to the target). This is the recommended reset strategy<br />
for STM32 devices. This reset strategy has been designed for the case that communication<br />
with the core is not possible in normal mode so the VC_CORERESET bit can not<br />
be set in order to guarantee that the core is halted immediately after reset.<br />
5.8.2.5 Type 4: Reset core & peripherals, halt after bootloader<br />
Same as type 0, but bootloader is always executed. This reset strategy has been<br />
designed for MCUs/CPUs which have a bootloader located in ROM which needs to run<br />
at first, after reset (since it might initialize some target settings to their reset state).<br />
When using this reset strategy, J-<strong>Link</strong> will let the bootloader run after reset and halts<br />
the target immediately after the bootloader and before the target application is<br />
started. This is the recommended reset strategy for LPC11xx and LPC13xx devices<br />
where a bootloader should execute after reset to put the chip into the "real" reset<br />
state.<br />
J-<strong>Link</strong> / J-<strong>Trace</strong> (<strong>UM08001</strong>) © 2004-2010 SEGGER Microcontroller GmbH & Co. KG
5.8.2.6 Type 5: Reset core & peripherals, halt before bootloader<br />
Same as Type 0, but bootloader is never executed. Not normally used, except in situations<br />
where the bootloader needs to be debugged.<br />
5.8.2.7 Type 6: Reset for Freescale Kinetis devices<br />
Performs a via reset strategy 0 (normal) first in order to reset the core & peripherals<br />
and halt the CPU immediately after reset. After the CPU is halted, the watchdog is<br />
disabled, since the watchdog is running after reset by default and if the target application<br />
does not feed the watchdog, J-<strong>Link</strong> loses connection to the device since it is<br />
reset permanently.<br />
J-<strong>Link</strong> / J-<strong>Trace</strong> (<strong>UM08001</strong>) © 2004-2010 SEGGER Microcontroller GmbH & Co. KG<br />
115
116 CHAPTER 5 Working with J-<strong>Link</strong> and J-<strong>Trace</strong><br />
5.9 Using DCC for memory access<br />
The ARM7/9 architecture requires cooperation of the CPU to access memory when the<br />
CPU is running (not in debug mode). This means that memory can not normally be<br />
accessed while the CPU is executing the application program. The normal way to read<br />
or write memory is to halt the CPU (put it into debug mode) before accessing memory.<br />
Even if the CPU is restarted after the memory access, the real time behavior is<br />
significantly affected; halting and restarting the CPU costs typically multiple milliseconds.<br />
For this reason, most debuggers do not even allow memory access if the CPU is<br />
running.<br />
Fortunately, there is one other option: DCC (Direct communication channel) can be<br />
used to communicate with the CPU while it is executing the application program. All<br />
that is required is that the application program calls a DCC handler from time to<br />
time. This DCC handler typically requires less than 1 µs per call.<br />
The DCC handler, as well as the optional DCC abort handler, is part of the J-<strong>Link</strong> software<br />
package and can be found in the Samples\DCC\IAR directory of the package.<br />
5.9.1 What is required?<br />
• An application program on the host (typically a debugger) that uses DCC<br />
• A target application program that regularly calls the DCC handler<br />
• The supplied abort handler should be installed (optional)<br />
An application program that uses DCC is J<strong>Link</strong>.exe.<br />
5.9.2 Target DCC handler<br />
The target DCC handler is a simple C-file taking care of the communication. The function<br />
DCC_Process() needs to be called regularly from the application program or<br />
from an interrupt handler. If a RTOS is used, a good place to call the DCC handler is<br />
from the timer tick interrupt. In general, the more often the DCC handler is called,<br />
the faster memory can be accessed. On most devices, it is also possible to let the<br />
DCC generate an interrupt which can be used to call the DCC handler.<br />
5.9.3 Target DCC abort handler<br />
An optional DCC abort handler (a simple assembly file) can be included in the application.<br />
The DCC abort handler allows data aborts caused by memory reads/writes via<br />
DCC to be handled gracefully. If the data abort has been caused by the DCC communication,<br />
it returns to the instruction right after the one causing the abort, allowing<br />
the application program to continue to run. In addition to that, it allows the host to<br />
detect if a data abort occurred.<br />
In order to use the DCC abort handler, 3 things need to be done:<br />
• Place a branch to DCC_Abort at address 0x10 ("vector" used for data aborts)<br />
• Initialize the Abort-mode stack pointer to an area of at least 8 bytes of stack<br />
memory required by the handler<br />
• Add the DCC abort handler assembly file to the application<br />
J-<strong>Link</strong> / J-<strong>Trace</strong> (<strong>UM08001</strong>) © 2004-2010 SEGGER Microcontroller GmbH & Co. KG
5.10 J-<strong>Link</strong> script files<br />
In some situations it it necessary to customize some actions performed by J-<strong>Link</strong>. In<br />
most cases it is the connection sequence and/or the way in which a reset is performed<br />
by J-<strong>Link</strong>, since some custom hardware needs some special handling which<br />
can not be integrated into the generic part of the J-<strong>Link</strong> software. J-<strong>Link</strong> script files<br />
are written in C-like syntax in order to have an easy start to learning how to write J-<br />
<strong>Link</strong> script files. The script file syntax does support most statements (if-else, while,<br />
declaration of variables, ...) which are allowed in C, but not all of them. Moverover,<br />
there are some statements that are script file specific. The script file allows maximum<br />
flexibility, so almost any target initialization which is necessary, can be supported.<br />
5.10.1 Actions that can be customized<br />
The script file support allows customizing of different actions performed by J-<strong>Link</strong>. If<br />
an generic-implemented action is replaced by an action defined in a scriptfile<br />
depends on if the corresponding function is present in the scriptfile. In the following<br />
all J-<strong>Link</strong> actions which can be customized using a script file, are listed and<br />
explained.<br />
5.10.1.1 ResetTarget()<br />
Decsription<br />
If present, it replaces the reset strategy performed by the DLL when issuing a reset.<br />
Prototype<br />
void ResetTarget(void);<br />
5.10.1.2 InitEMU()<br />
Decsription<br />
If present, it allows configuration of the emulator prior to starting target communication.<br />
Currently this function is only used to configure if the target which is connected<br />
to J-<strong>Link</strong> has an ETB or not. For more information how to configure the existence of<br />
an ETB, please refer to Global DLL variables on page 120.<br />
Prototype<br />
void InitEMU(void);<br />
5.10.1.3 InitTarget()<br />
Decsription<br />
If present, it can replace the auto-detection capability of J-<strong>Link</strong>. Some targets can<br />
not be auto-detected by J-<strong>Link</strong> since some special target initialization is necessary<br />
before communication with the core is possible. Moreover, J-<strong>Link</strong> uses a TAP reset to<br />
get the JTAG IDs of the devices in the JTAG chain. On some targets this disables<br />
access to the core.<br />
Prototype<br />
void InitTarget(void);<br />
5.10.2 Script file API functions<br />
In the following, the API functions which can be used in a script file to communicate<br />
with the DLL are explained.<br />
J-<strong>Link</strong> / J-<strong>Trace</strong> (<strong>UM08001</strong>) © 2004-2010 SEGGER Microcontroller GmbH & Co. KG<br />
117
118 CHAPTER 5 Working with J-<strong>Link</strong> and J-<strong>Trace</strong><br />
5.10.2.1 MessageBox()<br />
Description<br />
Outputs a string in a message box.<br />
Prototype<br />
__api__ int MessageBox(const char * sMsg);<br />
5.10.2.2 MessageBox1()<br />
Description<br />
Outputs a constant character string in a message box. In addition to that, a given<br />
value (can be a constant value, the return value of a function or the a variable) is<br />
added, right behind the string.<br />
Prototype<br />
__api__ int MessageBox1(const char * sMsg, int v);<br />
5.10.2.3 Report()<br />
Description<br />
Outputs a string on stdio.<br />
Prototype<br />
__api__ int Report(const char * sMsg);<br />
5.10.2.4 JTAG_SetDeviceId()<br />
Description<br />
Sets the JTAG Id of a specified device, in the JTAG chain. The index of the device<br />
depends on its position in the JTAG chain. The device closest to TDO has index 0. The<br />
Id is used by the DLL to recognize the device.<br />
Before calling this function, please make sure that the JTAG chain has been configured<br />
correctly by setting the appropriate global DLL variables. For more information<br />
about the known global DLL variables, please refer to Global DLL variables on<br />
page 120.<br />
Prototype<br />
__api__ int JTAG_SetDeviceId(int DeviceIndex, unsigned int Id);<br />
5.10.2.5 JTAG_GetDeviceId()<br />
Description<br />
Retrieves the JTAG Id of a specified device, in the JTAG chain. The index of the device<br />
depends on its position in the JTAG chain. The device closest to TDO has index 0.<br />
Prototype<br />
__api__ int JTAG_GetDeviceId(int DeviceIndex);<br />
5.10.2.6 JTAG_WriteIR()<br />
Description<br />
Writes a JTAG instruction.<br />
Before calling this function, please make sure that the JTAG chain has been configured<br />
correctly by setting the appropriate global DLL variables. For more information<br />
about the known global DLL variables, please refer to Global DLL variables on<br />
page 120.<br />
J-<strong>Link</strong> / J-<strong>Trace</strong> (<strong>UM08001</strong>) © 2004-2010 SEGGER Microcontroller GmbH & Co. KG
Prototype<br />
__api__ int JTAG_WriteIR(unsigned int Cmd);<br />
5.10.2.7 JTAG_StoreIR()<br />
Description<br />
Stores a JTAG instruction in the DLL JTAG buffer.<br />
Before calling this function, please make sure that the JTAG chain has been configured<br />
correctly by setting the appropriate global DLL variables. For more information<br />
about the known global DLL variables, please refer to Global DLL variables on<br />
page 120.<br />
Prototype<br />
__api__ int JTAG_StoreIR(unsigned int Cmd);<br />
5.10.2.8 JTAG_WriteDR()<br />
Description<br />
Writes JTAG data.<br />
Before calling this function, please make sure that the JTAG chain has been configured<br />
correctly by setting the appropriate global DLL variables. For more information<br />
about the known global DLL variables, please refer to Global DLL variables on<br />
page 120.<br />
Prototype<br />
__api__ int JTAG_WriteDR(unsigned __int64 tdi, int NumBits);<br />
5.10.2.9 JTAG_StoreDR()<br />
Description<br />
Stores JTAG data in the DLL JTAG buffer.<br />
Before calling this function, please make sure that the JTAG chain has been configured<br />
correctly by setting the appropriate global DLL variables. For more information<br />
about the known global DLL variables, please refer to Global DLL variables on<br />
page 120.<br />
Prototype<br />
__api__ int JTAG_StoreDR(unsigned __int64 tdi, int NumBits);<br />
5.10.2.10JTAG_Write()<br />
Description<br />
Writes a JTAG sequence (max. 64 bits per pin).<br />
Prototype<br />
__api__ int JTAG_Write(unsigned __int64 tms, unsigned __int64 tdi, int<br />
NumBits);<br />
5.10.2.11JTAG_Store()<br />
Description<br />
Stores a JTAG seuqnece (max. 64 bits per pin) in the DLL JTAG buffer.<br />
Prototype<br />
__api__ int JTAG_Store(unsigned __int64 tms, unsigned __int64 tdi, int<br />
NumBits);<br />
J-<strong>Link</strong> / J-<strong>Trace</strong> (<strong>UM08001</strong>) © 2004-2010 SEGGER Microcontroller GmbH & Co. KG<br />
119
120 CHAPTER 5 Working with J-<strong>Link</strong> and J-<strong>Trace</strong><br />
5.10.2.12JTAG_GetU32()<br />
Description<br />
Gets 32 bits JTAG data, starting at given bit position.<br />
Prototype<br />
__api__ int JTAG_GetU32(int BitPos);<br />
5.10.2.13JTAG_WriteClocks()<br />
Description<br />
Writes a given number of clocks.<br />
Prototype<br />
__api__ int JTAG_WriteClocks(int NumClocks);<br />
5.10.2.14JTAG_StoreClocks()<br />
Description<br />
Stores a given number of clocks in the DLL JTAG buffer.<br />
Prototype<br />
__api__ int JTAG_StoreClocks(int NumClocks);<br />
5.10.2.15JTAG_Reset()<br />
Description<br />
Performs a TAP reset and tries to auto-detect the JTAG chain (Total IRLen, Number of<br />
devices). If auto-detection was successful, the global DLL variables which determine<br />
the JTAG chain configuration, are set to the correct values. For more information<br />
about the known global DLL variables, please refer to Global DLL variables on<br />
page 120.<br />
Note: This will not work for devices which need some special init (for example to<br />
add the core to the JTAG chain), which is lost at a TAP reset.<br />
Prototype<br />
__api__ int JTAG_Reset(void);<br />
5.10.2.16SYS_Sleep()<br />
Description<br />
Waits for a given number of miliseconds. During this time, J-<strong>Link</strong> does not communicate<br />
with the target.<br />
Prototype<br />
__api__ int SYS_Sleep(int Delayms);<br />
5.10.3 Global DLL variables<br />
The script file feature also provides some global variables which are used for DLL<br />
configuration. Some of these variables can only be set to some specifc values, other<br />
ones can be set to the whole datatype with. In the following all global variables and<br />
their value ranges are listed and described.<br />
J-<strong>Link</strong> / J-<strong>Trace</strong> (<strong>UM08001</strong>) © 2004-2010 SEGGER Microcontroller GmbH & Co. KG
Note: All global variables are treated as unsigned 32-bit values and are zero-initialized.<br />
Variable Description R/W<br />
Used to set the target CPU core. If auto-detection<br />
of the device is not possible, you have to<br />
set this variable to tell J-<strong>Link</strong> what CPU core is<br />
connected to it. This variable can only be set<br />
CPU<br />
to a known Global J-<strong>Link</strong> DLL constant. For a<br />
list of all valid values, please refer to Global<br />
DLL constants on page 122.<br />
Example<br />
CPU = ARM926EJS;<br />
Used for JTAG chain configuration. Sets the<br />
number of IR-bits of all devices which are<br />
closer to TDO than the one we want to com-<br />
JTAG_IRPre<br />
municate with.<br />
Example<br />
JTAG_IRPre = 6;<br />
Used for JTAG chain configuration. Sets the<br />
number of devices which are closer to TDO<br />
JTAG_DRPre<br />
than the one we want to communicate with.<br />
Example<br />
JTAG_DRPre = 2;<br />
Used for JTAG chain configuration. Sets the<br />
number of IR-bits of all devices which are<br />
closer to TDI than the one we want to commu-<br />
JTAG_IRPost<br />
nicate with.<br />
Example<br />
JTAG_IRPost = 6;<br />
Used for JTAG chain configuration. Sets the<br />
number of devices which are closer to TDI<br />
JTAG_DRPost<br />
than the one we want to "communicate with.<br />
Example<br />
JTAG_DRPost = 0;<br />
IR-Len (in bits) of the device we want to communicate<br />
with.<br />
JTAG_IRLen<br />
Example<br />
JTAG_IRLen = 4;<br />
Computed automatically, based on the values<br />
of JTAG_IRPre, JTAG_DRPre, JTAG_IRPost and<br />
JTAG_TotalIRLen JTAG_DRPost.<br />
Example<br />
v = JTAG_TotalIRLen;<br />
En-/Disables auto-JTAG-detection of J-<strong>Link</strong>.<br />
Has to be disabled for devices which need<br />
some special init (for example to add the core<br />
to the JTAG chain), which is lost at a TAP<br />
JTAG_AllowTAPReset<br />
reset.<br />
Allowed values<br />
0 Auto-detection is enabled.<br />
1 Auto-detection is disabled.<br />
Sets the JTAG interface speed. Speed is given<br />
in kHz.<br />
JTAG_Speed<br />
Example<br />
JTAG_Speed = 2000; // 2MHz JTAG speed<br />
Table 5.10: Global DLL variables<br />
Write-only<br />
Read/Write<br />
Read/Write<br />
Read/Write<br />
Read/Write<br />
Read/Write<br />
Read-only<br />
Write-only<br />
Write-only<br />
J-<strong>Link</strong> / J-<strong>Trace</strong> (<strong>UM08001</strong>) © 2004-2010 SEGGER Microcontroller GmbH & Co. KG<br />
121
122 CHAPTER 5 Working with J-<strong>Link</strong> and J-<strong>Trace</strong><br />
Variable Description R/W<br />
Pulls reset pin low / Releases nRST pin. Used<br />
to issue a reset of the CPU. Value assigned to<br />
reset pin reflects the state. 0 = Low, 1 = high.<br />
JTAG_ResetPin Example<br />
JTAG_ResetPin = 0;<br />
SYS_Sleep(5); // Give pin some time to get low<br />
JTAG_ResetPin = 1;<br />
Pulls reset pin low / Releases nTRST pin. Used<br />
to issue a reset of the debug logic of the CPU.<br />
Value assigned to reset pin reflects the state.<br />
JTAG_TRSTPin<br />
0 = Low, 1 = high.<br />
Example<br />
JTAG_TRSTPin = 0;<br />
SYS_Sleep(5); // Give pin some time to get low<br />
JTAG_TRSTPin = 1;<br />
If the connected device has an ETB and you<br />
want to use it with J-link, this variable should<br />
be set to 1. Setting this variable in another<br />
function as InitEmu() does not have any<br />
EMU_ETB_IsPresent effect.<br />
Example<br />
void InitEmu(void) {<br />
EMU_ETB_IsPresent = 1;<br />
}<br />
Table 5.10: Global DLL variables<br />
5.10.4 Global DLL constants<br />
Currently there are only global DLL constants to set the global DLL variable CPU. If<br />
necessary, more constants will be implemented in the future.<br />
5.10.4.1 Constants for global variable: CPU<br />
The following constants can be used to set the global DLL variable CPU:<br />
• ARM7<br />
• ARM7TDMI<br />
• ARM7TDMIR3<br />
• ARM7TDMIR4<br />
• ARM7TDMIS<br />
• ARM7TDMISR3<br />
• ARM7TDMISR4<br />
• ARM9<br />
• ARM9TDMIS<br />
• ARM920T<br />
• ARM922T<br />
• ARM926EJS<br />
• ARM946EJS<br />
• ARM966ES<br />
• ARM968ES<br />
• ARM11<br />
• ARM1136<br />
• ARM1136J<br />
• ARM1136JS<br />
• ARM1136JF<br />
• ARM1136JFS<br />
• ARM1156<br />
• ARM1176<br />
• ARM1176J<br />
• ARM1176JS<br />
• ARM1176IF<br />
Write-only<br />
Write-only<br />
Write-only<br />
J-<strong>Link</strong> / J-<strong>Trace</strong> (<strong>UM08001</strong>) © 2004-2010 SEGGER Microcontroller GmbH & Co. KG
• ARM1176JFS<br />
• CORTEX_M0<br />
• CORTEX_M1<br />
• CORTEX_M3<br />
• CORTEX_M3R1P0<br />
• CORTEX_M3R1P1<br />
• CORTEX_M3R2P0<br />
• CORTEX_M4<br />
• CORTEX_R4<br />
5.10.5 Script file language<br />
The syntax of the J-<strong>Link</strong> script file language follows the conventions of the C-language,<br />
but it does not support all expresisons and operators which are supported by<br />
the C-language. In the following, the supported operators and expressions are listed.<br />
5.10.5.1 Supported Operators<br />
The following operators are supported by the J-<strong>Link</strong> script file language:<br />
• Multiplicative operators: *, /, %<br />
• Additive operators: +, -<br />
• Bitwise shift operators: )<br />
• Relational operators: , =<br />
• Equality operators: ==, !=<br />
• Bitwise operators: &, |, ^<br />
• Logical operators: &&, ||<br />
• Assignment operators: =, *=, /=, +=, -=, =, &=, ^=, |=<br />
5.10.5.2 Supported type specifiers<br />
The following type specifiers are supported by the J-<strong>Link</strong> script file language:<br />
• void<br />
• char<br />
• int (32-bit)<br />
• __int64<br />
5.10.5.3 Supported type qualifiers<br />
The following type qualifiers are supported by the J-<strong>Link</strong> script file language:<br />
• const<br />
• signed<br />
• unsigned<br />
5.10.5.4 Supported declarators<br />
The following type qualifiers are supported by the J-<strong>Link</strong> script file language:<br />
• Array declarators<br />
5.10.5.5 Supported selection statements<br />
The following selection statements are supported by the J-<strong>Link</strong> script file language:<br />
• if-statements<br />
• if-else-statements<br />
5.10.5.6 Supported iteration statements<br />
The following iteration statements are supported by the J-<strong>Link</strong> script file language:<br />
• while<br />
• do-while<br />
J-<strong>Link</strong> / J-<strong>Trace</strong> (<strong>UM08001</strong>) © 2004-2010 SEGGER Microcontroller GmbH & Co. KG<br />
123
124 CHAPTER 5 Working with J-<strong>Link</strong> and J-<strong>Trace</strong><br />
5.10.5.7 Jump statements<br />
The following jump statements are supported by the J-<strong>Link</strong> script file language:<br />
• return<br />
5.10.5.8 Sample script files<br />
The J-<strong>Link</strong> software and documentation package comes with sample script files for<br />
different devices. The sample script files can be found at $JLINK_INST_DIR$\Samples\J<strong>Link</strong>\Scripts.<br />
5.10.6 Executing J-<strong>Link</strong> script files<br />
5.10.6.1 In J-<strong>Link</strong> commander<br />
When J-<strong>Link</strong> commander is started it searches for a script file called<br />
Default.J<strong>Link</strong>Script. If this file is found, it is executed instead of the standard<br />
auto detection of J-<strong>Link</strong>. If this file is not present, J-<strong>Link</strong> commander behaves as<br />
before and the normal auto-detection is performed.<br />
5.10.6.2 In debugger IDE environment<br />
To execute a script file out of your debugger IDE, simply select the script file to execute<br />
in the Settings tab of the J-<strong>Link</strong> control panel and click the save button (after<br />
the debug session has been started). Usually a project file for J-<strong>Link</strong> is set by the<br />
debugger, which allows the J-<strong>Link</strong> DLL to save the settings of the control panel in this<br />
project file. After selecting the script file restart your debug session. From now on,<br />
the script file will be executed when starting the debug session.<br />
5.10.6.3 In GDB Server<br />
In order to execute a script file when using J-<strong>Link</strong> GDB Server, simply start the GDB<br />
Server, using the following command line paramter:<br />
-scriptfile <br />
For more information about the -scriptfile command line parameter, please refer<br />
to UM08005, chapter "command line options".<br />
J-<strong>Link</strong> / J-<strong>Trace</strong> (<strong>UM08001</strong>) © 2004-2010 SEGGER Microcontroller GmbH & Co. KG
5.11 Command strings<br />
The behavior of the J-<strong>Link</strong> can be customized via command strings passed to the<br />
J<strong>Link</strong>ARM.dll which controls J-<strong>Link</strong>. Applications such as the J-<strong>Link</strong> Commander, but<br />
also the C-SPY debugger which is part of the IAR Embedded Workbench, allow passing<br />
one or more command strings. Command line strings can be used for passing<br />
commands to J-<strong>Link</strong> (such as switching on target power supply), as well as customize<br />
the behavior (by defining memory regions and other things) of J-<strong>Link</strong>. The use of<br />
command strings enables options which can not be set with the configuration dialog<br />
box provided by C-SPY.<br />
5.11.1 List of available commands<br />
The table below lists and describes the available command strings.<br />
Command Description<br />
device Selects the target device.<br />
DisableFlashBPs Disables the FlashPB feature.<br />
DisableFlashDL Disables the J-<strong>Link</strong> ARM FlashDL feature.<br />
EnableFlashBPs Enables the FlashPB feature.<br />
EnableFlashDL Enables the J-<strong>Link</strong> ARM FlashDL feature.<br />
map exclude Ignore all memory accesses to specified area.<br />
map indirectread Specifies an area which should be read indirect.<br />
map ram Specifies location of target RAM.<br />
map reset<br />
Restores the default mapping, which means all memory<br />
accesses are permitted.<br />
SetAllowSimulation Enable/Disable instruction set simulation.<br />
SetCheckModeAfterRead Enable/Disable CPSR check after read operations.<br />
SetResetPulseLen Defines the length of the RESET pulse in milliseconds.<br />
SetResetType Selects the reset strategy<br />
SetRestartOnClose Specifies restart behavior on close.<br />
SetDbgPowerDownOnClose<br />
Used to power-down the debug unit of the target CPU<br />
when the debug session is closed.<br />
Used to power-down the target CPU, when there are<br />
SetSysPowerDownOnIdle no transmissions between J-<strong>Link</strong> and target CPU, for a<br />
specified timeframe.<br />
SupplyPower<br />
Activates/Deactivates power supply over pin 19 of the<br />
JTAG connector.<br />
SupplyPowerDefault<br />
Activates/Deactivates power supply over pin 19 of the<br />
JTAG connector permanently.<br />
Table 5.11: Available command line options<br />
J-<strong>Link</strong> / J-<strong>Trace</strong> (<strong>UM08001</strong>) © 2004-2010 SEGGER Microcontroller GmbH & Co. KG<br />
125
126 CHAPTER 5 Working with J-<strong>Link</strong> and J-<strong>Trace</strong><br />
5.11.1.1 device<br />
This command selects the target device.<br />
Syntax<br />
device = <br />
DeviceID has to be a valid device identifier. For a list of all available device identifiers<br />
please refer to chapter Supported devices on page 139.<br />
Example<br />
device = AT91SAM7S256<br />
5.11.1.2 DisableFlashBPs<br />
This command disables the FlashBP feature.<br />
Syntax<br />
DisableFlashBPs<br />
5.11.1.3 DisableFlashDL<br />
This command disables the J-<strong>Link</strong> ARM FlashDL feature.<br />
Syntax<br />
DisableFlashDL<br />
5.11.1.4 EnableFlashBPs<br />
This command enables the FlashBP feature.<br />
Syntax<br />
EnableFlashBPs<br />
5.11.1.5 EnableFlashDL<br />
This command enables the J-<strong>Link</strong> ARM FlashDL feature.<br />
Syntax<br />
EnableFlashDL<br />
5.11.1.6 map exclude<br />
This command excludes a specified memory region from all memory accesses. All<br />
subsequent memory accesses to this memory region are ignored.<br />
Memory mapping<br />
Some devices do not allow access of the entire 4GB memory area. Ideally, the entire<br />
memory can be accessed; if a memory access fails, the CPU reports this by switching<br />
to abort mode. The CPU memory interface allows halting the CPU via a WAIT signal.<br />
On some devices, the WAIT signal stays active when accessing certain unused memory<br />
areas. This halts the CPU indefinitely (until RESET) and will therefore end the<br />
debug session. This is exactly what happens when accessing critical memory areas.<br />
Critical memory areas should not be present in a device; they are typically a hardware<br />
design problem. Nevertheless, critical memory areas exist on some devices.<br />
To avoid stalling the debug session, a critical memory area can be excluded from<br />
access: J-<strong>Link</strong> will not try to read or write to critical memory areas and instead<br />
ignore the access silently. Some debuggers (such as IAR C-SPY) can try to access<br />
memory in such areas by dereferencing non-initialized pointers even if the debugged<br />
program (the debuggee) is working perfectly. In situations like this, defining critical<br />
memory areas is a good solution.<br />
J-<strong>Link</strong> / J-<strong>Trace</strong> (<strong>UM08001</strong>) © 2004-2010 SEGGER Microcontroller GmbH & Co. KG
Syntax<br />
map exclude -<br />
Example<br />
This is an example for the map exclude command in combination with an NXP<br />
LPC2148 MCU.<br />
Memory map<br />
0x00000000-0x0007FFFF On-chip flash memory<br />
0x00080000-0x3FFFFFFF Reserved<br />
0x40000000-0x40007FFF On-chip SRAM<br />
0x40008000-0x7FCFFFFF Reserved<br />
0x7FD00000-0x7FD01FFF On-chip USB DMA RAM<br />
0x7FD02000-0x7FD02000 Reserved<br />
0x7FFFD000-0x7FFFFFFF Boot block (remapped from on-chip flash memory)<br />
0x80000000-0xDFFFFFFF Reserved<br />
0xE0000000-0xEFFFFFFF VPB peripherals<br />
0xF0000000-0xFFFFFFFF AHB peripherals<br />
The "problematic" memory areas are:<br />
0x00080000-0x3FFFFFFF Reserved<br />
0x40008000-0x7FCFFFFF Reserved<br />
0x7FD02000-0x7FD02000 Reserved<br />
0x80000000-0xDFFFFFFF Reserved<br />
To exclude these areas from being accessed through J-<strong>Link</strong> the map exclude command<br />
should be used as follows:<br />
map exclude 0x00080000-0x3FFFFFFF<br />
map exclude 0x40008000-0x7FCFFFFF<br />
map exclude 0x7FD02000-0x7FD02000<br />
map exclude 0x80000000-0xDFFFFFFF<br />
5.11.1.7 map indirectread<br />
This command can be used to read a memory area indirectly. Indirectly reading<br />
means that a small code snippet is downloaded into RAM of the target device, which<br />
reads and transfers the data of the specified memory area to the host. Before map<br />
indirectread can be called a RAM area for the indirectly read code snippet has to be<br />
defined. Use therefor the map ram command and define a RAM area with a size of >=<br />
256 byte.<br />
Typical applications<br />
Refer to chapter Fast GPIO bug on page 163 for an example.<br />
Syntax<br />
map indirectread -<br />
Example<br />
map indirectread 0x3fffc000-0x3fffcfff<br />
J-<strong>Link</strong> / J-<strong>Trace</strong> (<strong>UM08001</strong>) © 2004-2010 SEGGER Microcontroller GmbH & Co. KG<br />
127
128 CHAPTER 5 Working with J-<strong>Link</strong> and J-<strong>Trace</strong><br />
5.11.1.8 map ram<br />
This command should be used to define an area in RAM of the target device. The area<br />
must be 256-byte aligned. The data which was located in the defined area will not be<br />
corrupted. Data which resides in the defined RAM area is saved and will be restored if<br />
necessary. This command has to be executed before map indirectread will be<br />
called.<br />
Typical applications<br />
Refer to chapter Fast GPIO bug on page 163 for an example.<br />
Syntax<br />
map ram -<br />
Example<br />
map ram 0x40000000-0x40003fff;<br />
5.11.1.9 map reset<br />
This command restores the default memory mapping, which means all memory<br />
accesses are permitted.<br />
Typical applications<br />
Used with other "map" commands to return to the default values. The map reset<br />
command should be called before any other "map" command is called.<br />
Syntax<br />
map reset<br />
Example<br />
map reset<br />
5.11.1.10 SetAllowSimulation<br />
This command can be used to enable or disable the instruction set simulation. By<br />
default the instruction set simulation is enabled.<br />
Syntax<br />
SetAllowSimulation = 0 | 1<br />
Example<br />
SetAllowSimulation 1 // Enables instruction set simulation<br />
5.11.1.11 SetCheckModeAfterRead<br />
This command is used to enable or disable the verification of the CPSR (current processor<br />
status register) after each read operation. By default this check is enabled.<br />
However this can cause problems with some CPUs (e.g. if invalid CPSR values are<br />
returned). Please note that if this check is turned off (SetCheckModeAfterRead = 0),<br />
the success of read operations cannot be verified anymore and possible data aborts<br />
are not recognized.<br />
Typical applications<br />
This verification of the CPSR can cause problems with some CPUs (e.g. if invalid CPSR<br />
values are returned). Note that if this check is turned off (SetCheckModeAfterRead =<br />
0), the success of read operations cannot be verified anymore and possible data<br />
aborts are not recognized.<br />
J-<strong>Link</strong> / J-<strong>Trace</strong> (<strong>UM08001</strong>) © 2004-2010 SEGGER Microcontroller GmbH & Co. KG
Syntax<br />
SetCheckModeAfterRead = 0 | 1<br />
Example<br />
SetCheckModeAfterRead = 0<br />
5.11.1.12 SetResetPulseLen<br />
This command defines the length of the RESET pulse in milliseconds. The default for<br />
the RESET pulse length is 20 milliseconds.<br />
Syntax<br />
SetResetPulseLen = <br />
Example<br />
SetResetPulseLen = 50<br />
5.11.1.13 SetResetType<br />
This command selects the reset startegy which shall be used by J-<strong>Link</strong>, to reset the<br />
device. The value which is used for this command is analog to the reset type which<br />
shall be selected. For a list of all reset types which are available, please refer to<br />
Reset strategies on page 112. Please note that there different reset strategies for<br />
ARM 7/9 and Cortex-M devices.<br />
Syntax<br />
SetResetType = <br />
Example<br />
SetResetType = 0 // Selects reset strategy type 0: normal<br />
5.11.1.14 SetRestartOnClose<br />
This command specifies whether the J-<strong>Link</strong> restarts target execution on close. The<br />
default is to restart target execution. This can be disabled by using this command.<br />
Syntax<br />
SetRestartOnClose = 0 | 1<br />
Example<br />
SetRestartOnClose = 1<br />
5.11.1.15 SetDbgPowerDownOnClose<br />
When using this command, the debug unit of the target CPU is powered-down when<br />
the debug session is closed.<br />
Note: This command works only for Cortex-M3 devices<br />
Typical applications<br />
This feature is useful to reduce the power consumption of the CPU when no debug<br />
session is active.<br />
Syntax<br />
SetDbgPowerDownOnClose = <br />
Example<br />
SetDbgPowerDownOnClose = 1 // Enables debug power-down on close.<br />
SetDbgPowerDownOnClose = 0 // Disables debug power-down on close.<br />
J-<strong>Link</strong> / J-<strong>Trace</strong> (<strong>UM08001</strong>) © 2004-2010 SEGGER Microcontroller GmbH & Co. KG<br />
129
130 CHAPTER 5 Working with J-<strong>Link</strong> and J-<strong>Trace</strong><br />
5.11.1.16 SetSysPowerDownOnIdle<br />
When using this command, the target CPU is powered-down when no transmission<br />
between J-<strong>Link</strong> and the target CPU was performed for a specific time. When the next<br />
command is given, the CPU is powered-up.<br />
Note: This command works only for Cortex-M3 devices.<br />
Typical applications<br />
This feature is useful to reduce the power consumption of the CPU.<br />
Syntax<br />
SetSysPowerDownOnIdle = <br />
Note: A 0 for disables the power-down on idle functionality.<br />
Example<br />
SetSysPowerDownOnIdle = 10; // The target CPU is powered-down when there is no<br />
// transmission between J-<strong>Link</strong> and target CPU for at least<br />
10ms<br />
5.11.1.17 SupplyPower<br />
This command activates power supply over pin 19 of the JTAG connector. The KS<br />
(Kickstart) versions of J-<strong>Link</strong> have the V5 supply over pin 19 activated by default.<br />
Typical applications<br />
This feature is useful for some eval boards that can be powered over the JTAG connector.<br />
Syntax<br />
SupplyPower = 0 | 1<br />
Example<br />
SupplyPower = 1<br />
5.11.1.18 SupplyPowerDefault<br />
This command activates power supply over pin 19 of the JTAG connector permanently.<br />
The KS (Kickstart) versions of J-<strong>Link</strong> have the V5 supply over pin 19 activated<br />
by default.<br />
Typical applications<br />
This feature is useful for some eval boards that can be powered over the JTAG connector.<br />
Syntax<br />
SupplyPowerDefault = 0 | 1<br />
Example<br />
SupplyPowerDefault = 1<br />
J-<strong>Link</strong> / J-<strong>Trace</strong> (<strong>UM08001</strong>) © 2004-2010 SEGGER Microcontroller GmbH & Co. KG
5.11.2 Using command strings<br />
5.11.2.1 J-<strong>Link</strong> Commander<br />
The J-<strong>Link</strong> command strings can be tested with the J-<strong>Link</strong> Commander. Use the command<br />
exec supplemented by one of the command strings.<br />
Example<br />
exec SupplyPower = 1<br />
exec map reset<br />
exec map exclude 0x10000000-0x3FFFFFFF<br />
5.11.2.2 IAR Embedded Workbench<br />
The J-<strong>Link</strong> command strings can be supplied using the C-SPY debugger of the IAR<br />
Embedded Workbench. Open the Project options dialog box and select Debugger.<br />
J-<strong>Link</strong> / J-<strong>Trace</strong> (<strong>UM08001</strong>) © 2004-2010 SEGGER Microcontroller GmbH & Co. KG<br />
131
132 CHAPTER 5 Working with J-<strong>Link</strong> and J-<strong>Trace</strong><br />
On the Extra Options page, select Use command line options.<br />
Enter --jlink_exec_command "" in the textfield, as shown in<br />
the screenshot below. If more than one command should be used separate the commands<br />
with semicolon.<br />
J-<strong>Link</strong> / J-<strong>Trace</strong> (<strong>UM08001</strong>) © 2004-2010 SEGGER Microcontroller GmbH & Co. KG
5.12 Switching off CPU clock during debug<br />
We recommend not to switch off CPU clock during debug. However, if you do, you<br />
should consider the following:<br />
Non-synthesizable cores (ARM7TDMI, ARM9TDMI, ARM920, etc.)<br />
With these cores, the TAP controller uses the clock signal provided by the emulator,<br />
which means the TAP controller and ICE-Breaker continue to be accessible even if the<br />
CPU has no clock.<br />
Therefore, switching off CPU clock during debug is normally possible if the CPU clock<br />
is periodically (typically using a regular timer interrupt) switched on every few ms for<br />
at least a few us. In this case, the CPU will stop at the first instruction in the ISR<br />
(typically at address 0x18).<br />
Synthesizable cores (ARM7TDMI-S, ARM9E-S, etc.)<br />
With these cores, the clock input of the TAP controller is connected to the output of a<br />
three-stage synchronizer, which is fed by clock signal provided by the emulator,<br />
which means that the TAP controller and ICE-Breaker are not accessible if the CPU<br />
has no clock.<br />
If the RTCK signal is provided, adaptive clocking function can be used to synchronize<br />
the JTAG clock (provided by the emulator) to the processor clock. This way, the JTAG<br />
clock is stopped if the CPU clock is switched off.<br />
If adaptive clocking is used, switching off CPU clock during debug is normally possible<br />
if the CPU clock is periodically (typically using a regular timer interrupt) switched<br />
on every few ms for at least a few us. In this case, the CPU will stop at the first<br />
instruction in the ISR (typically at address 0x18).<br />
J-<strong>Link</strong> / J-<strong>Trace</strong> (<strong>UM08001</strong>) © 2004-2010 SEGGER Microcontroller GmbH & Co. KG<br />
133
134 CHAPTER 5 Working with J-<strong>Link</strong> and J-<strong>Trace</strong><br />
5.13 Cache handling<br />
Most ARM systems with external memory have at least one cache. Typically, ARM7<br />
systems with external memory come with a unified cache, which is used for both<br />
code and data. Most ARM9 systems with external memory come with separate caches<br />
for the instruction bus (I-Cache) and data bus (D-Cache) due to the hardware architecture.<br />
5.13.1 Cache coherency<br />
When debugging or otherwise working with a system with processor with cache, it is<br />
important to maintain the cache(s) and main memory coherent. This is easy in systems<br />
with a unified cache and becomes increasingly difficult in systems with hardware<br />
architecture. A write buffer and a D-Cache configured in write-back mode can<br />
further complicate the problem.<br />
ARM9 chips have no hardware to keep the caches coherent, so that this is the<br />
responsibility of the software.<br />
5.13.2 Cache clean area<br />
J-<strong>Link</strong> / J-<strong>Trace</strong> handles cache cleaning directly through JTAG commands. Unlike<br />
other emulators, it does not have to download code to the target system. This makes<br />
setting up J-<strong>Link</strong> / J-<strong>Trace</strong> easier. Therefore, a cache clean area is not required.<br />
5.13.3 Cache handling of ARM7 cores<br />
Because ARM7 cores have a unified cache, there is no need to handle the caches during<br />
debug.<br />
5.13.4 Cache handling of ARM9 cores<br />
ARM9 cores with cache require J-<strong>Link</strong> / J-<strong>Trace</strong> to handle the caches during debug. If<br />
the processor enters debug state with caches enabled, J-<strong>Link</strong> / J-<strong>Trace</strong> does the following:<br />
When entering debug state<br />
J-<strong>Link</strong> / J-<strong>Trace</strong> performs the following:<br />
• it stores the current write behavior for the D-Cache<br />
• it selects write-through behavior for the D-Cache.<br />
When leaving debug state<br />
J-<strong>Link</strong> / J-<strong>Trace</strong> performs the following:<br />
• it restores the stored write behavior for the D-Cache<br />
• it invalidates the D-Cache.<br />
Note: The implementation of the cache handling is different for different cores.<br />
However, the cache is handled correctly for all supported ARM9 cores.<br />
J-<strong>Link</strong> / J-<strong>Trace</strong> (<strong>UM08001</strong>) © 2004-2010 SEGGER Microcontroller GmbH & Co. KG
Chapter 6<br />
Flash download and flash breakpoints<br />
This chapter describes how flash download and flash breakpoints with J-<strong>Link</strong> work. In<br />
addition to that it contains a list of supported microcontrollers for J-<strong>Link</strong>.<br />
J-<strong>Link</strong> / J-<strong>Trace</strong> (<strong>UM08001</strong>) © 2004-2010 SEGGER Microcontroller GmbH & Co. KG<br />
135
136 CHAPTER 6 Flash download and flash breakpoints<br />
6.1 Introduction<br />
The J<strong>Link</strong>ARM.dll is able to use the flash download and flash breakpoints features.<br />
Only the flash breakpoints feature requires an additional license. For more information<br />
about flash download and flash breakpoints, please refer to J-<strong>Link</strong> RDI <strong>User</strong>’s<br />
<strong>Guide</strong> (UM08004), chapter Flash download and chapter Breakpoints in flash memory.<br />
J-<strong>Link</strong> / J-<strong>Trace</strong> (<strong>UM08001</strong>) © 2004-2010 SEGGER Microcontroller GmbH & Co. KG
6.2 Licensing<br />
Some J-<strong>Link</strong>s are available with device-based licenses for flash download or flash<br />
breakpoints, but the standard J-<strong>Link</strong> does not come with a built-in license. You will<br />
need to obtain a license for every J-<strong>Link</strong>. For more information about the different<br />
license types, please refer to License types on page 42.<br />
For a complete list of devices which are supported by the device-based licenses,<br />
please refer to Device list on page 43.<br />
To purchase a key-based license, please contact sales@segger.com.<br />
Entering a license<br />
The easiest way to enter a license is the following:<br />
Open the J-<strong>Link</strong> control panel window, go to the General tab and choose License.<br />
Now the J-<strong>Link</strong> ARM license manager will open and show all licenses, both key-based<br />
and built-in licenses of J-<strong>Link</strong>.<br />
J-<strong>Link</strong> / J-<strong>Trace</strong> (<strong>UM08001</strong>) © 2004-2010 SEGGER Microcontroller GmbH & Co. KG<br />
137
138 CHAPTER 6 Flash download and flash breakpoints<br />
Now choose Add license to add one or more new licenses. Enter your license(s) and<br />
choose OK. Now the licenses should have been added.<br />
J-<strong>Link</strong> / J-<strong>Trace</strong> (<strong>UM08001</strong>) © 2004-2010 SEGGER Microcontroller GmbH & Co. KG
6.3 Supported devices<br />
The following table lists all microcontrollers with internal flash memory for which<br />
flash download and flash breakpoints are available. Furthermore, flash download and<br />
flash breakpoints are also available for all CFI compliant external NOR-flash devices.<br />
Internal flash devices are selected by the device identifier.<br />
Manufacturer Device ID Devices<br />
Analog Devices ADuC7020x62 ADuC7020x62<br />
Analog Devices ADuC7021x32 ADuC7021x32<br />
Analog Devices ADuC7021x62 ADuC7021x62<br />
Analog Devices ADuC7022x32 ADuC7022x32<br />
Analog Devices ADuC7022x62 ADuC7022x62<br />
Analog Devices ADuC7024x62 ADuC7024x62<br />
Analog Devices ADuC7025x32 ADuC7025x32<br />
Analog Devices ADuC7025x62 ADuC7025x62<br />
Analog Devices ADuC7026x62 ADuC7026x62<br />
Analog Devices ADuC7027x62 ADuC7027x62<br />
Analog Devices ADuC7028x62 ADuC7028x62<br />
Analog Devices ADuC7030 ADuC7030<br />
Analog Devices ADuC7031 ADuC7031<br />
Analog Devices ADuC7032 ADuC7032<br />
Analog Devices ADuC7033 ADuC7033<br />
Analog Devices** ADuC7034 ADuC7034<br />
Analog Devices ADuC7038 ADuC7038<br />
Analog Devices ADuC7060 ADuC7060<br />
Analog Devices** ADuC7061 ADuC7061<br />
Analog Devices** ADuC7062 ADuC7062<br />
Analog Devices ADuC7128 ADuC7128<br />
Analog Devices ADuC7129 ADuC7129<br />
Analog Devices ADuC7229x126 ADuC7229x126<br />
Atmel** AT91FR40162 AT91FR40162<br />
Atmel** AT91SAM3N1A AT91SAM3N1A<br />
Atmel** AT91SAM3N2A AT91SAM3N2A<br />
Atmel** AT91SAM3N4A AT91SAM3N4A<br />
Atmel** AT91SAM3N1B AT91SAM3N1B<br />
Atmel** AT91SAM3N2B AT91SAM3N2B<br />
Atmel** AT91SAM3N4B AT91SAM3N4B<br />
Atmel** AT91SAM3N1C AT91SAM3N1C<br />
Atmel** AT91SAM3N2C AT91SAM3N2C<br />
Atmel** AT91SAM3N4C AT91SAM3N4C<br />
Atmel** AT91SAM3S1A AT91SAM3S1A<br />
Atmel** AT91SAM3S2A AT91SAM3S2A<br />
Atmel** AT91SAM3S4A AT91SAM3S4A<br />
Atmel** AT91SAM3S1B AT91SAM3S1B<br />
Atmel** AT91SAM3S2B AT91SAM3S2B<br />
Atmel** AT91SAM3S4B AT91SAM3S4B<br />
Atmel** AT91SAM3S1C AT91SAM3S1C<br />
Atmel** AT91SAM3S2C AT91SAM3S2C<br />
Atmel** AT91SAM3S4C AT91SAM3S4C<br />
Atmel AT91SAM3U1C AT91SAM3U1C<br />
Atmel** AT91SAM3U2C AT91SAM3U2C<br />
Table 6.1: Supported microcontrollers<br />
J-<strong>Link</strong> / J-<strong>Trace</strong> (<strong>UM08001</strong>) © 2004-2010 SEGGER Microcontroller GmbH & Co. KG<br />
139
140 CHAPTER 6 Flash download and flash breakpoints<br />
Manufacturer Device ID Devices<br />
Atmel** AT91SAM3U4C AT91SAM3U4C<br />
Atmel** AT91SAM3U1E AT91SAM3U1E<br />
Atmel** AT91SAM3U2E AT91SAM3U2E<br />
Atmel** AT91SAM3U4E AT91SAM3U4E<br />
Atmel AT91SAM7A3 AT91SAM7A3<br />
Atmel** AT91SAM7L64 AT91SAM7L64<br />
Atmel** AT91SAM7L128 AT91SAM7L128<br />
Atmel AT91SAM7S32 AT91SAM7S32<br />
Atmel AT91SAM7S321 AT91SAM7S321<br />
Atmel AT91SAM7S64 AT91SAM7S64<br />
Atmel AT91SAM7S128 AT91SAM7S128<br />
Atmel AT91SAM7S256 AT91SAM7S256<br />
Atmel AT91SAM7S512 AT91SAM7S512<br />
Atmel AT91SAM7SE32 AT91SAM7SE32<br />
Atmel AT91SAM7SE256 AT91SAM7SE256<br />
Atmel AT91SAM7SE512 AT91SAM7SE512<br />
Atmel AT91SAM7X128 AT91SAM7X128<br />
Atmel AT91SAM7X256 AT91SAM7X256<br />
Atmel AT91SAM7X512 AT91SAM7X512<br />
Atmel AT91SAM7XC128 AT91SAM7XC128<br />
Atmel AT91SAM7XC256 AT91SAM7XC256<br />
Atmel AT91SAM7XC512 AT91SAM7XC512<br />
Atmel** AT91SAM9XE128 AT91SAM9XE128<br />
Atmel** AT91SAM9XE256 AT91SAM9XE256<br />
Atmel** AT91SAM9XE512 AT91SAM9XE512<br />
Ember** EM351 EM351<br />
Ember** EM357 EM357<br />
Energy Micro** EFM32G200F16 EFM32G200F16<br />
Energy Micro** EFM32G200F32 EFM32G200F32<br />
Energy Micro** EFM32G200F64 EFM32G200F64<br />
Energy Micro** EFM32G210F128 EFM32G210F128<br />
Energy Micro** EFM32G230F32 EFM32G230F32<br />
Energy Micro** EFM32G230F64 EFM32G230F64<br />
Energy Micro** EFM32G230F128 EFM32G230F128<br />
Energy Micro** EFM32G280F32 EFM32G280F32<br />
Energy Micro** EFM32G280F64 EFM32G280F64<br />
Energy Micro** EFM32G280F128 EFM32G280F128<br />
Energy Micro** EFM32G290F32 EFM32G290F32<br />
Energy Micro** EFM32G290F64 EFM32G290F64<br />
Energy Micro** EFM32G290F128 EFM32G290F128<br />
Energy Micro** EFM32G840F32 EFM32G840F32<br />
Energy Micro** EFM32G840F64 EFM32G840F64<br />
Energy Micro** EFM32G840F128 EFM32G840F128<br />
Energy Micro** EFM32G880F32 EFM32G880F32<br />
Energy Micro** EFM32G880F64 EFM32G880F64<br />
Energy Micro** EFM32G880F128 EFM32G880F128<br />
Energy Micro** EFM32G890F32 EFM32G890F32<br />
Energy Micro** EFM32G890F64 EFM32G890F64<br />
Energy Micro** EFM32G890F128 EFM32G890F128<br />
Freescale* MAC7101 MAC7101<br />
Table 6.1: Supported microcontrollers<br />
J-<strong>Link</strong> / J-<strong>Trace</strong> (<strong>UM08001</strong>) © 2004-2010 SEGGER Microcontroller GmbH & Co. KG
Manufacturer Device ID Devices<br />
Freescale* MAC7106 MAC7106<br />
Freescale* MAC7111 MAC7111<br />
Freescale* MAC7112 MAC7112<br />
Freescale* MAC7116 MAC7116<br />
Freescale* MAC7121 MAC7121<br />
Freescale* MAC7122 MAC7122<br />
Freescale* MAC7126 MAC7126<br />
Freescale* MAC7131 MAC7131<br />
Freescale* MAC7136 MAC7136<br />
Freescale* MAC7141 MAC7141<br />
Freescale* MAC7142 MAC7142<br />
Itron** TRIFECTA TRIFECTA<br />
Luminary LM3S101 LM3S101<br />
Luminary LM3S102 LM3S102<br />
Luminary LM3S301 LM3S301<br />
Luminary LM3S310 LM3S310<br />
Luminary LM3S315 LM3S315<br />
Luminary LM3S316 LM3S316<br />
Luminary LM3S317 LM3S317<br />
Luminary LM3S328 LM3S328<br />
Luminary LM3S601 LM3S601<br />
Luminary LM3S610 LM3S610<br />
Luminary LM3S611 LM3S611<br />
Luminary LM3S612 LM3S612<br />
Luminary LM3S613 LM3S613<br />
Luminary LM3S615 LM3S615<br />
Luminary LM3S617 LM3S617<br />
Luminary LM3S618 LM3S618<br />
Luminary LM3S628 LM3S628<br />
Luminary LM3S801 LM3S801<br />
Luminary LM3S811 LM3S811<br />
Luminary LM3S812 LM3S812<br />
Luminary LM3S815 LM3S815<br />
Luminary LM3S817 LM3S817<br />
Luminary LM3S818 LM3S818<br />
Luminary LM3S828 LM3S828<br />
Luminary LM3S2110 LM3S2110<br />
Luminary LM3S2139 LM3S2139<br />
Luminary LM3S2410 LM3S2410<br />
Luminary LM3S2412 LM3S2412<br />
Luminary LM3S2432 LM3S2432<br />
Luminary LM3S2533 LM3S2533<br />
Luminary LM3S2620 LM3S2620<br />
Luminary LM3S2637 LM3S2637<br />
Luminary LM3S2651 LM3S2651<br />
Luminary LM3S2730 LM3S2730<br />
Luminary LM3S2739 LM3S2739<br />
Luminary LM3S2939 LM3S2939<br />
Luminary LM3S2948 LM3S2948<br />
Luminary LM3S2950 LM3S2950<br />
Table 6.1: Supported microcontrollers<br />
J-<strong>Link</strong> / J-<strong>Trace</strong> (<strong>UM08001</strong>) © 2004-2010 SEGGER Microcontroller GmbH & Co. KG<br />
141
142 CHAPTER 6 Flash download and flash breakpoints<br />
Manufacturer Device ID Devices<br />
Luminary LM3S2965 LM3S2965<br />
Luminary** LM3S3739 LM3S3739<br />
Luminary** LM3S3748 LM3S3748<br />
Luminary** LM3S3749 LM3S3749<br />
Luminary** LM3S3826 LM3S3826<br />
Luminary** LM3S3J26 LM3S3J26<br />
Luminary** LM3S3N26 LM3S3N26<br />
Luminary** LM3S3W26 LM3S3W26<br />
Luminary** LM3S3Z26 LM3S3Z26<br />
Luminary LM3S6100 LM3S6100<br />
Luminary LM3S6110 LM3S6110<br />
Luminary LM3S6420 LM3S6420<br />
Luminary LM3S6422 LM3S6422<br />
Luminary LM3S6432 LM3S6432<br />
Luminary LM3S6610 LM3S6610<br />
Luminary LM3S6633 LM3S6633<br />
Luminary LM3S6637 LM3S6637<br />
Luminary LM3S6730 LM3S6730<br />
Luminary LM3S6918 LM3S6918<br />
Luminary LM3S6938 LM3S6938<br />
Luminary LM3S6952 LM3S6952<br />
Luminary LM3S6965 LM3S6965<br />
Luminary** LM3S8530 LM3S8530<br />
Luminary** LM3S8538 LM3S8538<br />
Luminary** LM3S8630 LM3S8630<br />
Luminary** LM3S8730 LM3S8730<br />
Luminary** LM3S8733 LM3S8733<br />
Luminary** LM3S8738 LM3S8738<br />
Luminary** LM3S8930 LM3S8930<br />
Luminary** LM3S8933 LM3S8933<br />
Luminary** LM3S8938 LM3S8938<br />
Luminary** LM3S8962 LM3S8962<br />
Luminary** LM3S8971 LM3S8971<br />
Luminary** LM3S9790 LM3S9790<br />
Luminary** LM3S9792 LM3S9792<br />
Luminary** LM3S9997 LM3S9997<br />
Luminary** LM3S9B90 LM3S9B90<br />
Luminary** LM3S9B92 LM3S9B92<br />
Luminary** LM3S9B95 LM3S9B95<br />
Luminary** LM3S9B96 LM3S9B96<br />
Luminary** LM3S9L97 LM3S9L97<br />
NXP** LPC1111 LPC1111<br />
NXP** LPC1113 LPC1113<br />
NXP** LPC1311 LPC1311<br />
NXP** LPC1313 LPC1313<br />
NXP** LPC1342 LPC1342<br />
NXP** LPC1343 LPC1343<br />
NXP** LPC1751 LPC1751<br />
NXP** LPC1752 LPC1752<br />
NXP** LPC1754 LPC1754<br />
Table 6.1: Supported microcontrollers<br />
J-<strong>Link</strong> / J-<strong>Trace</strong> (<strong>UM08001</strong>) © 2004-2010 SEGGER Microcontroller GmbH & Co. KG
Manufacturer Device ID Devices<br />
NXP** LPC1756 LPC1756<br />
NXP** LPC1758 LPC1758<br />
NXP** LPC1764 LPC1764<br />
NXP** LPC1765 LPC1765<br />
NXP** LPC1766 LPC1766<br />
NXP** LPC1768 LPC1768<br />
NXP LPC2101 LPC2101<br />
NXP LPC2102 LPC2102<br />
NXP LPC2103 LPC2103<br />
NXP LPC2104 LPC2104<br />
NXP LPC2105 LPC2105<br />
NXP LPC2106 LPC2106<br />
NXP LPC2109 LPC2109<br />
NXP LPC2114 LPC2114<br />
NXP LPC2119 LPC2119<br />
NXP LPC2124 LPC2124<br />
NXP LPC2129 LPC2129<br />
NXP LPC2131 LPC2131<br />
NXP LPC2132 LPC2132<br />
NXP LPC2134 LPC2134<br />
NXP LPC2136 LPC2136<br />
NXP LPC2138 LPC2138<br />
NXP LPC2141 LPC2141<br />
NXP LPC2142 LPC2142<br />
NXP LPC2144 LPC2144<br />
NXP LPC2146 LPC2146<br />
NXP LPC2148 LPC2148<br />
NXP LPC2194 LPC2194<br />
NXP LPC2212 LPC2212<br />
NXP LPC2214 LPC2214<br />
NXP LPC2292 LPC2292<br />
NXP LPC2294 LPC2294<br />
NXP LPC2364 LPC2364<br />
NXP** LPC2365 LPC2365<br />
NXP LPC2366 LPC2366<br />
NXP** LPC2367 LPC2367<br />
NXP LPC2368 LPC2368<br />
NXP** LPC2377 LPC2377<br />
NXP LPC2378 LPC2378<br />
NXP LPC2387 LPC2387<br />
NXP LPC2388 LPC2388<br />
NXP** LPC2458 LPC2458<br />
NXP LPC2468 LPC2468<br />
NXP LPC2478 LPC2478<br />
NXP** LPC2917 LPC2917<br />
NXP** LPC2919 LCP2919<br />
NXP** LPC2927 LPC2927<br />
NXP** LPC2929 LPC2929<br />
NXP* PCF87750 PCF87750<br />
NXP* SJA2010 SJA2010<br />
Table 6.1: Supported microcontrollers<br />
J-<strong>Link</strong> / J-<strong>Trace</strong> (<strong>UM08001</strong>) © 2004-2010 SEGGER Microcontroller GmbH & Co. KG<br />
143
144 CHAPTER 6 Flash download and flash breakpoints<br />
Manufacturer Device ID Devices<br />
NXP* SJA2510 SJA2510<br />
OKI ML67Q4002 ML67Q4002<br />
OKI ML67Q4003 ML67Q4003<br />
OKI ML67Q4050 ML67Q4050<br />
OKI ML67Q4051 ML67Q4051<br />
OKI ML67Q4060 ML67Q4060<br />
OKI ML67Q4061 ML67Q4061<br />
Samsung* S3F445HX S3F445HX<br />
ST STM32F101C6 STM32F101C6<br />
ST STM32F101C8 STM32F101C8<br />
ST STM32F101CB STM32F101CB<br />
ST STM32F101R6 STM32F101R6<br />
ST STM32F101R8 STM32F101R8<br />
ST STM32F101RB STM32F101RB<br />
ST STM32F101RC STM32F101RC<br />
ST STM32F101RD STM32F101RD<br />
ST STM32F101RE STM32F101RE<br />
ST STM32F101T6 STM32F101T6<br />
ST STM32F101T8 STM32F101T8<br />
ST STM32F101V8 STM32F101V8<br />
ST STM32F101VB STM32F101VB<br />
ST STM32F101VC STM32F101VC<br />
ST STM32F101VD STM32F101VD<br />
ST STM32F101VE STM32F101VE<br />
ST STM32F101ZC STM32F101ZC<br />
ST STM32F101ZD STM32F101ZD<br />
ST STM32F101ZE STM32F101ZE<br />
ST STM32F102C6 STM32F102C6<br />
ST STM32F102C8 STM32F102C8<br />
ST STM32F102CB STM32F102CB<br />
ST STM32F103C6 STM32F103C6<br />
ST STM32F103C8 STM32F103C8<br />
ST STM32F103CB STM32F103CB<br />
ST STM32F103R6 STM32F103R6<br />
ST STM32F103R8 STM32F103R8<br />
ST STM32F103RB STM32F103RB<br />
ST STM32F103RC STM32F103RC<br />
ST STM32F103RD STM32F103RD<br />
ST STM32F103RE STM32F103RE<br />
ST STM32F103T6 STM32F103T6<br />
ST STM32F103T8 STM32F103T8<br />
ST STM32F103V8 STM32F103V8<br />
ST STM32F103VB STM32F103VB<br />
ST STM32F103VC STM32F103VC<br />
ST STM32F103VD STM32F103VD<br />
ST STM32F103VE STM32F103VE<br />
ST STM32F103ZC STM32F103ZC<br />
ST STM32F103ZD STM32F103ZD<br />
ST STM32F103ZE STM32F103ZE<br />
ST STR710FZ1 STR710FZ1<br />
Table 6.1: Supported microcontrollers<br />
J-<strong>Link</strong> / J-<strong>Trace</strong> (<strong>UM08001</strong>) © 2004-2010 SEGGER Microcontroller GmbH & Co. KG
Manufacturer Device ID Devices<br />
ST STR710FZ2 STR710FZ2<br />
ST STR711FR0 STR711FR0<br />
ST STR711FR1 STR711FR1<br />
ST STR711FR2 STR711FR2<br />
ST STR712FR0 STR712FR0<br />
ST STR712FR1 STR712FR1<br />
ST STR712FR2 STR712FR2<br />
ST STR715FR0 STR715FR0<br />
ST STR730FZ1 STR730FZ1<br />
ST STR730FZ2 STR730FZ2<br />
ST STR731FV0 STR731FV0<br />
ST STR731FV1 STR731FV1<br />
ST STR731FV2 STR731FV2<br />
ST STR735FZ1 STR735FZ1<br />
ST STR735FZ2 STR735FZ2<br />
ST STR736FV0 STR736FV0<br />
ST STR736FV1 STR736FV1<br />
ST STR736FV2 STR736FV2<br />
ST STR750FV0 STR750FV0<br />
ST STR750FV1 STR750FV1<br />
ST STR750FV2 STR750FV2<br />
ST STR751FR0 STR751FR0<br />
ST STR751FR1 STR751FR1<br />
ST STR751FR2 STR751FR2<br />
ST STR752FR0 STR752FR0<br />
ST STR752FR1 STR752FR1<br />
ST STR752FR2 STR752FR2<br />
ST STR755FR0 STR755FR0<br />
ST STR755FR1 STR755FR1<br />
ST STR755FR2 STR755FR2<br />
ST STR755FV0 STR755FV0<br />
ST STR755FV1 STR755FV1<br />
ST STR755FV2 STR755FV2<br />
ST STR910FAM32 STR910FAM32<br />
ST STR910FAW32 STR910FAW32<br />
ST STR910FAZ32 STR910FAZ32<br />
ST STR911FAM42 STR911FAM42<br />
ST STR911FAM44 STR911FAM44<br />
ST STR911FAM46 STR911FAM46<br />
ST STR911FAM47 STR911FAM47<br />
ST STR911FAW42 STR911FAW42<br />
ST STR911FAW44 STR911FAW44<br />
ST STR911FAW46 STR911FAW46<br />
ST STR911FAW47 STR911FAW47<br />
ST STR911FM32 STR911FM32<br />
ST STR911FM42 STR911FM42<br />
ST STR911FM44 STR911FM44<br />
ST STR911FW32 STR911FW32<br />
ST STR911FW42 STR911FW42<br />
ST STR911FW44 STR911FW44<br />
Table 6.1: Supported microcontrollers<br />
J-<strong>Link</strong> / J-<strong>Trace</strong> (<strong>UM08001</strong>) © 2004-2010 SEGGER Microcontroller GmbH & Co. KG<br />
145
146 CHAPTER 6 Flash download and flash breakpoints<br />
Manufacturer Device ID Devices<br />
ST STR912FAW32 STR912FAW32<br />
ST STR912FAW42 STR912FAW42<br />
ST STR912FAW44 STR912FAW44<br />
ST STR912FAW46 STR912FAW46<br />
ST STR912FAW47 STR912FAW47<br />
ST STR912FAZ42 STR912FAZ42<br />
ST STR912FAZ44 STR912FAZ44<br />
ST STR912FAZ46 STR912FAZ46<br />
ST STR912FAZ47 STR912FAZ47<br />
ST STR912FM32 STR912FM32<br />
ST STR912FM42 STR912FM42<br />
ST STR912FM44 STR912FM44<br />
ST STR912FW32 STR912FW32<br />
ST STR912FW42 STR912FW42<br />
ST STR912FW44 STR912FW44<br />
TI TMS470R1A64 TMS470R1A64<br />
TI TMS470R1A128 TMS470R1A128<br />
TI TMS470R1A256 TMS470R1A256<br />
TI TMS470R1A288 TMS470R1A288<br />
TI TMS470R1A384 TMS470R1A384<br />
TI TMS470R1B512 TMS470R1B512<br />
TI TMS470R1B768 TMS470R1B768<br />
TI TMS470R1B1M TMS470R1B1M<br />
TI TMS470R1VF288 TMS470R1VF288<br />
TI TMS470R1VF688 TMS470R1VF688<br />
TI TMS470R1VF689 TMS470R1VF689<br />
Toshiba** TMPM330FDFG TMPM330FDFG<br />
Table 6.1: Supported microcontrollers<br />
*Supported by J-Flash only.<br />
**Not supported by J-<strong>Link</strong> ARM RDI<br />
J-<strong>Link</strong> / J-<strong>Trace</strong> (<strong>UM08001</strong>) © 2004-2010 SEGGER Microcontroller GmbH & Co. KG
6.4 Setup for different debuggers (internal flash)<br />
The J-<strong>Link</strong> flash download and flash breakpoints features can be used by different<br />
debuggers, such as IAR Embedded Workbench and GDB. For different debuggers<br />
there are different steps required to enable J-<strong>Link</strong> flash download and flash breakpoints<br />
which will be explained in this section.<br />
6.4.1 IAR Embedded Workbench<br />
To use the J-<strong>Link</strong> ARM FlashDL and FlashBP features with the IAR Embedded Workbench<br />
is quite simple:<br />
First, choose the right device in the project settings if not already done. The device<br />
settings can be found at Project->Options->General Options->Target.<br />
To use J-<strong>Link</strong> ARM FlashDL the IAR flashloader has to be disabled (the FlashBP feature<br />
can also be used when IAR flashloader is enabled). To disable the IAR flashloader<br />
the checkbox Use flash loader(s) at Project->Options->Debugger-<br />
>Download has to be disabled, as shown below.<br />
If you use the IAR project for the first time, the use of J-<strong>Link</strong> ARM FlashDL and<br />
FlashBPs is set to Auto, which is the default value. For more information about different<br />
configurations for J-<strong>Link</strong> ARM FlashDL and FlashBPs please refer to Settings<br />
J-<strong>Link</strong> / J-<strong>Trace</strong> (<strong>UM08001</strong>) © 2004-2010 SEGGER Microcontroller GmbH & Co. KG<br />
147
148 CHAPTER 6 Flash download and flash breakpoints<br />
on page 107. Now you can start the debug session. If you run this project for the<br />
first time a settings file is created in which the configuration of J-<strong>Link</strong> ARM FlashDL<br />
and FlashBPs is saved. This settings file is created for every project configuration<br />
(for example Debug_RAM, Debug_FLASH), so you can save different J-<strong>Link</strong> ARM<br />
FlashDL and FlashBP configurations for different project configurations. When the<br />
debug session starts, you should see the selected target in the Device tab of the J-<br />
<strong>Link</strong> status window. When the debug session is running you can modify the settings<br />
regarding J-<strong>Link</strong> ARM FlashDL and FlashBPs, in the Settings tab and save them to<br />
the settings file.<br />
Currently changes in this tab will take effect next time the debug session is started.<br />
6.4.2 Keil MDK<br />
To use the J-<strong>Link</strong> ARM FlashDL and FlashBP features with the Keil MDK is quite simple:<br />
First, choose the device in the project settings if not already done. The device settings<br />
can be found at Project->Options for Target->Device.<br />
J-<strong>Link</strong> / J-<strong>Trace</strong> (<strong>UM08001</strong>) © 2004-2010 SEGGER Microcontroller GmbH & Co. KG
Then J-<strong>Link</strong> / J-<strong>Trace</strong> has to be selected as debugger. To select J-<strong>Link</strong> / J-<strong>Trace</strong> as<br />
debugger simply choose J-<strong>Link</strong> / J-<strong>Trace</strong> from the list box which can be found at<br />
Project->Options for Target->Debug.<br />
To use J-<strong>Link</strong> ARM FlashDL the J-<strong>Link</strong> flashloader has to be selected (the FlashBP<br />
feature can also be used when J-<strong>Link</strong> flashloader is disabled). To enable the J-<strong>Link</strong><br />
flashloader J-<strong>Link</strong> / J-<strong>Trace</strong> at Project->Options for Target->Utilities has to be<br />
selected.<br />
If you use the MDK project for the first time, the J-<strong>Link</strong> ARM FlashDL and FlashBPs<br />
settings are configured to Auto, which is the default value. For more information<br />
about different configurations for J-<strong>Link</strong> ARM FlashDL and FlashBPs please refer to<br />
chapter Settings on page 107. Now you can start the debug session. If you run this<br />
project for the first time a settings file is created in which the configuration of J-<strong>Link</strong><br />
ARM FlashDL and FlashBPs is saved. This settings file is created for every project<br />
configuration (e.g. Debug_RAM, Debug_FLASH), so you can save different J-<strong>Link</strong><br />
ARM FlashDL and FlashBP configurations for different project configurations. When<br />
the debug session starts, you should see the selected target in the General tab of<br />
J-<strong>Link</strong> / J-<strong>Trace</strong> (<strong>UM08001</strong>) © 2004-2010 SEGGER Microcontroller GmbH & Co. KG<br />
149
150 CHAPTER 6 Flash download and flash breakpoints<br />
the J-<strong>Link</strong> status window. When the debug session is running you can modify the settings<br />
regarding J-<strong>Link</strong> ARM FlashDL and FlashBPs, in the Settings tab and save<br />
them in the settings file.<br />
6.4.3 J-<strong>Link</strong> GDB Server<br />
The configuration for the J-<strong>Link</strong> GDB Server is done by the .gdbinit file. The following<br />
commands has to be added to the .gdbinit file to enable J-<strong>Link</strong> ARM FlashDL and<br />
FlashBPs:<br />
monitor flash device <br />
monitor flash download = 1<br />
monitor flash breakpoints = 1<br />
For more information about these three commands please refer to the J-<strong>Link</strong> GDB<br />
Server <strong>User</strong> <strong>Guide</strong> chapter Supported remote commands.<br />
6.4.4 J-<strong>Link</strong> RDI<br />
The configuration for J-<strong>Link</strong> RDI is done via the J-<strong>Link</strong> RDI configuration dialog. For<br />
more information about the J-<strong>Link</strong> RDI configuration dialog please refer to the J-<strong>Link</strong><br />
RDI <strong>User</strong> <strong>Guide</strong>, chapter Configuration dialog. If you use the J-<strong>Link</strong> ARM FlashDL<br />
and/or FlashBP feature with RDI disable them in the J-<strong>Link</strong> status window or leave<br />
the default settings.<br />
J-<strong>Link</strong> / J-<strong>Trace</strong> (<strong>UM08001</strong>) © 2004-2010 SEGGER Microcontroller GmbH & Co. KG
6.5 Setup for different debuggers (CFI flash)<br />
The J-<strong>Link</strong> flash download and flash breakpoints features can be used by different<br />
debuggers, such as IAR Embedded Workbench and GDB. The setup for using flash<br />
download and flash breakpoints with external CFI-compliant NOR flash is different<br />
from the setup for internal flash. In this section the setup for CFI-compliant NOR<br />
flash is described.<br />
6.5.1 IAR Embedded Workbench / Keil MDK<br />
Using the J-<strong>Link</strong> flash download and flash breakpoints features with the IAR Embedded<br />
Workbench is quite simple:<br />
First, start the debug session and open the J-<strong>Link</strong> Control Panel. In the tab "Settings"<br />
you will find the location of the settings file.<br />
Close the debug session and open the settings file with a text editor. Add the following<br />
lines to the file:<br />
[CFI]<br />
CFISize = <br />
CFIAddr = <br />
[GENERAL]<br />
WorkRAMSize = <br />
WorkRAMAddr = <br />
After this the file should look similar to the sample in the following screenshot.<br />
J-<strong>Link</strong> / J-<strong>Trace</strong> (<strong>UM08001</strong>) © 2004-2010 SEGGER Microcontroller GmbH & Co. KG<br />
151
152 CHAPTER 6 Flash download and flash breakpoints<br />
Save the settings file and restart the debug session. Open the J-<strong>Link</strong> Control Panel<br />
and verify that the "MemMap" tab shows the new settings for CFI flash and work RAM<br />
area.<br />
6.5.2 J-<strong>Link</strong> GDB Server<br />
The configuration for the J-<strong>Link</strong> GDB Server is done by the .gdbinit file. The following<br />
commands has to be added to the .gdbinit file to enable J-<strong>Link</strong> ARM FlashDL and<br />
FlashBPs:<br />
monitor WorkRAM = -<br />
monitor flash CFI = -<br />
monitor flash download = 1<br />
monitor flash breakpoints = 1<br />
For more information about these four commands please refer to the J-<strong>Link</strong> GDB<br />
Server <strong>User</strong> <strong>Guide</strong> chapter Supported remote commands.<br />
6.5.3 J-<strong>Link</strong> RDI<br />
Currently J-<strong>Link</strong> RDI supports internal flash memory only.<br />
J-<strong>Link</strong> / J-<strong>Trace</strong> (<strong>UM08001</strong>) © 2004-2010 SEGGER Microcontroller GmbH & Co. KG
Chapter 7<br />
Device specifics<br />
This chapter gives some additional information about specific devices.<br />
J-<strong>Link</strong> / J-<strong>Trace</strong> (<strong>UM08001</strong>) © 2004-2010 SEGGER Microcontroller GmbH & Co. KG<br />
153
154 CHAPTER 7 Device specifics<br />
7.1 Analog Devices<br />
J-<strong>Link</strong> has been tested with the following MCUs from Analog Devices, but should work<br />
with any ARM7/9 and Cortex-M3 device:<br />
• ADuC7020x62<br />
• ADuC7021x32<br />
• ADuC7021x62<br />
• ADuC7022x32<br />
• ADuC7022x62<br />
• ADuC7024x62<br />
• ADuC7025x32<br />
• ADuC7025x62<br />
• ADuC7026x62<br />
• ADuC7027x62<br />
• ADuC7030<br />
• ADuC7031<br />
• ADuC7032<br />
• ADuC7033<br />
• ADuC7060<br />
• ADuC7128<br />
• ADuC7129<br />
• ADuC7229x126<br />
If you experience problems with a particular device, do not hesitate to contact Segger.<br />
7.1.1 ADuC7xxx<br />
All devices of this family are supported by J-<strong>Link</strong>.<br />
7.1.1.1 Software reset<br />
A special reset strategy has been made available for Analog Devices ADuC7xxx<br />
MCUs. This special reset strategy is a software reset. "Software reset" means basically<br />
no reset, just changing the CPU registers such as PC and CPSR.<br />
The software reset for Analog Devices ADuC7xxxx executes the following sequence:<br />
• The CPU is halted<br />
• A software reset sequence is downloaded to RAM<br />
• A breakpoint at address 0 is set<br />
• The software reset sequence is executed.<br />
It is recommended to use this reset strategy. This sequence performs a reset of CPU<br />
and peripherals and halts the CPU before executing instructions of the user program.<br />
It is the recommended reset sequence for Analog Devices ADuC7xxx MCUs and works<br />
with these devices only.<br />
This information is applicable to the following devices:<br />
• Analog ADuC7020x62<br />
• Analog ADuC7021x32<br />
• Analog ADuC7021x62<br />
• Analog ADuC7022x32<br />
• Analog ADuC7022x62<br />
• Analog ADuC7024x62<br />
• Analog ADuC7025x32<br />
• Analog ADuC7025x62<br />
• Analog ADuC7026x62<br />
• Analog ADuC7027x62<br />
• Analog ADuC7030<br />
• Analog ADuC7031<br />
• Analog ADuC7032<br />
• Analog ADuC7033<br />
J-<strong>Link</strong> / J-<strong>Trace</strong> (<strong>UM08001</strong>) © 2004-2010 SEGGER Microcontroller GmbH & Co. KG
• Analog ADuC7128<br />
• Analog ADuC7129<br />
• Analog ADuC7229x126<br />
J-<strong>Link</strong> / J-<strong>Trace</strong> (<strong>UM08001</strong>) © 2004-2010 SEGGER Microcontroller GmbH & Co. KG<br />
155
156 CHAPTER 7 Device specifics<br />
7.2 ATMEL<br />
J-<strong>Link</strong> has been tested with the following ATMEL devices, but should work with any<br />
ARM7/9 and Cortex-M3 device:<br />
• AT91SAM7A3<br />
• AT91SAM7S32<br />
• AT91SAM7S321<br />
• AT91SAM7S64<br />
• AT91SAM7S128<br />
• AT91SAM7S256<br />
• AT91SAM7S512<br />
• AT91SAM7SE32<br />
• AT91SAM7SE256<br />
• AT91SAM7SE512<br />
• AT91SAM7X128<br />
• AT91SAM7X256<br />
• AT91SAM7X512<br />
• AT91SAM7XC128<br />
• AT91SAM7XC256<br />
• AT91SAM7XC512<br />
• AT91RM9200<br />
• AT91SAM9260<br />
• AT91SAM9261<br />
• AT91SAM9262<br />
• AT91SAM9263<br />
If you experience problems with a particular device, do not hesitate to contact Segger.<br />
7.2.1 AT91SAM7<br />
All devices of this family are supported by J-<strong>Link</strong>.<br />
7.2.1.1 Reset strategy<br />
The reset pin of the device is per default disabled. This means that the reset strategies<br />
which rely on the reset pin (low pulse on reset) do not work per default. For this<br />
reason a special reset strategy has been made available.<br />
It is recommended to use this reset strategy. This special reset strategy resets the<br />
peripherals by writing to the RSTC_CR register. Resetting the peripherals puts all<br />
peripherals in the defined reset state. This includes memory mapping register, which<br />
means that after reset flash is mapped to address 0. It is also possible to achieve the<br />
same effect by writing 0x4 to the RSTC_CR register located at address 0xfffffd00.<br />
This information is applicable to the following devices:<br />
• AT91SAM7S (all devices)<br />
• AT91SAM7SE (all devices)<br />
• AT91SAM7X (all devices)<br />
• AT91SAM7XC (all devices)<br />
• AT91SAM7A (all devices)<br />
7.2.1.2 Memory mapping<br />
Either flash or RAM can be mapped to address 0. After reset flash is mapped to<br />
address 0. In order to map RAM to address 0, a 1 can be written to the RSTC_CR register.<br />
Unfortunately, this remap register is a toggle register, which switches between<br />
RAM and flash with every time bit zero is written.<br />
In order to achieve a defined mapping, there are two options:<br />
1. Use the software reset described above.<br />
2. Test if RAM is located at 0 using multiple read/write operations and testing the<br />
J-<strong>Link</strong> / J-<strong>Trace</strong> (<strong>UM08001</strong>) © 2004-2010 SEGGER Microcontroller GmbH & Co. KG
esults.<br />
Clearly 1. is the easiest solution and is recommended.<br />
This information is applicable to the following devices:<br />
• AT91SAM7S (all devices)<br />
• AT91SAM7SE (all devices)<br />
• AT91SAM7X (all devices)<br />
• AT91SAM7XC (all devices)<br />
• AT91SAM7A (all devices)<br />
7.2.1.3 Recommended init sequence<br />
In order to work with an ATMEL AT91SAM7 device, it has to be initialized. The following<br />
paragraph describes the steps of an init sequence. An example for different software<br />
tools, such as J-<strong>Link</strong> GDB Server, IAR Workbench and RDI, is given.<br />
• Set JTAG speed to 30kHz<br />
• Reset target<br />
• Perform peripheral reset<br />
• Disable watchdog<br />
• Initialize PLL<br />
• Use full JTAG speed<br />
Samples<br />
GDB Sample<br />
# connect to the J-<strong>Link</strong> gdb server<br />
target remote localhost:2331<br />
monitor flash device = AT91SAM7S256<br />
monitor flash download = 1<br />
monitor flash breakpoints = 1<br />
# Set JTAG speed to 30 kHz<br />
monitor endian little<br />
monitor speed 30<br />
# Reset the target<br />
monitor reset 8<br />
monitor sleep 10<br />
# Perform peripheral reset<br />
monitor long 0xFFFFFD00 = 0xA5000004<br />
monitor sleep 10<br />
# Disable watchdog<br />
monitor long 0xFFFFFD44 = 0x00008000<br />
monitor sleep 10<br />
# Initialize PLL<br />
monitor long 0xFFFFFC20 = 0x00000601<br />
monitor sleep 10<br />
monitor long 0xFFFFFC2C = 0x00480a0e<br />
monitor sleep 10<br />
monitor long 0xFFFFFC30 = 0x00000007<br />
monitor sleep 10<br />
monitor long 0xFFFFFF60 = 0x00480100<br />
monitor sleep 100<br />
# Setup GDB for faster downloads<br />
#set remote memory-write-packet-size 1024<br />
set remote memory-write-packet-size 4096<br />
set remote memory-write-packet-size fixed<br />
monitor speed 12000<br />
break main<br />
load<br />
continue<br />
J-<strong>Link</strong> / J-<strong>Trace</strong> (<strong>UM08001</strong>) © 2004-2010 SEGGER Microcontroller GmbH & Co. KG<br />
157
158 CHAPTER 7 Device specifics<br />
IAR Sample<br />
/*******************************************************************<br />
*<br />
* _Init()<br />
*/<br />
_Init() {<br />
__emulatorSpeed(30000); // Set JTAG speed to 30 kHz<br />
__writeMemory32(0xA5000004,0xFFFFFD00,"Memory"); // Perform peripheral reset<br />
__sleep(20000);<br />
__writeMemory32(0x00008000,0xFFFFFD44,"Memory"); // Disable Watchdog<br />
__sleep(20000);<br />
__writeMemory32(0x00000601,0xFFFFFC20,"Memory"); // PLL<br />
__sleep(20000);<br />
__writeMemory32(0x10191c05,0xFFFFFC2C,"Memory"); // PLL<br />
__sleep(20000);<br />
__writeMemory32(0x00000007,0xFFFFFC30,"Memory"); // PLL<br />
__sleep(20000);<br />
__writeMemory32(0x002f0100,0xFFFFFF60,"Memory"); // Set 1 wait state for<br />
__sleep(20000); // flash (2 cycles)<br />
__emulatorSpeed(12000000); // Use full JTAG speed<br />
}<br />
/*******************************************************************<br />
*<br />
* exec<strong>User</strong>Reset()<br />
*/<br />
exec<strong>User</strong>Reset() {<br />
__message "exec<strong>User</strong>Reset()";<br />
_Init();<br />
}<br />
/*******************************************************************<br />
*<br />
* exec<strong>User</strong>Preload()<br />
*/<br />
exec<strong>User</strong>Preload() {<br />
__message "exec<strong>User</strong>Preload()";<br />
_Init();<br />
}<br />
RDI Sample<br />
SetJTAGSpeed(30); // Set JTAG speed to 30 kHz<br />
Reset(0, 0);<br />
Write32(0xFFFFFD00, 0xA5000004); // Perform peripheral reset<br />
Write32(0xFFFFFD44, 0x00008000); // Disable watchdog<br />
Write32(0xFFFFFC20, 0x00000601); // Set PLL<br />
Delay(200);<br />
Write32(0xFFFFFC2C, 0x00191C05); // Set PLL and divider<br />
Delay(200);<br />
Write32(0xFFFFFC30, 0x00000007); // Select master clock and processor clock<br />
Write32(0xFFFFFF60, 0x00320300); // Set flash wait states<br />
SetJTAGSpeed(12000);<br />
7.2.2 AT91SAM9<br />
These devices are based on ARM926EJ-S core. All devices of this family are supported<br />
by J-<strong>Link</strong>.<br />
7.2.2.1 JTAG settings<br />
We recommend using adaptive clocking.<br />
This information is applicable to the following devices:<br />
• AT91RM9200<br />
• AT91SAM9260<br />
• AT91SAM9261<br />
• AT91SAM9262<br />
• AT91SAM9263<br />
J-<strong>Link</strong> / J-<strong>Trace</strong> (<strong>UM08001</strong>) © 2004-2010 SEGGER Microcontroller GmbH & Co. KG
7.3 Freescale<br />
J-<strong>Link</strong> has been tested with the following Freescale devices, but should work with any<br />
ARM7/9 and Cortex-M3 device:<br />
• MAC7101<br />
• MAC7106<br />
• MAC7111<br />
• MAC7112<br />
• MAC7116<br />
• MAC7121<br />
• MAC7122<br />
• MAC7126<br />
• MAC7131<br />
• MAC7136<br />
• MAC7141<br />
• MAC7142<br />
If you experience problems with a particular device, do not hesitate to contact Segger.<br />
7.3.1 MAC71x<br />
All devices of this family are supported by J-<strong>Link</strong>.<br />
J-<strong>Link</strong> / J-<strong>Trace</strong> (<strong>UM08001</strong>) © 2004-2010 SEGGER Microcontroller GmbH & Co. KG<br />
159
160 CHAPTER 7 Device specifics<br />
7.4 Luminary Micro<br />
J-<strong>Link</strong> has been tested with the following Luminary Micro devices, but should work<br />
with any ARM7/9 and Cortex-M3 device:<br />
• LM3S101<br />
• LM3S102<br />
• LM3S301<br />
• LM3S310<br />
• LM3S315<br />
• LM3S316<br />
• LM3S317<br />
• LM3S328<br />
• LM3S601<br />
• LM3S610<br />
• LM3S611<br />
• LM3S612<br />
• LM3S613<br />
• LM3S615<br />
• LM3S617<br />
• LM3S618<br />
• LM3S628<br />
• LM3S801<br />
• LM3S811<br />
• LM3S812<br />
• LM3S815<br />
• LM3S817<br />
• LM3S818<br />
• LM3S828<br />
• LM3S2110<br />
• LM3S2139<br />
• LM3S2410<br />
• LM3S2412<br />
• LM3S2432<br />
• LM3S2533<br />
• LM3S2620<br />
• LM3S2637<br />
• LM3S2651<br />
• LM3S2730<br />
• LM3S2739<br />
• LM3S2939<br />
• LM3S2948<br />
• LM3S2950<br />
• LM3S2965<br />
• LM3S6100<br />
• LM3S6110<br />
• LM3S6420<br />
• LM3S6422<br />
• LM3S6432<br />
• LM3S6610<br />
• LM3S6633<br />
• LM3S6637<br />
• LM3S6730<br />
• LM3S6938<br />
• LM3S6952<br />
• LM3S6965<br />
If you experience problems with a particular device, do not hesitate to contact Segger.<br />
J-<strong>Link</strong> / J-<strong>Trace</strong> (<strong>UM08001</strong>) © 2004-2010 SEGGER Microcontroller GmbH & Co. KG
7.4.1 Unlocking LM3Sxxx devices<br />
If your device has been "locked" accidentially (e.g. by bad application code in flash<br />
which mis-configures the PLL) and J-<strong>Link</strong> can not identify it anymore, there is a special<br />
unlock sequence which erases the flash memory of the device, even if it can not<br />
be identified. This unlock sequence can be send to the target, by using the "unlock"<br />
comnmand in J-<strong>Link</strong> Commander.<br />
7.4.2 Stellaris LM3S100 Series<br />
These device are Cortex-M3 based.<br />
All devices of this family are supported by J-<strong>Link</strong>.<br />
7.4.3 Stellaris LM3S300 Series<br />
These device are Cortex-M3 based.<br />
All devices of this family are supported by J-<strong>Link</strong>.<br />
7.4.4 Stellaris LM3S600 Series<br />
These device are Cortex-M3 based.<br />
All devices of this family are supported by J-<strong>Link</strong>.<br />
7.4.5 Stellaris LM3S800 Series<br />
These device are Cortex-M3 based.<br />
All devices of this family are supported by J-<strong>Link</strong>.<br />
7.4.6 Stellaris LM3S2000 Series<br />
These device are Cortex-M3 based.<br />
All devices of this family are supported by J-<strong>Link</strong>.<br />
7.4.7 Stellaris LM3S6100 Series<br />
These device are Cortex-M3 based.<br />
All devices of this family are supported by J-<strong>Link</strong>.<br />
7.4.8 Stellaris LM3S6400 Series<br />
These device are Cortex-M3 based.<br />
All devices of this family are supported by J-<strong>Link</strong>.<br />
7.4.9 Stellaris LM3S6700 Series<br />
These device are Cortex-M3 based.<br />
All devices of this family are supported by J-<strong>Link</strong>.<br />
7.4.10 Stellaris LM3S6900 Series<br />
These device are Cortex-M3 based.<br />
All devices of this family are supported by J-<strong>Link</strong>.<br />
J-<strong>Link</strong> / J-<strong>Trace</strong> (<strong>UM08001</strong>) © 2004-2010 SEGGER Microcontroller GmbH & Co. KG<br />
161
162 CHAPTER 7 Device specifics<br />
7.5 NXP<br />
J-<strong>Link</strong> has been tested with the following NXP devices, but should work with any<br />
ARM7/9 and Cortex-M3 device:<br />
• LPC1111<br />
• LPC1113<br />
• LPC1311<br />
• LPC1313<br />
• LPC1342<br />
• LPC1343<br />
• LPC1751<br />
• LPC1751<br />
• LPC1752<br />
• LPC1754<br />
• LPC1756<br />
• LPC1758<br />
• LPC1764<br />
• LPC1765<br />
• LPC1766<br />
• LPC1768<br />
• LPC2101<br />
• LPC2102<br />
• LPC2103<br />
• LPC2104<br />
• LPC2105<br />
• LPC2106<br />
• LPC2109<br />
• LPC2114<br />
• LPC2119<br />
• LPC2124<br />
• LPC2129<br />
• LPC2131<br />
• LPC2132<br />
• LPC2134<br />
• LPC2136<br />
• LPC2138<br />
• LPC2141<br />
• LPC2142<br />
• LPC2144<br />
• LPC2146<br />
• LPC2148<br />
• LPC2194<br />
• LPC2212<br />
• LPC2214<br />
• LPC2292<br />
• LPC2294<br />
• LPC2364<br />
• LPC2366<br />
• LPC2368<br />
• LPC2378<br />
• LPC2468<br />
• LPC2478<br />
• LPC2880<br />
• LPC2888<br />
• LPC2917<br />
• LPC2919<br />
• LPC2927<br />
• LPC2929<br />
• PCF87750<br />
• SJA2010<br />
• SJA2510<br />
J-<strong>Link</strong> / J-<strong>Trace</strong> (<strong>UM08001</strong>) © 2004-2010 SEGGER Microcontroller GmbH & Co. KG
If you experience problems with a particular device, do not hesitate to contact Segger.<br />
7.5.1 LPC<br />
7.5.1.1 Fast GPIO bug<br />
The values of the fast GPIO registers can not be read direct via JTAG from a debugger.<br />
The direct access to the registers corrupts the returned values. This means that<br />
the values in the fast GPIO registers normally can not be checked or changed from a<br />
debugger.<br />
Solution / Workaround<br />
J-<strong>Link</strong> supports command strings which can be used to read a memory area indirect.<br />
Indirectly reading means that a small code snippet will be written into RAM of the<br />
target device, which reads and transfers the data of the specified memory area to the<br />
debugger. Indirectly reading solves the fast GPIO problem, because only direct register<br />
access corrupts the register contents.<br />
Define a 256 byte aligned area in RAM of the LPC target device with the J-<strong>Link</strong> command<br />
map ram and define afterwards the memory area which should be read indirect<br />
with the command map indirectread to use the indirectly reading feature of J-<strong>Link</strong>.<br />
Note that the data in the defined RAM area is saved and will be restored after using<br />
the RAM area.<br />
This information is applicable to the following devices:<br />
• LPC2101<br />
• LPC2102<br />
• LPC2103<br />
• LPC213x/01<br />
• LPC214x (all devices)<br />
• LPC23xx (all devices)<br />
• LPC24xx (all devices)<br />
Example<br />
J-<strong>Link</strong> commands line options can be used for example with the C-SPY debugger of<br />
the IAR Embedded Workbench. Open the Project options dialog and select Debugger.<br />
Select Use command line options in the Extra Options tap and enter in the<br />
textfield --jlink_exec_command "map ram 0x40000000-0x40003fff; map indirectread<br />
0x3fffc000-0x3fffcfff; map exclude 0x3fffd000-0x3fffffff;" as shown<br />
in the screenshot below.<br />
J-<strong>Link</strong> / J-<strong>Trace</strong> (<strong>UM08001</strong>) © 2004-2010 SEGGER Microcontroller GmbH & Co. KG<br />
163
164 CHAPTER 7 Device specifics<br />
With these additional commands are the values of the fast GPIO registers in the C-<br />
SPY debugger correct and can be used for debugging. For more information about J-<br />
<strong>Link</strong> command line options refer to subchapter Command strings on page 125.<br />
7.5.1.2 Reset (Cortex-M3 based devices)<br />
For Cortex-M3 based NXP LPC devices the reset itself does not differ from the one for<br />
other Cortex-M3 based devices: After the device has been reset, the core is halted<br />
before any instruction is performed. For the Cortex-M3 based LPC devices this means<br />
the CPU is halted before the bootloader which is mapped at address 0 after reset.<br />
The user should write the memmap register after reset, to ensure that user flash is<br />
mapped at address 0. Moreover, the user have to correct the Stack pointer (R13) and<br />
the PC (R15) manually, after reset in order to debug the application.<br />
LPC288x flash programming<br />
In order to use the LPC288x devices in combination with J-<strong>Link</strong> FlashDL the application<br />
you are trying to debug, should be linked to the original flash @ addr<br />
0x10400000. Otherwise it is user’s responsibility to ensure that flash is re-mapped to<br />
0x0 in order to debug the application from addr 0x0.<br />
J-<strong>Link</strong> / J-<strong>Trace</strong> (<strong>UM08001</strong>) © 2004-2010 SEGGER Microcontroller GmbH & Co. KG
7.6 OKI<br />
J-<strong>Link</strong> has been tested with the following OKI devices, but should work with any<br />
ARM7/9 and Cortex-M3 device:<br />
• ML67Q4002<br />
• ML67Q4003<br />
• ML67Q4050<br />
• ML67Q4051<br />
• ML67Q4060<br />
• ML67Q4061<br />
If you experience problems with a particular device, do not hesitate to contact Segger.<br />
7.6.1 ML67Q40x<br />
All devices of this family are supported by J-<strong>Link</strong>.<br />
J-<strong>Link</strong> / J-<strong>Trace</strong> (<strong>UM08001</strong>) © 2004-2010 SEGGER Microcontroller GmbH & Co. KG<br />
165
166 CHAPTER 7 Device specifics<br />
7.7 ST Microelectronics<br />
J-<strong>Link</strong> has been tested with the following ST Microelectronics devices, but should<br />
work with any ARM7/9 and Cortex-M3 device:<br />
• STR710FZ1<br />
• STR710FZ2<br />
• STR711FR0<br />
• STR711FR1<br />
• STR711FR2<br />
• STR712FR0<br />
• STR712FR1<br />
• STR712FR2<br />
• STR715FR0<br />
• STR730FZ1<br />
• STR730FZ2<br />
• STR731FV0<br />
• STR731FV1<br />
• STR731FV2<br />
• STR735FZ1<br />
• STR735FZ2<br />
• STR736FV0<br />
• STR736FV1<br />
• STR736FV2<br />
• STR750FV0<br />
• STR750FV1<br />
• STR750FV2<br />
• STR751FR0<br />
• STR751FR1<br />
• STR751FR2<br />
• STR752FR0<br />
• STR752FR1<br />
• STR752FR2<br />
• STR755FR0<br />
• STR755FR1<br />
• STR755FR2<br />
• STR755FV0<br />
• STR755FV1<br />
• STR755FV2<br />
• STR911FM32<br />
• STR911FM44<br />
• STR911FW32<br />
• STR911FW44<br />
• STR912FM32<br />
• STR912FM44<br />
• STR912FW32<br />
• STR912FW44<br />
• STM32F101C6<br />
• STM32F101C8<br />
• STM32F101R6<br />
• STM32F101R8<br />
• STM32F101RB<br />
• STM32F101V8<br />
• STM32F101VB<br />
• STM32F103C6<br />
• STM32F103C8<br />
• STM32F103R6<br />
• STM32F103R8<br />
• STM32F103RB<br />
• STM32F103V8<br />
• STM32F103VB<br />
J-<strong>Link</strong> / J-<strong>Trace</strong> (<strong>UM08001</strong>) © 2004-2010 SEGGER Microcontroller GmbH & Co. KG
If you experience problems with a particular device, do not hesitate to contact Segger.<br />
7.7.1 STR 71x<br />
These devices are ARM7TDMI based.<br />
All devices of this family are supported by J-<strong>Link</strong>.<br />
7.7.2 STR 73x<br />
These devices are ARM7TDMI based.<br />
All devices of this family are supported by J-<strong>Link</strong>.<br />
7.7.3 STR 75x<br />
These devices are ARM7TDMI-S based.<br />
All devices of this family are supported by J-<strong>Link</strong>.<br />
7.7.4 STR91x<br />
These device are ARM966E-S based.<br />
All devices of this family are supported by J-<strong>Link</strong>.<br />
7.7.4.1 Flash erasing<br />
The devices have 3 TAP controllers built-in. When starting J-<strong>Link</strong>.exe, it reports 3<br />
JTAG devices. A special tool, J-<strong>Link</strong> STR9 Commander (J<strong>Link</strong>STR91x.exe) is available<br />
to directly access the flash controller of the device. This tool can be used to erase the<br />
flash of the controller even if a program is in flash which causes the ARM core to<br />
stall. For more information about the J-<strong>Link</strong> STR9 Commander, please refer to J-<strong>Link</strong><br />
STR91x Commander (Command line tool) on page 73.<br />
When starting the STR91x commander, a command sequence will be performed<br />
which brings MCU into Turbo Mode.<br />
"While enabling the Turbo Mode, a dedicated test mode signal is set and controls the<br />
GPIOs in output. The IOs are maintained in this state until a next JTAG instruction is<br />
send." (ST Microelectronics)<br />
Enabling Turbo Mode is necessary to guarantee proper function of all commands in<br />
the STR91x Commander.<br />
7.7.5 STM32<br />
These device are Cortex-M3 based.<br />
All devices of this family are supported by J-<strong>Link</strong>.<br />
7.7.5.1 Option byte programming<br />
we suggest to perform the programming of the option bytes directly from the target<br />
application. J-<strong>Link</strong> (or an additional software tool like J-Flash) does not support programming<br />
of the option bytes.<br />
7.7.5.2 Read-protection<br />
The user area internal flash of the STM32 devices can be protected against read by<br />
untrusted code. In order to unsecure a read-protected STM32 device, SEGGER offers<br />
a free command line tool which overrides the read-protection of a STM32 device. For<br />
more information about the J-<strong>Link</strong> STM32 Commander, please refer to J-<strong>Link</strong> STM32<br />
Commander (Command line tool) on page 75.<br />
Note: J-Flash ARM supports securing and unsecuring a STM32 device, too.<br />
J-<strong>Link</strong> / J-<strong>Trace</strong> (<strong>UM08001</strong>) © 2004-2010 SEGGER Microcontroller GmbH & Co. KG<br />
167
168 CHAPTER 7 Device specifics<br />
7.7.5.3 Hardware watchdog<br />
The hardware watchdog of a STM32 device can be enabled by programming the<br />
option bytes. If the hardware watchdog is enabled the device is reset periodically if<br />
the watchdog timer is not refreshed and reaches 0. If the hardware watchdog is<br />
enabled by an application which is located in flash and which does not refresh the<br />
watchdog timer, the device can not be debugged anymore.<br />
Disabling the hardware watchdog<br />
In order to disable the hardware watchdog the option bytes have to be re-programmed.<br />
SEGGER offers a free command line tool which reprograms the option<br />
bytes in order to disable the hardware watchdog. For more information about the<br />
STM32 commander, please refer to J-<strong>Link</strong> STM32 Commander (Command line tool)<br />
on page 75.<br />
Note: In order to re-program the option bytes they have to be erased first. Erasing<br />
the option bytes will read-protect the flash of the STM32. The STM32 commander<br />
will also override the read-protection of the STM32 device after disabling the watchdog.<br />
Please also note that unsecuring a read-protected device will cause a mass<br />
erase of the flash memory.<br />
J-<strong>Link</strong> / J-<strong>Trace</strong> (<strong>UM08001</strong>) © 2004-2010 SEGGER Microcontroller GmbH & Co. KG
7.8 Texas Instruments<br />
J-<strong>Link</strong> has been tested with the following Texas Instruments devices, but should work<br />
with any ARM7/9 and Cortex-M3 device:<br />
• TMS470R1A64<br />
• TMS470R1A128<br />
• TMS470R1A256<br />
• TMS470R1A288<br />
• TMS470R1A384<br />
• TMS470R1B512<br />
• TMS470R1B768<br />
• TMS470R1B1M<br />
• TMS470R1VF288<br />
• TMS470R1VF688<br />
• TMS470R1VF689<br />
If you experience problems with a particular device, do not hesitate to contact Segger.<br />
7.8.1 TMS470<br />
All devices of this family are supported by J-<strong>Link</strong>.<br />
J-<strong>Link</strong> / J-<strong>Trace</strong> (<strong>UM08001</strong>) © 2004-2010 SEGGER Microcontroller GmbH & Co. KG<br />
169
170 CHAPTER 7 Device specifics<br />
J-<strong>Link</strong> / J-<strong>Trace</strong> (<strong>UM08001</strong>) © 2004-2010 SEGGER Microcontroller GmbH & Co. KG
Chapter 8<br />
Target interfaces and adapters<br />
This chapter gives an overview about J-<strong>Link</strong> / J-<strong>Trace</strong> specific hardware details, such<br />
as the pinouts and available adapters.<br />
J-<strong>Link</strong> / J-<strong>Trace</strong> (<strong>UM08001</strong>) © 2004-2010 SEGGER Microcontroller GmbH & Co. KG<br />
171
172 CHAPTER 8 Target interfaces and adapters<br />
8.1 20-pin JTAG/SWD connector<br />
8.1.1 Pinout for JTAG<br />
J-<strong>Link</strong> and J-<strong>Trace</strong> have a JTAG connector compatible<br />
to ARM’s Multi-ICE. The JTAG connector is a 20<br />
way Insulation Displacement Connector (IDC) keyed<br />
box header (2.54mm male) that mates with IDC<br />
sockets mounted on a ribbon cable.<br />
The following table lists the J-<strong>Link</strong> / J-<strong>Trace</strong> JTAG<br />
pinout.<br />
PIN SIGNAL TYPE Description<br />
1 VTref Input<br />
2<br />
Not connected<br />
3 nTRST Output<br />
5 TDI Output<br />
7 TMS Output<br />
9 TCK Output<br />
11 RTCK Input<br />
13 TDO Input<br />
15 RESET I/O<br />
17 DBGRQ NC<br />
19<br />
5V-Supply<br />
This is the target reference voltage. It is used to check if<br />
the target has power, to create the logic-level reference for<br />
the input comparators and to control the output logic levels<br />
to the target. It is normally fed from Vdd of the target board<br />
and must not have a series resistor.<br />
NC This pin is not connected in J-<strong>Link</strong>.<br />
Output<br />
Table 8.1: J-<strong>Link</strong> / J-<strong>Trace</strong> pinout<br />
VTref 1 2 NC<br />
nTRST 3 4 GND<br />
TDI<br />
5 6 GND<br />
TMS 7 8 GND<br />
TCK 9 10 GND<br />
RTCK 11 12 GND<br />
TDO 13 14 GND<br />
RESET 15 16 GND<br />
DBGRQ 17 18 GND<br />
5V-Supply 19 20 GND<br />
JTAG Reset. Output from J-<strong>Link</strong> to the Reset signal of the<br />
target JTAG port. Typically connected to nTRST of the target<br />
CPU. This pin is normally pulled HIGH on the target to avoid<br />
unintentional resets when there is no connection.<br />
JTAG data input of target CPU.- It is recommended that this<br />
pin is pulled to a defined state on the target board. Typically<br />
connected to TDI of the target CPU.<br />
JTAG mode set input of target CPU. This pin should be<br />
pulled up on the target. Typically connected to TMS of the<br />
target CPU.<br />
JTAG clock signal to target CPU. It is recommended that this<br />
pin is pulled to a defined state of the target board. Typically<br />
connected to TCK of the target CPU.<br />
Return test clock signal from the target. Some targets must<br />
synchronize the JTAG inputs to internal clocks. To assist in<br />
meeting this requirement, you can use a returned, and<br />
retimed, TCK to dynamically control the TCK rate. J-<strong>Link</strong><br />
supports adaptive clocking, which waits for TCK changes to<br />
be echoed correctly before making further changes. Connect<br />
to RTCK if available, otherwise to GND.<br />
JTAG data output from target CPU. Typically connected to<br />
TDO of the target CPU.<br />
Target CPU reset signal. Typically connected to the RESET<br />
pin of the target CPU, which is typically called "nRST",<br />
"nRESET" or "RESET".<br />
This pin is not connected in J-<strong>Link</strong>. It is reserved for compatibility<br />
with other equipment to be used as a debug<br />
request signal to the target system. Typically connected to<br />
DBGRQ if available, otherwise left open.<br />
This pin can be used to supply power to the target hardware.<br />
Older J-<strong>Link</strong>s may not be able to supply power on this<br />
pin. For more information about how to enable/disable the<br />
power supply, please refer to Target power supply on<br />
page 174.<br />
J-<strong>Link</strong> / J-<strong>Trace</strong> (<strong>UM08001</strong>) © 2004-2010 SEGGER Microcontroller GmbH & Co. KG
Pins 4, 6, 8, 10, 12, 14, 16, 18, 20 are GND pins connected to GND in J-<strong>Link</strong>. They<br />
should also be connected to GND in the target system.<br />
8.1.1.1 Target board design<br />
We strongly advise following the recommendations given by the chip manufacturer.<br />
These recommendations are normally in line with the recommendations given in the<br />
table Pinout for JTAG on page 172. In case of doubt you should follow the recommendations<br />
given by the semiconductor manufacturer.<br />
You may take any female header following the specifications of DIN 41651.<br />
For example:<br />
Harting part-no. 09185206803<br />
Molex part-no. 90635-1202<br />
Tyco Electronics part-no. 2-215882-0<br />
JTAG connector<br />
J-<strong>Link</strong><br />
Typical target connection for JTAG<br />
5V supply<br />
VTref<br />
nTRST<br />
TDI<br />
TMS<br />
TCK<br />
RTCK<br />
TDO<br />
RESET<br />
GND<br />
19**<br />
8.1.1.2 Pull-up/pull-down resistors<br />
3*<br />
5<br />
7<br />
9<br />
11*<br />
* NTRST and RTCK may not be available on some CPUs.<br />
** Optional to supply the target board from J-<strong>Link</strong>.<br />
1<br />
13<br />
15<br />
nTRST<br />
Target board<br />
CPU<br />
Unless otherwise specified by developer’s manual, pull-ups/pull-downs are recommended<br />
to be between 2.2 kOhms and 47 kOhms.<br />
J-<strong>Link</strong> / J-<strong>Trace</strong> (<strong>UM08001</strong>) © 2004-2010 SEGGER Microcontroller GmbH & Co. KG<br />
19<br />
3<br />
5<br />
7<br />
9<br />
11<br />
13<br />
15<br />
20 20<br />
1<br />
TDI<br />
TMS<br />
TCK<br />
RTCK<br />
TDO<br />
nRST<br />
Voltage<br />
Regulator<br />
VCC<br />
GND<br />
VCC<br />
173
174 CHAPTER 8 Target interfaces and adapters<br />
8.1.1.3 Target power supply<br />
Pin 19 of the connector can be used to supply power to the target hardware. Supply<br />
voltage is 5V, max. current is 300mA. The output current is monitored and protected<br />
against overload and short-circuit.<br />
Power can be controlled via the J-<strong>Link</strong> commander. The following commands are<br />
available to control power:<br />
Command Explanation<br />
power on Switch target power on<br />
power off Switch target power off<br />
power on perm Set target power supply default to "on"<br />
power off perm<br />
Table 8.2: Command List<br />
Set target power supply default to "off"<br />
8.1.2 Pinout for SWD<br />
The J-<strong>Link</strong> and J-<strong>Trace</strong> JTAG connector is also compatible<br />
to ARM’s Serial Wire Debug (SWD).<br />
The following table lists the J-<strong>Link</strong> / J-<strong>Trace</strong> SWD<br />
pinout.<br />
PIN SIGNAL TYPE Description<br />
1 VTref Input<br />
2<br />
Not connected<br />
3 Not Used NC<br />
5 Not used NC<br />
7 SWDIO I/O<br />
9 SWCLK Output<br />
11 Not used NC<br />
13 SWO Output<br />
Table 8.3: J-<strong>Link</strong> / J-<strong>Trace</strong> SWD pinout<br />
This is the target reference voltage. It is used to check if<br />
the target has power, to create the logic-level reference for<br />
the input comparators and to control the output logic levels<br />
to the target. It is normally fed from Vdd of the target board<br />
and must not have a series resistor.<br />
NC This pin is not connected in J-<strong>Link</strong>.<br />
VTref 1 2 NC<br />
Not used 3 4 GND<br />
Not used 5 6 GND<br />
SWDIO 7 8 GND<br />
SWCLK 9 10 GND<br />
Not used 11 12 GND<br />
SWO 13 14 GND<br />
RESET 15 16 GND<br />
Not used 17 18 GND<br />
5V-Supply 19 20 GND<br />
This pin is not used by J-<strong>Link</strong>. If the device may also be<br />
accessed via JTAG, this pin may be connected to nTRST,<br />
otherwise leave open.<br />
This pin is not used by J-<strong>Link</strong>. If the device may also be<br />
accessed via JTAG, this pin may be connected to TDI, otherwise<br />
leave open.<br />
Single bi-directional data pin. A pull-up resistor is required.<br />
ARM recommends 100 kOhms.<br />
Clock signal to target CPU.<br />
It is recommended that this pin is pulled to a defined state<br />
on the target board. Typically connected to TCK of target<br />
CPU.<br />
This pin is not used by J-<strong>Link</strong> when operating in SWD mode.<br />
If the device may also be accessed via JTAG, this pin may<br />
be connected to RTCK, otherwise leave open.<br />
Serial Wire Output trace port. (Optional, not required for<br />
SWD communication.)<br />
J-<strong>Link</strong> / J-<strong>Trace</strong> (<strong>UM08001</strong>) © 2004-2010 SEGGER Microcontroller GmbH & Co. KG
PIN SIGNAL TYPE Description<br />
15 RESET I/O<br />
Target CPU reset signal. Typically connected to the RESET<br />
pin of the target CPU, which is typically called "nRST",<br />
"nRESET" or "RESET".<br />
17 Not used NC This pin is not connected in J-<strong>Link</strong>.<br />
19<br />
5V-Supply<br />
Output<br />
Table 8.3: J-<strong>Link</strong> / J-<strong>Trace</strong> SWD pinout<br />
This pin can be used to supply power to the target hardware.<br />
Older J-<strong>Link</strong>s may not be able to supply power on this<br />
pin. For more information about how to enable/disable the<br />
power supply, please refer to Target power supply on<br />
page 176.<br />
Pins 4, 6, 8, 10, 12, 14, 16, 18, 20 are GND pins connected to GND in J-<strong>Link</strong>. They<br />
should also be connected to GND in the target system.<br />
J-<strong>Link</strong> / J-<strong>Trace</strong> (<strong>UM08001</strong>) © 2004-2010 SEGGER Microcontroller GmbH & Co. KG<br />
175
176 CHAPTER 8 Target interfaces and adapters<br />
8.1.2.1 Target board design<br />
We strongly advise following the recommendations given by the chip manufacturer.<br />
These recommendations are normally in line with the recommendations given in the<br />
table Pinout for SWD on page 174. In case of doubt you should follow the recommendations<br />
given by the semiconductor manufacturer.<br />
JTAG connector<br />
J-<strong>Link</strong><br />
8.1.2.2 Pull-up/pull-down resistors<br />
A pull-up resistor is required on SWDIO on the target board. ARM recommends 100<br />
kOhms.<br />
In case of doubt you should follow the recommendations given by the semiconductor<br />
manufacturer.<br />
8.1.2.3 Target power supply<br />
Typical target connection for SWD<br />
5V supply<br />
VTref<br />
SWDIO<br />
SWCLK<br />
SWO<br />
RESET<br />
GND<br />
19*<br />
* Optional to supply the target board from J-<strong>Link</strong>.<br />
1<br />
7<br />
9<br />
13<br />
15<br />
SWDIO<br />
SWCLK<br />
SWO<br />
nRST<br />
Pin 19 of the connector can be used to supply power to the target hardware. Supply<br />
voltage is 5V, max. current is 300mA. The output current is monitored and protected<br />
against overload and short-circuit.<br />
Power can be controlled via the J-<strong>Link</strong> commander. The following commands are<br />
available to control power:<br />
Command Explanation<br />
power on Switch target power on<br />
power off Switch target power off<br />
power on perm Set target power supply default to "on"<br />
power off perm<br />
Table 8.4: Command List<br />
Set target power supply default to "off"<br />
Target board<br />
Voltage<br />
Regulator<br />
CPU<br />
J-<strong>Link</strong> / J-<strong>Trace</strong> (<strong>UM08001</strong>) © 2004-2010 SEGGER Microcontroller GmbH & Co. KG<br />
19<br />
7<br />
9<br />
13<br />
15<br />
20 20<br />
1<br />
100 k<br />
VCC<br />
GND<br />
VCC
8.2 38-pin Mictor JTAG and <strong>Trace</strong> connector<br />
J-<strong>Trace</strong> provides a JTAG+<strong>Trace</strong> connector. This connector is a 38-pin mictor plug. It<br />
connects to the target via a 1-1 cable.<br />
The connector on the target board should be "TYCO type 5767054-1" or a compatible<br />
receptacle. J-<strong>Trace</strong> supports 4, 8, and 16-bit data port widths with the high density<br />
target connector described below.<br />
Target board trace connector<br />
J-<strong>Trace</strong> can capture the state of signals PIPESTAT[2:0], TRACESYNC and<br />
TRACEPKT[n:0] at each rising edge of each TRACECLK or on each alternate rising or<br />
falling edge.<br />
8.2.1 Connecting the target board<br />
J-<strong>Trace</strong> connects to the target board via a 38-pin trace cable. This cable has a receptacle<br />
on the one side, and a plug on the other side. Alternatively J-<strong>Trace</strong> can be connected<br />
with a 20-pin JTAG cable.<br />
Warning: Never connect trace cable and JTAG cable at the same time because<br />
this may harm your J-<strong>Trace</strong> and/or your target.<br />
J-<strong>Trace</strong><br />
JTAG<br />
+<br />
<strong>Trace</strong> JTAG<br />
<strong>Trace</strong> cable<br />
Target board<br />
<strong>Trace</strong><br />
connector<br />
ARM<br />
Target board<br />
Target board<br />
JTAG<br />
connector<br />
38 37<br />
2<br />
1<br />
Target<br />
system<br />
Pin 1<br />
chamfer<br />
J-<strong>Trace</strong><br />
JTAG<br />
+<br />
<strong>Trace</strong> JTAG<br />
Target board<br />
<strong>Trace</strong><br />
connector<br />
J-<strong>Link</strong> / J-<strong>Trace</strong> (<strong>UM08001</strong>) © 2004-2010 SEGGER Microcontroller GmbH & Co. KG<br />
ARM<br />
Target board<br />
JTAG cable<br />
Target board<br />
JTAG<br />
connector<br />
J-<strong>Trace</strong><br />
JTAG<br />
+<br />
<strong>Trace</strong> JTAG<br />
<strong>Trace</strong> cable<br />
Target board<br />
<strong>Trace</strong><br />
connector<br />
ARM<br />
Target board<br />
JTAG cable<br />
Target board<br />
JTAG<br />
connector<br />
177
178 CHAPTER 8 Target interfaces and adapters<br />
8.2.2 Pinout<br />
The following table lists the JTAG+<strong>Trace</strong> connector pinout. It is compatible to the<br />
"<strong>Trace</strong> Port Physical Interface" described in [ETM], 8.2.2 "Single target connector<br />
pinout".<br />
PIN SIGNAL Description<br />
1 NC No connected.<br />
2 NC No connected.<br />
3 NC No connected.<br />
4 NC No connected.<br />
5 GND Signal ground.<br />
6 TRACECLK Clocks trace data on rising edge or both edges.<br />
7 DBGRQ Debug request.<br />
8 DBGACK<br />
Debug acknowledge from the test chip, high when in<br />
debug state.<br />
9 RESET<br />
Open-collector output from the run control to the target<br />
system reset.<br />
10 EXTTRIG<br />
Optional external trigger signal to the Embedded trace<br />
Macrocell (ETM). Not used. Leave open on target system.<br />
11 TDO Test data output from target JTAG port.<br />
12 VTRef<br />
Signal level reference. It is normally fed from Vdd of the<br />
target board and must not have a series resistor.<br />
13 RTCK Return test clock from the target JTAG port.<br />
14 VSupply<br />
Supply voltage. It is normally fed from Vdd of the target<br />
board and must not have a series resistor.<br />
15 TCK Test clock to the run control unit from the JTAG port.<br />
<strong>Trace</strong> signal. For more information, please refer to<br />
16 <strong>Trace</strong> signal 12 Assignment of trace information pins between ETM architecture<br />
versions on page 180.<br />
17 TMS Test mode select from run control to the JTAG port.<br />
<strong>Trace</strong> signal. For more information, please refer to<br />
18 <strong>Trace</strong> signal 11 Assignment of trace information pins between ETM architecture<br />
versions on page 180.<br />
19 TDI Test data input from run control to the JTAG port.<br />
<strong>Trace</strong> signal. For more information, please refer to<br />
20 <strong>Trace</strong> signal 10 Assignment of trace information pins between ETM architecture<br />
versions on page 180.<br />
21 nTRST Active-low JTAG reset<br />
Table 8.5: JTAG+<strong>Trace</strong> connector pinout<br />
J-<strong>Link</strong> / J-<strong>Trace</strong> (<strong>UM08001</strong>) © 2004-2010 SEGGER Microcontroller GmbH & Co. KG
PIN SIGNAL Description<br />
22 <strong>Trace</strong> signal 9<br />
23 <strong>Trace</strong> signal 20<br />
24 <strong>Trace</strong> signal 8<br />
25 <strong>Trace</strong> signal 19<br />
26 <strong>Trace</strong> signal 7<br />
27 <strong>Trace</strong> signal 18<br />
28 <strong>Trace</strong> signal 6<br />
29 <strong>Trace</strong> signal 17<br />
30 <strong>Trace</strong> signal 5<br />
31 <strong>Trace</strong> signal 16<br />
32 <strong>Trace</strong> signal 4<br />
33 <strong>Trace</strong> signal 15<br />
34 <strong>Trace</strong> signal 3<br />
35 <strong>Trace</strong> signal 14<br />
36 <strong>Trace</strong> signal 2<br />
37 <strong>Trace</strong> signal 13<br />
38 <strong>Trace</strong> signal 1<br />
Table 8.5: JTAG+<strong>Trace</strong> connector pinout<br />
<strong>Trace</strong> signals. For more information, please refer to<br />
Assignment of trace information pins between ETM architecture<br />
versions on page 180.<br />
J-<strong>Link</strong> / J-<strong>Trace</strong> (<strong>UM08001</strong>) © 2004-2010 SEGGER Microcontroller GmbH & Co. KG<br />
179
180 CHAPTER 8 Target interfaces and adapters<br />
8.2.3 Assignment of trace information pins between ETM<br />
architecture versions<br />
The following table show different names for the trace signals depending on the ETM<br />
architecture version.<br />
<strong>Trace</strong> signal ETMv1 ETMv2 ETMv3<br />
<strong>Trace</strong> signal 1 PIPESTAT[0] PIPESTAT[0] TRACEDATA[0]<br />
<strong>Trace</strong> signal 2 PIPESTAT[1] PIPESTAT[1] TRACECTL<br />
<strong>Trace</strong> signal 3 PIPESTAT[2] PIPESTAT[2] Logic 1<br />
<strong>Trace</strong> signal 4 TRACESYNC PIPESTAT[3] Logic 0<br />
<strong>Trace</strong> signal 5 TRACEPKT[0] TRACEPKT[0] Logic 0<br />
<strong>Trace</strong> signal 6 TRACEPKT[1] TRACEPKT[1] TRACEDATA[1]<br />
<strong>Trace</strong> signal 7 TRACEPKT[2] TRACEPKT[2] TRACEDATA[2]<br />
<strong>Trace</strong> signal 8 TRACEPKT[3] TRACEPKT[3] TRACEDATA[3]<br />
<strong>Trace</strong> signal 9 TRACEPKT[4] TRACEPKT[4] TRACEDATA[4]<br />
<strong>Trace</strong> signal 10 TRACEPKT[5] TRACEPKT[5] TRACEDATA[5]<br />
<strong>Trace</strong> signal 11 TRACEPKT[6] TRACEPKT[6] TRACEDATA[6]<br />
<strong>Trace</strong> signal 12 TRACEPKT[7] TRACEPKT[7] TRACEDATA[7]<br />
<strong>Trace</strong> signal 13 TRACEPKT[8] TRACEPKT[8] TRACEDATA[8]<br />
<strong>Trace</strong> signal 14 TRACEPKT[9] TRACEPKT[9] TRACEDATA[9]<br />
<strong>Trace</strong> signal 15 TRACEPKT[10] TRACEPKT[10] TRACEDATA[10]<br />
<strong>Trace</strong> signal 16 TRACEPKT[11] TRACEPKT[11] TRACEDATA[11]<br />
<strong>Trace</strong> signal 17 TRACEPKT[12] TRACEPKT[12] TRACEDATA[12]<br />
<strong>Trace</strong> signal 18 TRACEPKT[13] TRACEPKT[13] TRACEDATA[13]<br />
<strong>Trace</strong> signal 19 TRACEPKT[14] TRACEPKT[14] TRACEDATA[14]<br />
<strong>Trace</strong> signal 20 TRACEPKT[15] TRACEPKT[15] TRACEDATA[15]<br />
Table 8.6: Assignment of trace information pins between ETM architecture versions<br />
8.2.4 <strong>Trace</strong> signals<br />
Data transfer is synchronized by TRACECLK.<br />
8.2.4.1 Signal levels<br />
The maximum capacitance presented by J-<strong>Trace</strong> at the trace port connector,<br />
including the connector and interfacing logic, is less than 6pF. The trace port lines<br />
have a matched impedance of 50.<br />
The J-<strong>Trace</strong> unit will operate with a target board that has a supply voltage range of<br />
3.0V-3.6V.<br />
8.2.4.2 Clock frequency<br />
For capturing trace port signals synchronous to TRACECLK, J-<strong>Trace</strong> supports<br />
a TRACECLK frequency of up to 200MHz. The following table shows the TRACECLK<br />
frequencies and the setup and hold timing of the trace signals with respect to TRACE-<br />
CLK.<br />
Parameter Min. Max. Explanation<br />
Tperiod 5ns 1000ns Clock period<br />
Fmax 1MHz 200MHz Maximum trace frequency<br />
Tch 2.5ns - High pulse width<br />
Tcl<br />
Table 8.7: Clock frequency<br />
2.5ns - Low pulse width<br />
J-<strong>Link</strong> / J-<strong>Trace</strong> (<strong>UM08001</strong>) © 2004-2010 SEGGER Microcontroller GmbH & Co. KG
Parameter Min. Max. Explanation<br />
Tsh 2.5ns - Data setup high<br />
Thh 1.5ns - Data hold high<br />
Tsl 2.5ns - Data setup low<br />
Thl 1.5ns - Data hold low<br />
Table 8.7: Clock frequency<br />
The diagram below shows the TRACECLK frequencies and the setup and hold timing<br />
of the trace signals with respect to TRACECLK.<br />
Full<br />
TRACECLK<br />
DATA<br />
Half-rate<br />
TRACECLK<br />
Tperiod<br />
Tch Tcl<br />
Tsh Thh Tsl Thl<br />
Note: J-<strong>Trace</strong> supports half-rate clocking mode. Data is output on each edge of<br />
the TRACECLK signal and TRACECLK (max)
182 CHAPTER 8 Target interfaces and adapters<br />
8.3 19-pin JTAG/SWD and <strong>Trace</strong> connector<br />
J-<strong>Trace</strong> provides a JTAG/SWD+<strong>Trace</strong> connector. This<br />
connector is a 19-pin connector. It connects to the<br />
target via an 1-1 cable.<br />
The following table lists the J-<strong>Link</strong> / J-<strong>Trace</strong> SWD pinout.<br />
PIN SIGNAL TYPE Description<br />
1 VTref Input<br />
2<br />
SWDIO/<br />
TMS<br />
I/O /<br />
output<br />
4 SWCLK/TCK Output<br />
6 SWO/TDO Input<br />
--- --- ---<br />
8 TDI Output<br />
9 NC NC<br />
10 nRESET I/O<br />
11 5V-Supply Output<br />
This is the target reference voltage. It is used to check if<br />
the target has power, to create the logic-level reference<br />
for the input comparators and to control the output logic<br />
levels to the target. It is normally fed from Vdd of the<br />
target board and must not have a series resistor.<br />
JTAG mode set input of target CPU. This pin should be<br />
pulled up on the target. Typically connected to TMS of the<br />
target CPU.<br />
JTAG clock signal to target CPU. It is recommended that<br />
this pin is pulled to a defined state of the target board.<br />
Typically connected to TCK of the target CPU.<br />
JTAG data output from target CPU. Typically connected to<br />
TDO of the target CPU.<br />
This pin (normally pin 7) is not existent on the 19-pin<br />
JTAG/SWD and <strong>Trace</strong> connector.<br />
JTAG data input of target CPU.- It is recommended that<br />
this pin is pulled to a defined state on the target board.<br />
Typically connected to TDI of the target CPU.<br />
Not connected inside J-<strong>Link</strong>. Leave open on target hardware.<br />
Target CPU reset signal. Typically connected to the RESET<br />
pin of the target CPU, which is typically called "nRST",<br />
"nRESET" or "RESET".<br />
This pin can be used to supply power to the target hardware.<br />
For more information about how to enable/disable<br />
the power supply, please refer to Target power supply on<br />
page 183.<br />
12 TRACECLK Input Input trace clock. <strong>Trace</strong> clock = 1/2 CPU clock.<br />
This pin can be used to supply power to the target hard-<br />
13 5V-Supply Output<br />
ware. For more information about how to enable/disable<br />
the power supply, please refer to Target power supply on<br />
page 183.<br />
14<br />
TRACE-<br />
DATA[0]<br />
Input Input <strong>Trace</strong> data pin 0.<br />
16<br />
TRACE-<br />
DATA[1]<br />
Input Input <strong>Trace</strong> data pin 0.<br />
18<br />
TRACE-<br />
DATA[2]<br />
Input Input <strong>Trace</strong> data pin 0.<br />
20<br />
TRACE-<br />
DATA[3]<br />
Input Input <strong>Trace</strong> data pin 0.<br />
Table 8.8: 19-pin JTAG/SWD and <strong>Trace</strong> pinout<br />
VTref 1 2 SWDIO/TMS<br />
GND<br />
3 4 SWCLK/TCK<br />
GND<br />
5 6 SWO/TDO<br />
---<br />
7 8 TDI<br />
NC<br />
9 10 nRESET<br />
5V-Supply 11 12 TRACECLK<br />
5V-Supply 13 14 TRACEDATA[0]<br />
GND 15 16 TRACEDATA[1]<br />
GND 17 18 TRACEDATA[2]<br />
GND 19 20 TRACEDATA[3]<br />
J-<strong>Link</strong> / J-<strong>Trace</strong> (<strong>UM08001</strong>) © 2004-2010 SEGGER Microcontroller GmbH & Co. KG
Pins 3, 5, 15, 17, 19 are GND pins connected to GND in J-<strong>Trace</strong> CM3. They should<br />
also be connected to GND in the target system.<br />
8.3.1 Target power supply<br />
Pins 11 and 13 of the connector can be used to supply power to the target hardware.<br />
Supply voltage is 5V, max. current is 300mA. The output current is monitored and<br />
protected against overload and short-circuit.<br />
Power can be controlled via the J-<strong>Link</strong> commander. The following commands are<br />
available to control power:<br />
Command Explanation<br />
power on Switch target power on<br />
power off Switch target power off<br />
power on perm Set target power supply default to "on"<br />
power off perm<br />
Table 8.9: Command List<br />
Set target power supply default to "off"<br />
J-<strong>Link</strong> / J-<strong>Trace</strong> (<strong>UM08001</strong>) © 2004-2010 SEGGER Microcontroller GmbH & Co. KG<br />
183
184 CHAPTER 8 Target interfaces and adapters<br />
8.4 Adapters<br />
There are various adapters available for J-<strong>Link</strong> as for example the JTAG isolator, the<br />
J-<strong>Link</strong> RX adapter or the J-<strong>Link</strong> Cortex-M adapter.<br />
For more information about the different adapters, please refer to<br />
http://www.segger.com/jlink-adapters.html.<br />
J-<strong>Link</strong> / J-<strong>Trace</strong> (<strong>UM08001</strong>) © 2004-2010 SEGGER Microcontroller GmbH & Co. KG
Chapter 9<br />
Background information<br />
This chapter provides background information about JTAG and ARM. The ARM7 and<br />
ARM9 architecture is based on Reduced Instruction Set Computer (RISC) principles.<br />
The instruction set and the related decode mechanism are greatly simplified compared<br />
with microprogrammed Complex Instruction Set Computer (CISC).<br />
J-<strong>Link</strong> / J-<strong>Trace</strong> (<strong>UM08001</strong>) © 2004-2010 SEGGER Microcontroller GmbH & Co. KG<br />
185
186 CHAPTER 9 Background information<br />
9.1 JTAG<br />
JTAG is the acronym for Joint Test Action Group. In the scope of this document,<br />
"the JTAG standard" means compliance with IEEE Standard 1149.1-2001.<br />
9.1.1 Test access port (TAP)<br />
JTAG defines a TAP (Test access port). The TAP is a general-purpose port that can<br />
provide access to many test support functions built into a component. It is composed<br />
as a minimum of the three input connections (TDI, TCK, TMS) and one output connection<br />
(TDO). An optional fourth input connection (nTRST) provides for asynchronous<br />
initialization of the test logic.<br />
PIN Type Explanation<br />
TCK Input<br />
TDI Input<br />
TMS Input<br />
TDO Output<br />
nTRST<br />
Input<br />
(optional)<br />
Table 9.1: Test access port<br />
9.1.2 Data registers<br />
JTAG requires at least two data registers to be present: the bypass and the boundary-scan<br />
register. Other registers are allowed but are not obligatory.<br />
Bypass data register<br />
A single-bit register that passes information from TDI to TDO.<br />
Boundary-scan data register<br />
A test data register which allows the testing of board interconnections, access to<br />
input and output of components when testing their system logic and so on.<br />
9.1.3 Instruction register<br />
The test clock input (TCK) provides the clock for the test<br />
logic.<br />
Serial test instructions and data are received by the test<br />
logic at test data input (TDI).<br />
The signal received at test mode select (TMS) is<br />
decoded by the TAP controller to control test operations.<br />
Test data output (TDO) is the serial output for test<br />
instructions and data from the test logic.<br />
The optional test reset (nTRST) input provides for asynchronous<br />
initialization of the TAP controller.<br />
The instruction register holds the current instruction and its content is used by the<br />
TAP controller to decide which test to perform or which data register to access. It<br />
consist of at least two shift-register cells.<br />
J-<strong>Link</strong> / J-<strong>Trace</strong> (<strong>UM08001</strong>) © 2004-2010 SEGGER Microcontroller GmbH & Co. KG
9.1.4 The TAP controller<br />
The TAP controller is a synchronous finite state machine that responds to changes at<br />
the TMS and TCK signals of the TAP and controls the sequence of operations of the<br />
circuitry.<br />
TAP controller state diagram<br />
tms=1<br />
tms=0<br />
9.1.4.1 State descriptions<br />
Reset<br />
The test logic is disabled so that normal operation of the chip logic can continue<br />
unhindered. No matter in which state the TAP controller currently is, it can change<br />
into Reset state if TMS is high for at least 5 clock cycles. As long as TMS is high, the<br />
TAP controller remains in Reset state.<br />
Idle<br />
Idle is a TAP controller state between scan (DR or IR) operations. Once entered, this<br />
state remains active as long as TMS is low.<br />
DR-Scan<br />
Temporary controller state. If TMS remains low, a scan sequence for the selected<br />
data registers is initiated.<br />
IR-Scan<br />
Reset<br />
Idle<br />
Temporary controller state. If TMS remains low, a scan sequence for the instruction<br />
register is initiated.<br />
Capture-DR<br />
Data may be loaded in parallel to the selected test data registers.<br />
Shift-DR<br />
tms=0<br />
tms=1<br />
DR-Scan<br />
tms=1 tms=1<br />
Capture-DR<br />
Shift-DR<br />
Exit1-DR<br />
Exit1-IR<br />
tms=1 tms=1<br />
tms=0 tms=0<br />
Pause-DR<br />
tms=0 tms=0<br />
Exit2-DR<br />
Update-DR<br />
tms=1 tms=1<br />
IR-Scan<br />
tms=0 tms=0<br />
Capture-IR<br />
tms=0 tms=0<br />
Pause-IR<br />
Update-IR<br />
The test data register connected between TDI and TDO shifts data one stage towards<br />
the serial output with each clock.<br />
J-<strong>Link</strong> / J-<strong>Trace</strong> (<strong>UM08001</strong>) © 2004-2010 SEGGER Microcontroller GmbH & Co. KG<br />
Shift-IR<br />
tms=0 tms=0<br />
tms=1 tms=1<br />
tms=0 tms=0<br />
tms=1 tms=1<br />
Exit2-IR<br />
tms=1 tms=1<br />
tms=1 tms=0 tms=1 tms=0<br />
187
188 CHAPTER 9 Background information<br />
Exit1-DR<br />
Temporary controller state.<br />
Pause-DR<br />
The shifting of the test data register between TDI and TDO is temporarily halted.<br />
Exit2-DR<br />
Temporary controller state. Allows to either go back into Shift-DR state or go on to<br />
Update-DR.<br />
Update-DR<br />
Data contained in the currently selected data register is loaded into a latched parallel<br />
output (for registers that have such a latch). The parallel latch prevents changes at<br />
the parallel output of these registers from occurring during the shifting process.<br />
Capture-IR<br />
Instructions may be loaded in parallel into the instruction register.<br />
Shift-IR<br />
The instruction register shifts the values in the instruction register towards TDO with<br />
each clock.<br />
Exit1-IR<br />
Temporary controller state.<br />
Pause-IR<br />
Wait state that temporarily halts the instruction shifting.<br />
Exit2-IR<br />
Temporary controller state. Allows to either go back into Shift-IR state or go on to<br />
Update-IR.<br />
Update-IR<br />
The values contained in the instruction register are loaded into a latched parallel output<br />
from the shift-register path. Once latched, this new instruction becomes the current<br />
one. The parallel latch prevents changes at the parallel output of the instruction<br />
register from occurring during the shifting process.<br />
J-<strong>Link</strong> / J-<strong>Trace</strong> (<strong>UM08001</strong>) © 2004-2010 SEGGER Microcontroller GmbH & Co. KG
9.2 Embedded <strong>Trace</strong> Macrocell (ETM)<br />
Embedded <strong>Trace</strong> Macrocell (ETM) provides comprehensive debug and trace facilities<br />
for ARM processors. ETM allows to capture information on the processor's state without<br />
affecting the processor's performance. The trace information is exported immediately<br />
after it has been captured, through a special trace port.<br />
<strong>Microcontrollers</strong> that include an ETM allow detailed program execution to be recorded<br />
and saved in real time. This information can be used to analyze program flow and<br />
execution time, perform profiling and locate software bugs that are otherwise very<br />
hard to locate. A typical situation in which code trace is extremely valuable, is to find<br />
out how and why a "program crash" occurred in case of a runaway program count.<br />
A debugger provides the user interface to J-<strong>Trace</strong> and the stored trace data. The<br />
debugger enables all the ETM facilities and displays the trace information that has<br />
been captured. J-<strong>Trace</strong> is seamlessly integrated into the IAR Embedded Workbench®<br />
IDE. The advanced trace debugging features can be used with the IAR C-SPY debugger.<br />
9.2.1 Trigger condition<br />
The ETM can be configured in software to store trace information only after a specific<br />
sequence of conditions. When the trigger condition occurs the trace capture stops<br />
after a programmable period.<br />
9.2.2 Code tracing and data tracing<br />
Code trace<br />
Code tracing means that the processor outputs trace data which contain information<br />
about the instructions that have been executed at last.<br />
Data trace<br />
Data tracing means that the processor outputs trace data about memory accesses<br />
(read / write access to which address and which data has been read / stored). In<br />
general, J-<strong>Trace</strong> supports data tracing, but it depends on the debugger if this option<br />
is available or not. Note that when using data trace, the amount of trace data to be<br />
captured rises enormously.<br />
9.2.3 J-<strong>Trace</strong> integration example - IAR EWARM<br />
In the following a sample integration of J-<strong>Trace</strong> and the trace functionality on the<br />
debugger side is shown. The sample is based on IAR’s EWARM integration of J-<strong>Trace</strong>.<br />
J-<strong>Link</strong> / J-<strong>Trace</strong> (<strong>UM08001</strong>) © 2004-2010 SEGGER Microcontroller GmbH & Co. KG<br />
189
190 CHAPTER 9 Background information<br />
9.2.3.1 Code coverage - Disassembly tracing<br />
J-<strong>Link</strong> / J-<strong>Trace</strong> (<strong>UM08001</strong>) © 2004-2010 SEGGER Microcontroller GmbH & Co. KG
9.2.3.2 Code coverage - Source code tracing<br />
J-<strong>Link</strong> / J-<strong>Trace</strong> (<strong>UM08001</strong>) © 2004-2010 SEGGER Microcontroller GmbH & Co. KG<br />
191
192 CHAPTER 9 Background information<br />
J-<strong>Link</strong> / J-<strong>Trace</strong> (<strong>UM08001</strong>) © 2004-2010 SEGGER Microcontroller GmbH & Co. KG
9.3 Embedded <strong>Trace</strong> Buffer (ETB)<br />
The ETB is a small, circular on-chip memory area where trace information is stored<br />
during capture. It contains the data which is normally exported immediately after it<br />
has been captured from the ETM. The buffer can be read out through the JTAG port of<br />
the device once capture has been completed. No additional special trace port is<br />
required, so that the ETB can be read via J-<strong>Link</strong>. The trace functionality via J-<strong>Link</strong> is<br />
limited by the size of the ETB. While capturing runs, the trace information in the<br />
buffer will be overwritten every time the buffer size has been reached.<br />
The result of the limited buffer size is that not more data can be traced than the<br />
buffer can hold. Through this limitation is an ETB not in every case an fully-fledged<br />
alternative to the direct access to an ETM via J-<strong>Trace</strong>.<br />
J-<strong>Link</strong> / J-<strong>Trace</strong> (<strong>UM08001</strong>) © 2004-2010 SEGGER Microcontroller GmbH & Co. KG<br />
193
194 CHAPTER 9 Background information<br />
9.4 Flash programming<br />
J-<strong>Link</strong> / J-<strong>Trace</strong> comes with a DLL, which allows - amongst other functionalities -<br />
reading and writing RAM, CPU registers, starting and stopping the CPU, and setting<br />
breakpoints. The standard DLL does not have API functions for flash programming.<br />
However, the functionality offered can be used to program the flash. In that case, a<br />
flashloader is required.<br />
9.4.1 How does flash programming via J-<strong>Link</strong> / J-<strong>Trace</strong> work?<br />
This requires extra code. This extra code typically downloads a program into the RAM<br />
of the target system, which is able to erase and program the flash. This program is<br />
called RAM code and "knows" how to program the flash; it contains an implementation<br />
of the flash programming algorithm for the particular flash. Different flash chips<br />
have different programming algorithms; the programming algorithm also depends on<br />
other things such as endianess of the target system and organization of the flash<br />
memory (for example 1 * 8 bits, 1 * 16 bits, 2 * 16 bits or 32 bits). The RAM code<br />
requires data to be programmed into the flash memory. There are 2 ways of supplying<br />
this data: Data download to RAM or data download via DCC.<br />
9.4.2 Data download to RAM<br />
The data (or part of it) is downloaded to an other part of the RAM of the target system.<br />
The Instruction pointer (R15) of the CPU is then set to the start address of the<br />
Ram code, the CPU is started, executing the RAM code. The RAM code, which contains<br />
the programming algorithm for the flash chip, copies the data into the flash<br />
chip. The CPU is stopped after this. This process may have to be repeated until the<br />
entire data is programmed into the flash.<br />
9.4.3 Data download via DCC<br />
In this case, the RAM code is started as described above before downloading any<br />
data. The RAM code then communicates with the host computer (via DCC, JTAG and<br />
J-<strong>Link</strong> / J-<strong>Trace</strong>), transferring data to the target. The RAM code then programs the<br />
data into flash and waits for new data from the host. The WriteMemory functions of J-<br />
<strong>Link</strong> / J-<strong>Trace</strong> are used to transfer the RAM code only, but not to transfer the data.<br />
The CPU is started and stopped only once. Using DCC for communication is typically<br />
faster than using WriteMemory for RAM download because the overhead is lower.<br />
9.4.4 Available options for flash programming<br />
There are different solutions available to program internal or external flashes connected<br />
to ARM cores using J-<strong>Link</strong> / J-<strong>Trace</strong>. The different solutions have different<br />
fields of application, but of course also some overlap.<br />
9.4.4.1 J-Flash - Complete flash programming solution<br />
J-Flash is a stand-alone Windows application, which can read / write data files and<br />
program the flash in almost any ARM system. J-Flash requires an extra license from<br />
SEGGER.<br />
J-<strong>Link</strong> / J-<strong>Trace</strong> (<strong>UM08001</strong>) © 2004-2010 SEGGER Microcontroller GmbH & Co. KG
9.4.4.2 J<strong>Link</strong>ArmFlash.dll - A DLL with flash programming capabilities<br />
An enhanced version of the J<strong>Link</strong>ARM.DLL, which has add. API functions. The additional<br />
API functions allow loading and programming a data file. This DLL comes with<br />
a sample executable, as well as the source code of this executable and a project file.<br />
This can be an interesting option if you want to write your own programs for production<br />
purposes. This DLL also requires an extra license from SEGGER; contact us for<br />
more information.<br />
Output of Sample program:<br />
SEGGER J<strong>Link</strong>ARMFlash for ST STR710FR2T6 V1.00.00<br />
Compiled 11:16:22 on May 4 2005.<br />
This program and the DLL are (c) Copyright 2005 SEGGER, www.segger.com<br />
Connecting to J-<strong>Link</strong><br />
Resetting target<br />
Loading data file... 1060 bytes loaded.<br />
Erasing required sectors... O.K. - Completed after 0.703 sec<br />
Programming... O.K. - Completed after 0.031 sec<br />
Verifying... O.K. - Completed after 0.031 sec<br />
9.4.4.3 RDI flash loader: Allows flash download from any RDI-compliant<br />
tool chain<br />
RDI, (Remote debug interface) is a standard for "debug transfer agents" such as J-<br />
<strong>Link</strong>. It allows using J-<strong>Link</strong> from any RDI compliant debugger. RDI by itself does not<br />
include download to flash. To debug in flash, you need to somehow program your<br />
application program (debuggee) into the flash. You can use J-Flash for this purpose,<br />
use the flash loader supplied by the debugger company (if they supply a matching<br />
flash loader) or use the flash loader integrated in the J-<strong>Link</strong> RDI software. The RDI<br />
software as well as the RDI flash loader require licenses from SEGGER.<br />
9.4.4.4 Flash loader of compiler / debugger vendor such as IAR<br />
A lot of debuggers (some of them integrated into an IDE) come with their own flash<br />
loaders. The flash loaders can of course be used if they match your flash configuration,<br />
which is something that needs to be checked with the vendor of the debugger.<br />
9.4.4.5 Write your own flash loader<br />
Implement your own flash loader using the functionality of the J<strong>Link</strong>ARM.dll as<br />
described above. This can be a time consuming process and requires in-depth knowledge<br />
of the flash programming algorithm used as well as of the target system.<br />
J-<strong>Link</strong> / J-<strong>Trace</strong> (<strong>UM08001</strong>) © 2004-2010 SEGGER Microcontroller GmbH & Co. KG<br />
195
196 CHAPTER 9 Background information<br />
9.5 J-<strong>Link</strong> / J-<strong>Trace</strong> firmware<br />
The heart of J-<strong>Link</strong> / J-<strong>Trace</strong> is a microcontroller. The firmware is the software executed<br />
by the microcontroller inside of the J-<strong>Link</strong> / J-<strong>Trace</strong>. The J-<strong>Link</strong> / J-<strong>Trace</strong> firmware<br />
sometimes needs to be updated. This firmware update is performed<br />
automatically as necessary by the J<strong>Link</strong>ARM.dll.<br />
9.5.1 Firmware update<br />
Every time you connect to J-<strong>Link</strong> / J-<strong>Trace</strong>, J<strong>Link</strong>ARM.dll checks if its embedded firmware<br />
is newer than the one used the J-<strong>Link</strong> / J-<strong>Trace</strong>. The DLL will then update the<br />
firmware automatically. This process takes less than 3 seconds and does not require<br />
a reboot.<br />
It is recommended that you always use the latest version of J<strong>Link</strong>ARM.dll.<br />
In the screenshot:<br />
• The red box identifies the new firmware.<br />
• The green box identifies the old firmware which has been replaced.<br />
9.5.2 Invalidating the firmware<br />
Downdating J-<strong>Link</strong> / J-<strong>Trace</strong> is not performed automatically through an old<br />
J<strong>Link</strong>ARM.dll. J-<strong>Link</strong> / J-<strong>Trace</strong> will continue using its current, newer firmware when<br />
using older versions of the J<strong>Link</strong>ARM.dll.<br />
Note: Downdating J-<strong>Link</strong> / J-<strong>Trace</strong> is not recommended, you do it at your own<br />
risk!<br />
Note: Note also the firmware embedded in older versions of J<strong>Link</strong>ARM.dll might<br />
not execute properly with newer hardware versions.<br />
To downdate J-<strong>Link</strong> / J-<strong>Trace</strong>, you need to invalidate the current J-<strong>Link</strong> / J-<strong>Trace</strong> firmware,<br />
using the command exec InvalidateFW.<br />
In the screenshot, the red box contains information about the formerly used J-<strong>Link</strong> /<br />
J-<strong>Trace</strong> firmware version.<br />
J-<strong>Link</strong> / J-<strong>Trace</strong> (<strong>UM08001</strong>) © 2004-2010 SEGGER Microcontroller GmbH & Co. KG
Use an application (for example J<strong>Link</strong>.exe) which uses the desired version of<br />
J<strong>Link</strong>ARM.dll. This automatically replaces the invalidated firmware with its embedded<br />
firmware.<br />
In the screenshot:<br />
• The red box identifies the new firmware.<br />
• The green box identifies the old firmware which has been replaced.<br />
J-<strong>Link</strong> / J-<strong>Trace</strong> (<strong>UM08001</strong>) © 2004-2010 SEGGER Microcontroller GmbH & Co. KG<br />
197
198 CHAPTER 9 Background information<br />
J-<strong>Link</strong> / J-<strong>Trace</strong> (<strong>UM08001</strong>) © 2004-2010 SEGGER Microcontroller GmbH & Co. KG
Chapter 10<br />
Designing the target board for<br />
trace<br />
This chapter describes the hardware requirements which have to be met by the target<br />
board.<br />
J-<strong>Link</strong> / J-<strong>Trace</strong> (<strong>UM08001</strong>) © 2004-2010 SEGGER Microcontroller GmbH & Co. KG<br />
199
200 CHAPTER 10 Designing the target board for trace<br />
10.1 Overview of high-speed board design<br />
Failure to observe high-speed design rules when designing a target system containing<br />
an ARM Embedded <strong>Trace</strong> Macrocell (ETM) trace port can result in incorrect data<br />
being captured by J-<strong>Trace</strong>.You must give serious consideration to high-speed signals<br />
when designing the target system.<br />
The signals coming from an ARM ETM trace port can have very fast rise and fall<br />
times, even at relatively low frequencies.<br />
Note: These principles apply to all of the trace port signals (TRACEPKT[0:15],<br />
PIPESTAT[0:2], TRACESYNC), but special care must be taken with TRACECLK.<br />
10.1.1 Avoiding stubs<br />
Stubs are short pieces of track that tee off from the main track carrying the signal to,<br />
for example, a test point or a connection to an intermediate device. Stubs cause<br />
impedance discontinuities that affect signal quality and must be avoided.<br />
Special care must therefore be taken when ETM signals are multiplexed with other<br />
pin functions and where the PCB is designed to support both functions with differing<br />
tracking requirements.<br />
10.1.2 Minimizing Signal Skew (Balancing PCB Track Lengths)<br />
You must attempt to match the lengths of the PCB tracks carrying all of TRACECLK,<br />
PIPESTAT, TRACESYNC, and TRACEPKT from the ASIC to the mictor connector to<br />
within approximately 0.5 inches (12.5mm) of each other. Any greater differences<br />
directly impact the setup and hold time requirements.<br />
10.1.3 Minimizing Crosstalk<br />
Normal high-speed design rules must be observed. For example, do not run dynamic<br />
signals parallel to each other for any significant distance, keep them spaced well<br />
apart, and use a ground plane and so forth. Particular attention must be paid to the<br />
TRACECLK signal. If in any doubt, place grounds or static signals between the<br />
TRACECLK and any other dynamic signals.<br />
10.1.4 Using impedance matching and termination<br />
Termination is almost certainly necessary, but there are some circumstances where it<br />
is not required. The decision is related to track length between the ASIC and the<br />
JTAG+<strong>Trace</strong> connector, see Terminating the trace signal on page 201 for further reference.<br />
J-<strong>Link</strong> / J-<strong>Trace</strong> (<strong>UM08001</strong>) © 2004-2010 SEGGER Microcontroller GmbH & Co. KG
10.2 Terminating the trace signal<br />
To terminate the trace signal, you can choose between three termination options:<br />
• Matched impedance<br />
• Series (source) termination<br />
• DC parallel termination.<br />
Matched impedance<br />
Where available, the best termination scheme is to have the ASIC manufacturer<br />
match the output impedance of the driver to the impedance of the PCB track on your<br />
board. This produces the best possible signal.<br />
Series (source) termination<br />
This method requires a resistor fitted in series with signal. The resistor value plus the<br />
output impedance of the driver must be equal to the PCB track impedance.<br />
DC parallel termination<br />
This requires either a single resistor to ground, or a pull-up/pull-down combination of<br />
resistors (Thevenin termination), fitted at the end of each signal and as close as possible<br />
to the JTAG+<strong>Trace</strong> connector. If a single resistor is used, its value must be set<br />
equal to the PCB track impedance. If the pull-up/pull-down combination is used, their<br />
resistance values must be selected so that their parallel combination equals the PCB<br />
track impedance.<br />
Caution:<br />
At lower frequencies, parallel termination requires considerably more drive capability<br />
from the ASIC than series termination and so, in practice, DC parallel termination is<br />
rarely used.<br />
10.2.1 Rules for series terminators<br />
Series (source) termination is the most commonly used method. The basic rules are:<br />
1. The series resistor must be placed as close as possible to the ASIC pin (less than<br />
0.5 inches).<br />
2. The value of the resistor must equal the impedance of the track minus the output<br />
impedance of the output driver. So for example, a 50 PCB track driven by an output<br />
with a 17 impedance, requires a resistor value of 33.<br />
3. A source terminated signal is only valid at the end of the signal path. At any point<br />
between the source and the end of the track, the signal appears distorted<br />
because of reflections. Any device connected between the source and the end of<br />
the signal path therefore sees the distorted signal and might not operate correctly.<br />
Care must be taken not to connect devices in this way, unless the distortion<br />
does not affect device operation.<br />
J-<strong>Link</strong> / J-<strong>Trace</strong> (<strong>UM08001</strong>) © 2004-2010 SEGGER Microcontroller GmbH & Co. KG<br />
201
202 CHAPTER 10 Designing the target board for trace<br />
10.3 Signal requirements<br />
The table below lists the specifications that apply to the signals as seen at the<br />
JTAG+<strong>Trace</strong> connector.<br />
Signal Value<br />
Fmax 200MHz<br />
Ts setup time (min.) 2.0ns<br />
Th hold time (min.) 1.0ns<br />
TRACECLK high pulse width (min.) 1.5ns<br />
TRACECLK high pulse width (min.)<br />
Table 10.1: Signal requirements<br />
1.5ns<br />
J-<strong>Link</strong> / J-<strong>Trace</strong> (<strong>UM08001</strong>) © 2004-2010 SEGGER Microcontroller GmbH & Co. KG
Chapter 11<br />
Support and FAQs<br />
This chapter contains troubleshooting tips together with solutions for common problems<br />
which might occur when using J-<strong>Link</strong> / J-<strong>Trace</strong>. There are several steps you can<br />
take before contacting support. Performing these steps can solve many problems and<br />
often eliminates the need for assistance. This chapter also contains a collection of<br />
frequently asked questions (FAQs) with answers.<br />
J-<strong>Link</strong> / J-<strong>Trace</strong> (<strong>UM08001</strong>) © 2004-2010 SEGGER Microcontroller GmbH & Co. KG<br />
203
204 CHAPTER 11 Support and FAQs<br />
11.1 Measuring download speed<br />
11.1.1 Test environment<br />
J<strong>Link</strong>.exe has been used for measurement performance. The hardware consisted of:<br />
• PC with 2.6 GHz Pentium 4, running Win2K<br />
• USB 2.0 port<br />
• USB 2.0 hub<br />
• J-<strong>Link</strong><br />
• Target with ARM7 running at 50MHz.<br />
Below is a screenshot of J<strong>Link</strong>.exe after the measurement has been performed.<br />
J-<strong>Link</strong> / J-<strong>Trace</strong> (<strong>UM08001</strong>) © 2004-2010 SEGGER Microcontroller GmbH & Co. KG
11.2 Troubleshooting<br />
11.2.1 General procedure<br />
If you experience problems with J-<strong>Link</strong> / J-<strong>Trace</strong>, you should follow the steps below to<br />
solve these problems:<br />
1. Close all running applications on your host system.<br />
2. Disconnect the J-<strong>Link</strong> / J-<strong>Trace</strong> device from USB.<br />
3. Disable power supply on the target.<br />
4. Re-connect J-<strong>Link</strong> / J-<strong>Trace</strong> with the host system (attach USB cable).<br />
5. Enable power supply on the target.<br />
6. Try your target application again. If the problem remains continue the following<br />
procedure.<br />
7. Close all running applications on your host system again.<br />
8. Disconnect the J-<strong>Link</strong> / J-<strong>Trace</strong> device from USB.<br />
9. Disable power supply on the target.<br />
10. Re-connect J-<strong>Link</strong> / J-<strong>Trace</strong> with the host system (attach the USB cable).<br />
11. Enable power supply on the target.<br />
12. Start J<strong>Link</strong>.exe.<br />
13. If J<strong>Link</strong>.exe displays the J-<strong>Link</strong> / J-<strong>Trace</strong> serial number and the target processor’s<br />
core ID, the J-<strong>Link</strong> / J-<strong>Trace</strong> is working properly and cannot be the cause of<br />
your problem.<br />
14. If J<strong>Link</strong>.exe is unable to read the target processor’s core ID you should analyze<br />
the communication between your target and J-<strong>Link</strong> / J-<strong>Trace</strong> with a logic analyzer<br />
or oscilloscope. Follow the instructions in section 11.3.<br />
15. If the problem persists and you own an original product (not an OEM version),<br />
see section Contacting support on page 208.<br />
11.2.2 Typical problem scenarios<br />
J-<strong>Link</strong> / J-<strong>Trace</strong> LED is off<br />
Meaning:<br />
The USB connection does not work.<br />
Remedy:<br />
Check the USB connection. Try to re-initialize J-<strong>Link</strong> / J-<strong>Trace</strong> by disconnecting and<br />
reconnecting it. Make sure that the connectors are firmly attached. Check the cable<br />
connections on your J-<strong>Link</strong> / J-<strong>Trace</strong> and the host computer. If this does not solve the<br />
problem, check if your cable is defect. If the USB cable is ok, try a different host<br />
computer.<br />
J-<strong>Link</strong> / J-<strong>Trace</strong> LED is flashing at a high frequency<br />
Meaning:<br />
J-<strong>Link</strong> / J-<strong>Trace</strong> could not be enumerated by the USB controller.<br />
Most likely reasons:<br />
a.) Another program is already using J-<strong>Link</strong> / J-<strong>Trace</strong>.<br />
b.) The J-<strong>Link</strong> USB driver does not work correctly.<br />
Remedy:<br />
a.) Close all running applications and try to reinitialize J-<strong>Link</strong> / J-<strong>Trace</strong> by disconnecting<br />
and reconnecting it.<br />
b.) If the LED blinks permanently, check the correct installation of the J-<strong>Link</strong> USB<br />
driver. Deinstall and reinstall the driver as shown in chapter Setup on page 55.<br />
J-<strong>Link</strong> / J-<strong>Trace</strong> (<strong>UM08001</strong>) © 2004-2010 SEGGER Microcontroller GmbH & Co. KG<br />
205
206 CHAPTER 11 Support and FAQs<br />
J-<strong>Link</strong>/J-<strong>Trace</strong> does not get any connection to the target<br />
Most likely reasons:<br />
a.) The JTAG cable is defective.<br />
b.) The target hardware is defective.<br />
Remedy:<br />
Follow the steps described in General procedure on page 205.<br />
J-<strong>Link</strong> / J-<strong>Trace</strong> (<strong>UM08001</strong>) © 2004-2010 SEGGER Microcontroller GmbH & Co. KG
11.3 Signal analysis<br />
The following screenshots show the data flow of the startup and ID communication<br />
between J-<strong>Link</strong> / J-<strong>Trace</strong> and the target device.<br />
11.3.1 Start sequence<br />
This is the signal sequence output by J-<strong>Link</strong> / J-<strong>Trace</strong> at start of J<strong>Link</strong>.exe. It should<br />
be used as reference when tracing potential J-<strong>Link</strong> / J-<strong>Trace</strong> related hardware problems.<br />
The sequence consists of the following sections:<br />
• 5 clocks: TDI low, TMS high. Brings TAP controller into RESET state<br />
• 1 clock: TDI low, TMS low: Brings TAP controller into IDLE state<br />
• 2 clocks: TDI low, TMS high: Brings TAP controller into IR-SCAN state<br />
• 2 clocks: TDI low, TMS low: Brings TAP controller into SHIFT-IR state<br />
• 32 clocks: TMS low, TDI: 0x05253000 (lsb first): J-<strong>Link</strong> Signature as IR data<br />
• 240 clocks: TMS low, last clock high, TDI high: Bypass command<br />
• 1 clock: TDI low, TMS high: Brings TAP controller into UPDATE-IR state.<br />
J-<strong>Link</strong> / J-<strong>Trace</strong> checks the output of the device (output on TDO) for the signature to<br />
measure the IR length. For ARM7 / ARM9 chips, the IR length is 4, which means TDO<br />
shifts out the data shifted in on TDI with 4 clock cycles delay. If you compare the<br />
screenshot with your own measurements, the signals of TCK, TMS, TDI, and TDO<br />
should be identical.<br />
Note that the TDO signal is undefined for the first 10 clocks, since the output is usually<br />
tristated and the signal level depends on external components connected to TDO,<br />
such as pull-up or pull-down.<br />
Zoom-in<br />
The next screenshot shows the first 6 clock cycles of the screenshot above. For the<br />
first 5 clock cycles, TMS is high (Resulting in a TAP reset). TMS changes to low with<br />
the falling edge of TCK. At this time the TDI signal is low. Your signals should be<br />
identical. Signal rise and fall times should be shorter than 100ns.<br />
11.3.2 Troubleshooting<br />
If your measurements of TCK, TMS and TDI (the signals output by J-<strong>Link</strong> / J-<strong>Trace</strong>)<br />
differ from the results shown, disconnect your target hardware and test the output of<br />
TCK, TMS and TDI without a connection to a target, just supplying voltage to J-<br />
<strong>Link</strong>’s/J-<strong>Trace</strong>’s JTAG connector: VCC at pin 1; GND at pin 4.<br />
J-<strong>Link</strong> / J-<strong>Trace</strong> (<strong>UM08001</strong>) © 2004-2010 SEGGER Microcontroller GmbH & Co. KG<br />
207
208 CHAPTER 11 Support and FAQs<br />
11.4 Contacting support<br />
Before contacting support, make sure you tried to solve your problem by following<br />
the steps outlined in section General procedure on page 205. You may also try your<br />
J-<strong>Link</strong> / J-<strong>Trace</strong> with another PC and if possible with another target system to see if it<br />
works there. If the device functions correctly, the USB setup on the original machine<br />
or your target hardware is the source of the problem, not J-<strong>Link</strong> / J-<strong>Trace</strong>.<br />
If you need to contact support, send the following information to<br />
support@segger.com:<br />
• A detailed description of the problem<br />
• J-<strong>Link</strong>/J-<strong>Trace</strong> serial number<br />
• Output of J<strong>Link</strong>.exe if available<br />
• Your findings of the signal analysis<br />
• Information about your target hardware (processor, board, etc.).<br />
J-<strong>Link</strong> / J-<strong>Trace</strong> is sold directly by SEGGER or as OEM-product by other vendors. We<br />
can support only official SEGGER products.<br />
J-<strong>Link</strong> / J-<strong>Trace</strong> (<strong>UM08001</strong>) © 2004-2010 SEGGER Microcontroller GmbH & Co. KG
11.5 Frequently Asked Questions<br />
Supported CPUs<br />
Q: Which CPUs are supported?<br />
A: J-<strong>Link</strong> / J-<strong>Trace</strong> should work with any ARM7/9 and Cortex-M3 core. For a list of<br />
supported cores, see section Supported CPU cores on page 36.<br />
Maximum JTAG speed<br />
Q: What is the maximum JTAG speed supported by J-<strong>Link</strong> / J-<strong>Trace</strong>?<br />
A: J-<strong>Link</strong>’s/J-<strong>Trace</strong>’s maximum supported JTAG speed is 12MHz.<br />
Maximum download speed<br />
Q: What is the maximum download speed?<br />
A: The maximum download speed is currently about 720 Kbytes/second when downloading<br />
into RAM; Communication with a RAM-image via DCC can be still faster.<br />
However, the actual speed depends on various factors, such as JTAG, clock speed,<br />
host CPU core etc.<br />
ICE register access<br />
Q: Can I access individual ICE registers via J-<strong>Link</strong> / J-<strong>Trace</strong>?<br />
A: Yes, you can access all individual ICE registers via J-<strong>Link</strong> / J-<strong>Trace</strong>.<br />
Using J-<strong>Link</strong> in my application<br />
Q: I want to write my own application and use J-<strong>Link</strong> / J-<strong>Trace</strong>. Is this possible?<br />
A: Yes. We offer a dedicated Software Developer Kit (SDK). See section J-<strong>Link</strong> Software<br />
Developer Kit (SDK) on page 84 for further information.<br />
Using DCC with J-<strong>Link</strong><br />
Q: Can I use J-<strong>Link</strong> / J-<strong>Trace</strong> to communicate with a running target via DCC?<br />
A: Yes. The DLL includes functions to communicate via DCC. However, you can also<br />
program DCC communication yourself by accessing the relevant ICE registers<br />
through J-<strong>Link</strong> / J-<strong>Trace</strong>.<br />
Read status of JTAG pins<br />
Q: Can J-<strong>Link</strong> / J-<strong>Trace</strong> read back the status of the JTAG pins?<br />
A: Yes, the status of all pins can be read. This includes the outputs of J-<strong>Link</strong> / J-<strong>Trace</strong><br />
as well as the supply voltage, which can be useful to detect hardware problems on<br />
the target system.<br />
Advantage of more expensive JTAG probes<br />
Q: J-<strong>Link</strong> / J-<strong>Trace</strong> is quite inexpensive. What is the advantage of some more expensive<br />
JTAG probes?<br />
A: Some of the more expensive JTAG probes offered by other manufacturers support<br />
higher download speeds or an ethernet interface. The functionality is similar, there<br />
is no real advantage of using more expensive probes. J-<strong>Link</strong> / J-<strong>Trace</strong> is a suitable<br />
solution for the majority of development tasks as well as for production purposes.<br />
Some features that are available for J-<strong>Link</strong> / J-<strong>Trace</strong>, such as a DLL, exposing the<br />
full functionality of the emulator, flash download and flash breakpoints are not<br />
available for most of these emulators.<br />
J-<strong>Link</strong> support of ETM<br />
Q: Does J-<strong>Link</strong> support the Embedded <strong>Trace</strong> Macrocell (ETM)?<br />
A: No. ETM requires another connection to the ARM chip and a CPU with built-in ETM.<br />
Most current ARM7 / ARM9 chips do not have ETM built-in.<br />
J-<strong>Link</strong> support of ETB<br />
Q: Does J-<strong>Link</strong> support the Embedded <strong>Trace</strong> Buffer (ETB)?<br />
A: Yes. J-<strong>Link</strong> supports ETB. Most current ARM7 / ARM9 chips do not have ETB builtin.<br />
Q: Why does J-<strong>Link</strong> / J-<strong>Trace</strong> - in contrast to most other JTAG emulators for ARM<br />
cores - not require the user to specify a cache clean area?<br />
J-<strong>Link</strong> / J-<strong>Trace</strong> (<strong>UM08001</strong>) © 2004-2010 SEGGER Microcontroller GmbH & Co. KG<br />
209
210 CHAPTER 11 Support and FAQs<br />
A: J-<strong>Link</strong> / J-<strong>Trace</strong> handles cache cleaning directly through JTAG commands. Unlike<br />
other emulators, it does not have to download code to the target system. This<br />
makes setting up J-<strong>Link</strong> / J-<strong>Trace</strong> easier. Therefore, a cache clean area is not<br />
required.<br />
Registers on ARM 7 / ARM 9 targets<br />
Q: I’m running J-<strong>Link</strong>.exe in parallel to my debugger, on an ARM 7 target. I can read<br />
memory okay, but the processor registers are different. Is this normal?<br />
A: If memory on an ARM 7/9 target is read or written the processor registers are<br />
modified. When memory read or write operations are performed, J-<strong>Link</strong> preserves<br />
the register values before they are modified. The register values shown in the<br />
debugger’s register window are the preserved ones. If now a second instance, in<br />
this case J-<strong>Link</strong>.exe, reads the processor registers, it reads the values from the<br />
hardware, which are the modified ones. This is why it shows different register values.<br />
J-<strong>Link</strong> / J-<strong>Trace</strong> (<strong>UM08001</strong>) © 2004-2010 SEGGER Microcontroller GmbH & Co. KG
Chapter 12<br />
Glossary<br />
This chapter describes important terms used throughout this manual.<br />
J-<strong>Link</strong> / J-<strong>Trace</strong> (<strong>UM08001</strong>) © 2004-2010 SEGGER Microcontroller GmbH & Co. KG<br />
211
212 CHAPTER 12 Glossary<br />
Adaptive clocking<br />
A technique in which a clock signal is sent out by J-<strong>Link</strong> / J-<strong>Trace</strong>. J-<strong>Link</strong> / J-<strong>Trace</strong><br />
waits for the returned clock before generating the next clock pulse. The technique<br />
allows the J-<strong>Link</strong> / J-<strong>Trace</strong> interface unit to adapt to differing signal drive capabilities<br />
and differing cable lengths.<br />
Application Program Interface<br />
A specification of a set of procedures, functions, data structures, and constants that<br />
are used to interface two or more software components together.<br />
Big-endian<br />
Memory organization where the least significant byte of a word is at a higher address<br />
than the most significant byte. See Little-endian.<br />
Cache cleaning<br />
The process of writing dirty data in a cache to main memory.<br />
Coprocessor<br />
An additional processor that is used for certain operations, for example, for floatingpoint<br />
math calculations, signal processing, or memory management.<br />
Dirty data<br />
When referring to a processor data cache, data that has been written to the cache<br />
but has not been written to main memory is referred to as dirty data. Only write-back<br />
caches can have dirty data because a write-through cache writes data to the cache<br />
and to main memory simultaneously. See also cache cleaning.<br />
Dynamic <strong>Link</strong>ed Library (DLL)<br />
A collection of programs, any of which can be called when needed by an executing<br />
program. A small program that helps a larger program communicate with a device<br />
such as a printer or keyboard is often packaged as a DLL.<br />
Embedded <strong>Trace</strong> Macrocell (ETM)<br />
ETM is additional hardware provided by debuggable ARM processors to aid debugging<br />
with trace functionality.<br />
Embedded <strong>Trace</strong> Buffer (ETB)<br />
ETB is a small, circular on-chip memory area where trace information is stored during<br />
capture.<br />
EmbeddedICE<br />
The additional hardware provided by debuggable ARM processors to aid debugging.<br />
Halfword<br />
A 16-bit unit of information. Contents are taken as being an unsigned integer<br />
unless otherwise stated.<br />
Host<br />
A computer which provides data and other services to another computer. Especially, a<br />
computer providing debugging services to a target being debugged.<br />
ICache<br />
Instruction cache.<br />
ICE Extension Unit<br />
A hardware extension to the EmbeddedICE logic that provides more breakpoint units.<br />
J-<strong>Link</strong> / J-<strong>Trace</strong> (<strong>UM08001</strong>) © 2004-2010 SEGGER Microcontroller GmbH & Co. KG
ID<br />
Identifier.<br />
IEEE 1149.1<br />
The IEEE Standard which defines TAP. Commonly (but incorrectly) referred to as<br />
JTAG.<br />
Image<br />
An executable file that has been loaded onto a processor for execution.<br />
In-Circuit Emulator (ICE)<br />
A device enabling access to and modification of the signals of a circuit while that circuit<br />
is operating.<br />
Instruction Register<br />
When referring to a TAP controller, a register that controls the operation of the TAP.<br />
IR<br />
See Instruction Register.<br />
Joint Test Action Group (JTAG)<br />
The name of the standards group which created the IEEE 1149.1 specification.<br />
Little-endian<br />
Memory organization where the least significant byte of a word is at a lower address<br />
than the most significant byte. See also Big-endian.<br />
Memory coherency<br />
A memory is coherent if the value read by a data read or instruction fetch is the<br />
value that was most recently written to that location. Obtaining memory coherency is<br />
difficult when there are multiple possible physical locations that are involved, such as<br />
a system that has main memory, a write buffer, and a cache.<br />
Memory management unit (MMU)<br />
Hardware that controls caches and access permissions to blocks of memory, and<br />
translates virtual to physical addresses.<br />
Memory Protection Unit (MPU)<br />
Hardware that controls access permissions to blocks of memory. Unlike an MMU, an<br />
MPU does not translate virtual addresses to physical addresses.<br />
Multi-ICE<br />
Multi-processor EmbeddedICE interface. ARM registered trademark.<br />
RESET<br />
Abbreviation of System Reset. The electronic signal which causes the target system<br />
other than the TAP controller to be reset. This signal is also known as "nSRST"<br />
"nSYSRST", "nRST", or "nRESET" in some other manuals. See also nTRST.<br />
nTRST<br />
Abbreviation of TAP Reset. The electronic signal that causes the target system TAP<br />
controller to be reset. This signal is known as nICERST in some other manuals. See<br />
also nSRST.<br />
Open collector<br />
A signal that may be actively driven LOW by one or more drivers, and is otherwise<br />
passively pulled HIGH. Also known as a "wired AND" signal.<br />
J-<strong>Link</strong> / J-<strong>Trace</strong> (<strong>UM08001</strong>) © 2004-2010 SEGGER Microcontroller GmbH & Co. KG<br />
213
214 CHAPTER 12 Glossary<br />
Processor Core<br />
The part of a microprocessor that reads instructions from memory and executes<br />
them, including the instruction fetch unit, arithmetic and logic unit, and the register<br />
bank. It excludes optional coprocessors, caches, and the memory management unit.<br />
Program Status Register (PSR)<br />
Contains some information about the current program and some information about<br />
the current processor state. Often, therefore, also referred to as Processor Status<br />
Register.<br />
Also referred to as Current PSR (CPSR), to emphasize the distinction to the Saved<br />
PSR (SPSR). The SPSR holds the value the PSR had when the current function was<br />
called, and which will be restored when control is returned.<br />
Remapping<br />
Changing the address of physical memory or devices after the application has started<br />
executing. This is typically done to make RAM replace ROM once the initialization has<br />
been done.<br />
Remote Debug Interface (RDI)<br />
RDI is an open ARM standard procedural interface between a debugger and the<br />
debug agent. The widest possible adoption of this standard is encouraged.<br />
RTCK<br />
Returned TCK. The signal which enables Adaptive Clocking.<br />
RTOS<br />
Real Time Operating System.<br />
Scan Chain<br />
A group of one or more registers from one or more TAP controllers connected<br />
between TDI and TDO, through which test data is shifted.<br />
Semihosting<br />
A mechanism whereby the target communicates I/O requests made in the application<br />
code to the host system, rather than attempting to support the I/O itself.<br />
SWI<br />
Software Interrupt. An instruction that causes the processor to call a programerspecified<br />
subroutine. Used by ARM to handle semihosting.<br />
TAP Controller<br />
Logic on a device which allows access to some or all of that device for test purposes.<br />
The circuit functionality is defined in IEEE1149.1.<br />
Target<br />
The actual processor (real silicon or simulated) on which the application program is<br />
running.<br />
TCK<br />
The electronic clock signal which times data on the TAP data lines TMS, TDI, and<br />
TDO.<br />
TDI<br />
The electronic signal input to a TAP controller from the data source (upstream). Usually,<br />
this is seen connecting the J-<strong>Link</strong> / J-<strong>Trace</strong> Interface Unit to the first TAP controller.<br />
J-<strong>Link</strong> / J-<strong>Trace</strong> (<strong>UM08001</strong>) © 2004-2010 SEGGER Microcontroller GmbH & Co. KG
TDO<br />
The electronic signal output from a TAP controller to the data sink (downstream).<br />
Usually, this is seen connecting the last TAP controller to the J-<strong>Link</strong> / J-<strong>Trace</strong> Interface<br />
Unit.<br />
Test Access Port (TAP)<br />
The port used to access a device's TAP Controller. Comprises TCK, TMS, TDI, TDO,<br />
and nTRST (optional).<br />
Transistor-transistor logic (TTL)<br />
A type of logic design in which two bipolar transistors drive the logic output to one or<br />
zero. LSI and VLSI logic often used TTL with HIGH logic level approaching +5V and<br />
LOW approaching 0V.<br />
Watchpoint<br />
A location within the image that will be monitored and that will cause execution to<br />
stop when it changes.<br />
Word<br />
A 32-bit unit of information. Contents are taken as being an unsigned integer unless<br />
otherwise stated.<br />
J-<strong>Link</strong> / J-<strong>Trace</strong> (<strong>UM08001</strong>) © 2004-2010 SEGGER Microcontroller GmbH & Co. KG<br />
215
216 CHAPTER 12 Glossary<br />
J-<strong>Link</strong> / J-<strong>Trace</strong> (<strong>UM08001</strong>) © 2004-2010 SEGGER Microcontroller GmbH & Co. KG
Chapter 13<br />
Literature and references<br />
This chapter lists documents, which we think may be useful to gain deeper understanding<br />
of technical details.<br />
J-<strong>Link</strong> / J-<strong>Trace</strong> (<strong>UM08001</strong>) © 2004-2010 SEGGER Microcontroller GmbH & Co. KG<br />
217
218 CHAPTER 13 Literature and references<br />
Reference Title Comments<br />
[ETM]<br />
[RVI]<br />
Embedded <strong>Trace</strong> Macrocell<br />
Architecture Specification,<br />
ARM IHI 0014J<br />
RealView® ICE and RealView<br />
<strong>Trace</strong> <strong>User</strong> <strong>Guide</strong>, ARM DUI<br />
0155C<br />
Table 13.1: Literature and References<br />
This document defines the ETM<br />
standard, including signal protocol<br />
and physical interface.<br />
It is publicly available from ARM<br />
(www.arm.com).<br />
This document describes ARM’s<br />
realview ice emulator and requirements<br />
on the target side.<br />
It is publicly available from ARM<br />
(www.arm.com).<br />
J-<strong>Link</strong> / J-<strong>Trace</strong> (<strong>UM08001</strong>) © 2004-2010 SEGGER Microcontroller GmbH & Co. KG
A<br />
Adaptive clocking ............................... 212<br />
Application Program Interface .............. 212<br />
B<br />
Big-endian ........................................ 212<br />
C<br />
Cache cleaning .................................. 212<br />
Coprocessor ...................................... 212<br />
D<br />
Dirty data ......................................... 212<br />
Dynamic <strong>Link</strong>ed Library (DLL) .............. 212<br />
E<br />
Embedded <strong>Trace</strong> Buffer (ETB) .......193, 212<br />
Embedded <strong>Trace</strong> Macrocell (ETM) ..189, 212<br />
EmbeddedICE ................................... 212<br />
H<br />
Halfword ........................................... 212<br />
Host ................................................. 212<br />
I<br />
ICache ............................................. 212<br />
ICE Extension Unit ............................. 212<br />
ID ................................................... 213<br />
IEEE 1149.1 ...................................... 213<br />
Image .............................................. 213<br />
In-Circuit Emulator ............................ 213<br />
Instruction Register ............................ 213<br />
IR .................................................... 213<br />
J<br />
J-Flash ARM ........................................78<br />
J-<strong>Link</strong><br />
Adapters ........................................ 184<br />
Developer Pack DLL ...........................84<br />
Supported chips ....................... 136–137<br />
Index<br />
J-<strong>Link</strong> / J-<strong>Trace</strong> (<strong>UM08001</strong>) © 2004-2010 SEGGER Microcontroller GmbH & Co. KG<br />
219<br />
J-<strong>Link</strong> ARM Flash DLL ........................... 84<br />
J-<strong>Link</strong> Commander .............................. 72<br />
J-<strong>Link</strong> GDB Server ............................... 80<br />
J-<strong>Link</strong> RDI .......................................... 79<br />
J-<strong>Link</strong> STR9 Commander ...................... 73<br />
J-<strong>Link</strong> TCP/IP Server ............................ 76<br />
J-Mem Memory Viewer ......................... 77<br />
Joint Test Action Group (JTAG) .............213<br />
JTAG ................................................186<br />
TAP controller ..................................187<br />
JTAGLoad ........................................... 84<br />
L<br />
Little-endian ......................................213<br />
M<br />
Memory coherency .............................213<br />
Memory management unit (MMU) ........213<br />
Memory Protection Unit (MPU) .............213<br />
Multi-ICE ..........................................213<br />
N<br />
nTRST ...................................... 172, 213<br />
O<br />
Open collector ...................................213<br />
P<br />
Processor Core ..................................214<br />
Program Status Register (PSR) ............214<br />
R<br />
RDI Support ....................................... 79<br />
Remapping ........................................214<br />
Remote Debug Interface (RDI) .............214<br />
RESET ..............................................213<br />
RTCK ................................................214<br />
RTOS ................................................214
220 Index<br />
S<br />
Scan Chain ....................................... 214<br />
Semihosting ..................................... 214<br />
SetDbgPowerDownOnClose ................. 129<br />
SetSysPowerDownOnIdle .................... 130<br />
Support .................................... 203, 211<br />
Supported flash devices ....... 139, 147, 151<br />
SWI ................................................. 214<br />
T<br />
Tabs ................................................ 106<br />
TAP Controller ................................... 214<br />
Target .............................................. 214<br />
TCK .......................................... 172, 214<br />
TDI .......................................... 172, 214<br />
TDO ......................................... 172, 215<br />
Test Access Port (TAP) ........................ 215<br />
Transistor-transistor logic (TTL) ........... 215<br />
W<br />
Watchpoint ....................................... 215<br />
Word ............................................... 215<br />
J-<strong>Link</strong> / J-<strong>Trace</strong> (<strong>UM08001</strong>) © 2004-2010 SEGGER Microcontroller GmbH & Co. KG