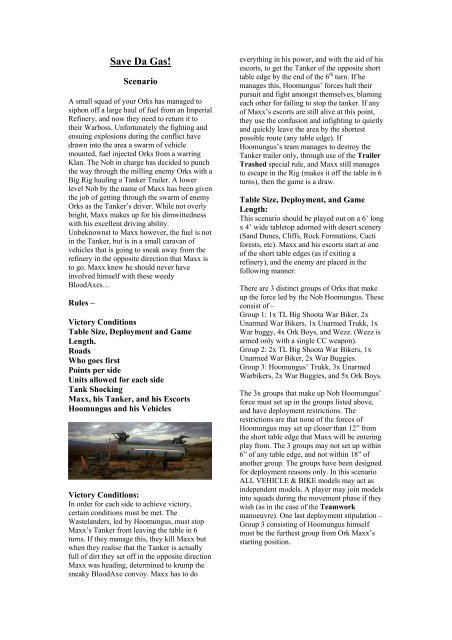
Save Da Gas!
Save Da Gas!
Save Da Gas!

You also want an ePaper? Increase the reach of your titles
YUMPU automatically turns print PDFs into web optimized ePapers that Google loves.
<strong>Save</strong> <strong>Da</strong> <strong>Gas</strong>!<br />
Scenario<br />
A small squad of your Orks has managed to<br />
siphon off a large haul of fuel from an Imperial<br />
Refinery, and now they need to return it to<br />
their Warboss. Unfortunately the fighting and<br />
ensuing explosions during the conflict have<br />
drawn into the area a swarm of vehicle<br />
mounted, fuel injected Orks from a warring<br />
Klan. The Nob in charge has decided to punch<br />
the way through the milling enemy Orks with a<br />
Big Rig hauling a Tanker Trailer. A lower<br />
level Nob by the name of Maxx has been given<br />
the job of getting through the swarm of enemy<br />
Orks as the Tanker’s driver. While not overly<br />
bright, Maxx makes up for his dimwittedness<br />
with his excellent driving ability.<br />
Unbeknownst to Maxx however, the fuel is not<br />
in the Tanker, but is in a small caravan of<br />
vehicles that is going to sneak away from the<br />
refinery in the opposite direction that Maxx is<br />
to go. Maxx knew he should never have<br />
involved himself with these weedy<br />
BloodAxes…<br />
Rules –<br />
Victory Conditions<br />
Table Size, Deployment and Game<br />
Length.<br />
Roads<br />
Who goes first<br />
Points per side<br />
Units allowed for each side<br />
Tank Shocking<br />
Maxx, his Tanker, and his Escorts<br />
Hoomungus and his Vehicles<br />
Victory Conditions:<br />
In order for each side to achieve victory,<br />
certain conditions must be met. The<br />
Wastelanders, led by Hoomungus, must stop<br />
Maxx’s Tanker from leaving the table in 6<br />
turns. If they manage this, they kill Maxx but<br />
when they realise that the Tanker is actually<br />
full of dirt they set off in the opposite direction<br />
Maxx was heading, determined to krump the<br />
sneaky BloodAxe convoy. Maxx has to do<br />
everything in his power, and with the aid of his<br />
escorts, to get the Tanker of the opposite short<br />
table edge by the end of the 6 th turn. If he<br />
manages this, Hoomungus’ forces halt their<br />
pursuit and fight amongst themselves, blaming<br />
each other for failing to stop the tanker. If any<br />
of Maxx’s escorts are still alive at this point,<br />
they use the confusion and infighting to quietly<br />
and quickly leave the area by the shortest<br />
possible route (any table edge). If<br />
Hoomungus’s team manages to destroy the<br />
Tanker trailer only, through use of the Trailer<br />
Trashed special rule, and Maxx still manages<br />
to escape in the Rig (makes it off the table in 6<br />
turns), then the game is a draw.<br />
Table Size, Deployment, and Game<br />
Length:<br />
This scenario should be played out on a 6’ long<br />
x 4’ wide tabletop adorned with desert scenery<br />
(Sand Dunes, Cliffs, Rock Formations, Cacti<br />
forests, etc). Maxx and his escorts start at one<br />
of the short table edges (as if exiting a<br />
refinery), and the enemy are placed in the<br />
following manner:<br />
There are 3 distinct groups of Orks that make<br />
up the force led by the Nob Hoomungus. These<br />
consist of –<br />
Group 1: 1x TL Big Shoota War Biker, 2x<br />
Unarmed War Bikers, 1x Unarmed Trukk, 1x<br />
War buggy, 4x Ork Boys, and Wezz. (Wezz is<br />
armed only with a single CC weapon).<br />
Group 2: 2x TL Big Shoota War Bikers, 1x<br />
Unarmed War Biker, 2x War Buggies.<br />
Group 3: Hoomungus’ Trukk, 3x Unarmed<br />
Warbikers, 2x War Buggies, and 5x Ork Boys.<br />
The 3x groups that make up Nob Hoomungus’<br />
force must set up in the groups listed above,<br />
and have deployment restrictions. The<br />
restrictions are that none of the forces of<br />
Hoomungus may set up closer than 12” from<br />
the short table edge that Maxx will be entering<br />
play from. The 3 groups may not set up within<br />
6” of any table edge, and not within 18” of<br />
another group. The groups have been designed<br />
for deployment reasons only. In this scenario<br />
ALL VEHICLE & BIKE models may act as<br />
independent models. A player may join models<br />
into squads during the movement phase if they<br />
wish (as in the case of the Teamwork<br />
manoeuvre). One last deployment stipulation –<br />
Group 3 consisting of Hoomungus himself<br />
must be the furthest group from Ork Maxx’s<br />
starting position.
The forces of Hoomungus deploy first, as Ork<br />
Maxx’s vehicles are coming in from the table<br />
edge.<br />
While it is not required, it would be<br />
recommended to model miniatures and<br />
vehicles (and terrain) for this scenario to get<br />
the most out of it. **If you do, please post<br />
these builds to The-Waaagh Forums!!!! – I’d<br />
love to see them ;) **<br />
Roads:<br />
If you choose to use roads the following rules<br />
apply for this scenario. Dirt Roads/Trails<br />
bestow no bonuses to movement.<br />
Tarred/Blacktop roads are treated just as they<br />
are in the 40K rulebook, with the following<br />
exceptions (which can still be performed even<br />
if the extra D6” movement is taken).<br />
1) Tank Shocking is allowed<br />
2) Transfer Passengers special rule is<br />
still allowed.<br />
Who goes first?<br />
Ork Maxx and his escorts automatically get<br />
first turn. Even though Hoomungus’ forces are<br />
deployed they still cannot automatically<br />
activate on their first turn. When Orks are not<br />
in battle they quickly get bored and start<br />
tinkering on their vehicles, picking fights with<br />
each, and a myriad of other mundane activities<br />
are often started. To show this, the different<br />
vehicles must roll a score on a D6 to see if<br />
their crew/passengers are alert. Hoomungus’<br />
War Bikers may act on their first turn on a D6<br />
roll of a 3+. The War Buggies may act on their<br />
first turn on a 4+, and the two Trukks in<br />
Hoomungus’ force may act on their first turn<br />
on a 5+ (this shows the fact that the Trukks<br />
must wait for the passengers to climb on<br />
board). Any of Hoomungus’ forces that failed<br />
to act in the first turn, get swept up in the<br />
commotion of the upcoming confrontation, and<br />
may act as normal starting with Hoomungus’<br />
turn 2.<br />
All War Bikers, War Buggies, and Trukks are<br />
Fast Attack vehicles (12” base move, 24”<br />
Turbo Charge). Except for Maxx’s Tanker. It<br />
is a slow/normal speed vehicle (6” Move, 12”<br />
Full Speed [Add +1 for the Red Paint Job]), as<br />
long as the vehicle consists of BOTH the Rig<br />
and the Trailer. If the Trailer is removed (by<br />
Trailer Trashed special manoeuvre) then<br />
Maxx’s Rig is then treated as the Trukks<br />
above, concerning speed (+1” for Red Paint<br />
Job).<br />
Any upgrades mentioned in this text, but not<br />
explained use the same rules as those printed in<br />
the official GW product for either 40K or the<br />
Orks.<br />
Maxx and his Escorts – Maxx and his Tanker,<br />
Pappagallow and his Modified War buggy<br />
armed with TL Big Shoota, and the Deffkopta<br />
Kaptin and his Deffkopta armed with TL Big<br />
Shoota, Big Bomb and a Buzz Saw.<br />
Tank Shocking:<br />
In this scenario Tank Shocking is handled<br />
differently to standard 40K games. Vehicles<br />
with equal or higher armour values (depending<br />
on the facing of said vehicle) may Tank Shock<br />
other vehicles. If the armour values of the<br />
striking ‘facings’ are equal, then both vehicles<br />
are dealt a Glancing Hit. If the armour value of<br />
the vehicle performing the Tank Shock is<br />
higher than that of the intended target, then the<br />
target is dealt a Penetrating Hit, and the other<br />
vehicle is unharmed. If a vehicle is not<br />
Stunned, Destroyed, or Immobilised it may<br />
continue on with it’s movement. Otherwise the<br />
result stands and all rules covering that result<br />
are taken into consideration.<br />
Points per side: Maxx, his Tanker, and his Escorts:<br />
There are no ‘points values’ per se used in this<br />
scenario.<br />
Maxx bestows the following rules and bonuses<br />
to his Tanker:<br />
Units allowed for each side: Road Warrior = Maxx rules the wastelands<br />
Nob Hoomungus’ Force – 9 Warbikers (3<br />
armed with TL Big Shootas), 4x War buggies<br />
armed with TL Big Shootas, 2x Trukks<br />
(Hoomungus’s trukk is armed with Reinforced<br />
Ram and modified TL Big Shoota. The other<br />
Trukk is unarmed, but carries 5 of the 9 Ork<br />
Boys), 9 Ork Boys armed with CC weapons<br />
only, and Wezz armed only with a single CC<br />
weapon.<br />
and when he drives a vehicle he is nigh<br />
unstoppable, often making roads with<br />
whatever vehicle he is driving where there are<br />
no roads. To show this, Maxx’s abilities in a<br />
vehicle allow him to drive through terrain that<br />
other drivers would have trouble with. Maxx<br />
rolls only a single D6 for dangerous terrain<br />
tests no matter how far his Tanker moves when<br />
entering or leaving terrain.
Lead Foot = Maxx knows only one speed,<br />
flat-out! Maxx drives his tanker at full speed at<br />
all times, but even though he does this, he is<br />
still able to manoeuvre his tanker with deft<br />
precision. His Tanker constantly moves at 12”<br />
+ 1” (Red Paint Job), for a total of 13” every<br />
turn while the Tanker trailer is still attached. If<br />
the trailer is removed, then Maxx’s Rig is<br />
treated as a Fast Vehicle.<br />
Oiler Grot = Maxx has found himself a new<br />
friend in the shape of Ferall the Oiler Grot.<br />
Ferall scurries about the tanker doing his<br />
utmost best to keep the big rig operational.<br />
Ferall can repair any immobilized damage rolls<br />
caused to the tanker on a 4+ on roll of a D6.<br />
He is so quick in doing this that he makes the<br />
repair test at the beginning of each of Maxx’s<br />
turns, before the movement phase.<br />
Armed with a Shotgun, a CC weapon, and<br />
wears ‘Eavy Armour.<br />
Ork Maxx drives his Tanker and so is<br />
considered Crew and therefore may not leave<br />
his vehicle.<br />
The Tanker also has it’s own hidden special<br />
abilities:<br />
Armour Values – Front 12/14 (Reinforced<br />
Ram), Side 11, Rear 11, 2x Structure Points.<br />
Thick Armour Plates = The Tanker is always<br />
able to move, unless of course it is<br />
Immobilized or Destroyed.<br />
Red Paint Job. – As per the Ork Codex.<br />
<strong>Gas</strong>oline Guards = The Tanker is protected<br />
by three Ork Boys with varying weaponry.<br />
These consist of a Stickbomb Chukker, A<br />
Ferall, Gretchin/Oiler Grot:<br />
WS BS S T W I A Ld Sv<br />
Burna Boy, and a Big Shoota Boy.<br />
2 3 2 2 1 2 1 5 -<br />
Stickbomb Chucker – is located at the rear of<br />
Armed with a single CC weapon.<br />
the Tanker Trailer. He throws Stikkbombs with<br />
Ferall is the Tankers Oiler Grot so is<br />
the following stats – Range 6, Str 6, Ap 5, 3<br />
considered Crew and therefore may not leave shots only (for the entire game).<br />
the vehicle. Burna Boy – is located at the top rear of the<br />
Tanker Trailer. His Burna uses a template, and<br />
Immobilised and Maxx’s Tanker - Ferall<br />
may fire directly over the Stickbomb Chucker<br />
CANNOT perform a repair on the Tanker<br />
without injuring his fellow Ork<br />
(against an Immobilised <strong>Da</strong>mage roll) if one of Big Shoota Boy – is located at the top front of<br />
the <strong>Gas</strong>oline Guards have been removed in<br />
the Tanker Trailer<br />
order to cover the Immobilised <strong>Da</strong>mage result.<br />
Defend da Fuel! – The <strong>Gas</strong>oline Guards know<br />
how important it is to keep the Wastelanders<br />
away from the Tanker. In order to keep the fuel<br />
safe, the <strong>Gas</strong>oline Guards are able to shoot<br />
their weapons no matter how far the Tanker<br />
moves. Also, whenever the Tanker suffers an<br />
Immobilised damage result one of the Guards<br />
(read: weapons) can be removed instead, thus<br />
nullifying the Immobilised result.<br />
My Vehicle! = Maxx doesn’t want anyone else<br />
riding on his Tanker. To show this, any vehicle<br />
that gets close enough to Transfer<br />
Passengers, becomes a target for Maxx’s lust<br />
for ramming. Maxx can perform a Tank Shock<br />
using any of the facings of his Tanker except<br />
the rear of his vehicle, by sideswiping etc.<br />
(Front or Side. All other Tank Shock rules<br />
apply however.)<br />
Maxx, Ork Nob:<br />
WS BS S T W I A Ld Sv<br />
4 2 4 4 2 3 3 7 4+<br />
If a <strong>Gas</strong>oline Guard is removed in order to<br />
cover the damage from an Immobilised<br />
<strong>Da</strong>mage result (caused by a Tank Shock) then<br />
of course Maxx’s Tanker may continue to<br />
move.<br />
To aid Maxx and his escape, two other<br />
vehicles escort him. These are:
Pappagallow and his Modified War buggy –<br />
Pappagallow has had his war buggy decked out<br />
with the same level of armour plating as the<br />
Tanker, and as such is immune to Crew<br />
Shaken and Crew Stunned damage results. His<br />
War Buggy also has a TL Big Shoota.<br />
Armour Values – Front 10, Side 10, Rear 10.<br />
Pappagallow, Ork Nob:<br />
WS BS S T W I A Ld Sv<br />
4 2 4 4 2 3 3 7 4+<br />
Armed with a CC weapon, and wears ‘Eavy<br />
Armour.<br />
Pappagallow drives his War Buggy and so is<br />
considered Crew and therefore may not leave<br />
his vehicle.<br />
Deffkopta Kaptin – As per the Deffkopta<br />
entry in the Ork Codex. The Kaptin has<br />
mounted on his Deffkopta a TL Big Shoota,<br />
Big Bomb, and a Buzz Saw.<br />
Deffkopta Kaptin:<br />
WS BS S T W I A Ld Sv<br />
4 2 3 4(5) 2 2 2 7 4+<br />
Unarmed.<br />
The Deffkopta Kaptin drives his Deffkopta and<br />
so is considered Crew. The Transfer<br />
Passengers special rule may not be used<br />
against the Deffkopta.<br />
Hoomungus and his Vehicles:<br />
9 Warbikers (3 armed with TL Big Shootas)<br />
= As if Ork Bikers weren’t mad enough, the<br />
ones in this scenario have worked out how to<br />
stop a vehicle much larger than themselves,<br />
through:<br />
Teamwork - When 3 or more bikers manage<br />
to line up together they may perform a Tank<br />
Shock like attack on any vehicle. No matter<br />
what the armour value of the vehicles facing is.<br />
To do this, the Bikers must pass a leadership<br />
test (as if they were being Tank Shocked). If<br />
they pass they strike the vehicle in a shower of<br />
wheels, Ork bodies, and bike frames. In their<br />
suicide attack, they cause a Glancing Hit on<br />
the target vehicle. Roll a D6 and work out<br />
damage as normal, then remove one of the<br />
Warbikers from the game as a casualty. This<br />
ends the War Biker’s turn. If the Ld test is<br />
failed remove all the Warbikers in the unit as<br />
casualties as the vehicle they tried to stop<br />
flattens them. This manoeuvre cannot be<br />
performed if any of the War Bikers involved<br />
wish to shoot in that turn’s shooting phase. The<br />
War Bikers must join up as a squad and must<br />
stay within squad coherency in order to use<br />
this special rule.<br />
4x War buggies armed with TL Big Shootas<br />
– These are stock standard Ork War buggies<br />
from the Ork Codex with no upgrades at all.<br />
2x Trukks (1 armed with Reinforced Ram<br />
and modified TL Big Shoota) – The trucks in<br />
this scenario are limited to carrying 5<br />
passengers at any one time. The Trucks may<br />
perform a special manoeuvre during the game<br />
however. This manoeuvre may only be<br />
performed once per turn by each trukk though.<br />
Transfer Passengers – is a special ability<br />
useable by Trucks only in this scenario. In<br />
order to Transfer Passengers, a truck must<br />
move alongside another vehicle and be no<br />
more than 2 inches away from the ‘receiving<br />
vehicle’ (friend or foe). Both vehicles must<br />
have moved in their respective previous<br />
movement phases. No loitering until a vehicle<br />
comes within 2” of yours! In order to get from<br />
one vehicle to another the Ork (player)<br />
attempting the transfer must roll a 5+ on a D6.<br />
If the roll is failed, the Ork attempting to<br />
transfer between vehicles falls from the truck<br />
and is driven over. Remove the model from the<br />
game as a casualty. If the roll is successful then<br />
the Ork may attempt to shoot at any passenger<br />
or crew on the second vehicle (whilst he is on<br />
board), and may even attempt to melee said<br />
passengers or crew. Fighting the Driver of any<br />
Vehicle causes that vehicle to be unable to<br />
move at full speed. There is no need to<br />
measure movement distance whilst moving<br />
about on a vehicle. (It’s allowable to melee the<br />
rear most gunner position on the Tanker, then<br />
next round melee the driver for instance –<br />
After the first ‘assault’ on a crew member is<br />
performed, there are no more charge bonuses<br />
for other melee battles on the same vehicle<br />
performed by the same model, treat each<br />
following combat as if the attacker/winner had<br />
consolidated into the next crew member). The<br />
Transfer Passengers special rule may also be<br />
used to ‘replace’ a gunner on a vehicle, which<br />
has had a ‘Weapon Destroyed’ damage result,<br />
rolled against it, but only on ‘friendly’<br />
vehicles, not enemy vehicles.<br />
Only the 2 Trukks on Hoomungus’ team may<br />
transfer passengers, as they are the only trucks<br />
in the scenario that carry passengers.
If a member of Hoomungus’ team is forced to<br />
fallback from melee when aboard the Tanker<br />
and there is no friendly truck within 2” the Ork<br />
falls from the Tanker and takes a wound on a<br />
4+, with no saves of any sort allowed. If there<br />
is a friendly Truck within 2”, the Ork manages<br />
to catch onto the side of the friendly truck, or<br />
smashes through the windscreen, and takes a<br />
wound on a 3+, but IS allowed Armour saves.<br />
This shows the Orks teammates doing their<br />
best to aid their team member. The Ork may<br />
also try to re-board the tanker in the following<br />
turn if he wishes and survives the fall into the<br />
friendly vehicle. This does not allow more than<br />
the usual 1 attempt per turn per truck to<br />
Transfer Passengers.<br />
Hoomungus’s Truck is the upgraded and<br />
armed truck. This is the only vehicle that the<br />
Waste Landers have that can effectively ram<br />
the Tanker. (Unless of course the Warbikers<br />
manage to get their manoeuvre to work).<br />
One other special manoeuvre that the<br />
Wastelanders can perform is the Trailer<br />
Trashed special attack.<br />
Trailer Trashed:<br />
If the Wastelanders are able to Tank Shock<br />
Maxx’s Tanker, and the damage results from<br />
BOTH Tank Shocks are able to cause enough<br />
damage to remove the Tankers two Structure<br />
points (over the course of 6 turns), then this<br />
causes the trailer to shake loose from the Rig<br />
and crash in a giant cloud of dirt and dust. This<br />
will ensure the Wastelanders a DRAW result if<br />
Maxx is still able to make it off the opposite<br />
short table edge from where he started. If the<br />
Wastelanders can also kill Maxx or stop the<br />
Rig in time, then they will be granted a WIN<br />
result. The only way this can be done is if both<br />
Tank Shock attacks deal enough damage to<br />
remove the 2 structure points. If a structure<br />
point is lost due to ANY OTHER damage<br />
source, then the Tanker’s trailer stays attached,<br />
and a DRAW result cannot be gained.<br />
Hoomungus, Ork Nob:<br />
WS BS S T W I A Ld Sv<br />
4 2 4 4 2 3 3 7 4+<br />
Hoomungus’ Trukk:<br />
Armour Values – Front 12, Side 10, Rear 10.<br />
Armed with a Slugga and wears ‘Eavy<br />
Armour.<br />
Hoomungus drives his Trukk and so is<br />
considered Crew and therefore may not leave<br />
his vehicle.<br />
9 Ork Boys armed with CC weapons only –<br />
Used as passengers for the 2 trucks. CC<br />
weapons only, NO SHOOTING WEAPONS!<br />
Wezz armed with a single CC weapon only<br />
– This Nob must be deployed with Group #1.<br />
Wezz, Ork Nob:<br />
WS BS S T W I A Ld Sv<br />
4 2 4 4 2 3 3 7 4+<br />
Armed with a CC weapon, and wears ‘Eavy<br />
Armour.<br />
Wezz is the Ork Nob who commands the 9<br />
Ork Boys, usually. Wezz rides on the unarmed<br />
Trukk in Hoomungus’ force. He is considered<br />
a Passenger and can therefore make use of the<br />
Transfer Passengers special rule. Wezz is<br />
actually quite adept at the Transfer<br />
Passengers special rule and hence is able to<br />
transfer between vehicles on a 3+ roll of a D6.