Magic2 Voice GB Manual - Fax-Anleitung.de
Magic2 Voice GB Manual - Fax-Anleitung.de
Magic2 Voice GB Manual - Fax-Anleitung.de

Create successful ePaper yourself
Turn your PDF publications into a flip-book with our unique Google optimized e-Paper software.
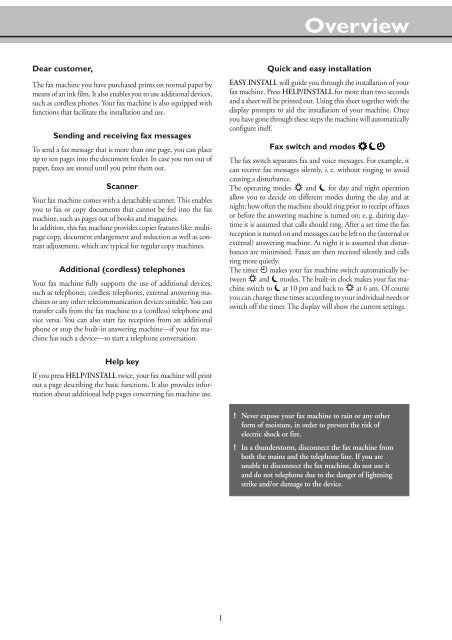
Dear customer,<br />
The fax machine you have purchased prints on normal paper by<br />
means of an ink film. It also enables you to use additional <strong>de</strong>vices,<br />
such as cordless phones. Your fax machine is also equipped with<br />
functions that facilitate the installation and use.<br />
Sending and receiving fax messages<br />
To send a fax message that is more than one page, you can place<br />
up to ten pages into the document fee<strong>de</strong>r. In case you run out of<br />
paper, faxes are stored until you print them out.<br />
Scanner<br />
Your fax machine comes with a <strong>de</strong>tachable scanner. This enables<br />
you to fax or copy documents that cannot be fed into the fax<br />
machine, such as pages out of books and magazines.<br />
In addition, this fax machine provi<strong>de</strong>s copier features like: multipage<br />
copy, document enlargement and reduction as well as contrast<br />
adjustment, which are typical for regular copy machines.<br />
Additional (cordless) telephones<br />
Your fax machine fully supports the use of additional <strong>de</strong>vices,<br />
such as telephones, cordless telephones, external answering machines<br />
or any other telecommunication <strong>de</strong>vices suitable. You can<br />
transfer calls from the fax machine to a (cordless) telephone and<br />
vice versa. You can also start fax reception from an additional<br />
phone or stop the built-in answering machine—if your fax machine<br />
has such a <strong>de</strong>vice—to start a telephone conversation.<br />
Help key<br />
If you press HELP/INSTALL twice, your fax machine will print<br />
out a page <strong>de</strong>scribing the basic functions. It also provi<strong>de</strong>s information<br />
about additional help pages concerning fax machine use.<br />
1<br />
Overview<br />
Quick and easy installation<br />
EASY INSTALL will gui<strong>de</strong> you through the installation of your<br />
fax machine. Press HELP/INSTALL for more than two seconds<br />
and a sheet will be printed out. Using this sheet together with the<br />
display prompts to aid the installation of your machine. Once<br />
you have gone through these steps the machine will automatically<br />
configure itself.<br />
<strong>Fax</strong> switch and mo<strong>de</strong>s SMU<br />
SMU<br />
The fax switch separates fax and voice messages. For example, it<br />
can receive fax messages silently, i. e. without ringing to avoid<br />
causing a disturbance.<br />
The operating mo<strong>de</strong>s S and M for day and night operation<br />
allow you to <strong>de</strong>ci<strong>de</strong> on different mo<strong>de</strong>s during the day and at<br />
night; how often the machine should ring prior to receipt of faxes<br />
or before the answering machine is turned on; e. g. during daytime<br />
it is assumed that calls should ring. After a set time the fax<br />
reception is turned on and messages can be left on the (internal or<br />
external) answering machine. At night it is assumed that disturbances<br />
are minimised. <strong>Fax</strong>es are then received silently and calls<br />
ring more quietly.<br />
The timer U makes your fax machine switch automatically between<br />
S and M mo<strong>de</strong>s. The built-in clock makes your fax machine<br />
switch to M at 10 pm and back to S at 6 am. Of course<br />
you can change these times according to your individual needs or<br />
switch off the timer. The display will show the current settings.<br />
! Never expose your fax machine to rain or any other<br />
form of moisture, in or<strong>de</strong>r to prevent the risk of<br />
electric shock or fire.<br />
! In a thun<strong>de</strong>rstorm, disconnect the fax machine from<br />
both the mains and the telephone line. If you are<br />
unable to disconnect the fax machine, do not use it<br />
and do not telephone due to the danger of lightning<br />
strike and/or damage to the <strong>de</strong>vice.
Safety instructions<br />
Ÿ Please read all warning notices and instructions and follow<br />
them precisely.<br />
Ÿ Never connect the telephone in damp rooms unless the wall<br />
sockets are specially <strong>de</strong>signed for humid conditions. Never<br />
touch the power plug, connection to the mains or telephone<br />
socket with wet hands.<br />
Ÿ Never touch uninsulated or telephone or power cables with<br />
damaged insulation, unless the telephone cable is disconnected<br />
from the telephone line and/or the power cable is<br />
disconnected from the power line.<br />
Ÿ Never install the fax machine close to radiators or air<br />
conditioners. Avoid operating the fax machine in direct<br />
sunlight.<br />
Ÿ Place the fax machine on a flat surface and ensure a<br />
minimum clearance of 10 cm between the fax machine and<br />
other machines and objects.<br />
Ÿ Make sure that your fax machine is stable and rests squarely<br />
on the supporting surface. Any fall can cause severe damage<br />
to the fax machine and/or injury to people, especially small<br />
children.<br />
Ÿ Make sure that air circulates freely around the fax machine.<br />
Do not operate the fax machine in closed boxes, cupboards,<br />
cabinets etc. Leave a clear space of 10 cm around the<br />
ventilation grilles of the fax machine. Never cover the fax<br />
machine (tablecloths, paper, fol<strong>de</strong>rs etc.). Do not place the<br />
fax machine on beds, tablecloths, cushions, sofas, carpets or<br />
other soft un<strong>de</strong>rlays due to the danger of overheating and<br />
subsequent fire.<br />
Ÿ Ensure safe cable laying (danger of stumbling, damage to<br />
the cable or the fax machine).<br />
Ÿ Disconnect the fax machine from the mains and telephone<br />
line before cleaning the surface of the machine.<br />
Ÿ Never use liquid or gaseous cleaning agents (sprays, scouring<br />
agents, polishes etc.).<br />
Ÿ Do not allow any liquid to enter the fax machine. Otherwise<br />
there is a risk of electric shock or other injury to people and<br />
severe damage to the fax machine. If any liquid does enter<br />
the fax machine, immediately remove the power plug and<br />
have the fax machine professionally inspected.<br />
Ÿ If the display breaks, a mildly corrosive liquid may leak out.<br />
Avoid contact with skin and eyes.<br />
Ÿ In case of any damage caused to the housing of your fax<br />
machine in particular to power cables please remove the<br />
mains plug and call your service repair centre. The housing<br />
of your fax machine may only be opened by authorised<br />
service personnel.<br />
Ÿ Your fax machine has been tested in conformity with<br />
standards UL 1950, EN 60950 and IEC 950 respectively,<br />
and may only be operated with telephone systems and<br />
power equipment which meet these standards.<br />
2<br />
International guarantee<br />
PHILIPS products have been <strong>de</strong>signed and manufactured to the<br />
highest quality standards. If, unfortunately, something should go<br />
wrong with this product, PHILIPS guarantees free of charge labour<br />
and replacement parts during a period of twelve months<br />
from date of purchase. This international PHILIPS guarantee<br />
complements the existing national guarantee obligations to you<br />
of <strong>de</strong>alers and PHILIPS in the country of purchase and does not<br />
affect your statutory rights as a customer.<br />
The PHILIPS guarantee applies provi<strong>de</strong>d the products are handled<br />
properly for its inten<strong>de</strong>d use, in accordance with its operating<br />
instructions and upon presentation of the original invoice or<br />
cash receipt, indicating the date of purchase, <strong>de</strong>aler’s name and<br />
mo<strong>de</strong>l and production number of the product.<br />
The guarantee may not apply if:<br />
Ÿ the documents have been altered in any way or ma<strong>de</strong><br />
illegible;<br />
Ÿ the mo<strong>de</strong>l or production number on the product has been<br />
altered, <strong>de</strong>leted, removed or ma<strong>de</strong> illegible;<br />
Ÿ repairs or product modifications and alterations have been<br />
executed by unauthorised service organisations or persons;<br />
Ÿ damage is caused by acci<strong>de</strong>nts including but not limited to<br />
lightning, water or fire misuse or neglect;<br />
Ÿ damage is caused by a power surge after a power cut.<br />
Please note that the product is not <strong>de</strong>fective un<strong>de</strong>r this guarantee<br />
in the case where modifications become necessary in or<strong>de</strong>r for the<br />
product to comply with local or national technical standards which<br />
apply in countries for which the product was not originally <strong>de</strong>signed<br />
and/or manufactured. Therefore always check whether a<br />
product can be used in a specific country.<br />
In case your PHILIPS product is not working correctly or is <strong>de</strong>fective,<br />
please contact your PHILIPS <strong>de</strong>aler. In the event you require<br />
service whilst in another country, a <strong>de</strong>aler address can be<br />
given to you by the PHILIPS Consumer Help Desk in that country.<br />
In or<strong>de</strong>r to avoid unnecessary inconvenience, we advise you to<br />
read the operating instructions carefully before contacting your<br />
<strong>de</strong>aler. If you have questions which your <strong>de</strong>aler cannot answer or<br />
any related question please send these in writing to our address or<br />
telephone your customer information service.<br />
PHILIPS cannot be held liable for faulty or incompletely received<br />
information.
Table of contents<br />
Overview......................................... 1<br />
Safety instructions ...........................................................2<br />
International guarantee ...................................................2<br />
1 Introduction................................. 3<br />
Overview of the machine ................................................4<br />
Description of machine ...................................................4<br />
General view of functions ................................................5<br />
Location of controls ........................................................6<br />
2 Installation ................................... 8<br />
Location .........................................................................8<br />
Connecting the fax machine ............................................8<br />
Replacing the ink film .....................................................9<br />
Removing the old ink film ..............................................9<br />
Loading the new ink film ................................................9<br />
Loading paper .............................................................. 10<br />
Removing paper ........................................................... 11<br />
Paper jam .....................................................................11<br />
Easy Install ...................................................................11<br />
Connecting additional <strong>de</strong>vices .......................................11<br />
Private branch exchange—line type ...............................12<br />
3 Basic functions........................... 13<br />
HELP function.............................................................13<br />
Time and date .............................................................. 13<br />
Entering your number .................................................. 13<br />
Entering your name ......................................................13<br />
Correction .................................................................... 14<br />
Language of display ......................................................14<br />
Type of ring signal ........................................................ 14<br />
Volume of the ring signal ..............................................14<br />
Volume of the loudspeaker ............................................ 14<br />
4 <strong>Fax</strong> switch .................................. 15<br />
Setting the Mo<strong>de</strong> SM ................................................15<br />
Special settings .............................................................. 16<br />
Mo<strong>de</strong> U ......................................................................16<br />
EASYLINK ..................................................................16<br />
External answering machine ..........................................17<br />
5 Telephone ................................... 18<br />
Making a call ................................................................18<br />
Redial ...........................................................................18<br />
Short dial n .........................................................18<br />
Telephone book a ............................................... 18<br />
List of telephone numbers .............................................19<br />
Call transfer ..................................................................19<br />
Hands-free operation* ...................................................19<br />
Mute ............................................................................19<br />
Calling line i<strong>de</strong>ntification ..............................................19<br />
* only with built-in answering machine<br />
3<br />
1 Introduction<br />
6 <strong>Fax</strong> .............................................. 20<br />
Feeding documents in ................................................... 20<br />
Sending faxes ................................................................20<br />
Broadcast......................................................................20<br />
Image quality ................................................................21<br />
Transmission report—error report ................................. 21<br />
Overseas function—Transmission ..................................21<br />
Size compression ........................................................... 21<br />
<strong>Fax</strong> journal ...................................................................21<br />
Polled reception ............................................................ 21<br />
Polling send .................................................................. 22<br />
Send later ..................................................................... 22<br />
Paperless fax reception ................................................... 22<br />
7 Scanner ...................................... 23<br />
Scanning ......................................................................23<br />
Copying ....................................................................... 23<br />
Contrast ....................................................................... 24<br />
8 Answering machine* ................. 25<br />
Switching on and off ..................................................... 25<br />
Recording a message ..................................................... 25<br />
Duration of recording ................................................... 25<br />
Listening to messages ....................................................25<br />
Play back volume ..........................................................25<br />
Deleting messages ......................................................... 25<br />
Forwarding messages ..................................................... 25<br />
Recording a conversation ..............................................26<br />
VIP co<strong>de</strong> ......................................................................26<br />
Memo .......................................................................... 26<br />
Remote control .............................................................27<br />
9 Hints & Tips ............................... 28<br />
Service co<strong>de</strong> .................................................................. 32<br />
Care and maintenance instructions ................................ 32<br />
Clean the scanner glass .................................................. 32<br />
Clean printer roller .......................................................33<br />
10 Appendix .................................. 34<br />
Technical data............................................................... 34<br />
Glossary ....................................................................... 34<br />
In<strong>de</strong>x .............................................. 36
Overview of the machine<br />
The following items are inclu<strong>de</strong>d in the packaging:<br />
1 Telephone cable with plug<br />
2 Mains cable with plug<br />
3 Telephone handset<br />
4 Spiral cable for telephone handset<br />
Description of machine<br />
1 Mains cable with power plug<br />
2 Document gui<strong>de</strong><br />
3 Paper feed flap<br />
4 Document support<br />
5 Paper tray<br />
6 Telephone handset<br />
4<br />
5 <strong>Fax</strong> machine<br />
6 Paper tray<br />
7 Document support<br />
8 User manual<br />
9 Installation gui<strong>de</strong><br />
7 Operation panel<br />
8 Scanner<br />
9 Front ink film compartment<br />
10 Rear ink film compartment<br />
11 Printer roller
15-MaY-02 12:30<br />
The symbols on the display indicate the current operating status:<br />
FINE f/PHOTO F<br />
indicates whether you are sending or copying with a higher picture<br />
quality or with grey tones. If neither of the two symbols is<br />
visible, the standard resolution is selected. To change the resolution<br />
use FINE/PHOTO.<br />
General view of functions<br />
You can print out a list of functions by pressing MENU three<br />
times.<br />
1 Setup Page<br />
11 Set language<br />
(select the language of the display text) ......................... 14<br />
12 Set time and date<br />
(setting time and date) ................................................. 13<br />
13 Your telephone number<br />
(enter your telephone number) ..................................... 13<br />
14 Your name<br />
(enter your name) ........................................................ 13<br />
15 Line type<br />
(setting the private branch exchange) ............................ 12<br />
2 <strong>Fax</strong><br />
21 Transmission speed/overseas function<br />
(setting for half-speed transmission).............................. 21<br />
22 Polled reception<br />
(you can call up fax messages) ...................................... 21<br />
23 Polling send<br />
(your fax message can be fetched) ................................. 22<br />
24 Send later<br />
(faxes will be sent later) ................................................ 22<br />
25 Broadcast<br />
(same fax will be sent to more than one party) ............... 20<br />
3 <strong>Fax</strong> switch<br />
31 Day<br />
(setting the DAY operating mo<strong>de</strong> S) .......................... 15<br />
32 Night<br />
(setting the NIGHT operating mo<strong>de</strong> M) ...................... 15<br />
33 Timer<br />
(setting the TIMER operating mo<strong>de</strong> U) ...................... 16<br />
34 Easylink<br />
(co<strong>de</strong>s for use with additional telephones) ................16, 17<br />
5<br />
h<br />
is visible when the document memory contains faxes.<br />
b* )<br />
shows that the built-in answering machine is switched on.<br />
S/M/U<br />
Three symbols on the display indicate the current settings. You<br />
can choose the mo<strong>de</strong> <strong>de</strong>sired with the key SM.<br />
* only for fax machine with built-in answering machine<br />
4 Others Page<br />
41 <strong>Fax</strong> journal<br />
(log of the last ten fax documents received and sent) ...... 21<br />
42 Dialling list<br />
(print out of stored names and numbers) ...................... 19<br />
43 Transmission report<br />
(automatic print out of transmission protocols) ............. 21<br />
44 Ringer types<br />
(selection between ten ringer types) .............................. 14<br />
45 Service co<strong>de</strong><br />
(<strong>de</strong>leting personal settings) ........................................... 32<br />
46 Size compression<br />
(size compression of received fax messages) ................... 21<br />
47 Set contrast<br />
(setting of contrast for copy / fax transmission) ............. 24<br />
5 Answering machine<br />
(for fax machines with built-in answering machine)<br />
51 Recording time<br />
(setting for recording duration of calls) ......................... 25<br />
52 Access co<strong>de</strong><br />
(setting the co<strong>de</strong> for the remote control of the<br />
answering machine and for message forwarding) ........... 27<br />
53 VIP co<strong>de</strong><br />
(authorised callers can overri<strong>de</strong><br />
the answering machine) ............................................... 26<br />
54 Memo mo<strong>de</strong><br />
(message for the caller without the<br />
possibility to leave a message) ....................................... 26<br />
55 Forwarding<br />
(messages forwar<strong>de</strong>d to<br />
another telephone number) .....................................25, 26
Location of controls<br />
START/COPY<br />
press briefly: to start fax transmission or to copy a document<br />
press and hold (two seconds): to multiple copy an inserted<br />
document / rapid call-up of faxes<br />
FINE f f /PHOTOF<br />
to select a higher resolution when copying or sending<br />
(for text and graphics—FINE; for photographs—PHOTO)<br />
STOP<br />
stops procedures<br />
Display lamp<br />
If this lamp flashes, please read the<br />
message on the display.<br />
CLEAR<br />
press briefly: to <strong>de</strong>lete messages / entries / individual symbols<br />
press and hold (two seconds): to cancel the whole entry<br />
6<br />
HELP/INSTALL<br />
press briefly (twice): print operating instructions for the most<br />
important functions with references to additional help pages<br />
press and hold (two seconds): to start the automatic installation<br />
of your fax machine / printout of Easy Install<br />
<<br />
to select options / to adjust the volume / to move cursor to<br />
left of display<br />
MENU/OK<br />
for calling up functions / to confirm entries<br />
><br />
to select options / to adjust the volume / to insert a space<br />
when entering a name / to move cursor to right of display<br />
S S M<br />
M<br />
to select the different operation mo<strong>de</strong>s<br />
press briefly: to choose between S and M<br />
press and hold (two seconds): operating mo<strong>de</strong> U U on/off<br />
for fax machine with built-in answering machine:<br />
ON/OFF<br />
to activate / <strong>de</strong>activate answering machine<br />
RECORD<br />
press briefly: to record an internal memo<br />
press and hold (two seconds): to record a new outgoing message<br />
PLAY<br />
To play back messages. The key flashes when new messages<br />
and memos have been recor<strong>de</strong>d. After playback the key stays<br />
lit until messages have been <strong>de</strong>leted.
n<br />
press briefly: to select a phone number quickly<br />
press and hold (two seconds): to store a telephone number<br />
a<br />
press briefly: to call up a name entry<br />
press and hold (two seconds): to store a name entry<br />
T<br />
temporary mute of microphone during a call / transferring a<br />
call from the fax machine to another telephone (only for serial<br />
connections, see Glossary)<br />
R<br />
press briefly: for special functions, e. g. for the use with a<br />
private branch exchange and for using various functions provi<strong>de</strong>d<br />
by your service provi<strong>de</strong>r (call waiting etc.)<br />
press and hold (two seconds): to insert a dialling pause between<br />
two figures<br />
PP<br />
PP<br />
press briefly: to repeat the last five numbers you have dialled<br />
press and hold (two seconds): to browse the list of callers<br />
DIAL / l MIC<br />
for dialling without lifting the handset. For <strong>de</strong>vices with builtin<br />
answering machine for hands-free operation.<br />
7
2 Installation<br />
! Neither telephone nor fax will operate during power<br />
failure.<br />
! Your fax machine was built for exclusive use in the<br />
country of purchase. It complies with the local<br />
network specifications.<br />
Location<br />
1 The fax machine must stand securely on a smooth, flat,<br />
horizontal surfaces (no soft surface such as carpets etc.).<br />
2 Avoid exposure to direct sunlight (the ink film is heatsensitive)<br />
and close proximity with heaters, radios and TV<br />
sets, air conditioning vents, dust, water and chemicals is not<br />
advised.<br />
3 Avoid heat build-up by ensuring that the machine is not<br />
covered. Place the fax in such a way as to ensure free circulation<br />
of air around it.<br />
4 If you would like to use a cordless phone, there should be a<br />
distance of at least 15 cm in between the fax machine and<br />
the base station, otherwise you may hear acoustic interference<br />
in your handset.<br />
Connecting the fax<br />
machine<br />
To the telephone socket<br />
Connect the telephone cable to the fax machine by inserting it in<br />
the socket on the bottom of the machine i<strong>de</strong>ntified with LINE.<br />
Insert the cable in the groove provi<strong>de</strong>d.<br />
8<br />
In the UK<br />
For all other countries<br />
Handset to the fax machine<br />
Insert one end of the spiral cable into the socket of the handset<br />
and the other end of the spiral cable into the socket i<strong>de</strong>ntified<br />
with a handset symbol, on the bottom of the machine, and press<br />
it into the specially provi<strong>de</strong>d cable groove.
To the power supply<br />
1 Plug the power connector into the back of the fax<br />
machine. Plug the mains cable into the wall socket. The<br />
machine will carry out an internal test. Afterwards you<br />
need to enter the current time and date.<br />
2 Use the dial pad to enter the correct time and date.<br />
Confirm with OK.<br />
Replacing the ink film<br />
You cannot receive or copy documents unless an ink film is<br />
loa<strong>de</strong>d in the fax machine. For this reason a test ink film has<br />
been inserted into your machine. The commercially available<br />
ink film PFA 321 has a capacity of approx. 260 pages.<br />
If the ink film is finished or if there is no ink film in the fax<br />
machine, the red display lamp flashes, and the following message<br />
appears:<br />
refill inkfilm<br />
1 Before loading a new ink film you must remove the paper<br />
from the paper feed mechanism! Also follow the instructions<br />
on your ink film packaging!<br />
2 Philips ink films provi<strong>de</strong> you with the best performance<br />
and printing quality. Our tests have shown that the use of<br />
other ink film may result in the machine not functioning<br />
correctly due to the build-up of static electricity. Therefore,<br />
for the protection of your machine, we have inclu<strong>de</strong>d<br />
a unique yellow sheet with each approved ink film,<br />
without which the machine will not work. Please be aware<br />
that your Philips guarantee may not apply if your machine<br />
is damaged by the use of other ink film than approved<br />
Philips film!<br />
3 Open the machine by carefully lifting the operation panel<br />
at the recess in the middle.<br />
! For use with Philips ink films only.<br />
9<br />
Removing the old ink film<br />
1 Lift the rear ink film roll holding both si<strong>de</strong>s with your in<strong>de</strong>x<br />
fingers upwards, in or<strong>de</strong>r to remove it out of its seat and<br />
place it next to the front ink film roll.<br />
2 Remove both ink film rolls. They cannot be reused. Dispose<br />
of the ink film rolls with normal waste. Load a new ink film,<br />
because your fax machine cannot work correctly without it.<br />
Loading the new ink film<br />
1 Carefully remove the rubber rings from the new ink film.<br />
Take care not to damage the ink film.<br />
2 Lay the large roll in the grooves provi<strong>de</strong>d in the rear ink film<br />
compartment.<br />
3 Now take the small roll and lay it in the front ink film<br />
compartment. Please make sure that the smaller roller is<br />
inserted into the si<strong>de</strong> i<strong>de</strong>ntations.
4 Turn small roll forward to tension the ink film. Make sure<br />
that the ink film is not creased.<br />
5 Close the machine by swinging the operation panel forward,<br />
until it snaps in.<br />
6 Insert the yellow sheet with the printed si<strong>de</strong> upwards and<br />
press START/COPY.<br />
A silver strip is fixed to the start of the ink film, so the<br />
quality of the first few pages may be impaired.<br />
The yellow sheet i<strong>de</strong>ntifies the inserted ink film and<br />
protects you from using ink films of other brands which<br />
may lead to your fax machine not functioning correctly.<br />
Loading paper<br />
Before you can copy documents, paper must be loa<strong>de</strong>d in your<br />
fax machine. Please use only the following paper format:<br />
standard A4, 210 x 297 mm. The fax machine works with<br />
normal paper used for writing and copying and has been<br />
optimised for smooth 80g/m 2 papier. The smoother the paper<br />
surface the better the print quality. If there is no paper in the fax<br />
machine the red display lamp flashes and on the display<br />
appears:<br />
OUT OF PAPER<br />
10<br />
1 Insert the paper tray in the slots provi<strong>de</strong>d behind the paper<br />
feed mechanism.<br />
2 Stick the paper support insertion in the openings provi<strong>de</strong>d<br />
on the paper feed flap.<br />
3 To prevent several sheets being drawn into the machine at<br />
once, first fan out the paper to separate the sheets and then<br />
straighten the stack on a flat surface before inserting it into<br />
the paper feed.<br />
4 Pull the paper feed flap fully forward until it stops. Insert<br />
several sheets of A4 paper (80 g) up to the end-stop in the<br />
paper feed mechanism (max. 50 sheets).
5 Close the paper feed flap.<br />
! Never load paper while the fax machine is printing!<br />
Do not use paper that has already been printed on one<br />
si<strong>de</strong>! This could lead to a paper jam.<br />
Removing paper<br />
1 Pull the paper feed flap forward.<br />
2 Pull the paper out.<br />
3 Close the paper feed flap.<br />
Paper jam<br />
Open the operation panel. Pull the paper carefully outwards from<br />
the insi<strong>de</strong>. Before closing the panel the ink film roll must be tensioned<br />
by turning the front ink film roll forwards.<br />
11<br />
! Do not pull the paper out from the top of the machine<br />
because doing so can tear the paper and disrupt the<br />
functionality of the fax machine.<br />
Easy Install<br />
Using EASY INSTALL your fax machine will be configured according<br />
to your local conditions.<br />
1 Press HELP/INSTALL for at least two seconds. Your fax<br />
machine will print one page with the hea<strong>de</strong>r EASY IN-<br />
STALL. Pull out the page firmly.<br />
2 Your fax machine will then gui<strong>de</strong> you on the display through<br />
the first settings such as your telephone number and your<br />
name.<br />
Connecting additional<br />
<strong>de</strong>vices<br />
In addition to your fax machine, you can also connect other <strong>de</strong>vices,<br />
such as additional telephones, call-fee indicators, answering<br />
machines or mo<strong>de</strong>ms to a single telephone line [for UK: As<br />
long as the Ringer Equivalent Number (REN value) on the line<br />
doesn’t exceed 4. The REN value of this fax is 1].<br />
To the same socket<br />
(not in all countries)<br />
You can connect additional <strong>de</strong>vices to the same<br />
telephone plug.<br />
Make sure that the fax machine is the first <strong>de</strong>vice connected<br />
to the line.<br />
a) Connecting to the telephone socket<br />
b) Connecting the handset to the fax machine<br />
c) Connecting additional <strong>de</strong>vices to the telephone plug<br />
Connecting additional <strong>de</strong>vices to the same socket ensures<br />
you the optimal function of your active fax switch<br />
(e. g. call transfer). Your fax machine can control the<br />
additional <strong>de</strong>vices.
To separate sockets<br />
(not in all countries)<br />
You can connect additional <strong>de</strong>vices to separate sockets on the same<br />
line even if they are in different rooms. Make sure that the fax<br />
machine is the first <strong>de</strong>vice connected.<br />
Please note: If you connect additional <strong>de</strong>vices to separate sockets<br />
(e. g. in separate rooms) your active fax switch cannot control them<br />
(which means that your fax machine behaves like any ordinary fax<br />
machine). For this reason e. g. call transfer is not possible. Therefore<br />
we recommend you to connect your additional <strong>de</strong>vices to the<br />
same socket.<br />
If you intend using special auxiliary <strong>de</strong>vices with your fax<br />
machine, please contact your <strong>de</strong>aler.<br />
If you wish to receive faxes via mo<strong>de</strong>m, you must set your<br />
fax machine to MANUAL RECEPTION.<br />
Connecting to ISDN<br />
Your fax machine is not an ISDN fax (group 4), but an analogue<br />
fax machine (group 3). Therefore it cannot be used directly on an<br />
ISDN connection. You will need an (analogue) adapter or an ISDN<br />
connection for analogue <strong>de</strong>vices. For further information please<br />
refer to your ISDN instructions.<br />
Connecting to a private branch exchange<br />
(PABX)<br />
Private branch exchange systems are very common in large companies.<br />
ISDN connections are private branch exchanges and are used<br />
very often in private households. To get a connection from a private<br />
branch exchange to the public network you have to dial a key<br />
to obtain the outsi<strong>de</strong> line.<br />
An additional telephone which is connected to a normal telephone<br />
line together with your fax machine must not be mixed up with a<br />
private branch exchange.<br />
If you wish to use your fax machine on a PABX you have to change<br />
some settings in function 15.<br />
12<br />
Private branch exchange—<br />
line type<br />
In the UK you can select with function 15 the connection to a<br />
private branch exchange.<br />
In all other countries it is also possible to select the telephone line<br />
type with this function. Press MENU 15, then OK , select<br />
with and confirm with OK. Continue with point 2.<br />
1 Select function 15 by pressing MENU and then entering the<br />
digits 15. Press OK.<br />
2 You can switch on the PABX operation using . Press<br />
OK.<br />
PABX: NO<br />
PABX: yes<br />
3 Now enter the key that has to be pressed to obtain an outsi<strong>de</strong><br />
line (this outsi<strong>de</strong> line access co<strong>de</strong> must be obtained from the<br />
manufacturer). This is either 0, R (in some systems also<br />
<strong>de</strong>scribed as FLASH) or a number key. Press OK.<br />
4 Press OK. Your machine will then check that the outsi<strong>de</strong> line<br />
can be obtained.<br />
5 ... if the check is successful, briefly appears:<br />
CHECK OK<br />
6 ... if the check is unsuccessful, briefly appears:<br />
CHECK NOT OK<br />
7 You will be asked to repeat the entry. Check the key for<br />
obtaining an outsi<strong>de</strong> line. However, if you have chosen the<br />
correct key and on the display still appears the message<br />
CHECK NOT OK<br />
<strong>de</strong>lete the key for obtaining the outsi<strong>de</strong> line by pressing<br />
CLEAR.<br />
In case your PABX requires R to obtain an outsi<strong>de</strong> line but<br />
it is still not possible to get through to the line, your system<br />
might not be according to the regulations. Therefore some<br />
technical settings have to be changed on your fax machine.<br />
Please refer to your <strong>Fax</strong> Call Centre.
! If you press a wrong key by mistake, press the STOP<br />
key as often as necessary to return to the original<br />
position.<br />
If you want to keep a note of the factory settings on your<br />
machine for later, we recommend printing out a function<br />
list before you change any of the settings (press MENU<br />
three times).<br />
If you want to <strong>de</strong>lete your individual settings, you can do<br />
so in function 45 Service co<strong>de</strong> (see chapter Hints and Tips<br />
/ Service co<strong>de</strong>).<br />
“Your name” and “your telephone number” are transmitted<br />
at the top of each page (the first 4 mm) together with the<br />
date, time and page number.<br />
HELP function<br />
1 Press HELP/INSTALL twice. You will receive a printout<br />
explaining how to use the most important functions. It also<br />
specifies how to obtain further HELP pages concerning<br />
other features of your fax machine.<br />
Time and date<br />
1 Select function 12 by pressing MENU and numbers 1 and<br />
2.<br />
2 Press OK.<br />
3 Enter the correct time using the number keys (e. g.<br />
0915 for 9:15). Your fax machine will now ask you for<br />
the correct date (e. g. 150502 for May 15, 2002).<br />
4 Press OK.<br />
Grun<strong>de</strong>instellung<br />
3 Basic functions<br />
13<br />
Entering your number<br />
Use # or * to enter the “+”, that is often used in international<br />
fax numbers in front of the country co<strong>de</strong>, and > to enter a space.<br />
The maximum number of digits you can use for your number<br />
is 20.<br />
1 Select function 13 by pressing MENU and numbers 1 and<br />
3.<br />
2 Press OK.<br />
3 Enter your telephone or fax number (Country co<strong>de</strong>s: UK<br />
+44, Ireland +353, Hong Kong +852, Singapore +65).<br />
4 Press OK. Your number is now stored.<br />
Entering your name<br />
When you enter a name (maximum 32 digits), the number keys<br />
are used to enter letters. Every key has a number of different characters.<br />
The table below shows which characters are entered by<br />
which key. Every time you press a particular key you will call up<br />
the next character. After the last character the sequence starts again<br />
from the beginning.<br />
1 Select function 14 by pressing MENU and numbers 1 and<br />
4.<br />
2 Press OK.<br />
3 Use the dial pad to enter a name. After pressing > the cursor<br />
moves one position to the right.<br />
4 Confirm with OK. Your name is now stored.
Correction<br />
If you have entered a wrong letter or number in function 13 or 14<br />
you can correct the mistake during the entering as well as later. If<br />
you want to make your corrections later you have to select the<br />
functions for entering numbers or names once again.<br />
1 Position the cursor on the right si<strong>de</strong> of the character you<br />
want to change with . Press CLEAR to <strong>de</strong>lete the<br />
character. A long press on CLEAR will <strong>de</strong>lete the whole line.<br />
2 Now enter the correct characters by using the keyboard.<br />
Confirm with OK.<br />
Language of display<br />
1 For selecting the language of the display and the reports,<br />
press MENU and numbers 1 and 1 and press OK.<br />
2 Select the <strong>de</strong>sired language with and confirm with<br />
OK.<br />
Type of ring signal<br />
You can choose between ten different ring signals.<br />
1 Enter function 44. Press MENU and numbers 4 and 4<br />
and then OK.<br />
2 Select the <strong>de</strong>sired ring signal with 0 to 9.<br />
3 Confirm your setting with OK.<br />
Volume of the ring signal<br />
You can adjust the volume of the ring signal if the fax machine<br />
is in stand-by mo<strong>de</strong> or if it is just ringing. Please note that<br />
different volumes can be set in S and M mo<strong>de</strong> (see <strong>Fax</strong><br />
switch).<br />
1 By pressing the display shows the current setting for<br />
about three seconds.<br />
2 Change the volume by pressing until the <strong>de</strong>sired<br />
volume is achieved.<br />
14<br />
Volume of the loudspeaker<br />
1 You can adjust the volume of the loudspeaker at any time<br />
by pressing DIAL (without built-in answering machine)<br />
or l (with built-in answering machine).<br />
2 By pressing the display shows the current setting. If<br />
you wish to adjust the displayed value, press until the<br />
<strong>de</strong>sired volume is achieved.<br />
3 Finish your entry by pressing STOP.
The intelligent fax switch enables you to phone and fax<br />
from the same telephone connection and use additional<br />
<strong>de</strong>vices. The fax switch separates fax and voice messages.<br />
For example, it can receive fax messages silently, i. e.<br />
without ringing to avoid causing a disturbance.<br />
The operating mo<strong>de</strong>s S and M for day and night<br />
operation allow you to <strong>de</strong>ci<strong>de</strong> on different mo<strong>de</strong>s during<br />
the day and at night; how often the machine should ring<br />
prior to receipt of faxes or before the answering machine<br />
is turned on.<br />
Example:<br />
During daytime it is assumed that calls should ring.<br />
After a set time the fax reception is turned on and<br />
messages can be left on the (internal or external)<br />
answering machine. At night it is assumed that disturbances<br />
are minimised. <strong>Fax</strong>es are then received silently<br />
and calls ring more quietly.<br />
You may change-over the operating mo<strong>de</strong> between S<br />
and M of your fax machine automatically using the<br />
timer function U. The integral clock ensures that your<br />
machine is changed over at 10 pm to M and at 6 am to<br />
S. Of course you may adjust these times to suit your<br />
own requirements. The display allows you to check the<br />
current operating status. You change-over between S<br />
and M by briefly pressing S/M until the display shows<br />
the required symbol.<br />
Setting the Mo<strong>de</strong> SM<br />
SM<br />
with built-in answering machine<br />
Display Possible settings<br />
TAM RINGS: 0, 1, 2, 3, 4, 5, 6,<br />
7, 5/2<br />
FAX RINGS: 0, 1, 2, 3, 4, 5,<br />
MANUAL RECEPTION<br />
RINGER VOL.: Low, Medium,<br />
High<br />
LISTEN-IN: ON, OFF<br />
1 Select function 31 (Day) by pressing MENU and numbers<br />
3 and 1. Confirm with OK.<br />
2 Select number of rings with u before your answering<br />
machine will be activated.<br />
TAM RINGS: 5/2<br />
15<br />
Die 4 <strong>Fax</strong> <strong>Fax</strong>weiche switch<br />
3 Confirm your entry with OK.<br />
4 Now enter the number of ringing signals, after which the<br />
automatic fax switch should accept the call and separate faxes<br />
from voice messages. Although the caller will continue to<br />
hear slightly different ringing tones after this time, charges<br />
will already accrue.<br />
FAX RINGS: 5<br />
5 Confirm your entry with OK.<br />
6 Using , <strong>de</strong>termine the ringer volume when receiving a<br />
call. Press OK.<br />
RINGER VOL.:HIGH<br />
7 Select with if the caller should be heard while leaving a<br />
message.<br />
LISTEN-IN: ON<br />
8 Confirm with OK. To activate mo<strong>de</strong> M select MENU 32<br />
(Night) and repeat steps 2 to 7.<br />
without built-in answering machine<br />
Display Possible settings<br />
TOTAL RINGS: 0, 1, 2, 3, 4, 5,<br />
6, 7<br />
FAX RINGS: 0, 1, 2, 3, 4, 5,<br />
MANUAL RECEPTION<br />
RINGER VOL.: Low, Medium,<br />
High<br />
1 Select function 31 (Day) by pressing MENU and numbers<br />
3 and 1. Confirm with OK.<br />
2 Using u, set the total number of rings before the fax<br />
reception commences.<br />
TOTAL RINGS: 5<br />
3 Confirm your entry with OK.<br />
4 Now enter the number of ringing signals after which the fax<br />
switch should accept the call and separate faxes from voice<br />
messages. Although the caller will continue to hear slightly<br />
different ringing tones after this time, charges will already<br />
accrue.<br />
FAX RINGS: 5<br />
5 Confirm your entry with OK.<br />
6 Using u, <strong>de</strong>termine the ringer volume when receiving a<br />
call. Press OK.<br />
RINGER VOL.:HIGH
7 Confirm with OK. To activate mo<strong>de</strong> M select MENU32<br />
(Night) and repeat steps 2 to 7.<br />
If you cannot receive any faxes, you may have set both<br />
ringing signal numbers too high (see points 2 and 4). Set<br />
both ringing signal numbers to values lower than five .<br />
If you are using other <strong>de</strong>vices apart from the fax machine<br />
(telephones, answering machines), which are not connected<br />
by serial links (see Glossary), the ringing pattern may<br />
change as follows: Other <strong>de</strong>vices ring as often as set un<strong>de</strong>r<br />
FAX RINGS. Your fax will ring as often as set un<strong>de</strong>r<br />
TAM RINGS or TOTAL RINGS .<br />
Special settings<br />
Silent fax reception FAX RINGS: 0<br />
To receive faxes without any ring signals, set the amount of ring<br />
signals in FAX RINGS to 0.<br />
Completely silent operation<br />
You should use this option only with <strong>de</strong>vices with integral answering<br />
machines. If, for example, you do not wish to be disturbed<br />
by calls or faxes arriving at night, you may set the number<br />
of ringing signals to 0. <strong>Fax</strong>es are then received silently and calls are<br />
immediately answered by the answering machine, provi<strong>de</strong>d you<br />
have switched the answering machine on.<br />
For <strong>de</strong>vices without integral answering machine the fax switch is<br />
turned off, i. e. your <strong>de</strong>vice immediately switches over to fax reception<br />
and will not ring, when calls are received (the caller hears<br />
a whistling tone).<br />
For this reason calls cannot be recor<strong>de</strong>d by any external<br />
answering machine which may be connected.<br />
<strong>Manual</strong> fax reception MANUAL RECEPTION<br />
If you select MANUAL RECEPTION, then faxes are only automatically<br />
printed out by your fax machine, if you activate<br />
the fax reception by pressing START. This may be sensible for<br />
example, if you wish to receive your faxes by mo<strong>de</strong>m at your<br />
computer.<br />
Economy operating mo<strong>de</strong>—answering machine*<br />
TAM RINGS: 5/2<br />
If you select option 5/2 at TAM RINGS: , then your answering<br />
machine will start after two ringing signals instead of after five,<br />
when you receive messages. Via the remote access function you<br />
have the opportunity to check, whether your answering machine<br />
holds any messages without incurring telephone cost (if your answering<br />
machine turns itself on after only two ringing signals you<br />
will know, that new messages have been left). After listening to<br />
your new messages your answering machine will, at the next call,<br />
switch itself on again after five ringing signals.<br />
* only with built-in answering machine<br />
16<br />
Mo<strong>de</strong> U<br />
The <strong>de</strong>fault operating mo<strong>de</strong> set in the factory is S. You may<br />
also select operating mo<strong>de</strong> U. In mo<strong>de</strong> U your machine<br />
switches automatically between S and M. The factory setting<br />
provi<strong>de</strong>s that your machine switches at 10 pm to M and<br />
at 6 am back to S.<br />
U activating/<strong>de</strong>activating<br />
1 If you want to switch on function U, press SM for two<br />
seconds, until you hear a confirmation tone and U<br />
appears on the display.<br />
2 If you want to switch off function U, press SM for two<br />
seconds, until you hear a confirmation tone and U disappears.<br />
On the display appears S or M.<br />
U configuring/checking<br />
1 Select function 33 by pressing MENU and numbers 3<br />
and 3. Press OK.<br />
2 Enter the time at which you want your fax machine to<br />
switch automatically to S and confirm with OK.<br />
3 Enter the time at which you want your fax machine to<br />
switch automatically to M. To confirm your settings press<br />
OK.<br />
EASYLINK<br />
Setting additional <strong>de</strong>vices<br />
The three co<strong>de</strong>s below will help you, when you receive a call on<br />
an additional telephone and wish to transfer a call or fax to your<br />
fax machine.<br />
1 Co<strong>de</strong> for starting your fax machine from another telephone:<br />
*5<br />
2 Serial connection (see Glossary): Co<strong>de</strong> for transferring a call<br />
from another telephone connected serial to your fax<br />
machine: *0<br />
Please note that when using this co<strong>de</strong> you have to replace<br />
the handset of your additional <strong>de</strong>vice after you have entered<br />
the co<strong>de</strong>. See chapter Telephone / Call transfer.<br />
3 Parallel connection (see Glossary): Co<strong>de</strong> for turning off the<br />
answering message, if the answering machine is switched on:<br />
** For fax machines without built-in answering<br />
machine this co<strong>de</strong> is used to switch off the fax machine.<br />
To be able to use this function you must set your additional or<br />
cordless telephone to tone dialling. If your telephone service is<br />
not compatible with this dialling method and requires pulse dialling,<br />
you must temporarily set your additional <strong>de</strong>vice to transmit<br />
tone dial signals. Please refer to the operating instructions of your<br />
additional <strong>de</strong>vice to find out how to make this temporary adjustment.
! Only change the specified EASYLINK co<strong>de</strong>s if<br />
absolutely necessary!<br />
If you need to change the pre-set co<strong>de</strong>s, select MENU 34 and<br />
press OK. Enter a two digit co<strong>de</strong>. The first digit should be the<br />
sign * or #. Confirm with OK. Execute this procedure for<br />
each of the three co<strong>de</strong>s.<br />
Please note that the three EASYLINK co<strong>de</strong>s must be<br />
different. Otherwise on the display appears:<br />
CODE NOT OK<br />
External answering<br />
machine<br />
Connect the answering machine as <strong>de</strong>scribed in chapter Installation<br />
/ Connecting additional <strong>de</strong>vices.<br />
To provi<strong>de</strong> for the optimum performance of an external answering<br />
machine, set this <strong>de</strong>vice to ring once or twice. To avoid<br />
the automatic acceptance of calls by the fax switch, you must<br />
set FAX RINGS: and TOTAL RINGS: to a value at least two<br />
ringing signals higher than the setting of the external answering<br />
machine.<br />
If you switch off the external answering machine, calls are accepted<br />
by the fax switch (see sub-heading Setting the operating<br />
mo<strong>de</strong> SM / without built-in answering machine)<br />
Setting example:<br />
ANSWERING MACHINE RINGS 2<br />
FAX RINGS 4<br />
TOTAL RINGS 4<br />
17<br />
Tips:<br />
Die <strong>Fax</strong>weiche<br />
1 The answering message of your answering machine should<br />
be shorter than 10 secs.<br />
2 Please avoid music in your answering message.<br />
3 If your fax machine is unable to recognise ol<strong>de</strong>r fax machine<br />
mo<strong>de</strong>ls, which do not transmit those signals that are commonly<br />
used in today's technology, you should advise your<br />
callers in your answering message to press * and 5<br />
followed by START to commence the fax reception.<br />
4 If the automatic fax reception is impossible, press START to<br />
manually begin receiving the fax.<br />
5 If your answering machine provi<strong>de</strong>s an “economy function”<br />
(e. g. a function which changes the number of ringing signals<br />
as soon as a message was recor<strong>de</strong>d), you should preferably<br />
switch this function off.<br />
6 It is possible that the answering machine not only counts the<br />
messages received, but also the number of fax calls.<br />
7 Please ensure that the co<strong>de</strong> for starting the fax reception from<br />
other telephones (factory setting * and 5) is not the same<br />
as for remote access to recor<strong>de</strong>d messages. Where necessary<br />
the co<strong>de</strong> for function 34 may be changed (see sub-heading<br />
EASYLINK).<br />
8 If your answering machine accepts the call but your fax<br />
machine does not stop ringing, try and install your answering<br />
machine by serial connection, for example by connecting<br />
it to the same telephone socket or to the EXT. port of your<br />
fax machine (see chapter Installation / Connection of<br />
additional <strong>de</strong>vices).<br />
9 If your answering m/c cannot accept calls, your fax machine<br />
will automatically start to receive faxes after the no. of ringing<br />
signals set in TOTAL RINGS has been received.<br />
10 If your external answering machine records fax signals, but<br />
your fax machine cannot receive any faxes, check the<br />
connection of your external answering machine. Connect the<br />
external answering machine to the same telephone socket or<br />
to the EXT. port of your fax machine (see chapter Installation<br />
/ Connection of additional <strong>de</strong>vices).
5 Telephone<br />
If you enter a wrong digit, <strong>de</strong>lete it by using CLEAR.<br />
Then lift the handset.<br />
The R key allows you to use various services offered by<br />
the telephone service provi<strong>de</strong>r (call waiting, toggling<br />
calls, etc.). Contact your telephone service provi<strong>de</strong>r for<br />
more information.<br />
If you have not connected your fax machine to the mains,<br />
it will not function at all—even for making telephone<br />
calls.<br />
Making a call<br />
1 Dial the <strong>de</strong>sired number.<br />
2 Lift the handset. If you want to dial with the handset<br />
replaced press DIAL/l. As soon as the other party<br />
answers, lift the handset and speak.<br />
You can also first lift the handset and then dial the<br />
number.<br />
Redial<br />
With PP you can redial the last five numbers you have dialled<br />
previously.<br />
1 Press PP.<br />
2 Press until <strong>de</strong>sired number appears on the display.<br />
If you want to edit the number press OK and make the<br />
<strong>de</strong>sired changes.<br />
3 Lift the handset or press DIAL/l to dial.<br />
Delete stored numbers<br />
With CLEAR you can <strong>de</strong>lete the numbers you do not need<br />
anymore from the redial memory.<br />
1 Briefly press CLEAR.<br />
2 Choose with whether to <strong>de</strong>lete only the last<br />
number displayed or all five numbers.<br />
3 Press OK to execute the cancel command.<br />
Short dial n<br />
There are short dialling keys available, which you can use to<br />
store numbers you dial frequently.<br />
Storing numbers<br />
1 Press n for two seconds.<br />
2 Choose a number between 0 and 9.<br />
18<br />
3 Use the dial pad to enter a name. After pressing > the cursor<br />
moves one position to the right. Press OK.<br />
4 Enter the telephone number you wish to store and confirm<br />
with OK.<br />
Using short dial<br />
1 Press n and choose a number between 0 and 9. The<br />
stored name or telephone number appears on the display. In<br />
or<strong>de</strong>r to edit the number press OK and make the <strong>de</strong>sired<br />
changes.<br />
2 Lift the handset. In case you want to send a fax message,<br />
press START.<br />
Correcting entries<br />
1 Press n and select an entry by using the number<br />
keys. The stored name and number appear on the display.<br />
2 Press n for two seconds. Select wrong character<br />
with .<br />
3 Press CLEAR to <strong>de</strong>lete wrong character.<br />
4 Enter <strong>de</strong>sired character and confirm with OK.<br />
Deleting entries<br />
1 Press n and then a key between 0 and 9. The stored<br />
name or telephone number appears on the display.<br />
2 Press CLEAR. Select with whether to actually <strong>de</strong>lete<br />
entry.<br />
3 Press OK to <strong>de</strong>lete entry.<br />
Telephone book a<br />
The telephone book function on your fax machine has a capacity<br />
for about 200 numbers and names. The exact figure<br />
<strong>de</strong>pends on the length of each entry. You can also store numbers<br />
during a telephone conversation.<br />
Storing numbers<br />
1 Press a for two seconds.<br />
2 Use the dial pad to enter a name. After pressing > the cursor<br />
moves one position to the right. Then press OK.<br />
3 Enter a telephone number and confirm with OK.<br />
Using the telephone book<br />
1 Press a.<br />
2 Select with u. The stored name or telephone number<br />
appears on the display.<br />
3 Pick up the handset. In case you want to send a fax message,<br />
press START.
Correcting entries<br />
1 Press a and select the entry you want to edit with<br />
u (see above).<br />
2 Press a for two seconds. Select wrong character with<br />
u.<br />
3 Press CLEAR to <strong>de</strong>lete wrong character.<br />
4 Enter correct character and confirm with OK.<br />
Deleting entries<br />
1 Press a and select entry you want to <strong>de</strong>lete with u.<br />
2 Press CLEAR. Select with u whether to actually <strong>de</strong>lete<br />
entry.<br />
3 Confirm with OK to <strong>de</strong>lete entry.<br />
Editing stored numbers may be particularly relevant<br />
when, for example, the number of a net operator should<br />
be stored as pre-fix co<strong>de</strong>.<br />
List of telephone numbers<br />
1 Choose function 42 to print a list of your stored Short dial<br />
and Telephone book numbers. Press MENU 4 2 .<br />
2 Press OK. Your fax machine will then print out the list.<br />
Call transfer<br />
You can transfer an existing phone call from your fax machine<br />
to an additional telephone and vice versa. This <strong>de</strong>scription<br />
only refers to telephones connected serial (see Glossary).<br />
From fax machine to an additional telephone<br />
1 Press T during the phone call and replace the handset.<br />
2 Your other telephone will ring for about 30 seconds. If the<br />
handset is not lifted in time, the fax machine takes over the<br />
call again and rings for about 20 seconds. If you do not lift<br />
the handset in time the call will be disconnected.<br />
From an additional telephone to the fax machine<br />
1 Press * and 0 during the phone call. If the connection<br />
is established successfully, you will hear a tone. Replace<br />
the handset of the additional telephone within three<br />
seconds.<br />
2 Your fax machine will ring for about 30 seconds. If the<br />
handset is not lifted in time, the additional <strong>de</strong>vice takes<br />
over the call again and rings for about 20 seconds. If you<br />
do not lift the handset in time the call will be disconnected.<br />
19<br />
Das Telefon<br />
Hands-free operation<br />
(only with built-in answering machine)<br />
You can make a call without using the handset or let persons in<br />
the same room participate at the conversation. Therefore press l<br />
after having dialled or during the call. Replace the handset. The<br />
microphone and the loudspeaker are being activated.<br />
Mute<br />
You can mute the microphone of the handset so that the other<br />
party cannot hear you any more.<br />
1 Press T. You will still hear the person on the other<br />
end of the line at reduced volume.<br />
2 If you want to continue your conversation, press T<br />
again.<br />
Calling line i<strong>de</strong>ntification<br />
(not available in all countries)<br />
Your fax machine is capable of showing the caller’s telephone<br />
number before you lift the handset. To have this feature at your<br />
disposal you must subscribe to it via your telephone service provi<strong>de</strong>r.<br />
The use of this feature is subject to network selection.<br />
1 The telephone numbers of the last ten received calls are<br />
stored.<br />
2 To call up the caller’s list keep PP pressed for two<br />
seconds.<br />
3 Using you can now step through the entries. The<br />
new entries are marked with an “ * ”.<br />
4 To call back the displayed number just lift the handset.<br />
Your fax machine starts dialling.<br />
5 To <strong>de</strong>lete an entry press CLEAR. Choose with and<br />
confirm <strong>de</strong>letion by pressing OK.<br />
If you set FAX RINGS with MENU 31 or 32 to 0,<br />
then the telephone number cannot be displayed on your<br />
external telephones.
6 <strong>Fax</strong><br />
The following points are the most common causes of<br />
errors when sending faxes! Don’t send<br />
... pages from newspapers (printer’s ink).<br />
... stapled pages or pages held together with<br />
paperclips. Remove all staples and clips before<br />
sending.<br />
... creased or torn pages.<br />
... wet pages or pages with corrections ma<strong>de</strong><br />
with correction fluid; dirty pages or pages with<br />
a glossy or laminated surface.<br />
... pages joined with sticky tape or glue, with<br />
adhesive stickers such as “post-it®” notes, or<br />
pages which are too thin or too thick.<br />
... pages written in faint pencil, crayon, chalk<br />
or artist’s charcoal.<br />
Documents smaller than A5 risk getting stuck in the<br />
machine.<br />
Write clearly and legibly. Only use pens with dark ink<br />
(black/dark-blue, not yellow/orange/light green).<br />
Documents printed on your fax machine are visible on<br />
the used up ink film. In case of confi<strong>de</strong>ntial texts the ink<br />
film should be <strong>de</strong>stroyed after usage.<br />
Feeding documents in<br />
1 To avoid more than one page being fed at the same time,<br />
first fan out the stack and then straighten it on a smooth<br />
surface.<br />
2 Insert your documents (max. 10 sheets) loosely with the<br />
printed si<strong>de</strong> up into the document feed slot. In case a<br />
document jam occurs, remove the scanner from the<br />
<strong>de</strong>vice and remove the document.<br />
20<br />
Sending faxes<br />
1 Dial the number you require.<br />
2 Insert your documents face up into the document feed<br />
slot (max. ten pages).<br />
3 If you want to select a higher resolution, press FINE/<br />
PHOTO.<br />
4 Press START. Transmission now begins. In case the<br />
connection is not successful your fax machine will redial<br />
later.<br />
5 If you want to interrupt transmission, press STOP.<br />
Broadcast<br />
This feature is very useful, in case you want to send the same<br />
document to more than one party (Circular send).<br />
1 Insert the document face up into the document feed slot.<br />
If you want to select a higher resolution, press FINE/<br />
PHOTO.<br />
2 Select MENU 25. Press OK. The inserted document<br />
will be stored into the memory.<br />
3 Enter the first telephone number and press OK. This will<br />
be your first entry in the recipient list. Repeat the procedure<br />
until you have entered data for max. five recipients.<br />
4 To send the document press START. The document will<br />
be sent successively to every party entered. If transmission<br />
to one of the recipients is not possible your fax machine<br />
will continue transmission according to the list and retry<br />
transmission to the party missed. After transmission a<br />
transmission report will be printed out automatically.
Image quality<br />
If you want to improve the image quality you can choose between<br />
the options FINE f (for small print or fine drawings)<br />
and PHOTO F (for photographs and pictures). Press FINE/<br />
PHOTO as often as nee<strong>de</strong>d until the pointer for the <strong>de</strong>sired<br />
resolution lights up. Document transmission will take longer<br />
in the FINE/PHOTO operating mo<strong>de</strong>. After transmitting or,<br />
if there is no document in the feed slot, after 40 seconds the<br />
fax machine will automatically return to standard resolution.<br />
Transmission report—<br />
error report<br />
Your fax machine can print a transmission report every time<br />
you have sent a document. This way you are given confirmation<br />
that your document has been received. If an error occurs<br />
during transmission you will be informed on the error report.<br />
The printing of a transmission report can be switched on and<br />
off while the error report is always printed.<br />
1 Call up function 43. Press MENU 4 3 and OK.<br />
2 Select with and confirm with OK.<br />
Overseas function—<br />
Transmission<br />
Your fax machine automatically adjusts its transmission speed<br />
to the quality of the telephone line. Especially in case of overseas<br />
transmissions this process can take more time. If the poor<br />
line quality is already known it is useful to set the machine at<br />
a slower speed from the very beginning using in function<br />
21. This will save time and charges the automatic adjustment<br />
would require.<br />
1 Press MENU, 2 1 and OK.<br />
2 Select a slower speed with u and confirm with OK.<br />
Size compression<br />
To make sure that received faxes that are slightly longer than<br />
A4 size are printed on one page, these pages are slightly reduced<br />
vertically. If you do not wish to use this facility, you<br />
can switch off reduction using function 46.<br />
1 Press MENU, 4 6 and OK.<br />
2 Select with u and confirm with OK.<br />
21<br />
<strong>Fax</strong> journal<br />
Das <strong>Fax</strong><br />
The fax journal is a list of the last ten received and transmitted<br />
faxes.<br />
1 Call up function 41 by pressing MENU, 41 and OK.<br />
2 Select with if, and when the fax journal will be<br />
printed out (immediately or after ten transmissions).<br />
3 Confirm your choice with OK.<br />
Polled reception<br />
By means of this function documents which have been prepared<br />
for collection from another fax machine can be retrieved.<br />
Quick polling<br />
1 Dial the <strong>de</strong>sired number with the handset replaced and<br />
press START for a longer time.<br />
2 In case you want to enter a sub address or a co<strong>de</strong> as well<br />
(check polling with co<strong>de</strong>) enter the telephone number<br />
first and close with R. Attach <strong>de</strong>sired sub address or co<strong>de</strong><br />
and press START for a longer time. (e. g.<br />
12345R17Rco<strong>de</strong> or<br />
12345RRco<strong>de</strong>).<br />
Polling with co<strong>de</strong><br />
If your correspon<strong>de</strong>nt has entered a co<strong>de</strong> to protect the document<br />
to be retrieved please follow this procedure:<br />
1 Select MENU 2 2. Press OK.<br />
2 Enter the co<strong>de</strong> and confirm with OK.<br />
3 Enter the telephone number and press START. In case it<br />
does not work try to poll manually. Lift the handset, dial<br />
the required number and then press START.<br />
Polling co<strong>de</strong>s work in accordance with the ITU international<br />
standard. However, there are manufacturers who<br />
use other processes and whose machines are therefore<br />
not compatible.<br />
If you want to send faxes to fax databases or if you want<br />
to poll from these, some databases have a sub-address<br />
which you can add to the telephone number. This will<br />
save you money in telephone charges. First enter the<br />
telephone number of the database and then press R.<br />
Then enter the required sub-address. If you are not sure<br />
whether your fax polling service supports sub-addresses,<br />
please contact your polling service operator.
Polling send<br />
You can allow a document to be polled from your fax machine.<br />
1 Insert the document in the document feed slot.<br />
2 If you wish to protect the document from unauthorised<br />
access, enter a co<strong>de</strong> with function 23. Press MENU, 2<br />
3 and confirm with OK. The document can now be<br />
polled by a person in possession of this co<strong>de</strong>. You can still<br />
make telephone calls while this function is activated.<br />
3 The operation is interrupted as soon as you remove the<br />
document.<br />
Send later<br />
If you wish to make use of cheaper telephone rates, or if your<br />
fax correspon<strong>de</strong>nt is only available at particular times, you can<br />
program automatic transmission of a fax at a later time (within<br />
24 hours).<br />
1 Select function 24 by pressing MENU 2 4 and OK.<br />
Enter the time when you wish the document to be sent.<br />
2 Press OK and insert the document.<br />
3 Dial the <strong>de</strong>sired telephone number and then press<br />
START or OK.<br />
4 The fax machine is now ready to send the inserted<br />
document. You can still make telephone calls while this<br />
function is activated.<br />
5 If you remove the inserted document the stand-by mo<strong>de</strong><br />
is cancelled.<br />
Paperless fax reception<br />
If there is no paper in the paper feed mechanism or if the ink<br />
film is finished, any incoming fax will be received into memory<br />
(storage capacity for <strong>de</strong>vices without answering machines is<br />
approximately 25 pages, for <strong>de</strong>vices with answering machines<br />
approximately 50 pages according to ITU-TS Test document).<br />
The symbol h appears on the display to indicate that the<br />
memory contains documents. As soon as paper and/or ink<br />
film are loa<strong>de</strong>d, the fax machine automatically prints out all<br />
documents in memory.<br />
When a fax message has been fully printed, it is <strong>de</strong>leted automatically<br />
from memory. If the printing process is interrupted,<br />
all fax messages not printed completely remain in memory. If<br />
the memory is full, no more pages can be stored. The red<br />
display lamp flashes and on the display appears:<br />
MEMORY FULL<br />
22
Scanning<br />
The <strong>de</strong>tachable scanner allows you to copy or fax documents<br />
which cannot be fed into the fax machine due to their size or<br />
thickness (e. g. books, magazines). The scanned area can be<br />
printed out or sent as a fax message.<br />
! Please do not touch the glass on the bottom of the<br />
scanner with your fingers to avoid fingerprints which<br />
might affect the scanning quality (see chapter Hints<br />
and Tips / Care and maintenance instructions).<br />
1 Detach the scanner from the fax machine by pulling it<br />
forward and then lifting it upwards on both si<strong>de</strong>s.<br />
2 If you want to improve the image quality, you can achieve<br />
this by pressing FINE/PHOTO. However, this will scan<br />
the document at a slower speed (see chapter <strong>Fax</strong> /Image<br />
quality).<br />
3 Press START. Whenever the machine is ready for scanning<br />
you will hear a confirmation tone.<br />
4 Press the scanner slightly against the document. Slowly<br />
move the scanner over the document from top to bottom.<br />
The available memory capacity is being indicated on the<br />
display while scanning. The correct speed for moving the<br />
scanning <strong>de</strong>vice is indicated with short confirmation<br />
tones. If you move too fast, you will hear a warning signal<br />
indicating that the scanning process of the document was<br />
not successful. Start the scanning again.<br />
Weitere Funktionen 7 Scanner<br />
23<br />
5 After the scanning process is completed the document will be<br />
printed if you press START or automatically after approximately<br />
four seconds. Documents larger than A4 will be split<br />
up into more than one page automatically.During the<br />
printing process printed information will be simultaneously<br />
erased from the memory. Press STOP or CLEAR to<br />
terminate printout.<br />
6 Place the scanning <strong>de</strong>vice face front into the fax machine<br />
after use. Press both si<strong>de</strong>s of the scanner down until you hear<br />
a <strong>de</strong>finite click.<br />
The best copy quality will be achieved if you are copying<br />
with the scanner inserted (see chapter Copying).<br />
In case you scanner was not put in correctly the indicator<br />
lamp flashes and on the display appears<br />
Copying<br />
CHECK SCANNER<br />
You can use your fax machine to make copies of an original. You<br />
may also choose PHOTO F and FINE f resolution (see chapter<br />
<strong>Fax</strong> / Image quality).<br />
1 Place your documents face up in the document fee<strong>de</strong>r.<br />
The documents must rest against the document gui<strong>de</strong>. To<br />
prevent several sheets being drawn into the machine at<br />
once, please straighten the documents to the same height<br />
before inserting them in the document feed (see chapter<br />
<strong>Fax</strong> / Feeding documents in). You can load up to ten<br />
pages at once.
2 Select the <strong>de</strong>sired resolution with FINE/PHOTO. To make<br />
only one copy of the original, briefly press START. The<br />
copying process starts immediately.<br />
In or<strong>de</strong>r to make more than one copy press START/COPY<br />
(for at least two seconds). The display will show the actual<br />
number of copies. If you want to change this figure enter the<br />
<strong>de</strong>sired number with the number keys (max. 50). Press<br />
START or OK.<br />
3 Choose whether to reduce or enlarge the document in size<br />
when copying. Your machine provi<strong>de</strong>s the following options:<br />
ZOOM ENLARGE:200 ZOOM ENLARGE:150<br />
ZOOM REDUCE: 75 ZOOM REDUCE: 50<br />
ZOOM NORMAL: 1:1<br />
Select the <strong>de</strong>sired option with and confirm with OK.<br />
The machine stores the first page of the document into<br />
memory and starts copying. If <strong>de</strong>sired number of copies has<br />
been achieved, the next page will be stored etc. Automatic<br />
sorting is therefore not an option!<br />
4 The document that has been pulled through will come out<br />
on the top si<strong>de</strong> of the fax machine.<br />
5 To stop copying press STOP. The document and the copy<br />
will be ejected.<br />
You can only enlarge or reduce documents with the<br />
scanner inserted.<br />
In case a paper jam occurs or the ink film or the<br />
memory capacity is used up the copying process automatically<br />
stops.<br />
If documents have jammed, first remove the scanner<br />
from the machine and then the document. Refit the<br />
scanner according to instructions.<br />
24<br />
Contrast<br />
The factory <strong>de</strong>fault for this feature has been set to medium.<br />
With function 47 you can adjust the contrast quality (brightness)<br />
for documents you want to copy or send as a fax message,<br />
e. g. dark photos or forms with coloured background.<br />
1 Press MENU, 47 and OK.<br />
2 With you can choose between three different<br />
options:<br />
CONTRAST: LOW<br />
CONTRAST: MEDIUM<br />
CONTRAST: HIGH<br />
3 Confirm your choice with OK.
Your fax machine is equipped with a digital telephone<br />
answering machine. All recor<strong>de</strong>d messages are stored in a<br />
solid-state electronic memory which has a recording<br />
capacity of up to 30 minutes. There is neither a magnetic<br />
tape nor a cassette.<br />
Your answering machine is factory-programmed with a<br />
recor<strong>de</strong>d outgoing message. If you want to record your own<br />
outgoing message, proceed as <strong>de</strong>scribed un<strong>de</strong>r “Recording a<br />
message”. Write down your messages before you record<br />
them.<br />
Make sure that your fax machine stands on a hard, flat<br />
surface, because otherwise the microphone may be covered.<br />
Switching on and off<br />
Activate or <strong>de</strong>activate your fax machine with ON/OFF. Activate<br />
mo<strong>de</strong> is indicated with the symbol b on the display.<br />
Recording a message<br />
1 Hold down RECORD for two seconds. Press RECORD<br />
again, until you hear a confirmation tone. Lift the handset<br />
and start to record your message.<br />
2 A black bar indicates you how much memory is available for<br />
the outgoing message (max. 20 seconds).<br />
3 Stop recording by pressing RECORD or STOP.<br />
4 The new answering message is automatically replayed. By<br />
pressing you can change the volume of the message.<br />
5 To hear the message again, press RECORD for a while (two<br />
seconds) and then PLAY.<br />
Duration of recording<br />
1 Select MENU 51 and press OK.<br />
2 Press to choose between 30, 60, 120 seconds or the<br />
AUTO mo<strong>de</strong> (unlimited recording time). Please note that<br />
AUTO mo<strong>de</strong> is not available in all countries.<br />
3 Confirm with OK.<br />
Der 8 Answering Anrufbeantworter machine<br />
25<br />
Listening to messages<br />
1 If PLAY flashes, messages have been recor<strong>de</strong>d for you. Press<br />
PLAY to listen to the first message. The date and time the<br />
message was received will be shown on the display.<br />
2 The next message will be replayed if you press PLAY while<br />
listening to any message. (If you want to switch to the first<br />
message, while listening to the other messages, press 1.<br />
3 After listening to your messages PLAY will stay on until all<br />
messages have been erased.<br />
Play back volume<br />
1 Press while playing back messages. The current<br />
volume setting will be displayed.<br />
2 Press to obtain the <strong>de</strong>sired volume.<br />
Deleting messages<br />
Single messages<br />
1 If you want to <strong>de</strong>lete the message which is currently being<br />
played, press CLEAR.<br />
2 You will be asked on the display if you really want to <strong>de</strong>lete<br />
this message. Press CLEAR again.<br />
All messages<br />
(only with built-in answering machine)<br />
1 Press CLEAR after having listened to all messages.<br />
2 If you actually want to <strong>de</strong>lete all messages, press CLEAR<br />
again. To interrupt the <strong>de</strong>leting process press STOP.<br />
Forwarding messages<br />
Your fax machine can automatically forward all incoming messages<br />
to another telephone number. Enter the telephone<br />
number to which you wish recor<strong>de</strong>d calls to be forwar<strong>de</strong>d.<br />
You can select the number of messages to be forwar<strong>de</strong>d each<br />
time. Your fax machine will wait until the selected number of<br />
messages has been received and then calls the <strong>de</strong>sired number<br />
automatically. A text announcing the call forwarding is transmitted<br />
when the connection is ma<strong>de</strong>. Then the party to which<br />
the calls are being forwar<strong>de</strong>d needs to enter the access co<strong>de</strong><br />
(see function 52). If the correct access co<strong>de</strong> is not entered within<br />
40 seconds, your fax machine will disconnect the call.<br />
1 In case your answering machine is <strong>de</strong>activated turn it on with<br />
ON/OFF. The symbol b appears on the display.<br />
2 Select MENU 55 and press OK.<br />
3 Choose with and confirm with OK.
4 Enter the telephone number your messages should be<br />
forwar<strong>de</strong>d to and press OK.<br />
5 Choose with the number of messages you want to be<br />
forwar<strong>de</strong>d each time.<br />
6 To record a new forwarding message, press OK.*<br />
7 Press RECORD. Wait for the confirmation tone and start<br />
speaking. An example of an announcement might be: “Hello,<br />
there are messages for Mr. Smith; please enter the access co<strong>de</strong>.”<br />
Position yourself about 20 cm from the fax machine. A black<br />
bar will indicate how much memory is available.<br />
8 Press STOP when you have finished. The forwarding<br />
message will be played back.<br />
9 The fax machine is now switched to stand-by mo<strong>de</strong>.<br />
* If a message has already been recor<strong>de</strong>d<br />
a Press OK.<br />
b Select with . If you wish to record a new forwarding<br />
message, select YES. If you want to use the existing<br />
message, select NO. Press OK to confirm.<br />
REC. MESSAGE:YES<br />
REC. MESSAGE: NO<br />
c Follow the process <strong>de</strong>scribed above from paragraph 7.<br />
Recording a conversation<br />
You can record a telephone conversation with your fax machine.<br />
1 Press RECORD during a telephone conversation.<br />
2 To stop recording, replace handset or press STOP.<br />
3 The recor<strong>de</strong>d conversation can be played back and<br />
<strong>de</strong>leted like any recor<strong>de</strong>d message.<br />
You can not record a telephone conversation while<br />
hands-free operation is activated.<br />
26<br />
VIP co<strong>de</strong><br />
Ringing <strong>de</strong>spite answering machine<br />
Persons you had given this co<strong>de</strong>, can make the telephone ring<br />
after the answering machine has taken the call. This is useful if<br />
both ring counts in function 31 and 32 have been set to 0.<br />
1 To enter the co<strong>de</strong> select MENU 53 and press OK. Enter<br />
a four digit co<strong>de</strong>. Confirm with OK.<br />
2 This co<strong>de</strong> must not be i<strong>de</strong>ntical with the access co<strong>de</strong><br />
(function 52).<br />
Memo<br />
External memo<br />
With this function, you can record a message which the caller<br />
can hear without being able to leave a message in return. For<br />
this the answering machine must be switched on.<br />
1 Select MENU 54 and press OK. Choose the external<br />
memo mo<strong>de</strong> by pressing . Confirm with OK. (If you<br />
already have recor<strong>de</strong>d a memo you want to use again, just<br />
press OK once more.)<br />
2 Press RECORD and wait for the confirmation tone. Start to<br />
speak. Press RECORD or STOP when you are finished. The<br />
message will be played back.<br />
Internal memo<br />
You can record a personal message with this function. Messages<br />
can be heard on the fax machine itself or by remote control<br />
from a telephone. Briefly press RECORD twice and wait<br />
for the confirmation tone. Record the <strong>de</strong>sired message. A black<br />
bar on the display indicates the remaining recording time. To<br />
end recording press RECORD or STOP. Internal memos can<br />
be played back and <strong>de</strong>leted like any other message.
Remote control<br />
You can also control the answering machine functions on your<br />
fax from any telephone using tone dialling. Before you can use<br />
remote control you have to enter an access co<strong>de</strong> in function<br />
52 (this co<strong>de</strong> will also be used for function 55 Forwarding).<br />
Preparing your fax machine for remote access<br />
1 Select MENU 52 and press OK.<br />
2 Enter a four digit co<strong>de</strong>.<br />
3 Press OK. The co<strong>de</strong> is now stored.<br />
Remote access of the answering machine<br />
1 If you want to listen to the messages recor<strong>de</strong>d from<br />
another telephone, call your fax machine and wait for the<br />
answering machine to play the message.<br />
2 Enter the four-digit co<strong>de</strong>. The outgoing message will be<br />
interrupted and you will hear a confirmation tone. The<br />
new messages will be played back. If no new messages<br />
have been recor<strong>de</strong>d, you will hear a second confirmation<br />
tone.<br />
3 Then you can enter commands as usual or terminate the<br />
remote control by replacing the handset.<br />
Der Anrufbeantworter<br />
27<br />
Overview of commands<br />
1 The message you are just listening to will be repeated.<br />
2 Your messages will be played back.<br />
3 Move to the next message.<br />
4 Record a new outgoing message. If you press 4 again after<br />
two confirmation tones, you will hear a long confirmation<br />
tone. Record the new outgoing message and finish with 4.<br />
5 The current outgoing message will be replayed.<br />
6 The current message will be <strong>de</strong>leted. If you press 6 after<br />
having listened to all messages, all messages will be <strong>de</strong>leted. In<br />
both cases you will hear a confirmation tone after the first<br />
time you press the key. Press 6 again within five seconds to<br />
execute the <strong>de</strong>leting command.<br />
7 Switch answering machine off.<br />
8 The current command will be interrupted.<br />
9 Switch answering machine on.
9 Hints & Tips<br />
The following table contains an overview of the most frequent<br />
operating errors or problems and their possible causes and<br />
remedies. Before calling our service <strong>de</strong>sk, please consult this table.<br />
If you can not rectify a fault using the instructions provi<strong>de</strong>d, please<br />
do as follows:<br />
Error<br />
You or your fax correspon<strong>de</strong>nt receive<br />
blank pages.<br />
<strong>Fax</strong>es are of poor quality.<br />
Your fax or your recipient’s fax machine<br />
produces black lines when printing.<br />
Your fax machine produces white lines<br />
when receiving or copying.<br />
You can not send faxes.<br />
The <strong>de</strong>vice does not draw the document<br />
in during copying or sending.<br />
Possible cause<br />
28<br />
1 Disconnect the mains.<br />
Your fax correspon<strong>de</strong>nt sends the<br />
wrong (blank) si<strong>de</strong> of a document.<br />
The printer or scanner is faulty.<br />
The document contains photographs<br />
or small print.<br />
The document lacks contrast.<br />
Your fax machine is faulty.<br />
There is paper in the sheet fee<strong>de</strong>r.<br />
The scanner is dirty.<br />
Your fax machine is faulty.<br />
Thermal printhead is dirty.<br />
Scanner not put in.<br />
Scanner has not clicked in.<br />
2 Wait at least ten seconds and reconnect.<br />
3 If the fault reoccurs, please contact your customer information<br />
center.<br />
Remedy<br />
Your fax correspon<strong>de</strong>nt must feed the<br />
document properly.<br />
Test the fax machine by making a<br />
copy. If your copy is faultless the<br />
correspon<strong>de</strong>nt's fax machine might be<br />
<strong>de</strong>fective. Call service if necessary.<br />
Change the resolution setting to FINE<br />
or PHOTO.<br />
Check the document or set a higher<br />
contrast with function 47 (see chapter<br />
Scanner / Contrast).<br />
Test the fax machine by making a<br />
copy. If your copy is faultless the<br />
correspon<strong>de</strong>nt's fax machine might be<br />
<strong>de</strong>fective. Call service if necessary.<br />
Open the operation panel and remove<br />
the paper from the document feed<br />
slot.<br />
Clean the scanner with a cloth (see<br />
Care and maintenance instructions).<br />
Test the fax machine by making a<br />
copy. If your copy is faultless the<br />
correspon<strong>de</strong>nt's fax machine might be<br />
<strong>de</strong>fective. Call service if necessary.<br />
Copy a black page several times until<br />
the lines disappear.<br />
Please put in scanner (see chapter<br />
Scanner).<br />
Press both si<strong>de</strong>s of the scanner down<br />
until you hear a <strong>de</strong>finite click.
Error<br />
The scanned copy is printed out<br />
with white or black stripes.<br />
The copy of the scanned document<br />
is mirror-inverted.<br />
TRANSM. ERROR<br />
Error report<br />
NO CONNECTION<br />
or<br />
REDIAL FAILED<br />
NO LOOP CURRENT<br />
NO DIALTONE<br />
When you lift the receiver of your<br />
fax machine you do not hear the dial<br />
tone.<br />
busy<br />
or<br />
fax transmissions are constantly<br />
interrupted<br />
You cannot receive any faxes.<br />
You cannot phone or send faxes.<br />
Possible cause<br />
The scanner was not placed correctly<br />
on the document.<br />
The scanner was moved in the wrong<br />
direction.<br />
The telephone connection is of poor<br />
quality.<br />
The recipient has a paper jam or has<br />
run out of paper.<br />
Your fax partner’s line is busy, does not<br />
answer or a different <strong>de</strong>vice like an<br />
answering machine answers.<br />
Improper installation or plug-in of fax<br />
machine.<br />
You are connected to a PABX system.<br />
You have connected your telephone<br />
cable to the socket i<strong>de</strong>ntified with<br />
EXT.<br />
You have connected the telephone<br />
cable to the socket marked with EXT.<br />
Your fax correspon<strong>de</strong>nt has a fax<br />
machine that cannot receive the usual<br />
standard i<strong>de</strong>ntifying signals.<br />
You have set the number of rings too<br />
high for the answering machine or the<br />
total number of ringing signals for a<br />
<strong>de</strong>vice without answering machine.<br />
You are operating your fax machine<br />
on a private branch exchange and have<br />
not set it accordingly.<br />
29<br />
Störungen<br />
Remedy<br />
Press the scanner firmly against the<br />
document or put the document on a<br />
flat surface.<br />
Move the scanner in the direction<br />
marked with an arrow across the<br />
document (symbol on the right si<strong>de</strong><br />
of the scanner).<br />
Try again or send the fax at reduced<br />
speed (function 21).<br />
Call your fax partner or try to<br />
transmit at a later stage.<br />
Try later or draw your fax partner’s<br />
attention to a possible installation<br />
fault.<br />
Check the installation of your fax<br />
machine.<br />
Check the settings in function 15.<br />
Connect your telephone cable to the<br />
socket on the bottom of your fax<br />
machine i<strong>de</strong>ntified with LINE.<br />
Plug the telephone cable into the<br />
socket marked with LINE on the<br />
base of the fax machine.<br />
Try to send the fax manually: press<br />
DIAL/l and dial the fax number.<br />
You will hear the call being established.<br />
If the recipient is using an<br />
automatic answering machine, wait<br />
until you hear a tone after the prerecor<strong>de</strong>d<br />
message. Press START.<br />
Set the number of ringing signals for<br />
the answering machine or the total<br />
number of ringing signals with<br />
function 31 or 32 to lower than five.<br />
In function 15, select<br />
PABX: yes .
Error<br />
When you receive a phone call, after<br />
the first ring your correspon<strong>de</strong>nt<br />
does not hear the usual ringback<br />
tone.<br />
Your fax machine rings once, then<br />
there is a moment of silence and<br />
another ring signal after that.<br />
You do not hear the dial tone when<br />
using your cordless telephone.<br />
You cannot transfer calls from the<br />
additional phone to the fax machine.<br />
Your external answering machine<br />
records fax signals but your fax<br />
machine does not receive these fax<br />
messages.<br />
Copy is blank.<br />
On lifting the handset you hear a<br />
tone or silence.<br />
Possible cause<br />
Your correspon<strong>de</strong>nt is being informed<br />
that the fax machine has taken the call<br />
already and that he has to pay charges.<br />
Your machine checks whether it is a<br />
phone or a fax correspon<strong>de</strong>nce.<br />
This process is perfectly normal!<br />
The connection of your cordless phone<br />
might be incorrect.<br />
Your auxiliary <strong>de</strong>vices are not set to<br />
tone dialling.<br />
You have not connected your external<br />
answering machine correctly.<br />
Document loa<strong>de</strong>d the wrong way up.<br />
Printer or scanner faulty.<br />
The caller is trying to send a fax.<br />
30<br />
Remedy<br />
In function 31 or 32 you can put<br />
the tollfree rings to a higher level<br />
un<strong>de</strong>r FAX RINGS (see chapter<br />
<strong>Fax</strong> switch / Setting the operating<br />
mo<strong>de</strong>).<br />
You have just noticed how the<br />
automatic fax switch operates. After<br />
the first ring signal the fax machine<br />
takes over the call. When the fax<br />
machine has recognised that the<br />
incoming call is a telephone<br />
correspon<strong>de</strong>nce, the fax machine<br />
will continue to ring.<br />
The connection of your cordless<br />
phone might be incorrect. Check<br />
whether the cordless phone was<br />
installed correctly (see chapter<br />
Installation / Connecting additional<br />
<strong>de</strong>vices).<br />
For further information as to how<br />
you change your <strong>de</strong>vice to tone<br />
dialling see the instructions of your<br />
additional telephones. Otherwise<br />
you have not configured your<br />
external phones to be in serial with<br />
your fax unit (see chapter Installation<br />
/ Connecting additional<br />
<strong>de</strong>vices).<br />
Connect your answering machine as<br />
<strong>de</strong>scribed in the chapter Installation<br />
/ Connecting additional <strong>de</strong>vices.<br />
Load the document with the<br />
printed si<strong>de</strong> up.<br />
Service.<br />
On the fax machine: press START.<br />
On the additional phone: press *<br />
and 5. Then replace the handset.
Error<br />
On lifting the handset of an additional<br />
telephone you hear in the background<br />
some brief tones or, <strong>de</strong>pending on the<br />
<strong>de</strong>vice type, the activated outgoing<br />
message of your own built-in answering<br />
machine.<br />
Received documents do not appear as<br />
normal at the front of the fax machine.<br />
Only for fax machines with built-in<br />
answering machine:<br />
You have switched on your answering<br />
machine and cannot receive any faxes.<br />
PAPER JAM<br />
DOCUMENT JAM<br />
external phone<br />
INKFILM LOW<br />
Possible cause<br />
Your additional telephone is connected<br />
in parallel.<br />
Paper jam.<br />
You use background music.<br />
Your outgoing message is too long.<br />
One sheet or more sheets of paper<br />
were not drawn in straight.<br />
Too many sheets inserted (more than<br />
50 sheets).<br />
One document was not drawn in<br />
straight or more documents were both<br />
drawn in at the same time.<br />
You are now using an additional<br />
telephone.<br />
Your ink film is nearly used up.<br />
31<br />
Störungen<br />
Remedy<br />
Press * twice to switch off the<br />
tones or the outgoing message. You<br />
can now make a call without<br />
interferences (see chapter <strong>Fax</strong><br />
switch).<br />
Open the operation panel. Leave<br />
the paper refill flap closed. Pull the<br />
crumpled paper out carefully from<br />
insi<strong>de</strong>.<br />
Record a message without music.<br />
Record a shorter announcement (no<br />
longer than 20 seconds).<br />
Open the operation panel and pull<br />
the paper carefully outwards from<br />
the insi<strong>de</strong>.<br />
Remove the scanner and pull the<br />
paper carefully outwards in one<br />
direction.<br />
This is not a fault!<br />
Get a new ink film.
Service co<strong>de</strong><br />
! Only use this function when absolutely necessary. If<br />
you are satisfied with your changes to the factory<br />
settings you should not use this function.<br />
Function 45 (Service co<strong>de</strong>) is used to <strong>de</strong>lete some or all of your<br />
changes to the factory settings. This function enables you to<br />
partially or fully reconfigure your <strong>de</strong>vice. It is especially helpful if<br />
you have modified settings but find that your fax machine does<br />
not respond as expected.<br />
After <strong>de</strong>leting some or all of your custom settings please rerun<br />
EASY INSTALL.<br />
The following co<strong>de</strong>s are at your disposal:<br />
Co<strong>de</strong> No. 7117<br />
This co<strong>de</strong> erases all your modifications to the factory settings.<br />
The fax machine will therefore react in exactly the same way as on<br />
first installation.<br />
Co<strong>de</strong> No. 7140<br />
When you enter this co<strong>de</strong>, all your entered settings and data will<br />
be erased, except for:<br />
your personal outgoing message on your built-in answering<br />
machine<br />
received messages<br />
stored short dial numbers<br />
stored telephone book numbers<br />
your name<br />
your telephone number<br />
Example for using a service co<strong>de</strong>:<br />
1 Select MENU 45 and press OK. Enter the service co<strong>de</strong><br />
(7117 or 7140). Press OK.<br />
2 With you can select whether you really want to <strong>de</strong>lete<br />
your settings. Confirm with OK. Your fax machine will be<br />
reset to its original configuration.<br />
32<br />
Care and maintenance<br />
instructions<br />
The scanner glass and rollers of your fax machine should be cleaned<br />
of paper dust and scuff when necessary.<br />
! Before opening the fax machine, make sure that you<br />
are electrically discharged by e. g. touching the metal<br />
housing of a groun<strong>de</strong>d appliance, a water pipe or<br />
radiator.<br />
! Use a soft, fluff-free cloth lightly moistened with a<br />
little alcohol (96%). You can also use a special cloth<br />
for cleaning fax machines, which is available on the<br />
market. Do not allow any moisture to penetrate insi<strong>de</strong><br />
the <strong>de</strong>vice.<br />
Clean the scanner glass<br />
1 Carefully remove the scanner by pulling it upwards on both<br />
si<strong>de</strong>s.<br />
2 Place the scanner in front of you with the scanning glass<br />
surface face up.<br />
3 Gently wipe the glass surface with a soft cloth (A).<br />
4 Before you re-install the scanner, also wipe the scanner<br />
compartment.
Clean printer roller<br />
If the paper feed mechanism contains paper please remove it.<br />
1 Open the operation panel by carefully lifting it upwards at<br />
the recess in the middle.<br />
2 Using a cloth as <strong>de</strong>scribed above, wipe the printer roller (A).<br />
To clean the entire roller turn the roller by hand.<br />
3 When cleaning is complete close the operation panel.<br />
! Do not use the fax cleaners available on the market<br />
which are drawn through the machine automatically.<br />
By doing so you can damage your fax machine!<br />
33<br />
Störungen
10 Appendix<br />
Technical data<br />
Compatibility ITU Group 3<br />
Type of connection outsi<strong>de</strong> line (PSTN) / extension (PABX)<br />
Flash times outsi<strong>de</strong> line (PSTN): 100 ms<br />
extension (PABX): 100 ms<br />
Size of document width: single sheet 148–217 mm<br />
several sheets 148–217 mm<br />
length: single sheet 100–600 mm<br />
several sheets 148–297 mm<br />
thickness: single sheet 0.05–0.2 mm<br />
several sheets 0.07–0.15 mm<br />
Printing paper A4 210 x 297 mm, 80 g/m 2<br />
Largest scanning width 216 ± 1 mm<br />
Resolution horizontal: 8 points/mm (200 dpi)<br />
vertical: standard 3.85 lines/mm<br />
fine 7.7 lines/mm<br />
Photo mo<strong>de</strong> 16 grey tones (fax machine<br />
without integrated answering machine)<br />
64 grey tones (fax machine<br />
with integrated answering machine)<br />
Contrast control automatic and manual<br />
Copying fine and photo resolution<br />
Data compression MH, MR<br />
Modulation V29bis, V27ter, V21<br />
Transmission speeds 9600/7200/4800/2400 bps<br />
Sound power level stand by mo<strong>de</strong>:
DECLARATION OF CONFORMITY<br />
We,<br />
ÖSTERREICHISCHE PHILIPS INDUSTRIE GMBH, Internet <strong>Fax</strong> Appliances<br />
Gutheil-Scho<strong>de</strong>r-Gasse 10<br />
A-1102 Wien, Österreich<br />
<strong>de</strong>clare un<strong>de</strong>r our sole responsibility that the product<br />
Plain paper <strong>Fax</strong><br />
PHILIPS PPF 450<br />
________________________________________________________________________________________<br />
to which this <strong>de</strong>claration relates is in conformity with the following standard(s) or other normative<br />
document(s):<br />
vvvvvvvvvvvvvvvvvvvvvvvvvvvvvvvvvvvvvvvvvvvvvvvvvvvvvvv<br />
Safety:<br />
EN 60950:1992 + A1:1993 + A2:1993 + A3:1995 + A4:1997 + A11:1997<br />
Electromagnetic Compatibility:<br />
EN 55022:1998 class B, EN 50082-1:1997, EN 55024:1998<br />
vvvvvvvvvvvvvvvvvvvvvvvvvvvvvvvvvvvvvvvvvvvvvvvvvvvvvvv<br />
following the provisions of the Directive 1999/5/EC on radio equipment and telecommunication<br />
terminal equipment and the mutual recognition of their conformity.<br />
Wien, 2001-02-06 Paul SANDBERG<br />
Managing Director<br />
=====================================================================================<br />
DECLARATION OF CONFORMITY<br />
We,<br />
ÖSTERREICHISCHE PHILIPS INDUSTRIE GMBH, Internet <strong>Fax</strong> Appliances<br />
Gutheil-Scho<strong>de</strong>r-Gasse 10<br />
A-1102 Wien, Österreich<br />
<strong>de</strong>clare un<strong>de</strong>r our sole responsibility that the product<br />
Plain paper <strong>Fax</strong><br />
PHILIPS PPF 470<br />
________________________________________________________________________________________<br />
to which this <strong>de</strong>claration relates is in conformity with the following standard(s) or other normative<br />
document(s):<br />
vvvvvvvvvvvvvvvvvvvvvvvvvvvvvvvvvvvvvvvvvvvvvvvvvvvvvvv<br />
Safety:<br />
EN 60950:1992 + A1:1993 + A2:1993 + A3:1995 + A4:1997 + A11:1997<br />
Electromagnetic Compatibility:<br />
EN 55022:1998 class B, EN 50082-1:1997, EN 55024:1998<br />
vvvvvvvvvvvvvvvvvvvvvvvvvvvvvvvvvvvvvvvvvvvvvvvvvvvvvvv<br />
following the provisions of the Directive 1999/5/EC on radio equipment and telecommunication<br />
terminal equipment and the mutual recognition of their conformity.<br />
Wien, 2001-02-06 Paul SANDBERG<br />
Managing Director<br />
35
In<strong>de</strong>x<br />
A<br />
Access co<strong>de</strong> 27<br />
Additional <strong>de</strong>vice<br />
Definition 34<br />
Additional <strong>de</strong>vices 1<br />
Connection 11<br />
Additional telephone 19<br />
ALT key 7<br />
Answering <strong>de</strong>vice 1<br />
Answering machine<br />
Switch on and off 25<br />
Volume 25<br />
Auto mo<strong>de</strong> 25<br />
B<br />
Basic functions 13<br />
C<br />
Call<br />
Making 18<br />
Call transfer 19<br />
Call waiting 18<br />
Calling Line I<strong>de</strong>ntification 19<br />
Calling line i<strong>de</strong>ntification<br />
Definition 34<br />
CE mark 40<br />
Check Display 10<br />
Paper jam 11<br />
Circular send 20<br />
CLEAR 7<br />
Clear 6<br />
Clear key 25<br />
CLID 19<br />
Clock 1<br />
Co<strong>de</strong><br />
Access co<strong>de</strong> 27<br />
Service 32<br />
VIP co<strong>de</strong> 26<br />
Commands for remote control 27<br />
Compatibility 34<br />
Completely silent operation 16<br />
Compression<br />
Data 34<br />
Confirmation tone 27<br />
Connecting<br />
Additional <strong>de</strong>vices to the same<br />
socket 11<br />
ISDN 12<br />
PABX 12<br />
Connection<br />
Additional <strong>de</strong>vices 11<br />
Parallel 34<br />
Serial 34<br />
Type 34<br />
Consumption (power) 34<br />
Contrast 24<br />
Controls<br />
location 6<br />
Conversation<br />
Record 26<br />
Copy key 23<br />
Copying 23<br />
Cordless telephone 1<br />
Correct<br />
Entries 18, 19<br />
Correction 14, 18<br />
D<br />
Data<br />
Technical 34<br />
Data compression 34<br />
Date 13<br />
Day 1, 13, 17<br />
Day mo<strong>de</strong> 15<br />
Delayed send 22<br />
Delete<br />
Entries 19<br />
Entry 18<br />
Message 25<br />
Numbers 18<br />
Description<br />
Machine 4<br />
Dial key 18<br />
DIAL/MIC 7<br />
Dimensions 34<br />
Display 5<br />
Language 14<br />
Display lamp 6<br />
DMM 5<br />
Explanation 34<br />
Document<br />
Feed in 20<br />
DTMF<br />
Explanation 34<br />
Duration<br />
Recording 25<br />
Duration of recording 25<br />
E<br />
Easy Install 1, 11<br />
EASYLINK 16<br />
Entering<br />
Name 13<br />
Number 13<br />
Environment protection 40<br />
Error report 21<br />
External memo 26<br />
F<br />
<strong>Fax</strong><br />
Journal 21<br />
<strong>Fax</strong> message<br />
Receiving 1<br />
Sending 1<br />
<strong>Fax</strong> reception<br />
Paperless 22<br />
<strong>Fax</strong> switch 1, 15, 34<br />
<strong>Fax</strong>es<br />
Send 20<br />
Feed in<br />
Document 20<br />
Fine key 23<br />
Fine setting 23<br />
Fine/Photo 6<br />
Flash times 34<br />
Function<br />
Overseas 21<br />
Function list 13<br />
Functions<br />
general view 5<br />
G<br />
General view<br />
functions 5<br />
36<br />
Glossary 34<br />
Grey tones 34<br />
Guarantee 2<br />
H<br />
Hands-free operation 19<br />
Handset<br />
Dial/Mic key 18<br />
Mute 19<br />
Help function 13<br />
Help key 1, 11, 13<br />
Help/Install 6<br />
Hook-Flash-Function 34<br />
HTS<br />
Explanation 34<br />
I<br />
Image quality 21<br />
Ink film 34<br />
Loading 9<br />
Removing 9<br />
Replacing 9<br />
Install key 11, 13<br />
Installation 1, 8<br />
Instructions<br />
Care and maintenance 32<br />
Interference suppression 34<br />
Internal memo 26<br />
International guarantee 2<br />
ISDN 12<br />
ITU 34<br />
J<br />
Journal 21<br />
L<br />
Language<br />
Display 14<br />
Line 8<br />
List<br />
Telephone numbers 19<br />
List of telephone numbers 19<br />
Print 19<br />
Loading<br />
Ink film 9<br />
Paper 10<br />
Location 8<br />
Location of controls 6<br />
Loudspeaker 19<br />
Volume 14<br />
M<br />
Machine<br />
Description 4<br />
Overview 4<br />
<strong>Manual</strong> fax reception 16<br />
Memo 26<br />
Menu key 13<br />
Menu/OK 6<br />
Message 25<br />
Delete 25<br />
Mic key 18, 19<br />
Microphone 19<br />
Mo<strong>de</strong><br />
Day (Sun) 17<br />
Modulation 34<br />
Month 13<br />
Moon (symbol) 15<br />
Mute 19<br />
N<br />
Name<br />
Entering 13<br />
Night 1<br />
Night mo<strong>de</strong> 15<br />
Number<br />
Entering 13<br />
Numbers<br />
Delete 18<br />
O<br />
Other <strong>de</strong>vices 19<br />
Connection 11<br />
Overseas function 21<br />
Overview<br />
Machine 4<br />
P<br />
PABX 12<br />
Explanation 34<br />
Packaging 40<br />
Paper<br />
Format 21<br />
Loading 10<br />
Paper jam 11<br />
Removing 11<br />
Size 34<br />
Paper format 10, 34<br />
Paper tray 10<br />
Paperless<br />
<strong>Fax</strong> reception 22<br />
Parallel 11<br />
Connection 34<br />
Pause key 25<br />
Photo key 23<br />
Photo mo<strong>de</strong> 34<br />
Photo setting 23<br />
Play 6<br />
Play back volume 25<br />
Play key 25<br />
Polled reception 21<br />
Polling<br />
Explanation 34<br />
Quick 21<br />
Send 22<br />
Polling with co<strong>de</strong> 21<br />
Power consumption 34<br />
Power supply 34<br />
Print<br />
List of telephone numbers 19<br />
Private branch exchange 12<br />
Pulse dialling<br />
Explanation 34<br />
R<br />
R key 7, 18<br />
Receive<br />
Automatic 34<br />
<strong>Manual</strong> 34<br />
Record 6, 25<br />
Conversation 26<br />
Record key 25, 26<br />
Recording<br />
Duration 25<br />
Recording time 25<br />
Recycling 40
Redial 7, 18<br />
Remote control 27<br />
Removing<br />
Ink film 9<br />
Paper 11<br />
Replacing<br />
Ink film 9<br />
Report<br />
Error report 21<br />
Transmission report 21<br />
Resolution 23<br />
Technical data 34<br />
Ring signal 14<br />
Type 14<br />
Volume 14<br />
Ringing<br />
Despite answering <strong>de</strong>vice 26<br />
S<br />
Safety instructions 2<br />
Scanner 1<br />
Explanation 34<br />
Scanning 23<br />
Scanning width 34<br />
Send<br />
Delayed 22<br />
<strong>Fax</strong>es 20<br />
Sen<strong>de</strong>r i<strong>de</strong>ntification<br />
Explanation 34<br />
Serial 11<br />
Connection 34<br />
Service 2<br />
Service co<strong>de</strong> 32<br />
Use 32<br />
Setting<br />
Day mo<strong>de</strong> 15<br />
Night mo<strong>de</strong> 15<br />
Shift key 7<br />
Short dial 7, 18<br />
Silent fax reception 16<br />
Size<br />
Document 34<br />
Size compression 21<br />
Space key 7<br />
Special settings 16<br />
START 7<br />
Start/Copy 6<br />
STOP 7<br />
Stop 6<br />
Storing numbers 18<br />
Sun (symbol) 15, 17<br />
T<br />
Technical data 34<br />
Telephone 18<br />
Record a conversation 26<br />
Telephone book 7, 18<br />
List of numbers 19<br />
Telephone cable 8<br />
Telephone numbers<br />
List 19<br />
Time 13, 22<br />
Timer 1, 5, 15, 16<br />
Timer mo<strong>de</strong> 16<br />
Activate 16<br />
Check 16<br />
Configure 16<br />
Deactivate 16<br />
Tipps 28<br />
Toggling calls 18<br />
Tone dialling<br />
Explanation 34<br />
Transmission report 21<br />
Transmission speed 34<br />
V<br />
VIP co<strong>de</strong> 26<br />
Volume 25<br />
Loudspeaker 14<br />
Ring signal 14<br />
W<br />
Weight 34<br />
Y<br />
Year 13<br />
37
5103 506 1796.1 <strong>GB</strong>/INT (SG12/17P)<br />
1718<br />
The CE mark confirms that the<br />
machine corresponds to the relevant<br />
gui<strong>de</strong>lines of the European Union.<br />
This product is inten<strong>de</strong>d for use on<br />
an analogue public switched network<br />
(PSTN) and for use in the country<br />
indicated on the label of the box. The<br />
usage in other countries could cause<br />
malfunction.<br />
Initially contact your <strong>de</strong>aler if problems<br />
occur during operation.<br />
This operation manual has been<br />
printed on chlorine-free, recycled<br />
paper, in line with the highest standards<br />
of environmental friendliness.<br />
40<br />
The used cardboard packaging as<br />
well as the cardboard protecting your<br />
facility at its si<strong>de</strong>s ma<strong>de</strong> of waste paper<br />
can be recycled like waste paper;<br />
corresponding to your country’s <strong>de</strong>mands<br />
dispose the plastic foils either<br />
for recycling or with your rubbish.<br />
This electronic facility contains recyclable<br />
material. At the end of use<br />
of this facility please inform yourself<br />
about the corresponding recycling<br />
<strong>de</strong>mands of your country.<br />
Technical changes and errors excepted.<br />
Copyright © 2001