HOT167-1
HOT167-1
HOT167-1

Create successful ePaper yourself
Turn your PDF publications into a flip-book with our unique Google optimized e-Paper software.
Infineon Technologies Corp.<br />
June 99<br />
<strong>HOT167</strong>-1<br />
A Hands-On Introduction to the C167CR/CS<br />
using DAvE, the kitCON-167CR/CS Starter Kit,<br />
Keil µVision2, and an oscilloscope<br />
This version is based on DAvE Version 1.0, Keil µVision2 V2.0,<br />
Keil C166 tool chain V4.0, 16-bit Starter Kit CD ROM V4.1.<br />
Please report any errors to axel.wolf@infineon.com<br />
<strong>HOT167</strong>-1 Version 2.0<br />
1
Infineon Technologies Corp.<br />
June 99<br />
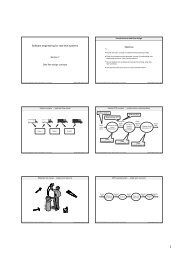
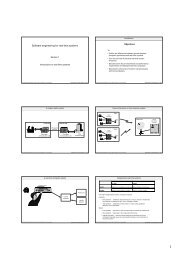
Contents (I)<br />
Introduction<br />
• Introduction to <strong>HOT167</strong>-1<br />
HOT Overview<br />
Short Introduction to DAvE<br />
Short Introduction to Keil µVision2<br />
<strong>HOT167</strong>-1 Version 2.0<br />
2
Infineon Technologies Corp.<br />
June 99<br />
Contents (II)<br />
C166 Architectural Overview<br />
C166 - A Modular Architecture<br />
16 bit Roadmap<br />
C167CR/CS Block Diagram<br />
C166 CPU Core<br />
Internal & External Memory<br />
Interrupt System, PEC<br />
C167CR/CS Peripheral Overview<br />
<strong>HOT167</strong>-1 Version 2.0<br />
RAM<br />
1KByte<br />
RAM<br />
1KByte<br />
PWM<br />
ADC<br />
SAB-C167CR<br />
XRAM<br />
XRAM<br />
1KByte<br />
1KByte<br />
CAN<br />
BUS-<br />
CONTROL<br />
CORE<br />
ROM<br />
INTERRUPT<br />
IR+PEC-<br />
UNIT<br />
CONTROL<br />
CAPCOM<br />
SSC<br />
WDT<br />
1+2<br />
GPT<br />
USART<br />
1+2<br />
3
Infineon Technologies Corp.<br />
June 99<br />
Introduction to <strong>HOT167</strong>-1<br />
<strong>HOT167</strong>-1 is a Hands-On Training material created for the<br />
C167CR/CS, using<br />
the kitCON-167CR/CS Starter Kit<br />
the Keil µVision2 integrated development environment (IDE)<br />
including the C166 compiler, A166 Assembler, L166 Linker/Locator<br />
and Debugger<br />
DAvE, the Digital Application Engineer from Infineon<br />
Microcontrollers<br />
an oscilloscope (for visualization purposes).<br />
A Windows95/98 or Windows NT PC (to be able to run DAvE)<br />
<strong>HOT167</strong>-1 shows the user from the scratch how to generate<br />
software for the C167CR/CS with DAvE and the Keil tool chain:<br />
There are several exercises included, small tasks to be solved<br />
using every peripheral of the C167CR/CS.<br />
The user creates a new project in DAvE and configures the device,<br />
following the detailed instructions.<br />
<strong>HOT167</strong>-1 Version 2.0<br />
5
Infineon Technologies Corp.<br />
June 99<br />
Introduction to <strong>HOT167</strong>-1 (cont.)<br />
After having generated the code, the user<br />
- switches to Keil µVision2,<br />
- creates a new project (or uses a pre-configured project),<br />
- includes the C files created by DAvE and the assembler startup<br />
file,<br />
- adds some User Code,<br />
- compiles, assembles, links and locates the project.<br />
After compilation with µVision2, the user<br />
- switches to the integrated debugger<br />
- connects to the kitCON-167CR/CS via bootstrap loader<br />
(loading the monitor),<br />
- loads, starts and debugs his example,<br />
- confirms his working program with a scope (screen shots are<br />
included for most of the examples).<br />
The first <strong>HOT167</strong>-1 example shows the user from the scratch how<br />
to generate software with the used tool chain, including the setup of<br />
the µVision2 project. The following examples are based on an<br />
already prepared µVision2 project.<br />
<strong>HOT167</strong>-1 Version 2.0<br />
6
Name of Hands-On-Training<br />
Infineon Technologies Corp.<br />
June 99<br />
HOT161-2 (C161O)<br />
HOT Overview (cont.)<br />
Compiler, Assembler, Linker, Locator<br />
Keil µVision2<br />
(Keil C166,<br />
A166, L166)<br />
-<br />
Tasking EDE<br />
(Tasking C166,<br />
A166, L166)<br />
X<br />
<strong>HOT167</strong>-1 Version 2.0<br />
C166 Tools used<br />
Keil<br />
Debugger in<br />
µVision2<br />
-<br />
Debugger<br />
Tasking<br />
CrossView Pro<br />
HOT161CI-2 -<br />
X -<br />
X<br />
HOT163-2 -<br />
X -<br />
X<br />
HOT164-2 -<br />
X -<br />
X<br />
HOT165-2 -<br />
X -<br />
X<br />
<strong>HOT167</strong>-2 -<br />
X -<br />
X<br />
X<br />
8
Infineon Technologies Corp.<br />
June 99<br />
Short Introduction to DAvE<br />
DAvE is your Digital Application Engineer from Infineon<br />
Microcontrollers.<br />
DAvE can help you compare and evaluate the different members of<br />
the Infineon C500 (8-Bit) and C166 (16-Bit) families of<br />
microcontrollers and help you find the right chip for your<br />
embedded control application.<br />
DAvE can be your one-stop access point to all standard<br />
knowledge associated with Infineon embedded technology<br />
expertise by offering you context sensitive access to user's<br />
manuals, data sheets, application notes etc. directly in your<br />
development environment.<br />
DAvE can help you program the Infineon microcontroller you want<br />
to use in your project, by offering you intelligent wizards that help<br />
you configure the chip to work the way you need it and<br />
automatically generate C-level templates with appropriate access<br />
functions for all of the on chip peripherals and interrupt controls.<br />
More DAvE info at www.infineon.com/DAvE.html<br />
<strong>HOT167</strong>-1 Version 2.0<br />
9
Infineon Technologies Corp.<br />
June 99<br />
Short Introduction to the Keil µVision2<br />
Integrated Development Environment<br />
Keil µVision2:<br />
µVision2, the IDE from Keil Software, combines Project<br />
Management, Source Code Editing, and Program Debugging in one<br />
powerful environment. The Quick Start guide on the starter Kit CD<br />
ROM gives you the information necessary to use µVision2 for your<br />
own projects. It provides a step-by-step introduction of the most<br />
commonly used µVision2 features including:<br />
- Project Setup for the Make and Build Process<br />
- Editor facilities for Modifying and Correcting Source Code<br />
- Program Debugging and Additional Test Utilities<br />
More information is available on the Starter Kit CD ROM or at<br />
www.keil.com.<br />
<strong>HOT167</strong>-1 Version 2.0<br />
10
Infineon Technologies Corp.<br />
June 99<br />
C166 Architectural Overview<br />
RAM<br />
1KByte<br />
RAM<br />
1KByte<br />
PWM<br />
ADC<br />
SAB-C167CR<br />
XRAM<br />
1KByte<br />
CAN<br />
BUS-<br />
CONTROL<br />
CORE<br />
XRAM<br />
1KByte<br />
ROM<br />
INTERRUPT<br />
IR+PEC-<br />
UNIT<br />
CONTROL<br />
CAPCOM<br />
SSC<br />
WDT<br />
1+2<br />
GPT<br />
USART<br />
1+2<br />
<strong>HOT167</strong>-1 Version 2.0<br />
C166 - A Modular<br />
Architecture<br />
16 bit Roadmap<br />
C167CR/CS Block<br />
Diagram<br />
C166 CPU Core<br />
Internal & External<br />
Memory<br />
Interrupt System<br />
PEC<br />
C167CR/CS Peripheral<br />
Overview<br />
11
Infineon Technologies Corp.<br />
June 99<br />
Four Bus Modular System<br />
Flash<br />
64K<br />
Flash<br />
32K<br />
Flash<br />
128K<br />
New<br />
Modules<br />
OTP<br />
64K<br />
ROM<br />
8K<br />
ROM<br />
32K<br />
New<br />
Modules<br />
ADC<br />
CAPCOM<br />
SSP<br />
32 bit<br />
XBusModules<br />
I²C<br />
Timers USART SSC<br />
WDT<br />
<strong>HOT167</strong>-1 Version 2.0<br />
XRAM<br />
16 - b i t<br />
Core<br />
16 - b i t<br />
New<br />
Modules<br />
Ports<br />
CAN<br />
2x16 bit<br />
Basic Library Modules<br />
New<br />
Modules<br />
RAM<br />
1k<br />
RAM<br />
1k<br />
New<br />
Modules<br />
13
High-Integration<br />
General Purpose<br />
Low-Cost<br />
Infineon Technologies Corp.<br />
June 99<br />
16-bit Roadmap<br />
* 16 M Address Range<br />
*2/4KByteRAM<br />
*32CAPCOM<br />
*4PWM<br />
* 2 Serial Interface<br />
*5Timer<br />
* Chip Selects<br />
Benefits in System<br />
Integration<br />
* Extensive I/O<br />
Balanced Peripheral<br />
set for a broad<br />
Application Ranges:<br />
*1K/2KBRAM<br />
*ROM/Flash/OTP<br />
* Different RAM Size<br />
* 16 M Addr. Range<br />
* 3/5 16-bit Timers<br />
* Serial i/f SSP, SSC<br />
* Reduced Chip Selects<br />
* Wide Ext. Bus Support<br />
* 3 V Options<br />
C167<br />
*2KBRAM<br />
* CAPCOM<br />
*PWM<br />
* Serial Interfaces<br />
*Timer<br />
* 10-bit / 8bit ADC<br />
* Full Bus Support/<br />
MUX Bus only<br />
C165<br />
*2KBRAM<br />
*3V<br />
* P-MQFP-100<br />
* P-TQFP-100<br />
C167SR<br />
*2KBRAM<br />
*PLL<br />
C163<br />
<strong>HOT167</strong>-1 Version 2.0<br />
8xC166<br />
*1KBRAM<br />
* 32KB ROM<br />
* 32KB Flash<br />
* P-MQFP-100<br />
C167CR<br />
*CAN<br />
*4KRAM<br />
*PLL<br />
C161V/K/O<br />
*25MHzOption<br />
*1KBRAM<br />
*SSP<br />
*3V<br />
* Red. Peripherals<br />
* P-TQFP-100<br />
* 16MHz CPU<br />
* 4 M address<br />
*1-2KBRAM<br />
* P-MQFP-80<br />
C164CI<br />
C167CS<br />
*2xCAN<br />
* 11K RAM<br />
* 256K FLASH<br />
*PLL<br />
* Power Management / RTC<br />
*2KBRAM<br />
* 64KB OTP/ROM/Flash<br />
* Full-CAN 2.0B<br />
* Power Management / RTC<br />
* Motor Control Peripheral<br />
* P-MQFP-80<br />
C161RI<br />
*3KBRAM<br />
*Pwr.Man./RTC<br />
*I 2 C Interface<br />
*ADC<br />
C161xx<br />
* Large RAM<br />
* Large Flash<br />
*Pwr.Man./RTC<br />
*I 2 C Interface<br />
* CAPCOM<br />
*2USARTs<br />
* CAN / J1850<br />
*ADC<br />
14
Infineon Technologies Corp.<br />
June 99<br />
C166 Part Numbering Scheme<br />
(at the example of the C167 Products)<br />
Prefix Temp. Range Type Memory Memory Package<br />
Designation Size Type Type<br />
SA<br />
B,F C167 (-) ROMLess<br />
L M<br />
B C167S 4<br />
Mask ROM<br />
R M<br />
B,F,K C167SR 32KBytes<br />
(-) L M<br />
B, F, K C167CR<br />
4 R M<br />
(-) L M<br />
B= 0/ 70 °C<br />
F= -40/ 85 °C<br />
K= -40/125 °C<br />
C= CAN Interface M= Metric Quad Flatpack<br />
<strong>HOT167</strong>-1 Version 2.0<br />
Flash<br />
B C167CR 16 F M<br />
128KBytes<br />
B, F,K C167CR 16 R M<br />
B, F,K C167CS 32 F M<br />
15
Infineon Technologies Corp.<br />
June 99<br />
XTAL<br />
8<br />
8<br />
16<br />
C167 Block Diagram<br />
Port 4<br />
Port 6<br />
Port 0<br />
128 KByte<br />
ROM/<br />
EPRON<br />
FLASH<br />
PLL<br />
OSC<br />
CAN<br />
2.0 B active<br />
2K XRAM<br />
XBUS (16-bit NON MUX Data / Addresses)<br />
Instr./Data<br />
32<br />
External Bus,<br />
XBUS Control,<br />
5 * CS Logic<br />
External Instr./Data<br />
16<br />
MultiFunctional<br />
10-Bit<br />
<strong>HOT167</strong>-1 Version 2.0<br />
C166-Core<br />
CPU<br />
Interrupt Controller<br />
USART Sync.<br />
ADC<br />
16 Channels<br />
Channel<br />
(SPI)<br />
ASC SSC<br />
BRG BRG<br />
GPT1<br />
T2<br />
T3<br />
T4<br />
Interrupt Bus<br />
Peripheral Data<br />
GPT2<br />
Port 1 Port 5 Port 3 Port 2 Port 8 Port 7<br />
T5<br />
T6<br />
PEC<br />
36 ext. IR<br />
Timer 7 Timer 1<br />
CAPCOM1, 2<br />
32<br />
Channels<br />
Timer 0<br />
Timer 8<br />
Dual Port<br />
PWM Module<br />
PT 1<br />
PT 2<br />
PT 3<br />
PT 4<br />
16 16 15 16 8 8<br />
Data<br />
Data<br />
16<br />
16<br />
RAM<br />
2KByte<br />
Watchdog<br />
16<br />
167CR<br />
16
Infineon Technologies Corp.<br />
June 99<br />
XTAL<br />
8<br />
8<br />
16<br />
C167CS Block Diagram<br />
Port 4<br />
Port 6<br />
Port 0<br />
256<br />
KByte<br />
FLASH<br />
PLL<br />
OSC<br />
2xCAN<br />
2.0 B active<br />
4K XFlash<br />
8K XRAM<br />
XBUS (16-bit NON MUX Data / Addresses)<br />
Instr./Data<br />
32<br />
External Bus,<br />
XBUS Control,<br />
5 * CS Logic<br />
External Instr./Data<br />
16<br />
MultiFunctional<br />
10-Bit<br />
<strong>HOT167</strong>-1 Version 2.0<br />
C166-Core<br />
CPU<br />
Interrupt Controller<br />
USART Sync.<br />
Channel<br />
ADC<br />
(SPI)<br />
24 Channels<br />
ASC SSC<br />
BRG BRG<br />
GPT1<br />
T2<br />
T3<br />
T4<br />
Interrupt Bus<br />
Peripheral Data<br />
GPT2<br />
Port 1 Port 5 Port 3 Port 2 Port 8 Port 7<br />
T5<br />
T6<br />
PEC<br />
36 ext. IR<br />
Timer 7 Timer 1<br />
CAPCOM1, 2<br />
32<br />
Channels<br />
Timer 0<br />
Timer 8<br />
Dual Port<br />
PWM Module<br />
PT 1<br />
PT 2<br />
PT 3<br />
PT 4<br />
16 16 15 16 8 8<br />
Data<br />
Data<br />
16<br />
16<br />
RAM<br />
3KByte<br />
Watchdog<br />
RTC<br />
16<br />
167CR<br />
17
Infineon Technologies Corp.<br />
June 99<br />
Architectural Overview<br />
Complete 16-bit architecture with 32-bit bus to the internal ROM<br />
single-cycle 16-bit and 32-bit (MUL/DIV) operations<br />
20 MHz CPU clock results in an instruction cycle time of 100ns<br />
allows zero wait-state 70ns external bus access time<br />
Avoids accumulator bottlenecks<br />
16 General Purpose Register (GPR) implemented<br />
Up to 16 GPRs form a register bank<br />
Any register bank can be freely located in internal RAM<br />
Easy efficient programming supported by powerful instructions<br />
combined with complex addressing modes<br />
Transparent programming of on-chip peripherals via<br />
Special Function Register (SFR) interface<br />
<strong>HOT167</strong>-1 Version 2.0<br />
18
Infineon Technologies Corp.<br />
June 99<br />
General Purpose Register<br />
(GPR)<br />
Up to 16 GPRs = 1 Register bank<br />
Consisting of max.<br />
8 Word-Registers<br />
8 Word-Registers with lower and higher Byte access<br />
The GPRs are bit-addressable<br />
Any Register bank can be freely allocated in internal RAM<br />
The location of the active Register bank is determined by Context<br />
Pointer (CP)<br />
CP can be easily switched to select another Register bank by<br />
using the Switch Context instruction (one instruction cycle)<br />
<strong>HOT167</strong>-1 Version 2.0<br />
20
Infineon Technologies Corp.<br />
June 99<br />
Block Diagram<br />
ROM / RAM interaction with 2K* Internal RAM<br />
RH7<br />
RH6<br />
RH5<br />
RH4<br />
RH3<br />
RH2<br />
RH1<br />
RH0<br />
R15<br />
R14<br />
R13<br />
R12<br />
R11<br />
R10<br />
R9<br />
R8<br />
Stackpointer Underflow<br />
Stackpointer<br />
Stackpointer Overflow<br />
RL7<br />
RL6<br />
RL5<br />
RL4<br />
RL3<br />
RL2<br />
RL1<br />
RL0<br />
STKUV<br />
STKOV<br />
R7<br />
R6<br />
R5<br />
R4<br />
R3<br />
R2<br />
R1<br />
R0<br />
* C167CS has 3KBytes of internal RAM<br />
<strong>HOT167</strong>-1 Version 2.0<br />
2*KBytes<br />
internal RAM<br />
R15<br />
R0<br />
0FDFE<br />
0FC00<br />
0F600<br />
Context pointer<br />
STKUV<br />
STKOV<br />
21
Infineon Technologies Corp.<br />
June 99<br />
Four Stage Instruction Pipeline<br />
100ns effective instruction execution time<br />
Three word pre-fetch queue (bus controller) to support pipeline<br />
Optimized branch processing<br />
For branch instruction (Jump, Cond. Jump, Call, Return,...) only one<br />
additional machine cycle is normally required to fetch target<br />
instruction<br />
Jump Cache<br />
For loop processing no additional machine cycle is required<br />
Fetch<br />
Decode<br />
Execute<br />
Write Back<br />
1. Instr. 2. Instr. 3. Instr. 4. Instr.<br />
1 Machine Cycle = 100 ns at 20 MHz CPU clock<br />
<strong>HOT167</strong>-1 Version 2.0<br />
Time<br />
22
Infineon Technologies Corp.<br />
June 99<br />
Instruction Set<br />
Data manipulation<br />
Arithmetic and boolean instruction incl. fast multiply/divide in<br />
0.5/1.0µs at 20 MHz<br />
Multiple (up to 15) bit shift and rotate in 100ns<br />
Bit to bit manipulation in internal RAM and SFR’s<br />
Data movement<br />
MOV instructions with all important addressing modes<br />
Byte to word conversion<br />
System stack (PUSH, POP) with over and underflow control<br />
User stack (MOV with auto increment and decrement)<br />
<strong>HOT167</strong>-1 Version 2.0<br />
23
Infineon Technologies Corp.<br />
June 99<br />
Address Space (cont.)<br />
Flexible ext. bus configurations to simplify system integration<br />
up to 24-bit Address / 8-bit Data (MUX and NMUX)<br />
up to 24-bit Address / 16-bit Data (MUX and NMUX)<br />
5 completely independent configuration registers<br />
5 programmable chip selects and programmable bus control signals<br />
- saves external glue-logic<br />
Programmable HOLD/HOLDA/BREQ bus arbitration function for<br />
multi-master operations<br />
<strong>HOT167</strong>-1 Version 2.0<br />
26
Code<br />
Segments<br />
(64K each)<br />
256KB<br />
Internal<br />
FLASH<br />
Infineon Technologies Corp.<br />
June 99<br />
FF’FFFF<br />
16 MBytes<br />
256<br />
4’FFFF<br />
4<br />
4‘0000<br />
3<br />
3‘0000<br />
2<br />
2’0000<br />
1<br />
1’0000<br />
0<br />
Internal and external Memory<br />
Map of the C167CS<br />
1024<br />
1023<br />
1022<br />
1021<br />
19<br />
18<br />
17<br />
16<br />
15<br />
14<br />
13<br />
12<br />
11<br />
10<br />
9<br />
8<br />
7<br />
6<br />
5<br />
4<br />
3<br />
2<br />
1<br />
0<br />
Data Pages<br />
(16K each)<br />
System Page (3)<br />
4K<br />
4K<br />
8K<br />
16K<br />
32K<br />
<strong>HOT167</strong>-1 Version 2.0<br />
IRAM / SFR + X-Peripheral area<br />
28
Infineon Technologies Corp.<br />
June 99<br />
Data Addressing via Paging<br />
on the 16 Mbyte address range<br />
Page<br />
Number<br />
Paging with Data Page Pointer (DPP)<br />
15 14 13<br />
Selection of one<br />
Data Page Pointer<br />
DPP3<br />
DPP2<br />
DPP1<br />
DPP0<br />
10-bit<br />
16-bit Address<br />
<strong>HOT167</strong>-1 Version 2.0<br />
14-bit<br />
Page<br />
Offset<br />
Physical 24-bit Data address<br />
0<br />
30
Infineon Technologies Corp.<br />
June 99<br />
Interrupt System<br />
Interrupt Controller<br />
Extremely short interrupt response time minimum 250ns typical:<br />
400ns (@20 MHz)<br />
Short interrupt service overhead<br />
Low total latency gives highest real-time performance<br />
Comprehensive prioritization scheme<br />
- Easy scheduling of complex real-time systems by using up to<br />
15 priority levels (with 4 groups each)<br />
Non-maskable interrupt input (NMI)<br />
Hardware traps on runtime errors and Software trap<br />
<strong>HOT167</strong>-1 Version 2.0<br />
31
Infineon Technologies Corp.<br />
June 99<br />
Interrupt System (cont.)<br />
CPU independent interrupt-service via<br />
Peripheral Events Controller (PEC)<br />
Off-loads the CPU from simple, but frequent interrupt-services<br />
Interrupt-driven “DMA-like” data transfer to any location in<br />
segment 0, without task switch of the CPU<br />
Makes peripheral data transfers independent of running CPU<br />
routine<br />
Response time is minimum 150ns, typical 300ns<br />
with a CPU load of 100ns (@20 MHz)<br />
<strong>HOT167</strong>-1 Version 2.0<br />
32
Infineon Technologies Corp.<br />
June 99<br />
Interrupt Priority System, PEC<br />
group 3<br />
(Level 0)<br />
group 3<br />
Level 1-13<br />
group 2<br />
group 3<br />
Level 14<br />
group 2<br />
group 3<br />
Level 15<br />
PEC 3<br />
group 1<br />
PEC 7<br />
group 2<br />
group 1<br />
group 2<br />
PEC 2<br />
group 0<br />
PEC 6<br />
group 1<br />
group 0<br />
<strong>HOT167</strong>-1 Version 2.0<br />
PEC 5<br />
group 1<br />
PEC 1<br />
group 0<br />
group 0<br />
PEC 0<br />
PEC 4<br />
Level<br />
Group<br />
3 2 1 0<br />
15 64<br />
14<br />
13<br />
12<br />
11<br />
10<br />
9<br />
8<br />
7<br />
6<br />
5<br />
4<br />
3<br />
2<br />
1<br />
0<br />
1<br />
33
Infineon Technologies Corp.<br />
June 99<br />
INTR Flag is Set<br />
Peripheral Interrupt<br />
Peripheral Interrupt<br />
Peripheral Interrupt<br />
External Interrupt*<br />
Peripheral Interrupt<br />
External Interrupt*<br />
Interrupt Processing<br />
Interrupt Control Register of the appropriate peripheral<br />
Priority Check<br />
Comparison of<br />
Interrupt Priority<br />
with CPU<br />
Runtime Priority<br />
16 Priority Levels<br />
if<br />
higher<br />
Priority<br />
* External Interrupts are possible, e.g. instead of the Capture Input<br />
55 Peripheral Interrupts<br />
<strong>HOT167</strong>-1 Version 2.0<br />
Group Check<br />
4 Groups<br />
Clear<br />
INTR Flag<br />
36 ext. Interrupts(+ NMI) including 8 which are sampled every 50 ns<br />
INTR Service:<br />
Save PSW,<br />
CSP, IP<br />
Set new priority<br />
in PSW.<br />
Set CSP, IP<br />
according to<br />
peripheral<br />
vector or<br />
Trap no.<br />
PEC<br />
Service<br />
34
Infineon Technologies Corp.<br />
June 99<br />
INTR Service:<br />
Save PSW,<br />
CSP, IP<br />
Set new priority<br />
in PSW.<br />
Set CSP, IP<br />
according to<br />
Peripheral<br />
vector or<br />
Trap No.<br />
Peripheral Event Controller<br />
(PEC)<br />
Interrupt has passed priority and group check<br />
Interrupt priority < 14<br />
Interrupt priority 14 or 15<br />
and Data Counter > 0<br />
Interrupt service PEC service<br />
priority & group<br />
check<br />
8 PEC<br />
Channel<br />
PEC<br />
Contr. Reg.<br />
Data Counter<br />
SRC Pointer<br />
DEST Pointer<br />
IR request if Data Counter = 0<br />
<strong>HOT167</strong>-1 Version 2.0<br />
Memory Segment 0<br />
0FFFF<br />
Byte or<br />
Word<br />
Transfer<br />
00000<br />
35
Infineon Technologies Corp.<br />
June 99<br />
Peripherals Set of the C167CR<br />
(20 MHz)<br />
2 General Purpose Timer units (GPT1 & GPT2)<br />
5 Timers (200/400ns) with enhanced Input/Output, Reload and<br />
Capture functions and complex concatenation capabilities<br />
2 Capture/Compare units (CAPCOM1 & 2)<br />
4 Timers (400ns) with Reload register and 32 independent 16-bit<br />
Capture/Compare channels programmable to 6 modes of operation<br />
4 high resolution PWM channels<br />
each with independent time-base of up to 50ns resolution and<br />
programmable operation modes (edge-aligned, center-aligned,<br />
burst and single-shot mode)<br />
V2.0B active Full CAN Module<br />
Handles 29 bit and 11 bit Identifier, Maximum CAN Transfer Rate<br />
(1 MBit/s), 15 Message Objects with their own identifier and their<br />
own status and control bits, Programmable Mask Registers for<br />
Acceptance Filtering, Basic CAN Feature (Message Object 15,<br />
Equipped with two Receive Buffers and Global Mask Register)<br />
<strong>HOT167</strong>-1 Version 2.0<br />
36
Infineon Technologies Corp.<br />
June 99<br />
C167CR/CS Hands-On Peripheral Training<br />
<strong>HOT167</strong>-1 Version 2.0<br />
Exercise Overview<br />
How to set up the Hardand<br />
Software used<br />
Peripherals in Detail +<br />
Exercises<br />
Timer Unit 1 (GPT1)<br />
Timer Unit 2 (GPT2)<br />
PWM Unit<br />
CAPCOM Units<br />
A/D Converter<br />
Synchronous serial<br />
Channel (SSC)<br />
USART (ASC)<br />
CAN Module 1/2<br />
39
Infineon Technologies Corp.<br />
June 99<br />
Exercise Overview<br />
Exercise for General Purpose Timer Unit 1:<br />
7GPT1_1 - PWM Signal with T3 (T2, T4 for Reload)<br />
Exercises for General Purpose Timer Unit 2:<br />
7GPT2_1 - PWM Signal with T6 & CAPREL<br />
7GPT2_2 - Frequency Multiplication with GPT2**<br />
Exercises for the Pulse Width Modulation Unit:<br />
7PWM_1 - Two edge-aligned PWM Signals with PWM unit<br />
7PWM_2 - Two center-aligned PWM Signals with PWM unit<br />
Exercises for the Capture Compare Unit 1:<br />
7CC1_1 - Two edge-aligned PWM Signals with CAPCOM1<br />
7CC1_2 - Two center-aligned PWM Signals with CAPCOM1<br />
Exercises for the Capture Compare Unit 2:<br />
7CC2_1 - Signal Generation with CAPCOM1 -<br />
Signal Detection with CAPCOM2*<br />
<strong>HOT167</strong>-1 Version 2.0<br />
40
Infineon Technologies Corp.<br />
June 99<br />
Exercise Overview (cont.)<br />
Exercises for the Analog Digital Converter<br />
7ADC_1 - Control the Pulse Width of a PWM signal with an<br />
ADC Value (using PEC transfer)**<br />
7ADC_2 - Control the Frequency of a 50% duty cycle PWM<br />
signal with an ADC Value (using the ADC ISR)**<br />
Exercise for the Synchronous Serial Channel SSC:<br />
7SSC_1 - Synchronous Serial Transmission of ADC<br />
Conversion Results (10 bits) at 5 Mbit/s**<br />
Exercise for the Asynchronous Serial Channel ASC:<br />
7ASC_1 - Asynchronous Serial Transmission of consecutive<br />
Ascii Characters at 19.2kbit/s every 10 ms<br />
Exercise for the CAN Module:<br />
7CAN_1 - Transmit a standard CAN Message with the<br />
On-Chip CAN Module<br />
<strong>HOT167</strong>-1 Version 2.0<br />
41
Infineon Technologies Corp.<br />
June 99<br />
Exercise Overview (cont.)<br />
Exercise for the CAN Module 1 and 2 of the C167CS****:<br />
7CAN_2 - Transmit a standard CAN Message with the<br />
CAN Module 1 and receive it with CAN Module 2<br />
(this Exercise uses the Phytec Flash tools)<br />
Exercises involving more Peripherals:<br />
DAAD - Digital/Analog - Analog/Digital Conversion using the serial<br />
interface ASC0, the PWM unit, the ADC and the GPT1***<br />
- running on a modified C167 Starter Kit (external resistor and<br />
capacitor necessary)<br />
- using the Phytec Flash tools<br />
- using the corresponding Visual Basic Interface<br />
<strong>HOT167</strong>-1 Version 2.0<br />
42
Infineon Technologies Corp.<br />
June 99<br />
Exercise Overview (cont.)<br />
* : this exercise requires an external connection of two pins<br />
** : this exercise requires an external potentiometer<br />
*** : this exercise requires an external R-C filter and the<br />
corresponding visual basic program -<br />
(see section “Hints regarding the exercises - how to<br />
install the DAAD program”)<br />
**** : C167CS with CAN Module 2 not yet supported<br />
by DAvE V1.0 CDROM.<br />
See “Hints regarding DAvE.”<br />
<strong>HOT167</strong>-1 Version 2.0<br />
43
Infineon Technologies Corp.<br />
June 99<br />
Exercise Overview (Table, Part I)<br />
Exercises<br />
GPT1 GPT2 PWM CC1 CC2<br />
7GPT1_1<br />
X - - - - -<br />
7GPT2_1 - X - - - -<br />
7PWM_1 - - X - - -<br />
7PWM_2 - - X - - -<br />
7CC1_1 - - - X - -<br />
7CC1_2 - - - X - -<br />
7CC2_1 - - - X X -<br />
7ADC_1 - - X - - X<br />
7ADC_2 - - X - - X<br />
7SSC_1 - - - - - X<br />
7ASC_1 X - - - - -<br />
7CAN_1 - - - - - -<br />
7CAN_2* X - - - - -<br />
7GPT2_2 - X X - - -<br />
DAAD X - X - - X<br />
<strong>HOT167</strong>-1 Version 2.0<br />
Peripherals<br />
* C167CS with CAN Module 2 not yet supported by DAvE V1.0 CD ROM. See “Hints regarding DAvE.”<br />
ADC<br />
44
Infineon Technologies Corp.<br />
June 99<br />
How to set up your system:<br />
kitCON-167CR/CS HW setup<br />
Connect your Starter Kit board to your IBM compatible PC using a<br />
serial cable (connector P1 to COM1)<br />
Attention Windows 95 users:<br />
It is recommended to disable the FIFO Buffer in Settings/Control<br />
Panel/System/Device Manager/Ports/COM1/Port<br />
Settings/Advanced.<br />
Switch 1 of the blue DIP switches needs to be set to ON (this<br />
activates the bootstrap loader)*<br />
Attach an unregulated power supply with 8V to 12V / 500 mA to X5<br />
on the kitCON-167. Double check the correct polarity. The red LED<br />
in the power supply area will light to indicate correct power<br />
supply.<br />
Press switch S1 to perform a reset.<br />
* older versions of the kitCON-167 boards (without blue DIP<br />
switches):<br />
Connect jumper JP2 at 1+2 (usually a red jumper)<br />
<strong>HOT167</strong>-1 Version 2.0<br />
46
Infineon Technologies Corp.<br />
June 99<br />
How to set up your system:<br />
kitCON-167CR/CS HW setup (cont.)<br />
Memory Map of kitCON-167CR/CS in Bootstrap Mode:<br />
Data Area: 0x0FEA00 .. 0x0FEBFF<br />
Code Area: 0x0FEC00 .. 0x0FFFFF<br />
The available RAM is 0 .. 0xD8FF<br />
and may be used as ROM or RAM in the<br />
Options - Target dialog<br />
<strong>HOT167</strong>-1 Version 2.0<br />
47
Infineon Technologies Corp.<br />
June 99<br />
How to set up your system: DAvE installation<br />
Insert the DAvE CD in your CD ROM drive.<br />
Run CD ROM\Setup\Setup.exe.<br />
Follow the setup program’s instructions.<br />
If you don’t have Acrobat Reader installed on your PC, do so by<br />
choosing to install Acrobat Reader which is included on the DAvE<br />
CD.<br />
(Hint: You need Acrobat Reader 3.0 or higher)<br />
Please note:<br />
You need WINDOWS95/98 or WINDOWS NT in order to run DAvE!<br />
To use DAvE 1.0 with Windows 98:<br />
Download and install the DAvE Service Pack 1 from<br />
www.infineon.com/dave.html first!<br />
<strong>HOT167</strong>-1 Version 2.0<br />
48
Infineon Technologies Corp.<br />
June 99<br />
How to set up your system: Keil µVision2<br />
installation (Starter Kit CD 4.0 and higher)<br />
Insert the Starter Kit CD 4.0 or higher into your CD ROM drive.<br />
Wait for the Auto Start.<br />
(Acrobat Reader is required but also included on the CD:<br />
...\install\reader\)<br />
Go to Third Party Development Tools<br />
Go to Keil<br />
Choose the desired tool chain:<br />
For the current Keil Tool version:<br />
- click EK 166 Installation (V 4.0) + µVision2 (2.0).<br />
- This document assumes that the current Keil tool chain is<br />
installed in the default directory c:\keil\<br />
For the older Keil Tools:<br />
- click EK 166 Installation (V 3.11) and continue with the Hands-<br />
On Training for the old Keil µVision (separate document).<br />
<strong>HOT167</strong>-1 Version 2.0<br />
49
Infineon Technologies Corp.<br />
June 99<br />
How to set up your system:<br />
Exercise directory structure<br />
If you own the Infineon Starter Kit CD ROM (V3.0 and higher):<br />
Copy the directory<br />
or<br />
d:\cdrom\startkit\sk_167\hot167\hot167_1\<br />
d:\cdrom\startkit\sk_167cs\hot167\hot167_1\<br />
and all its contents to your hard drive:<br />
c:\hot167_1\<br />
This directory contains this pdf file and several exercise directories<br />
(e.g. 7gpt1_1, 7asc_1 etc.).<br />
These directories will be your work-directories for <strong>HOT167</strong>-1.<br />
If you don’t want the training tutorial itself (hot167_1) to take away<br />
space on your hard drive, you can erase it and use the one on the<br />
starter kit CD ROM.<br />
<strong>HOT167</strong>-1 Version 2.0<br />
50
Infineon Technologies Corp.<br />
June 99<br />
C166 emitted file types<br />
Projectname . OBJ<br />
Unlocated object file with no absolute addresses assigned.<br />
Projectname . LST<br />
A list file containing the original source lines but with any errors or<br />
warnings indicated<br />
Projectname . SRC<br />
An optional file containing the assembler code generated by the<br />
compilation process.<br />
This can be assembled with A166 to produce the .OBJ file as an<br />
alternative to going straight to a .OBJ file from the compiler.<br />
Projectname . ERR<br />
A summary of the errors and warnings that occurred during<br />
compilation<br />
<strong>HOT167</strong>-1 Version 2.0<br />
53
Infineon Technologies Corp.<br />
June 99<br />
Hints regarding DAvE V1.0<br />
To use DAvE 1.0 with Windows 98:<br />
Download and install the DAvE Service Pack 1 from<br />
www.infineon.com/dave.html first!<br />
To create a new Project with DAvE:<br />
Select “Project | New” from the pull down menu<br />
To generate code with DAvE:<br />
Select “Project | Generate Code” from the pull down menu<br />
To configure a peripheral:<br />
Move your mouse over the peripheral when DAvE shows the block<br />
diagram<br />
Click the right mouse button<br />
Select Configure<br />
To get context specific help in DAvE:<br />
Move your mouse over the item you want to find out about<br />
Click the right mouse button<br />
Make your choice<br />
Validate each alpha numeric entry by pressing ENTER<br />
<strong>HOT167</strong>-1 Version 2.0<br />
55
Infineon Technologies Corp.<br />
June 99<br />
Hints regarding DAvE (cont.)<br />
Assembler Startup File<br />
DAvE also incorporates the Assembler Startup Files of the Keil and<br />
the Tasking Compilers.<br />
Whenever you do a configuration which affects this Startup file,<br />
DAvE is altering the Startup File for you.<br />
When starting a project, be sure to include the modified Assembler<br />
Startup File when compiling the C-code created by DAvE.<br />
Original Startup<br />
File name<br />
Modified Startup<br />
File name<br />
<strong>HOT167</strong>-1 Version 2.0<br />
Keil C166 Tasking C166<br />
START167.A66 CSTART.ASM<br />
START.ASM START.ASM<br />
56
Infineon Technologies Corp.<br />
June 99<br />
Hints regarding DAvE V1.0 - C167CS Projects<br />
The DAvE CD ROM Version 1.0 as it is does not yet support the<br />
generation of projects for the C167CS.<br />
However, you can check the DAvE website<br />
http://www.infineon.com/dave.html<br />
for the C167CS Update Package. Use C167CR projects until this<br />
update package is available.<br />
As soon as it becomes available, you can download the DAvE<br />
C167CS module from the DAvE web site and update your DAvE on<br />
your hard drive:<br />
Go to http://www.infineon.com/dave.html<br />
click on “Updates for DAvE”<br />
select and download the update package for the C167CS<br />
execute the downloaded .exe-file<br />
after the installation you can create C167CS projects with DAvE.<br />
<strong>HOT167</strong>-1 Version 2.0<br />
57
Infineon Technologies Corp.<br />
June 99<br />
Hints regarding the Exercises (cont.)<br />
Difference between the first exercise and the following exercises:<br />
The first exercise includes the creation of a µVision2 project to<br />
show how it works (to avoid this use c167_blank.uv2)<br />
The following exercises use a pre-configured µVision2 project. But<br />
you still have to add the necessary files (C-files generated by DAvE<br />
plus the Assembler Startup File START.ASM (optional))<br />
The exercises are created in a way that they use only peripherals<br />
which have been introduced already (either directly before the<br />
exercise or in previous exercises)<br />
If an exercise does not work when running the debugger:<br />
Check the oscilloscope connections (right pin?)<br />
Check the DAvE / µVision2 configurations<br />
Re-generate the code with DAvE (USER CODE remains!)<br />
Recompile the exercise in µVision2<br />
Reload the exercise into the debugger and run it again<br />
<strong>HOT167</strong>-1 Version 2.0<br />
59
Infineon Technologies Corp.<br />
June 99<br />
Hints regarding the Exercises: How to install<br />
the Visual Basic Program for exercise DAAD<br />
If you work from the Infineon Starter Kit CD ROM (V3.0 and<br />
higher):<br />
Close all applications.<br />
Copy the directory<br />
…\cdrom\startkit\sk_167\hot167\daad_prg\<br />
to your hard drive:<br />
c:\daad_prg\<br />
Run the program c:\daad_prg\setup.exe<br />
Follow the instructions on the screen.<br />
After the installation is completed, you can start the daad program<br />
with your Windows95/98 / Windows NT Start button (Start |<br />
Programs | daad)<br />
<strong>HOT167</strong>-1 Version 2.0<br />
60
Infineon Technologies Corp.<br />
June 99<br />
Hints regarding the Exercises: How to install the<br />
Visual Basic Program for exercise DAAD (cont.)<br />
If you downloaded this file from the Infineon Web Site:<br />
Create a directory named c:\daad_prg\ on your hard drive.<br />
Download the file daad.exe from the Infineon Web Site<br />
(http://www.infineon.com/mc.html, branch to the Hands-On<br />
Training) to the new directory<br />
Run the program c:\daad_prg\daad.exe to unzip the files<br />
Run the program c:\daad_prg\setup.exe<br />
Follow the instructions on the screen.<br />
After the installation is completed, you can start the daad program<br />
with your Windows95/98 / Windows NT Start button (Start |<br />
Programs | daad)<br />
<strong>HOT167</strong>-1 Version 2.0<br />
61
Infineon Technologies Corp.<br />
June 99<br />
Let’s get started now!<br />
<strong>HOT167</strong>-1 Version 2.0<br />
62
Infineon Technologies Corp.<br />
June 99<br />
GPT 1 Function Diagram<br />
(20 MHz)<br />
P3.5 / T4IN<br />
P3.7 / T2IN<br />
(max. 1.25 MHz)<br />
P5.15/T2EUD<br />
P5.14/T4EUD<br />
P3.6 / T3IN<br />
(max. 1.25 MHz)<br />
P3.4/T3EUD<br />
P3.5 / T4IN<br />
P3.7 / T2IN<br />
(max. 1.25 MHz)<br />
P5.15/T2EUD<br />
P5.14/T4EUD<br />
Clk max<br />
2.5 MHz<br />
Clk max<br />
2.5 MHz<br />
Clk max<br />
2.5 MHz<br />
Gate<br />
Gate<br />
Gate<br />
Input<br />
Mode<br />
Control<br />
Input<br />
Mode<br />
Control<br />
Input<br />
Mode<br />
Control<br />
Run<br />
Enable<br />
Run<br />
Enable<br />
Run<br />
Enable<br />
<strong>HOT167</strong>-1 Version 2.0<br />
33-bit cascaded path<br />
Reload<br />
Aux Timer T2 / T4<br />
up / down<br />
Core Timer T3<br />
up / down<br />
Capture<br />
Aux Timer T2 / T4<br />
up / down<br />
Toggle<br />
Latch<br />
INTR<br />
Flag<br />
Outp.<br />
enables<br />
INTR<br />
Flag<br />
INTR<br />
Flag<br />
P3.3 /<br />
T3OUT<br />
64
Infineon Technologies Corp.<br />
June 99<br />
Exercise 7GPT1_1 - PWM Signal with Timer 3<br />
(Timer 2, Timer 4 for Reload)<br />
Objective: Generate a PWM Signal using GPT1:<br />
Period: 26.2 ms<br />
25% pulse, 75% pause<br />
Use core Timer 3 to count up, enable Timer 3 output toggle latch<br />
(T3OTL)<br />
Use Timer 2 to reload Timer 3 on positive transition of T3OTL<br />
Use Timer 4 to reload Timer 3 on negative transition of T3OTL<br />
<strong>HOT167</strong>-1 Version 2.0<br />
65
Infineon Technologies Corp.<br />
June 99<br />
Exercise 7GPT1_1 - DAvE Configurations<br />
Start DAvE<br />
Create new Project with microcontroller C167CR/CS*<br />
Project name: 7GPT1_1<br />
Select project path: c:\hot167_1\7gpt1_1<br />
Project Settings:<br />
General:<br />
- Select Keil Compiler, SMALL model<br />
System Clock:<br />
- External Oscillator Frequency: Set to 5 MHz<br />
Startup Configuration:<br />
- Bus Type after Reset: Set to 16 bit DEMUX<br />
- Write Configuration: Pin #WR and #BHE operates as #WRL<br />
and #WRH<br />
Save & close<br />
* C167CS not yet supported by DAvE V1.0 CD ROM. See “Hints regarding DAvE.”<br />
<strong>HOT167</strong>-1 Version 2.0<br />
66
Infineon Technologies Corp.<br />
June 99<br />
Exercise 7GPT1_1 - DAvE Configurations (cont.)<br />
Configure GPT1:<br />
Auxiliary Timer 2:<br />
- Timer 2 Mode: Reload Timer 3 with T2<br />
- Input Selection: Positive transition of T3OTL<br />
- T2 Register: Set to 0xC000 (to generate 25% pulse)<br />
Core Timer 3<br />
- Timer 3 Mode: Timer mode<br />
- Timer Start: Start T3 after initialization (this will generate a<br />
26.2ms period of T3)<br />
- Alternate Output Function: enable alternate output function (use<br />
T3OUT)<br />
Auxiliary Timer 4:<br />
- Timer 4 Mode: Reload Timer 3 with T4<br />
- Input Selection: Negative transition of T3OTL<br />
- T4 Register: Set to 0x4000 (to generate 75% pause)<br />
<strong>HOT167</strong>-1 Version 2.0<br />
67
Infineon Technologies Corp.<br />
June 99<br />
Exercise 7GPT1_1 - DAvE Configurations (cont.)<br />
Configure GPT1 (cont.)<br />
Functions:<br />
- Include GPT1 initialization function GT1_vInit<br />
Save & close<br />
Generate Code<br />
<strong>HOT167</strong>-1 Version 2.0<br />
68
Infineon Technologies Corp.<br />
June 99<br />
Exercise 7GPT1_1 - µVision2 Configurations<br />
Start Keil µVision2<br />
Create new Project: ‘7gpt1_1.uv2’<br />
Go to Project | New Project<br />
Browse to directory c:\hot167_1\7gpt1_1\<br />
Enter file name: 7gpt1_1.uv2<br />
Select Target Device:<br />
Go to Project | Select Device for Target ‘Target 1’<br />
Double-click ‘Siemens’<br />
Select ‘C167CR-LM’ or ‘C167CS-32FM’<br />
Click ‘OK’<br />
<strong>HOT167</strong>-1 Version 2.0<br />
69
Infineon Technologies Corp.<br />
June 99<br />
Exercise 7GPT1_1 -<br />
µVision2 Configurations (cont.)<br />
Add Files:<br />
Go to Project | Targets, Groups, Files…<br />
Click ‘Groups / Add Files’<br />
Select ‘Source Group 1’<br />
Click ‘Add Files to Group’<br />
Select all C files and click ‘add’<br />
Enter file name ‘start.asm’, click ‘add’<br />
Click ‘Close’ and ‘OK’<br />
Double-click all files in the Project Window to open them<br />
<strong>HOT167</strong>-1 Version 2.0<br />
70
Infineon Technologies Corp.<br />
June 99<br />
Exercise 7GPT1_1 -<br />
µVision2 Configurations (cont.)<br />
Select Target Options:<br />
Go to Project | Options for Target ‘Target 1’<br />
Select External Memory configuration<br />
- Go to ‘Target’ tab<br />
- If you are using C167CS:<br />
Uncheck the box “Allocate On-chip Code ROM”<br />
- External Memory #1: RAM: Start 0x4000, Size 0x3FFF<br />
- External Memory #2: ROM: Start 0x1000, Size 0x2FFF<br />
(those are example values and they need to be adapted<br />
e.g. for programming the code into the on-chip Flash memory)<br />
Select Linker Options:<br />
- Go to ‘L166 Misc’<br />
- Interrupt Vector Table Address: Enter 0x0<br />
- Reserve: Enter 08H-0BH, 0ACH-0AFH<br />
(to reserve the Interrupt vector locations for NMI (Non-<br />
Maskable Interrupt) and Serial Interface Receive Interrupt)<br />
<strong>HOT167</strong>-1 Version 2.0<br />
71
Infineon Technologies Corp.<br />
June 99<br />
Exercise 7GPT1_1 -<br />
µVision2 Configurations (cont.)<br />
Set Debug Options:<br />
- Go to ‘Debug’ tab<br />
- Click ‘Use Keil Monitor-166 Driver’ (upper right hand corner)<br />
- Click ‘Load Application at Startup’ and ‘Go till main()’<br />
- Click ‘Settings’ (upper right hand corner)<br />
- Monitor configuration: select ‘Phytec KC167’<br />
- Stop Program Execution with: select ‘Serial Interrupt or NMI’<br />
- Click ‘OK’<br />
Edit MAIN.C:<br />
include endless loop in main():<br />
// USER CODE BEGIN (Main,2)<br />
while(1) {};<br />
// USER CODE END<br />
<strong>HOT167</strong>-1 Version 2.0<br />
72
Infineon Technologies Corp.<br />
June 99<br />
Exercise 7GPT1_1 - Running the Program<br />
Reset Target Hardware (Press Reset Button on Starter Kit)<br />
Connect Oscilloscope to P3.3 / T3OUT (connector X3 pin 106)<br />
Build Project:<br />
µVision2: Project | Rebuild Target<br />
Run integrated Debugger from within µVision2<br />
Debug | Start / Stop Debug Session (click ‘OK’ when prompted)<br />
The Debugger will load the Keil Monitor into the kitCON-167’s RAM<br />
via bootstrap loader<br />
Object file c:\hot167_1\7gpt1_1\7gpt1_1 will be loaded<br />
automatically and the debugger will go to main().<br />
Watch the yellow arrow in the Disassembly Window or the C-files.<br />
Go! (Debug | Go)<br />
Watch oscilloscope signal<br />
If you hit Stop (Debug | Stop Running), the application stops in<br />
the endless loop in main().<br />
<strong>HOT167</strong>-1 Version 2.0<br />
73
Infineon Technologies Corp.<br />
June 99<br />
Exercise 7GPT2_1 -<br />
PMW Signal with T6 & CAPREL<br />
Objective: Generate a PWM Signal using GPT2:<br />
Frequency: 50 Hz<br />
50% pulse, 50% pause<br />
Use core Timer 6 to count down, enable Timer 6 output toggle latch<br />
(T6OTL)<br />
Use Capture / Reload Register CAPREL to Reload Timer 6 on<br />
every underflow<br />
<strong>HOT167</strong>-1 Version 2.0<br />
75
Infineon Technologies Corp.<br />
June 99<br />
Exercise 7GPT2_1 -<br />
PMW Signal with T6 & CAPREL<br />
Objective: Generate a PWM Signal using GPT2:<br />
Frequency: 50 Hz<br />
50% pulse, 50% pause<br />
Use core Timer 6 to count down, enable Timer 6 output toggle latch<br />
(T6OTL)<br />
Use Capture / Reload Register CAPREL to Reload Timer 6 on<br />
every underflow<br />
<strong>HOT167</strong>-1 Version 2.0<br />
77
Infineon Technologies Corp.<br />
June 99<br />
Exercise 7GPT2_1 - DAvE Configurations<br />
Start DAvE<br />
Create new Project with microcontroller C167CR/CS*<br />
Project name: 7GPT2_1<br />
Select project path: c:\hot167_1\7gpt2_1<br />
Project Settings:<br />
General:<br />
- Select Keil Compiler, SMALL model<br />
System Clock:<br />
- External Oscillator Frequency: Set to 5 MHz<br />
Startup Configuration:<br />
- Bus Type after Reset: Set to 16 bit DEMUX<br />
- Write Configuration: Pin #WR and #BHE operates as #WRL<br />
and #WRH<br />
Save & close<br />
* C167CS not yet supported by DAvE V1.0 CD ROM. See “Hints regarding DAvE.”<br />
<strong>HOT167</strong>-1 Version 2.0<br />
78
Infineon Technologies Corp.<br />
June 99<br />
Exercise 7GPT2_1 - DAvE Configurations (cont.)<br />
Configure GPT2:<br />
Core Timer 6:<br />
- Timer 6 Mode: Timer mode<br />
- Up/Down Control: Count down<br />
- Timer Register: Load T6 with 10ms pulse value<br />
((20ms / 2) / 200ns) in HEX) (0xC350)<br />
- Timer Start: Start T6 after initialization<br />
- Reload Mode: Enable Reload from CAPREL<br />
- Alternate Output Function: Enable alternate output function<br />
(use T6OUT)<br />
Capture/Reload:<br />
- CAPREL Register: Set to 10ms pulse value (see above)<br />
Functions:<br />
- Include GPT2 initialization function GT2_vInit<br />
Save & close<br />
Generate code<br />
<strong>HOT167</strong>-1 Version 2.0<br />
79
Infineon Technologies Corp.<br />
June 99<br />
Exercise 7GPT2_1 - µVision2 Configurations<br />
Start µVision2<br />
Open Project c:\hot167_1\7gpt2_1\7gpt2_1.uv2 (Project | Open Pr.)<br />
Add Files:<br />
Go to Project | Targets, Groups, Files…<br />
Click ‘Groups / Add Files’<br />
Select ‘Source Group 1’<br />
Click ‘Add Files to Group’<br />
Select all C files and click ‘add’<br />
Enter file name ‘start.asm’, click ‘add’ (Assembler Startup File)<br />
Click ‘Close’ and ‘OK’<br />
Double-click all files in the Project Window to open them<br />
Select Target Hardware (kitCON-167):<br />
Go to Project | Options for Target ‘Target 1’<br />
Go to ‘Debug’ tab<br />
Click ‘Settings’ (upper right hand corner)<br />
Monitor configuration: select ‘Phytec KC167’)<br />
Click ‘OK’ twice<br />
<strong>HOT167</strong>-1 Version 2.0<br />
80
Infineon Technologies Corp.<br />
June 99<br />
Pulse Width Modulation Unit (PWM)<br />
(20 MHz)<br />
4 independent PWM channels each with its own time-base<br />
50ns or 12.8µs timer-resolution provides a very wide frequency<br />
range to generate PWM signals<br />
Programmable output polarity<br />
Up to 78 KHz at 8-bit PWM resolution<br />
F PWMmax =<br />
1<br />
2 8 x 50ns =78kHz<br />
Four operation modes<br />
Standard, edge-aligned PWM<br />
Symmetrical, center-aligned PWM for asynchronous motor control<br />
Burst-mode for modulated PWM signals<br />
Single-shot mode<br />
<strong>HOT167</strong>-1 Version 2.0<br />
84
Infineon Technologies Corp.<br />
June 99<br />
PWM unit - Mode 0 and 1<br />
PWM Mode 0:<br />
Standard PWM’s or Edge-Aligned PWM’s<br />
Contents of the<br />
PWx Register<br />
PWM Signal<br />
Timer Period<br />
Interrupt Request and<br />
Latch of the Shadow Register<br />
If all channels are programmed to mode 0,<br />
edge-aligned PWM signals will be generated.<br />
A duty cycle from 0 to 100% is programmable<br />
PWMx<br />
PWMy<br />
Contents of the Period Register (PPx)<br />
<strong>HOT167</strong>-1 Version 2.0<br />
PWM Mode 1:<br />
Symmetrical or Center-Aligned PWM’s<br />
PWM Signal<br />
Timer Period<br />
Contents of the PWx<br />
Register<br />
Timer Period<br />
If all channels are programmed to mode 1,<br />
center-aligned PWM signals will be generated.<br />
A duty cycle from 0 to 100% is programmable<br />
Possible PWM Signals from other channels programmed to the same mode:<br />
IR and Latch of the<br />
Shadow Register<br />
87
Infineon Technologies Corp.<br />
June 99<br />
Overview Port Structure<br />
The Port lines provide the connection to the external world<br />
111 Port lines on the C167<br />
All Port lines are individually addressable and all I/0 lines are<br />
independently programmable for input or output<br />
Each Port line is dedicated to one or more peripheral functions<br />
Each Port is protected with fast diodes<br />
Programmable open drain buffers<br />
P2, 3, 6, 7, 8 on the C167<br />
<strong>HOT167</strong>-1 Version 2.0<br />
89
Infineon Technologies Corp.<br />
June 99<br />
Overview Port Structure<br />
Internal Bus<br />
Alternate<br />
Output<br />
Alternate<br />
Enable<br />
Read Direction<br />
Buffer<br />
Mux<br />
Mux<br />
Alternate Input<br />
Write<br />
Output<br />
Latch<br />
<strong>HOT167</strong>-1 Version 2.0<br />
Direction<br />
Register<br />
Buffer<br />
Input<br />
Latch<br />
Clock<br />
Open Drain<br />
Control<br />
VCC<br />
Vss<br />
ESD structure<br />
Port<br />
Pin<br />
90
Infineon Technologies Corp.<br />
June 99<br />
Exercise 7PWM_1- DAvE Configurations<br />
Start DAvE<br />
Create new Project with microcontroller C167CR/CS*<br />
Project name: 7pwm_1<br />
Select project path: c:\hot167_1\7pwm_1<br />
Project Settings:<br />
General:<br />
- Select Keil Compiler, SMALL model<br />
System Clock:<br />
- External Oscillator Frequency: Set to 5 MHz<br />
Startup Configuration:<br />
- Bus Type after Reset: Set to 16 bit DEMUX<br />
- Write Configuration: Pin #WR and #BHE operates as #WRL<br />
and #WRH<br />
Save & close<br />
* C167CS not yet supported by DAvE V1.0 CD ROM. See “Hints regarding DAvE.”<br />
<strong>HOT167</strong>-1 Version 2.0<br />
92
Infineon Technologies Corp.<br />
June 99<br />
Exercise 7PWM_1 - DAvE Configurations (cont.)<br />
Configure PWM (cont.)<br />
Functions:<br />
- Include PWM initialization function PWM_vInit<br />
Save & Close<br />
Configure Port 7:<br />
Port 7:<br />
- DAvE has reserved P7.1 and P7.3 for the PWM alternate<br />
functions with 0 as initial output<br />
Functions:<br />
- Include port initialization function IO_vInit<br />
Save & close<br />
Generate Code<br />
<strong>HOT167</strong>-1 Version 2.0<br />
94
Infineon Technologies Corp.<br />
June 99<br />
Exercise 7PWM_1 - µVision2 Configurations<br />
Start µVision2<br />
Open Project c:\hot167_1\7pwm_1\7pwm_1.uv2 (Project | Open Pr.)<br />
Add Files:<br />
Go to Project | Targets, Groups, Files…<br />
Click ‘Groups / Add Files’<br />
Select ‘Source Group 1’<br />
Click ‘Add Files to Group’<br />
Select all C files and click ‘add’<br />
Enter file name ‘start.asm’, click ‘add’ (Assembler Startup File)<br />
Click ‘Close’ and ‘OK’<br />
Double-click all files in the Project Window to open them<br />
Select Target Hardware (kitCON-167):<br />
Go to Project | Options for Target ‘Target 1’<br />
Go to ‘Debug’ tab<br />
Click ‘Settings’ (upper right hand corner)<br />
Monitor configuration: select ‘Phytec KC167’<br />
Click ‘OK’ twice<br />
<strong>HOT167</strong>-1 Version 2.0<br />
95
Infineon Technologies Corp.<br />
June 99<br />
Exercise 7PWM_1 - Screenshot<br />
P7.1 / POUT1<br />
P7.3 / POUT3<br />
Period: 1ms<br />
<strong>HOT167</strong>-1 Version 2.0<br />
DC 25%<br />
Edge<br />
Alignment<br />
DC 50%<br />
98
Infineon Technologies Corp.<br />
June 99<br />
Exercise 7PWM_2 - DAvE Configurations (cont.)<br />
Configure PWM:<br />
Control:<br />
- Configure Channel 1:<br />
- General: Use PWM Channel 1<br />
- PWM Channel Mode Control: Symmetrical PWM<br />
(center aligned)<br />
- Channel Output Enable: Enable Channel 1 output signal<br />
- PWM Timer Start Control: Start PWM Timer 1 after init<br />
- Period: Required Period: 250 us<br />
- Duty Cycle: Required Duty Cycle: 25%<br />
- Save & Close<br />
- Configure Channel 3:<br />
- General: Use PWM Channel 3<br />
- PWM Channel Mode Control: Symmetrical PWM<br />
(center aligned)<br />
- Channel Output Enable: Enable Channel 3 output signal<br />
- PWM Timer Start Control: Start PWM Timer 3 after init<br />
- Period: Required Period: 250 us<br />
- Duty Cycle: Required Duty Cycle: 50%<br />
- Save & Close<br />
<strong>HOT167</strong>-1 Version 2.0<br />
101
Infineon Technologies Corp.<br />
June 99<br />
Exercise 7PWM_2 - DAvE Configurations (cont.)<br />
Configure PWM (cont.)<br />
Functions:<br />
- Include PWM initialization function PWM_vInit<br />
Save & Close<br />
Configure Port 7:<br />
Port 7:<br />
- DAvE has reserved P7.1 and P7.3 for the PWM alternate<br />
functions with 0 as initial output<br />
Functions:<br />
- Include port initialization function IO_vInit<br />
Save & close<br />
Generate Code<br />
<strong>HOT167</strong>-1 Version 2.0<br />
102
Infineon Technologies Corp.<br />
June 99<br />
Exercise 7PWM_2 - µVision2 Configurations<br />
Start µVision2<br />
Open Project c:\hot167_1\7pwm_1\7pwm_1.uv2 (Project | Open Pr.)<br />
Add Files:<br />
Go to Project | Targets, Groups, Files…<br />
Click ‘Groups / Add Files’<br />
Select ‘Source Group 1’<br />
Click ‘Add Files to Group’<br />
Select all C files and click ‘add’<br />
Enter file name ‘start.asm’, click ‘add’ (Assembler Startup File)<br />
Click ‘Close’ and ‘OK’<br />
Double-click all files in the Project Window to open them<br />
Select Target Hardware (kitCON-167):<br />
Go to Project | Options for Target ‘Target 1’<br />
Go to ‘Debug’ tab<br />
Click ‘Settings’ (upper right hand corner)<br />
Monitor configuration: select ‘Phytec KC167’<br />
Click ‘OK’ twice<br />
<strong>HOT167</strong>-1 Version 2.0<br />
103
Infineon Technologies Corp.<br />
June 99<br />
Exercise 7PWM_2 -<br />
µVision2 Configurations (cont.)<br />
Edit MAIN.C:<br />
include endless loop in main():<br />
// USER CODE BEGIN (Main,2)<br />
while(1) {};<br />
// USER CODE END<br />
<strong>HOT167</strong>-1 Version 2.0<br />
104
Infineon Technologies Corp.<br />
June 99<br />
Exercise 7PWM_2 - Screenshot<br />
P7.1 / POUT1<br />
P7.3 / POUT3<br />
Period: 250us<br />
DC 25%<br />
Center<br />
Alignment<br />
DC 50%<br />
<strong>HOT167</strong>-1 Version 2.0<br />
106
Infineon Technologies Corp.<br />
June 99<br />
CAPCOM 1<br />
Function Diagram<br />
P3.0 / T0IN<br />
P2.0 / CC0IO<br />
.<br />
.<br />
.<br />
.<br />
.<br />
.<br />
.<br />
.<br />
.<br />
P2.15 / CC15IO<br />
Clk max<br />
2.5 MHz<br />
from T6<br />
Clk max<br />
2.5 MHz<br />
from T6<br />
Edge Select<br />
for<br />
Capture Input<br />
Input<br />
Mode<br />
Control<br />
Input<br />
Mode<br />
Control<br />
Run<br />
Enable<br />
Run<br />
Enable<br />
<strong>HOT167</strong>-1 Version 2.0<br />
T0 Reload<br />
Timer T0<br />
Sixteen<br />
16 Bit<br />
Capture/<br />
Compare<br />
Register<br />
CC0-CC15<br />
Timer T1<br />
T1 Reload<br />
Mode Control<br />
- Capture Mode<br />
- Compare Mode 0<br />
- Compare Mode 1<br />
- Compare Mode 2<br />
- Compare Mode 3<br />
- Double Register<br />
Compare Mode 0<br />
INTR<br />
Flag<br />
INTR<br />
Flag<br />
INTR<br />
Flag<br />
INTR<br />
Flag<br />
108
Infineon Technologies Corp.<br />
June 99<br />
CAPCOM 2<br />
Function Diagram<br />
P2.15 / T7IN<br />
P8.0/CC16IO-<br />
P8.7 / CC23IO<br />
P1H.4 / CC24IO -<br />
P1H.7 / CC27IO<br />
P7.4/CC28IO-<br />
P7.7 / CC31IO<br />
Clk max<br />
2.5 MHz<br />
from T6<br />
Channel 24 to 27<br />
only Capture<br />
Input possible<br />
Clk max<br />
2.5 MHz<br />
from T6<br />
Edge Select<br />
for<br />
Capture Input<br />
Input<br />
Mode<br />
Control<br />
Input<br />
Mode<br />
Control<br />
Run<br />
Enable<br />
Run<br />
Enable<br />
<strong>HOT167</strong>-1 Version 2.0<br />
T7 Reload<br />
Timer T7<br />
Sixteen<br />
16 Bit<br />
Capture/<br />
Compare<br />
Register<br />
CC16-CC33<br />
Timer T8<br />
T8 Reload<br />
Mode Control<br />
- Capture Mode<br />
- Compare Mode 0<br />
- Compare Mode 1<br />
- Compare Mode 2<br />
- Compare Mode 3<br />
- Double Register<br />
Compare Mode 0<br />
INTR<br />
Flag<br />
INTR<br />
Flag<br />
INTR<br />
Flag<br />
Channel 31 is able to trigger<br />
an ADC Channel Injection<br />
INTR<br />
Flag<br />
109
Infineon Technologies Corp.<br />
June 99<br />
CAPCOM 1/2<br />
Compare Mode 2 and 3<br />
Only one Compare events is possible within a single Timer period<br />
FFFF<br />
Mode 2: only<br />
INTR Flag is set<br />
Mode 3: INTR Flag is set.<br />
Port Pin is set at the first<br />
Compare Event and reset<br />
at Timer overflow<br />
Port Level<br />
P2.x / P8.x / P7.x<br />
Reload Value<br />
Compare Register X: Value 1 Value 2<br />
Compare INTR<br />
is changed to<br />
<strong>HOT167</strong>-1 Version 2.0<br />
Compare Value 2<br />
Compare Value 1<br />
Timer INTR<br />
New<br />
Reload Value<br />
111
Infineon Technologies Corp.<br />
June 99<br />
Exercise 7CC1_1 - Two edge-aligned<br />
PWM Signals with the CAPCOM1 unit<br />
Objective:<br />
Generate an edge-aligned 25% duty cycle PWM Signal using<br />
CAPCOM channel 0 (Period: 26ms) allocated to Timer T0<br />
Generate an edge-aligned 50% duty cycle PWM Signal using<br />
CAPCOM channel 8 (Period: 26ms) allocated to Timer T1<br />
<strong>HOT167</strong>-1 Version 2.0<br />
113
Infineon Technologies Corp.<br />
June 99<br />
Exercise 7CC1_1 - DAvE Configurations<br />
Start DAvE<br />
Create new Project with microcontroller C167CR/CS*<br />
Project name: 7cc1_1<br />
Select project path: c:\hot167_1\7cc1_1<br />
Project Settings:<br />
General:<br />
- Select Keil Compiler, SMALL model<br />
System Clock:<br />
- External Oscillator Frequency: Set to 5 MHz<br />
Startup Configuration:<br />
- Bus Type after Reset: Set to 16 bit DEMUX<br />
- Write Configuration: Pin #WR and #BHE operates as #WRL<br />
and #WRH<br />
Save & close<br />
* C167CS not yet supported by DAvE V1.0 CD ROM. See “Hints regarding DAvE.”<br />
<strong>HOT167</strong>-1 Version 2.0<br />
114
Infineon Technologies Corp.<br />
June 99<br />
Exercise 7CC1_1 - DAvE Configurations (cont.)<br />
Configure CAPCOM1:<br />
Timer 0/1:<br />
- Timer 0 Mode: Timer Mode<br />
- Timer 0 Input Selection: Fcpu / 8 (Resolution 400 ns)<br />
- Timer 0 Reload Register: 0x0000 (this will result in the 26 ms<br />
Period (65535 steps * 400ns = 26 ms))<br />
- Timer 0 Start Control: Start Timer 0 after Initialization<br />
- Timer 1 Mode: Timer Mode<br />
- Timer 1 Input Selection: Fcpu / 8 (Resolution 400 ns)<br />
- Timer 1 Reload Register: 0x0000 (this will result in the 26 ms<br />
Period (65535 steps * 400ns = 26 ms))<br />
- Timer 1 Start Control: Start Timer 1 after Initialization<br />
Channels:<br />
- Configure Channel 0:<br />
- Mode Selection: Enable Compare Mode 3<br />
- Allocation Bit: Allocate Channel 0 to Timer 0<br />
- Capture/Compare Register 0: Set to C000h (25% duty cycle)<br />
- Save & close<br />
<strong>HOT167</strong>-1 Version 2.0<br />
115
Infineon Technologies Corp.<br />
June 99<br />
Exercise 7CC1_1 - DAvE Configurations (cont.)<br />
Configure Port 2:<br />
Port 2:<br />
- DAvE has reserved P2.0 and P2.8 for the CAPCOM alternate<br />
functions with 0 as initial output<br />
Functions:<br />
- Include port initialization function IO_vInit<br />
Save & close<br />
Generate Code<br />
<strong>HOT167</strong>-1 Version 2.0<br />
117
Infineon Technologies Corp.<br />
June 99<br />
Exercise 7CC1_1 - µVision2 Configurations<br />
Start µVision2<br />
Open Project c:\hot167_1\7cc1_1\7cc1_1.uv2 (Project | Open Pr.)<br />
Add Files:<br />
Go to Project | Targets, Groups, Files…<br />
Click ‘Groups / Add Files’<br />
Select ‘Source Group 1’<br />
Click ‘Add Files to Group’<br />
Select all C files and click ‘add’<br />
Enter file name ‘start.asm’, click ‘add’ (Assembler Startup File)<br />
Click ‘Close’ and ‘OK’<br />
Double-click all files in the Project Window to open them<br />
Select Target Hardware (kitCON-167):<br />
Go to Project | Options for Target ‘Target 1’<br />
Go to ‘Debug’ tab<br />
Click ‘Settings’ (upper right hand corner)<br />
Monitor configuration: select ‘Phytec KC167’<br />
Click ‘OK’ twice<br />
<strong>HOT167</strong>-1 Version 2.0<br />
118
Infineon Technologies Corp.<br />
June 99<br />
Exercise 7CC1_1 - Running the Program<br />
Reset Target Hardware (Press Reset Button on Starter Kit)<br />
Build Project (Project | Rebuild Target)<br />
Run integrated Debugger from within µVision2<br />
Debug | Start / Stop Debug Session (click ‘OK’ when prompted)<br />
The Debugger will load the Keil Monitor into the kitCON-167’s RAM<br />
via bootstrap loader<br />
Object file c:\hot167_1\7cc1_1\7cc1_1 will be loaded automatically<br />
and the debugger will go to main().<br />
Go! (Debug | Go)<br />
Program Verification: Connect Scope to<br />
P2.0 / CC0IO (connector X3 pin 85)<br />
P2.8 / CC8IO (connector X3 pin 93)<br />
<strong>HOT167</strong>-1 Version 2.0<br />
120
Infineon Technologies Corp.<br />
June 99<br />
Exercise 7CC1_2 - DAvE Configurations<br />
Start DAvE<br />
Create new Project with microcontroller C167CR/CS*<br />
Project name: 7cc1_2<br />
Select project path: c:\hot167_1\7cc1_2<br />
Project Settings:<br />
General:<br />
- Select Keil Compiler, SMALL model<br />
System Clock:<br />
- External Oscillator Frequency: Set to 5 MHz<br />
Startup Configuration:<br />
- Bus Type after Reset: Set to 16 bit DEMUX<br />
- Write Configuration: Pin #WR and #BHE operates as #WRL<br />
and #WRH<br />
Save & close<br />
* C167CS not yet supported by DAvE V1.0 CD ROM. See “Hints regarding DAvE.”<br />
<strong>HOT167</strong>-1 Version 2.0<br />
123
Infineon Technologies Corp.<br />
June 99<br />
Exercise 7CC1_2 - DAvE Configurations (cont.)<br />
Configure CAPCOM1:<br />
Timer 0/1:<br />
- Timer 0 Mode: Timer Mode<br />
- Timer 0 Input Selection: Fcpu / 8 (Resolution 400 ns)<br />
- Timer 0 Reload Register: 0x0000 (this will result in the 26 ms<br />
Period (65535 steps * 400ns = 26 ms))<br />
- Timer 0 Start Control: Start Timer 0 after Initialization<br />
- Timer 1 Mode: Timer Mode<br />
- Timer 1 Input Selection: Fcpu / 8 (Resolution 400 ns)<br />
- Timer 1 Reload Register: 0x0000 (this will result in the 26 ms<br />
Period (65535 steps * 400ns = 26 ms))<br />
- Timer 1 Start Control: Start Timer 1 after Initialization<br />
Channels:<br />
- Configure Channel 3:<br />
- Mode Selection: Enable Compare Mode 1 (Double Register<br />
Compare Mode with CC11)<br />
- Allocation Bit: Allocate Channel 3 to Timer 0<br />
- Capture/Compare Register 3: Set to 6000h<br />
- Save & close<br />
<strong>HOT167</strong>-1 Version 2.0<br />
124
Infineon Technologies Corp.<br />
June 99<br />
Exercise 7CC1_2 - DAvE Configurations (cont.)<br />
Configure CAPCOM1 (cont.)<br />
Channels (cont.)<br />
- Configure Channel 11:<br />
- Mode Selection: Enable Compare Mode 0 (Double Register<br />
CompareModewithCC3)<br />
- Allocation Bit: Allocate Channel 11 to Timer 0<br />
- Capture/Compare Register 11: Set to A000h<br />
- Save & close<br />
- Configure Channel 4:<br />
- Mode Selection: Enable Compare Mode 1 (Double Register<br />
Compare Mode with CC12)<br />
- Allocation Bit: Allocate Channel 4 to Timer 1<br />
- Capture/Compare Register 4: Set to 4000h<br />
- Save & close<br />
- Configure Channel 12:<br />
- Mode Selection: Enable Compare Mode 0 (Double Register<br />
CompareModewithCC4)<br />
- Allocation Bit: Allocate Channel 12 to Timer 1<br />
- Capture/Compare Register 12: Set to C000h<br />
- Save & close<br />
<strong>HOT167</strong>-1 Version 2.0<br />
125
Infineon Technologies Corp.<br />
June 99<br />
Exercise 7CC1_2 -<br />
µVision2 Configurations (cont.)<br />
Edit MAIN.C:<br />
include endless loop in main():<br />
// USER CODE BEGIN (Main,2)<br />
while(1) {};<br />
// USER CODE END<br />
<strong>HOT167</strong>-1 Version 2.0<br />
128
Infineon Technologies Corp.<br />
June 99<br />
Exercise 7CC2_1 - Signal Generation with<br />
CAPCOM1, Signal Detection with CAPCOM2<br />
Objective:<br />
Generate an edge-aligned 50% duty cycle PWM Signal using<br />
CAPCOM1 channel 0 (Period: 26ms) allocated to Timer T0<br />
React on this signal with CAPCOM2 (Channel 16, P8.0 / CC16IO<br />
which shall be allocated to Timer 7).<br />
Let Capture Input channel 16 (CC16) generate an interrupt every<br />
time a rising edge is detected in the signal of Compare Output<br />
Channel 0 (CC0). (In addition to that, the value of Timer 7 is<br />
automatically captured into Capture/Compare Register 16.)<br />
In the ISR of CC16, toggle pin P8.1<br />
kitCON-167 Configurations:<br />
Connect pin P2.0 / CC0IO (connector X3 pin 85)<br />
with pin 8.0 / CC16IO (connector X3 pin 125):<br />
P2.0 / CC0IO<br />
Signal Output<br />
(X3 pin 85)<br />
<strong>HOT167</strong>-1 Version 2.0<br />
P8.0 / CC16IO<br />
Signal Detection<br />
(X3 pin 125)<br />
131
Infineon Technologies Corp.<br />
June 99<br />
Exercise 7CC2_1 - DAvE Configurations<br />
Start DAvE<br />
Create new Project with microcontroller C167CR/CS*<br />
Project name: 7cc2_1<br />
Select project path: c:\hot167_1\7cc2_1<br />
Project Settings:<br />
General:<br />
- Select Keil Compiler, SMALL model<br />
System Clock:<br />
- External Oscillator Frequency: Set to 5 MHz<br />
Startup Configuration:<br />
- Bus Type after Reset: Set to 16 bit DEMUX<br />
- Write Configuration: Pin #WR and #BHE operates as #WRL<br />
and #WRH<br />
Save & close<br />
* C167CS not yet supported by DAvE V1.0 CD ROM. See “Hints regarding DAvE.”<br />
<strong>HOT167</strong>-1 Version 2.0<br />
132
Infineon Technologies Corp.<br />
June 99<br />
Exercise 7CC2_1 - DAvE Configurations (cont.)<br />
Configure CAPCOM1:<br />
Timer 0/1:<br />
- Timer 0 Mode: Timer Mode<br />
- Timer 0 Input Selection: Fcpu / 8 (Resolution 400 ns)<br />
- Timer 0 Reload Register: 0x0000 (this will result in the 26 ms<br />
Period (65535 steps * 400ns = 26 ms))<br />
- Timer 0 Start Control: Start Timer 0 after Initialization<br />
Channels:<br />
- Configure Channel 0:<br />
- Mode Selection: Enable Compare Mode 3<br />
- Allocation Bit: Allocate Channel 0 to Timer 0<br />
- Capture/Compare Register 0: Set to 8000h (50% duty cycle)<br />
- Save & close<br />
Functions:<br />
- Include CAPCOM1 initialization function CC1_vInit<br />
Save & close<br />
<strong>HOT167</strong>-1 Version 2.0<br />
133
Infineon Technologies Corp.<br />
June 99<br />
Exercise 7CC2_1 - DAvE Configurations (cont.)<br />
Configure CAPCOM2:<br />
Timer 7/8:<br />
- Timer 7 Mode: Timer Mode<br />
- Timer 7 Input Selection: Fcpu / 8 (Resolution 400 ns)<br />
- Timer 7 Reload Register: 0x0000 (this will result in the 26 ms<br />
Period (65535 steps * 400ns = 26 ms))<br />
- Timer 7 Start Control: Start Timer 7 after Initialization<br />
Channels:<br />
- Configure Channel 16:<br />
- Mode Selection: Capture on positive transition at pin CC16IO<br />
- Allocation Bit: Allocate Channel 16 to Timer 7<br />
- Interrupt Control: Enable Capture Interrupt<br />
- Save & close<br />
Interrupts:<br />
- Select an Interrupt Level for CAPCOM2 Channel 16 Interrupt<br />
Functions:<br />
- Include CAPCOM2 initialization function CC2_vInit<br />
Save & close<br />
<strong>HOT167</strong>-1 Version 2.0<br />
134
Infineon Technologies Corp.<br />
June 99<br />
Exercise 7CC2_1 - µVision2 Configurations<br />
Start µVision2<br />
Open Project c:\hot164_1\4cc6_1\4cc6_1.uv2 (Project | Open Pr.)<br />
Add Files:<br />
Go to Project | Targets, Groups, Files…<br />
Click ‘Groups / Add Files’<br />
Select ‘Source Group 1’<br />
Click ‘Add Files to Group’<br />
Select all C files and click ‘add’<br />
Enter file name ‘start.asm’, click ‘add’ (Assembler Startup File)<br />
Click ‘Close’ and ‘OK’<br />
Double-click all files in the Project Window to open them<br />
Select Target Hardware (kitCON-164):<br />
Go to Project | Options for Target ‘Target 1’<br />
Go to ‘Debug’ tab<br />
Click ‘Settings’ (upper right hand corner)<br />
Monitor configuration: select ‘Phytec KC164’<br />
Click ‘OK’ twice<br />
<strong>HOT167</strong>-1 Version 2.0<br />
136
Infineon Technologies Corp.<br />
June 99<br />
Exercise 7CC2_1 - Running the Program<br />
Reset Target Hardware (Press Reset Button on Starter Kit)<br />
Build Project (Project | Rebuild Target)<br />
Run integrated Debugger from within µVision2<br />
Debug | Start / Stop Debug Session (click ‘OK’ when prompted)<br />
The Debugger will load the Keil Monitor into the kitCON-167’s RAM<br />
via bootstrap loader<br />
Object file c:\hot167_1\7cc2_1\7cc2_1 will be loaded automatically<br />
and the debugger will go to main().<br />
Go! (Debug | Go)<br />
Program Verification:<br />
Connect Scope to P2.0 / CC0IO (connector X3 pin 85)<br />
and P8.1 (connector X3 pin 129)<br />
<strong>HOT167</strong>-1 Version 2.0<br />
138
Infineon Technologies Corp.<br />
June 99<br />
Exercise 7CC2_1 -<br />
Screenshot<br />
P2.0 / CC0IO<br />
P8.1<br />
Rising Edges in the signal<br />
ISR toggles P8.1<br />
<strong>HOT167</strong>-1 Version 2.0<br />
139
Infineon Technologies Corp.<br />
June 99<br />
Analog Digital Converter<br />
(ADC)<br />
10-Bit ADC based on the successive approximation principle<br />
9.7µs conversion-time<br />
On-chip Sample & Hold circuit (1.6 us sample-time)<br />
16 Multiplexed input channels on C167CR, 24 on C167CS<br />
Automatic self-calibration after conversion<br />
Flexible operation mode<br />
Single-channel and single-channel-continuous for periodic data<br />
acquisition<br />
Auto-scan and auto-scan-continuous for permanent data tracking<br />
Channel-injection mode with own result-register can be used to<br />
interrupt the scan modes<br />
Easy error handling and channel identification<br />
10-bit result and channel number in result register<br />
Overrun error check<br />
<strong>HOT167</strong>-1 Version 2.0<br />
140
Infineon Technologies Corp.<br />
June 99<br />
10-Bit A/D Converter<br />
Block Diagram<br />
P5.0**/AN0<br />
.<br />
.<br />
.<br />
.<br />
P5.15**/AN15<br />
Analog<br />
Inputs<br />
Reference<br />
Voltage<br />
Channel and Mode Control Conversion Control<br />
16*<br />
Channel<br />
Analog<br />
MUX<br />
C-NET<br />
Comparator<br />
Switch<br />
Tree<br />
Channel<br />
Information<br />
Channel<br />
Selection<br />
<strong>HOT167</strong>-1 Version 2.0<br />
Timing<br />
Control<br />
and<br />
Successive<br />
Approximation<br />
Register<br />
Result Register<br />
INTR<br />
Flag<br />
INTR<br />
Flag<br />
Result Register for Channel Injection Mode<br />
* C167CS has 24 ADC channels<br />
** the analog signal inputs of the C167CS are fetched from port P1L.0 - P1L.7<br />
141
Infineon Technologies Corp.<br />
June 99<br />
Exercise 7ADC_1 - Control the Pulse Width of a<br />
PWM signal with a PEC-transferred ADC Value<br />
Objective:<br />
Control the Pulse Width of PWM channel 2 from 0% to 100% with<br />
PEC-transferred ADC Value from ADC Channel 0.<br />
(external potentiometer necessary. Hint: won’t run like this with any<br />
other A/D channel except channel 0 because of the channel<br />
number integrated in the A/D conversion result)<br />
kitCON-167 Configurations:<br />
Connect a potentiometer to analog input channel 1 (>= 10kOhm)<br />
and connect ADC input pins 0 and 1 (with jumper or cable):<br />
GND<br />
(e.g. X3 pin 3<br />
or X3 pin 4)<br />
A/D input<br />
channel 1<br />
P5.1 / AN1<br />
(X3 pin 73)<br />
<strong>HOT167</strong>-1 Version 2.0<br />
A/D input<br />
channel 0<br />
P5.0 / AN0<br />
(X3 pin 69)<br />
Vcc<br />
(e.g. X3 pin 1<br />
or X3 pin 2)<br />
142
Infineon Technologies Corp.<br />
June 99<br />
Exercise 7ADC_1 - DAvE Configurations (cont.)<br />
Configure ADC:<br />
Control:<br />
- Mode Selection: Fixed channel continuous conversion<br />
- Analog Channel Input Selection: Analog Channel 0<br />
- Start Bit: Start Conversion after Initialization<br />
- Interrupt Control: Enable end-of-conversion Interrupt<br />
Interrupts:<br />
- Allocate ADC Conversion Interrupt to IR Level 14, Group Level<br />
3 (PEC channel 3)<br />
PEC: Click to configure channel 3 for ADC Conversion<br />
- Transfer Count: Continuous Transfer<br />
- Increment Control: Pointers are not modified<br />
- Byte / Word Transfer: Transfer a Word<br />
- Pointers:<br />
- Select ADC Result Register ADDAT as Source Pointer<br />
- Select PWM Pulse Width Register 2 (PW2) as Destination<br />
Pointer<br />
- Save & close<br />
<strong>HOT167</strong>-1 Version 2.0<br />
144
Infineon Technologies Corp.<br />
June 99<br />
Exercise 7ADC_1 - DAvE Configurations (cont.)<br />
Configure ADC (cont)<br />
Functions:<br />
- Include ADC initialization function ADC_vInit<br />
Save & close<br />
Configure PWM:<br />
Control:<br />
- Configure Channel 2:<br />
- General: Use PWM Channel 2<br />
- PWM Channel Mode Control: Standard PWM (edge aligned)<br />
- Channel Output Enable: Enable Channel 2 output signal<br />
- PWM Timer Start Control: Start PWM Timer 2 after init<br />
- Period: Required Period: 50 us<br />
- Duty Cycle: Required Duty Cycle: 0% (just as an initial value)<br />
- Save & Close<br />
Functions:<br />
- Include PWM initialization function PWM_vInit<br />
Save & Close<br />
Generate Code<br />
<strong>HOT167</strong>-1 Version 2.0<br />
145
Infineon Technologies Corp.<br />
June 99<br />
Exercise 7ADC_1 - µVision2 Configuration<br />
Start µVision2<br />
Open Project c:\hot167_1\7adc_1\7adc_1.uv2 (Project | Open Pr.)<br />
Add Files:<br />
Go to Project | Targets, Groups, Files…<br />
Click ‘Groups / Add Files’<br />
Select ‘Source Group 1’<br />
Click ‘Add Files to Group’<br />
Select all C files and click ‘add’<br />
Enter file name ‘start.asm’, click ‘add’ (Assembler Startup File)<br />
Click ‘Close’ and ‘OK’<br />
Double-click all files in the Project Window to open them<br />
Select Target Hardware (kitCON-167):<br />
Go to Project | Options for Target ‘Target 1’<br />
Go to ‘Debug’ tab<br />
Click ‘Settings’ (upper right hand corner)<br />
Monitor configuration: select ‘Phytec KC167’<br />
Click ‘OK’ twice<br />
<strong>HOT167</strong>-1 Version 2.0<br />
146
Infineon Technologies Corp.<br />
June 99<br />
Exercise 7ADC_1 - Running the Program<br />
Reset Target Hardware (Press Reset Button on Starter Kit)<br />
Build Project (Project | Rebuild Target)<br />
Run integrated Debugger from within µVision2<br />
Debug | Start / Stop Debug Session (click ‘OK’ when prompted)<br />
The Debugger will load the Keil Monitor into the kitCON-167’s RAM<br />
via bootstrap loader<br />
Object file c:\hot167_1\7adc_1\7adc_1 will be loaded automatically<br />
and the debugger will go to main().<br />
Go! (Debug | Go)<br />
Program Verification:<br />
Connect Scope to P7.2 / POUT2 (Connector X3 pin 118)<br />
(no screenshot is included for this exercise)<br />
<strong>HOT167</strong>-1 Version 2.0<br />
148
Infineon Technologies Corp.<br />
June 99<br />
Exercise 7ADC_2 - DAvE Configurations (cont.)<br />
Configure ADC:<br />
Control:<br />
- Mode Selection: Fixed channel continuous conversion<br />
- Analog Channel Input Selection: Analog Channel 1<br />
- Start Bit: Start Conversion after Initialization<br />
- Interrupt Control: Enable end-of-conversion Interrupt<br />
Interrupts:<br />
- Allocate ADC Conversion Interrupt to IR Level 14, Group Level<br />
3 (but we don’t want PEC service this time)<br />
(PEC: Click to configure channel 3 for ADC Conversion<br />
- Transfer Count: NORMAL INTERRUPT (default)<br />
- Save & close or cancel)<br />
Functions:<br />
- Include ADC initialization functions ADC_vInit and<br />
ADC_uwReadConv<br />
Save & close<br />
<strong>HOT167</strong>-1 Version 2.0<br />
151
Infineon Technologies Corp.<br />
June 99<br />
Exercise 7ADC_2 - DAvE Configurations (cont.)<br />
Configure PWM:<br />
Control:<br />
- Configure Channel 0:<br />
- General: Use PWM Channel 0<br />
- PWM Channel Mode Control: Standard PWM (edge aligned)<br />
- Channel Output Enable: Enable Channel 0 output signal<br />
- PWM Timer Start Control: Start PWM Timer 0 after init<br />
- Period: Required Period: 3000 us (just as an initial value)<br />
- Duty Cycle: Required Duty Cycle: 50% (just as an initial value)<br />
- Save & Close<br />
Functions:<br />
- Include PWM initialization function PWM_vInit<br />
- Include PWM_vSetPeriod(Channel,Value)<br />
- Include PWM_vSetPw(Channel,Value)<br />
Save & Close<br />
Generate Code<br />
<strong>HOT167</strong>-1 Version 2.0<br />
152
Infineon Technologies Corp.<br />
June 99<br />
Exercise 7ADC_2 - µVision2 Configurations<br />
Start µVision2<br />
Open Project c:\hot167_1\7adc_2\7adc_2.uv2 (Project | Open Pr.)<br />
Add Files:<br />
Go to Project | Targets, Groups, Files…<br />
Click ‘Groups / Add Files’<br />
Select ‘Source Group 1’<br />
Click ‘Add Files to Group’<br />
Select all C files and click ‘add’<br />
Enter file name ‘start.asm’, click ‘add’ (Assembler Startup File)<br />
Click ‘Close’ and ‘OK’<br />
Double-click all files in the Project Window to open them<br />
Select Target Hardware (kitCON-167):<br />
Go to Project | Options for Target ‘Target 1’<br />
Go to ‘Debug’ tab<br />
Click ‘Settings’ (upper right hand corner)<br />
Monitor configuration: select ‘Phytec KC167’<br />
Click ‘OK’ twice<br />
<strong>HOT167</strong>-1 Version 2.0<br />
153
Infineon Technologies Corp.<br />
June 99<br />
Exercise 7ADC_2 -<br />
µVision2 Configurations (cont.)<br />
void ADC_viIsrConv(void) interrupt ADCINT<br />
{<br />
// USER CODE BEGIN (ADC_IsrConv,1)<br />
unsigned int adc_result;<br />
adc_result=ADC_uwReadConv();<br />
// get ADC conversion value<br />
adc_result=adc_result & 0x3ff;<br />
// … and get rid of channel number<br />
PWM_vSetPeriod(PWM_REG0,adc_result);<br />
// load Period Register 0 with adc conversion<br />
PWM_vSetPw(PWM_REG0,adc_result/2);<br />
// load Pulse Width register 0 with adc/2<br />
// USER CODE END<br />
}<br />
<strong>HOT167</strong>-1 Version 2.0<br />
155
Infineon Technologies Corp.<br />
June 99<br />
Exercise 7SSC_1 - Synchronous Serial Transm.<br />
of ADC Conversion Results (10 bits) at 5 Mbit/s<br />
Objective:<br />
Use the Synchronous Serial Channel to transmit the 10 bits of the<br />
ADC conversion result of ADC channel 1 at 5 Mbit/s, LSB first, Idle<br />
Clock low, every time a new ADC conversion result is available.<br />
Use a PEC Transfer to move ADC Conversion Value of channel 1<br />
to the SSC Transmit Buffer on every ADC Interrupt Event.<br />
Use the ADC Interrupt Service Routine to reload the PEC counter<br />
at every 5th conversion<br />
(to demonstrate how to do a certain number of PEC transfers and<br />
then react on the following Interrupt Service Routine)<br />
Hint: external potentiometer necessary. See next page.<br />
<strong>HOT167</strong>-1 Version 2.0<br />
159
Infineon Technologies Corp.<br />
June 99<br />
Exercise 7SSC_1 (cont.)<br />
kitCON-167 Configurations:<br />
Connect a potentiometer to analog input channel 1:<br />
(>= 10kOhm) :<br />
GND<br />
(e.g. X3 pin 3<br />
or X3 pin 4)<br />
A/D input channel 1<br />
P5.1 / AN1<br />
(X3 pin 73)<br />
<strong>HOT167</strong>-1 Version 2.0<br />
Vcc<br />
(e.g. X3 pin 1<br />
or X3 pin 2)<br />
160
Infineon Technologies Corp.<br />
June 99<br />
Exercise 7SSC_1 - DAvE Configurations<br />
Start DAvE<br />
Create new Project with microcontroller C167CR/CS*<br />
Project name: 7ssc_1<br />
Select project path: c:\hot167_1\7ssc_1<br />
Project Settings:<br />
General:<br />
- Select Keil Compiler, SMALL model<br />
System Clock:<br />
- External Oscillator Frequency: Set to 5 MHz<br />
Startup Configuration:<br />
- Bus Type after Reset: Set to 16 bit DEMUX<br />
- Write Configuration: Pin #WR and #BHE operates as #WRL<br />
and #WRH<br />
Save & close<br />
* C167CS not yet supported by DAvE V1.0 CD ROM. See “Hints regarding DAvE.”<br />
<strong>HOT167</strong>-1 Version 2.0<br />
161
Infineon Technologies Corp.<br />
June 99<br />
Exercise 7SSC_1 - DAvE Configurations (cont.)<br />
Configure SSC:<br />
Control:<br />
- Enable Bit: Enable transmission and reception<br />
- Master Select: Master Mode<br />
- Data Control:<br />
- Data Width 10 bits<br />
- Transmit LSB first<br />
- Clock Phase Control: Shift Transmit data on leading clock<br />
edge, latch on trailing edge (not important for this example)<br />
- Clock Polarity Control: Idle Clock line is low<br />
Baudrate:<br />
- Required Baudrate: 5000 kBaud<br />
Functions:<br />
- Include SSC initialization function SSC_vInit<br />
Save & close<br />
<strong>HOT167</strong>-1 Version 2.0<br />
162
Infineon Technologies Corp.<br />
June 99<br />
Exercise 7SSC_1 - DAvE Configurations (cont.)<br />
Configure ADC (cont)<br />
Functions:<br />
- Include ADC initialization function ADC_vInit<br />
Save & close<br />
Generate Code<br />
<strong>HOT167</strong>-1 Version 2.0<br />
164
Infineon Technologies Corp.<br />
June 99<br />
Exercise 7SSC_1 - Running the Program<br />
Reset Target Hardware (Press Reset Button on Starter Kit)<br />
Build Project (Project | Rebuild Target)<br />
Run integrated Debugger from within µVision2<br />
Debug | Start / Stop Debug Session (click ‘OK’ when prompted)<br />
The Debugger will load the Keil Monitor into the kitCON-167’s RAM<br />
via bootstrap loader<br />
Object file c:\hot167_1\7ssc_1\7ssc_1 will be loaded automatically<br />
and the debugger will go to main().<br />
Go! (Debug | Go)<br />
Program Verification:<br />
Connect Scope to P3.13 / SCLK (connector X3 pin 115)<br />
and P3.9 / MTSR (connector X3 pin 113)<br />
<strong>HOT167</strong>-1 Version 2.0<br />
167
Infineon Technologies Corp.<br />
June 99<br />
Exercise 7SSC_1 - Screenshot<br />
P3.13 / SCLK<br />
P3.9 / MTSR<br />
10 Clock pulses from the SSC<br />
for10bitstobetransmitted:<br />
Speed: 5 Mbaud<br />
LSB MSB<br />
ADC Result<br />
<strong>HOT167</strong>-1 Version 2.0<br />
168
Infineon Technologies Corp.<br />
June 99<br />
Asynchronous / Synchronous Serial Channel<br />
(USART) (20MHz)<br />
Synchronous / asynchronous serial channel with its own baudrate-generator<br />
Asynchronous mode with max 625 KBaud transfer rate<br />
Full duplex (receive and transmit at the same time)<br />
programmable features:<br />
1 or 2 stop bits, 7, 8 or 9 data bits<br />
Generation of parity- or wake-up bit at data transmission<br />
Odd or even parity<br />
Error detection (parity, overrun, framing)<br />
Wake-up check (receive int. flag is set if wake-up bit is true)<br />
Synchronous mode with max 2.5 Mbit/sec transfer range<br />
Half duplex operation (only transmit or receive possible)<br />
Easy I/O expansion with external shift register<br />
Overrun error detection<br />
<strong>HOT167</strong>-1 Version 2.0<br />
169
Infineon Technologies Corp.<br />
June 99<br />
Exercise 7ASC_1 - Asynchronous Serial<br />
Transmission of Ascii-Characters<br />
Objective:<br />
Use the Asynchronous Serial Channel to transmit consecutive Ascii<br />
characters to the PC<br />
Use Timer 3 interrupt service routine to write the next character to<br />
the ASC Transmit Buffer on every Timer 3 underflow<br />
Timer 3 shall underflow every 10ms (use Timer 4 for reload)<br />
<strong>HOT167</strong>-1 Version 2.0<br />
171
Infineon Technologies Corp.<br />
June 99<br />
Exercise 7ASC_1 - DAvE Configurations (cont.)<br />
Configure GPT1:<br />
Core Timer 3:<br />
- Timer 3 Mode: Timer Mode<br />
- Up/Down Control: Count down<br />
- Timer Start: Start T3 after initialization<br />
- Input Selection: Fcpu/16 (this results in a resolution of 0.8us<br />
and a period of 52.4ms)<br />
- Timer Register: Load T3 Register with 10ms value<br />
((10ms / 0.8us) in HEX) (0x30d4)<br />
- Interrupt Control: Enable Timer 3 interrupt<br />
Auxiliary Timer 4:<br />
- Timer 4 Mode: Reload Timer 3 with T4<br />
- Timer Register: Load T4 Register with 10ms value<br />
((10ms / 0.8us) in HEX) (0x30d4)<br />
- Input Selection: Any transition of output toggle latch T3OTL<br />
<strong>HOT167</strong>-1 Version 2.0<br />
173
Infineon Technologies Corp.<br />
June 99<br />
Exercise 7ASC_1 - µVision2 Configurations<br />
Start µVision2<br />
Open Project c:\hot167_1\7asc_1\7asc_1.uv2 (Project | Open Pr.)<br />
Add Files:<br />
Go to Project | Targets, Groups, Files…<br />
Click ‘Groups / Add Files’<br />
Select ‘Source Group 1’<br />
Click ‘Add Files to Group’<br />
Select all C files and click ‘add’<br />
Enter file name ‘start.asm’, click ‘add’ (Assembler Startup File)<br />
Click ‘Close’ and ‘OK’<br />
Double-click all files in the Project Window to open them<br />
Select Target Hardware (kitCON-167):<br />
Go to Project | Options for Target ‘Target 1’<br />
Go to ‘Debug’ tab<br />
Click ‘Settings’ (upper right hand corner)<br />
Monitor configuration: select ‘Phytec KC167’<br />
Click ‘OK’ twice<br />
<strong>HOT167</strong>-1 Version 2.0<br />
175
Infineon Technologies Corp.<br />
June 99<br />
Exercise 7ASC_1 -<br />
µVision2 Configurations (cont.)<br />
Edit MAIN.C:<br />
include endless loop in main():<br />
// USER CODE BEGIN (Main,2)<br />
while(1) {};<br />
// USER CODE END<br />
Edit GT1.C:<br />
Define Global Variable ascii_char:<br />
// USER CODE BEGIN (GT1_General,2)<br />
unsigned char ascii_char;<br />
// USER CODE END<br />
In Timer 3 Interrupt Service Routine (GT1_viIsrTmr3(void)):<br />
Write ascii_char to ASC and increment ascii_char:<br />
// USER CODE BEGIN (GT1_IsrTmr3,1)<br />
ASC_vSendData(ascii_char++);<br />
// USER CODE END<br />
<strong>HOT167</strong>-1 Version 2.0<br />
176
Infineon Technologies Corp.<br />
June 99<br />
Infineon, The CAN<br />
Reference!<br />
<strong>HOT167</strong>-1 Version 2.0<br />
179
Infineon Technologies Corp.<br />
June 99<br />
User Benefits<br />
CAN is low cost<br />
Serial bus with two wires: good price/performance ratio<br />
Low cost protocol devices available driven by high volume<br />
production in the automotive and industrial markets<br />
About 15.000.000 CAN nodes in use so far<br />
CAN is reliable<br />
Sophisticated error detection and error handling mechanisms<br />
results in high reliability transmission<br />
Example: 500 kbit/s, 25% bus load, 2000 hours per year:<br />
One undetected error every 1000 years<br />
Erroneous messages are detected and repeated<br />
Every bus node is informed about an error<br />
High immunity to Electromagnetic Interference<br />
<strong>HOT167</strong>-1 Version 2.0<br />
180
Infineon Technologies Corp.<br />
June 99<br />
Higher Layer Protocols (cont.)<br />
CANopen (CiA DS-301)<br />
Application profile based on CAL<br />
While CAL determines the way of communicating, an Application<br />
Profile determines the meaning of specific messages for the<br />
respective application<br />
Target: device interchangeability for certain applications<br />
Further higher level protocols / standards:<br />
Automotive Sector: VOLCANO, OSEK (in development)<br />
Industrial Automation: DeviceNet (ODVA),<br />
SDS (Honeywell)<br />
<strong>HOT167</strong>-1 Version 2.0<br />
184
Infineon Technologies Corp.<br />
June 99<br />
Application Examples (cont.)<br />
CAN in trains<br />
High need of data exchange between the different electronic<br />
subsystem control units<br />
Mainly data about acceleration, braking, door control, error<br />
messages etc. but also for diagnosis<br />
CAN in industrial automation<br />
Excellent way of connecting all kinds of automation equipment<br />
(control units, sensors and actuators)<br />
Used for initialization, program and parameter up-/download,<br />
exchange of rated values / actual values, diagnosis etc.<br />
Machine control (printing machines, paper- and textile machines<br />
etc.): Connection of the different intelligent subsystems<br />
Transport systems<br />
<strong>HOT167</strong>-1 Version 2.0<br />
186
Infineon Technologies Corp.<br />
June 99<br />
Some things worth knowing about CAN<br />
Developed in the mid-eighties by BOSCH<br />
Asynchronous serial bus with linear bus structure and equal<br />
nodes (Multi Master bus)<br />
CAN does not address nodes (address information is inside the<br />
messages combined with message priority)<br />
Two bus states: dominant and recessive<br />
Bus logic according to "Wired-AND" mechanism:<br />
dominant bits (Zeros) override recessive bits (Ones)<br />
Bus Access via CSMA/CD with NDA (Carrier Sense Multiple<br />
Access/ Collision Detection with Non-Destructive Arbitration)<br />
<strong>HOT167</strong>-1 Version 2.0<br />
188
Infineon Technologies Corp.<br />
June 99<br />
Some things worth knowing about CAN (cont.)<br />
NODE A<br />
NODE B<br />
bus idle<br />
CAN BUS<br />
Node B sends out recessive<br />
but reads back dominant level<br />
<strong>HOT167</strong>-1 Version 2.0<br />
recessive<br />
dominant<br />
recessive<br />
dominant<br />
recessive<br />
dominant<br />
Node B loses arbitration<br />
and switches to receive<br />
189
Infineon Technologies Corp.<br />
June 99<br />
Typical CAN node structure<br />
Application<br />
Host-Controller<br />
CAN-Controller<br />
CAN-<br />
Transceiver<br />
CAN-Bus<br />
CAN_H<br />
CAN_L<br />
Node A Node B<br />
e.g.<br />
ABS<br />
e.g.<br />
80C166<br />
e.g.<br />
SAE81C90<br />
<strong>HOT167</strong>-1 Version 2.0<br />
e.g.<br />
EMS<br />
e.g.<br />
C167CR<br />
or<br />
C515C<br />
CAN<br />
(more nodes)<br />
U Diff<br />
190
Infineon Technologies Corp.<br />
June 99<br />
CAN Data Frames<br />
There are mainly two ways of communicating:<br />
One node is 'talking', all other nodes 'listen'<br />
Node A is asking Node B for something and gets the answer.<br />
To 'talk', CAN nodes use Data Frames.<br />
A Data Frame consists of an Identifier, the data to be<br />
transmittedand a CRC-Checksum.<br />
Identifier Data Field (0..8 Bytes)<br />
CRC-Field<br />
<strong>HOT167</strong>-1 Version 2.0<br />
191
Infineon Technologies Corp.<br />
June 99<br />
CAN Data Frames (cont.)<br />
The identifier specifies the contents of the message<br />
('engine speed', 'oil temperature', etc.) and the message priority<br />
The Data Field contains the corresponding value<br />
('6000 rpm', '110°C', etc.)<br />
The Cyclic Redundancy Check is used to detect transmission<br />
errors.<br />
All nodes receive the Data Frame. Those who do not need the<br />
information, just don't store it.<br />
<strong>HOT167</strong>-1 Version 2.0<br />
192
Infineon Technologies Corp.<br />
June 99<br />
CAN Remote Frame Scenario<br />
Node A<br />
How hot is the oil ?<br />
Remote Frame; Identifier 'oil_tmp'<br />
115 °C !<br />
Data Frame; Identifier 'oil_tmp';<br />
contains desired information<br />
<strong>HOT167</strong>-1 Version 2.0<br />
Node B<br />
(oil temp.sensor)<br />
~~~~~<br />
~~~~~<br />
115°C<br />
194
Infineon Technologies Corp.<br />
June 99<br />
Standard CAN / Extended CAN<br />
Most CAN nodes talk in the 'language' that most other CAN nodes<br />
understand: They use Standard Data or Remote Frames.<br />
A Standard Frame contains an identifier which is 11 bits long.<br />
With this 11 bits, 211 (=2048) different messages can be<br />
addressed.<br />
CAN nodes using Standard-CAN-Frames use the CAN<br />
Specification Version 2.0A.<br />
Some CAN nodes talk with a special 'accent':<br />
They use Extended Data or Remote Frames.<br />
An Extended Frame contains an identifier which is 29 bits long.<br />
<strong>HOT167</strong>-1 Version 2.0<br />
195
Infineon Technologies Corp.<br />
June 99<br />
Standard CAN / Extended CAN (cont.)<br />
Over 536 million (229) different messages can be addressed.<br />
CAN nodes using Extended-CAN-Frames use the CAN<br />
Specification Version 2.0B (active).<br />
Some Standard-CAN nodes don't understand this 'accent', but<br />
they tolerate it and just don't care.<br />
If an Extended Frame is 'on the air', these CAN nodes cannot store<br />
the data, but they as well do not produce errors.<br />
These CAN nodes use CAN Version 2.0A, but are also known as<br />
Version 2.0B passive.<br />
They can be used in a Controller Area Network where Extended<br />
Frames are used.<br />
<strong>HOT167</strong>-1 Version 2.0<br />
196
Infineon Technologies Corp.<br />
June 99<br />
Standard CAN / Extended CAN (cont.)<br />
Some Standard-CAN nodes don't understand and also don't<br />
tolerate this 'accent'.<br />
If an Extended Frame is 'on the air', these CAN nodes produce<br />
errors.<br />
These CAN nodes use only CAN Version 2.0A.<br />
They can not be used in a Controller Area Network where Extended<br />
Frames are used.<br />
Infineon 16 bit parts: C161xx, C167CR/CS, C164CI: V2.0B active<br />
<strong>HOT167</strong>-1 Version 2.0<br />
197
Infineon Technologies Corp.<br />
June 99<br />
Basic CAN / Full CAN<br />
In some CAN controllers, only the basic CAN functions are<br />
implemented. They are called Basic-CAN controllers.<br />
Mostly there's only one transmit buffer and one or two receive<br />
buffers for transmission and reception of the Data- / Remote<br />
Frames.<br />
Each incoming message is stored. The host CPU has to decide<br />
whether the message data is needed or not.<br />
Therefore these controllers should only be used in CANs with very<br />
low baudrates and/or very few messages because of the high CPU<br />
load. Advantage: They use the least possible silicon area.<br />
CAN Bus<br />
Receive Buffer<br />
Transmit Buffer<br />
Basic-CAN Controller<br />
<strong>HOT167</strong>-1 Version 2.0<br />
Host CPU<br />
low high<br />
CPU load<br />
Messages<br />
to be sent<br />
Received<br />
Messages<br />
198
Infineon Technologies Corp.<br />
June 99<br />
Basic CAN / Full CAN (cont.)<br />
In the other CAN controllers, also message management and<br />
acceptance filtering are implemented. They are called Full-CAN<br />
controllers.<br />
There are several Message Objects, each with its own identifier.<br />
Only if a message for one of these preprogrammed identifier is<br />
received, it is stored and the CPU is interrupted.<br />
In this way, the CPU load is low.<br />
CAN Bus<br />
Acceptance<br />
Filtering<br />
Message Object 1<br />
Message Object 2<br />
.<br />
.<br />
Message Object n CPU load<br />
Full-CAN Controller<br />
<strong>HOT167</strong>-1 Version 2.0<br />
Message<br />
Management<br />
All Infineon CAN-Controllers are Full-CAN controllers.<br />
But they also provide Basic-CAN functionality.<br />
<br />
low high<br />
Host CPU<br />
199
Infineon Technologies Corp.<br />
June 99<br />
Features of the CAN Module<br />
on the C167CR/CS<br />
Functionality corresponds to AN 82527<br />
Complies with CAN spec V2.0B active<br />
(Standard- und Extended-CAN)<br />
Maximum CAN Transfer Rate<br />
(1 MBit/s)<br />
Full CAN Device<br />
15 Message Objects with their own<br />
identifier and their own status and<br />
control bits<br />
Each Message Object can be defined<br />
as Transmit or Receive Object<br />
<strong>HOT167</strong>-1 Version 2.0<br />
200
Infineon Technologies Corp.<br />
June 99<br />
Features of the CAN Module on the C167CR/CS<br />
(cont.)<br />
Programmable Mask Registers for Acceptance Filtering<br />
Global Mask for incoming Messages (Full-CAN-Objects)<br />
Additional Mask for Message Object 15<br />
(Basic-CAN-Feature)<br />
Basic CAN Feature (Message Object 15)<br />
Equipped with two Receive Buffers<br />
Own Global Mask Register for Acceptance Filtering<br />
Connection to the Host CPU (C166-Core)<br />
Module access via chip-internal XBUS<br />
(16-bit demultiplexed mode)<br />
Interrupt connection to the CPU; Flexible interrupt event control<br />
To connect the application to CAN only a CAN transceiver is<br />
needed<br />
<strong>HOT167</strong>-1 Version 2.0<br />
201
Infineon Technologies Corp.<br />
June 99<br />
Connecting the C167CR/CS to CAN<br />
Connection<br />
to the<br />
Application<br />
Pa.b<br />
Pc.d<br />
C164CI<br />
P4.5<br />
CAN_RxD<br />
P4.6<br />
CAN_TxD<br />
E.g. P8.0<br />
R(opt)<br />
<strong>HOT167</strong>-1 Version 2.0<br />
CAN-Bus<br />
Transceiver<br />
Receive<br />
CAN_H<br />
Transmit<br />
CAN_L<br />
(Standby)<br />
Vref<br />
n.c.<br />
CAN_L<br />
CAN_H<br />
202
Infineon Technologies Corp.<br />
June 99<br />
Exercise 7CAN_1 - Transmitting a Standard CAN<br />
Message with the CAN Module<br />
Objective:<br />
Generate one Standard CAN (11-bit-Identifier) Message with the<br />
on-chip CAN Module*<br />
Evaluate every identifier bit of incoming messages*<br />
Use maximum bus speed of 1 Mbaud<br />
Use Message Object 1<br />
Use Identifier 0x123<br />
Use 8 Data Bytes containing the data 0x00, 0x11, …, 0x77.<br />
*Hints:<br />
As long as no receiving node is connected to the kitCON-167, the<br />
C167CR will not receive an acknowledge for its transmission and<br />
therefore will keep on trying to transmit the CAN message “forever”.<br />
Connect another Starter Kit with CAN Capability or a CAN Analyzer<br />
to the CAN bus to generate real CAN data transfers.<br />
<strong>HOT167</strong>-1 Version 2.0<br />
203
Infineon Technologies Corp.<br />
June 99<br />
Exercise 7CAN_2 - DAvE Configurations<br />
Start DAvE<br />
Create new Project with microcontroller C167CS*<br />
Project name: 7can_2<br />
Select project path: c:\hot167_2\7can_2<br />
Project Settings:<br />
General:<br />
- Select Keil Compiler, SMALL model<br />
System Clock:<br />
- External Oscillator Frequency: Set to 5 MHz<br />
Startup Configuration:<br />
- Bus Type after Reset: Set to 16 bit DEMUX<br />
- Write Configuration: Pin #WR and #BHE operates as #WRL<br />
and #WRH<br />
Save & close<br />
* C167CS not yet supported by DAvE V1.0 CD ROM. See “Hints regarding DAvE.”<br />
<strong>HOT167</strong>-1 Version 2.0<br />
211
Infineon Technologies Corp.<br />
June 99<br />
Exercise 7CAN_2 - DAvE Configurations (cont.)<br />
Configure CAN Modules:<br />
Because DAvE does not yet support the C167CS with the on-chip<br />
CAN Module 2, the files CAN1.C, CAN2.C, CAN1.H, CAN2.H are<br />
included in the directory c:\hot167_1\7can_2<br />
The files contain the same code as it would be generated by DAvE<br />
Configure Port 2:<br />
Port 2:<br />
- Enable P2.0 / CC0IO as general IO / Out<br />
Functions:<br />
- Include Port Initialization Function IO_vInit<br />
Save & Close<br />
Configure GPT1:<br />
Auxiliary Timer 2:<br />
- Timer 2 Mode: Reload Timer 3 with T2<br />
- Input Selection: Any transition of T3OTL<br />
- T2Register:Setto0x4C4B<br />
<strong>HOT167</strong>-1 Version 2.0<br />
212
Infineon Technologies Corp.<br />
June 99<br />
Exercise 7CAN_2 - DAvE Configurations (cont.)<br />
Core Timer 3<br />
- Up/Down Control: Count down<br />
- Timer Start: Start T3 after initialization (this will generate a<br />
1000ms period of T3)<br />
- T3Register:Setto0x4C4B<br />
- Input Selection/Prescaler: Fcpu/512<br />
- Alternate Output Function: enable alternate output function (use<br />
T3OUT)<br />
- Interrupt Control: Enable T3 interrupt<br />
Functions:<br />
- Include GPT1 initialization function GT1_vInit<br />
Interrupts:<br />
- Place interrupt of T3 in level 14, group 1 of the Interrupt Vector<br />
Table<br />
Save & close<br />
<strong>HOT167</strong>-1 Version 2.0<br />
213
Infineon Technologies Corp.<br />
June 99<br />
Exercise 7CAN_2 - DAvE Configurations (cont.)<br />
Configure External Bus Controller:<br />
BUSCON 0 (Flash):<br />
- Memory Cycles Time Control: 1 waitstate<br />
- Memory Tristate Control: No Waitstate<br />
- ALE Lengthening Control: Normal ALE Signal<br />
BUSCON 1 (RAM):<br />
- Enable external bus<br />
- Bus Configuration (BTYP): 16 bit DMUX<br />
- Memory Cycles Time Control: 1 waitstate<br />
- Memory Tristate Control: No Waitstate<br />
- Address Area (ADDRSEL 4):<br />
- Set Windows Size to 64 Kbyte<br />
- Set Required start address (A23..A12) to 0x040<br />
Generate code<br />
<strong>HOT167</strong>-1 Version 2.0<br />
214
Infineon Technologies Corp.<br />
June 99<br />
Exercise 7CAN_2 - µVision2 Configurations<br />
Start Keil µVision2<br />
Create new Project: ‘7can_2.uv2’<br />
Go to Project | New Project<br />
Browse to directory c:\hot167_1\7can_2\<br />
Enter file name: 7can_2.uv2<br />
Select Target Device:<br />
Go to Project | Select Device for Target ‘Target 1’<br />
Double-click ‘Siemens’<br />
Select ‘C167CS-32FM’<br />
Click ‘OK’<br />
<strong>HOT167</strong>-1 Version 2.0<br />
215
Infineon Technologies Corp.<br />
June 99<br />
Exercise 7CAN_2 -<br />
µVision2 Configurations (cont.)<br />
Add Files:<br />
Go to Project | Targets, Groups, Files…<br />
Click ‘Groups / Add Files’<br />
Select ‘Source Group 1’<br />
Click ‘Add Files to Group’<br />
Select all C files and click ‘add’<br />
Enter file name ‘start.asm’, click ‘add’<br />
Click ‘Close’ and ‘OK’<br />
Double-click all files in the Project Window to open them<br />
<strong>HOT167</strong>-1 Version 2.0<br />
216
Infineon Technologies Corp.<br />
June 99<br />
Exercise 7CAN_2 -<br />
µVision2 Configurations (cont.)<br />
Select Target Options:<br />
Go to Project | Options for Target ‘Target 1’<br />
Select External Memory configuration<br />
- Go to ‘Target’ tab<br />
- Uncheck the box “Allocate On-chip Code ROM”<br />
- External Memory #1: RAM: Start 0x40000, Size0x0FFFF<br />
- External Memory #2: ROM: Start 0x00000, Size0x3FFFF<br />
Select Linker Options:<br />
- Go to ‘L166 Misc’<br />
- Interrupt Vector Table Address: Enter 0x0<br />
Set Output Options:<br />
- Go to ‘Output’ tab<br />
- Click ‘Create HEX-File’<br />
- Click ‘OK’<br />
<strong>HOT167</strong>-1 Version 2.0<br />
217
Infineon Technologies Corp.<br />
June 99<br />
Exercise 7CAN_2 -<br />
µVision2 Configurations (cont.)<br />
Edit MAIN.C (Project_Init()-function, Main()-function):<br />
Edit Project_Init()-function:<br />
- Insert: CAN1_vInit();<br />
CAN2_vInit();<br />
Edit Main()-function:<br />
// USER CODE BEGIN (Main,2)<br />
while(1);<br />
// USER CODE END<br />
Edit MAIN.H<br />
Include:<br />
#include “CAN1.H”<br />
#include “CAN2.H”<br />
<strong>HOT167</strong>-1 Version 2.0<br />
218
Infineon Technologies Corp.<br />
June 99<br />
Exercise 7CAN_2 -<br />
µVision2 Configurations (cont.)<br />
Edit Start.asm*:<br />
Edit Start.asm (Special Function Register Addresses):<br />
XPERCON DEFR 0F024H<br />
Edit Start.asm (in C_STARTUP, after watchdog timer instruction):<br />
...<br />
DISWDT<br />
$ENDIF<br />
EXTR #1<br />
; Disable watchdog timer<br />
MOV XPERCON,#0403H<br />
Build Project:<br />
µVision2: Project | Rebuild Target<br />
This will generate the HEX-file<br />
* Because of the new XPERCON register both CAN modules have to be selected, before the<br />
selected XBUS peripherals are globally enabled (by bit XPEN within SYSCON).<br />
<strong>HOT167</strong>-1 Version 2.0<br />
220
Infineon Technologies Corp.<br />
June 99<br />
Exercise 7GPT2_2 - Frequency Multiplication<br />
of a 50% duty cycle PWM signal with GPT2<br />
Objective:<br />
Generate a 50% duty cycle PWM signal with PWM channel 0<br />
Control the Frequency of the signal at PWM channel 0 with an ADC<br />
Value from ADC Channel 1 using the ADC Interrupt Service<br />
Routine to reload the PWM registers (external potentiometer<br />
necessary)<br />
Multiply this frequency by 8 with GPT2<br />
kitCON-167 Configurations:<br />
Connect a potentiometer to analog input channel 1 (>= 10kOhm)<br />
and connect PWM channel 0 output to GPT2 Capture Input:<br />
GND<br />
(e.g. X3 pin 3<br />
or X3 pin 4)<br />
P7.0 / POUT0<br />
Signal Output<br />
(X3 pin 117)<br />
A/D input channel 1 (P5.1 / AN1) (X3 pin 73)<br />
<strong>HOT167</strong>-1 Version 2.0<br />
Vcc<br />
(e.g. X3 pin 1<br />
or X3 pin 2)<br />
P3.2 / CAPIN<br />
Signal Detection<br />
(X3 pin 102)<br />
223
Infineon Technologies Corp.<br />
June 99<br />
Exercise 7GPT2_2 - DAvE Configurations<br />
Start DAvE<br />
Create new Project with microcontroller C167CR/CS*<br />
Project name: 7GPT2_2<br />
Select project path: c:\hot167_1\7gpt2_2<br />
Project Settings:<br />
General:<br />
- Select Keil Compiler, SMALL model<br />
System Clock:<br />
- External Oscillator Frequency: Set to 5 MHz<br />
Startup Configuration:<br />
- Bus Type after Reset: Set to 16 bit DEMUX<br />
- Write Configuration: Pin #WR and #BHE operates as #WRL<br />
and #WRH<br />
Save & close<br />
* C167CS not yet supported by DAvE V1.0 CD ROM. See “Hints regarding DAvE.”<br />
<strong>HOT167</strong>-1 Version 2.0<br />
224
Infineon Technologies Corp.<br />
June 99<br />
Exercise 7GPT2_2 - DAvE Configurations (cont.)<br />
Configure ADC:<br />
Control:<br />
- Mode Selection: Fixed channel continuous conversion<br />
- Analog Channel Input Selection: Analog Channel 1<br />
- Start Bit: Start Conversion after Initialization<br />
- Interrupt Control: Enable end-of-conversion Interrupt<br />
Interrupts:<br />
- Select an Interrupt Level for ADC Conversion Interrupt<br />
Functions:<br />
- Include ADC initialization functions ADC_vInit and<br />
ADC_uwReadConv<br />
Save & close<br />
<strong>HOT167</strong>-1 Version 2.0<br />
225
Infineon Technologies Corp.<br />
June 99<br />
Exercise 7GPT2_2 - DAvE Configurations (cont.)<br />
Configure GPT2:<br />
Core Timer 5:<br />
- Timer 5 Mode: Timer mode<br />
- Up/Down Control: Count up<br />
- Input Selection: Fcpu / 32 (Resolution 1.600 us)<br />
- Timer Start: Start T5 after initialization<br />
Core Timer 6:<br />
- Timer 6 Mode: Timer mode<br />
- Up/Down Control: Count down<br />
- Input Selection: Fcpu / 4 (Resolution 0.200 us)<br />
- Timer Start: Start T6 after initialization<br />
- Reload Mode: Enable Reload from CAPREL<br />
- Alternate Output Function: Enable alternate output function<br />
(use T6OUT)<br />
<strong>HOT167</strong>-1 Version 2.0<br />
227
Infineon Technologies Corp.<br />
June 99<br />
Exercise 7GPT2_2 - DAvE Configurations (cont.)<br />
Configure GPT2 (cont.)<br />
Capture/Reload:<br />
- Capture Enable: Enable Capture of T5 into CAPREL<br />
- CAPREL Input Selection: any transition on capture input pin<br />
CAPIN<br />
- Timer 5 Clear Bit: T5 cleared on capture event<br />
Functions:<br />
- Include GPT2 initialization function GT2_vInit<br />
Save & close<br />
Configure Port 7:<br />
Port 7:<br />
- Configure pin P7.0 for General Purpose I/O with Push/Pull<br />
Output and 0 as initial output<br />
Functions:<br />
- Include port initialization function IO_vInit<br />
Save & close<br />
Generate code<br />
<strong>HOT167</strong>-1 Version 2.0<br />
228
Infineon Technologies Corp.<br />
June 99<br />
Exercise 7GPT2_2 - µVision2 Configurations<br />
Start µVision2<br />
Open Project c:\hot167_1\7gpt2_2\7gpt2_2.uv2 (Project | Open Pr.)<br />
Add Files:<br />
Go to Project | Targets, Groups, Files…<br />
Click ‘Groups / Add Files’<br />
Select ‘Source Group 1’<br />
Click ‘Add Files to Group’<br />
Select all C files and click ‘add’<br />
Enter file name ‘start.asm’, click ‘add’ (Assembler Startup File)<br />
Click ‘Close’ and ‘OK’<br />
Double-click all files in the Project Window to open them<br />
Select Target Hardware (kitCON-167):<br />
Go to Project | Options for Target ‘Target 1’<br />
Go to ‘Debug’ tab<br />
Click ‘Settings’ (upper right hand corner)<br />
Monitor configuration: select ‘Phytec KC167’<br />
Click ‘OK’ twice<br />
<strong>HOT167</strong>-1 Version 2.0<br />
229
Infineon Technologies Corp.<br />
June 99<br />
Exercise 7GPT2_2 -<br />
µVision2 Configurations (cont.)<br />
Edit MAIN.C:<br />
include endless loop in main():<br />
// USER CODE BEGIN (Main,2)<br />
while(1) {};<br />
// USER CODE END<br />
Edit ADC Interrupt Service Routine in ADC.C (also s. next page)<br />
Get ADC Conversion Value and shift it left by four to make it a 16bit<br />
value. Use function ADC_uwReadConv().<br />
Load Period Register of PWM channel 0 with this value.<br />
Use function PWM_vSetPeriod(Channel,Value).<br />
(channel=PWM_REG0)<br />
Load Pulse Width Register of PWM channel 0 with half of the<br />
Period Register to achieve 50% duty cycle.<br />
Use function PWM_vSetPw(Channel,Value).<br />
(channel=PWM_REG0)<br />
<strong>HOT167</strong>-1 Version 2.0<br />
230
Infineon Technologies Corp.<br />
June 99<br />
Exercise 7GPT2_2 -<br />
µVision2 Configurations (cont.)<br />
void ADC_viIsrConv(void) interrupt ADCINT<br />
{<br />
// USER CODE BEGIN (ADC_IsrConv,1)<br />
unsigned int adc_result;<br />
adc_result=ADC_uwReadConv();<br />
// get ADC conversion value<br />
adc_result=adc_result
Infineon Technologies Corp.<br />
June 99<br />
Exercise 7GPT2_2 - Running the Program<br />
Reset Target Hardware (Press Reset Button on Starter Kit)<br />
Build Project (Project | Rebuild Target)<br />
Run integrated Debugger from within µVision2<br />
Debug | Start / Stop Debug Session (click ‘OK’ when prompted)<br />
The Debugger will load the Keil Monitor into the kitCON-167’s RAM<br />
via bootstrap loader<br />
Object file c:\hot167_1\7gpt2_2\7gpt2_2 will be loaded<br />
automatically and the debugger will go to main().<br />
Go! (Debug | Go)<br />
Program Verification:<br />
Connect Scope to P7.0 / POUT0 (connector X3 pin 117)<br />
Connect Scope to P3.1 / T6OUT (connector X3 pin 105)<br />
<strong>HOT167</strong>-1 Version 2.0<br />
232
Infineon Technologies Corp.<br />
June 99<br />
Exercise 7GPT2_2 -<br />
Screenshot<br />
P7.0 / POUT0<br />
P3.1 / T6OUT<br />
Signal generated by PWM Channel 0<br />
Signal generated by GPT2 from the above signal<br />
<strong>HOT167</strong>-1 Version 2.0<br />
x8<br />
233
Infineon Technologies Corp.<br />
June 99<br />
Exercise DAAD:<br />
D/A A/D Conversion using the serial interface<br />
ASC0, the PWM unit, the ADC and the GPT1<br />
Byte sent from PC 01001101<br />
Receive Buffer S0RBUF<br />
Async. Serial Interface<br />
PEC<br />
Puls Width Register PW0<br />
PWM channel 0<br />
5V R<br />
t<br />
PC<br />
µC<br />
<strong>HOT167</strong>-1 Version 2.0<br />
Timer 2 Overflow<br />
C<br />
Byte sent to PC 11010110<br />
Transmit Buffer S0TBUF<br />
Async. Serial Interface<br />
A/D-Converter channel 0<br />
Result Register ADDAT<br />
3V<br />
234<br />
t
Infineon Technologies Corp.<br />
June 99<br />
Exercise DAAD - Description<br />
Objective:<br />
The microcontroller shall communicate with the PC via the serial<br />
interfaceinbothdirections.<br />
The Visual Basic program DAAD allows to send a byte between<br />
00h and FFh to the microcontroller, representing a voltage between<br />
0and5volts.<br />
This byte is received by the microcontroller via the serial interface.<br />
On every reception, a PEC Transfer moves the received byte into<br />
the pulse-width register of PWM Channel 0, which generates a<br />
PWM signal with 0% to 100% duty cycle according to the received<br />
value.<br />
The PWM Channel 0 output is connected to an integrator (only a<br />
resistor & capacitor) which is connected to the A/D-Converter input<br />
(channel 0). The average of the PWM-signal is measured.<br />
The Flash Tools are used to burn the program into the on-board<br />
FLASH.<br />
<strong>HOT167</strong>-1 Version 2.0<br />
235
Infineon Technologies Corp.<br />
June 99<br />
Exercise DAAD - Description (cont.)<br />
Objective (cont.)<br />
On every timer 2 overflow the corresponding interrupt service<br />
routine writes the A/D-result (only the highest 8 bit of 10) to the<br />
S0TBUF register to transmit the byte to the PC.<br />
(Note: You could also use the A/D Converter end-of-conversion<br />
Interrupt to trigger the transmission of a new byte. Timer 2 was<br />
chosen to include another peripheral into the exercise).<br />
The byte received by the PC is evaluated and the corresponding<br />
voltage that has been measured by the A/D-Converter is shown in<br />
the voltmeter window.<br />
kitCON-167 Configurations:<br />
Connect PWM Channel 0 output to analog input channel 0 via a<br />
47kOhm resistor and a 10uF capacitor :<br />
PWM output<br />
channel 0:<br />
P7.0 / POUT0<br />
47kΩ<br />
<strong>HOT167</strong>-1 Version 2.0<br />
10µF<br />
A/D input<br />
channel 0:<br />
P5.0<br />
236
Infineon Technologies Corp.<br />
June 99<br />
Exercise DAAD - DAvE Configurations<br />
Start DAvE<br />
Create new Project with microcontroller C167CR/CS*<br />
Project name: DAAD<br />
Select project path: c:\hot167_1\daad<br />
Project Settings:<br />
General:<br />
- Select Keil Compiler, SMALL model<br />
System Clock:<br />
- External Oscillator Frequency: Set to 5 MHz<br />
Startup Configuration:<br />
- Bus Type after Reset: Set to 16 bit DEMUX<br />
- Write Configuration: Pin #WR and #BHE operates as #WRL<br />
and #WRH<br />
Save & close<br />
* C167CS not yet supported by DAvE V1.0 CD ROM. See “Hints regarding DAvE.”<br />
<strong>HOT167</strong>-1 Version 2.0<br />
237
Infineon Technologies Corp.<br />
June 99<br />
Exercise DAAD - DAvE Configurations (cont.)<br />
Configure ASC USART:<br />
Control:<br />
- Global: Use pin TxD0 for ASC<br />
- Receiver: Enable Receiver (S0REN)<br />
- Interrupts: Enable the receive interrupt (S0RIE)<br />
Interrupts:<br />
- Pick highest level for ASC Receive interrupt<br />
PEC: Click to configure channel 7 for ASC Receive Interrupt<br />
- Transfer Count: Continuous Transfer<br />
- Increment Control: Pointers are not modified<br />
- Byte / Word Transfer: Transfer a Word<br />
- Pointers:<br />
- Select ASC0 Receive Buffer Register as Source Pointer<br />
- Select PWM Pulse Width Register 0 as Destination Pointer<br />
- Save & close<br />
Functions:<br />
- Include select ASC_vInit, ASC_vSendData<br />
Save & close<br />
<strong>HOT167</strong>-1 Version 2.0<br />
238
Infineon Technologies Corp.<br />
June 99<br />
Exercise DAAD - DAvE Configurations (cont.)<br />
Configure ADC:<br />
Control:<br />
- Mode Selection: Fixed channel continuous conversion<br />
- Analog Channel Input Selection: Analog Channel 0<br />
- Start Bit: Start Conversion after Initialization<br />
Functions:<br />
- Include ADC initialization function ADC_vInit and<br />
ADC_uwReadConv<br />
Save & close<br />
<strong>HOT167</strong>-1 Version 2.0<br />
240
Infineon Technologies Corp.<br />
June 99<br />
Exercise DAAD - DAvE Configurations (cont.)<br />
Configure GPT1:<br />
Auxiliary Timer 2:<br />
- Timer 2 Mode: Timer mode<br />
- Timer Start: Start T2 after initialization (this will generate a<br />
26.2ms period of T2)<br />
- Interrupt Control: Enable Timer 2 Interrupt<br />
Interrupts:<br />
- Select a level for Timer 2 Interrupt<br />
Functions:<br />
- Include GPT1 initialization function GT1_vInit<br />
Save & close<br />
<strong>HOT167</strong>-1 Version 2.0<br />
241
Infineon Technologies Corp.<br />
June 99<br />
Exercise DAAD - DAvE Configurations (cont.)<br />
Configure External Bus Controller:<br />
BUSCON 0 (Flash):<br />
- Memory Cycles Time Control: 1 waitstate<br />
- Memory Tristate Control: No Waitstate<br />
- ALE Lengthening Control: Normal ALE Signal<br />
BUSCON 1 (RAM):<br />
- Enable external bus<br />
- Bus Configuration (BTYP): 16 bit DMUX<br />
- Memory Cycles Time Control: 1 waitstate<br />
- Memory Tristate Control: No Waitstate<br />
- Address Area (ADDRSEL 4):<br />
- Set Windows Size to 64 Kbyte<br />
- Set Required start address (A23..A12) to 0x040<br />
Generate Code<br />
<strong>HOT167</strong>-1 Version 2.0<br />
242
Infineon Technologies Corp.<br />
June 99<br />
Exercise DAAD - µVision2 Configurations<br />
Start Keil µVision2<br />
Create new Project: ‘daad.uv2’<br />
Go to Project | New Project<br />
Browse to directory c:\hot167_1\daad\<br />
Enter file name: daad.uv2<br />
Select Target Device:<br />
Go to Project | Select Device for Target ‘Target 1’<br />
Double-click ‘Siemens’<br />
Select ‘C167CR-LM’ or ‘C167CS-32FM’<br />
Click ‘OK’<br />
<strong>HOT167</strong>-1 Version 2.0<br />
243
Infineon Technologies Corp.<br />
June 99<br />
Exercise DAAD -<br />
µVision2 Configurations (cont.)<br />
Add Files:<br />
Go to Project | Targets, Groups, Files…<br />
Click ‘Groups / Add Files’<br />
Select ‘Source Group 1’<br />
Click ‘Add Files to Group’<br />
Select all C files and click ‘add’<br />
Enter file name ‘start.asm’, click ‘add’<br />
Click ‘Close’ and ‘OK’<br />
Double-click all files in the Project Window to open them<br />
<strong>HOT167</strong>-1 Version 2.0<br />
244
Infineon Technologies Corp.<br />
June 99<br />
Exercise DAAD -<br />
µVision2 Configurations (cont.)<br />
Edit MAIN.C:<br />
include endless loop in main():<br />
// USER CODE BEGIN (Main,2)<br />
while(1) {};<br />
// USER CODE END<br />
<strong>HOT167</strong>-1 Version 2.0<br />
246
Infineon Technologies Corp.<br />
June 99<br />
Exercise DAAD -<br />
µVision2 Configurations (cont.)<br />
Edit GT1.C:<br />
void GT1_viIsrTmr2(void) interrupt T2INT<br />
{<br />
// USER CODE BEGIN (GT1_IsrTmr2,1)<br />
int AD_value;<br />
//read a 8 bit result:<br />
AD_value = (ADC_uwReadConv() & 0x03FC) >>2;<br />
// and send it to the PC:<br />
ASC_vSendData(AD_value);<br />
// USER CODE END<br />
}<br />
Build Project:<br />
µVision2: Project | Rebuild Target<br />
This will generate the HEX-file<br />
<strong>HOT167</strong>-1 Version 2.0<br />
247
Infineon Technologies Corp.<br />
June 99<br />
Exercise DAAD - Using the Flash Tools<br />
Step by Step to use the Flashtool:<br />
connect your evaluation board to a power supply and the PC<br />
Put blue DIP switch #1 to the ON position<br />
- Older Starter kits: close pins 1+2 of jumper 2 (usually red)<br />
press reset button S1 on kitCON-167<br />
run flasht.exe in ..\cdrom\startkit\sk_167\flash\<br />
Press (2) to erase entire Flash-Area and (Y) for yes<br />
Press (4) - Load INTEL-Hexfile to download the Hex-code to the<br />
evaluation board<br />
Press F2 and enter the complete path of the hex-file (.h86):<br />
c:\hot167_1\daad\daad.h86<br />
Press F1 and (Y) to exit Flashtool<br />
<strong>HOT167</strong>-1 Version 2.0<br />
248
Infineon Technologies Corp.<br />
June 99<br />
Exercise DAAD - Screenshot 1<br />
<strong>HOT167</strong>-1 Version 2.0<br />
250
Infineon Technologies Corp.<br />
June 99<br />
Exercise DAAD - Screenshot 2<br />
P7.0 / POUT0<br />
5V<br />
P5.0 / AN0 0V<br />
<strong>HOT167</strong>-1 Version 2.0<br />
251