Download - FileMaker
Download - FileMaker
Download - FileMaker

You also want an ePaper? Increase the reach of your titles
YUMPU automatically turns print PDFs into web optimized ePapers that Google loves.
FILEMAKER PRO 5 UNLIMITED AND MACROMEDIA ULTRADEV<br />
7. Rename the list/menu form object by clicking it then entering mnuDept in the List/Menu box on the Property<br />
inspector (Window » Properties).<br />
8. Save your work (File » Save).<br />
That is all for the search page.You are ready to build the results page, which involves defining a recordset to hold the search<br />
results and displaying the search results on the page.<br />
Define a filtered recordset for the results page<br />
A recordset is a subset of data extracted from one or more tables in a database. It acts as a source of data for your dynamic<br />
pages.You will define a recordset that contains only the records returned by the search. For a simple search/results page set,<br />
you can create this kind of recordset by defining a filter.<br />
You will begin by defining the general outlines of the recordset.<br />
10<br />
1. In the Site window, (Window » Site Files) double-click the Results file under Local Folder.<br />
The simple results page for the Compass employee directory opens in UltraDev.<br />
2. In the Data Bindings panel (Window » Data Bindings), click the Plus (+) button and select Recordset (Query) from<br />
the pop-up menu.<br />
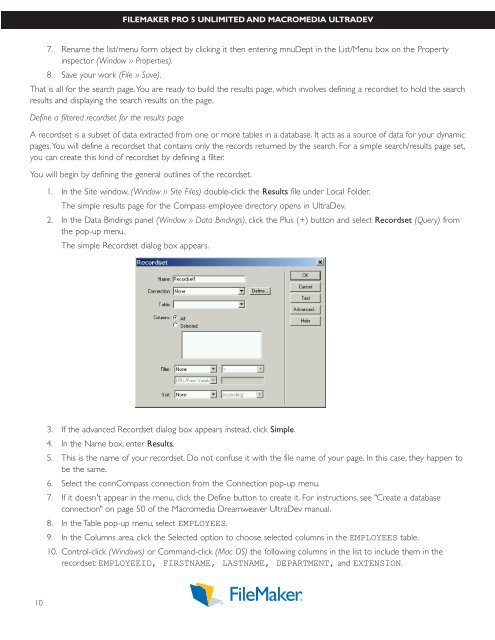
The simple Recordset dialog box appears.<br />
3. If the advanced Recordset dialog box appears instead, click Simple.<br />
4. In the Name box, enter Results.<br />
5. This is the name of your recordset. Do not confuse it with the file name of your page. In this case, they happen to<br />
be the same.<br />
6. Select the connCompass connection from the Connection pop-up menu.<br />
7. If it doesn't appear in the menu, click the Define button to create it. For instructions, see "Create a database<br />
connection" on page 50 of the Macromedia Dreamweaver UltraDev manual.<br />
8. In the Table pop-up menu, select EMPLOYEES.<br />
9. In the Columns area, click the Selected option to choose selected columns in the EMPLOYEES table.<br />
10. Control-click (Windows) or Command-click (Mac OS) the following columns in the list to include them in the<br />
recordset: EMPLOYEEID, FIRSTNAME, LASTNAME, DEPARTMENT, and EXTENSION.