Manual (PDF) - certon systems GmbH
Manual (PDF) - certon systems GmbH
Manual (PDF) - certon systems GmbH

Create successful ePaper yourself
Turn your PDF publications into a flip-book with our unique Google optimized e-Paper software.
www.<strong>certon</strong>.de<br />
<strong>Manual</strong><br />
<strong>certon</strong> <strong>systems</strong> <strong>GmbH</strong><br />
Hans-Bunte-Straße 8-10<br />
D-69123 Heidelberg<br />
Tel. +49 (0)6221 7590-260<br />
Fax +49 (0)6221 7590-261<br />
E-Mail: info@<strong>certon</strong>.de<br />
http://www.<strong>certon</strong>.de<br />
Seite 1
www.<strong>certon</strong>.de<br />
Preface<br />
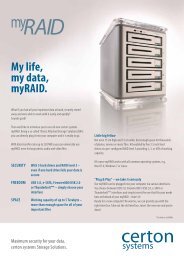
• The purchase of your studioRAID Blueline network storage is a valuable investment ensuring<br />
the security of your data well into the future.<br />
• With a studioRAID Blueline network attached storage from <strong>certon</strong> <strong>systems</strong> Ltd you have a high<br />
tech product which offers you the perfect combination of the highest possible quality, reliability<br />
and performance.<br />
• The studioRAID Blueline network attached storage from <strong>certon</strong> <strong>systems</strong> Gmbh is conceived to<br />
simply and securely store large amounts of digital pictures and other data over your network.<br />
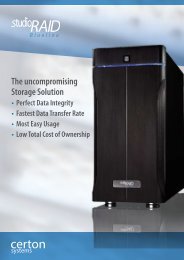
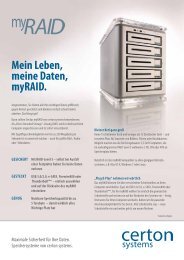
The studioRAID Blueline Network Storage<br />
• studioRAID Blueline is a network attached storage device enabling large amounts of data, for<br />
instance digital images, videos and business information to be securely stored, shared and<br />
archived.<br />
• Utilizing RAID level 6, two hard disks are able to fail and data integrity is maintained. Unusually<br />
studioRAID Blueline features SATA II hard disks that are designed for server applications and<br />
are certificated for 24 hours of continuous operation (24/7).<br />
• As opposed to many other (NAS) the studioRAID Blueline does not need a computer program<br />
to run on it, rather the communication between the computer and the studioRAID Blueline is<br />
via the browser ensuring that the functioning of the studioRAID Blueline is independent of the<br />
computer.<br />
• The studioRAID Blueline NAS is available in capacities of 8TB, 12TB, 16TB and 24TB.<br />
Seite 2
www.<strong>certon</strong>.de<br />
Table of contents<br />
Preface ..................................................................................................................................................................................... 2<br />
The studioRAID Blueline Network Storage ............................................................................................................. 2<br />
Table of contents ................................................................................................................................................................. 3<br />
1. Safety instructions ................................................................................................................................................ 5<br />
1.1 General safety instructions ................................................................................................................................ 5<br />
1.2 Installation location, details on precaution ................................................................................................. 5<br />
1.3 Risk of Electric Shock ........................................................................................................................................... 5<br />
1.4 Repairing .................................................................................................................................................................. 6<br />
1.5 Cleaning ................................................................................................................................................................... 6<br />
1.6 Additional hints to intended usage ............................................................................................................... 6<br />
1.7 Reparation and remodelling studioRAID Blueline ................................................................................. 6<br />
2. Technical Data ............................................................................................................................................................ 7<br />
3. Starting .......................................................................................................................................................................... 8<br />
3.1 Contents of Shipment ......................................................................................................................................... 8<br />
3.2 Peripheral connections ....................................................................................................................................... 8<br />
3.2.1 Frontside ............................................................................................................................................................. 8<br />
3.2.2 Backside ............................................................................................................................................................... 9<br />
3.2.3 Function of front connections .................................................................................................................... 9<br />
3.2.4 Function of back connections ..................................................................................................................... 9<br />
4. Quickstart .................................................................................................................................................................. 10<br />
5. Placement of hard disks ....................................................................................................................................... 10<br />
6. First steps with the studioRAID Control Center ....................................................................................... 11<br />
6.1 Open up studioRAID Control Center ........................................................................................................ 11<br />
6.2 Registration .......................................................................................................................................................... 12<br />
6.3 Changing password of main user “admin“ ............................................................................................... 13<br />
6.4 Call state information ....................................................................................................................................... 13<br />
6.5 Manage users ...................................................................................................................................................... 14<br />
6.6 Change running password of different users by “admin“ ................................................................... 15<br />
6.7 Change running password of user by user ............................................................................................... 15<br />
6.8 Manage folders ................................................................................................................................................... 15<br />
6.9 Create folder ........................................................................................................................................................ 15<br />
6.10 Settings ............................................................................................................................................................. 17<br />
6.11 Language ......................................................................................................................................................... 18<br />
6.12 Create date and time. .................................................................................................................................. 18<br />
6.13 Set up network ............................................................................................................................................... 18<br />
6.14 Notifications .................................................................................................................................................... 19<br />
6.15 iTunes Interface ............................................................................................................................................. 20<br />
Seite 3
www.<strong>certon</strong>.de<br />
6.16 Services ............................................................................................................................................................. 21<br />
6.17 FTP-Access to studioRAID ....................................................................................................................... 21<br />
6.18 studioRAID status message .................................................................................................................... 23<br />
6.19 Show network-information ....................................................................................................................... 23<br />
6.20 Update studioRAID .................................................................................................................................... 23<br />
7. Working with the studioRAID NAS ................................................................................................................ 24<br />
7.1 Find studioRAID NAS in a Windows network ........................................................................................ 24<br />
7.2 Find studioRAID NAS in Apple network ................................................................................................. 27<br />
8. Replacing hard disk drives .................................................................................................................................. 28<br />
8.1 Turn-off alarm signal ........................................................................................................................................ 28<br />
8.2 Insert new hard disk drive .............................................................................................................................. 29<br />
8.3 Shutting down studioRAID NAS ................................................................................................................ 29<br />
9. Troubleshooting ..................................................................................................................................................... 29<br />
9.1 Problems with different browsers ............................................................................................................... 29<br />
9.2 What’s the password for the studioRAID control center? ................................................................ 29<br />
9.3 My memory card is not read. ......................................................................................................................... 29<br />
9.4 studioRAID NAS is reacting quiet slow after one hour. ..................................................................... 30<br />
9.5 I Cannot create new users ................................................................................................................................. 30<br />
9.6 studioRAID NAS uses more the 200 MB on disk though I did not save any data. ................... 30<br />
9.7 studioRAID NAS makes noise though no hard disk has failed. ...................................................... 30<br />
9.8 Why is he usable capancy lower than the denoted one? .................................................................... 30<br />
9.9 Where do I get more help? ............................................................................................................................. 30<br />
10. Warranty ................................................................................................................................................................ 31<br />
11. CE-declaration of conformity ........................................................................................................................ 32<br />
Seite 4
www.<strong>certon</strong>.de<br />
1. Safety instructions<br />
1.1 General safety instructions<br />
• The studioRAID Blueline NAS is earthed by the power connection. Therefore you first have to<br />
plug in the power supply before the LAN-cable.<br />
• When disconnecting the studioRAID Blueline NAS unplug the LAN-cable before the power<br />
supply.<br />
• Use the original packaging for transport.<br />
• Do not touch the power plug with wet hands. Do not open the studioRAID Blueline. This is<br />
only to be done by qualified service personal.<br />
• Do not set up the device in shower rooms etc. It is not waterproof.<br />
• Should you pass the studioRAID Blueline NAS on to a third party, please pass on the manual,<br />
too.<br />
The studioRAID Blueline NAS has to be plugged in to an<br />
easily accessible power supply plug so as to be able to<br />
quickly unplug the studioRAID Blueline from power<br />
supply system in case of an emergency. The power supply<br />
plug must have a earthed connection.<br />
1.2 Installation location, details on precaution<br />
Your device complies with the safety regulations for equipment of information technology. If<br />
you have any questions regarding its intended use then please direct your inquiry to your<br />
dealer or the manufacturer.<br />
• Keep this manual together with the device. Should you pass the studioRAID Blueline NAS on to<br />
a third party, please pass on the manual, too.<br />
1.3 Risk of Electric Shock<br />
• For using the system a power supply, which meets the safety regulations of your country, is<br />
needed.<br />
• Please check cables and power plug for damage.<br />
• The system should only be connected to a standard power socket.<br />
• The system will not work, if the local power supply voltage is different than that required by the<br />
system.<br />
The system is only fully disconnected by pulling out the power plug.<br />
• The intended usage of the studioRAID Blueline NAS is only guaranteed if the case is unopened.<br />
(electric shock, fire protection, cooling)<br />
• The system should only be opened by authorized persons otherwise the warranty will be<br />
invalidated. Never open up the power plug.<br />
Seite 5
www.<strong>certon</strong>.de<br />
1.4 Repairing<br />
• Repairs may only be performed by an expert. By opening up the system or performing<br />
inappropriate repairs, the user may be in danger of electric shock or fire.<br />
1.5 Cleaning<br />
• To clean the studioRAID Blueline NAS occasionally disconnect the LAN cable and then the<br />
power cable. Only use a damp cloth and a non-aggressive cleaner.<br />
• Avoid usage of alcohol and other flammable solutions, also abrasive powders and syntheticsolving<br />
cleaning solutions.<br />
1.6 Additional hints to intended usage<br />
• The system has to be set up, so it can get enough air for cooling. Never cover the system, this<br />
can be dangerous and the life of your system will be shorted by overheating.<br />
• Remove protective films which are left on some surfaces before you start the system.<br />
• Protect the system from moisture, direct sun light and extremely high or low temperatures. If<br />
condensation is apparent on the system due to moving it from a cold environment to a warm<br />
one then please wait until the system temperature is adapted to the room and it is totally dry<br />
before you switch it on (around 2 to 4 hours).<br />
• The system is not waterproof. Never put it into water and protect it from splashing (rain, sea<br />
etc.)<br />
• If there is any un-normal behavior, smoke or emergency situations (e.g. damage of cage, power<br />
plug, entering of liquid or foreign material immediately shut off the system, unplug the power<br />
and call your dealer or the manufacturer.<br />
• The cables should be organised so they don’t cause a risk of tripping and so they cannot be<br />
easily damaged.<br />
• Transport should be done using the original packaging because it is specially made for the<br />
system.<br />
1.7 Reparation and remodelling studioRAID Blueline<br />
• The manufacturer only guarantees that system will work correctly if it is unmodified therefore<br />
any changes or repairs should only be performed by authorized experts. Fitting components<br />
that are not accredited by the manufacturer can damage the system in which case <strong>certon</strong><br />
<strong>systems</strong> <strong>GmbH</strong> assumes no liability. For questions in this regard please contact the<br />
manufacturer.<br />
• The system should not be disposed in normal consumer waste. Please conform to the EU-policy<br />
2002/96/EG for electric powered equipment Professional users are asked to return<br />
their studioRAID Blueline to the purveyor dealer where they have purchased the<br />
device or to send it back to the manufacturer. Consumers End customers are asked<br />
to bring the device to e-waste collection points, free of charge.<br />
Seite 6
www.<strong>certon</strong>.de<br />
2. Technical Data<br />
Capacity: 8-24TB<br />
Interface: Gigabit LAN Firewire 400, USB 2.0,<br />
Hard Disk Speed (rpm): 7200 rpm (revolutions per minute)<br />
Cache: Level 1: 2GB, Level 2: 256MB, Level 3:<br />
8x16MB,<br />
Interface Transfer Rate<br />
LAN:<br />
Fire Wire 400:<br />
USB 2.0:<br />
Seek Time (Read):
www.<strong>certon</strong>.de<br />
3. Starting<br />
• To start the studioRAID Blueline NAS you need a connection to the network as well as one for<br />
power supply and a computer with a web browser which is connected to the network.<br />
3.1 Contents of Shipment<br />
• 8 Network Attached Storage harddisks<br />
• Power cord for connect the power supply<br />
• LAN cable for network connection<br />
• Usermanual<br />
• studioRAID Blueline NAS<br />
3.2 Peripheral connections<br />
3.21 Frontside<br />
• The following ports and controls are placed at the front side of your studioRAID Blueline:<br />
Seite 8
www.<strong>certon</strong>.de<br />
3.22 Backside<br />
• The following ports and controls are placed at the rear side of your studioRAID Blueline:<br />
3.23 Function of front connections<br />
• The smartRAID NAS is equipped with 2 x USB 2.0 ports and a Multi-Cardreader (34 in 1).<br />
• The following storage media can be attached:<br />
• USB flash drive<br />
• external USB-hard disk drives<br />
• numerous digital cameras with USB or Firewire connection<br />
• memory cards:<br />
• Compact Flash I/II, IBM Micro Drive, Magic Gate, Smart Media, Smart Media ROM, xD, xD M-<br />
Type, xD H-Type, Secure Digital, mini SD, SDHC, SD ROM, T-Flash, Micro SD, Multi Media Card-<br />
I, Multi Media Card-II, MMC 4.0, MMC Dual Voltage, MMC Plus, MMC Mobile, MMC Micro,<br />
RSHS-MMC, RS-MMC, RS- MMC Dual Voltage, RS-MMC 4.0, Memory Stick, MS Select,<br />
MS ROM, MS Pro, MS Magic Gate, MS-Pro Magic Gate, MS-Duo, MS-Duo Magic Gate, MS-Pro<br />
Duo, etc.<br />
• As soon as one of the mentioned devices is connected to the studioRAID Blueline NAS,<br />
Exceptions exist for some cameras and some hard disk drives that may require special drivers.<br />
Such devices can only be read with a computer which is equipped with the appropriate driversoftware.<br />
The copying process will be reported by the display.<br />
3.24 Function of back connections<br />
• The back of the studioRAID Blueline NAS is equipped with connection for the power supply and<br />
master switch. Furthermore there is a USB 2.0 connection, two Gigabit network connections as<br />
well as a FireWire / IEEE connection. The following media can be attached:<br />
• USB flash drives<br />
• external USB harddisks<br />
• Firewire harddisk drives<br />
• Numerous digital cameras with USB or FireWire-connection.<br />
• Connections to network<br />
Seite 9
www.<strong>certon</strong>.de<br />
Do not disconnect the connected device until the copy process is finished. As soon as the copy<br />
process is finished, it will be reported by Display.<br />
i<br />
• Data will be copied into the AutoStorage folder where a sub-folder, labeled with the date and<br />
time will be generated.<br />
The AutoStorage folder cannot be deleted by the web interface to ensure that the data is not<br />
accidentally deleted.<br />
i<br />
4. Quickstart<br />
• To do a quick start with your studioRAID Blueline, please read the following chapter. If<br />
problems emerge, please read the corresponding chapters in this manual.<br />
• Ensure that the hard disk drives are properly located.<br />
• Connect the power supply.<br />
• Connect the LAN cable to your network.<br />
• Make sure that a DHCP Server is available<br />
• Switch on the studioRAID Blueline NAS.<br />
• Wait until an IP-address is reported on the Display.<br />
• Type in the IP-address in your web browser.<br />
• The studioRAID Blueline Control-Center starts, login with username “admin” and password<br />
“admin”.<br />
• Change the administrator-password and memorize the new password.<br />
• Generate the user accounts at “user administration”<br />
• Define the network permissions for the users at “folder administration”<br />
• The studioRAID Blueline NAS is now ready for use.<br />
5. Placement of hard disks<br />
• Insert the included hard disk drives in the studioRAID Blueline NAS<br />
• Begin with the hard disk 1and insert it into the first bay<br />
• Continue with the next hard disk and insert it in the next bay<br />
• Insert all hard disk drives top down:<br />
Seite 10
www.<strong>certon</strong>.de<br />
6. First steps with the studioRAID Control Center<br />
• The studioRAID Blueline Control Center quickly and easily overviews the status of your<br />
studioRAID Blueline NAS. At a glance you can see the disk space. You can also see if all hard<br />
disk drives are faultless. Furthermore you can easily create network drives and give permissions<br />
for users (read- /write permissions). With the appropriate administrator rights you can also<br />
generate and delete these users. You can also look into the system-messages.<br />
6.1 Open up studioRAID Control Center<br />
• For configuration of the studioRAID Blueline please wait until the IP-address is reported in the<br />
display. With the Bonjour protocol (Apple Mac OS X Computer) you can easily get access to the<br />
studioRAID Blueline Control Center. If your computer does not support the Bonjour protocol<br />
(Apple Mac <strong>systems</strong> earlier than OS X, Windows, and so on) please type in the IP-address,<br />
reported in the display, in your web browser as follows: In the example the IP-address in the<br />
display of the studioRAID Blueline is 192.168.0.178:<br />
• Example of the IP-address in the browser:<br />
• An encrypted Website will open up automatically. Please acknowledge the safety certificate of<br />
the website. The process of acknowledging the safety certificate can differ from web browser to<br />
web browser.<br />
• Example of an acknowledgment of a certificate with the Safari Browser:<br />
• In your web browser you see the following:<br />
Seite 11
www.<strong>certon</strong>.de<br />
6.2 Registration<br />
• To administrate network permissions, you have to be logged in. Please press Login and type in<br />
your access data. .<br />
The name of the user is admin and the password of the factory setting is also admin. Change the<br />
password after your first login. Make sure to choose a safe password, which you should not tell<br />
anyone. After 10 minutes of inactivity you are logged out automatically for security reasons.<br />
i<br />
Seite 12
www.<strong>certon</strong>.de<br />
6.3 Changing password of main user “admin“<br />
• For changing the password of the user “admin” please click Change password. The window<br />
Change password for “admin” opens.<br />
• Enter the old password (when studioRAID is provided new, it is admin) and enter the new<br />
password twice. With OK you complete the operation.<br />
It is essential that you memorize the new password!<br />
There is no possibility to reset a forgotten password. In this case contact the service<br />
department.<br />
i<br />
6.4 Call state information<br />
• In the studioRAID Blueline Control Center you see on the left side everything to control the<br />
status of the studioRAID Blueline NAS.<br />
• At RAID Status on the left side you can see the hard disk status and confirmation that your data<br />
is secure. System security 2 means that the system is functioning 100%. System security 1<br />
means that one hard disk has failed. System security 0 means that two hard disk drives have<br />
failed. (Your data is still safe and complete, but you should immediately replace the failed hard<br />
disk drives with new hard disk drives). If you press the arrow symbol to the right of Service jobs,<br />
you can see if there are any automatic services running, such as the integration of a new hard<br />
disk drive, and you can see how far the process has proceeded. At Disk usage you see the free<br />
disk space of the studioRAID Blueline NAS.<br />
Seite 13
www.<strong>certon</strong>.de<br />
• By pressing Show hard disks a new window appears, showing the status of the individual hard<br />
disks: Size, temperature and usage.<br />
• The green signal means that the hard disk works normally. For identification of a hard disk, use<br />
the particular loupe. The respective hard disk flashes red for a short time.<br />
6.5 Manage users<br />
• Pressing the button User administration enables you to generate or delete user accounts and<br />
reset their passwords.<br />
• For generating a new user click Add. Enter a username and a password twice.<br />
• To delete a user, choose from the list and press Delete.<br />
Seite 14
www.<strong>certon</strong>.de<br />
Please keep in mind that usernames may not feature any capital letters. Please avoid using<br />
capital letters and special characters by using only the 26 lower case letters and the numbers.<br />
i<br />
6.6 Change running password of different users by “admin“<br />
• The user “admin” can reset a password at any time by selecting the user and clicking on Edit. It is<br />
impossible to tell the old password to a user because the passwords are saved in an encrypted<br />
form for reasons of safety.<br />
6.7 Change running password of user by user<br />
• A user who is not the administrator can login at the Control Center using a web browser and<br />
change his password. No other features are available to him.<br />
6.8 Manage folders<br />
• To visualize the disk space of the smartRAID in the network folders have to be shared to the network.<br />
These network folders must be generated first. At the same time you can define which user should be<br />
able to access the folders and define his read- /write permissions.<br />
• This Picture contains two folders in the Control Center which are generated automatically.<br />
These are permanent system folders which cannot be deleted.<br />
6.9 Create folder<br />
• To share a new folder to the network, choose Folder administration and Click on Add. Name the<br />
new folder that should be shared.<br />
• To share a new folder to the network, choose Folder administration and Click on Add. Name the<br />
new folder that should be shared.<br />
Seite 15
www.<strong>certon</strong>.de<br />
• With this name the folder will appear in the network therefore it should point to the content. If<br />
you only want to give access to the folder to chosen users, click Restrict access.<br />
• Depending on the Operating System of the Computer (Mac, Windows, Linux) there are signs,<br />
which cannot be used for naming a folder because they are reserved for the operating system.<br />
• Therefore you should only use the characters of the alphabet (without special characters), never<br />
use colons, slashes or dots in folder names. This assures that you and also other computers in<br />
the network, even if using other operating <strong>systems</strong>, gain access to these folders. (i.e. a<br />
photographer may use a Mac, while the accounts department may uses a Windows computer).<br />
• Furthermore you should avoid folder names that only differ in capital letters and lower case<br />
letters.<br />
• For selecting users, who should get read-/write permissions for the new folder click User.<br />
Afterwards choose Restrict access to give the user permissions by check mark<br />
• Now select the user who should get read- and/or write permissions for the new folder, therefore<br />
press User again. If there is no user generated at this time, first generate a user (see 6.5) and after<br />
this define the read- and/or write permissions in this menu item.<br />
• When you have generated the folder and defined the read- and write permissions choose<br />
Apply.<br />
• The following warning appears:<br />
Seite 16
www.<strong>certon</strong>.de<br />
• Make sure, that no one is using the system at this time. Acknowledge by clicking into the<br />
checkbox and choose OK.<br />
• You get an acknowledgment for the operation.<br />
• The folder is now available in the network and users can access it from their computer via the<br />
network.<br />
To visualize the availability in the network, all connections in the network have to be<br />
interrupted temporarily. Ensure that nobody accesses the studioRAID NAS and select the<br />
checkbox, acknowledge with OK.<br />
i<br />
6.10 Settings<br />
• The menu Settings gives you further possibilities to adapt the studioRAID Blueline to your<br />
individual terms.<br />
Seite 17
www.<strong>certon</strong>.de<br />
6.11 Language<br />
• You may change the language of the Control-Center to German, English, Russian or French with<br />
the Button Language. Select the right Language and acknowledge with OK.<br />
6.12 Create date and time.<br />
• Out of the Box your studioRAID Blueline is set up for automatic updating of system time via<br />
the Internet. You can change the settings for date and time manually if you disable the<br />
checkbox. By pressing OK you can acknowledge your settings.<br />
6.13 Set up network<br />
• Factory-provided the studioRAID Blueline-System is configured for use with a DHCP-Server.<br />
• The studioRAID Blueline-System is accessible at the address given by the DHCP-Server. Type<br />
the address in the address bar of your web browser.<br />
• If no DHCP-Server is available in your network, you can reach the studioRAID Blueline-System<br />
at IP address 192.168.0.149.<br />
• You can always reach the studioRAID Blueline if:<br />
• No DHCP-Server is available in the network, that gives an automatically assigned address to the<br />
studioRAID Blueline and no other computer in the network is available with the address<br />
192.168.0.149. In this case the new address is reported at the display. You did not manually<br />
assign another fixed IP address in the Control Center. Then the studioRAID Blueline NAS is<br />
available at your fixed IP address.<br />
Furthermore the studioRAID Blueline supports Bonjour/Zeroconf. This protocol is useful for the<br />
automatic assignment of IP addresses in small networks without a DHCP server. The studioRAID<br />
Blueline is always accessible at a second address. This second IP address is in the range of<br />
Seite 18
www.<strong>certon</strong>.de<br />
196.154.xxx.xxx and is also used by Windows and OS X for the automatic address assignment.<br />
Thus computers from this automatic range of addresses always “see each other”, further services<br />
are not necessary. This means, that a direct network connection of a Mac computer and the<br />
studioRAID Blueline appears in Apple’s “finder” after a short time.<br />
• If no DHCP server is available on your network and you want to define a fixed IP address, please<br />
enter this address in Settings at Network then press “Save and Apply<br />
6.14 Notifications<br />
• In this setting you can define that you will be informed automatically by e-mail, if there are<br />
variances from the normal working process of your studioRAID Blueline (hard disk drive failure,<br />
overheating, finishing of the RAID-rebuilding). If the working process is undisturbed, you get a<br />
status report once a week.<br />
• If you choose Settings and Notifications the following window appears:<br />
• Press Add.<br />
• In this setting you can define that you will be informed automatically by e-mail, if there are<br />
variances from normal working process of your studioRAID Blueline (hard disk drive failure,<br />
overheating, finishing of the RAID-rebuilding).<br />
• Please enter unique username and e-mail of the person that should be informed in cases of<br />
failure. You can also enter several users. After clicking OK you see the following window:<br />
Seite 19
www.<strong>certon</strong>.de<br />
• Please check your emails at your email account. You should receive an automatic system<br />
notification with an activation code. Thus you can change your status from unconfirmed to<br />
confirmed. Therefore choose the respective name, choose Activate and enter the e-mailed Code<br />
in the new window. The annotation “unconfirmed” disappears and you will be informed about<br />
failures.<br />
• To remove the notification choose the name and select Delete.<br />
6.15 iTunes Interface<br />
• The studioRAID Blueline you can play back and administrate pieces of music with the iTunes-<br />
Mediaplayer.<br />
• Therefore the Apple iTunes-Software has to be installed. Choose Settings and then iTunes<br />
Interface in the studioRAID Blueline Control-Center. The following window opens:<br />
• Select Activate iTunes Server<br />
• Choose media directory you can select a directory for your music.<br />
• If you want to protect the connection between iTunes and the studioRAID by a password, select<br />
Password protect on/off. Enter a password in the line beneath. Click OK.<br />
• Now start your iTunes-Software. A window with the Media-library opens<br />
• On the left side at Shared you see the connection to the smartRAID. It is build in the form <<br />
name of the computer > - itunes.<br />
Seite 20
www.<strong>certon</strong>.de<br />
• You can look up the name of the computer in settings at Network.<br />
6.16 Services<br />
• In case, contrary to expectations, there is a problem with studioRAID Blueline you can activate<br />
the service-mode in the menu Service. This should only happen if user-support instructs you to<br />
do, because the service-mode allows support-team to remote access the studioRAID Blueline<br />
using a secure VPN-connection. To activate the service-mode you may select Activate servicemode<br />
(on/off) and click OK.<br />
6.17 FTP-Access to studioRAID<br />
• The studioRAID Blueline enables you to access your data on the studioRAID Blueline via FTP<br />
(File Transfer Protocol).<br />
• It is required that you first establish a connection between your computer and the studioRAID<br />
Blueline via FTP-port (port 21).<br />
• For further information please read the manual of your router.<br />
Seite 21
www.<strong>certon</strong>.de<br />
Attention:<br />
For security reasons you have to define access authorizations for folders you want to access via<br />
FTP.<br />
i<br />
• The necessary settings of access authorization are the following:<br />
• Choose the button FTP in the Settings. Select FTP activate (On/Off)<br />
• Create a new user. (See chapter 6.5 User Administration)<br />
• Allow access via FTP: Choose allow FTP access“.<br />
• Define the read-/write permissions for the user in the folder-settings at index card User:<br />
• Acknowledge by clicking OK.<br />
• Press Apply.<br />
• Assure that no other person is accessing the system at this moment and then press OK.<br />
Seite 22
www.<strong>certon</strong>.de<br />
6.18 studioRAID status message<br />
• Additional information about status of the studioRAID, e.g. failed hard disks or finished<br />
resynchronisations.<br />
6.19 Show network-information<br />
• Here you may change the network-configuration settings.<br />
6.20 Update studioRAID<br />
• At the homepage http://www.<strong>certon</strong>-<strong>systems</strong> .com you may find new firmware for your studioRAID.<br />
Please download the latest firmware to your computer and select the path to the update-firmware<br />
at the existing window. Confirm the update process.<br />
• Confirm by clicking “OK“-button.<br />
Seite 23
www.<strong>certon</strong>.de<br />
Ensure that nobody is accessing the studioRAID Blueline! If anybody is accessing the system<br />
during an update data will be lost.<br />
i<br />
Your Data, Rights and existing Users will not be modified, deleted or changed during an update<br />
process.<br />
i<br />
7. Working with the studioRAID NAS<br />
7.1 Find studioRAID NAS in a Windows network<br />
• If you would you like to use a Windows computer to access the studioRAID Blueline, you will<br />
find the studioRAID Blueline in the network environment in the work group studioRAID<br />
Blueline. Click on your desktop, click Start, and then click Network Neighbourhood. Under<br />
View Entire Network, then Microsoft Windows Network, see the working groups.<br />
Seite 24
www.<strong>certon</strong>.de<br />
• There you’ll find a group storage.<br />
• The studioRAID Blueline NAS appears with the name Studioraid:<br />
Seite 25
www.<strong>certon</strong>.de<br />
If you changed the name in the network configuration via your internet browser you’ll find the<br />
studioRAID Blueline NAS here with that given one.<br />
i<br />
• You can find your own shares here:<br />
• When you click the right mouse button on the share and then connect or map to network drive,<br />
you can set up a permanent connection that is integrated after a reboot of your computer<br />
automatically adding studioRAID NAS to your desktop.<br />
Seite 26
www.<strong>certon</strong>.de<br />
7.2 Find studioRAID NAS in an Apple network<br />
• To connect the studioRAID Blueline NAS with an Apple computer:<br />
• Choose Finder and the button “go to“, then connect to server<br />
• Enter the IP address of the studioRAID NAS in the line “server address“and press the button<br />
“search“. The IP address or network address of the studioRAID NAS is directly shown on the<br />
display<br />
• A Window opens which shows all available shares (also folders and volumes).<br />
Seite 27
www.<strong>certon</strong>.de<br />
• Select the volume in which you want to save your data. Press the OK button. On the desktop of<br />
your Mac you also can make multiple folders accessible.<br />
• If you would like to find a specific network folder always automatically on your desktop after<br />
starting the Mac you go to “System Preferences“ and go to the “user entry“. Choose “My<br />
Account“ from your user name and then go to “startup items“. Here is a list of all programs and<br />
other objects that are loaded automatically at startup. Just drag the icons of your network folder<br />
from the desktop to the list. As of now these will be treated as the start objects always appear<br />
automatically on the desktop after a start of your Mac provided that the studioRAID Blueline<br />
NAS was already switched on! Turning the studioRAID Blueline NAS on after the Mac brings up<br />
an error message though you can access the network folder manually (see above).<br />
8. Replacing hard disk drives<br />
• If a hard disk fails, then the studioRAID Blueline NAS notifies you of this in several ways:<br />
• The built-in speaker will sound a loud audible warning<br />
• The status window will look similar to like this, depending on which disk has failed:<br />
8.1 Turn-off alarm signal<br />
• The signal that indicates a defect in the acoustically hard drive can be turned off via the speaker<br />
icon in studioRAID Blueline control center.<br />
Should the temperature of the hard drives exceed 50 ° C, you will be warned. Shut down the<br />
system and ensure adequate cooling.<br />
i<br />
Seite 28
www.<strong>certon</strong>.de<br />
8.2 Insert new hard disk drive<br />
• In the event of a failure of a hard drive contact the manufacturer and order a replacement disk<br />
Upon receipt of the new disk send the failed disk to the manufacturer. To remove the hard disk,<br />
proceed as follows:<br />
• Check which disk has failed. The disks are in studioRAID control center listed as they are fitted.<br />
The first disk in studioRAID Blueline control center is the top one in studioRAID NAS.<br />
• Remove the old hard drive by sliding the blue tab down. Pull the hard drive from the housing<br />
via the metal lever.<br />
• Slide in the replacement disk until the metal lever locks. Replacement disks are assembled<br />
ready to be fitted.<br />
• After a short time the volume will be synchronized.<br />
• once the data has been synchronized the hard disk status switches to green and the system is<br />
working again with optimum data security. During data synchronization, you can continue to<br />
work as normal with the studioRAID Blueline NAS.<br />
8.3 Shutting down studioRAID NAS<br />
• To turn off the RAID, briefly press the On / Off switch on the front housing. The studioRAID<br />
Blueline NAS will shut down automatically after one minute and switch off. In general, it makes<br />
sense to run the studioRAID NAS continuously since the built power management techniques<br />
reduce the consumption significantly when the studioRAID NAS is not needed.<br />
9. Troubleshooting<br />
9.1 Problems with different browsers<br />
• Unfortunately, it is often the case that different versions of the various internet browsers can<br />
cause the smartRAID control center to be displayed wrongly. The manufacturer has tested the<br />
following browsers successfully:Internet Explorer 8.x<br />
• Mozilla Firefox 3.x<br />
• Safari 4.x.x<br />
• Other internet browsers (Konqueror, Internet Explorer 6.x or older Safari versions) show some<br />
faulty functions.<br />
9.2 What’s the password for the studioRAID control center?<br />
• At delivery the password for the admin user is admin.<br />
9.3 My memory card is not read.<br />
• The card reader is capable of over 6 different types of storage media automatically read and<br />
copy its contents into the folder AutoStorage. It is possible that there are memory cards that can<br />
not be read. In this case plug the memory card into a suitable computer and copy over the<br />
network the data on the studioRAID Blueline NAS.<br />
Seite 29
www.<strong>certon</strong>.de<br />
9.4 studioRAID NAS is reacting quiet slow after one hour.<br />
• After a certain time the hard disks in studioRAID Blueline NAS switch off to save electricity. If<br />
the disks are turned off it takes a few seconds until the speed of each disk is back to normal and<br />
data can be read or written.<br />
9.5 I Cannot create new users<br />
• User names may not contain capital letters, spaces or special characters.<br />
9.6 studioRAID NAS uses more the 200 MB on disk though I<br />
did not save any data.<br />
• This area has been reserved to administer studioRAID Blue Line NAS so network storage can<br />
continue.<br />
9.7 studioRAID NAS makes noise though no hard disk has<br />
failed.<br />
• If the audible beep is heard though no hard drive has failed, either one fan has failed or the<br />
temperature of the hard disks has increased over 50 ° Celsius. In this case press the little red LED<br />
button on the left of the hard disks. You will need a sharp object such as a pen. There are two<br />
other LEDs, one shows the failure of a fan of (top LED) and the second (lower LED) displays to<br />
high a temperature. If the temperature is too high ensure sufficient cooling immediately and<br />
turn off the studioRAID Blueline. With the failure of a fan you should contact your dealer or<br />
<strong>certon</strong> <strong>systems</strong>. The fan can be replaced only by trained personnel.<br />
9.8 Why is he usable capancy lower than the denoted one?<br />
• The effective capacity of two of the hard disks is for the security of the system and thus not used<br />
for data. This allows any two hard drives fail without the loss of data occuring.<br />
9.9 Where do I get more help?<br />
• Getting help from the studioRAID NAS community at the URL: http://studioraidforum.<strong>certon</strong>.de.<br />
If you have signed a service contract when buying the studioRAID Blueline<br />
network storage, contact the service department by phone (UK: 0845 543 6765 Germany:<br />
01805/88304429). Please have your contract number available.<br />
Seite 30
www.<strong>certon</strong>.de<br />
10. Warranty<br />
• The consumer (customer)k, without prejudice to any claim against the seller, shall be granted a<br />
statutory guarantee given to the following conditions:<br />
• Devices and their components, which, due to manufacturing and / or material faults within 24<br />
months of purchase, may be replaced at the discretion of Certon Systems or repaired free of<br />
charge. For wear aand tear parts (eg fans), this warranty applies to six months from purchase.<br />
• This guarantee does not apply if the defect is attributable to improper treatment and / or<br />
ignoring the user manuals.<br />
• This guarantee does not apply to the contract by the dealer or the customer themselves (eg<br />
installation, software downloads, configuration) and supplied manuals or possibly on a separate<br />
disk software.<br />
• This warranty applies to new devices purchased in the European Union. A proof of purchase<br />
receipt with purchase date is required.<br />
• Warranty claims must be filed within 60 days after becoming aware of the problem but within<br />
the warranty period.<br />
• If the customer wants to replace parts, especially the hard disks, the replacements will be<br />
supplied in advance. The customer informs <strong>certon</strong> <strong>systems</strong> service department about the<br />
problem and receives drive bay-mounted hard drive replacement. The customer then sends<br />
back the defective hard disk with carrier to the <strong>certon</strong> <strong>systems</strong> service department in the same<br />
shipping box.<br />
• Replaced equipment becomes the property of <strong>certon</strong> <strong>systems</strong>.<br />
• Further or other claims are excluded. <strong>certon</strong> <strong>systems</strong> shall not be liable for business interruption,<br />
loss of data, lost profits, or loss of customers, loss of software or other data. The disclaimer does<br />
not apply to mandatory liability, eg under the Product Liability Act.<br />
• The duration of the warranty does not extend beyond the warranty period.<br />
• <strong>certon</strong> <strong>systems</strong> reserve the right to charge the customer for the repair or replacement if the<br />
warranty is not applicable.<br />
Seite 31
www.<strong>certon</strong>.de<br />
11. CE-declaration of conformity<br />
Seite 32