Create successful ePaper yourself
Turn your PDF publications into a flip-book with our unique Google optimized e-Paper software.
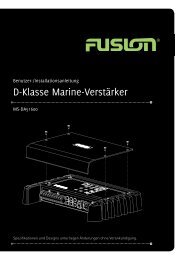
<strong>User</strong> / Installation <strong>Manual</strong><br />
Marine HD Widescreen<br />
LCD Television With DVD<br />
TV-M160DVD, TV-M190DVD, TV-M220DVD
WARNING<br />
RISK OF ELECTRIC SHOCK<br />
DO NOT OPEN<br />
WARNING: TO REDUCE THE RISK OF ELECTRIC SHOCK DO NOT<br />
REMOVE COVER OR BACK. NO USER-SERVICEABLE PARTS INSIDE.<br />
REFER SERVICING TO QUALIFIED SERVICE PERSONNEL.<br />
Double insulation this is class II apparatus.<br />
The mains plug used as the disconnect device. The disconnect device shall remain readily operable.<br />
WARNING: To reduce the risk of electric shock do not expose this apparatus to rain or moisture<br />
and objects filled with liquids, such as vases, should not be placed on this apparatus.<br />
WARNING: According to the industrial standards, there are a certain number of defective pixels<br />
both bright and dark that are acceptable. Although we produce panel with more than 99.99<br />
percent active cells, there still may be some cells that do not produce light or remain lit. For more<br />
information, please contact sales or the technical support.<br />
CAUTION<br />
Changes or modifications not expressly approved by the party responsible for<br />
compliance with the FCC Rules could void the use’s authority to operate this equipment.<br />
Important Safety Instructions<br />
1. READ INSTRUCTIONS - All the safety and operating instructions should be read before the unit is<br />
operated.<br />
2. RETAIN INSTRUCTIONS - The safety and operating instructions should be retained for future<br />
reference.<br />
3. HEED WARNINGS - All warnings on the unit and in the operating instructions should be adhered<br />
to.<br />
4. FOLLOW INSTRUCTIONS - All operating and use instructions should be followed.<br />
5. CLEANING - Unplug this unit from the wall outlet before cleaning. Do not use liquid cleaners or<br />
aerosol cleaners. Use a damp cloth for cleaning the exterior cabinet only.<br />
6. ATTACHMENTS - The manufacturer of this unit does not make any recommendations for<br />
attachments, as they may cause hazards.<br />
7. WATER AND MOISTURE - Do not use this unit near water. For example, near a bathtub, washbowl,<br />
kitchen sink, laundry tub, in a wet basement, or near a swimming pool.<br />
8. ACCESSORIES - Do not place this unit on an unstable cart, stand, tripod, bracket, or table. The<br />
unit may fall, causing serious injury, and serious damage to the unit. An appliance and cart<br />
combination should be moved with care. Quick stops, excessive force, and uneven surfaces may<br />
cause the appliance and cart combination to overturn.<br />
PORTABLE CART WARNING<br />
S3126A<br />
9. VENTILATION - Slots and openings in the cabinet back or bottom are provided for ventilation, to<br />
ensure reliable operation of the unit and to protect it from overheating. These openings should<br />
never be blocked by placing the unit on a bed, sofa, rug, or other similar surface. This unit should<br />
never be placed near or over a radiator or heat source. This unit should not be placed in a built-in<br />
installation, such as a bookcase, or rack unless proper ventilation is provided or the manufacture’s<br />
instructions have been adhered to.<br />
10. POWER SOURCE - This unit should be operated only from the type of power source indicated<br />
on the rating plate. If you are not sure of the type of power supply to your home, consult your<br />
appliance dealer or local power company. For units intended to operate from battery power, or<br />
other sources, refer to the operating instructions.<br />
11. POLARIZATION - This unit is equipped with a polarized alternating current line plug (a plug<br />
having one blade wider than the other). This plug will fit into the power outlet only one way. This<br />
is a safety feature. If you are unable to insert the plug fully into the outlet, try reversing the<br />
plug. If the plug still fails to fit, contact your electrician to replace your obsolete outlet. Do not<br />
defeat the safety purpose of the polarized plug.<br />
12. POWER-CORD PROTECTION - Power supply cords should be routed so that they are not likely to<br />
be walked on or pinched by items placed upon or against them, paying particular attention to<br />
cords at plugs, convenience receptacles, and the point where they exit from the appliance.<br />
13. LIGHTNING - To protect your unit during a lightning storm, or when it is left unattended and<br />
unused for long periods of time, unplug it from the wall outlet and disconnect the antenna or<br />
cable system. This will prevent damage to the unit due to lightning and power line surges.<br />
14. POWER LINES - An outside antenna system should not be located in the vicinity of overhead<br />
power lines, or other electric light or power circuits, or where it can fall into such power lines or<br />
circuits. When installing an outside antenna system, extreme care should be taken to keep from<br />
touching such power lines or circuits as contact with them might be fatal.<br />
The lightning flash with arrowhead symbol, within an<br />
equilateral triangle, is intended to alert the user to the<br />
presence of uninsulated “dangerous voltage” within the<br />
product’s enclosure that may be of sufficient magnitude<br />
to constitute a risk of electric shock to persons.<br />
The exclamation point within an equilateral triangle is<br />
intended to alert the user to the presence of important<br />
operating and maintenance (servicing) instructions in<br />
the literature accompanying the appliance.<br />
WARNING: Do not leave any stationary images, patterns, PIP box, or letterbox images on the screen<br />
for an extended period of time. Also, do not display the same stationary patterns frequently. This<br />
may result in permanent ghost images on the display unit. This type of damage is not covered<br />
under warranty. Examples of this type of situation can be but not limited to the following: side<br />
bar images, stock market report bars, video game patterns, closed captioning, shopping channel<br />
logo, price display, and letterbox black bars. To prevent this type of damage, display constant<br />
moving images that fill the screen as often as possible.<br />
TV/CATV MODE SELECTION<br />
When shipped from the factory, the TV/CATV menu option is set to the “TV” mode.<br />
If using CATV, set the menu option to “CATV” (Cable Television)<br />
15. OVERLOADING - Do not overload wall outlets and extension cords as this can result in a risk of<br />
fire or electric shock.<br />
16. OBJECT AND LIQUID ENTRY - Do not push objects through any openings in this unit as they may<br />
touch dangerous voltage points or short out parts that could result in fire or electric shock.<br />
Never spill or spray any type of liquid into the unit.<br />
17. OUTDOOR ANTENNA GROUNDING - If an outside antenna or cable system is connected to the unit,<br />
be sure the antenna or cable system is grounded to provide some protection against voltage<br />
surges and built-up static charges. Section 810 of the National Electrical Code, ANSI/NFPA 70,<br />
provides information with respect to proper grounding of the mast and supporting structure,<br />
grounding of the lead-in wire to an antenna discharge unit, size of grounding conductors,<br />
location of antenna discharge unit, connection to grounding electrodes, and requirements for the<br />
grounding electrode.<br />
18. SERVICING - Do not attempt to service this unit yourself as opening or removing covers<br />
may expose you to dangerous voltage or other hazards. Refer all servicing to qualified service<br />
personnel.<br />
19 .DAMAGE REQUIRING SERVICE - Unplug this unit from the wall outlet and refer servicing to qualified<br />
service personnel under the following conditions:<br />
A. When the power-supply cord or plug is damaged.<br />
B. If liquid has been spilled, or objects have fallen into the unit.<br />
C. If the unit has been exposed to rain or water.<br />
D. If the unit does not operate normally by following the operating instructions. Adjust only<br />
those controls that are covered by the operating instructions, as an improper adjustment<br />
of other controls may result in damage and will often require extensive work by a qualified<br />
technician to restore the unit to Its normal operation.<br />
E. If the unit has been dropped or the cabinet has been damaged.<br />
F. When the unit exhibits a distinct change in performance, this indicates a need for service.<br />
20. REPLACEMENT PARTS - When replacement parts are required, be sure the service technician uses<br />
replacement parts specified by the manufacturer or those that have the same characteristics as<br />
the original part. Unauthorized substitutions may result in fire, electric shock or other hazards.<br />
21. SAFETY CHECK - Upon completion of any service or repairs to this unit, ask the service<br />
technician to perform safety checks to determine that the unit is in proper operating condition.<br />
22. HEAT - The product should be situated away from heat sources such as radiators, heat<br />
registers, stoves, or other products (including amplifiers) that produce heat.<br />
23. NOTE TO CATV SYSTEM INSTALLER - This reminder is provided to call the CATV system installer’s<br />
attention to Article 820-40 of the NEC that provides guidelines for proper grounding and, In<br />
particular, specifies that the cable ground shall be connected to the grounding system of the<br />
building, as close to the point of cable entry as practical.<br />
EXAMPLE OF ANTENNA GROUNDING AS PER<br />
NATIONAL ELECTRICAL CODE S2898A<br />
GROUND<br />
CLAMP<br />
ELECTRIC<br />
SERVICE<br />
EQUIPMENT<br />
NEC - NATIONAL ELECTRIC CODE<br />
ANTENNA LEAD<br />
IN WIRE<br />
ANTENNA DISCHARGE UNIT<br />
(NEC SECTION 810-20)<br />
GROUNDING CONDUCTORS<br />
(NEC SECTION 810-21)<br />
GROUND CLAMPS<br />
POWER SERVICE GROUNDING<br />
ELECTRODE SYSTEM<br />
(NEC ART 250. PART H)
Contents<br />
Connections And Setup 2<br />
Remote Control 3<br />
Button Description 4<br />
Antenna Connection 4<br />
AV Connection 4<br />
S-Video Connection 4<br />
Y Pb Pr Connection 5<br />
VGA Connection 5<br />
HDMI Connection 5<br />
USB Connection 5<br />
Menu Operation 6<br />
EPG (Electronic Program Guide) 6<br />
Source Selection 6<br />
Channel 7<br />
Picture 8<br />
Time 9<br />
Sound 10<br />
Options 10<br />
Lock 11<br />
Media Play Function (DMP) 11<br />
Personal Video Recorder (PVR) File System 12<br />
Specifications 13<br />
Troubleshooting 13
002<br />
Connections And Setup<br />
Thank you very much for your purchase of this product. Please read this manual carefully and keep it safe for reference.<br />
Please use the power cord designated for the product. When an extension cord is required, use one with the correct power rating. The cord must be grounded. The product should<br />
be installed on a flat surface to avoid tipping. Space should be maintained between the back of the product and the wall for proper ventilation. If you would like to mount the TV to<br />
the wall, please see “Preparing the LCD for Wall Mounting” below for additional information. Avoid installing the product in the kitchen, bathroom or other places with high humidity.<br />
Preparing Your LCD TV For Wall Mounting<br />
The HDTV can either be kept on the stand or mounted to the wall for viewing. If you<br />
choose to mount the HDTV to the wall, please follow the instructions below .<br />
» Unplug all the cables and cords from your LCD TV.<br />
» Place the LCD TV face down on a soft and flat surface (blanket, foam, cloth, etc) to<br />
prevent any damage to the display.<br />
» Remove the stand screws allowing the stand to be removed.<br />
» The mounting bracket is made up of two parts - the wall bracket and the TV<br />
bracket. Attach the TV bracket to the TV via the included screws.<br />
» Attach the wall bracket to the wall with appropriate screws. Ensure the wall is<br />
suitable to hold the weight of the TV.<br />
» Slide the TV bracket into the wall bracket.<br />
Important Notes<br />
RESET: Like any product controlled by microprocessors this TV may hang or become<br />
unresponsive, in the unlikely event this occurs simple disconnect the power and<br />
reconnect after 10 seconds.<br />
REMOTE: To prevent leakage which may result in bodily harm or damage to the remote:<br />
1. Install AAA batteries correctly, and make sure polarities are correctly aligned with<br />
the battery compartment markings.<br />
2. Do not mix batteries (OLD and NEW or CARBON and ALKALINE ,etc)<br />
3. Remove batteries when the remote is not used for a long time.<br />
My music, movie or image files do not display?<br />
Due to the large variation of file sizes, compression formats and codec available,<br />
playback of all files cannot be guaranteed.<br />
I cannot record onto my USB flash drive?<br />
FAT 32 formatted flash drive is required.<br />
Time Shift functionality does work work?<br />
FAT 32 formatted flash drive is required.<br />
Warning! Do not keep images on the screen for a long time<br />
To prevent the screen from burn in, do not leave static images including menu screens<br />
displayed for a period of time. Burn in is not covered under warranty provision.<br />
ATTENTION: Do not try to update the TV unless directed by a service technician.<br />
Product misconfigured by an incorrect update is not covered under warranty.<br />
PUBLISHED BY FUSION ELECTRONICS LIMITED. © Copyright 2010 by FUSION Electronics Limited. All rights reserved. Specifications and design are subject to change without notice.<br />
YOU CAN HELP PROTECT THE ENVIRONMENT Please remember to respect the local regulations: Hand in the non-working electrical equipment to an appropriate waste disposal centre. v3.2
Remote Control<br />
POWER - Switch between Standby and On<br />
TIME SHIFT - Pause live TV. Press in DTV source to activate the Time Shift function.<br />
(Requires USB flash drive connection)<br />
AUTO - AUTO adjust resolution refresh rate in VGA mode.<br />
MUTE - Press to mute the audio. Press again or press VOL+ to resume.<br />
P.MODE - Select the picture mode.<br />
S.MODE - Select the audio mode.<br />
AUDIO - Press to change the language of the audio in DTV or DVD source.<br />
I/II - Select NICAM mode. Only available in TV programs with NICAM transmission.<br />
Default mode is mono.<br />
NUMBER BUTTONS - Press 0-9 to select a TV channel directly when watching TV.<br />
The channel changes after 2 seconds or press ENTER button to change immediately.<br />
REC MENU - Press to enter recorded files menu.<br />
Return to the previously viewed program.<br />
GOTO - In DVD source press to cycle to a desired position.<br />
SLEEP - Set the TV to turn off after a specified time.<br />
ASPECT - Select the screen aspect.<br />
SOURCE - Select the TV source.<br />
▲/▼/◄/►/ENTER - Allows you to navigate the on-screen menus and adjust<br />
the system settings to your preference.<br />
Eject in DVD source.<br />
Press in Time Shift mode to minimise onscreen display<br />
D.MENU - Display the DVD menu.<br />
SETUP - DVD menu setup.<br />
D.DISP - Press to cycle the DVD disc information.<br />
DISPLAY - IN DTV source press to show and minimise onscreen program information.<br />
EXIT - Exit the menu or sub menu.<br />
MENU - Access the on-screen menu.<br />
CH+/- - Press to change channel.<br />
VOL+/- - Press to increase or decrease volume.<br />
MEDIA - Access DMP menu.<br />
REC - Press to record the program immediately.<br />
►II - Play/pause<br />
■ - Stop playing<br />
A-B - Repeat the segment between A and B<br />
REPEAT - Press to change the playing mode<br />
◄◄/►► - Play fast backward/forward<br />
I◄◄/►►I - Play previous/next media file<br />
EPG - Press to display EPG information (Electronic Program Guide).<br />
FAV - Press to display favorite programs.<br />
SUBTITLE - Select subtitle language.<br />
TV/RADIO - Press to switch between DTV and radio programs.<br />
TITLE - Press to display Title information.<br />
TEXT - Press to turn the Teletext On and Off. Note: The following buttons are for<br />
use in teletext mode<br />
INDEX - Press to return to the index/initial page.<br />
MIX - Press to display the picture and the teletext at the same time<br />
HOLD - HOLD On or Off the current page display<br />
SUBPAGE - Display a sub-page of upper options<br />
REVEAL - Reveal or Hide the hidden words.<br />
SIZE - Change the size of display in Teletext mode<br />
CANCEL - Press to return to TV mode while teletext ‘searches’ for a page. When the<br />
required page is found ,the page number will appear at the top of the TV picture,<br />
press again to return to teletext.<br />
003
004<br />
Button Description<br />
» Press VOL- or VOL+ to decrease or increase the sound level.<br />
» Press CH- or CH+ to scan through channels.<br />
» Press MENU to bring up the main menu screen.<br />
» Press SOURCE to select the input source.<br />
» Press to play/pause<br />
» Press to eject the disc<br />
» Press POWER button to alternate between standby and ‘on’ modes.<br />
Red light indicates TV is in standby mode, Green indicates TV is on.<br />
POWER: DC 12V input<br />
HDMI: Connect the HDMI output jack of DVD<br />
VGA: Connect the PC-RGB output jack of PC<br />
S-VIDEO: Connect the S-VIDEO output jack of DVD or VCR<br />
VIDEO: Connect the video output jack of DVD or VCR<br />
PC AUDIO INPUT: Connect the audio output jack of PC audio.<br />
EARPHONE: Connect the headphone<br />
RF IN: Connect the antenna<br />
USB: Connect the USB flash drive to play multimedia files<br />
Y/Pb/Pr IN: Connect component Video<br />
Antenna Connection<br />
To ensure good picture and sound, a Terrestrial TV antenna system needs to be<br />
installed.<br />
Video / Audio Out<br />
Connect the AUDIO output from the television to the AUX input of the device using<br />
the RCA cable (White and Red [left and right audio]).<br />
AV Connection<br />
Connect the VIDEO and AUDIO output jack of the DVD or VCR to the AV IN jacks using<br />
the RCA cable (Yellow [Video], White and Red [left and right audio]).<br />
Select the AV input source using the SOURCE button on the remote.<br />
S-Video Connection<br />
Connect the S-VIDEO output jack of the DVD or VCR to the S-VIDEO jacks.<br />
Connect the AUDIO output jack of the DVD or VCR to the Audio In jacks using the RCA<br />
cable.<br />
Select the S-Video input source using the SOURCE button on the remote.
Y Pb Pr Connection<br />
Connect the Y Pb Pr output of the accessory device to the Y Pb Pr input on the TV. The<br />
picture quality is improved, compared to connecting a regular VCR video input.<br />
Connect the Audio output of the accessory device to the Audio input jacks on the TV<br />
using the RCA cable.<br />
Select the Y Pb Pr input source using the SOURCE button on the remote.<br />
VGA Connection<br />
Connect the RGB output of the PC to the VGA input on the TV.<br />
Connect the PC audio output of the PC to the PC Audio input jacks on the TV<br />
Select the VGA input source using the SOURCE button on the remote.<br />
HDMI Connection<br />
Connect the HDMI output of the accessory device to the HDMI input on the TV.<br />
Select the HDMI input source using the SOURCE button on the remote.<br />
USB Connection<br />
Insert the USB flash drive into the USB slot on the TV.<br />
Select the USB input source using the MEDIA button on the remote.<br />
005
006<br />
Menu Operation<br />
Menu Operation<br />
This section explores the menus of your TV. Each menu is outlined and detailed to<br />
help you get the most from your TV.<br />
To access the main menu page press MENU on the remote.<br />
Press ◄/► to cycle through the seven main functions below:<br />
» CHANNEL<br />
» PICTURE<br />
» SOUND<br />
» TIME<br />
» OPTION<br />
» LOCK<br />
EPG (Electronic Program Guide)<br />
Only available for DTV source.<br />
» Press EPG on remote to enter menu<br />
» Follow on screen instructions for EPG control and navigation.<br />
Source Selection<br />
To access the input source’s press SOURCE on the remote.<br />
» Press ▲/▼ to move the cursor<br />
» Press OK to confirm your selection
Channel<br />
Press MENU button on the remote to enter the CHANNEL page below:<br />
Auto Tuning:<br />
ATV and DTV auto program, operate as below:<br />
» Select Auto Tuning and press OK .<br />
» To return to previous page press MENU or Exit<br />
» To interrupt tuning, press MENU or Exit. The below confirmation screen will appear.<br />
Press ◄ to confirm exit, or ► to continue tuning.<br />
DTV <strong>Manual</strong> Tuning<br />
Input source is DTV, operate as below:<br />
» From the CHANNEL menu select<br />
DTV <strong>Manual</strong> Tuning<br />
» Select channel number by<br />
pressing ◄/►<br />
» Press ENTER to search<br />
ATV <strong>Manual</strong> Tuning<br />
Input source is ATV, operate as below:<br />
» From the CHANNEL menu select ATV <strong>Manual</strong> Tuning<br />
» Select Storage To 1 and enter channel that you wish to store program to (1-100).<br />
» Select System DK and select TV system.<br />
» Select Search to start ATV <strong>Manual</strong> Tuning. To interrupt press MENU or Exit<br />
» Select Fine Tune and use ◄/► to fine tune program<br />
Program Edit<br />
» From the CHANNEL menu select Program Edit<br />
» Select the program using ▲/▼ and press the following:<br />
Delete Program: Delete selected program<br />
Rename Program: Edit program name<br />
Reorder Program: Select first program and then select the second program.<br />
The two programs will swap order.<br />
Skip Program: Select program to be skipped.<br />
Favourite: Press the remote FAV button to activate. Select program to add<br />
to favourite list.<br />
Signal Information<br />
Display’s the signal information of current program.<br />
» From the CHANNEL menu select Signal Information<br />
007
008<br />
Picture<br />
Press MENU button on the remote and ◄/► use to cycle to PICTURE page below:<br />
Picture Mode:<br />
» Select Picture Mode<br />
» Press ◄ or ► to cycle through available picture modes:<br />
Standard, Mild, <strong>User</strong> and Dynamic.<br />
Note: Contrast, Brightness, Color and Sharpness can only be changed under <strong>User</strong>.<br />
Color Temperature:<br />
» From the PICTURE menu select Color Temperature<br />
» Press ◄ or ► to cycle through available color temperature modes:<br />
Medium, <strong>User</strong>, Warm and Cool.<br />
Note: Red, Green, and Blue can only be changed under <strong>User</strong>.<br />
Aspect Ratio:<br />
» From the PICTURE menu select Aspect Ratio<br />
» Press ▲/▼ to select Aspect Ratio: Auto, 4:3 and Full.<br />
Noise Reduction:<br />
» From the PICTURE menu select Noise Reduction<br />
» Press ▲/▼ to select Noise Reduction: Off, Low, Middle, High and Default.<br />
Screen:<br />
» From the PICTURE menu select Screen<br />
» Press ▲/▼ to select Screen Options:<br />
Auto Adjust, Horizontal Position, Vertical Position, Size and Phase.
Time<br />
Press MENU button on the remote and ◄/► use to cycle to TIME page below:<br />
Clock:<br />
Set TV system time settings<br />
» Select Clock<br />
» Press ◄ or ► to cycle through available clock settings:<br />
Date, Month, Year, Hour and Minute.<br />
Sleep Timer:<br />
» From the TIME menu select Sleep Timer<br />
» Select Sleep Timer setting:<br />
Off, 10min, 20min, 30min, 60min, 90min, 120min, 180min or 240min<br />
Auto Sleep:<br />
» From the TIME menu select Auto Sleep.<br />
» Select ON or OFF<br />
Time Zone:<br />
» From the TIME menu select TIME ZONE.<br />
» Select your Time Zone<br />
Off Time:<br />
Set TV system to turn off automatically.<br />
» From the TIME menu select Off Time<br />
» Press ◄ or ► to select Off Time mode:<br />
Off, Once, Every Day, Mon - Fri, Mon - Sat, Sat -Sun or Sunday<br />
» Set the Hour and Minute<br />
On Time:<br />
Set TV system to turn on automatically.<br />
» From the TIME menu select On Time<br />
» Press ◄ or ► to select On Time mode:<br />
Off, Once, Every Day, Mon - Fri, Mon - Sat, Sat -Sun or Sunday<br />
» Set the Hour and Minute<br />
» Select the input source<br />
» If ATV or DTV source is selected, also select the program number<br />
» Select the Volume setting at turn on<br />
009
010<br />
Sound<br />
Press MENU button on the remote and ◄/► use to cycle to SOUND page below:<br />
Sound Mode:<br />
» Select Sound Mode<br />
» Press ◄ or ► to cycle through available sound modes:<br />
Standard, Music, Movie, Sports and <strong>User</strong>.<br />
Note: Treble and Bass can only be changed under <strong>User</strong>.<br />
Adjust Balance:<br />
» From the SOUND menu select Balance<br />
Auto Volume:<br />
» From the SOUND menu select Auto Volume.<br />
» Select ON or OFF<br />
Options<br />
Press MENU button on the remote and ◄/► use to cycle to OPTION page below:<br />
OSD Language:<br />
Set current menu language<br />
» Select OSD Language<br />
Audio Language:<br />
Set audio language<br />
» Select Audio Language<br />
» Press ◄ or ► to cycle through available languages:<br />
Subtitle Language:<br />
Set subtitle language<br />
» Select Subtitle Language<br />
» Press ◄ or ► to cycle through available languages:<br />
Hearing Impaired:<br />
» Select Hearing Impaired<br />
» Select ON or OFF<br />
PVR File System:<br />
(Reference ‘PVR File System’ on following page)<br />
Restore Factory Default:<br />
» Select Restore Factory Default to restore to initial settings
Lock<br />
Press MENU button on the remote and ◄/► use to cycle to LOCK page:<br />
Note: All options are initially greyed out until password is entered (see below)<br />
Lock System:<br />
Set TV system time settings<br />
» Select Lock System<br />
» Enter factory default password (0000)<br />
Set Password:<br />
» From the LOCK menu select SET PASSWORD<br />
» Change password from factory default (above):<br />
Block Program:<br />
» From the LOCK menu select Block Program.<br />
» Select channels to block and require password to watch.<br />
Parental Guidance:<br />
» From the LOCK menu select Parent Guidance.<br />
» Select age restriction<br />
Media Play Function (DMP)<br />
Access media files (Photo’s, Music, Movie’s and Text) via the TV’s USB port.<br />
Press MEDIA button on the remote.<br />
Picture:<br />
Supported picture formats include .jpg/jpeg and .gif<br />
The image should be no bigger than 3000 x 3000 pixels.<br />
» Select Photo source<br />
» Use ◄ or ► to select C and enter photo view list<br />
» Select the desired Photo/s<br />
» Press play to view<br />
Music:<br />
Supported music formats include .mp3<br />
» Select Music source<br />
» Use ◄ or ► to select C and enter music view list<br />
» Select the desired music track/s<br />
» Press play to begin playback<br />
Movie:<br />
Supported movie formats include .mpg, .vob, .avi, mp4 and .dat<br />
The maximum matrix is below MPEG2 MA/ML.<br />
» Select Movie source<br />
» Use ◄ or ► to select C and enter movie view list<br />
» Select the desired movie.<br />
» Press play to begin playback<br />
Text:<br />
Supported text format is .txt<br />
» Select Text source<br />
» Use ◄ or ► to select C and enter text view list<br />
» Select the desired text.<br />
011
012<br />
PVR File System<br />
(Only for DTV source)<br />
The PVR File System Menu Description<br />
SELECT DISK: Select the PVR file system disk<br />
Check PVR File System: Check the disk file format.<br />
USB Disk: Display the USB Disk activation status, “PASS” flag is activation<br />
Format: Format the USB device, create PVR file system format on the USB device<br />
Time Shift Size: Show the TSR capacity information<br />
Speed: Read and write speed.<br />
Free Record Limit: Set the recording set-up time, unit is hours.<br />
Digital Video Record<br />
» Insert a USB device and enter the PVR File System page.<br />
» Select Check PVR File System, if USB device not previously formatted the system will<br />
automatically prompt USB disk formatting.<br />
» The size of the USB device affects the recording time available.<br />
» To record a DTV program press the button. The recording will continue until<br />
the Stop button is pressed or the USB device is full.<br />
» Press the button to shrink the on-screen information.<br />
» Pressing the REC MENU button will open the recorded program page.<br />
» Recorded Programs can be viewed or deleted.<br />
Important Recording Information<br />
» The USB device must be at least 1 GB.<br />
» When formatting a USB device all contents will be deleted. Formatting will fail if<br />
the USB device contains a virus or any other defect.<br />
» PVR function is only available in DTV source<br />
» USB device must be compatible USB 2.0 HS specification.
Specifications<br />
TV-M160DVD TV-M190DVD TV-M220DVD<br />
Screen size, visible 16” Wide Screen TFT LCD 19” Wide Screen TFT LCD 22” Wide Screen TFT LCD<br />
Screen Format 16:9 16:9 16:9<br />
Resolution 1366 x 768 Pixel 1366 x 768 Pixel 1366 x 768 Pixel<br />
Max. contrast ratio 500:1 1000:1 1000:1<br />
Brightness (Typical) 250 cd/m2 250 cd/m2 300 cd/m2<br />
Response Time (Typical) 8ms 5ms 5ms<br />
Display Colours 16.7M 16.7M 16.7M<br />
Viewing Angle (Typical) H:90˚, V:65˚ H:170˚, V:160˚ H:170˚, V:160˚<br />
Power Supply 110-240V AC, 12V DC 5 metre cable 110-240V AC, 12V DC 5 metre cable 110-240V AC, 12V DC 5 metre cable<br />
Power Consumption 30W 48W 52W<br />
Standby Power Dissipation ≤1W ≤1W ≤1W<br />
Colour System PAL PAL PAL<br />
Sound System BG/DK/I BG/DK/I BG/DK/I<br />
AV Playback PAL/SECAM/NTSC PAL/SECAM/NTSC PAL/SECAM/NTSC<br />
All Models Feature:<br />
» Conformal coated PCB<br />
» Built-in DVD/CD drive<br />
» Built in DVB-T digital tuner<br />
» HDMI input for true digital connection<br />
» USB connection for digital media playback<br />
Troubleshooting<br />
PROBLEM SOLUTION<br />
No picture or sound Check the power supply is plugged in and turned on.<br />
Picture is OK but no sound Make sure the volume is not set to minimum or mute. Turn off the TV and turn back on.<br />
Remote control doesn’t work Check the battery connection is correct. Check the batteries. Make sure no obstacles are between the sensor of the remote and TV<br />
No TV Signal Check the source is set to ATV or DTV. Check the antenna signal status.<br />
No external video signal Check the source is set to AV<br />
Picture lacks colour or is to dark Check colour, brightness and contrast settings<br />
All channels lose colour intermittently Check the antenna in case it is broken, disconnected or damaged.<br />
Poor reception, loss of colour Check channel is tuned correctly<br />
» PVR functionality (record digital TV)**<br />
» Component and Composite video inputs<br />
» VGA port for connection to a PC<br />
» S-Video<br />
» Multi-language On-screen display<br />
Diagonal stripes on picture Receiver may be affected by interference. e.g. nearby radio broadcasting transmitter or from another TV receiver.<br />
Ghost images appear Antenna direction may have been changed by a storm or strong wind. Ghost images are caused from both the signal travelling<br />
directly from the transmitter and a signal reflected from a hill or large building. Direction of the antenna should be chosen to avoid<br />
this situation.<br />
USB media files don’t work FAT 32 formatted flash drive required. Reformat if required.<br />
Time Shift and PVR don’t work FAT 32 formatted flash drive required. Reformat if required.<br />
» Closed Caption Decoder<br />
» Parental Lock<br />
» Sleep Timer<br />
» Built in speakers (4W x 2)<br />
» Wall mounting bracket included<br />
013
www.fusionelectronics.com<br />
FUSION Electronics New Zealand Ph: +64 9 369 2900<br />
FUSION Electronics Australia Ph: +61 1300 736 012<br />
FUSION Electronics Europe Ph: +44 845 299 7586<br />
FUSION Electronics USA Ph: +1 623 580 9000