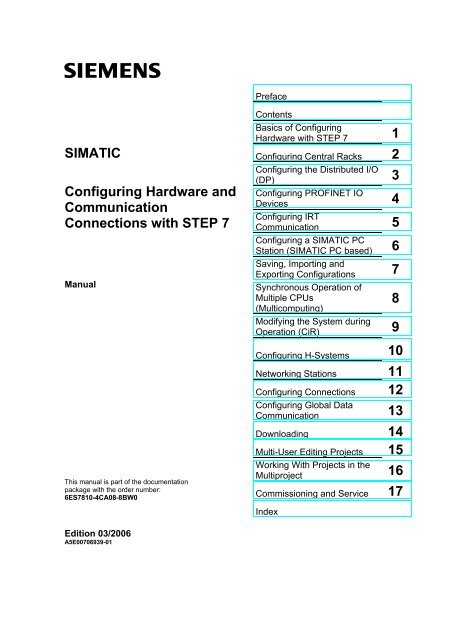
Configuring Hardware and Communication Connections STEP 7.pdf
Configuring Hardware and Communication Connections STEP 7.pdf
Configuring Hardware and Communication Connections STEP 7.pdf

Create successful ePaper yourself
Turn your PDF publications into a flip-book with our unique Google optimized e-Paper software.
s<br />
SIMATIC<br />
<strong>Configuring</strong> <strong>Hardware</strong> <strong>and</strong><br />
<strong>Communication</strong><br />
<strong>Connections</strong> with <strong>STEP</strong> 7<br />
Manual<br />
This manual is part of the documentation<br />
package with the order number:<br />
6ES7810-4CA08-8BW0<br />
Edition 03/2006<br />
A5E00706939-01<br />
Preface<br />
Contents<br />
Basics of <strong>Configuring</strong><br />
<strong>Hardware</strong> with <strong>STEP</strong> 7<br />
<strong>Configuring</strong> Central Racks<br />
<strong>Configuring</strong> the Distributed I/O<br />
(DP)<br />
<strong>Configuring</strong> PROFINET IO<br />
Devices<br />
<strong>Configuring</strong> IRT<br />
<strong>Communication</strong><br />
<strong>Configuring</strong> a SIMATIC PC<br />
Station (SIMATIC PC based)<br />
Saving, Importing <strong>and</strong><br />
Exporting Configurations<br />
Synchronous Operation of<br />
Multiple CPUs<br />
(Multicomputing)<br />
Modifying the System during<br />
Operation (CiR)<br />
1<br />
2<br />
3<br />
4<br />
5<br />
6<br />
7<br />
8<br />
9<br />
10<br />
<strong>Configuring</strong> H-Systems<br />
Networking Stations 11<br />
<strong>Configuring</strong> <strong>Connections</strong> 12<br />
<strong>Configuring</strong> Global Data<br />
<strong>Communication</strong><br />
13<br />
Downloading 14<br />
Multi-User Editing Projects 15<br />
16<br />
Working With Projects in the<br />
Multiproject<br />
Commissioning <strong>and</strong> Service 17<br />
Index
Safety Guidelines<br />
This manual contains notices you have to observe in order to ensure your personal safety, as well as to<br />
prevent damage to property. The notices referring to your personal safety are highlighted in the manual<br />
by a safety alert symbol, notices referring to property damage only have no safety alert symbol. The<br />
notices shown below are graded according to the degree of danger.<br />
!<br />
!<br />
!<br />
Danger<br />
indicates that death or severe personal injury will result if proper precautions are not taken.<br />
Warning<br />
indicates that death or severe personal injury may result if proper precautions are not taken.<br />
Caution<br />
with a safety alert symbol indicates that minor personal injury can result if proper precautions are not<br />
taken.<br />
Caution<br />
without a safety alert symbol indicates that property damage can result if proper precautions are not<br />
taken.<br />
Attention<br />
indicates that an unintended result or situation can occur if the corresponding notice is not taken into<br />
account.<br />
If more than one degree of danger is present, the warning notice representing the highest degree of<br />
danger will be used. A notice warning of injury to persons with a safety alert symbol may also include a<br />
warning relating to property damage.<br />
Qualified Personnel<br />
The device/system may only be set up <strong>and</strong> used in conjunction with this documentation. Commissioning<br />
<strong>and</strong> operation of a device/system may only be performed by qualified personnel. Within the context of<br />
the safety notices in this documentation qualified persons are defined as persons who are authorized to<br />
commission, ground <strong>and</strong> label devices, systems <strong>and</strong> circuits in accordance with established safety<br />
practices <strong>and</strong> st<strong>and</strong>ards.<br />
Prescribed Usage<br />
!<br />
Trademarks<br />
Note the following:<br />
Warning<br />
This device <strong>and</strong> its components may only be used for the applications described in the catalog or the<br />
technical description, <strong>and</strong> only in connection with devices or components from other manufacturers<br />
which have been approved or recommended by Siemens.<br />
Correct, reliable operation of the product requires proper transport, storage, positioning <strong>and</strong> assembly<br />
as well as careful operation <strong>and</strong> maintenance.<br />
All names identified by ® are registered trademarks of the Siemens AG.<br />
The remaining trademarks in this publication may be trademarks whose use by third parties for their<br />
own purposes could violate the rights of the owner.<br />
Disclaimer of Liability<br />
We have reviewed the contents of this publication to ensure consistency with the hardware <strong>and</strong> software<br />
described. Since variance cannot be precluded entirely, we cannot guarantee full consistency. However,<br />
the information in this publication is reviewed regularly <strong>and</strong> any necessary corrections are included in<br />
subsequent editions<br />
Siemens AG<br />
Automation <strong>and</strong> Drives<br />
Postfach 4848<br />
90437 NÜRNBERG<br />
GERMANY<br />
Copyright © Siemens AG 2006<br />
A5E00706939-01<br />
Siemens AG 2006<br />
Technical data subject to change.
Preface<br />
Purpose<br />
This manual provides a complete overview of the procedures involved in<br />
configuring hardware <strong>and</strong> communication connections with the <strong>STEP</strong> 7 software. It<br />
is designed to support you when depicting the hardware configuration in the form of<br />
a <strong>STEP</strong> 7 project <strong>and</strong> describes how to establish data exchange between<br />
automation systems.<br />
The manual is intended for people who are involved in carrying out control tasks<br />
using <strong>STEP</strong> 7 <strong>and</strong> SIMATIC S7 automation systems.<br />
We recommend that you familiarize yourself with the examples in the manual<br />
"Working with <strong>STEP</strong> 7 V5.4, Getting Started." These examples provide an easy<br />
introduction to the topic "Programming with <strong>STEP</strong> 7."<br />
Basic Knowledge Required<br />
In order to underst<strong>and</strong> this manual, general knowledge of automation technology is<br />
required.<br />
In addition, you must be familiar with using computers or PC-similar tools (for<br />
example, programming devices) with the MS Windows 2000 Professional,<br />
MS Windows XP Professional or MS Windows Server 2003 operating system.<br />
Scope of the Manual<br />
This manual is valid for release 5.4 of the <strong>STEP</strong> 7 programming software package.<br />
You can find the latest information on the service packs:<br />
• in the "readme.wri" file<br />
• in the updated <strong>STEP</strong> 7 online help.<br />
The topic "What's new?" in the online help offers an excellent introduction <strong>and</strong><br />
overview of the newest <strong>STEP</strong> 7 innovations.<br />
<strong>Configuring</strong> <strong>Hardware</strong> <strong>and</strong> <strong>Communication</strong> <strong>Connections</strong> with <strong>STEP</strong> 7<br />
A5E00706939-01 iii
Preface<br />
<strong>STEP</strong> 7 Documentation Packages<br />
This manual is part of the documentation package "<strong>STEP</strong> 7 Basic Information.“<br />
The following table displays an overview of the <strong>STEP</strong> 7 documentation:<br />
Documentation Purpose Order Number<br />
<strong>STEP</strong> 7 Basic Information with<br />
Basic information for technical 6ES7810-4CA08-8BW0<br />
•<br />
•<br />
•<br />
Working with <strong>STEP</strong> 7,<br />
Getting Started Manual<br />
Programming with <strong>STEP</strong> 7<br />
<strong>Configuring</strong> <strong>Hardware</strong> <strong>and</strong><br />
<strong>Communication</strong> <strong>Connections</strong> with<br />
<strong>STEP</strong> 7<br />
personnel describing the methods<br />
of implementing control tasks with<br />
<strong>STEP</strong> 7 <strong>and</strong> the S7-300/400<br />
programmable controllers.<br />
• From S5 to S7, Converter Manual<br />
<strong>STEP</strong> 7 Reference with<br />
Provides reference information 6ES7810-4CA08-8BW1<br />
•<br />
•<br />
Ladder Logic (LAD)/Function Block<br />
Diagram (FBD)/Statement List (STL)<br />
for S7-300/400 manuals<br />
St<strong>and</strong>ard <strong>and</strong> System Functions for<br />
S7-300/400<br />
Volume 1 <strong>and</strong> Volume 2<br />
<strong>and</strong> describes the programming<br />
languages LAD, FBD, <strong>and</strong> STL,<br />
<strong>and</strong> st<strong>and</strong>ard <strong>and</strong> system<br />
functions extending the scope of<br />
the <strong>STEP</strong> 7 basic information.<br />
Online Helps Purpose Order Number<br />
Help on <strong>STEP</strong> 7 Basic information on<br />
programming <strong>and</strong> configuring<br />
hardware with <strong>STEP</strong> 7 in the form<br />
of an online help.<br />
Reference helps on STL/LAD/FBD<br />
Reference help on SFBs/SFCs<br />
Reference help on Organization Blocks<br />
Context-sensitive reference<br />
information.<br />
Part of the <strong>STEP</strong> 7<br />
St<strong>and</strong>ard software.<br />
Part of the <strong>STEP</strong> 7<br />
St<strong>and</strong>ard software.<br />
<strong>Configuring</strong> <strong>Hardware</strong> <strong>and</strong> <strong>Communication</strong> <strong>Connections</strong> with <strong>STEP</strong> 7<br />
iv A5E00706939-01
Online Help<br />
Preface<br />
The manual is complemented by an online help which is integrated in the software.<br />
This online help is intended to provide you with detailed support when using the<br />
software.<br />
The help system is integrated in the software via a number of interfaces:<br />
• There are several menu comm<strong>and</strong>s which you can select in the Help menu:<br />
The Contents comm<strong>and</strong> opens the index for the Help on <strong>STEP</strong> 7.<br />
• Using Help provides detailed instructions on using the online help.<br />
• The context-sensitive help offers information on the current context, for<br />
example, an open dialog box or an active window. You can open the<br />
contextsensitive help by clicking the "Help" button or by pressing F1.<br />
• The status bar offers another form of context-sensitive help. It displays a short<br />
explanation for each menu comm<strong>and</strong> when the mouse pointer is positioned on<br />
the menu comm<strong>and</strong>.<br />
• A brief explanation is also displayed for each icon in the toolbar when the<br />
mouse pointer is positioned on the icon for a short time.<br />
If you prefer to read the information from the online help in printed format, you can<br />
print out individual help topics, books, or the entire online help.<br />
This manual, as well as the manuals "Programming with <strong>STEP</strong> 7", "Modifiying the<br />
System During Operation via CiR" <strong>and</strong> "Automation System S7-400H - Fault-<br />
Tolerant Systems" is an extract from the HTML-based Help on <strong>STEP</strong> 7. For<br />
detailed procedures please refer to the <strong>STEP</strong> 7 help. As the manuals <strong>and</strong> the<br />
online help share an almost identical structure, it is easy to switch between the<br />
manuals <strong>and</strong> the online help.<br />
You can find the electronic manuals after installing <strong>STEP</strong> 7 via the Windows Start<br />
menu: Start > SIMATIC > Documentation.<br />
<strong>Configuring</strong> <strong>Hardware</strong> <strong>and</strong> <strong>Communication</strong> <strong>Connections</strong> with <strong>STEP</strong> 7<br />
A5E00706939-01 v
Preface<br />
Further Support<br />
If you have any technical questions, please get in touch with your Siemens<br />
representative or responsible agent.<br />
You will find your contact person at:<br />
http://www.siemens.com/automation/partner<br />
You will find a guide to the technical documentation offered for the individual<br />
SIMATIC Products <strong>and</strong> Systems here at:<br />
http://www.siemens.com/simatic-tech-doku-portal<br />
The online catalog <strong>and</strong> order system is found under:<br />
http://mall.automation.siemens.com/<br />
Training Centers<br />
Siemens offers a number of training courses to familiarize you with the SIMATIC<br />
S7 automation system. Please contact your regional training center or our central<br />
training center in D 90327 Nuremberg, Germany for details:<br />
Telephone: +49 (911) 895-3200.<br />
Internet: http://www.sitrain.com<br />
<strong>Configuring</strong> <strong>Hardware</strong> <strong>and</strong> <strong>Communication</strong> <strong>Connections</strong> with <strong>STEP</strong> 7<br />
vi A5E00706939-01
Technical Support<br />
You can reach the Technical Support for all A&D products<br />
• Via the Web formula for the Support Request<br />
http://www.siemens.com/automation/support-request<br />
• Phone: + 49 180 5050 222<br />
Preface<br />
• Fax: + 49 180 5050 223<br />
Additional information about our Technical Support can be found on the Internet<br />
pages http://www.siemens.com/automation/service<br />
Service & Support on the Internet<br />
In addition to our documentation, we offer our Know-how online on the internet at:<br />
http://www.siemens.com/automation/service&support<br />
where you will find the following:<br />
• The newsletter, which constantly provides you with up-to-date information on<br />
your products.<br />
• The right documents via our Search function in Service & Support.<br />
• A forum, where users <strong>and</strong> experts from all over the world exchange their<br />
experiences.<br />
• Your local representative for Automation & Drives.<br />
• Information on field service, repairs, spare parts <strong>and</strong> more under "Services".<br />
<strong>Configuring</strong> <strong>Hardware</strong> <strong>and</strong> <strong>Communication</strong> <strong>Connections</strong> with <strong>STEP</strong> 7<br />
A5E00706939-01 vii
Preface<br />
<strong>Configuring</strong> <strong>Hardware</strong> <strong>and</strong> <strong>Communication</strong> <strong>Connections</strong> with <strong>STEP</strong> 7<br />
viii A5E00706939-01
Contents<br />
1 Basics of <strong>Configuring</strong> <strong>Hardware</strong> with <strong>STEP</strong> 7............................................................. 1-1<br />
1.1 Introduction to <strong>Configuring</strong> <strong>Hardware</strong>.......................................................... 1-1<br />
1.2 Basic Procedure for <strong>Configuring</strong> <strong>Hardware</strong>................................................. 1-3<br />
1.2.1 Basic Steps for <strong>Configuring</strong> a Station.......................................................... 1-3<br />
1.2.2 Layout of the Station Window...................................................................... 1-4<br />
1.2.3 Configuration Table as a Representation of a Rack.................................... 1-5<br />
1.2.4 Setting the Properties of Components ........................................................ 1-6<br />
1.2.5 Opening Objects in HW-Konfig.................................................................... 1-7<br />
1.2.6 What You Should Know About Slot Rules <strong>and</strong> Other Rules ....................... 1-7<br />
1.3 Overview: Procedure for <strong>Configuring</strong> <strong>and</strong> Assigning Parameters<br />
to a Local Configuration............................................................................... 1-8<br />
1.4 Working with the <strong>Hardware</strong> Catalog............................................................ 1-9<br />
1.4.1 Customizing the <strong>Hardware</strong> Catalog............................................................. 1-9<br />
1.4.2 Searching in the <strong>Hardware</strong> Catalog .......................................................... 1-10<br />
1.5 Tips for Editing Station Configurations ...................................................... 1-11<br />
1.5.1 Exchanging <strong>and</strong> Moving Modules ............................................................. 1-13<br />
1.5.2 Exchanging Racks, C7 Devices, <strong>and</strong> DP Slaves ...................................... 1-14<br />
1.5.3 Displaying Information on Components in the <strong>Hardware</strong> Catalog ............ 1-17<br />
1.5.4 Installing <strong>Hardware</strong> Updates ..................................................................... 1-18<br />
2 <strong>Configuring</strong> Central Racks............................................................................................ 2-1<br />
2.1 Rules for Arranging Modules (SIMATIC 300).............................................. 2-1<br />
2.1.1 Special Rules for the Dummy Module (DM 370 Dummy) ........................... 2-2<br />
2.1.2 Special Rules for the Digital Simulation Module (SIM 374 IN/OUT 16) ...... 2-2<br />
2.1.3 Special Rules for M7-300 ............................................................................ 2-3<br />
2.2 Rules for Arranging Modules (SIMATIC-400).............................................. 2-4<br />
2.2.1 Rules for Arranging Modules (SIMATIC-400).............................................. 2-4<br />
2.2.2 Special Rules for Power Supply Modules with<br />
Redundant Capability (S7-400) ................................................................... 2-5<br />
2.2.3 Special Rules for M7-400 ............................................................................ 2-5<br />
2.2.4 Special Rules for PROFIBUS-DP Interface Submodules (M7-400)............ 2-6<br />
2.3 How to Configure Central Racks ................................................................. 2-7<br />
2.3.1 Creating a Station........................................................................................ 2-7<br />
2.3.2 Starting the Application to Configure the <strong>Hardware</strong> .................................... 2-7<br />
2.3.3 Arranging the Central Rack ......................................................................... 2-8<br />
2.3.4 Arranging Modules in a Rack ...................................................................... 2-8<br />
2.3.5 Displaying the Version of the CPU Operating System<br />
in the '<strong>Hardware</strong> Catalog' window ............................................................... 2-9<br />
2.3.6 Arranging C7 Control Systems (Special Features) ................................... 2-10<br />
2.3.7 Assigning Properties to Modules/Interfaces .............................................. 2-11<br />
2.3.8 Assigning Addresses ................................................................................. 2-12<br />
2.3.9 Assigning I/O Addresses ........................................................................... 2-13<br />
2.3.10 Assigning Symbols to I/O Addresses ........................................................ 2-14<br />
2.3.11 Monitoring Inputs <strong>and</strong> Modifying Outputs When <strong>Configuring</strong> <strong>Hardware</strong> ... 2-14<br />
2.3.12 <strong>Configuring</strong> Point-to-Point CPs.................................................................. 2-17<br />
2.3.13 <strong>Configuring</strong> S5 Modules ............................................................................ 2-18<br />
<strong>Configuring</strong> <strong>Hardware</strong> <strong>and</strong> <strong>Communication</strong> <strong>Connections</strong> with <strong>STEP</strong> 7<br />
A5E00706939-01 ix
Contents<br />
2.4 Exp<strong>and</strong>ing the Central Rack with Expansion Racks ................................. 2-19<br />
2.4.1 Rules for Connecting Expansion Racks (SIMATIC 400)........................... 2-20<br />
2.4.2 Arranging the Expansion Rack (SIMATIC 400)......................................... 2-20<br />
2.4.3 Special Case: When the Central Rack Has More Than One CPU............ 2-20<br />
3 <strong>Configuring</strong> the Distributed I/O (DP) ............................................................................ 3-1<br />
3.1 Basic Procedure for <strong>Configuring</strong> a DP Master System ............................... 3-1<br />
3.2 Where Are the DP Slaves in the <strong>Hardware</strong> Catalog Window?.................... 3-4<br />
3.3 Distributed Reading <strong>and</strong> Writing of Consistent Data (> 4 Bytes) ................ 3-5<br />
3.4 Configurations for PROFIBUS-DP .............................................................. 3-6<br />
3.4.1 Configuration with 'Simple' (Modular or Compact) DP Slaves<br />
(Data Exchange: Slave Master) ............................................................. 3-6<br />
3.4.2 Configuration with Intelligent DP Slaves<br />
(Data Exchange: I Slave Master) ........................................................... 3-7<br />
3.4.3 Configuration with Intelligent DP Slaves<br />
(Direct Data Exchange: Slave > I Slave)..................................................... 3-8<br />
3.4.4 Configuration with Two DP Master Systems<br />
(Direct Data Exchange: Slave > I Slave)..................................................... 3-9<br />
3.4.5 Configuration with Two DP Master Systems<br />
(Direct Data Exchange: Slave > Master)................................................... 3-10<br />
3.5 How to Configure Distributed I/O Systems................................................ 3-11<br />
3.5.1 Creating a DP Master System................................................................... 3-11<br />
3.5.2 H<strong>and</strong>ling DP Master Systems <strong>and</strong> DP Interfaces...................................... 3-12<br />
3.5.3 Selecting <strong>and</strong> Arranging DP Slaves .......................................................... 3-13<br />
3.5.4 Copying Multiple DP Slaves ...................................................................... 3-13<br />
3.5.5 <strong>Configuring</strong> Compact DP Slaves............................................................... 3-14<br />
3.5.6 <strong>Configuring</strong> Modular DP Slaves ................................................................ 3-14<br />
3.5.7 Assigning DP Slaves to SYNC or FREEZE Groups.................................. 3-15<br />
3.6 Other DP Slave Configurations ................................................................. 3-17<br />
3.6.1 ET 200L <strong>and</strong> DP/AS-i Link......................................................................... 3-17<br />
3.6.2 ET 200S..................................................................................................... 3-17<br />
3.6.3 ET 200S with Option H<strong>and</strong>ling .................................................................. 3-20<br />
3.6.4 ET 200S in DPV1 Mode ............................................................................ 3-22<br />
3.6.5 ET 200iS.................................................................................................... 3-23<br />
3.6.6 PROFIBUS PA........................................................................................... 3-25<br />
3.6.7 HART Modules .......................................................................................... 3-26<br />
3.6.8 <strong>Configuring</strong> Software Redundancy............................................................ 3-26<br />
3.7 Intelligent DP Slaves ................................................................................. 3-30<br />
3.7.1 <strong>Configuring</strong> Intelligent DP Slaves.............................................................. 3-30<br />
3.7.2 Example of <strong>Configuring</strong> an S7-400 as I-Slave .......................................... 3-35<br />
3.7.3 Creating an Alarm in the I Slave with SFB75 'SALRM.............................. 3-42<br />
3.8 Direct Data Exchange (Lateral <strong>Communication</strong>)....................................... 3-45<br />
3.8.1 <strong>Configuring</strong> Direct Data Exchange between PROFIBUS-DP Nodes ........ 3-45<br />
3.8.2 Example of <strong>Configuring</strong> Direct Data Exchange......................................... 3-47<br />
3.8.3 <strong>Configuring</strong> a DP-Slave (GSD Rev. 5) as a Receiver for<br />
Direct Data Exchange................................................................................ 3-50<br />
3.9 Working with *.GSD Files .......................................................................... 3-53<br />
3.9.1 Installing a *.GSD File ............................................................................... 3-53<br />
3.9.2 What You Should Know About GSD Revisions......................................... 3-55<br />
3.9.3 What You Should Know about GSD Files for PROFINET IO Devices...... 3-57<br />
3.10 DPV1 ......................................................................................................... 3-58<br />
3.10.1 What You Should Know About PROFIBUS DPV1 .................................... 3-58<br />
3.10.2 <strong>Configuring</strong> DPV1 Devices........................................................................ 3-59<br />
3.10.3 Programming DPV1 Devices..................................................................... 3-61<br />
3.10.4 The Slot Model of DPV1 Slaves with I-Slaves........................................... 3-65<br />
<strong>Configuring</strong> <strong>Hardware</strong> <strong>and</strong> <strong>Communication</strong> <strong>Connections</strong> with <strong>STEP</strong> 7<br />
x A5E00706939-01
Contents<br />
3.11 Diagnostic Repeater .................................................................................. 3-70<br />
3.11.1 <strong>Configuring</strong> <strong>and</strong> Commissioning the Diagnostic Repeater........................ 3-70<br />
3.11.2 Displaying the Topology With the Help of Diagnostic Repeaters.............. 3-73<br />
3.11.3 Working With the Topology View .............................................................. 3-75<br />
3.12 Setting Constant Bus Cycle Times for PROFIBUS Subnets..................... 3-78<br />
3.12.1 <strong>Configuring</strong> Short <strong>and</strong> Equal-Length Process Reaction Times on<br />
PROFIBUS DP .......................................................................................... 3-82<br />
3.12.2 Assigning Parameters for Constant Bus Cycle Time<br />
<strong>and</strong> Isochrone Mode in HW Config ........................................................... 3-87<br />
3.12.3 Connecting a PG/PC to a Constant-Cycle PROFIBUS network<br />
via Industrial Ethernet <strong>and</strong> an IE/PB Link.................................................. 3-91<br />
3.12.4 Shortening the Process Reaction Time by Overlapping Ti <strong>and</strong> To ........... 3-92<br />
4 <strong>Configuring</strong> PROFINET IO Devices .............................................................................. 4-1<br />
4.1 What You Should Know about PROFINET IO ............................................ 4-1<br />
4.1.1 What is PROFINET IO?............................................................................... 4-1<br />
4.1.2 PROFIBUS DP <strong>and</strong> PROFINET IO: Similarities <strong>and</strong> Differences ............... 4-2<br />
4.1.3 Assigning Addresses <strong>and</strong> Names for PROFINET IO Devices .................... 4-4<br />
4.1.4 Integrating Existing PROFIBUS DP Configurations .................................... 4-6<br />
4.1.5 Update Times For Cyclical Data Exchange................................................. 4-8<br />
4.1.6 Setting a Specific Update Time for an IO-Device...................................... 4-10<br />
4.2 Steps For <strong>Configuring</strong> a PROFInet IO System.......................................... 4-11<br />
4.2.1 Overview: From Configuration To Cyclical Data Exchange ...................... 4-11<br />
4.2.2 Basic Procedure for <strong>Configuring</strong> a PROFINET IO System ....................... 4-13<br />
4.2.3 Creating a PROFINET IO System............................................................. 4-15<br />
4.2.4 Selecting <strong>and</strong> Arranging IO Devices ......................................................... 4-16<br />
4.2.5 Where Are The IO Devices Located In The <strong>Hardware</strong> Catalog? .............. 4-17<br />
4.2.6 H<strong>and</strong>ling PROFINET IO Systems ............................................................. 4-18<br />
4.3 Examples of Configurations with PROFINET IO....................................... 4-19<br />
4.3.1 Configuration with an Integrated IO Controller .......................................... 4-19<br />
4.3.2 Configuration with an External IO Controller ............................................. 4-20<br />
4.3.3 Configuration with IE/PB Link.................................................................... 4-21<br />
4.3.4 Configuration with SIMATIC PC Stations .................................................. 4-22<br />
4.4 Placing PROFINET IO Devices in Operation ............................................ 4-24<br />
4.4.1 Accessing PROFINET IO Devices Online via Ethernet ............................ 4-24<br />
4.4.2 Displaying Ethernet Nodes in the "Accessible Nodes" Window................ 4-25<br />
4.4.3 Downloading to PROFINET IO Devices.................................................... 4-27<br />
4.4.4 Assigning Device Names via a Memory Card (MMC)............................... 4-29<br />
4.4.5 Changing the IP-Address or the Device Name During Operation............. 4-30<br />
4.4.6 Diagnosing PROFINET IO Devices........................................................... 4-31<br />
4.4.7 <strong>Configuring</strong> the Watchdog Time................................................................ 4-32<br />
5 <strong>Configuring</strong> IRT <strong>Communication</strong>.................................................................................. 5-1<br />
5.1.1 Introduction: Isochronous Realtime Ethernet .............................................. 5-1<br />
5.2 Overview: Basic Procedure For <strong>Configuring</strong> IRT ........................................ 5-3<br />
5.3 Creating a PROFINET IO Configuration ..................................................... 5-3<br />
5.4 Creating a Sync Domain.............................................................................. 5-4<br />
5.5 Setting Update Times .................................................................................. 5-5<br />
5.6 <strong>Configuring</strong> the Topology ............................................................................ 5-6<br />
5.7 <strong>Configuring</strong> Direct Data Exchange .............................................................. 5-7<br />
5.8 Downloading an IRT Configuration ............................................................. 5-8<br />
5.9 Media Redundancy...................................................................................... 5-9<br />
5.9.1 What You Should Know a About Media Redundancy................................. 5-9<br />
5.9.2 <strong>Configuring</strong> Media Redundancy ................................................................ 5-12<br />
<strong>Configuring</strong> <strong>Hardware</strong> <strong>and</strong> <strong>Communication</strong> <strong>Connections</strong> with <strong>STEP</strong> 7<br />
A5E00706939-01 xi
Contents<br />
6 <strong>Configuring</strong> a SIMATIC PC Station (SIMATIC PC based)........................................... 6-1<br />
6.1 Creating <strong>and</strong> Assigning Parameters to SIMATIC PC Stations.................... 6-1<br />
6.2 Slot Rules for a SIMATIC PC Station .......................................................... 6-4<br />
6.3 Comparison: S7 Station - PC Station .......................................................... 6-4<br />
6.4 Appending SIMATIC PC Configurations of Previous Versions ................... 6-5<br />
6.5 Highlighting the SIMATIC PC Station to be Configured<br />
in the Network View..................................................................................... 6-7<br />
7 Saving, Importing <strong>and</strong> Exporting Configurations....................................................... 7-1<br />
7.1 Saving a Configuration <strong>and</strong> Checking the Consistency .............................. 7-1<br />
7.2 Importing <strong>and</strong> Exporting a Configuration..................................................... 7-2<br />
7.3 Exporting <strong>and</strong> Importing CAx Data.............................................................. 7-5<br />
8 Synchronous Operation of Multiple CPUs (Multicomputing).................................... 8-1<br />
8.1 What You Should Know About Multicomputing........................................... 8-1<br />
8.1.1 Special Features of Multicomputing ............................................................ 8-3<br />
8.1.2 When to Use Multicomputing....................................................................... 8-4<br />
8.2 <strong>Configuring</strong> Multicomputing Operation ........................................................ 8-5<br />
8.2.1 <strong>Configuring</strong> Modules for Multicomputing Operation .................................... 8-6<br />
8.2.2 Displaying the CPU Assignment.................................................................. 8-6<br />
8.2.3 Changing the CPU Number......................................................................... 8-7<br />
8.3 Programming CPUs..................................................................................... 8-8<br />
9 Modifying the System during Operation (CiR)............................................................ 9-1<br />
10 <strong>Configuring</strong> H-Systems ............................................................................................... 10-1<br />
11 Networking Stations .................................................................................................... 11-1<br />
11.1 Networking Stations within a Project ......................................................... 11-1<br />
11.2 Properties of Subnets <strong>and</strong> <strong>Communication</strong> Nodes ................................... 11-2<br />
11.3 Rules for Network Configuration ............................................................... 11-3<br />
11.4 Ethernet Address Assignment................................................................... 11-4<br />
11.5 Importing <strong>and</strong> Exporting Stations in the Network View ............................. 11-7<br />
11.6 How to Configure <strong>and</strong> Save a Subnet ..................................................... 11-10<br />
11.6.1 Procedure for <strong>Configuring</strong> a Subnet........................................................ 11-10<br />
11.6.2 Creating <strong>and</strong> Assigning Parameters to a New Subnet............................ 11-14<br />
11.6.3 Creating <strong>and</strong> Assigning Parameters to a New Station ............................ 11-15<br />
11.6.4 Creating <strong>and</strong> Assigning Parameters to a Network Connection............... 11-16<br />
11.6.5 Creating <strong>and</strong> Assigning Parameters to a New DP Slave ........................ 11-18<br />
11.6.6 Creating <strong>and</strong> Assigning Parameters to Programming Devices/PCs,<br />
'Other' Stations, <strong>and</strong> S5 Stations............................................................. 11-19<br />
11.6.7 Taking <strong>Connections</strong> for Programming Devices/PCs into Account<br />
in the Network Configuration ................................................................... 11-21<br />
11.6.8 Checking the Consistency of the Network............................................... 11-24<br />
11.6.9 Saving the Network Configuration........................................................... 11-26<br />
11.6.10 Tips for Editing the Network Configuration.............................................. 11-27<br />
11.7 Networking Stations that Represent Network Gateways ........................ 11-30<br />
11.7.1 Networking Stations that Represent Network Gateways ........................ 11-30<br />
11.7.2 Programming Devices / PCs Connected to a Subnet<br />
via TeleService or WAN .......................................................................... 11-33<br />
11.8 Networking Stations from Different Projects............................................ 11-35<br />
<strong>Configuring</strong> <strong>Hardware</strong> <strong>and</strong> <strong>Communication</strong> <strong>Connections</strong> with <strong>STEP</strong> 7<br />
xii A5E00706939-01
Contents<br />
12 <strong>Configuring</strong> <strong>Connections</strong>............................................................................................ 12-1<br />
12.1 Introduction to <strong>Configuring</strong> <strong>Connections</strong> ................................................... 12-1<br />
12.2 <strong>Configuring</strong> <strong>Communication</strong> with an Ethernet CP..................................... 12-2<br />
12.3 <strong>Configuring</strong> <strong>Communication</strong> with a PROFIBUS CP .................................. 12-3<br />
12.4 What You Should Know About the Different Connection Types ............... 12-4<br />
12.5 What You Should Know About Assigning Connection Resources............ 12-8<br />
12.6 Using Connection Resources with Fault-Tolerant S7 <strong>Connections</strong> ........ 12-13<br />
12.7 Blocks for Different Connection Types .................................................... 12-18<br />
12.8 Working with the Connection Table......................................................... 12-20<br />
12.9 Inconsistent <strong>Connections</strong> ........................................................................ 12-22<br />
12.10 Displaying the Connection Status ........................................................... 12-23<br />
12.11 Access to Connection IDs during Programming...................................... 12-25<br />
12.12 <strong>Configuring</strong> <strong>Connections</strong> to Partners in the Same Project...................... 12-26<br />
12.12.1 Connection Types for Connection Partners in the Same Project............ 12-26<br />
12.12.2 Rules for Creating <strong>Connections</strong>............................................................... 12-28<br />
12.12.3 <strong>Configuring</strong> <strong>Connections</strong> for Modules in a SIMATIC Station .................. 12-28<br />
12.12.3.1 Inserting a New Connection .................................................................... 12-29<br />
12.12.3.2 Changing the Connection Partner ........................................................... 12-30<br />
12.12.3.3 Reserving a Connection .......................................................................... 12-31<br />
12.12.3.4 Deleting One or More <strong>Connections</strong> ......................................................... 12-32<br />
12.12.3.5 Copying <strong>Connections</strong> .............................................................................. 12-32<br />
12.12.4 <strong>Configuring</strong> <strong>Connections</strong> for a SIMATIC PC Station............................... 12-33<br />
12.12.4.1 <strong>Configuring</strong> Routed S7 <strong>Connections</strong> for a SIMATIC PC Station............. 12-34<br />
12.12.5 Programming Devices / PCs as Connection Partners ............................ 12-36<br />
12.12.5.1 S7 Connection to a PG/PC...................................................................... 12-36<br />
12.12.5.2 S7 Connection to a PG/PC with WinCC.................................................. 12-37<br />
12.13 <strong>Configuring</strong> <strong>Connections</strong> to Partners in Other Projects .......................... 12-38<br />
12.13.1 Connection Types for Partners in Other Projects.................................... 12-38<br />
12.13.2 Basic Procedure for <strong>Configuring</strong> <strong>Connections</strong> between Projects............ 12-40<br />
12.13.3 Creating a New Connection to an Unspecified Partner........................... 12-41<br />
12.13.4 Creating a Connection to an 'Other Station', a 'PG/PC',<br />
or a 'SIMATIC S5 Station'........................................................................ 12-43<br />
12.14 Saving <strong>Connections</strong>................................................................................. 12-43<br />
13 <strong>Configuring</strong> Global Data <strong>Communication</strong> ................................................................. 13-1<br />
13.1 Overview: Global Data <strong>Communication</strong> .................................................... 13-1<br />
13.2 Determining the <strong>Communication</strong> Capabilities from the GD Resources .... 13-3<br />
13.2.1 Required Number of GD Packets.............................................................. 13-4<br />
13.2.2 Required Number of GD Circles................................................................ 13-5<br />
13.2.3 Exceptions for Calculating the GD Circles Required................................. 13-8<br />
13.3 Conditions for Sending <strong>and</strong> Receiving ...................................................... 13-9<br />
13.3.1 Relationship between the Scan Rate <strong>and</strong> Scan Cycle Time................... 13-10<br />
13.4 Response Time ....................................................................................... 13-11<br />
13.5 How to Configure <strong>and</strong> Save Global Data <strong>Communication</strong> ...................... 13-12<br />
13.5.1 Procedure for <strong>Configuring</strong> Global Data <strong>Communication</strong> ......................... 13-12<br />
13.5.2 Opening the GD Table............................................................................. 13-13<br />
13.5.3 Tips for Working with GD Tables............................................................. 13-14<br />
13.5.4 Filling Out the GD Table .......................................................................... 13-15<br />
13.5.5 Saving <strong>and</strong> Compiling the GD Table for the First Time........................... 13-17<br />
13.5.6 Entering Scan Rates................................................................................ 13-18<br />
13.5.7 Entering Status Rows .............................................................................. 13-19<br />
13.5.8 Compiling the GD Table for a Second Time............................................ 13-20<br />
13.6 Global Data Transmission Using System Functions ............................... 13-21<br />
<strong>Configuring</strong> <strong>Hardware</strong> <strong>and</strong> <strong>Communication</strong> <strong>Connections</strong> with <strong>STEP</strong> 7<br />
A5E00706939-01 xiii
Contents<br />
14 Downloading................................................................................................................. 14-1<br />
14.1 Downloading a Configuration to a Programmable Controller.................... 14-1<br />
14.2 Downloading the Network Configuration for the First Time....................... 14-3<br />
14.3 Downloading the Network Configuration to a Programmable Controller .. 14-5<br />
14.4 Downloading to a PC Station..................................................................... 14-6<br />
14.5 Downloading Changes to the Network Configuration ............................... 14-7<br />
14.6 Downloading a Changed HW Configuration to an S7-400H Station......... 14-9<br />
14.7 Downloading the Global Data Configuration ........................................... 14-10<br />
14.8 Uploading a Configuration from a Station ............................................... 14-11<br />
14.9 Uploading a Network Configuration......................................................... 14-12<br />
15 Multi-User Editing Projects ......................................................................................... 15-1<br />
15.1 Multi-User Configuration in a Network....................................................... 15-1<br />
15.1.1 Setting the Workstation Configuration....................................................... 15-3<br />
15.2 Single Terminal Configuration on Non-Networked Workstations .............. 15-4<br />
15.2.1 Merging Several S7 Programs into One.................................................... 15-4<br />
15.2.2 Copying S7 Programs with Message Attributes........................................ 15-4<br />
16 Working With Projects in the Multiproject................................................................. 16-1<br />
16.1 What You Should Know About Multiprojects............................................. 16-1<br />
16.2 Multiproject - Requirements <strong>and</strong> Recommendations ................................ 16-4<br />
16.3 H<strong>and</strong>ling Multiprojects ............................................................................... 16-7<br />
16.4 Online Access to PLCs in a Multiproject ................................................. 16-12<br />
16.5 Creating Cross-Project Subnets.............................................................. 16-14<br />
16.6 Display Of Merged Subnets In The Network View .................................. 16-17<br />
16.7 Multiproject-Oriented Network View ........................................................ 16-18<br />
16.8 <strong>Configuring</strong> Cross-Project <strong>Connections</strong> .................................................. 16-20<br />
16.9 Options for Merging Cross-Project <strong>Connections</strong>..................................... 16-24<br />
16.10 S7 <strong>Connections</strong> to Unspecified Connection Partners ............................. 16-24<br />
16.11 Adjusting Projects in the Multiproject ...................................................... 16-24<br />
16.12 Archiving <strong>and</strong> Retrieving Multiprojects .................................................... 16-25<br />
17 Commissioning <strong>and</strong> Service....................................................................................... 17-1<br />
17.1 Commissioning PROFIBUS Nodes ........................................................... 17-1<br />
17.2 Identification <strong>and</strong> Maintenance (I&M)........................................................ 17-4<br />
17.3 Changing M-Data in the SIMATIC Manager.............................................. 17-5<br />
17.4 Entering or Changing M-Data in HW Config ............................................. 17-6<br />
Index ..................................................................................................................................Index-1<br />
<strong>Configuring</strong> <strong>Hardware</strong> <strong>and</strong> <strong>Communication</strong> <strong>Connections</strong> with <strong>STEP</strong> 7<br />
xiv A5E00706939-01
1 Basics of <strong>Configuring</strong> <strong>Hardware</strong> with<br />
<strong>STEP</strong> 7<br />
1.1 Introduction to <strong>Configuring</strong> <strong>Hardware</strong><br />
<strong>Configuring</strong><br />
The term "configuring" refers to the arranging of racks, modules, distributed I/O<br />
(DP) racks, <strong>and</strong> interface submodules in a station window. Racks are represented<br />
by a configuration table that permits a specific number of modules to be inserted,<br />
just like a real rack.<br />
In the configuration table, <strong>STEP</strong> 7 automatically assigns an address to each<br />
module. You can change the addresses of the modules in a station if the CPU in<br />
the station can be addressed freely (meaning an address can be assigned freely to<br />
every channel of the module, independent of its slot).<br />
You can copy your configuration as often as you like to other <strong>STEP</strong> 7 projects,<br />
modify it as necessary, <strong>and</strong> download it to one or more existing plants. When the<br />
programmable controller starts up, the CPU compares the preset configuration<br />
created in <strong>STEP</strong> 7 with the actual configuration of the plant. Any errors are<br />
therefore recognized immediately <strong>and</strong> reported.<br />
Assigning Parameters<br />
The term "assigning parameters" refers to the following:<br />
• Setting properties for programmable modules in a local configuration <strong>and</strong> in a<br />
network. For example: a CPU is a programmable module. Its watchdog time is a<br />
parameter you can set.<br />
• Setting bus parameters, master <strong>and</strong> slave parameters for a master system<br />
(PROFIBUS) or making other settings for exchanging data between<br />
components.<br />
The parameters are downloaded to the CPU <strong>and</strong> transferred during startup by the<br />
CPU to the respective modules. Modules can easily be replaced because the<br />
parameters set with <strong>STEP</strong> 7 are automatically downloaded to the new module<br />
during startup.<br />
<strong>Configuring</strong> <strong>Hardware</strong> <strong>and</strong> <strong>Communication</strong> <strong>Connections</strong> with <strong>STEP</strong> 7<br />
A5E00706939-01 1-1
Basics of <strong>Configuring</strong> <strong>Hardware</strong> with <strong>STEP</strong> 7<br />
When Should You "Configure <strong>Hardware</strong>"?<br />
The properties of the S7 programmable controllers <strong>and</strong> modules are preset with<br />
default values such that in many cases you do not need to configure them.<br />
Configuration is necessary in the following cases:<br />
• If you want to change the default parameters of a module (for example, enable<br />
a hardware interrupt for a module)<br />
• If you want to configure communication connections<br />
• For stations with a distributed I/O (PROFIBUS DP or PROFINET IO)<br />
• For S7-400 stations with a number of CPUs (multicomputing) or expansion<br />
racks<br />
• For fault-tolerant (H) programmable control systems<br />
<strong>Configuring</strong> <strong>Hardware</strong> <strong>and</strong> <strong>Communication</strong> <strong>Connections</strong> with <strong>STEP</strong> 7<br />
1-2 A5E00706939-01
Basics of <strong>Configuring</strong> <strong>Hardware</strong> with <strong>STEP</strong> 7<br />
1.2 Basic Procedure for <strong>Configuring</strong> <strong>Hardware</strong><br />
Window for <strong>Configuring</strong><br />
<strong>Configuring</strong> a programmable controller involves the use of two windows:<br />
• The station window in which you place the racks for the station structure<br />
• The "<strong>Hardware</strong> Catalog" window from which you select the required hardware<br />
components, for example, racks, modules, <strong>and</strong> interface submodules<br />
Displaying the <strong>Hardware</strong> Catalog<br />
If the "<strong>Hardware</strong> Catalog" window is not displayed, select the menu comm<strong>and</strong><br />
View > Catalog. This comm<strong>and</strong> toggles the display of the <strong>Hardware</strong> Catalog on<br />
<strong>and</strong> off.<br />
1.2.1 Basic Steps for <strong>Configuring</strong> a Station<br />
Independent of which structure a station has - you always configure using the<br />
following steps:<br />
1. Select a hardware component in the "<strong>Hardware</strong> Catalog" window.<br />
2. Copy the selected component to the station window using drag & drop.<br />
The following figure shows the basic operation:<br />
<strong>Configuring</strong> <strong>Hardware</strong> <strong>and</strong> <strong>Communication</strong> <strong>Connections</strong> with <strong>STEP</strong> 7<br />
A5E00706939-01 1-3
Basics of <strong>Configuring</strong> <strong>Hardware</strong> with <strong>STEP</strong> 7<br />
1.2.2 Layout of the Station Window<br />
The lower part of the station window shows a detailed view of the inserted/selected<br />
rack. The order numbers <strong>and</strong> addresses of the modules are shown here in table<br />
form.<br />
The table has the structure shown below for a central rack equipped with modules<br />
(detailed view):<br />
<strong>Configuring</strong> <strong>Hardware</strong> <strong>and</strong> <strong>Communication</strong> <strong>Connections</strong> with <strong>STEP</strong> 7<br />
1-4 A5E00706939-01
Basics of <strong>Configuring</strong> <strong>Hardware</strong> with <strong>STEP</strong> 7<br />
1.2.3 Configuration Table as a Representation of a Rack<br />
For a local configuration you arrange the modules beside the CPU in a rack <strong>and</strong><br />
continue into additional expansion racks. The number of racks which can be<br />
configured depends on the CPU you used.<br />
Just as you do in a real plant, you arrange your modules in racks with <strong>STEP</strong> 7. The<br />
difference is that in <strong>STEP</strong> 7 racks are represented by "configuration tables" that<br />
have as many rows as the rack has slots for modules.<br />
The following figure shows an example of how a real structure is converted into a<br />
configuration table. The configuration table corresponds to the rack used; <strong>STEP</strong> 7<br />
automatically places the number of the rack in brackets in front of the name.<br />
Example: (0) UR corresponds to the central rack (Universal Rack) number 0.<br />
<strong>Configuring</strong> <strong>Hardware</strong> <strong>and</strong> <strong>Communication</strong> <strong>Connections</strong> with <strong>STEP</strong> 7<br />
A5E00706939-01 1-5
Basics of <strong>Configuring</strong> <strong>Hardware</strong> with <strong>STEP</strong> 7<br />
1.2.4 Setting the Properties of Components<br />
Once you have arranged your components in the station window, you always arrive<br />
in the following manner in a dialog box for changing the default properties<br />
(parameters or addresses):<br />
• Double-click the component or select the menu comm<strong>and</strong> Edit > Object<br />
Properties.<br />
• Right mouse button: Move the cursor on the component, press the right mouse<br />
button <strong>and</strong> select the comm<strong>and</strong> Object Properties from the pop-up menu.<br />
Properties of CPUs<br />
The properties of the CPUs have a special significance for the behavior of the<br />
system. In the dialog boxes for a CPU, you can set the following, for example:<br />
startup characteristics, local data areas <strong>and</strong> priorities for interrupts, memory areas,<br />
retentive behavior, clock memory, protection level, <strong>and</strong> password - to name only a<br />
few. <strong>STEP</strong> 7 "knows" what can be set <strong>and</strong> within what range limits.<br />
In the "General" tab of the CPU or via the properties of the CPU interface you can<br />
assign parameters to the interfaces (for example, MPI or integrated PROFIBUS-DP<br />
interfaces). Via these dialog boxes you can also access the properties dialog box<br />
for the corresponding subnet to which the CPU is to be connected.<br />
Other Ways of Assigning Parameters<br />
For S7-300 <strong>and</strong> S7-400 programmable controllers you can set the parameters for<br />
some modules in the user program (for example, for analog modules). You need to<br />
call the system functions (SFCs) WR_PARM, WR_DPARM, <strong>and</strong> PARM_MOD in<br />
the user program to do this. These settings are lost following a warm restart.<br />
You will find more detailed information about system functions in the System<br />
Software for S7-300 <strong>and</strong> S7-400, System <strong>and</strong> St<strong>and</strong>ard Functions Reference<br />
Manual<br />
For M7-300 <strong>and</strong> M7-400 programmable control systems you can set the<br />
parameters for signal modules in the C program. You need to call the M7 API<br />
function "M7StoreRecord" in the C program to do this. This function transfers the<br />
parameters to a signal module.<br />
You will find more information about the M7 API functions in the manuals on the<br />
system software for M7-300 <strong>and</strong> M7-400.<br />
<strong>Configuring</strong> <strong>Hardware</strong> <strong>and</strong> <strong>Communication</strong> <strong>Connections</strong> with <strong>STEP</strong> 7<br />
1-6 A5E00706939-01
1.2.5 Opening Objects in HW Config<br />
Basics of <strong>Configuring</strong> <strong>Hardware</strong> with <strong>STEP</strong> 7<br />
In <strong>STEP</strong> 7, you can open objects in order to edit them.<br />
To do this, go to the SIMATIC Manager <strong>and</strong> select an object (such as "<strong>Hardware</strong>").<br />
Now select the Edit > Open Object menu comm<strong>and</strong> to start HW Config, where<br />
you can edit the station configuration.<br />
You can also start HW Config by simply double-clicking the object.<br />
Special Feature of HW Config<br />
If want to edit an object in HW Config, the double-clicking it produces the same<br />
result as selecting the Edit > Object Properties menu comm<strong>and</strong>. In general, this<br />
is the place to assign addresses, set parameters or enter other information. If there<br />
is an application available to edit the object, then a button for starting this<br />
application is located in the property sheet for the object.<br />
As of <strong>STEP</strong> 7 V5.4, you now have available the Edit > Open Object With menu<br />
comm<strong>and</strong>. You can use this menu comm<strong>and</strong> to open an application to edit the<br />
object as required. This menu comm<strong>and</strong> is only available if such an application is<br />
necessary <strong>and</strong> available for use<br />
1.2.6 What You Should Know About Slot Rules <strong>and</strong> Other Rules<br />
<strong>STEP</strong> 7 offers you support with configuring a station so that a message is generally<br />
displayed immediately if, for example, a module cannot be inserted in the slot you<br />
want to insert it in.<br />
As of <strong>STEP</strong> 7 V5.2 you can identify available module slots at a glance, provided<br />
you have your monitor display set for more than 256 colors. When you select a<br />
module in the <strong>Hardware</strong> Catalog <strong>and</strong> this module can be inserted in a configured<br />
module rack, all slots available for the insertion of this module are highlighted in<br />
color. This feature increases configuring efficiency.<br />
Furthermore, because address ranges are checked automatically, double address<br />
assignments cannot occur.<br />
In this connection, please pay attention to the status bar at the lower edge of the<br />
window <strong>and</strong> to any displayed messages that provide details on the causes <strong>and</strong><br />
effects of an operation. You can also use the online help to obtain additional<br />
information for the messages.<br />
Other additional, temporary rules (for a specific release), such as restrictions to the<br />
slots you can use owing to a functional restriction to individual modules, are not<br />
taken into account. Consequently, always consult the documentation or the current<br />
Product Information for the modules.<br />
<strong>Configuring</strong> <strong>Hardware</strong> <strong>and</strong> <strong>Communication</strong> <strong>Connections</strong> with <strong>STEP</strong> 7<br />
A5E00706939-01 1-7
Basics of <strong>Configuring</strong> <strong>Hardware</strong> with <strong>STEP</strong> 7<br />
1.3 Overview: Procedure for <strong>Configuring</strong> <strong>and</strong> Assigning<br />
Parameters to a Local Configuration<br />
Requirement<br />
Basic Procedure<br />
Summary<br />
You must have opened a project or created a new project in the<br />
SIMATIC Manager.<br />
To configure <strong>and</strong> assign parameters to a structure, proceed as shown below:<br />
<br />
<br />
<br />
<br />
<br />
<br />
<br />
<br />
As usual in Windows applications, you can put together the whole configuration in<br />
<strong>STEP</strong> 7 using drag <strong>and</strong> drop. You will find detailed information on h<strong>and</strong>ling <strong>and</strong><br />
setting up your real plant configuration, for example, how you configure the<br />
connection to expansion racks or how you configure special components in the<br />
<strong>STEP</strong> 7 online help.<br />
<strong>Configuring</strong> <strong>Hardware</strong> <strong>and</strong> <strong>Communication</strong> <strong>Connections</strong> with <strong>STEP</strong> 7<br />
1-8 A5E00706939-01
1.4 Working with the <strong>Hardware</strong> Catalog<br />
1.4.1 Customizing the <strong>Hardware</strong> Catalog<br />
Procedure<br />
Basics of <strong>Configuring</strong> <strong>Hardware</strong> with <strong>STEP</strong> 7<br />
In addition to the st<strong>and</strong>ard <strong>Hardware</strong> Catalog supplied with <strong>STEP</strong> 7, you can tailor<br />
your "own" catalog. This can result in a number of different catalog profiles. The<br />
basis for each new catalog profile is the st<strong>and</strong>ard <strong>Hardware</strong> Catalog with all<br />
modules/components - the profile for this catalog is called "St<strong>and</strong>ard"; you can<br />
assign your own names for the catalog profiles you create yourself.<br />
Example: You can create a catalog profile that contains only the modules you are<br />
currently using.<br />
From <strong>STEP</strong> 7 V5.0, Service Pack 3 onwards, the following catalog profiles are<br />
available in addition to the "St<strong>and</strong>ard" profile:<br />
• Current modules, (for example, November 1999 or July 2000 version)<br />
In this profile, no "old" modules are available (only current order numbers)<br />
• SIMATIC Outdoor (for example, November 1999 or July 2000 version)<br />
This profile offers only current modules which can be used in extended<br />
environmental conditions (higher mechanical stress <strong>and</strong> extended climatic<br />
conditions are permitted)<br />
Note<br />
The additional profiles available for selection are for modules that are available in<br />
the hardware catalog of the <strong>STEP</strong> 7 st<strong>and</strong>ard package. Modules that are installed<br />
by means of optional packages, GSD files or hardware updates are only available<br />
in the 'St<strong>and</strong>ard' catalog profile!<br />
1. Select the menu comm<strong>and</strong> Options > Edit Catalog Profiles.<br />
In the application that opens, two catalog profiles are displayed: the "St<strong>and</strong>ard"<br />
profile <strong>and</strong> an "empty" profile that does not contain any components as yet.<br />
2. Drag the required folders <strong>and</strong> modules from the st<strong>and</strong>ard profile window <strong>and</strong><br />
drop them in the empty profile window. You can also adapt the structure to<br />
your own requirements using the menu comm<strong>and</strong> Insert > Folder.<br />
3. Save the new catalog profile using the menu comm<strong>and</strong> File > Save As;<br />
choose a suitable name for the new profile.<br />
The name of the new profile then appears in the "Profile" list box in the<br />
<strong>Hardware</strong> Catalog <strong>and</strong> can be selected.<br />
GSD Files only update "St<strong>and</strong>ard" Profile<br />
DP slaves that have been installed later via GSD files are only added to the<br />
"St<strong>and</strong>ard" profile's Other Field Devices folder <strong>and</strong> are not included in the catalog<br />
profiles you created yourself.<br />
<strong>Configuring</strong> <strong>Hardware</strong> <strong>and</strong> <strong>Communication</strong> <strong>Connections</strong> with <strong>STEP</strong> 7<br />
A5E00706939-01 1-9
Basics of <strong>Configuring</strong> <strong>Hardware</strong> with <strong>STEP</strong> 7<br />
1.4.2 Searching in the <strong>Hardware</strong> Catalog<br />
If you know the order number for a component or the name of a function that is<br />
displayed in the info text in the <strong>Hardware</strong> Catalog, then you can search for this<br />
component.<br />
The upper section of the <strong>Hardware</strong> Catalog contains a "Search" box.<br />
Procedure<br />
1. Select <strong>and</strong> entry in the <strong>Hardware</strong> Catalog<br />
2. Enter a search term, such as the first part of the order number 6ES7 331.<br />
3. To start searching, click on "Search down" or "Search up", as appropriate.<br />
Search down<br />
Search up<br />
<strong>STEP</strong> 7 locates the first occurrence of the search term. If the component you are<br />
looking for is in another folder that is not open or outside of the visible area, then<br />
the folder is automatically opened <strong>and</strong> moved in to the visible area.<br />
<strong>STEP</strong> 7 saves the search term that you entered. You can then easily select it again<br />
from the drop-down list in the search tool.<br />
What Can Be Entered in the Search Box<br />
You can enter any test, infotext, catalog entry or order number in the search box.<br />
The search is not case sensitive.<br />
Wildcards (*, ?,...) are not supported.<br />
You can also enter parts of a larger/complete search term (e.g. 331).<br />
Spaces, tabs or hyphens must be entered as they are shown in the <strong>Hardware</strong><br />
Catalog; otherwise, the item being searched for will not be found (i.e. be sure to<br />
note the difference between the spaces <strong>and</strong> the hyphens in an order number!).<br />
<strong>Configuring</strong> <strong>Hardware</strong> <strong>and</strong> <strong>Communication</strong> <strong>Connections</strong> with <strong>STEP</strong> 7<br />
1-10 A5E00706939-01
1.5 Tips for Editing Station Configurations<br />
Basics of <strong>Configuring</strong> <strong>Hardware</strong> with <strong>STEP</strong> 7<br />
Docking the "<strong>Hardware</strong> Catalog" Window on the Side of the Station Window<br />
To prevent the "<strong>Hardware</strong> Catalog" window obscuring the contents of the station<br />
window, you can "dock" it on one side edge of the station window; meaning it is<br />
then positioned <strong>and</strong> fixed there. Simply double-click the area above the "Profile" list<br />
box in the <strong>Hardware</strong> Catalog. To release the "docked" window, double-click in this<br />
area once again.<br />
You can change the size (height <strong>and</strong> width) of the "<strong>Hardware</strong> Catalog" window<br />
when the window is undocked. When the window is docked, the width of the<br />
"<strong>Hardware</strong> Catalog" window can be changed.<br />
Recognizing Available Slots<br />
As of <strong>STEP</strong> 7 V5.2 you can easy recognize available slots for modules at first<br />
glance, provided your monitor display is set to more than 256 colors. If you select a<br />
module in the hardware catalog <strong>and</strong> the module can be inserted in a configured<br />
rack, then the possible slots for this module are highlighted in color. This feature<br />
makes configuration faster <strong>and</strong> easier for you.<br />
If you click a module in the "<strong>Hardware</strong> Catalog" window, <strong>and</strong> no slot is selected, the<br />
module will then be placed in the first available slot.<br />
Selecting a Number of Rows in the Configuration Table<br />
If you want to select a number of rows in the configuration table to copy (for<br />
example, using the pop-up menu comm<strong>and</strong> Copy) or delete (for example, using the<br />
pop-up menu comm<strong>and</strong> Delete) a number of modules or insert a number of<br />
modules of the same type, proceed as follows:<br />
To select all rows: Select the menu comm<strong>and</strong> Edit > Select > All.<br />
To select a group of consecutive rows: Click on the first row of the group you want to select.<br />
Keep the SHIFT key pressed <strong>and</strong> click on the last row of the<br />
group you want to select.<br />
To select a number of rows: Press CTRL, keep it pressed, <strong>and</strong> click on each row you want<br />
to select.<br />
You can also insert copied modules beyond the limitations of stations if you do not<br />
violate any slot rules when inserting.<br />
<strong>Configuring</strong> <strong>Hardware</strong> <strong>and</strong> <strong>Communication</strong> <strong>Connections</strong> with <strong>STEP</strong> 7<br />
A5E00706939-01 1-11
Basics of <strong>Configuring</strong> <strong>Hardware</strong> with <strong>STEP</strong> 7<br />
H<strong>and</strong>ling Complex Stations<br />
If you have a complex station structure with a lot of racks, for example, you can set<br />
the configuration tables to their minimum size.<br />
1. Select the configuration table.<br />
2. Press the right mouse button <strong>and</strong> select the menu comm<strong>and</strong> Minimize in the<br />
popup menu.<br />
You can also set this overview using the menu comm<strong>and</strong> Options > Customize.<br />
Arranging the Racks in the View Automatically<br />
Using the menu comm<strong>and</strong> View > Arrange Automatically you can let <strong>STEP</strong> 7<br />
arrange your current view automatically.<br />
Displaying Insertable ("Pluggable") Components in the <strong>Hardware</strong> Catalog<br />
If you have selected a slot in a rack, then you can use the menu comm<strong>and</strong>s<br />
Insert > Insert Object or Insert > Change Object to display a selection of<br />
modules than can be inserted. This method saves you from having to search<br />
through the hardware catalog. You can select from all modules that are available in<br />
the current catalog profile.<br />
<strong>Configuring</strong> <strong>Hardware</strong> <strong>and</strong> <strong>Communication</strong> <strong>Connections</strong> with <strong>STEP</strong> 7<br />
1-12 A5E00706939-01
1.5.1 Exchanging <strong>and</strong> Moving Modules<br />
Moving Modules<br />
Basics of <strong>Configuring</strong> <strong>Hardware</strong> with <strong>STEP</strong> 7<br />
You can adapt an existing configuration not only by copying or deleting<br />
components, but also by moving <strong>and</strong> exchanging.<br />
You can move modules or other components in a simple manner by dragging <strong>and</strong><br />
dropping them into another valid slot within the station.<br />
Exchanging Modules<br />
If you have already created a configuration <strong>and</strong> wish to exchange a module for<br />
which parameters have been specified previously (for example, CPU or analog<br />
module) with another module without "losing" the assigned parameters or<br />
connection configuration, then proceed as follows:<br />
1. Drag the new module (for example, CPU) to the slot containing the module you<br />
want to replace.<br />
2. Confirm you want to replace the module in the dialog box which appears.<br />
If the message "The slot is already occupied" appears, you must activate the<br />
function first using the menu comm<strong>and</strong> Options > Customize <strong>and</strong> selecting the<br />
option "Enable module exchange."<br />
Alternative:<br />
After you have selected a slot of a module rack, you can open the context-sensitive<br />
menu (right-click) Insert Object or Replace Object to view a list of modules you<br />
can insert. This feature saves you the search through the <strong>Hardware</strong> Catalog. You<br />
select from all the modules that are listed in the currently available catalog profile.<br />
You can only exchange "compatible" modules. If the modules are not compatible,<br />
you have to delete the old module, insert the new module, <strong>and</strong> assign parameters<br />
to it again. <strong>STEP</strong> 7 uses an appropriate message to acknowledge an attempt to<br />
exchange modules that are not compatible.<br />
Example: You cannot exchange a CPU with parameters assigned for a CPU with a<br />
new order number - the entire parameter assignment (for example, the MPI<br />
address) will be adopted by the new module.<br />
<strong>Configuring</strong> <strong>Hardware</strong> <strong>and</strong> <strong>Communication</strong> <strong>Connections</strong> with <strong>STEP</strong> 7<br />
A5E00706939-01 1-13
Basics of <strong>Configuring</strong> <strong>Hardware</strong> with <strong>STEP</strong> 7<br />
1.5.2 Exchanging Racks, C7 Devices, <strong>and</strong> DP Slaves<br />
As of <strong>STEP</strong> 7 V5.1, Service Pack 1, if you have configured a station <strong>and</strong> assigned<br />
addresses <strong>and</strong> parameters to the modules in a SIMATIC 400 rack, a C7 control<br />
system, or a DP slave, you can exchange the rack if you maintain the module<br />
arrangement <strong>and</strong> settings. In this case, a C7 control system <strong>and</strong> a DP slave are<br />
considered racks.<br />
Exchanging racks is not relevant for the SIMATIC 300 systems with only one rack<br />
type (st<strong>and</strong>ard rail).<br />
When Does It Make Sense to Exchange A Rack?<br />
It is always necessary to exchange the rack of a SIMATIC 400 station if<br />
functionality can only be exp<strong>and</strong>ed with the help of a different rack.<br />
• Replacement of a power supply that does not have redundant capability with a<br />
power supply that does have redundant capability, but is not supported by the<br />
old rack.<br />
• Replacement of a "short" rack (9 slots) with a "long" rack (18 slots) in order to<br />
insert additional modules.<br />
For racks that are configured as expansion racks (UR or ER with Receive-IM),<br />
the Receive-IM is automatically placed in the last slot.<br />
• A station that was configured originally with a long rack must be configured on a<br />
short rack for reasons of space.<br />
However, this exchange will not be permitted for long racks that are configured<br />
as expansion racks (UR or ER with Receive-IM).<br />
Procedure<br />
Exchange of a C7 control system is always necessary in the following cases:<br />
• The old C7 control system is to be replaced by a new one (order number with<br />
higher function status, newer firmware version)<br />
• The functionality of the old C7 control system is to be exp<strong>and</strong>ed (new C7 control<br />
system with more integrated modules).<br />
If you want to exchange a rack that has been fitted with modules, a C7 control<br />
system, or a DP slave in a station configuration, proceed as follows:<br />
1. In the station configuration, select the components (for example, a rack), that<br />
you want to exchange.<br />
2. In the <strong>Hardware</strong> Catalog window, select a component that is compatible with<br />
the selected component (see below), but that has a different order number.<br />
You cannot exchange identical components.<br />
For DP slaves, the slave interface module (for example, the IM 153-2) is<br />
selected from the <strong>Hardware</strong> Catalog window for the exchange.<br />
3. Double-click on the component you want in the <strong>Hardware</strong> Catalog.<br />
If the component is compatible, the exchange is made <strong>and</strong> the modules of the<br />
originally configured component are adopted with their addresses <strong>and</strong><br />
parameters (to the extent possible).<br />
An exchange is also possible if you use a drag-<strong>and</strong>-drop operation to move the<br />
component from the <strong>Hardware</strong> Catalog window to the component to be exchanged.<br />
<strong>Configuring</strong> <strong>Hardware</strong> <strong>and</strong> <strong>Communication</strong> <strong>Connections</strong> with <strong>STEP</strong> 7<br />
1-14 A5E00706939-01
When Is a Rack "Compatible"?<br />
Basics of <strong>Configuring</strong> <strong>Hardware</strong> with <strong>STEP</strong> 7<br />
A rack of a SIMATIC 400 station can be exchanged for another rack only if the<br />
basic rules listed below are adhered to. If one or more of the basic rules are not<br />
adhered to, <strong>STEP</strong> 7 does not permit an exchange <strong>and</strong> terminates the procedure<br />
with an error message that provides information on the cause of the termination.<br />
• A segmented rack (CR2) cannot be exchanged for a non-segmented rack (for<br />
example, UR1) <strong>and</strong> vice versa.<br />
• You must be able to insert all modules of the rack to be exchanged into the new<br />
rack; that is, no slot rules must be violated when the modules are inserted into<br />
the new rack.<br />
Example 1: An attempt to replace a UR1 rack that has a CPU with an ER1<br />
expansion rack is not permitted. Inserting a CPU in the ER1 violates a slot rule - no<br />
CPUs can be inserted in an ER1.<br />
Example 2: An attempt to replace a segmented central rack in an S7-400 station<br />
(CR2) with a Universal rack (for example, UR1) is not permitted. The slots of the<br />
modules from two segments cannot be assigned uniquely to the slots in a different,<br />
non-segmented rack, <strong>and</strong> vice versa. A CR2 rack therefore can be replaced only<br />
by a CR2 rack with a different order number, for example, to make it possible to<br />
insert redundant power supply modules without having to enter the rest of the<br />
configuration again.<br />
When Is a C7 control System "Compatible"?<br />
A C7 control system contains integrated modules (CPU <strong>and</strong> I/O) <strong>and</strong> can be<br />
exchanged for another one if the following rules are adhered to:<br />
• For each slot (row in the configuration table) of the new C7 control system, the<br />
corresponding slot in the old C7 control system meets the following conditions:<br />
- Has no modules<br />
- Has an identical or exchangeable module (also applies to the CPU)<br />
• The new C7 control system has just as many or more integrated modules as the<br />
old C7 control system.<br />
When Is a DP Slave "Compatible"?<br />
If DP slaves can be exchanged, then they can only be exchanged within the same<br />
family, for example, within the ET 200M family. DP slaves can also be displayed in<br />
NetPro; however, they can only be exchanged in the <strong>Configuring</strong> <strong>Hardware</strong><br />
application.<br />
The same basic rules for exchange apply to modular DP slaves as apply to racks:<br />
the number of inserted modules must have a place in the new DP slave <strong>and</strong> the<br />
functionality of the old DP slave must also be provided by the new DP slave.<br />
If functions that are used by more than one station were configured, such as direct<br />
data exchange between DP slaves, you must provide this configuration to the new<br />
DP slave.<br />
<strong>Configuring</strong> <strong>Hardware</strong> <strong>and</strong> <strong>Communication</strong> <strong>Connections</strong> with <strong>STEP</strong> 7<br />
A5E00706939-01 1-15
Basics of <strong>Configuring</strong> <strong>Hardware</strong> with <strong>STEP</strong> 7<br />
The following table provides information on each individual slave family:<br />
DP Slave Type Exchangeable Conditions for Exchange<br />
DP slaves whose properties<br />
are specified by GSD files<br />
(additional information...)<br />
No -<br />
DP-As-i Link No -<br />
DP/PA Link Yes Maximum configuration of the DP master cannot be<br />
exceeded (I/O address space, number of slots)<br />
A redundantly operated DP/PA link can only be<br />
exchanged for a DP/PA link that can be operated<br />
redundantly.<br />
ET 200L SC <strong>and</strong> IM SC Yes You must be able to put all inserted modules into the<br />
new DP slave.<br />
ET 200M (IM 153-x) Yes Cannot be exchanged if:<br />
• For the old ET 200M, the function "Change<br />
Modules during Operation" was activated <strong>and</strong> the<br />
new ET 200M does not support the function<br />
• CPs/FMs with their own MPI address (for example,<br />
FM 353)<br />
• Modules are inserted in the old ET 200M which<br />
cannot be inserted in the new ET 200M<br />
• The old ET 200M was operated redundantly <strong>and</strong><br />
the new ET 200M cannot be operated redundantly<br />
ET 200S (IM 151-1) Yes Cannot be exchanged with IM 151/CPU<br />
ET 200S (IM 151/CPU) Yes Cannot be exchanged with IM 151-1<br />
ET 200X<br />
Yes You must be able to put all inserted modules into the<br />
(X-BM 141.., X-BM 142..)<br />
new DP slave.<br />
An X-BM 143/DESINA cannot be exchanged for other<br />
ET 200X basic modules <strong>and</strong> vice versa<br />
Cannot be exchanged with X-BM 147/CPU<br />
ET 200X BM 147/CPU Yes Cannot be exchanged with X-BM 141..., X-BM 142...<br />
<strong>and</strong> X-BM 143...<br />
Which DP Slaves Are Specified by GSD files?<br />
DP slaves whose properties are specified by GSD files (device database files) are<br />
located in the <strong>Hardware</strong> Catalog in the "Other Field Devices" folder or also in the<br />
"CP 342-5 as DP-Master" folder, for example. Those DP Slaves (also called<br />
"St<strong>and</strong>ard Slaves") can be identified by specifying the GSD file or type file in the<br />
"Order no." row or in the "DP Slave properties" dialog, "General" tab.<br />
<strong>Configuring</strong> <strong>Hardware</strong> <strong>and</strong> <strong>Communication</strong> <strong>Connections</strong> with <strong>STEP</strong> 7<br />
1-16 A5E00706939-01
Basics of <strong>Configuring</strong> <strong>Hardware</strong> with <strong>STEP</strong> 7<br />
1.5.3 Displaying Information on Components in the <strong>Hardware</strong> Catalog<br />
Requirements<br />
In HW Config, you can access information on modules <strong>and</strong> components on the<br />
Internet.<br />
You programming device (PG) has an Internet connection <strong>and</strong> a browser installed<br />
to view Internet pages.<br />
There is information on a module available on the Internet. (The exact extent of the<br />
information available will depend on the module <strong>and</strong> when you are searching for<br />
information.).<br />
You have enabled the function in HW Config (menu comm<strong>and</strong> Options ><br />
Customize) <strong>and</strong> have selected <strong>and</strong> found a valid Internet page.<br />
Procedure<br />
1. In the hardware catalog or in the module rack, select the component for which<br />
you need information.<br />
2. Right-click to display a context menu with the following options:<br />
Product Support Information<br />
FAQs or<br />
Manuals<br />
If an Internet page is available, it will contain links to FAQs or product information<br />
that have to do with the component selected. If you select "Manuals", a search is<br />
carried out for manuals or operating instructions that contain a description of the<br />
selected component.<br />
Other Sources of Information<br />
The Help page for a component property sheet or the module-related Help on a<br />
message also provides links to "More Information <strong>and</strong> FAQs". <strong>STEP</strong> 7<br />
automatically searches for appropriate information on the Internet. The results of<br />
this search are displayed in the browser.<br />
<strong>Configuring</strong> <strong>Hardware</strong> <strong>and</strong> <strong>Communication</strong> <strong>Connections</strong> with <strong>STEP</strong> 7<br />
A5E00706939-01 1-17
Basics of <strong>Configuring</strong> <strong>Hardware</strong> with <strong>STEP</strong> 7<br />
1.5.4 Installing <strong>Hardware</strong> Updates<br />
As of <strong>STEP</strong> 7 V5.2. you can subsequently install components for the <strong>Hardware</strong><br />
Catalog.<br />
In this way you can use individual components such as new CPUs or new I/O<br />
devices in the current version of <strong>STEP</strong> 7 without having to install a new service<br />
pack.<br />
Basic Information on <strong>Hardware</strong>-Updates<br />
Requirements<br />
Install a HW update in the following two steps:<br />
• Download the update from the Internet or copy it from the CD to the appropriate<br />
folder.<br />
• Install the HW update that you downloaded or copied.<br />
Once this is completed, these subsequently installed components are available in<br />
the <strong>Hardware</strong> Catalog in the "St<strong>and</strong>ard" catalog profile. If necessary, you can<br />
follow this procedure so that you can also edit stations that were created with a<br />
later version of <strong>STEP</strong> 7.<br />
You must have a Internet address <strong>and</strong> a path set to the "HW Updates" storage<br />
folder. To make these settings, click the "Customize" button to open the dialog for<br />
configuring the HW update procedure.<br />
You must have an Internet connection available to download updates.<br />
If the Internet connection is established over a proxy server requiring<br />
authentication, you will need to know the user name <strong>and</strong> the password.<br />
Procedure<br />
1. Select the menu comm<strong>and</strong> Options > Install HW Updates.<br />
2. In the dialog that appears, specify whether the HW update should be<br />
downloaded from the Internet or copied from a CD or<br />
whether you want to install updates that have already been download<br />
(selection available)<br />
3. Select the component to be installed <strong>and</strong> then click the "Install" button.<br />
<strong>Configuring</strong> <strong>Hardware</strong> <strong>and</strong> <strong>Communication</strong> <strong>Connections</strong> with <strong>STEP</strong> 7<br />
1-18 A5E00706939-01
2 <strong>Configuring</strong> Central Racks<br />
2.1 Rules for Arranging Modules (SIMATIC 300)<br />
Basic Rule<br />
Slot Rules (S7-300)<br />
Modules must be inserted in the rack without gaps.<br />
Exception: For installations with one rack, one slot in the configuration table must<br />
remain free (reserved for the interface module). With the S7-300, this is slot 3 <strong>and</strong><br />
with M7-300, the slot after the module group (slot 3, 4, 5, or 6). In the actual<br />
configuration there is no gap because the backplane bus would be interrupted.<br />
Rack 0:<br />
• Slot 1: Power supply only (for example, 6ES7 307-...) or empty<br />
• Slot 2: CPU only (for example, 6ES7 314-...)<br />
• Slot 3: Interface module (for example, 6ES7 360-.../361-...) or empty<br />
• Slots 4 through 11: Signal or function modules, communications processors, or<br />
free.<br />
Racks 1 to 3:<br />
• Slot 1: Power supply module only (for example, 6ES7 307-...) or empty<br />
• Slot 2: Free<br />
• Slot 3: Interface module<br />
• Slots 4 through 11: Signal or function modules, communications processors<br />
(dependent on the inserted interface module), or free.<br />
<strong>Configuring</strong> <strong>Hardware</strong> <strong>and</strong> <strong>Communication</strong> <strong>Connections</strong> with <strong>STEP</strong> 7<br />
A5E00706939-01 2-1
<strong>Configuring</strong> Central Racks<br />
2.1.1 Special Rules for the Dummy Module (DM 370 Dummy)<br />
Switch Setting on<br />
DM 370 Dummy<br />
A dummy module (DM 370 Dummy) is a module that you can insert instead of a<br />
module that will be used later.<br />
Depending on the switch setting, the module may or may not reserve address<br />
space for a module. For example, address space is reserved for a digital<br />
input/output module but not for an interface module.<br />
Meaning Order Number<br />
A Address space can be reserved.<br />
Modules in a modular DP slave ET<br />
200M: reserve 0 bytes of address<br />
space.<br />
6ES7 370-0AA00-0AA0<br />
NA No address space reserved. None<br />
(Module is "not visible"; it is not<br />
configured)<br />
2.1.2 Special Rules for the Digital Simulation Module<br />
(SIM 374 IN/OUT 16)<br />
The SIM 374 IN/OUT 16 digital simulation module can be used to simulate digital<br />
inputs <strong>and</strong> outputs.<br />
You cannot find this module in the "<strong>Hardware</strong> Catalog" window. You must place<br />
the module you want to simulate in the configuration table instead of the SIM 374.<br />
Switch Setting on SIM 374 IN/OUT 16 Module to Place<br />
16xOutput 6ES7322-1BH00-0AA0<br />
8xOutput 8xInput 6ES7323-1BH00-0AA0<br />
16xInput 6ES7321-1BH00-0AA0<br />
<strong>Configuring</strong> <strong>Hardware</strong> <strong>and</strong> <strong>Communication</strong> <strong>Connections</strong> with <strong>STEP</strong> 7<br />
2-2 A5E00706939-01
2.1.3 Special Rules for M7-300<br />
<strong>Configuring</strong> Central Racks<br />
When you configure an M7-300 module group, each module in the group occupies<br />
a slot.<br />
If the first module of the module group is an M7-300 CPU, then the next slot after<br />
the module group can be occupied only by either an interface module or it remains<br />
empty.<br />
Module Group (M7-300)<br />
An M7-300 module group is formed when expansion modules (EXM) or a massstorage<br />
module (MSM) are used to extend an M7 CPU or an M7 FM (function<br />
module). All modules in the module group are connected with each other via their<br />
AT-ISA bus <strong>and</strong> form, in effect, the automation computer.<br />
First arrange the basic module (M7 CPU or M7 FM) <strong>and</strong> then the expansion<br />
modules in the configuration table. Otherwise you will not be able to insert the<br />
expansion modules.<br />
Arranging Modules in a Module Group (M7-300)<br />
A module group results in new slot rules:<br />
• The M7 CPU or the exp<strong>and</strong>able M7 FM is always the first module in the<br />
module group.<br />
• The mass-storage module (only one can be inserted) is always the last module<br />
within the module group.<br />
• The M7 CPU or M7 FM may not be exp<strong>and</strong>ed by more than three modules<br />
(MSM or EXM). The permitted number of expansion modules is documented for<br />
the appropriate M7 FMs.<br />
<strong>Configuring</strong> <strong>Hardware</strong> <strong>and</strong> <strong>Communication</strong> <strong>Connections</strong> with <strong>STEP</strong> 7<br />
A5E00706939-01 2-3
<strong>Configuring</strong> Central Racks<br />
2.2 Rules for Arranging Modules (SIMATIC-400)<br />
2.2.1 Rules for Arranging Modules (SIMATIC-400)<br />
Central Rack<br />
The rules for the arrangement of modules on a rack of the S7-400 depend on the<br />
type of the installed rack.<br />
The following rules apply:<br />
• Insert power supply modules only in slot 1 (exception: power supply modules<br />
with redundant capability)<br />
• Insert a maximum of six interface modules (send IMs), not more than two with<br />
power transmission<br />
• Connect a maximum of 21 expansion racks using interface modules to the<br />
central rack<br />
• Connect not more than one expansion rack with power transmission to an<br />
interface of the send IM (IM 460-1 coupled with IM 461-1);<br />
• Connect a maximum of four expansion racks without power transmission<br />
(IM 460-0 with IM 461-0 or IM 460-3 with IM 461-3).<br />
Expansion Rack<br />
The following rules apply:<br />
• Insert power supply modules only in slot 1<br />
• Insert the interface module (receive IM) only in the extreme right slot (slot 9 or<br />
slot 18).<br />
• <strong>Communication</strong> bus modules should only be inserted in expansion racks with a<br />
number not greater than 6 (otherwise, they cannot be addressed).<br />
<strong>Configuring</strong> <strong>Hardware</strong> <strong>and</strong> <strong>Communication</strong> <strong>Connections</strong> with <strong>STEP</strong> 7<br />
2-4 A5E00706939-01
<strong>Configuring</strong> Central Racks<br />
2.2.2 Special Rules for Power Supply Modules with Redundant<br />
Capability (S7-400)<br />
Power supply modules with redundant (st<strong>and</strong>by) capability can be inserted in a<br />
rack twice. These modules can be recognized by their info text in the "<strong>Hardware</strong><br />
Catalog" window.<br />
You should observe the following rules:<br />
• It is only possible to insert power supply modules with redundant capability in<br />
the racks intended for this purpose (these can be recognized by the higher<br />
order number <strong>and</strong> info text in the "<strong>Hardware</strong> Catalog" window).<br />
• Power supply modules with redundant capability can be operated only with the<br />
CPUs that are designed for this purpose; CPUs that are not suited for this<br />
purpose (for example, older models) are rejected during configuration.<br />
• The power supply modules with redundant capability must be inserted in slot 1<br />
<strong>and</strong> the slot immediately next to it (no gaps allowed).<br />
• Power supply modules with <strong>and</strong> without redundant capability cannot be inserted<br />
in the same rack (no "mixed" configurations possible).<br />
2.2.3 Special Rules for M7-400<br />
An M7-400 module group is formed when expansion modules (EXM, ATM) or a<br />
mass-storage module (MSM) are used to extend an M7 CPU or an M7 FM.<br />
First arrange the basic module (M7 CPU or M7 FM) <strong>and</strong> then the expansion<br />
modules in the configuration table. Otherwise you will not be able to insert the<br />
expansion modules.<br />
Arranging Modules in a Module Group (M7-400)<br />
The following rules apply:<br />
• Not more than one mass-storage module (MSM) can be inserted.<br />
• The M7 CPU may not be exp<strong>and</strong>ed by more than three modules (EXM, ATM, or<br />
MSM).<br />
• The modules of the module group can be arranged only in the following order to<br />
the right of the M7 CPU:<br />
- EXM module(s)<br />
- MSM module<br />
- ATM module(s).<br />
<strong>Configuring</strong> <strong>Hardware</strong> <strong>and</strong> <strong>Communication</strong> <strong>Connections</strong> with <strong>STEP</strong> 7<br />
A5E00706939-01 2-5
<strong>Configuring</strong> Central Racks<br />
2.2.4 Special Rules for PROFIBUS-DP Interface Submodules (M7-400)<br />
If you wish to use an interface submodule for PROFIBUS-DP in an M7-400<br />
programmable controller (for example, IF 964-DP as DP master), then you should<br />
note the following:<br />
• No other interface submodule can be inserted in the CPU, FM, or EXM under<br />
this interface submodule.<br />
• An interface of the CPU, FM, or EXM that is below this interface submodule<br />
cannot be used.<br />
Reason: The PROFIBUS bus connector covers the module slot or interface below.<br />
Recommendation: Insert an interface submodule for PROFIBUS-DP only in the<br />
lowest or in the lower left module slot of a CPU, FM, or EXM.<br />
<strong>Configuring</strong> <strong>Hardware</strong> <strong>and</strong> <strong>Communication</strong> <strong>Connections</strong> with <strong>STEP</strong> 7<br />
2-6 A5E00706939-01
2.3 How to Configure Central Racks<br />
2.3.1 Creating a Station<br />
<strong>Configuring</strong> Central Racks<br />
Requirement<br />
You must have opened the SIMATIC Manager <strong>and</strong> opened a project or created a<br />
new project.<br />
Procedure<br />
A station can only be created directly beneath a project.<br />
1. Select the project in the left half of the project window.<br />
2. Select the menu comm<strong>and</strong> Insert > Station > SIMATIC 300-Station or ... ><br />
SIMATIC 400-Station.<br />
The station is created with a preset name. You can replace the name of the<br />
station with a more relevant name of your own.<br />
2.3.2 Starting the Application to Configure the <strong>Hardware</strong><br />
Requirement<br />
You must have created a station (SIMATIC 300, SIMATIC 400).<br />
Procedure<br />
1. Select the "Station" object in the project window so that the "<strong>Hardware</strong>" object<br />
becomes visible in the right half of the station window.<br />
"Station" object<br />
2. Double-click on the "<strong>Hardware</strong>" object.<br />
"<strong>Hardware</strong>" object<br />
Alternatively you can select the "Station" object <strong>and</strong> then the menu comm<strong>and</strong><br />
Edit > Open Object.<br />
Result: A station window <strong>and</strong> the module catalog (if it was still open when you last<br />
exited the application) appear on the screen. You can position racks <strong>and</strong> other<br />
components in accordance with the station structure; select the components<br />
required for the station structure from the module catalog ("<strong>Hardware</strong> Catalog"<br />
window).<br />
Opening More Stations<br />
Using the menu comm<strong>and</strong> Station > New you can configure another station in the<br />
same project; using Station > Open you can open an existing (offline) station<br />
configuration for editing.<br />
<strong>Configuring</strong> <strong>Hardware</strong> <strong>and</strong> <strong>Communication</strong> <strong>Connections</strong> with <strong>STEP</strong> 7<br />
A5E00706939-01 2-7
<strong>Configuring</strong> Central Racks<br />
2.3.3 Arranging the Central Rack<br />
Requirement<br />
Procedure<br />
The station window must be open <strong>and</strong> you must have a plan of the hardware<br />
configuration of the station.<br />
1. Select a suitable central rack ("Rack") for your configuration from the<br />
"<strong>Hardware</strong> Catalog" window; in SIMATIC 300 the Rail, in SIMATIC 400 the<br />
Universal rack (UR1), for example.<br />
2. Drag the rack to the station window.<br />
The rack appears in the form of a small configuration table in the upper part of<br />
the station window. In the lower part of the window, the detailed view of the<br />
rack appears with additional information such as the order number, MPI<br />
address, <strong>and</strong> I/O addresses.<br />
Alternatively to steps 1 <strong>and</strong> 2, you can also double-click the rack in the<br />
"<strong>Hardware</strong> Catalog" window.<br />
2.3.4 Arranging Modules in a Rack<br />
Requirements<br />
Procedure<br />
You have arranged a rack in a station window <strong>and</strong> the rack is not shown minimized<br />
(the rack slots are visible).<br />
If you want to have the visual advantage of having the available slots of a selected<br />
module highlighted in color in <strong>STEP</strong> 7, your monitor display must set for more than<br />
256 colors.<br />
1. Select a module (for example, a CPU) from the "<strong>Hardware</strong> Catalog" window.<br />
The slots available for this module are highlighted in color.<br />
2. Drag & drop the module into the appropriate row of the rack (configuration<br />
table). <strong>STEP</strong> 7 checks whether any slot rules are violated (an S7-300 CPU<br />
must not, for example, be inserted in slot 2).<br />
Symbol that appears when the slot rules are violated.<br />
3. Repeat steps 1 <strong>and</strong> 2 until the rack has been fully equipped with the required<br />
modules.<br />
Alternatively, you can also select the appropriate row in the configuration table <strong>and</strong><br />
double-click on the required module in the "<strong>Hardware</strong> Catalog" window.<br />
If no row in the rack is selected <strong>and</strong> you double-click a module in the "<strong>Hardware</strong><br />
Catalog" window, the module will then be placed in the first available slot.<br />
<strong>Configuring</strong> <strong>Hardware</strong> <strong>and</strong> <strong>Communication</strong> <strong>Connections</strong> with <strong>STEP</strong> 7<br />
2-8 A5E00706939-01
Tip<br />
<strong>Configuring</strong> Central Racks<br />
After you have selected a slot of a module rack, you can open the context-sensitive<br />
menu (right-click) Insert Object or Replace Object to view a list of modules you<br />
can insert. This feature saves you the search through the <strong>Hardware</strong> Catalog. You<br />
select from all the modules that are listed in the currently available catalog profile.<br />
Display of Interfaces <strong>and</strong> Interface Submodules<br />
The interfaces <strong>and</strong> interface submodules are shown in the configuration table in a<br />
separate row. The row has the same name as the interface (for example, X1) or - if<br />
the module has slots for interface submodules - bears the prefix "IF" (for example,<br />
IF1).<br />
With integrated interfaces the name of the interface appears in the "Module"<br />
column; with modules with slots for interface submodules you can copy a suitable<br />
interface submodule (IF) from the "<strong>Hardware</strong> Catalog" window to the appropriate<br />
row using drag & drop.<br />
2.3.5 Displaying the Version of the CPU Operating System in the<br />
'<strong>Hardware</strong> Catalog' window<br />
When a CPU has more than one operating system this CPU is shown as a folder<br />
with different order number icons in the "<strong>Hardware</strong> Catalog" window. The different<br />
versions of the CPU operating system are arranged under the order number icons.<br />
Please check the version of your CPU's operating system <strong>and</strong> select the correct<br />
version in the "<strong>Hardware</strong> Catalog" window.<br />
<strong>Configuring</strong> <strong>Hardware</strong> <strong>and</strong> <strong>Communication</strong> <strong>Connections</strong> with <strong>STEP</strong> 7<br />
A5E00706939-01 2-9
<strong>Configuring</strong> Central Racks<br />
2.3.6 Arranging C7 Control Systems (Special Features)<br />
In a C7 control system (C7-620), the following components are integrated in one<br />
housing:<br />
• SIMATIC 300 CPU<br />
• Inputs <strong>and</strong> outputs (digital <strong>and</strong> analog)<br />
• Interface module IM 360 for connecting further SIMATIC 300 modules<br />
• Line-oriented operator panel with a printer port<br />
Simplified Procedure<br />
The C7 control system is not mounted on a rail - this means you do not have to<br />
arrange a rack.<br />
Requirement<br />
Procedure<br />
The station window <strong>and</strong> "<strong>Hardware</strong> Catalog" window must be visible.<br />
1. Select a C7 control system from the "<strong>Hardware</strong> Catalog" window. These<br />
systems can be found under SIMATIC 300.<br />
2. Drag the C7 control system to the station window.<br />
3. If you want to exp<strong>and</strong> the C7 control system:<br />
- Select rails as racks from the "<strong>Hardware</strong> Catalog" window.<br />
- Drag the racks to the station window one by one.<br />
- Assign modules to the racks. Important: The interface modules (IM) must<br />
be inserted in all racks so that connecting up is possible.<br />
<strong>Configuring</strong> <strong>Hardware</strong> <strong>and</strong> <strong>Communication</strong> <strong>Connections</strong> with <strong>STEP</strong> 7<br />
2-10 A5E00706939-01
2.3.7 Assigning Properties to Modules/Interfaces<br />
Introduction<br />
Requirement<br />
Procedure<br />
<strong>Configuring</strong> Central Racks<br />
Properties of components such as modules or interfaces are addresses <strong>and</strong><br />
parameters. Only if you want to change the default values do you need to read the<br />
following sections.<br />
You have arranged in the configuration table the component for which you want to<br />
modify the properties.<br />
Every component (module, interface, or interface submodule) has default<br />
properties; for example, default measurement types <strong>and</strong> measuring ranges for<br />
analog input modules.<br />
If you want to change these settings, proceed as follows:<br />
1. Double-click in the configuration table on the component (for example, module<br />
or interface submodule) that is to have parameters assigned or select the row<br />
<strong>and</strong> select the Edit > Object Properties menu comm<strong>and</strong>.<br />
Using the right-h<strong>and</strong> mouse button: Move the mouse pointer to the component,<br />
press the right-h<strong>and</strong> mouse button, <strong>and</strong> select the Object Properties<br />
comm<strong>and</strong> from the pop-up menu<br />
2. Use the displayed tabbed dialog boxes to assign the component properties.<br />
<strong>Configuring</strong> <strong>Hardware</strong> <strong>and</strong> <strong>Communication</strong> <strong>Connections</strong> with <strong>STEP</strong> 7<br />
A5E00706939-01 2-11
<strong>Configuring</strong> Central Racks<br />
2.3.8 Assigning Addresses<br />
There is a difference between assigning addresses to nodes <strong>and</strong> assigning<br />
input/output addresses (I/O addresses).<br />
Node addresses are addresses of programmable modules (MPI, PROFIBUS,<br />
Industrial Ethernet addresses); they are required in order to be able to address the<br />
various nodes in a subnet, for example, in order to download a user program to a<br />
CPU. You will find information on assigning node addresses in the subnet in the<br />
chapter on networking stations.<br />
Input/output (I/O) addresses are required in order to read inputs <strong>and</strong> set outputs in<br />
the user program.<br />
Special Feature: MPI Addresses of FMs <strong>and</strong> CPs (S7-300)<br />
<strong>Communication</strong>s processors (CPs) <strong>and</strong> function modules (FMs) with their own MPI<br />
address have a special feature: their MPI address is determined automatically by<br />
the CPU <strong>and</strong> assigned according to the following pattern:<br />
• First CP/FM after the CPU: MPI address of the CPU + 1<br />
• Second CP/FM after the CPU: MPI address of the CPU + 2<br />
The newer S7-300 CPUs (see CPU manual or Product Information) permit free<br />
MPI address allocation for such CPs <strong>and</strong> FMs (via the "General" tab for the<br />
module).<br />
<strong>Configuring</strong> <strong>Hardware</strong> <strong>and</strong> <strong>Communication</strong> <strong>Connections</strong> with <strong>STEP</strong> 7<br />
2-12 A5E00706939-01
2.3.9 Assigning I/O Addresses<br />
Requirements<br />
Procedure<br />
<strong>Configuring</strong> Central Racks<br />
<strong>STEP</strong> 7 assigns input <strong>and</strong> output addresses when modules are placed in the<br />
configuration table. This means every module has a start address (address of the<br />
first channel); the addresses for the remaining channels are based on this start<br />
address.<br />
• The module is inserted in a central rack or expansion rack <strong>and</strong> the CPU must<br />
permit free address assignment.<br />
• The module is inserted in a DP slave or the module is a DP slave (compact DP<br />
slave).<br />
1. Double-click on the row of the rack containing the module whose start address<br />
you wish to set, or select the module <strong>and</strong> select the Edit > Object Properties<br />
menu comm<strong>and</strong>.<br />
2. Select the "Addresses" tab.<br />
3. Change the default start address.<br />
Note<br />
For modules within a local bus segment, formed by a function module (S7-300) or<br />
for special function modules (S7-400), you have to assign a further start address.<br />
In addition to the start address for the CPU, the module then has a start address<br />
for the FM. In the overall view of the configuration table, the start address from the<br />
point of view of the FM is always displayed in this case.<br />
Displaying the Address Overview<br />
You can display the input <strong>and</strong> output addresses already used <strong>and</strong> any address<br />
gaps as follows:<br />
1. Open the station whose addresses you want to display.<br />
2. Select the menu comm<strong>and</strong> View > Address Overview.<br />
3. In the "Address Overview" dialog box, select the module whose assigned<br />
inputs <strong>and</strong> outputs you want to display (for example, CPU).<br />
4. If required, you can filter the display by address type (for example, input<br />
addresses only).<br />
The address areas "Inputs" <strong>and</strong> "Outputs" are displayed with locations for the<br />
modules (e.g. master system no., PROFIBUS address for PROFIBUS DP, rack,<br />
slot, interface submodule slot). Input addresses with the length 0 (for example,<br />
addresses of interface modules) are marked with an asterisk (*).<br />
<strong>Configuring</strong> <strong>Hardware</strong> <strong>and</strong> <strong>Communication</strong> <strong>Connections</strong> with <strong>STEP</strong> 7<br />
A5E00706939-01 2-13
<strong>Configuring</strong> Central Racks<br />
2.3.10 Assigning Symbols to I/O Addresses<br />
Introduction<br />
You can assign symbols to input/output addresses when you configure modules<br />
without having to go via the symbol table.<br />
You can only assign symbols to the inputs <strong>and</strong> outputs of digital or analog modules<br />
when configuring the hardware. With integrated inputs/outputs (for example,<br />
CPU 312 IFM), in CPs, FMs, <strong>and</strong> S5 modules (for example, configured via the<br />
adapter module) you must assign the symbols in the symbol table.<br />
The assigned symbols are not downloaded to the station (menu comm<strong>and</strong>: PLC ><br />
Download). The consequence of this is: when you upload a station configuration<br />
back into the programming device (menu comm<strong>and</strong>: PLC > Upload), no symbols<br />
are displayed.<br />
Procedure<br />
1. Select the digital/analog module to whose addresses you want to assign<br />
symbols.<br />
2. Select the menu comm<strong>and</strong> Edit > Symbols or press the right mouse button<br />
<strong>and</strong> select the Symbols comm<strong>and</strong> in the pop-up menu.<br />
You can assign symbols in the dialog box that appears.<br />
If you click the "Add Symbol" button in the dialog box, the name of the address<br />
is entered as the symbol.<br />
2.3.11 Monitoring Inputs <strong>and</strong> Modifying Outputs When <strong>Configuring</strong><br />
<strong>Hardware</strong><br />
Introduction<br />
If the CPU can be reached online <strong>and</strong> you have loaded the hardware configuration<br />
onto the CPU, you can address the inputs <strong>and</strong> outputs of the configured input <strong>and</strong><br />
output modules directly, that is, without having to change the application.<br />
Proceed as follows:<br />
1. Highlight the module you want to monitor or control.<br />
2. Select the menu comm<strong>and</strong> PLC > Monitor/Modify.<br />
The menu comm<strong>and</strong> can only be activated if the module can be monitored or<br />
modified (modules of the type DI, DO, AI, or AO, for example).<br />
A dialog box will open displaying the inputs <strong>and</strong> outputs of the module in a<br />
table (Address column).<br />
The inputs <strong>and</strong> outputs will be displayed in binary format for digital modules<br />
<strong>and</strong> in word format for analog modules.<br />
<strong>Configuring</strong> <strong>Hardware</strong> <strong>and</strong> <strong>Communication</strong> <strong>Connections</strong> with <strong>STEP</strong> 7<br />
2-14 A5E00706939-01
Monitor<br />
Modify<br />
<strong>Configuring</strong> Central Racks<br />
1. Activate the Monitor check box.<br />
2. Click on the Trigger button to modify or change the trigger point <strong>and</strong> trigger<br />
frequencies. You will find information about the settings in the Help of the<br />
Trigger dialog box that appears when you click on the button.<br />
3. If you want to monitor peripheral inputs directly, activate the I/O Display check<br />
box; if the check box is not activated, the process image of the inputs is<br />
monitored.<br />
4. If you choose the trigger frequency Once, you must update the display in the<br />
Status Value column by means of the Status Values button. The value remains<br />
"frozen" until you click again on the Status Value button.<br />
With a defined trigger:<br />
1. Enter the modify values in the table.<br />
2. Click on the "Trigger" button to check or change the trigger point or trigger<br />
condition.<br />
You will find information about the settings in the Help of the "Trigger" dialog<br />
box that is displayed when you click the button.<br />
3. Select the "Modify" check box. All visible addresses with a modify value will be<br />
modified.<br />
Modifying variables once:<br />
Regardless of the trigger point or trigger condition set, you can also assign values<br />
to variables once in a separate operation. When the function is activated, an action<br />
like "Trigger immediately" is carried out, without reference to a specific point in the<br />
user program.<br />
1. Enter the modify values in the table.<br />
2. Click the "Modify values" button.<br />
• If you want to modify peripheral outputs directly, activate the I/O Display check<br />
box; if the check box is not activated, the process image of the outputs is<br />
controlled.<br />
• If you also want to modify outputs directly in STOP mode of the CPU, you must<br />
activate the Enable PQ check box. Otherwise, the outputs remain set in STOP<br />
mode, <strong>and</strong> they have a configured substitute value.<br />
Monitoring Modified Addresses<br />
Note that the display in the "Status Value" column depends on the trigger points set<br />
<strong>and</strong> on the processes in the CPU (for example, the update times of the process<br />
images).<br />
You should set the trigger point for monitoring to "Cycle Start" <strong>and</strong> the trigger point<br />
for modifying to "Cycle End", so that the modified value can be displayed in the<br />
"Status Value" column!<br />
<strong>Configuring</strong> <strong>Hardware</strong> <strong>and</strong> <strong>Communication</strong> <strong>Connections</strong> with <strong>STEP</strong> 7<br />
A5E00706939-01 2-15
<strong>Configuring</strong> Central Racks<br />
Monitoring <strong>and</strong> Modifying I/O Modules<br />
When monitoring an I/O module (for example, 8DI/8DO), note that the trigger<br />
applies to the entire module.<br />
If, for example, you set the trigger point for monitoring to "Cycle Start", the inputs<br />
as well as the outputs are modified at that time. In this case, the control values for<br />
the inputs are activated, because they overwrite the process image of the inputs<br />
after the process image of the inputs has been updated; this means, directly before<br />
the cyclic program processing of the input process images was started. In this<br />
case, the values for the outputs are overwritten by the user program.<br />
Monitoring <strong>and</strong> Modifying Distributed I/Os<br />
Distributed I/Os can be read consistently with the SFC 14 "DPRD_DAT" <strong>and</strong> can<br />
be written consistently with the SFC 15 "DPWR_DAT". In order to access the<br />
actual status or values when monitoring, you must note the following:<br />
The "RECORD" input parameter of the SFCs has to be provided with "I" (input) or<br />
"O" (output). This must be exactly the configured address area which is displayed<br />
in the configuration table of the DP slave in the "I address" or "O address" column.<br />
If different areas are selected for saving the consistent data, non-relevant areas of<br />
the process image are displayed in the table for monitoring.<br />
<strong>Configuring</strong> <strong>Hardware</strong> <strong>and</strong> <strong>Communication</strong> <strong>Connections</strong> with <strong>STEP</strong> 7<br />
2-16 A5E00706939-01
2.3.12 <strong>Configuring</strong> Point-to-Point CPs<br />
Introduction to <strong>Configuring</strong> Point-to-Point CPs (PtP CPs)<br />
<strong>Configuring</strong> Central Racks<br />
As with other modules, you drag communication processors from the <strong>Hardware</strong><br />
Catalog window <strong>and</strong> arrange them <strong>and</strong> assign parameters to them in the<br />
configuration table (General Settings, Addresses <strong>and</strong> Basic Parameters).<br />
You can start the optional software for setting the procedure parameters by means<br />
of the Parameters interface in the Basic Parameters tab.<br />
For PtP CPs in a SIMATIC 400 station, you have to configure PtP connections. The<br />
following section describes the procedure briefly. You can find a more detailed<br />
description in the manuals for the PtP CPs.<br />
<strong>Configuring</strong> <strong>Connections</strong> for S7-400 PtP CPs<br />
For the connection between an S7 CPU <strong>and</strong> a partner that is connected by means<br />
of a point-to-point interface, the PtP CP represents the link.<br />
You must configure connections between the S7-400 CPU <strong>and</strong> the PtP CP.<br />
Proceed as follows:<br />
1. In HW Config, configure the PtP CP <strong>and</strong>, if the connection partner is also a PtP<br />
CP in an S7-400 station, configure the partner station also.<br />
2. Start NetPro (from HW Config: menu comm<strong>and</strong> Options > Configure<br />
Network).<br />
3. If you have already created a PtP subnet while you were configuring the PtP<br />
CP <strong>and</strong> you have networked the CP, continue with step 4;<br />
otherwise, insert a PtP subnet <strong>and</strong> use it to network the CP.<br />
4. Select the connection partner:<br />
- The connection partner is a CP 34x (PtP CP in an S7-300 station), an S5<br />
CP PtP, a printer, or a device from another manufacturer:<br />
Configure an "Other Station" as connection partner. For the "Other<br />
Station," configure a PtP interface <strong>and</strong> network this interface with the PtP<br />
subnet that you created.<br />
- The connection partner is a PtP CP for a SIMATIC 400 station:<br />
You have already configured the connection partner in step 1 <strong>and</strong> so you<br />
can continue with step 5.<br />
5. <strong>Configuring</strong> PtP <strong>Connections</strong><br />
6. Load the configuration data <strong>and</strong> the connection data into the appropriate<br />
stations.<br />
<strong>Configuring</strong> <strong>Hardware</strong> <strong>and</strong> <strong>Communication</strong> <strong>Connections</strong> with <strong>STEP</strong> 7<br />
A5E00706939-01 2-17
<strong>Configuring</strong> Central Racks<br />
2.3.13 <strong>Configuring</strong> S5 Modules<br />
You can insert S5 modules in a SIMATIC 400 station. These modules are<br />
connected via:<br />
• An S5 adapter module (IM 470) or<br />
• An IM 463-2 for connecting S5 expansion devices with IM 314<br />
You can find these modules in the "<strong>Hardware</strong> Catalog" window under "IM 400."<br />
Note<br />
You must configure the input or output address areas of the S5 modules for each<br />
connection. (Double-click the adapter module or IM 463-2 <strong>and</strong> then select the<br />
"Input Addresses" or "Output Addresses" tab.)<br />
If the address areas are not configured, the modules mentioned above will not be<br />
saved in the system data blocks (SDB). Result: The configuration which was<br />
downloaded to the CPU will not contain information about these modules. If this<br />
configuration is uploaded to the programming device, these modules will not<br />
appear in the configuration table.<br />
<strong>Configuring</strong> <strong>Hardware</strong> <strong>and</strong> <strong>Communication</strong> <strong>Connections</strong> with <strong>STEP</strong> 7<br />
2-18 A5E00706939-01
<strong>Configuring</strong> Central Racks<br />
2.4 Exp<strong>and</strong>ing the Central Rack with Expansion Racks<br />
<strong>Configuring</strong> Expansion Racks in SIMATIC 300<br />
For SIMATIC 300 stations, only "Rails" are available as central racks <strong>and</strong> as<br />
expansion racks; this means you can position as many rails (max. 4) as there are<br />
in the actual configuration.<br />
Expansion racks are linked in <strong>STEP</strong> 7 by inserting the appropriate interface module<br />
in slot 3 of every rack.<br />
• To exp<strong>and</strong> the configuration by one rack:<br />
racks 0 <strong>and</strong> 1: IM 365<br />
• To exp<strong>and</strong> the configuration by up to three racks:<br />
rack 0: IM 360; racks 1 to 3: IM 361<br />
<strong>Configuring</strong> Expansion Racks in SIMATIC 400<br />
In SIMATIC 400, the possibilities for expansion are more complex owing to the<br />
different racks <strong>and</strong> interface modules.<br />
All expansion racks that are connected to an interface of the send IM on the central<br />
rack form a cascade.<br />
In the following figure, three expansion racks are connected to each interface of the<br />
send IM.<br />
<strong>Configuring</strong> <strong>Hardware</strong> <strong>and</strong> <strong>Communication</strong> <strong>Connections</strong> with <strong>STEP</strong> 7<br />
A5E00706939-01 2-19
<strong>Configuring</strong> Central Racks<br />
2.4.1 Rules for Connecting Expansion Racks (SIMATIC 400)<br />
If you connect expansion racks (SIMATIC 400) to an interface module (send IM) of<br />
the central rack, then the following characteristics for the send IM <strong>and</strong> the receive<br />
IM must match:<br />
• Power transfer (with/without)<br />
• Type of link (centralized/distributed)<br />
• <strong>Communication</strong> bus transmission (with/without interrupt transmission).<br />
2.4.2 Arranging the Expansion Rack (SIMATIC 400)<br />
Procedure<br />
1. Select the appropriate (expansion) racks from the "<strong>Hardware</strong> Catalog" window.<br />
2. Drag the racks to the station window one by one.<br />
3. If you wish to change the number of the rack:<br />
Double-click the second row of the rack in the upper half of the station window.<br />
You can change the number in the "General" tab for the rack.<br />
4. Assign modules to the racks.<br />
Important: To permit the racks to be connected to each other, the interface<br />
modules must be inserted in all racks.<br />
5. For S7-400 only: make the connections between the interface modules in the<br />
racks:<br />
- Double-click on the send IM.<br />
- Select the "Connect" tab<br />
This tab shows all racks that are not connected (racks with inserted receive<br />
IMs).<br />
- Select the individual racks <strong>and</strong> use the "Connect" button to connect them<br />
to the required interface of the send IM (C1 or C2).<br />
Connection lines then show how the racks are connected together.<br />
2.4.3 Special Case: When the Central Rack Has More Than One CPU<br />
If you wish to extend the configuration which consists of the segmented rack CR2<br />
(S7-400) or a multicomputing configuration with racks you must adhere to the<br />
following order:<br />
1. Configure the central rack (for example, CR2) with the send IM.<br />
2. Only insert Receive IMs in the expansion racks.<br />
3. Remove the connections between the interface modules (IMs) as described<br />
above.<br />
Only then can you insert modules in the expansion racks. Reason: Because the<br />
address space exists more than once for multiple CPUs, the expansion rack must<br />
first be assigned to an address space (= a CPU).<br />
<strong>Configuring</strong> <strong>Hardware</strong> <strong>and</strong> <strong>Communication</strong> <strong>Connections</strong> with <strong>STEP</strong> 7<br />
2-20 A5E00706939-01
3 <strong>Configuring</strong> the Distributed I/O (DP)<br />
Introduction<br />
The distributed I/O refers to master systems, comprising DP (distributed I/O)<br />
master <strong>and</strong> DP slaves that are connected via a bus cable <strong>and</strong> communicate with<br />
each other via the PROFIBUS-DP protocol.<br />
As DP masters <strong>and</strong> DP slaves can be different devices, this section only explains<br />
the basic procedures involved in configuring. You will find details on functionality,<br />
access procedures etc. in the manuals for the specific devices <strong>and</strong> in the online<br />
help for the special FCs (for example, DP-SEND <strong>and</strong> DP-RECEIVE for CP 342-5).<br />
3.1 Basic Procedure for <strong>Configuring</strong> a DP Master System<br />
If you know the principles of how to configure a central structure, you also know<br />
how to configure the distributed I/O - the procedure is the same to a large extent.<br />
Station Window as an Image of the Real DP Master System<br />
When you place a DP master (for example, a CPU 315-2DP), <strong>STEP</strong> 7<br />
automatically draws a line that represents the master system. At the end of the line,<br />
place the DP slaves that are assigned to this DP master using drag & drop from the<br />
"<strong>Hardware</strong> Catalog" window under "PROFIBUS-DP."<br />
As a DP master system is always connected to a PROFIBUS subnet, <strong>STEP</strong> 7<br />
automatically displays dialog boxes for setting the subnet properties (for example,<br />
transmission rate) <strong>and</strong> the PROFIBUS address when you place the DP<br />
components.<br />
<strong>Configuring</strong> <strong>Hardware</strong> <strong>and</strong> <strong>Communication</strong> <strong>Connections</strong> with <strong>STEP</strong> 7<br />
A5E00706939-01 3-1
<strong>Configuring</strong> the Distributed I/O (DP)<br />
DP Slave Does Not Appear in the "<strong>Hardware</strong> Catalog" Window<br />
If a DP slave does not appear in the "<strong>Hardware</strong> Catalog" window, you must install<br />
the corresponding *.GSD file after the start of <strong>STEP</strong> 7 using the menu comm<strong>and</strong><br />
Options > Install GSD File. The dialog boxes then guide you through the process<br />
of installing the *.GSD file. The installed DP slave then appears in the "<strong>Hardware</strong><br />
Catalog" window under "PROFIBUS-DP - Other Field Devices."<br />
Slave Configuration in the Detailed View<br />
If you select the DP slave, the slave structure (DP identifiers <strong>and</strong><br />
modules/submodules) <strong>and</strong> I/O addresses are displayed in the detailed view of the<br />
station window.<br />
<strong>Configuring</strong> <strong>Hardware</strong> <strong>and</strong> <strong>Communication</strong> <strong>Connections</strong> with <strong>STEP</strong> 7<br />
3-2 A5E00706939-01
<strong>Configuring</strong> the Distributed I/O (DP)<br />
Switching Between the DP Master System <strong>and</strong> the DP Slave in the Detailed View<br />
of the Station Window<br />
If you select the symbol for the DP master system ( ), all DP slaves<br />
belonging to the DP master system will be displayed in the lower half of the station<br />
window. If you select a DP slave symbol, the configuration of the DP slave is<br />
displayed in the lower half of the station window. You can easily change between<br />
displays by using the <strong>and</strong> buttons.<br />
Slot Numbering in Distributed I/O Devices<br />
Depending on which DP slave type you are configuring, the slots in the detailed<br />
view of the DP slave begin either with "0" or "4."<br />
With DP slaves that are configured by *.GSD files, the *.GSD file specifies at which<br />
slot the I/O addresses start; the slots before that are "empty."<br />
Slot numbering of DP slaves such as ET 200M that are completely integrated in<br />
<strong>STEP</strong> 7 is derived from the structure of an S7-300 station according to the<br />
following pattern:<br />
<br />
<br />
<br />
<br />
<br />
<br />
<br />
<br />
<br />
<br />
<br />
Remarks on the slots of a DP slave, which is structured like the S7-300 station:<br />
• The "actual" I/O (inputs/outputs) always starts with slot 4.<br />
• Independent of whether a power supply module (PS) is inserted in the real<br />
configuration or not: slot 1 is always reserved for a PS.<br />
• Slot 2 is always reserved for the DP interface module.<br />
• Slot 3 is always reserved for an expansion interface module (IM), independent<br />
of whether a "real" I/O device can be exp<strong>and</strong>ed or not.<br />
This pattern is used for all DP slave types: modular <strong>and</strong> compact. The slot<br />
arrangement is important for evaluating diagnostic messages (the slot that triggers<br />
diagnostics).<br />
<strong>Configuring</strong> <strong>Hardware</strong> <strong>and</strong> <strong>Communication</strong> <strong>Connections</strong> with <strong>STEP</strong> 7<br />
A5E00706939-01 3-3
<strong>Configuring</strong> the Distributed I/O (DP)<br />
3.2 Where Are the DP Slaves in the <strong>Hardware</strong> Catalog<br />
Window?<br />
All DP slaves can be found in the "<strong>Hardware</strong> Catalog" window under the<br />
"PROFIBUS-DP" folder.<br />
The following applies here:<br />
The DP master is...<br />
• ...a SIMATIC 300 or SIMATIC 400 CPU with integrated PROFIBUS-DP<br />
interface, a PROFIBUS CP (without CP 342-5DA00) in a SIMATIC 300/400 or a<br />
SIMATIC PC station with a PROFIBUS CP (without CP 5611/CP 5613)<br />
The DP slaves appear under their "family name" (e.g. PROFIBUS-<br />
DP\ET 200B).<br />
• ...a CP 342-5DA00 with PROFIBUS-DP interface or an SIMATIC PC station<br />
with CP 5611/CP 5613:<br />
The DP slaves appear either in the "DP V0 Slaves" folder <strong>and</strong> then under their<br />
family name<br />
(e.g. PROFIBUS DP\DP V0 Slaves\ET 200B).<br />
The "DP V0 Slaves" contains the DP slaves represented by their GSD file or type<br />
file (referred to as "St<strong>and</strong>ard Slaves").<br />
Folders designated with the family name <strong>and</strong> located directly under PROFIBUS DP<br />
(e.g. PROFIBUS DP\ET 200B) usually contain the DP slaves whose properties are<br />
represented by internal <strong>STEP</strong> 7 information (referred to as "S7 Slaves").<br />
The DP slave was purchased separately (with a new *.GSD file)<br />
The DP slave will appear under "Other Field Devices" after you have installed the<br />
*.GSD file.<br />
The DP slave is an intelligent DP slave<br />
Examples: You can configure stations as a DP slave with:<br />
• CP 342-5 DP<br />
• CPU 315-2 DP, CPU 316-2 DP, CPU 318-2 DP<br />
• Basic submodule ET 200X (BM 147/CPU)<br />
• IM 151/CPU (ET 200S)<br />
The DP slave appears under the "Configured Stations" folder after configuring the<br />
station. The procedure (how does a station appear in the "Configured Stations"<br />
folder?) is described in detail in the section about configuring the intelligent DP<br />
slaves.<br />
<strong>Configuring</strong> <strong>Hardware</strong> <strong>and</strong> <strong>Communication</strong> <strong>Connections</strong> with <strong>STEP</strong> 7<br />
3-4 A5E00706939-01
<strong>Configuring</strong> the Distributed I/O (DP)<br />
3.3 Distributed Reading <strong>and</strong> Writing of Consistent Data<br />
(> 4 Bytes)<br />
Previously, you were able to access consistent data (> 4 Bytes) on a DP slave by<br />
means of SFC 14 <strong>and</strong> SFC 15.<br />
As of Version 3.0 of CPU 318-2 <strong>and</strong> CPUs 41x, you can also access a consistent<br />
data area by accessing the process image (such as L IW).<br />
<strong>Configuring</strong> Consistent Data Areas > 4 Bytes<br />
1. In the hardware configuration, select the "Addresses" tab for the DP slave.<br />
Depending on the type of DP slave, the consistency area either has st<strong>and</strong>ard<br />
default settings <strong>and</strong> cannot be changed (such as specified by a GSD file), or<br />
you can define the consistency area in the fields "Length", "Unit" <strong>and</strong><br />
"Consistency via".<br />
2. If necessary, define the length of the consistent area <strong>and</strong> enter this area into a<br />
process image. To do this proceed as follows: In the "Process image partition"<br />
field, select OB1-PI or, in the case of S7-400, select yet another process-image<br />
partition (PIP) such as PIP 3. If you do not put the data in a process image<br />
partition, then you must use SFC 14 or SFC 15 for data exchanges.<br />
Upon update of the process image, the operating system transfers these data<br />
consistently, <strong>and</strong> you can use download <strong>and</strong> transfer comm<strong>and</strong>s to access the data<br />
in the process image. This provides you with an easy <strong>and</strong> efficient (low run-time<br />
load) way to access consistent data.<br />
<strong>Configuring</strong> <strong>Hardware</strong> <strong>and</strong> <strong>Communication</strong> <strong>Connections</strong> with <strong>STEP</strong> 7<br />
A5E00706939-01 3-5
<strong>Configuring</strong> the Distributed I/O (DP)<br />
3.4 Configurations for PROFIBUS-DP<br />
The following topics provide examples of configurations for PROFIBUS-DP that<br />
you can create with <strong>STEP</strong> 7.<br />
• Configuration with "Simple" (Modular or Compact) DP Slaves (Data Exchange:<br />
Slave Master)<br />
• Configuration with Intelligent DP Slaves (Data Exchange: Slave Master)<br />
• Configuration with Intelligent DP Slaves (Direct Data Exchange: Slave > I Slave)<br />
• Configuration with Two DP Master Systems (Direct Data Exchange: Slave ><br />
Master)<br />
• Configuration with Two DP Master Systems (Direct Data Exchange: Slave > I<br />
Slave)<br />
• Example of <strong>Configuring</strong> Direct Data Exchange (Lateral <strong>Communication</strong>)<br />
3.4.1 Configuration with 'Simple' (Modular or Compact) DP Slaves<br />
(Data Exchange: Slave Master)<br />
In this configuration, data exchange takes place between the DP master <strong>and</strong><br />
simple DP slaves, that is, I/O modules, by means of the DP master. The DP master<br />
polls each configured DP slave, one after the other, in the master's polling list<br />
within the DP master system <strong>and</strong> transmits the output data or receives the input<br />
data from the slaves. The I/O addresses are assigned automatically by the<br />
configuration system.<br />
This configuration is also known as a mono-master system because a single<br />
master with its associated DP slaves are connected to one physical PROFIBUS DP<br />
subnet.<br />
<br />
<br />
<br />
<strong>Configuring</strong> <strong>Hardware</strong> <strong>and</strong> <strong>Communication</strong> <strong>Connections</strong> with <strong>STEP</strong> 7<br />
3-6 A5E00706939-01
3.4.2 Configuration with Intelligent DP Slaves<br />
(Data Exchange: I Slave Master)<br />
<strong>Configuring</strong> the Distributed I/O (DP)<br />
You can divide automation tasks into subtasks that can be controlled by a higherlevel<br />
programmable logic controller. These control tasks, which can be<br />
accomplished independently <strong>and</strong> efficiently, run as preprocessing on a CPU. This<br />
CPU can be implemented in the form of an intelligent DP slave.<br />
For configurations with intelligent DP slaves (I slaves), such as a CPU 315-2DP,<br />
the DP master does not access the I/O modules of the intelligent DP slave; instead,<br />
the master accesses only the address areas of the CPU of the I slave. This means<br />
that this address area cannot be assigned for real I/O modules in the I slave. This<br />
assignment must be made when the I slave is configured.<br />
Examples of intelligent DP slaves (= DP slaves with preprocessing): station with<br />
CPU 315-2DP, CPU 316-2DP, CPU 318-2DP<br />
<br />
<br />
<br />
<br />
<strong>Configuring</strong> <strong>Hardware</strong> <strong>and</strong> <strong>Communication</strong> <strong>Connections</strong> with <strong>STEP</strong> 7<br />
A5E00706939-01 3-7
<strong>Configuring</strong> the Distributed I/O (DP)<br />
3.4.3 Configuration with Intelligent DP Slaves (Direct Data Exchange:<br />
Slave > I Slave)<br />
With this configuration, input data from DP slaves can be transmitted very rapidly to<br />
intelligent DP slaves on the PROFIBUS-DP subnet.<br />
In this manner, all simple DP slaves (as of a certain release) or other intelligent DP<br />
slaves can, in principle, provide selected input data for direct data exchange (DX)<br />
between DP slaves. Only intelligent DP slaves such as CPU 315-2DP can be used<br />
to receive these data.<br />
Example of stations that can be configured as intelligent DP slaves: CPU 315-2DP,<br />
CPU 316-2DP, CPU 318-2DP<br />
<br />
<br />
<br />
<strong>Configuring</strong> <strong>Hardware</strong> <strong>and</strong> <strong>Communication</strong> <strong>Connections</strong> with <strong>STEP</strong> 7<br />
3-8 A5E00706939-01
<strong>Configuring</strong> the Distributed I/O (DP)<br />
3.4.4 Configuration with Two DP Master Systems (Direct Data<br />
Exchange: Slave > I Slave)<br />
<br />
Several DP master systems on one physical PROFIBUS-DP subnet are also called<br />
a multiple master system. In this configuration, input data from DP slaves can be<br />
read very rapidly by intelligent DP slaves on the same physical PROFIBUS-DP<br />
subnet. The intelligent DP slaves can be located on the same DP master system or<br />
on another system.<br />
In this manner, an intelligent DP slave such as a CPU 315-2DP can allow input<br />
data from DP slaves to be transmitted directly to its input data area, even from<br />
different DP master systems (that is, multiple master systems).<br />
In principle, all DP slaves (as of a certain release) can provide selected input data<br />
for direct data exchange (DX) between DP slaves. These input data can in turn be<br />
used further only by intelligent DP slaves such as CPU 315-2DP.<br />
<br />
<br />
<br />
<br />
<br />
<br />
<br />
<br />
<br />
<strong>Configuring</strong> <strong>Hardware</strong> <strong>and</strong> <strong>Communication</strong> <strong>Connections</strong> with <strong>STEP</strong> 7<br />
A5E00706939-01 3-9
<strong>Configuring</strong> the Distributed I/O (DP)<br />
3.4.5 Configuration with Two DP Master Systems (Direct Data<br />
Exchange: Slave > Master)<br />
Several DP master systems on one physical PROFIBUS-DP subnet are also called<br />
a multiple master system. In this configuration, input data from intelligent DP slaves<br />
or simple DP slaves can be read directly by the master of a different DP master<br />
system on the same physical PROFIBUS-DP subnet.<br />
<br />
<br />
<br />
<br />
<br />
<br />
<br />
<strong>Configuring</strong> <strong>Hardware</strong> <strong>and</strong> <strong>Communication</strong> <strong>Connections</strong> with <strong>STEP</strong> 7<br />
3-10 A5E00706939-01
3.5 How to Configure Distributed I/O Systems<br />
3.5.1 Creating a DP Master System<br />
Requirement<br />
DP Master<br />
<strong>Configuring</strong> the Distributed I/O (DP)<br />
You have arranged a rack in a station window <strong>and</strong> the rack is shown as being open<br />
(the rack slots are visible).<br />
You can use the following items as DP master:<br />
• A CPU with a fixed integrated or installable DP master interface (fixed<br />
integrated, for example, CPU 315-2 DP).<br />
• An interface submodule that is assigned to a CPU/FM<br />
(for example, IF 964-DP in CPU 488-4).<br />
• A CP in conjunction with a CPU (for example, CP 3425, CP 4435).<br />
• An interface module with DP master interface (for example, IM 467)<br />
Procedure<br />
1. Select a DP master from the "<strong>Hardware</strong> Catalog" window (for example,<br />
CPU 315-2 DP).<br />
2. Drag the module to a suitable row in the rack. The "Properties - PROFIBUS<br />
Node" dialog box opens.<br />
Here you can do the following:<br />
- Create a new PROFIBUS subnet or select an existing subnet<br />
- Set properties for the PROFIBUS subnet (transmission rate etc.)<br />
- Set the PROFIBUS address of the DP master<br />
3. Confirm the settings with "OK."<br />
The following symbol appears:<br />
This symbol is the "anchor" for the DP slave of the master system.<br />
Tip: If you cannot find the symbol immediately, it may be hidden by the<br />
configuration table. Make the width of the configuration table containing the DP<br />
master smaller. If the symbol for the DP master system is still not visible, select the<br />
menu comm<strong>and</strong> Insert > Master System.<br />
<strong>Configuring</strong> <strong>Hardware</strong> <strong>and</strong> <strong>Communication</strong> <strong>Connections</strong> with <strong>STEP</strong> 7<br />
A5E00706939-01 3-11
<strong>Configuring</strong> the Distributed I/O (DP)<br />
3.5.2 H<strong>and</strong>ling DP Master Systems <strong>and</strong> DP Interfaces<br />
Separating DP Master Systems<br />
If you insert a CPU with an integrated PROFIBUS-DP interface or a PROFIBUS CP<br />
in a station (configurable as an intelligent DP slave) <strong>and</strong> you have configured the<br />
CPU or CP as a DP master with master system, you can separate the master<br />
system from the DP master:<br />
1. Select the DP master interface<br />
2. Select the menu comm<strong>and</strong> Edit > Master System > Separate.<br />
Alternative: Use the right mouse button to get a pop-up menu <strong>and</strong> select the<br />
comm<strong>and</strong> Master System > Separate.<br />
The master system is maintained as an "orphaned" master system <strong>and</strong> is visible in<br />
the station. The configured direct data exchange (lateral communication) is<br />
maintained.<br />
If no slaves are connected to the master system, the master system is deleted.<br />
Inserting a DP Master System<br />
If you configured one or more DP master systems <strong>and</strong> separated them from the DP<br />
master interface, you can insert one of the orphaned DP master systems again at<br />
the selected DP master interface by means of the menu comm<strong>and</strong> Edit > Master<br />
System > Insert.<br />
Giving the PROFIBUS-DP Interface Online Capability<br />
If you want the integrated PROFIBUS-DP interface of a CPU to behave like an<br />
active node on the PROFIBUS-DP (thus enabling programming device functions by<br />
means of this interface), make sure that the following conditions are met:<br />
1. The PROFIBUS-DP interface must be configured as "networked," that is, when<br />
the PROFIBUS-DP interface is selected, a PROFIBUS subnet must be<br />
selected or newly created by means of the menu comm<strong>and</strong> Edit > Object<br />
Properties.<br />
2. This configuration must be loaded to the CPU.<br />
Afterwards, such functions as monitoring with the programming device are<br />
possible by means of the PROFIBUS-DP interface.<br />
Changing the Properties of a Master System<br />
From <strong>STEP</strong> 7 V5.0, Service Pack 3 onwards you can change the properties of a<br />
master system (name <strong>and</strong> number):<br />
1. Double-click the line representing the master system in an open station<br />
configuration.<br />
2. Select the "General" tab <strong>and</strong> adapt the name <strong>and</strong> master system number to<br />
your requirements.<br />
You can also edit the corresponding subnet using the "Properties" button.<br />
<strong>Configuring</strong> <strong>Hardware</strong> <strong>and</strong> <strong>Communication</strong> <strong>Connections</strong> with <strong>STEP</strong> 7<br />
3-12 A5E00706939-01
3.5.3 Selecting <strong>and</strong> Arranging DP Slaves<br />
Types of DP Slaves<br />
Requirement<br />
<strong>Configuring</strong> the Distributed I/O (DP)<br />
When configuring DP slaves, we differentiate between:<br />
• Compact DP slaves<br />
(modules with integrated digital/analog inputs <strong>and</strong> outputs, for example,<br />
ET 200B)<br />
• Modular DP slaves<br />
(interface modules with S5 or S7 modules assigned, for example, ET 200M<br />
• Intelligent slaves (I slaves)<br />
(S7-300 stations with, for example, CP 342-5, CPU 315-2DP, or ET 200X with<br />
BM 147/CPU)<br />
Note<br />
Note the technical specifications (max. number of nodes, max. number of slots,<br />
max. number of user data) of the DP master when configuring the master system.<br />
It is possible that you may not be able to configure the maximum number of nodes<br />
owing to the limits for the number of slots or user data.<br />
A DP master system must be present <strong>and</strong> visible in the station window.<br />
Symbol for the DP master system:<br />
If the symbol is not visible (for example, it was deleted), you can create it by<br />
selecting the row for the DP interface of the DP master <strong>and</strong> selecting the menu<br />
comm<strong>and</strong> Insert > Master System.<br />
3.5.4 Copying Multiple DP Slaves<br />
1. Hold CTRL pressed <strong>and</strong> click on the DP slaves you want to copy one by one.<br />
Result: The DP slaves are selected.<br />
2. Select the menu comm<strong>and</strong> Edit > Copy.<br />
3. Select the DP master system to which the copied DP slaves are to be added.<br />
4. Select the menu comm<strong>and</strong><br />
Edit > Paste ("normal" copying) or<br />
Edit > Redundant Paste (when copying for software redundancy).<br />
<strong>Configuring</strong> <strong>Hardware</strong> <strong>and</strong> <strong>Communication</strong> <strong>Connections</strong> with <strong>STEP</strong> 7<br />
A5E00706939-01 3-13
<strong>Configuring</strong> the Distributed I/O (DP)<br />
3.5.5 <strong>Configuring</strong> Compact DP Slaves<br />
Procedure<br />
1. Select a compact DP slave (for example, ET 200B) from the "<strong>Hardware</strong><br />
Catalog" window.<br />
2. Drag the DP slave to the following symbol for a DP master system:<br />
The "Properties - PROFIBUS Node" dialog box opens. Here you can set the<br />
following:<br />
- The properties for the PROFIBUS subnet (transmission rate etc.)<br />
- The PROFIBUS address of the DP slave.<br />
3. Confirm the settings with "OK."<br />
Result: A symbol is attached to the DP master system to represent the<br />
compact DP slave. The I/O configuration of the compact DP slave is displayed<br />
in the lower half of the station window (detailed view).<br />
3.5.6 <strong>Configuring</strong> Modular DP Slaves<br />
Procedure<br />
1. Select an interface module for a modular DP slave (for example, IM 153 for<br />
ET 200M) from the "<strong>Hardware</strong> Catalog" window.<br />
2. Drag the interface module to the following symbol for the DP master system:<br />
Result: The "Properties - PROFIBUS Node" dialog box opens. Here you can<br />
set the following:<br />
- The properties of the PROFIBUS subnet (transmission rate, etc.).<br />
- The PROFIBUS address of the DP slave.<br />
3. Confirm your settings with "OK."<br />
A symbol for the DP slave is attached to the DP master system. The detailed<br />
view of the DP slave appears in the lower half of the station window showing all<br />
the possible slots or DP identifiers.<br />
4. Assign the modules for the modular DP slave in the lower half of the station<br />
window.<br />
For modular DP slaves, the possible modules are arranged in the "<strong>Hardware</strong><br />
Catalog" window below the associated DP slave "family."<br />
These are e.g.:<br />
- Terminal blocks (TB...SC) for Smart Connect (family ET 200L SC)<br />
- SC submodules (family ET 200L SC)<br />
- AS-i slaves (family DP/AS-i Link)<br />
- S7-300 modules (family ET 200M)<br />
<strong>Configuring</strong> <strong>Hardware</strong> <strong>and</strong> <strong>Communication</strong> <strong>Connections</strong> with <strong>STEP</strong> 7<br />
3-14 A5E00706939-01
3.5.7 Assigning DP Slaves to SYNC or FREEZE Groups<br />
Requirement<br />
Procedure<br />
<strong>Configuring</strong> the Distributed I/O (DP)<br />
A DP master with the appropriate function can send the SYNC <strong>and</strong>/or FREEZE<br />
control comm<strong>and</strong>s simultaneously to a group of slaves to synchronize the DP<br />
slaves. To do this, you must assign the SYNC <strong>and</strong> FREEZE groups for the DP<br />
slaves.<br />
You must have created a DP master system.<br />
1. Select the DP master system symbol containing the DP slave that you wish to<br />
assign to a group.<br />
2. Select the menu comm<strong>and</strong> Edit > Object Properties.<br />
Result: The "Group Assignment" tab appears with a table in which you can<br />
assign the SYNC/FREEZE groups for the DP slave.<br />
Note<br />
You can assign a maximum of one SYNC <strong>and</strong> one FREEZE group to each DP<br />
slave.<br />
Exception: If a CP 3425 is used as DP master, a maximum of eight groups (SYNC<br />
<strong>and</strong>/or FREEZE groups) can be assigned to each DP slave of this master system<br />
(see CP 342-5 documentation).<br />
What You Should Know About the SYNC <strong>and</strong> FREEZE Control Comm<strong>and</strong>s<br />
The SYNC <strong>and</strong> FREEZE comm<strong>and</strong>s can be used to perform event-driven<br />
synchronization of the DP slaves. The DP master sends the control comm<strong>and</strong>s<br />
simultaneously to a group of DP slaves of its master system. Those slaves that<br />
have failed or are currently reporting diagnostics are ignored.<br />
The requirement for synchronization using control comm<strong>and</strong>s is that you have<br />
assigned the DP slaves to SYNC <strong>and</strong>/or FREEZE groups.<br />
Für eine S7-CPU verwenden Sie den SFC 11 (DPSYC_FR) zur Synchronisation<br />
der DP-Slaves.<br />
<strong>Configuring</strong> <strong>Hardware</strong> <strong>and</strong> <strong>Communication</strong> <strong>Connections</strong> with <strong>STEP</strong> 7<br />
A5E00706939-01 3-15
<strong>Configuring</strong> the Distributed I/O (DP)<br />
SYNC Control Comm<strong>and</strong><br />
The DP master uses the SYNC control comm<strong>and</strong> for a group of DP slaves to<br />
freeze the states of their outputs at their current values.<br />
In the following frames, the DP slaves store the output data of the DP master, but<br />
the states of the DP slaves' outputs remain unchanged.<br />
After every new SYNC control comm<strong>and</strong>, the DP slave sets its outputs to the<br />
values that it stored as output data of the DP master.<br />
The outputs are only then cyclically updated again when the DP master sends the<br />
UNSYNC control comm<strong>and</strong>.<br />
FREEZE Control Comm<strong>and</strong><br />
After receiving the FREEZE control comm<strong>and</strong> from the DP master, the DP slaves<br />
of a group freeze the current state of their inputs <strong>and</strong> transfer these cyclically to the<br />
DP master.<br />
After every new FREEZE control comm<strong>and</strong>, the DP slave freezes the states of their<br />
inputs again.<br />
The input data are only then cyclically transferred from the DP slave to the DP<br />
master when the DP master sends the UNFREEZE control comm<strong>and</strong>.<br />
<strong>Configuring</strong> <strong>Hardware</strong> <strong>and</strong> <strong>Communication</strong> <strong>Connections</strong> with <strong>STEP</strong> 7<br />
3-16 A5E00706939-01
3.6 Other DP Slave Configurations<br />
3.6.1 ET 200L <strong>and</strong> DP/AS-i Link<br />
3.6.2 ET 200S<br />
Introduction<br />
Note<br />
<strong>Configuring</strong> the Distributed I/O (DP)<br />
When configuring the DP slaves ET 200L <strong>and</strong> DP/AS-i Link (distributed<br />
I/O/actuator-sensor interface), the following applies:<br />
• ET 200L can be exp<strong>and</strong>ed using Smart Connect (SC) a channel at a time<br />
• DP/AS-i Link is configured with actuator-sensor interface slaves; see below.<br />
When placing a DP/AS-i Link, a configuration table is displayed automatically in<br />
which you can place the actuator-sensor interface slaves from the "<strong>Hardware</strong><br />
Catalog" window.<br />
DP slaves <strong>and</strong> IO devices of the ET 200S family are configured like other modular<br />
DP slaves <strong>and</strong> IO devices.<br />
Special feature: Digital electronic modules with an address space of 2 bits initially<br />
occupy 1 byte when they are inserted in the configuration table (Details view).<br />
However, the occupied address space can be compressed after configuration by<br />
means of the Pack Addresses button.<br />
Example:<br />
Before Packing<br />
Addresses<br />
After Packing<br />
Addresses<br />
Module I Address I Address<br />
DI_1_Module 10.0 to 10.1 10.0 to 10.1<br />
DI_2_Module 11.0 to 11.1 10.2 to 10.3<br />
Addresses cannot be packed in the GSD-based variant of the ET 200S IO device.<br />
In the HW catalog, use the variant that does not have a reference to a GSD file<br />
(*.XML) in its info text.<br />
<strong>Configuring</strong> <strong>Hardware</strong> <strong>and</strong> <strong>Communication</strong> <strong>Connections</strong> with <strong>STEP</strong> 7<br />
A5E00706939-01 3-17
<strong>Configuring</strong> the Distributed I/O (DP)<br />
Procedure: "Packing" Address Spaces Together<br />
1. Select one contiguous range of modules whose addresses are to be packed.<br />
2. In the Details view of the configuration table, click on the Pack Addresses<br />
button.<br />
The address areas for inputs, outputs, <strong>and</strong> motor starters are packed<br />
separately.<br />
- The beginning of the address area is defined by the address of each<br />
module that is selected first <strong>and</strong> has the form X.0.<br />
- If the bit address is not 0, the next (available) byte address from which the<br />
selected area can be inserted is used automatically, for example, (X+1).0.<br />
- If there is no other contiguous range, packing takes place automatically<br />
into available address spaces.<br />
Undoing Address Packing<br />
If you want to set the start address of a module with a "packed" address again as a<br />
byte address, proceed as follows:<br />
1. Select the module with the packed address (e.g. 100.2).<br />
2. Click the "Pack Addresses" button.<br />
The start address of the module will be set to the next free byte address<br />
(e.g. 101.0, if this address is still free).<br />
Special considerations for modules with packed addresses<br />
When a module has a packed address, it can no longer be assigned a slot from the<br />
point of view of the CPU. For this reason SFC 5 (GADR_LGC) reports the error<br />
message W#16#8099 (slot not configured) for the actual slot of the module.<br />
SFC 49 (LGC_GADR) <strong>and</strong> SZL-ID W#16#xy91 (module status information) are<br />
also incapable of evaluating a module with packed addresses.<br />
From the point of view of the CPU, interrupts can also not be assigned for a<br />
module with packed addresses. Therefore, in DPV1 mode an additional diagnostic<br />
address is automatically assigned for the module.<br />
The features "Pack addresses" <strong>and</strong> "Plug/remove interrupt" are mutually<br />
exclusively.<br />
<strong>Configuring</strong> <strong>Hardware</strong> <strong>and</strong> <strong>Communication</strong> <strong>Connections</strong> with <strong>STEP</strong> 7<br />
3-18 A5E00706939-01
Rules for <strong>Configuring</strong> an ET 200S<br />
• Slot 1: Only power module (PM-E or PM-D)<br />
<strong>Configuring</strong> the Distributed I/O (DP)<br />
• To the left of an electronic module (EM): only an EM or a power module (PM-E<br />
or PM-D)<br />
• To the left of a motor starter (MS): only an MS or PM-D or a power module (PM-<br />
D Fx (1..x..4) or PM-X)<br />
• To the left of a PM-X: only a motor starter or a PM-D<br />
• You must pay attention to the assignment of the PM-E voltage range <strong>and</strong> the<br />
EM voltage range.<br />
• A maximum of 63 modules <strong>and</strong> one interface module are permitted.<br />
Special Features of Assigning Parameters to Reference Junctions<br />
Note the following sequence:<br />
1. In the configuration table (Details view) of the ET 200S: place an analog<br />
electronic module <strong>and</strong> set a channel for the reference junction function to the<br />
measuring range "RTD-4L Pt 100 Cl."<br />
2. Double-click the ET 200S (properties of the DP slave interface connection):<br />
specify reference junction(s), slot <strong>and</strong> channel of the RTD module<br />
3. Place an analog electronic module for measuring temperature by means of<br />
thermocouple (TC module) <strong>and</strong> assign the reference junction number (of the<br />
RTD module) as parameter.<br />
<strong>Configuring</strong> <strong>Hardware</strong> <strong>and</strong> <strong>Communication</strong> <strong>Connections</strong> with <strong>STEP</strong> 7<br />
A5E00706939-01 3-19
<strong>Configuring</strong> the Distributed I/O (DP)<br />
3.6.3 ET 200S with Option H<strong>and</strong>ling<br />
Requirements for Option H<strong>and</strong>ling<br />
• Power submodule: PM-E DC 24V/AC120/230V or PM-E DC 24..48V/AC<br />
120..230V with option h<strong>and</strong>ling (as of <strong>STEP</strong> 7 V5.3)<br />
• Interface submodule: IM 151-1 STANDARD (6ES7 151-1AA03-0AB0) or IM<br />
151-1 FO STANDARD (6ES7 151-1AB02-0AB0)<br />
Overview of the Procedure<br />
Rules<br />
Option h<strong>and</strong>ling allows you to prepare the ET 200S for future expansions (options).<br />
The following section provides overview of the function <strong>and</strong> procedure (for a<br />
detailed description, see the ET 200S Distributed I/O manual):<br />
1. Install, wire, configure <strong>and</strong> program the planned maximum configuration for<br />
ET 200S.<br />
2. Instead of using the electronic submodules that will be required later, use<br />
economical RESERVE submodules (138-4AA00 or 138-4AA10) for the first<br />
installation. The ET 200S can be completely prewired ("master wiring")<br />
because a RESERVE submodule is not connected to the terminals of the<br />
terminal submodule <strong>and</strong> thus is not involved in the process.<br />
3. For those slots that will first be fitted with RESERVE submodules instead of<br />
electronic submodules, enable option h<strong>and</strong>ling (in the property sheet for the IM<br />
151-1 STANDARD, go to the "Option H<strong>and</strong>ling" tab).<br />
4. In the property sheet for the power submodule, reserve the required address<br />
space in the process image output table (PIQ) <strong>and</strong> the process image input<br />
table (PII) for the control <strong>and</strong> feedback interface by enabling option h<strong>and</strong>ling.<br />
5. Later on, you can replace the RESERVE submodules with the configured<br />
submodules without having to repeat the configuration procedure.<br />
Option h<strong>and</strong>ling may be enabled for exactly one PM E-DC24..48V or PM<br />
EDC24..48V/AC24.. power submodule.<br />
Functionality: Option H<strong>and</strong>ling During Start-up<br />
If "Startup when defined <strong>and</strong> actual configuration differ" is disabled, then the<br />
ET 200S will also start up if a RESERVE module is inserted instead of the<br />
configured electronic submodule <strong>and</strong> option h<strong>and</strong>ling is enabled for the slot.<br />
<strong>Configuring</strong> <strong>Hardware</strong> <strong>and</strong> <strong>Communication</strong> <strong>Connections</strong> with <strong>STEP</strong> 7<br />
3-20 A5E00706939-01
Functionality: Option H<strong>and</strong>ling During Operation<br />
<strong>Configuring</strong> the Distributed I/O (DP)<br />
• Option h<strong>and</strong>ling is enabled for a slot:<br />
The slot may have the RESERVE submodule (option) or the configured<br />
electronic submodule inserted in it. If another submodule is detected in this slot,<br />
a diagnostic message is triggered (no submodule, incorrect submodule).<br />
• Option h<strong>and</strong>ling is disabled for a slot:<br />
The slot may only have the configured electronic submodule inserted in it. If<br />
another submodule is detected in this slot, a diagnostic message is triggered<br />
(no submodule, incorrect submodule).<br />
Substitute Values for the RESERVE submodule<br />
Substitute value for digital inputs: 0<br />
Substitute value for analog inputs: 0x7FFF<br />
Modifying <strong>and</strong> Evaluating in the User Program<br />
The ET 200S has a control <strong>and</strong> feedback interface for the "option h<strong>and</strong>ling"<br />
function.<br />
The modifying interface is in the process image output table (PIQ). Each bit in this<br />
address area modifies one of the slots 2 to 63:<br />
• Bit value = 0: The option h<strong>and</strong>ling parameters apply. RESERVE submodules<br />
are permitted.<br />
• Bit value = 1: The option h<strong>and</strong>ling parameters do not apply. RESERVE<br />
submodules are not accepted in this slot:<br />
The feedback interface is in the process image input table (PII). Each bit in this<br />
address area provides information about what submodule is actually inserted in<br />
slots 2 to 63:<br />
• Bit value = 0: The slot contains the RESERVE submodule, an incorrect<br />
submodule or no submodule (submodule removed).<br />
• Bit value = 1: The slot contains the configured submodule.<br />
The addresses of these interfaces are reserved as soon as option h<strong>and</strong>ling is<br />
enabled in the power submodule ("Addresses" tab).<br />
Please note that the option h<strong>and</strong>ling function must also be enabled in the DP slave<br />
(interface module IM 151-1 STANDARD). If it is not enabled, the address reserved<br />
for the control <strong>and</strong> feedback interface will be released again! Repeated enabling<br />
<strong>and</strong> disabling of option h<strong>and</strong>ling may change the address of the control <strong>and</strong><br />
feedback interface.<br />
For more information on the assignment <strong>and</strong> meaning the bytes in the process<br />
image, see the ET 200S Distributed I/O manual.<br />
<strong>Configuring</strong> <strong>Hardware</strong> <strong>and</strong> <strong>Communication</strong> <strong>Connections</strong> with <strong>STEP</strong> 7<br />
A5E00706939-01 3-21
<strong>Configuring</strong> the Distributed I/O (DP)<br />
3.6.4 ET 200S in DPV1 Mode<br />
Procedure<br />
DPV1 functions provide you with extended functions such as interrupts. You can<br />
assign parameters to these functions with the respective DP interface module<br />
IM 151.<br />
To be able to set the DPV1 mode, the DP master interface must also be set to the<br />
DPV1 mode.<br />
1. Configure a station with a DP master that supports DPV1 (such as a<br />
CPU S7-41x DP with firmware version 3.0) <strong>and</strong> the respective ET 200S<br />
(IM 151).<br />
The DP interface for the DP master is set to DPV1 mode.<br />
2. Double-click the DP slave icon (IM 151).<br />
3. Click the "Operating Parameters" tab.<br />
This register contains additional parameters such as DP Interrupt Mode <strong>and</strong><br />
DPV1 Interrupts.<br />
4. Set the parameters.<br />
Special Features:<br />
There are certain dependencies among the parameters, which are shown in the<br />
following table:<br />
Parameter DPV0 Mode DPV1 Mode<br />
Operation with expected actual No operational restrictions<br />
configuration<br />
No operational restrictions<br />
Diagnostic interrupt Not operational, not set No operational restrictions<br />
<strong>Hardware</strong> interrupt Not operational, not set No operational restrictions<br />
Insert/remove interrupt Not operational, not set No operational restrictions<br />
If insert/remove interrupt is<br />
activated, 'Start-up with expected<br />
actual configuration' is<br />
activated automatically.<br />
Only operational if addresses are<br />
not packed<br />
<strong>Configuring</strong> <strong>Hardware</strong> <strong>and</strong> <strong>Communication</strong> <strong>Connections</strong> with <strong>STEP</strong> 7<br />
3-22 A5E00706939-01
Interrupts for Modules with Packed Addresses<br />
<strong>Configuring</strong> the Distributed I/O (DP)<br />
If the submodule can trigger interrupts <strong>and</strong> its addresses are packed (that is, it has<br />
a bit address not equal to 0), then you must use the ET 200S address dialog to<br />
assign a dialog address.<br />
The diagnostic address is essential to assigning a DPV1 interrupt to the submodule<br />
as the interrupt trigger. Only when a submodule has this "unpacked address" can<br />
the CPU assign an interrupt <strong>and</strong> store information about the interrupt in the start<br />
information for the interrupt OB or in the diagnostic buffer. The CPU cannot use a<br />
"packed" address to do this.<br />
This diagnostic address assigned to the submodule is only valid for interrupt<br />
processing (interrupt OB). For processing input <strong>and</strong> output data in the user<br />
program, the submodule still has the packed addresses.<br />
Note<br />
If the submodule addresses are packed, then the insert/remove interrupt for the<br />
ET 200S is also disabled!<br />
3.6.5 ET 200iS<br />
Configuration<br />
You can either configure ET 200iS <strong>and</strong> its electronic modules in the HW Config or<br />
conveniently do so with the SIMATIC PDM option package The respective system<br />
requirements <strong>and</strong> procedure are described below:<br />
System Requirement<br />
<strong>STEP</strong> 7 as of version 5.1, SP 2, Hotfix 1 or PCS7 as of version 5.2.<br />
In this case, ET 200iS is in the <strong>STEP</strong> 7 hardware catalog. Diagnostic interrupts,<br />
process interrupts, inserting <strong>and</strong> removing interrupts <strong>and</strong> time stamps are<br />
supported.<br />
<strong>Configuring</strong> the ET 200iS<br />
1. Start the SIMATIC Manager.<br />
2. Configure ET 200iS with HW Config.<br />
- Create new project.<br />
- Drag <strong>and</strong> drop the module from the hardware catalog to the configuration<br />
table.<br />
3. Configure the time stamping (optional).<br />
4. Save or download the configuration to the DP master.<br />
<strong>Configuring</strong> <strong>Hardware</strong> <strong>and</strong> <strong>Communication</strong> <strong>Connections</strong> with <strong>STEP</strong> 7<br />
A5E00706939-01 3-23
<strong>Configuring</strong> the Distributed I/O (DP)<br />
Assigning Parameters<br />
System Requirements<br />
<strong>STEP</strong> 7 as of version 5.1, SP 2, Hotfix 1 <strong>and</strong> SIMATIC PDM optional package as of<br />
version 5.1, SP 2 or PCS7 as of version 5.2.<br />
To be able to work with PDM online, you require a PROFIBUS DP interface e.g.<br />
CP5611 (6GK1 561-1AA00). The CP has to be set at the PROFIBUS DP interface<br />
(in the SIMATIC Manager via: Extras > Setting the PG/PC Interface).<br />
Assigning Parameters to the Electronic Module<br />
1. In HW Config, double-click the first electronic module in the configuration table.<br />
2. Select "Specialist" in the subsequent dialog box as user <strong>and</strong> confirm with "OK";<br />
you can assign parameters in this mode.<br />
3. SIMATIC PDM is started with the current parameters <strong>and</strong> identification data of<br />
the module.<br />
4. Set the parameters of the electronic module using the SIMATIC PDM, save the<br />
parameters (via File > Save menu comm<strong>and</strong>) <strong>and</strong> load them via the Device ><br />
Load Into Device menu comm<strong>and</strong> into the electronic module; exit SIMATIC<br />
PDM.<br />
5. Double-click the next electronic module in the configuration table <strong>and</strong> repeat<br />
steps 2 <strong>and</strong> 3 until you have configured all electronic modules.<br />
Assigning Parameters to the Interface Module.<br />
1. In HW Config, double-click on DP slave "IM 151-2" (in the upper part of the<br />
station window). Select "Specialist" in the subsequent window; SIMATIC PDM<br />
is started.<br />
2. Set the parameters of the IM 151-2 interface module, save the parameters (via<br />
File > Save menu comm<strong>and</strong>) <strong>and</strong> download the parameters into the interface<br />
module via the Device > Load Into Device menu comm<strong>and</strong>; exit SIMATIC<br />
PDM.<br />
Assigning Parameters to all ET 200iS modules.<br />
1. In HW Config, double-click on DP slave "IM 151-2" (in the upper part of the<br />
station window). Select "Specialist" in the subsequent window; SIMATIC PDM<br />
is started <strong>and</strong> all ET 200iS modules are loaded.<br />
2. Download all module parameters (via the File > Load into Programming<br />
Device/PC menu comm<strong>and</strong>).<br />
3. Assign parameters to all necessary modules. You can navigate to all ET 200iS<br />
modules from the left panel of SIMATIC PDM.<br />
4. Save the changes (via File > Save menu comm<strong>and</strong>) for the file to be updated.<br />
5. Load all parameters into the modules (via Device > Load into Device menu<br />
comm<strong>and</strong>); exit SIMATIC PDM.<br />
You can also parameterize ET 200iS only with SIMATIC PDM (For more<br />
information, see the SIMATIC PDM online Help.)<br />
<strong>Configuring</strong> <strong>Hardware</strong> <strong>and</strong> <strong>Communication</strong> <strong>Connections</strong> with <strong>STEP</strong> 7<br />
3-24 A5E00706939-01
3.6.6 PROFIBUS PA<br />
DP/PA Coupler<br />
DP/PA Link<br />
<strong>Configuring</strong> the Distributed I/O (DP)<br />
In order to configure field devices for the PROFIBUS PA (PROFIBUS for Process<br />
Automation), you should note the following:<br />
You cannot configure the DP/PA coupler in <strong>Hardware</strong> Configuration, because it is<br />
"invisible" in the station configuration. You only have to set the transmission rate for<br />
the PROFIBUS subnet to 45.45 Kbps in the properties dialog box of the<br />
PROFIBUS interface of the DP master or DP slave. The coupler reduces the<br />
transmission rate to 31.25 Kbps for the PA field devices.<br />
The DP/PA link is a gateway between PROFIBUS DP <strong>and</strong> PROFIBUS PA. The<br />
DP/PA link is a DP slave, which for its part (acting as a kind of "master") "opens" a<br />
PROFIBUS PA for connecting PROFIBUS PA devices.<br />
The device can be assigned to a DP master system as a DP slave from the<br />
"<strong>Hardware</strong> Catalog" window.<br />
The representation of the DP/PA link also incorporates a symbol for the PA master<br />
system as well as the device symbol itself - this is similar to the DP master system.<br />
You can assign PA field devices (PA slaves) to this symbol.<br />
The PROFIBUS PA must be running at a transmission rate of 45.45 Kbps when<br />
you connect PA devices.<br />
Procedure for <strong>Configuring</strong> the DP/PA Link<br />
1. Install the optional software SIMATIC PDM (PDM=Process Device Manager);<br />
this will enable you to configure the PA slaves from the "<strong>Hardware</strong> Catalog"<br />
window at a later stage.<br />
2. Configure a DP master system.<br />
3. Drag the DP/PA link (IM 157) from the " <strong>Hardware</strong> Catalog" window to the DP<br />
master system.<br />
4. Select the DP/PA link; the DP slave structure will be displayed in the lower half<br />
of the station window.<br />
5. Slot 2 represents the master for the PA devices (PA master); double-click slot<br />
2 to configure the PROFIBUS PA.<br />
6. Click the "Properties" button (under "Interface") <strong>and</strong> then select the subnet with<br />
the transmission rate of 45.45 Kbps.<br />
7. Then configure the PA devices.<br />
You will find the PA devices in the "<strong>Hardware</strong> Catalog" window under<br />
"PROFIBUS-PA". This entry can only be seen if the SIMATIC PDM optional<br />
software package is installed.<br />
<strong>Configuring</strong> <strong>Hardware</strong> <strong>and</strong> <strong>Communication</strong> <strong>Connections</strong> with <strong>STEP</strong> 7<br />
A5E00706939-01 3-25
<strong>Configuring</strong> the Distributed I/O (DP)<br />
3.6.7 HART Modules<br />
Requirement:<br />
HART modules are analog modules to which HART transducers can be connected<br />
(HART=Highway Addressable Remote Transducer).<br />
HART modules are required for distributed use with the IM 153-2 (ET 200M).<br />
To assign parameters to the HART transducers, start the parameter assignment<br />
tool SIMATIC PDM<br />
SIMATIC PDM is installed on the programming device/PC.<br />
Representing HART Measuring Transducers<br />
The transducers for HART modules are represented as interface submodules in<br />
the configuration table.<br />
Example: The module is located in slot 4. The transducer for the first channel is<br />
then represented as slot 4.1.<br />
To start SIMATIC PDM:<br />
• Double-click one of the "slots" for HART transducers.<br />
As you can also use the SIMATIC PDM tool for assigning parameters to<br />
PROFIBUS-PA field devices, you can start it as follows:<br />
• Assign a PA field device to a PA master system by dragging & dropping it from<br />
the "<strong>Hardware</strong> Catalog" window, <strong>and</strong> then double-click this PA field device.<br />
3.6.8 <strong>Configuring</strong> Software Redundancy<br />
The configuration of a "warm st<strong>and</strong>by" system consists of:<br />
• Two S7 stations with one PROFIBUS-DP master interface each<br />
(each of these interfaces forms its own subnet)<br />
• One or more slaves with the property "can be used redundantly with active<br />
backplane bus" (e.g. ET 200Ms with IM 153-3) which are connected to both<br />
subnets.<br />
This configuration guarantees that the st<strong>and</strong>by station is able to take over the<br />
processing of the user program if one station (this is, one of the two DP masters)<br />
fails. The slaves that are connected to both stations are then controlled by the<br />
reserve station.<br />
<strong>Configuring</strong> <strong>Hardware</strong> <strong>and</strong> <strong>Communication</strong> <strong>Connections</strong> with <strong>STEP</strong> 7<br />
3-26 A5E00706939-01
Concept Behind <strong>Configuring</strong> Software Redundancy<br />
<strong>Configuring</strong> the Distributed I/O (DP)<br />
With SW redundancy, each of individual stations does not provide any indication<br />
that it is being operated together with another station. The coordination of the<br />
redundant stations is up to the user <strong>and</strong> is not, in contrast to H stations, not<br />
supported by the system<br />
The ET 200M, which physically is only present once, is configured as two identical<br />
S7 stations (same modules, identical addresses, identical settings). To perform this<br />
configuration, go to HW Config <strong>and</strong> select the Edit > Insert Redundant menu<br />
comm<strong>and</strong>.<br />
<strong>Configuring</strong> SW Redundancy with DP/PA Links<br />
Since, with SW redundancy, each of individual stations does not provide any<br />
indication that it is being operated redundantly, the DP/PA Link must be informed of<br />
this condition. To do this, select the "Software redundancy (SWR) activated for the<br />
slave" check box in the "Redundancy" tab of the DP/PA link. This setting ensures<br />
that the PA slaves will automatically start again when the controlling CPU initiates a<br />
switchover. The prerequisites required to ensure a smooth switchover of the slaves<br />
are checked <strong>and</strong>, if necessary, adapted to the DP mode (DPV1, DPV0).<br />
Special Case for IM 153-2 as of V4<br />
Depending on how the IM 153-2 interface module is structured, it will function as a<br />
"normal" ET 200M with modules from the S7-300 range of peripherals or as a<br />
DP/PA link.<br />
IM 153-2 V4 as a DP/PA Link (as of <strong>STEP</strong> 7 V5.4)<br />
If the IM 153-2 is structure with suitable bus submodules, it will automatically<br />
function as a "DP/PA link". To connect it to a PROFIBUS PA, you must first insert a<br />
DP/PA couplers into the bus submodules.<br />
Since the bus submodules are not being configured, <strong>STEP</strong> 7 must be informed in<br />
other way about how the IM 153-2 functions. You make this functional decision<br />
when selecting the IM 153-2 in the <strong>Hardware</strong> Catalog. The IM, with its different<br />
variants (st<strong>and</strong>ard, outdoor, FO), is listed twice in the <strong>Hardware</strong> Catalog:<br />
• As IM 153-2 under "ET 200M"<br />
• As IM 153-2 under "DP/PA Link"<br />
An ET 200M (IM 153-2 as of V4) can likewise be copied <strong>and</strong> redundantly inserted<br />
along with its subordinate PA slaves.<br />
<strong>Configuring</strong> <strong>Hardware</strong> <strong>and</strong> <strong>Communication</strong> <strong>Connections</strong> with <strong>STEP</strong> 7<br />
A5E00706939-01 3-27
<strong>Configuring</strong> the Distributed I/O (DP)<br />
Procedure<br />
1. Configure the first station completely with all ET 200Ms (IM 153-3) or with<br />
DP/PA links.<br />
For a DP/PA link also specify that it is to be operated redundantly as follows:<br />
- Double-click the "DP/PA Link"<br />
- Select the "Redundancy" tab <strong>and</strong> then select the "Software redundancy<br />
(SWR) activated for the slave" check box<br />
- Confirm your setting with "OK".<br />
2. Configure the second station without the ET 200Ms or without DP PA links.<br />
3. Select the slaves in the first station, select the master system in the second<br />
station, <strong>and</strong> insert these slaves in the DP master system of the second station<br />
(menu comm<strong>and</strong>: Edit > Insert Redundant).<br />
Note<br />
The DP slaves must be configured in each of the two stations, which means they<br />
appear as two separate objects - although they are physically one <strong>and</strong> the same<br />
DP slave. If you change the settings for one of the ET 200M DP slaves, you must<br />
also copy this modified DP slave to the other station again to ensure consistency.<br />
<strong>Configuring</strong> <strong>Hardware</strong> <strong>and</strong> <strong>Communication</strong> <strong>Connections</strong> with <strong>STEP</strong> 7<br />
3-28 A5E00706939-01
Sample Configuration<br />
<strong>Configuring</strong> the Distributed I/O (DP)<br />
The illustration below shows the two stations. The DP/PA link is redundantly<br />
inserted along with its subordinate PA slaves. In NetPro, the DP/PA link is only<br />
shown once (which corresponds to the actual, real configuration); nevertheless, the<br />
subordinate PA slaves along with the associated PROFIBUS PA are shown twice<br />
(which does not correspond to the actual, real configuration).<br />
<strong>Configuring</strong> <strong>Hardware</strong> <strong>and</strong> <strong>Communication</strong> <strong>Connections</strong> with <strong>STEP</strong> 7<br />
A5E00706939-01 3-29
<strong>Configuring</strong> the Distributed I/O (DP)<br />
3.7 Intelligent DP Slaves<br />
3.7.1 <strong>Configuring</strong> Intelligent DP Slaves<br />
An intelligent DP slave does not directly provide the DP master with input <strong>and</strong><br />
output data from a real input or output, but rather from the CPU which, together<br />
with the CP, makes up the DP slave.<br />
<br />
<br />
<br />
<br />
<br />
<br />
Difference: "Normal" DP Slave - Intelligent DP Slave<br />
<br />
<br />
In a "normal" DP slave such as a compact (ET 200B) or modular (ET 200M) DP<br />
slave, the DP master accesses the distributed inputs/outputs.<br />
In an intelligent DP slave, the DP master does not access the connected<br />
inputs/outputs of the intelligent DP slave, but accesses a transitional area in the<br />
input/output address space of the "preprocessing CPU." The user program for the<br />
preprocessing CPU must take care of data exchange between the address area<br />
<strong>and</strong> the inputs/outputs.<br />
Note<br />
The configured input/output areas for data exchange between master <strong>and</strong> slaves must not<br />
be "occupied" by I/O modules.<br />
Applications<br />
Configurations with intelligent DP slaves:<br />
• Data Exchange Intelligent Slave Master<br />
• Direct Data Exchange Slave > Intelligent Slave<br />
<strong>Configuring</strong> <strong>Hardware</strong> <strong>and</strong> <strong>Communication</strong> <strong>Connections</strong> with <strong>STEP</strong> 7<br />
3-30 A5E00706939-01
Basic Procedure<br />
<strong>Configuring</strong> the Distributed I/O (DP)<br />
Two steps are required to insert an intelligent DP slave into a DP master system:<br />
1. Configure a station in which a module with a PROFIBUS-DP interface is being<br />
operated as a DP slave (such as a CPU 316-2 DP).<br />
2. Configure an additional station in which this DP slave (I slave) is assigned (that<br />
is, is connected) to a DP master.<br />
<strong>Configuring</strong> <strong>Hardware</strong> <strong>and</strong> <strong>Communication</strong> <strong>Connections</strong> with <strong>STEP</strong> 7<br />
A5E00706939-01 3-31
<strong>Configuring</strong> the Distributed I/O (DP)<br />
<strong>Configuring</strong> the CP 342-5 as a DP Slave<br />
Procedure<br />
The CP 342-5 can be configured for operation as a DP slave. The station in which<br />
the CP was configured is then an "intelligent slave."<br />
1. Configure a station with the CP 342-5 DP as DP slave.<br />
(Select the option "DP slave" in the "Operating Mode" tab of the CP.)<br />
2. Configure a DP master (CPU with integrated PROFIBUS-DP interface or CP<br />
with PROFIBUS-DP interface) in another station.<br />
3. Drag the CP 342-5 from the "<strong>Hardware</strong> Catalog" window (Configured<br />
Stations folder) <strong>and</strong> drop it onto the symbol for the DP master system<br />
( ).<br />
A dialog box appears in which you can select configured intelligent DP slaves.<br />
4. Confirm your selection with "OK."<br />
5. Configure the DP IDs <strong>and</strong> addresses for the input <strong>and</strong> output areas in the<br />
displayed configuration table for the DP slave. To do this, drag <strong>and</strong> drop the<br />
"Universal Module" from the "<strong>Hardware</strong> Catalog" window (Configured<br />
Stations folder) into the configuration table (lower half of the station window)<br />
<strong>and</strong> then double-click the corresponding row.<br />
Note<br />
Data exchange between a "preprocessing CPU" <strong>and</strong> a CP 342-5 DP within the DP<br />
slave is described in the SIMATIC NCM documentation.<br />
<strong>Configuring</strong> the CPU 31X-2 DP or CPU 41X-..DP as a DP Slave<br />
CPUs with integrated DP interface (such as CPU 315-2 DP) can be configured for<br />
operation as a DP slave. The station is which the CPU was configured is then the<br />
"intelligent slave."<br />
The procedure for a CPU 315-2 DP is described below. The procedure is always<br />
the same, save for the selection of the CPU type (also refer to Example for the<br />
Configuration of an S7-400 as I-Slave).<br />
<strong>Configuring</strong> <strong>Hardware</strong> <strong>and</strong> <strong>Communication</strong> <strong>Connections</strong> with <strong>STEP</strong> 7<br />
3-32 A5E00706939-01
Procedure<br />
<strong>Configuring</strong> the Distributed I/O (DP)<br />
1. Configure a station, for example, with the CPU 315-2 DP as DP slave.<br />
(Double-click the row 2.1 (interface) in the configuration table <strong>and</strong> select the<br />
DP Slave option in the "Operating Mode" tab.)<br />
You can set the local I/O addresses <strong>and</strong> the diagnostic address in the<br />
"Configuration" tab.<br />
2. Configure a DP master (CPU with integrated PROFIBUS-DP interface or CP<br />
with PROFIBUS-DP interface) in another station.<br />
3. Drag the CPU, for example the 315-2 DP, from the "<strong>Hardware</strong> Catalog" window<br />
(Configured Stations folder) <strong>and</strong> drop it onto the symbol for the DP master<br />
system ( ).<br />
4. Double-click the symbol for the intelligent DP slave <strong>and</strong> select the "Connection"<br />
tab. In this tab you determine which station should represent the intelligent DP<br />
slave here.<br />
5. Select the intelligent DP slave <strong>and</strong> click the "Connect" button.<br />
6. Select the "Configuration" tab <strong>and</strong> assign the addresses to each other:<br />
- For data exchange with the DP master by means of the I/O areas, select<br />
the "MS" (master-slave) mode.<br />
- For direct data exchange with a DP slave or DP master, select the "DX"<br />
(direct data exchange) mode.<br />
7. Confirm your entries with "OK."<br />
<strong>Configuring</strong> the ET 200X (BM 147/CPU) as a DP Slave<br />
Procedure<br />
The BM 147/CPU basic submodule is configured like an intelligent DP slave. In<br />
contrast to other intelligent DP slaves, the basic submodule can be found in the<br />
"<strong>Hardware</strong> Catalog" window under PROFIBUS-DP/ET 200X/BM147/CPU.<br />
1. Configure the DP slave ET 200X (with BM 147/CPU) as an S7-300 station.<br />
- Create a new station of the type S7-300 (menu comm<strong>and</strong> Station > New).<br />
- Select the directory PROFIBUS-DP/ET 200X/BM147/CPU in the<br />
"<strong>Hardware</strong> Catalog" window.<br />
- Drag & drop the object "BM 147/CPU" to the empty station window.<br />
- Configure the DP slave with the required I/O expansion submodules.<br />
- Save the station (the intelligent DP slave).<br />
2. Configure a DP master (CPU with integrated PROFIBUS-DP interface or CP<br />
with PROFIBUS-DP interface) in another station.<br />
<strong>Configuring</strong> <strong>Hardware</strong> <strong>and</strong> <strong>Communication</strong> <strong>Connections</strong> with <strong>STEP</strong> 7<br />
A5E00706939-01 3-33
<strong>Configuring</strong> the Distributed I/O (DP)<br />
3. Drag the DP slave ET 200X (with BM 147/CPU) from the "<strong>Hardware</strong> Catalog"<br />
window (Configured Stations folder) <strong>and</strong> drop it onto the DP master system<br />
symbol ( ).<br />
4. Double-click the symbol for the intelligent DP slave <strong>and</strong> select the "Connection"<br />
tab. In this tab, you can assign the station that is to represent the intelligent DP<br />
slave.<br />
5. Select the intelligent DP slave <strong>and</strong> click the "Connect" button.<br />
6. Select the "Configuration" tab <strong>and</strong> assign the addresses to each other.<br />
7. Confirm your entries with "OK."<br />
<strong>Configuring</strong> the ET 200S (IM 151/CPU) as a DP Slave<br />
Procedure<br />
The IM 1151/CPU is configured like an intelligent DP slave. In contrast to other<br />
intelligent DP slaves, this DP slave can be found in the <strong>Hardware</strong> Catalog window<br />
under PROFIBUS DP/ET 200S/IM 151/CPU.<br />
1. Configure the DP slave ET 200S (with IM 151/CPU) as an S7-300 station.<br />
- Create a new station of the type S7-300 (menu comm<strong>and</strong> Station > New).<br />
- Select the directory PROFIBUS-DP/ET 200S/IM151/CPU in the <strong>Hardware</strong><br />
Catalog window.<br />
- Drag & drop the object IM 151/CPU to the empty station window.<br />
- Configure the DP slave with the required I/O electronic modules.<br />
- Save the station (the intelligent DP slave).<br />
2. Configure a DP master (CPU with integrated PROFIBUS DP interface or CP<br />
with PROFIBUS DP interface) in another station.<br />
3. Drag the DP slave ET 200S (with IM 151/CPU) from the "<strong>Hardware</strong> Catalog"<br />
window (Configured Stations folder) <strong>and</strong> drop it onto the DP master system<br />
symbol ( ).<br />
4. Double-click the symbol for the intelligent DP slave <strong>and</strong> select the Connection<br />
tab. In this tab, you can assign the station that is to represent the intelligent DP<br />
slave.<br />
5. Select the intelligent DP slave <strong>and</strong> click the Connect button.<br />
6. Select the Configuration tab <strong>and</strong> assign the addresses to each other.<br />
7. Confirm your entries with OK.<br />
<strong>Configuring</strong> <strong>Hardware</strong> <strong>and</strong> <strong>Communication</strong> <strong>Connections</strong> with <strong>STEP</strong> 7<br />
3-34 A5E00706939-01
3.7.2 Example of <strong>Configuring</strong> an S7-400 as I-Slave<br />
<strong>Configuring</strong> the Distributed I/O (DP)<br />
Below we shall create the following configuration:<br />
• Master Station (Name "DP Master") with CPU 417-4 as DP Master (DPV1).<br />
S7-400-CPUs with integrated DP interface can only be customized as DPV1<br />
Master as of Firmware Version 3.0.<br />
• Slave Station (Name "DP Slave") with CPU 414-3 DP as DP I-Slave<br />
As usual for the configuration of intelligent DP Slaves, proceed with the following<br />
steps:<br />
Step Procedure Explanation<br />
1 Creating the Master Station with the CPU<br />
417-4. Name: DP Master<br />
The PROFIBUS address should be 2.<br />
2 Creating the Slave Station with the CPU 414- The operating mode of the DP interface of the<br />
3 DP. Name: DP Slave.<br />
CPU 414-3 DP must be set to "DP Slave". The<br />
PROFIBUS address should be 3.<br />
3 Filling out the first row in the "Configuration" If this line is not filled out, the data will be<br />
tab of the slave station. To create new line, inconsistent. In the properties dialog, select the<br />
click on the "New" button<br />
"MS" (master-slave) mode <strong>and</strong> apply the default<br />
settings.<br />
4 Inserting the DP I-Slaves into the Master From the hardware catalog under PROFIBUS<br />
Station from the folder "Configured Stations". DP select a CPU 41x from the folder<br />
"Configured Stations" <strong>and</strong> drag-<strong>and</strong>-drop this<br />
"Representative" symbol for the DP Slave<br />
station created to the DP Master System.<br />
5 Coupling the inserted DP I-Slaves to the Coupling is prerequisite for assigning the<br />
configured Slave Station.<br />
"Representative" symbol to the configured<br />
station, or for assigning the DP Slave inputs to<br />
the DP-Master outputs <strong>and</strong> vice versa.<br />
<strong>Configuring</strong> <strong>Hardware</strong> <strong>and</strong> <strong>Communication</strong> <strong>Connections</strong> with <strong>STEP</strong> 7<br />
A5E00706939-01 3-35
<strong>Configuring</strong> the Distributed I/O (DP)<br />
Arrange the Master Station <strong>and</strong> Slave Station configuration to view them side-byside.<br />
The result is shown in the screenshot below:<br />
<strong>Configuring</strong> <strong>Hardware</strong> <strong>and</strong> <strong>Communication</strong> <strong>Connections</strong> with <strong>STEP</strong> 7<br />
3-36 A5E00706939-01
How to Assign Addresses<br />
<strong>Configuring</strong> the Distributed I/O (DP)<br />
Step Procedure Explanation<br />
A double-click on "General" tab:<br />
the DP interface of Name of the interface <strong>and</strong> PROFIBUS address with network assignment.<br />
the DP Master in The PROFIBUS address should be set to 2.<br />
the Master Station<br />
"Address" tab:<br />
opens a dialog <strong>and</strong><br />
a number of tabs Logic address of the DP interface (system messages identify the interface<br />
via this address).<br />
"Operating mode" tab:<br />
The option "DP Master" must be selected.<br />
Also, DP mode "DPV1" must be set.<br />
The other tab contents are not relevant for this example.<br />
A double-click on "General" tab:<br />
the DP Slave Editable designation of the DP Slave symbols <strong>and</strong> diagnostic address(es).<br />
symbol in the Here, two diagnostic addresses are assigned to a DPV1 Master:<br />
Master Station<br />
The first diagnostic address is assigned to the virtual slot 0 of the DP<br />
opens a dialog with<br />
Slave. Via this address the DP Master receives diagnostic data <strong>and</strong>/or<br />
several tabs<br />
interrupts that are not assigned to a DP Slave slot. In our example, this is<br />
the address 16381.<br />
The second diagnostic address is assigned to the virtual slot 2 of the DP<br />
Slave. Via this address the DP Master receives diagnostics or interrupts<br />
that are assigned to the DP interface. In our example, this is the address<br />
16380.<br />
(Also refer to the section "DP Slave from the view of the DP Master").<br />
"Coupling" tab:<br />
Assigning the DP Slave symbol in the Master station to the configured<br />
Slave station. Once the assignment is made, the designation of the<br />
configured Slave station appears in the lower section of the tab under<br />
"Active Coupling".<br />
"Configuration" tab:<br />
Assignment of I/O areas for the data exchange between the Master station<br />
<strong>and</strong> the Slave station. Double-click the first line, <strong>and</strong> in the dialog that is<br />
displayed, fill out the fields completely.<br />
A double-click on "General" tab:<br />
the DP Slave Name of the interface <strong>and</strong> PROFIBUS address with network assignment.<br />
interface in the The PROFIBUS address should be set to 3.<br />
Slave station opens<br />
"Address" tab:<br />
a dialog that<br />
contains a number Logical address of the DP interface (the system messages reference the<br />
of tabs<br />
interface via this address).<br />
"Operating mode" tab:<br />
The option "DP-Slave" must be selected. Actuate the checkbox<br />
"Programming <strong>and</strong> Status/Control..." if a PG/PC is connected to the same<br />
PROFIBUS <strong>and</strong> if, for example, you want to download programs using this<br />
path.<br />
A Diagnostic address is visible. This address can be used by the<br />
intelligent DP slave to diagnose conditions such as a failure of the DP-<br />
Master.<br />
An "Address for the virtual slot 2" is only visible if the DP Master<br />
supports the "DPV1" mode <strong>and</strong> if this mode is set. This address can be<br />
used in the DP Slave user program to generate a hardware interrupt in the<br />
DP Master<br />
<strong>Configuring</strong> <strong>Hardware</strong> <strong>and</strong> <strong>Communication</strong> <strong>Connections</strong> with <strong>STEP</strong> 7<br />
A5E00706939-01 3-37
<strong>Configuring</strong> the Distributed I/O (DP)<br />
Step Procedure Explanation<br />
(also refer to the section "DP Master from the view of the DP Slave ").<br />
DP mode: Here, DPV1 should also be selected if "DPV1" mode is set for<br />
the DP Master. Otherwise, the "Address for the virtual slot 2" cannot be<br />
selected.<br />
"Configuration" tab:<br />
For the meaning of this tab refer to<br />
Difference: The "Local: ..." column can be edited, even if the<br />
intelligent DP Slave has not yet been assigned to a DP Master (refer to the<br />
"Coupling" tab).<br />
For our example all other tab contents are not relevant.<br />
<strong>Configuring</strong> <strong>Hardware</strong> <strong>and</strong> <strong>Communication</strong> <strong>Connections</strong> with <strong>STEP</strong> 7<br />
3-38 A5E00706939-01
DP Slave from the View of the DP Master<br />
<strong>Configuring</strong> the Distributed I/O (DP)<br />
You can use the DP Master CPU user program to obtain DP Slave status<br />
information via the configured diagnostic address 16381 which is assigned to<br />
virtual slot 0 (Slot 0) of the DP Slave. Slot 0 is, subordinate to DPV1, representative<br />
for the entire Slave station. SFB 54 "RALRM", for example, uses the output<br />
parameter ID as a pointer to this address if an interrupt is triggered by this Slave<br />
<strong>and</strong> if this interrupt is not assigned to a slot. If the virtual slot 2 of this DP Slave<br />
triggers the interrupt (that is, the CPU section) it can be identified via diagnostic<br />
address 16380.<br />
<br />
<br />
<br />
<br />
<br />
<br />
<br />
<br />
<br />
<br />
<br />
<br />
<br />
<br />
<br />
<strong>Configuring</strong> <strong>Hardware</strong> <strong>and</strong> <strong>Communication</strong> <strong>Connections</strong> with <strong>STEP</strong> 7<br />
A5E00706939-01 3-39
<strong>Configuring</strong> the Distributed I/O (DP)<br />
DP Master from the View of the DP-Slave<br />
<br />
<br />
You can use the DP-Slave CPU user program, for example, to read DP Master<br />
failure information via the configured diagnostic address 8189.<br />
If you have set the DP Slave to DPV1 mode you can, for example, trigger a<br />
<strong>Hardware</strong> Interrupt. Here, in the DP Slave user program you must utilize SFC 7<br />
"DP_PRAL" to trigger the interrupt in the DP Master via the configurable address<br />
for the virtual slot 2 (Slot 2). This address is 8188 in our example. The sample<br />
below shows user program segments of the DP Slave that has triggered the<br />
hardware interrupt <strong>and</strong> user program segments of the DP Master that evaluate this<br />
interrupt.<br />
<br />
<br />
<br />
<br />
<br />
<br />
<br />
<br />
<br />
<br />
<br />
<br />
<strong>Configuring</strong> <strong>Hardware</strong> <strong>and</strong> <strong>Communication</strong> <strong>Connections</strong> with <strong>STEP</strong> 7<br />
3-40 A5E00706939-01
<strong>Configuring</strong> the Distributed I/O (DP)<br />
DP-Slave Program (in the I-Slave CPU) for Triggering a <strong>Hardware</strong> Interrupt<br />
//<br />
// ...<br />
L DW#16#F0F0 //Constant for the identification of the I-Slave event<br />
//that triggered the <strong>Hardware</strong> Interrupt<br />
T MD 100<br />
//...<br />
CALL "DP_PRAL"<br />
REQ :=M1.0 //trigger <strong>Hardware</strong> Interrupt if REQ=1<br />
IOID :=B#16#54 //Input area (configured address = E 8188)<br />
LADDR :=W#16#8189 //Address (configured address = E 8188)<br />
AL_INFO:=MD100 //MD 100 is an interrupt info directed towards the<br />
//DP Master (can be read from the start info of<br />
//OB 40 in the Master as OB40_POINT_ADDR)<br />
RET_VAL:=MW10 //Return value (0000, if no error)<br />
BUSY :=M1.1 //If BUSY =1 the <strong>Hardware</strong> Interrupt is not yet<br />
//acknowledged by the Master<br />
// ...<br />
DP Master Program (in the DP Master station CPU) for the Evaluation of a<br />
<strong>Hardware</strong> Interrupt<br />
// ...<br />
L #OB40_POINT_ADDR //load interrupt info<br />
L DW#16#F0F0 //compare with the constant which the I-Slave has<br />
//"passed on" when it generated the interrupt<br />
==I //Interrupt info from I-Slave?<br />
SPB m001 //if yes, jump to respective program segment<br />
BEB<br />
m001: CALL FC 100 //Program segment with interrupt processing<br />
//for I-Slave<br />
// ...<br />
<strong>Configuring</strong> <strong>Hardware</strong> <strong>and</strong> <strong>Communication</strong> <strong>Connections</strong> with <strong>STEP</strong> 7<br />
A5E00706939-01 3-41
<strong>Configuring</strong> the Distributed I/O (DP)<br />
3.7.3 Creating an Alarm in the I Slave with SFB75 'SALRM<br />
Intelligent DP slaves with SFB 75 'SALRM' can trigger interrupts in their assigned<br />
DP master. The following table shows the possible types of interrupts depending<br />
on the DP mode setting:<br />
Interrupt Type DP Mode: S7-compatible? DP Mode: DPV1<br />
Diagnostic interrupt (OB 82) Yes Yes<br />
<strong>Hardware</strong> interrupt (OB 40 to 47) Yes Yes<br />
Insert/remove module interrupt<br />
Yes (if the I slave supports this Yes<br />
(OB 83)<br />
interrupt)<br />
Status interrupt (OB 55) No Yes<br />
Update interrupt (OB 56) No Yes<br />
Vendor-specific interrupt (OB 57) No Yes<br />
Addresses for triggering interrupts<br />
You can use each address configured in the "Configuration" tab in the I slave<br />
configuration dialog to trigger interrupts using SFB 75. These addresses are not<br />
assigned to actual, "real" modules but to virtual "slots".<br />
The addresses for "Slot" 0" (diagnostic address) <strong>and</strong> "Slot" 2 (Address for "Slot" 2)<br />
cannot be used to trigger interrupts.<br />
<strong>Configuring</strong> <strong>Hardware</strong> <strong>and</strong> <strong>Communication</strong> <strong>Connections</strong> with <strong>STEP</strong> 7<br />
3-42 A5E00706939-01
Basic Method of Creating Interrupts<br />
<strong>Configuring</strong> the Distributed I/O (DP)<br />
The basic procedure for creating an interrupt will be shown as it applies to a<br />
diagnostic interrupt.<br />
• In the I slave, the output address 0 in the "Configuration" tab is assigned to a<br />
virtual slot.<br />
• In the example, the output address 0 is used to trigger a diagnostic interrupt<br />
(OB 82) in the DP master.<br />
For each diagnostic interrupt, data must also be input with the user program<br />
(AINFO). These data have to correspond to the basic structure for additional<br />
interrupt information.<br />
For example, you can use the following simplified structure (a detailed description<br />
is available in the manual "System <strong>and</strong> St<strong>and</strong>ard Functions for S7-300/400" in the<br />
chapter "Diagnostic Data"):<br />
Note<br />
The additional interrupt information has an influence on the module status data <strong>and</strong><br />
the "SF" error LED at the I slave. Similarly, the interrupt also influences the module<br />
status data <strong>and</strong> the error LED at the DP master. For this reason, you must be sure<br />
to observe the meaning of the diagnostic data sets (data set 0 <strong>and</strong> data set 1)<br />
when providing data for additional information about the interrupt.<br />
<strong>Configuring</strong> <strong>Hardware</strong> <strong>and</strong> <strong>Communication</strong> <strong>Connections</strong> with <strong>STEP</strong> 7<br />
A5E00706939-01 3-43
<strong>Configuring</strong> the Distributed I/O (DP)<br />
The procedure for creating the interrupt is shown in the following illustration:<br />
<strong>Configuring</strong> <strong>Hardware</strong> <strong>and</strong> <strong>Communication</strong> <strong>Connections</strong> with <strong>STEP</strong> 7<br />
3-44 A5E00706939-01
<strong>Configuring</strong> the Distributed I/O (DP)<br />
3.8 Direct Data Exchange (Lateral <strong>Communication</strong>)<br />
3.8.1 <strong>Configuring</strong> Direct Data Exchange between PROFIBUS-DP<br />
Nodes<br />
Introduction<br />
In a configuration for direct data exchange (lateral communication), local input<br />
address areas of an intelligent DP slave or of a DP master are assigned to the<br />
input address areas of a PROFIBUS-DP partner.<br />
The intelligent DP slave or the DP master uses these assigned input address areas<br />
to receive the input data that the PROFIBUS-DP partner sends to its DP master.<br />
Number of PROFIBUS-DP Partner That Can Be Connected<br />
The type of interface limits the total number of PROFIBUS-DP partners that are<br />
connected directly to a DP interface or are addressed over this interface by means<br />
of direct data exchange. A maximum of 32 PROFIBUS-DP partners can be<br />
addressed on the MPI/DP interface.<br />
Applications<br />
The following applications are possible for direct data exchange:<br />
• Configuration with intelligent DP slaves (direct data exchange: slave -><br />
intelligent slave)<br />
• Configuration with two DP Master systems (data exchange: slave -> master)<br />
• Configuration with two DP master systems (direct data exchange: slave -><br />
intelligent slave)<br />
<strong>Configuring</strong> <strong>Hardware</strong> <strong>and</strong> <strong>Communication</strong> <strong>Connections</strong> with <strong>STEP</strong> 7<br />
A5E00706939-01 3-45
<strong>Configuring</strong> the Distributed I/O (DP)<br />
Starting Configuration<br />
1. Double-click the DP interface of the configured receiver (DP master or already<br />
configured I slave).<br />
2. Select the "Configuration" tab.<br />
3. To create new line in order to configure direct data exchange, click the "New"<br />
button.<br />
4. In the dialog that appears, select "DX" mode <strong>and</strong> assign the input address<br />
areas to each other (you can find more information in the online help for this<br />
dialog).<br />
<br />
<br />
<br />
<br />
<br />
<br />
<br />
Contents of the "Configuration" tab<br />
<br />
<br />
<br />
<br />
• Mode: "DX" for direct data exchange, ("MS" for master-slave)<br />
• Partner DP Addr.: PROFIBUS address of the DP partner<br />
• Partner Addr.: Address of the logically assigned address area (sender)<br />
• Local Addr.: Address of the logically assigned address area (receiver)<br />
For further information, see the online help for this tab.<br />
<strong>Configuring</strong> <strong>Hardware</strong> <strong>and</strong> <strong>Communication</strong> <strong>Connections</strong> with <strong>STEP</strong> 7<br />
3-46 A5E00706939-01
3.8.2 Example of <strong>Configuring</strong> Direct Data Exchange<br />
The configuration for the example is as follows:<br />
Task<br />
Procedure<br />
• CPU 417-4 as DP master<br />
• CPU 316-2 DP as receiver<br />
• CPU 318-2 DP as publisher<br />
<strong>Configuring</strong> the Distributed I/O (DP)<br />
CPU 318-2 DP sends 8 words of consistent data to the DP master.<br />
CPU 316-2 DP receives the first two bytes of these data.<br />
1. Configure three stations, each with the CPUs listed. Then, assign meaningful<br />
names to them such as "DP master station", "receiver station", <strong>and</strong> "publisher<br />
station".<br />
2. Configure the publisher <strong>and</strong> receiver station as intelligent slave:<br />
- Double-click the DP master row.<br />
- Select the Operating Mode tab.<br />
- Select the DP Slave option.<br />
3. In the master station:<br />
- Drag the icon for CPU 31x 2-DP from the "Catalog" window (PROFIBUS-<br />
DP, "Already Configured Stations" folder) to the DP master system.<br />
The DP Slave Properties dialog box appears with the "Connection" tab.<br />
- Select a slave in the Configured Slave Controllers box <strong>and</strong> click the<br />
"Connect" button. Then confirm with "OK".<br />
- Repeat the procedure in order to connect the second station that was<br />
configured as an intelligent slave to the master system.<br />
<strong>Configuring</strong> <strong>Hardware</strong> <strong>and</strong> <strong>Communication</strong> <strong>Connections</strong> with <strong>STEP</strong> 7<br />
A5E00706939-01 3-47
<strong>Configuring</strong> the Distributed I/O (DP)<br />
Publisher<br />
Station (local)<br />
PROFIBUS-<br />
DP Partner<br />
Length, Unit,<br />
Consistency<br />
4. Configure the address area of the publisher station so that the DP master<br />
reads the data from the CPU 318-2 DP by means of the address I 200:<br />
- Double-click the DP slave row of the CPU 318-2 DP.<br />
- Select the "Configuration" tab <strong>and</strong> click the "New" button. Fill in the fields in<br />
the properties dialog as follows:<br />
Mode = MS (master-slave)<br />
Address type = Output<br />
Address = 100<br />
PROFIBUS address = 2 (fixed, PROFIBUS address of the DP master)<br />
Address type = Input<br />
Address = 200<br />
Length = 8<br />
Unit = Word<br />
Consistency = Entire length<br />
5. Configure the address areas of the receiver:<br />
- Double-click the DP slave row of the CPU 316-2-DP.<br />
- Select the "Configuration" tab <strong>and</strong> click the "New" button. Fill in the fields in<br />
the properties dialog so that the CPU 316-2 uses the address I 120 to<br />
access the data of the CPU that the CPU 318-2 sends to its master:<br />
Receiver Station (local) Mode = DX (direct data exchange)<br />
Address type = Input (fixed)<br />
Address = 120<br />
PROFIBUS-<br />
PROFIBUS address = 3 (offered as a selection)<br />
DP Partner<br />
Address type = Input (fixed)<br />
Address = 200 (offered as a selection)<br />
Length, unit, consistency Taken automatically from the settings in the publisher station.<br />
Change the length to 1 (word) because only the first two bytes are to be read.<br />
Special Feature:<br />
In principle, you can set an address that is higher than I 200, such as I 202.<br />
<strong>STEP</strong> 7 adapts the length of the consistent data automatically. You can also set a<br />
length that is shorter than the one that the publisher prescribes (such as 1 byte).<br />
Note<br />
If the setting for consistent length at the publisher is 3 bytes or more than 4 bytes,<br />
<strong>and</strong> the data are being transmitted with SFC15 (DPWR_DAT), the receiver must<br />
always use SFC14 (DPRD_DAT), even if only 1 byte is being read.<br />
In this case, if you are using Load operations (L IB…), a "0" is read in (incorrect<br />
value).<br />
<strong>Configuring</strong> <strong>Hardware</strong> <strong>and</strong> <strong>Communication</strong> <strong>Connections</strong> with <strong>STEP</strong> 7<br />
3-48 A5E00706939-01
Calling SFC15 in the Publisher (CPU 318-2 DP)<br />
<strong>Configuring</strong> the Distributed I/O (DP)<br />
CALL "DPWR_DAT"<br />
LADDR :=W#16#64 //start address Q 100<br />
RECORD :=P#M 10.0 BYTE 16 //source area for user data<br />
RET_VAL:=MW100 //return value<br />
Calling SFC14 in the Receiver (CPU 316-2 DP)<br />
CALL "DPRD_DAT"<br />
LADDR :=W#16#78 //start address I 120<br />
RET_VAL:=MW100 //return value<br />
RECORD :=P#M 10.0 BYTE 2 //target area for user data<br />
<strong>Configuring</strong> <strong>Hardware</strong> <strong>and</strong> <strong>Communication</strong> <strong>Connections</strong> with <strong>STEP</strong> 7<br />
A5E00706939-01 3-49
<strong>Configuring</strong> the Distributed I/O (DP)<br />
3.8.3 <strong>Configuring</strong> a DP-Slave (GSD Rev. 5) as a Receiver for Direct<br />
Data Exchange<br />
As of <strong>STEP</strong> 7 Version 5.3, you can install DP slaves that can be configured as<br />
receivers for direct data exchange by means of a GSD file ("st<strong>and</strong>ard slaves"<br />
Configuration of direct data exchange (lateral communication) is possible for GSD<br />
files as of Revision 5.<br />
Key Words in the GSD File<br />
Description<br />
A DP slave with the GSD entry "Subscriber_supp =1" can be configured as a<br />
receiver (subscriber). In <strong>STEP</strong> 7 this entry means that the property sheet for the<br />
DP slave contains an "Address Configuration" tab in which you can assign input<br />
<strong>and</strong> output areas.<br />
A DP slave with the entry "Publisher_supp =1" can be used as a transmitter<br />
(publisher) for direct data exchange. The input areas for such a DP slaves can be<br />
selected ("subscribed to") in the "Address Configuration" tab. DP slaves without<br />
this entry, that is without "publishing capability", are not even offered as<br />
transmitters for direct data exchange.<br />
Other entries in the GSD file are automatically applied by <strong>STEP</strong> 7. For example, in<br />
the consistency test the maximum number of relations for direct data exchange are<br />
considered. If this number is exceeded, a message will be displayed prompting you<br />
to reduce their number.<br />
As in the case of direct data exchange, such as between data-transmitting<br />
(publishing) DP slaves <strong>and</strong> data-receiving (subscribing) I slaves, data are<br />
exchanged directly between DP slaves through a DP master.<br />
In contrast to a data-subscribing I slave, which "monitors" the input data from a<br />
publishing DP slave in its own local address area, a data-subscribing "st<strong>and</strong>ard<br />
slave" creates an image of the input data of the publishing DP slave directly on the<br />
outputs of the subscribing DP slave.<br />
This means that the parameters assigned to the subscriber determine whether an<br />
output byte comes from the DP master or from a publishing DP slave.<br />
<strong>Configuring</strong> <strong>Hardware</strong> <strong>and</strong> <strong>Communication</strong> <strong>Connections</strong> with <strong>STEP</strong> 7<br />
3-50 A5E00706939-01
The following illustration shows an example of this situation.<br />
<strong>Configuring</strong> the Distributed I/O (DP)<br />
Here two master systems are shown in a configuration for direct data exchange.<br />
Slave 1 was configured as the subscriber for direct data exchange. Data exchange<br />
is shown between masters <strong>and</strong> slaves.<br />
Slave 1 outputs the input data from slave 2 to its output data area Q2. Both areas<br />
must have the same length (a least 1 byte).<br />
Slave 1 also outputs the input data from slave 3 to its output data area Q3. Both<br />
areas also have the same length.<br />
For master 1, slave 1 (subscriber) only has the output data area Q1. The output<br />
data areas Q2 <strong>and</strong> Q3 are not available to it.<br />
Rules <strong>and</strong> Notes<br />
The direct data exchange between subscriber <strong>and</strong> publisher is restricted to DP<br />
slaves (slave-to-slave communication).<br />
Direct data exchange between DP slaves in different master systems is possible. In<br />
this case, both master must be connected to the same PROFIBUS subnet.<br />
As a rule, output areas of the subscriber are assigned to the DP master <strong>and</strong> can be<br />
assigned to a publisher during configuration. It is also possible to assign an output<br />
area to neither the DP master nor to a publisher. In this case, the output areas are<br />
assigned a value of "0". The consistency test will provide warning for such areas.<br />
Direct data exchange is no limited to st<strong>and</strong>ard slaves. Any slave in the <strong>Hardware</strong><br />
Catalog ("PROFIBUS DP" folder ) that is listed as a transmitter (publisher) or<br />
receiver (subscriber) for direct data exchange (see the info text in the <strong>Hardware</strong><br />
Catalog) can be used.<br />
<strong>Configuring</strong> <strong>Hardware</strong> <strong>and</strong> <strong>Communication</strong> <strong>Connections</strong> with <strong>STEP</strong> 7<br />
A5E00706939-01 3-51
<strong>Configuring</strong> the Distributed I/O (DP)<br />
Procedure<br />
1. Import the required GSD files for slaves that are to be configured as publishers<br />
or subscribers.<br />
2. Configure a master system with these slaves.<br />
3. For a slave to be configured as a subscriber, carry out the following steps. Do<br />
this for each ID concerned (module).<br />
- Double-click the DP-ID.<br />
- Select the "Address Configuration" tab<br />
- Assign the respective address areas: either to the master (default setting),<br />
to a publisher or to no node.<br />
If you set an address area for the DP ID to "DX" mode, then this address<br />
area is invisible from the point of view of the DP master CPU. This means<br />
that there are no logical addresses for the DP master CPU for this address<br />
area. The user dialog shows the area of the publisher (DP partner) that<br />
modifies the outputs of the subscriber.<br />
In the illustration above, this is the Q2 address area from slave 1.<br />
From the point of view of Master 1, Q2 is invisible. During configuration, the<br />
name, PROFIBUS address <strong>and</strong> the logical address area for I1 from slave<br />
3 (publisher) is shown (e.g. I 100).<br />
If you set an address area for the DP ID to "MS" mode, then this address<br />
area is visible from the point of view of the DP master CPU. This means<br />
that during configuration this address area is mirrored to logical output<br />
addresses (e.g. Q 100).<br />
If you set the DP ID to Mode "--" for the subscriber, then this address area<br />
is invisible from the point of view of the DP master CPU <strong>and</strong> this area is not<br />
modified by any other node. During configuration, this address area is not<br />
mirrored to logical output addresses.<br />
The online help on the "Address Configuration" tab contains information on<br />
selecting the address area <strong>and</strong> an example of how this is done.<br />
- Confirm you settings with "OK"<br />
4. Configure the remaining slaves at the station <strong>and</strong> the master with all modules.<br />
5. Save <strong>and</strong> compile the configuration.<br />
6. Download the hardware configuration to the station.<br />
If several master systems are affected by direct data exchange, the affected<br />
stations must also be downloaded.<br />
<strong>Configuring</strong> <strong>Hardware</strong> <strong>and</strong> <strong>Communication</strong> <strong>Connections</strong> with <strong>STEP</strong> 7<br />
3-52 A5E00706939-01
3.9 Working with *.GSD Files<br />
Device Database (GSD) File for DP Slaves<br />
<strong>Configuring</strong> the Distributed I/O (DP)<br />
All the properties of a DP slave are saved in a device database (*.GSD) file.<br />
<strong>STEP</strong> 7 requires a *.GSD file for every DP slave in order that the DP slave can be<br />
selected in the module catalog. The manufacturer supplies a *.GSD file for non-<br />
Siemens devices that are DP slaves.<br />
Device Database (GSD) File for IO Devices<br />
Similar to the case for DP slaves, there are GSD (Generic Station Description) files<br />
for IO devices. The DSD file for an IO device contains all the properties of the<br />
device. These files have the file extension "*.xml".<br />
3.9.1 Installing a *.GSD File<br />
Requirements<br />
Procedure<br />
If a DP slave or an IO device does not appear in the "<strong>Hardware</strong> Catalog" window,<br />
you must install the corresponding *.GSD file supplied by the manufacturer. You<br />
can also use GSD files that were used in another project.<br />
The required GSD files must be in a folder on the hard disk or in an <strong>STEP</strong> 7 project<br />
that you have access to. GSD files are always saved with the project. In other<br />
words, all the information needed to display the device (including the symbols) are<br />
available in the project.<br />
1. Close all stations in HW Config.<br />
2. Select the menu comm<strong>and</strong> Options > Install GSD File.<br />
3. In the "Install *.GSD Files" dialog box that appears, select the source:<br />
The folder containing the *.GSD files, or<br />
The <strong>STEP</strong> 7 project containing the *.GSD files<br />
4. Select one or more files from the list of *.GSD files, <strong>and</strong> then click the "Install"<br />
button.<br />
If some of the files could not be installed or if errors occurred during the installation,<br />
<strong>STEP</strong> will log these events. To open this log file, click the "View Log" button.<br />
<strong>Configuring</strong> <strong>Hardware</strong> <strong>and</strong> <strong>Communication</strong> <strong>Connections</strong> with <strong>STEP</strong> 7<br />
A5E00706939-01 3-53
<strong>Configuring</strong> the Distributed I/O (DP)<br />
Overwriting *.GSD Files<br />
To represent DP slaves <strong>STEP</strong> 7 uses device database (*.GSD) files <strong>and</strong> symbols<br />
which are installed in <strong>STEP</strong> 7, meaning:<br />
• They were installed automatically with <strong>STEP</strong> 7 or<br />
• They were installed at a later date<br />
When you install or import the files at a later date, the existing *.GSD files/symbols<br />
are not completely deleted but are stored in the following backup directory:<br />
\\Step7\S7data\Gsd\Bkp[No.],<br />
where [No.] is a serial number which <strong>STEP</strong> 7 assigns automatically.<br />
Restoring Overwritten *.GSD Files<br />
To restore *.GSD files/symbols you overwrote accidentally, proceed as follows:<br />
1. Select the menu comm<strong>and</strong> Options > Install GSD File.<br />
2. In the following dialog box, navigate to the directory<br />
\\Step7\S7data\Gsd\Bkp[No]. Make sure that you select the required backup<br />
directory (use the Explorer to find the directory with the correct date/time).<br />
3. Click the "Open" button.<br />
<strong>Configuring</strong> <strong>Hardware</strong> <strong>and</strong> <strong>Communication</strong> <strong>Connections</strong> with <strong>STEP</strong> 7<br />
3-54 A5E00706939-01
3.9.2 What You Should Know About GSD Revisions<br />
<strong>Configuring</strong> the Distributed I/O (DP)<br />
The properties of DP slaves are provided to configuration tools by means of<br />
GSD files.<br />
Any extended functions for distributed I/O devices will have an effect on the<br />
GSD specification, such as resulting in the definition of new keywords.<br />
This results in their being different versions of the specification. The version of the<br />
specification that a GSD file interacts with is called "GSD-Revision".<br />
The GSD revision is contained as an obligatory keyword "GSD_Revision" in<br />
GSD files as of GSD Revision 1. GSD files lacking this keyword will be thus be<br />
interpreted by configuration tools as GSD Revision "0".<br />
<strong>STEP</strong> 7 V5.1, Service Pack 3<br />
This version of <strong>STEP</strong> 7 can interpret GSD files up to GSD Revision 4. This means<br />
that you can also use the following new functions for DP slaves that are installed by<br />
means of GSD (Revision 4):<br />
• F-parameter assignment of submodules<br />
• Diagnostic messages for interrupt blocks<br />
• Constant mode (isochrone mode)<br />
Special Features:<br />
Please note that the optional package COM PROFISafe must be installed to edit Fparameters.<br />
If this package is not installed, the parameters will not be visible <strong>and</strong><br />
thus cannot be changed. The F-parameters will, however, remain (default values<br />
are taken from the GSD file or are values changed with COM PROFISafe) <strong>and</strong> will<br />
be taken into account when generating a configuration (For further information, see<br />
the documentation on distributed F-systems).<br />
The following functions, although possible in GSD Revision 4, are not supported:<br />
• A second parameter frame (extended parameter assignment)<br />
• Subscriber functions (receive capability for direct data exchange/lateral<br />
communication)<br />
• Keywords for HART parameter assignment<br />
<strong>Configuring</strong> <strong>Hardware</strong> <strong>and</strong> <strong>Communication</strong> <strong>Connections</strong> with <strong>STEP</strong> 7<br />
A5E00706939-01 3-55
<strong>Configuring</strong> the Distributed I/O (DP)<br />
<strong>STEP</strong> 7 V5.3<br />
This version of <strong>STEP</strong> 7 can interpret GSD files up to GSD Revision 5. This means<br />
that you can use new functions also for DP slaves that are installed using GSD<br />
(Revision 5):<br />
• Using a DP Slaver as a receiver (subscriber) for direct data exchange (lateral<br />
communication).<br />
• Redundant configuration of a DP slave in an H station.<br />
A DP slave can be redundantly configured if the GSD entry<br />
"Slave_Redundancy_supp = 8" is present.<br />
• Clock Synchronization for DP slaves.<br />
A DP slave with the GSD entry "Time_Sync_supp = 1" provides the "Clock<br />
Synchronization" tab for configuring this function.<br />
<strong>STEP</strong> 7 V5.3 Service Pack 1<br />
In addition to GSD files for DP slaves (up to Revision 5), this version of <strong>STEP</strong> 7<br />
can also interpret GSD files for PROFINET IO devices in XML format (Generic<br />
Station Description). Both types of GSD files are h<strong>and</strong>led identically.<br />
There are special considerations with respect to naming these new GSD files <strong>and</strong><br />
specifying their versions. <strong>STEP</strong> 7 V5.3, Service Pack 1, interprets GSD files with<br />
the GSDML schema V1.0.<br />
<strong>Configuring</strong> <strong>Hardware</strong> <strong>and</strong> <strong>Communication</strong> <strong>Connections</strong> with <strong>STEP</strong> 7<br />
3-56 A5E00706939-01
<strong>Configuring</strong> the Distributed I/O (DP)<br />
3.9.3 What You Should Know about GSD Files for PROFINET IO<br />
Devices<br />
Basic information<br />
The properties of PROFINET IO devices are not stored in a key-word based text<br />
file (as for PROFIBUS DP slaves) but in an XML file whose structure <strong>and</strong> rules are<br />
determined by a GSDML schema.<br />
The language used to described GSD files is GSDML (Generic Station Description<br />
Markup Language). It is defined by the GSDML schema.<br />
A GSDML schema contains validity rules that, among other things, allow the syntax<br />
of a GSD file to be checked. Manufacturers of IO devices get the GSDML schemas<br />
(in the form of schema files) from PROFIBUS International.<br />
Exp<strong>and</strong>ed functionalities in the area of PROFINET IO also effect the GSDML<br />
specification <strong>and</strong> the associated schema. Exp<strong>and</strong>ed functionalities result in a new<br />
version of the GSDML specification <strong>and</strong> the schema.<br />
Names of GSD files for IO devices<br />
The structure of the names for a GSD file is explained based on the following<br />
example:<br />
"GSDML-V1.0-Siemens-ET200S-20030616.xml"<br />
Part of name Explanation<br />
GSDML Every GSD file for IO devices starts with this character string<br />
V1.0 Version of the GSDML schema<br />
Siemens Manufacturer<br />
ET200S Name of device<br />
20030616 Version identifier (date)<br />
.xml File extension<br />
If the <strong>Hardware</strong> Catalog happens to contain duplicate names, then the GSD file<br />
with latest version number or date is the one used.<br />
Versions of GSD files for IO devices<br />
The version information for GSD files consists of two parts:<br />
One of these parts indicates the version of the GSDML schema. This determines<br />
what languages that a GSD file uses.<br />
The other part indicates the file version (based on date). A GSD file receives a<br />
new, later version number whenever it is improved (e.g. errors corrected) or its<br />
functions are enhanced.<br />
<strong>Configuring</strong> <strong>Hardware</strong> <strong>and</strong> <strong>Communication</strong> <strong>Connections</strong> with <strong>STEP</strong> 7<br />
A5E00706939-01 3-57
<strong>Configuring</strong> the Distributed I/O (DP)<br />
3.10 DPV1<br />
3.10.1 What You Should Know About PROFIBUS DPV1<br />
Below you can find information relating to the topics:<br />
• New mechanisms introduced by the DPV1 Masters/Slaves<br />
• The changes you meet when configuring <strong>and</strong> programming those components<br />
Additional Information<br />
Our Internet Customer Support Pages contain a FAQ publication relating to this<br />
topic under article ID 7027576. (Title: "Changing over to DPV1"; refer to<br />
Automation Systems > SIMATIC Decentralized Peripherals > PROFIBUS ><br />
General)<br />
How do you recognize a DPV1 Master/Slave?<br />
CPUs of the S7-400 family with integrated DP interface support DPV1 Master<br />
functions as of Firmware Version 3.0.<br />
DPV1 Master functions are also available for the new CP 443-5 (DX03).<br />
DP Slaves listed in the Step 7 hardware catalog under their family name can be<br />
recognized in the Info text as DPV1 Slaves.<br />
DP Slaves implemented in <strong>STEP</strong> 7 via GSD Files support DPV1 functions as of<br />
GSD Revision 3.<br />
Additional Functions DPV1 Devices (Master/Slaves)<br />
DP Masters <strong>and</strong> DP Slaves that support DPV1 are, contrary to the "old" devices<br />
(often referred to as "St<strong>and</strong>ard Masters" or "St<strong>and</strong>ard Slaves"), equipped with the<br />
following additional functions:<br />
• Acyclic data exchange between Masters <strong>and</strong> Slaves is supported<br />
(reading/writing a data record to reconfigure an operational slave). The module<br />
data records <strong>and</strong> their structure is explained in the documentation for the<br />
respective module.<br />
• A DPV1 Slave can provide interrupts to insure that the Master CPU h<strong>and</strong>les the<br />
event triggering the interrupt. Interrupt data is also evaluated in CPU STOP<br />
mode (updating the diagnostic buffer <strong>and</strong> module status); OBs are, however,<br />
not processed in STOP mode.<br />
In addition to the interrupts known in SIMATIC (for example, diagnostic interrupt<br />
with ET 200M), the new Status/Update/Manufacturer specific interrupts are now<br />
also supported.<br />
Comment: DP Slaves that were up to now fully integrated in <strong>STEP</strong> 7 (that is,<br />
Slaves not configured via GSD File, but rather via internal <strong>STEP</strong> 7 module<br />
information) also supported a part of those functions, however, with an S7 specific<br />
significance of, for example, data record contents. New is here that those functions<br />
are now available manufacturer independent (for example, for DP Slaves with GSD<br />
Files Revision 3).<br />
<strong>Configuring</strong> <strong>Hardware</strong> <strong>and</strong> <strong>Communication</strong> <strong>Connections</strong> with <strong>STEP</strong> 7<br />
3-58 A5E00706939-01
3.10.2 <strong>Configuring</strong> DPV1 Devices<br />
Changing the DP Master Interface <strong>and</strong> <strong>Configuring</strong> DP-Slaves<br />
<strong>Configuring</strong> the Distributed I/O (DP)<br />
DPV1 operating mode is set by default in your hardware configuration with <strong>STEP</strong> 7<br />
when you insert a DP Master with DPV1 functions in the master module rack. To<br />
change this operating mode, proceed as follows:<br />
1. Double-click on the "DP Master" row of the CPU in the configuration table. This<br />
row represents the DP interface..<br />
2. In the properties dialog, click on the dropdown menu "DP-Mode" <strong>and</strong> select the<br />
desired operating mode:<br />
- "S7 compatible", if you do not use DPV1 functions<br />
- "DPV1", if you use DPV1 functions.<br />
3. Implement all DP Slaves in the DP Master system.<br />
Valid is:<br />
- On a DP interface with DPV1 operating mode you can, generally seen,<br />
also operate DP Slaves that do not support those functions (for example,<br />
DP Slaves with GSD Revision < 3).<br />
- You can also, on principal, operate DPV1 Slaves on a DP interface in<br />
operating mode "S7 compatible". In this case, DPV1 functions are<br />
automatically switched off. However, manufacturer specific configuration<br />
rules for certain DP Slaves possibly force DPV1 mode, thus preventing you<br />
from connecting them to the DP Master system (this is automatically<br />
checked during the configuration process)!<br />
Consequences of Switching Over a DP Master Interface<br />
Case 1: The DP Master Interface is to be changed to "DPV1":<br />
On this interface you can maintain operation of currently connected DP Slaves that<br />
do not support DPV1 functionality.<br />
Case 2: The DP Master Interface is to be switched over from "DPV1" to "S7<br />
compatible":<br />
<strong>STEP</strong> 7 checks whether all DP Slaves can be switched over to this operating<br />
mode. If a DP Slave forces DPV1 functionality, for example, if an interrupt must be<br />
activated, you can not use this DP Slave on the DP Master in "S7 compatible"<br />
operating mode.<br />
<strong>Configuring</strong> <strong>Hardware</strong> <strong>and</strong> <strong>Communication</strong> <strong>Connections</strong> with <strong>STEP</strong> 7<br />
A5E00706939-01 3-59
<strong>Configuring</strong> the Distributed I/O (DP)<br />
Changes in the Structure of a DPV1-Slave<br />
DPV1 Slaves are equipped with a slot model design which is new compared to the<br />
ones known up to now. However, the consequences involved for you as <strong>STEP</strong> 7<br />
user are minute.<br />
As a rule, you address the distributed I/Os via logic addresses in the same way as<br />
you used to do. The slot address logic address conversion is carried out<br />
automatically or controlled in a dialog when a DP Slave is being configured. Here,<br />
the slot <strong>and</strong> address assignment of the configuration corresponds with the<br />
assignment you can determine via address conversion in the user program<br />
(conversion of the physical address into a logic address <strong>and</strong> vice versa - via SFC 5<br />
<strong>and</strong> SFC 49).<br />
As of <strong>STEP</strong> 7 V5.1, Service Pack 2, the slots in the detail view of a DP1 Slave<br />
always start with slot number 1. This has the consequence that, when using DP<br />
Slaves not configured via GSD file, the DP connection (for example, an IM 153) is<br />
visible on slot number 2.<br />
Diagnostic Address<br />
The diagnostic address of a DP Slave is not altered by the switch-over. With DPV1<br />
Slaves it is automatically assigned to the "virtual" slot number "0" as station<br />
representative.<br />
Generally, the following assignment applies:<br />
• Diagnostic data <strong>and</strong> interrupts which can only be assigned globally to the DP<br />
Slave are assigned to virtual slot 0 <strong>and</strong> its diagnostic address: for example,<br />
interrupts from modules inserted in slots which have not been configured,<br />
station failure/station return (OB 86)<br />
• The remaining slots <strong>and</strong> their respective start addresses are configured with<br />
diagnostics <strong>and</strong> interrupts triggered by the module (for example, by a DP<br />
connection IM 153-2 in slot 2).<br />
<strong>Configuring</strong> <strong>Hardware</strong> <strong>and</strong> <strong>Communication</strong> <strong>Connections</strong> with <strong>STEP</strong> 7<br />
3-60 A5E00706939-01
3.10.3 Programming DPV1 Devices<br />
New Interrupt OBs for DPV1 Events<br />
<strong>Configuring</strong> the Distributed I/O (DP)<br />
DPV1 Slaves can trigger interrupts. You can use the respective OBs the S7 CPU<br />
operating system provides up to now for Diagnostic/System/Extraction/Insertion<br />
Interrupts.<br />
New are the OBs for the following interrupts:<br />
DPV1 Interrupt OB Explanation<br />
Status Interrupt OB 55 A Status Interrupt can be triggered by the operating<br />
state transition of a module, for example, from RUN<br />
to STOP mode.<br />
Refer to the respective DPV1 Slave manufacturer's<br />
documentation for detailed information on events<br />
that can trigger a Status Interrupt.<br />
Update Interrupt OB 56 An Update Interrupt can be triggered after a slot<br />
was reconfigured. For example, this might occur as<br />
a result of local or remote access to the parameters.<br />
Refer to the respective DPV1 Slave manufacturer's<br />
documentation for detailed information on events<br />
that can trigger an Update Interrupt.<br />
Manufacturer Specific<br />
Interrupt<br />
OB 57 The event triggering a Manufacturer Specific<br />
Interrupt can be specified by the manufacturer of a<br />
DPV1 Slave<br />
<strong>Configuring</strong> <strong>Hardware</strong> <strong>and</strong> <strong>Communication</strong> <strong>Connections</strong> with <strong>STEP</strong> 7<br />
A5E00706939-01 3-61
<strong>Configuring</strong> the Distributed I/O (DP)<br />
New SFBs <strong>and</strong> SFCs for Accessing DPV1 Slaves<br />
In order to make the topic more comprehensive, the table below shows - wherever<br />
possible - the new interfaces <strong>and</strong> their functions compared with previous interfaces.<br />
You can find detailed information in the descriptions of the SFBs/SFCs <strong>and</strong> new<br />
OBs. A conversion of existing configurations to the new SFBs/SFCs is not<br />
necessarily required. However, you should use the new SFCs/SFBs when you<br />
create new projects with a DPV1 configuration to be able to use all DPV1 functions.<br />
Function Previous Interface New Interface (DPV1) Comments<br />
Read Data Record SFC 59 RD_REC SFB 52 RDREC -<br />
Write Data Record SFC 58 WR_REC SFB 53 WRREC -<br />
Receive interrupt from - SFB 54 RALRM The SFB must be called in the OB<br />
a DP Slave<br />
that is triggered by the interrupt.<br />
Hinweis<br />
Wenn ein DPV1-Slave über GSD-Datei projektiert ist (GSD ab Rev. 3) und die<br />
DP-Schnittstelle des DP-Masters ist auf "S7-kompatibel" eingestellt, dürfen im<br />
Anwenderprogramm keine Datensätze mit SFC 58/59 bzw. SFB 53/52 von den<br />
E/A-Baugruppen gelesen bzw. beschrieben werden. Der DP-Master adressiert in<br />
diesem Fall den falschen Steckplatz (projektierter Steckplatz+3).<br />
Abhilfe: Schnittstelle des DP-Masters auf "DPV1" umstellen.<br />
Checklist for Testing Existing User Programs<br />
The following sections of your existing user program must be checked if you have<br />
edited the configuration with <strong>STEP</strong> 7 V5.1, Service Pack 2 <strong>and</strong> if you have<br />
switched to "DPV1":<br />
Function What is to be checked?<br />
Address<br />
conversion<br />
Reading<br />
Diagnostics with<br />
SFC 13<br />
Reading/Writing<br />
Data Records<br />
For DP Slaves configured via GSD files you must check the assignments Slot <br />
Logic Start Address, if you have used address conversion in the user program<br />
(SFC 5, SFC 49, SFC 50). Slot 0 has an additional address.<br />
• DP Slave implemented via GSD File:<br />
Previously the first I/O module of the DP Slave was assigned to slot 4. However,<br />
the first I/O module is now assigned to slot (as you can see in the hardware<br />
configuration).<br />
• DP Slave integrated in <strong>STEP</strong> 7 (for example, ET 200M):<br />
the interface module (slot 2) has its own address.<br />
The originally assigned diagnostic address still functions. <strong>STEP</strong> 7 assigns this<br />
address internally to slot 0.<br />
However, the diagnostic data record of DPV1 Slaves has a different structure (refer to<br />
the description of DP Slaves. With ET 200M, for example, also refer to the keyword<br />
"Extended Diagnostics").<br />
If you transfer data records to a DPV1 slave with SFC58 "WR_REC" or if you fetch<br />
data records from a DPV1 slave with SFC59 "RD_REC" <strong>and</strong> if this DPV1 slave<br />
operates in DPV1 mode, the DP Master evaluates the error information it received<br />
from the Slave as follows: If the error information lies within the range from<br />
W#16#8000 to W#16#80FF or W#16#F000 to W#16#FFFF the DP master passes<br />
the error information to the SFC. If it lies out of this range, the CPU passes the value<br />
W#16#80A2 to the SFC <strong>and</strong> suspends the slave. For a description of the error<br />
information received from DPV1-Slaves, see Receiving an Interrupt from a DP-Slave<br />
with SFB 54 "RALRM" STATUS[3].<br />
See also: Jumps to Language Descriptions <strong>and</strong> Help on Blocks, System Attributes<br />
<strong>Configuring</strong> <strong>Hardware</strong> <strong>and</strong> <strong>Communication</strong> <strong>Connections</strong> with <strong>STEP</strong> 7<br />
3-62 A5E00706939-01
Function What is to be checked?<br />
Reading the<br />
System Status List<br />
<strong>Configuring</strong> the Distributed I/O (DP)<br />
If you use SFC 51 (RDSYSST), for example, to read out information on module status<br />
or module rack/station status, you must take into consideration the changed<br />
significance of the slots <strong>and</strong> of the additional slot 0 (see above).<br />
Example 1: Evaluating Interrupt Info from OB 40 with SFB 54 "RALRM"<br />
A distributed S7 digital input module (Start address 288) triggers a <strong>Hardware</strong><br />
Interrupt. The supplementary interrupt information on this module is to be read from<br />
OB 40 via call of SFB 54 "DP_ALRM". It is checked whether the first channel has<br />
triggered a hardware interrupt.<br />
You could also read out additional interrupt information with S7 modules directly<br />
from the start information of OB 40. However, the DPV1 st<strong>and</strong>ard generally permits<br />
up 59 bytes of additional interrupt information - too much for the OB 40 start<br />
information.<br />
For information on the SFB 54 <strong>and</strong> the structure of additional interrupt information<br />
for the various interrupt types please refer to the manual "System Software for<br />
S7-300/400 System <strong>and</strong> St<strong>and</strong>ard functions" or to the corresponding Online Help.<br />
// ...<br />
// ...<br />
//Switch for address that triggered the interrupt (288)<br />
L DW#16#120<br />
T "MD10"<br />
CALL "RALRM" , "DB54"<br />
MODE :=1 //function mode: 1 = set all<br />
//output parameters (that is,<br />
//F_ID has no effect)<br />
F_ID :="MD10" //start address of the slot from<br />
//which an interrupt is<br />
//permitted<br />
MLEN :=8 //max. length of supplementary<br />
//interrupt info in bytes<br />
//(for example, for module<br />
//channel status)<br />
NEW :="Alarm_neu" //receive interrupt ? (yes = 1)<br />
STATUS:="DP_RALRM_STATUS" //Return value with function<br />
//result/error message<br />
ID :="Slotadresse_Alarm" //start address of the slot from<br />
//which an interrupt was<br />
//received<br />
LEN :="Laenge_Alarminfo" //length of supplementary<br />
//interrupt info (4 bytes header<br />
//info + ,for example, 4 bytes<br />
//with S7 I/O modules)<br />
TINFO :=P#M 100.0 BYTE 28 //pointer for OB start info +<br />
//management info: 28 bytes as<br />
//of MB 100<br />
AINFO :=P#M 130.0 BYTE 8 //pointer for target area of the<br />
//header info + supplementary<br />
//interrupt info (max. 59 bytes)<br />
U M 124.0 //has input 1 (bit 0) triggered<br />
//the interrupt?<br />
SPB Alrm<br />
BEA<br />
Alrm: S A 0.0 // interrupt h<strong>and</strong>ling<br />
// ...<br />
<strong>Configuring</strong> <strong>Hardware</strong> <strong>and</strong> <strong>Communication</strong> <strong>Connections</strong> with <strong>STEP</strong> 7<br />
A5E00706939-01 3-63
<strong>Configuring</strong> the Distributed I/O (DP)<br />
Example 2: Evaluation of Diagnostic Data in OB 82 with SFB 54 "RALRM"<br />
The target area for diagnostic data must be large enough to hold st<strong>and</strong>ard<br />
diagnostics (6 bytes), identifier specific diagnostics (3 bytes for 12 slots) <strong>and</strong> the<br />
evaluation of device-specific diagnostics (module status only, which requires 7<br />
more bytes).<br />
Extended evaluation (channel-specific diagnostics) would require the reservation of<br />
additional bytes, provided the DP Slave supports this function.<br />
// ...<br />
// ...<br />
L 120 //determine the start address for the<br />
//module/station,<br />
T "Slotadresse_Diag" //from which the diagnosis is to be<br />
//fetched<br />
CALL "RALRM" , "DB54"<br />
MODE :="Alle_Params" // 1 = all output parameters are set<br />
F_ID :="Slotadresse_Diag" //start address of the slot from<br />
//which the diagnosis is to be fetched<br />
MLEN :=20 //max. length of diagnostic data in bytes<br />
NEW :="neu" //irrelevant<br />
STATUS:="RET_VAL" //function result, error message<br />
ID :="Slotadresse_Alarm" //start address of the slot from which an<br />
//interrupt was received<br />
LEN :="Laenge_Alarminfo" //length of the supplementary interrupt<br />
//info (4 bytes header info+16 bytes<br />
//diagnostic data<br />
TINFO :=P#M 100.0 BYTE 28 //pointer for OB start info + management<br />
//info: 28 bytes as of MB 100<br />
AINFO :=P#M 130.0 BYTE 20 //pointer to the target area in which the<br />
//diagnostic data is to be stored<br />
// ...<br />
//Structure of the stored diagnostic data:<br />
// MB 130 to MB 133: header info (length, identifier, slot)<br />
// MB 134 to MB 139: St<strong>and</strong>ard Diagnostics (6 bytes)<br />
// MB 140 to MB 142: identifier specific diagnostics (3 bytes)<br />
// MB 143 to MB 149: module status (7 bytes)<br />
// ...<br />
U M 141.0 //slot 1 error?<br />
SPB stp1<br />
BE<br />
stp1: L MB 147 //fetch module status slots 1 to 4<br />
UW W#16#3 //filter slot 1<br />
L W#16#2 //2-bit status 'wrong module',<br />
//wrong module inserted<br />
==I<br />
S A 0.1 //reaction to wrong module<br />
//..<br />
L MB 147 //fetch module status slots 1 to 4<br />
UW W#16#3 //filter slot 1<br />
L W#16#1 //2-bit status 'invalid data',<br />
//invalid user data<br />
==I<br />
S A 0.2 //reaction to invalid user data<br />
<strong>Configuring</strong> <strong>Hardware</strong> <strong>and</strong> <strong>Communication</strong> <strong>Connections</strong> with <strong>STEP</strong> 7<br />
3-64 A5E00706939-01
3.10.4 The Slot Model of DPV1 Slaves with I-Slaves<br />
<strong>Configuring</strong> the Distributed I/O (DP)<br />
Subject of article below is the visualization of the assignment of addresses (I/O<br />
addresses <strong>and</strong> diagnostic addresses) to the slots within the DPV1 model. We shall<br />
pay close attention to the addresses that do not carry user data <strong>and</strong> especially to<br />
the configuration of those addresses.<br />
The Slot Model for DPV1<br />
With DPV1 (IEC 61158) a slave is built of slots in the same way as DP<br />
(EN 50 170). The slot numbers are 0, 1, ...n. Slot 0 - a new slot - is of high<br />
significance because it is representative of the complete DP Slave.<br />
Representative means, for example, that interrupts triggered via slot 0 are<br />
assigned quasi to the global DP slave rather than to a certain slot within the DP<br />
Slave. Diagnostics output from this slot are globally assigned to the DP Slave<br />
rather than to any individual slot or module.<br />
Excursion: Addresses for DP Interface<br />
Seen from the CPU, a separate logical address is available for every one of your<br />
interfaces.<br />
You can locate this address in the "Addresses" tab of the Master interface <strong>and</strong> of<br />
the Slave interface (double-click on the "DP" row in the configuration table ).<br />
These addresses have nothing in common with the slot model of DP Slaves.<br />
Rather, they are used by the CPU internally for the identification of, for example,<br />
the failure of an interface. This address is of little significance to the user program.<br />
<strong>Configuring</strong> <strong>Hardware</strong> <strong>and</strong> <strong>Communication</strong> <strong>Connections</strong> with <strong>STEP</strong> 7<br />
A5E00706939-01 3-65
<strong>Configuring</strong> the Distributed I/O (DP)<br />
Slots <strong>and</strong> Addresses for User Data<br />
Generally speaking, the manufacturer of a DP Slave can freely choose what kind of<br />
data he assigns to any slot.<br />
The first I/O module of DP Slaves (often referred to as "S7 Slaves") configured in<br />
Step 7 via the internal <strong>STEP</strong> 7 module knowledge base are always located in slot<br />
4. In contrast, the DP Slaves that are installed in Step 7 via the GSD file can<br />
contain user data as of slot 1.<br />
Distributed peripheral data are usually addressed in the same way as centralized<br />
peripheral data via their addresses. Therefore, for S7 Slaves the user data are<br />
always addressed as of the start address of slot 4.<br />
This is also valid for intelligent DP Slaves. For intelligent DP Slaves you can assign<br />
the I/O memory area of the Slave via a table ("Configuration" tab) to the I/O<br />
memory area of the Master. In operate state (cyclic data exchange) the data that<br />
you transfer in the user program of the intelligent DP Slave to these memory areas<br />
are transferred to the assigned Master memory areas.<br />
However, the slot number remains hidden when you configure the addresses,<br />
because the slot limits are not formed by real modules (for example, with<br />
ET 200M). This is formed rather by a freely customizable length of the respective<br />
I/O area. In such cases we also speak of "virtual" slots.<br />
Important for the assignment of addresses is:<br />
• In addition to "real" slots, the memory area of an intelligent Slave also has<br />
"virtual" slots.<br />
• Virtual slots are addressed in the same way as real slots, namely via their<br />
logical address. For "St<strong>and</strong>ard" DP Slaves such as ET 200M this happens via<br />
module start address, <strong>and</strong> for an I-Slave via the address configured in the<br />
"Configuration" tab (I/O area).<br />
• The addresses of the virtual slots are different from the DP Master point of view<br />
than from the DP Slave. The assignment is configurable. Therefore, the DP<br />
Master <strong>and</strong> the DP Slave as a rule use different addresses to address one <strong>and</strong><br />
the same DP Slave slot.<br />
<strong>Configuring</strong> <strong>Hardware</strong> <strong>and</strong> <strong>Communication</strong> <strong>Connections</strong> with <strong>STEP</strong> 7<br />
3-66 A5E00706939-01
Example of an Address Assignment for User Data<br />
Example<br />
address from<br />
the view of<br />
the DP Slave<br />
<br />
<br />
<br />
<br />
<br />
Previously the assignment of "virtual" slots was as follows.<br />
Significance<br />
(for DP Slave)<br />
Slot<br />
(not visible when<br />
configuring)<br />
<strong>Configuring</strong> the Distributed I/O (DP)<br />
Significance<br />
(for DP Master)<br />
E 2 Reading via input byte 2<br />
0<br />
1<br />
2<br />
3<br />
4 ... what the Master A 4<br />
that ...<br />
wrote into output byte<br />
4.<br />
A 5 What was written to<br />
5 ... can be read in the E 6<br />
output byte 5 in the Slave<br />
...<br />
Master as input byte 6.<br />
E 8 ... 6<br />
...<br />
35<br />
... A 8<br />
Example<br />
address from<br />
the view of the<br />
DP Master<br />
Tip: the slot assignment is displayed in the address overview of the Master CPU or<br />
Slave CPU.<br />
Slots <strong>and</strong> Addresses for System Information<br />
Addresses for system information are used, for example, to h<strong>and</strong>le diagnostic<br />
information or information on operating state transitions.<br />
<strong>Configuring</strong> <strong>Hardware</strong> <strong>and</strong> <strong>Communication</strong> <strong>Connections</strong> with <strong>STEP</strong> 7<br />
A5E00706939-01 3-67
<strong>Configuring</strong> the Distributed I/O (DP)<br />
Addresses of the DP Slave<br />
The system information of DP Slaves is also assigned to slots. Relevant for<br />
operating mode DPV1 in this context are the following slots:<br />
• Slot 0 (Station representative):<br />
Via the address of this virtual slot, seen from the view of the DP Master, the DP<br />
Master diagnoses the failure or return of the intelligent DP Slave.<br />
Via the address of this virtual slot, seen from the view of the DP-Slave, the<br />
intelligent DP Slave diagnoses the failure or return of the DP Master.<br />
• Slot 2 (for "St<strong>and</strong>ard" DP Slaves the DP interface):<br />
Via the address of this virtual slot, seen from the view of the DP Master, the DP<br />
Master can detect an operating state transition of the DP Slave.<br />
Via the address of this virtual slot, seen from the view of the DP-Slave, the DP<br />
Slave can detect an operating state transition of the DP Master.<br />
• Slots 1 <strong>and</strong> 3 are not relevant for intelligent DP Slaves.<br />
In the table below you can find an assignment for slots 0 to 3 ("virtual" slots). The<br />
tab designations relevant for the configuration of the Master station <strong>and</strong> of the<br />
Slave station are listed below the table.<br />
In <strong>STEP</strong> 7 addresses are automatically assigned "from top to bottom" in order to<br />
avoid conflicts with user data. You should apply the recommended addresses,<br />
even though you can edit them. Check whether or not the size of the addresses<br />
area matches the "smallest" CPU in case the user program is to run on different<br />
CPUs.<br />
Example Significance<br />
Slot Significance<br />
Example<br />
address from (for DP Slave)<br />
the view of<br />
the DP Slave<br />
(not visible<br />
when<br />
configuring)<br />
(for DP Master)<br />
address from<br />
the view of the<br />
DP-Masters<br />
8189 Station failure / station<br />
0 Station failure / station 16381<br />
return of the DP Master<br />
return of the DP-Slaves<br />
(see 1)<br />
(see 3)<br />
- Not relevant 1 Not relevant -<br />
8188 Operating state transition 2 Operating state transition 16380<br />
of the DP Master<br />
of the DP Slave<br />
(see 2)<br />
(see 4)<br />
- Not relevant 3 Not relevant -<br />
User data (see above) 4 ... 35 User data (see above)<br />
(1) Double-click on the DP interface of the intelligent DP Slave (e.g., CPU 414-3 DP) in the Slave station,<br />
"Configuration" tab; input is possible in the table, "Diagnostics" field.<br />
(2) Double-click on the DP interface of the intelligent DP Slave (e.g., CPU 414-3 DP) in the Slave station,<br />
"Operating Mode" tab; input is possible under the option "DP Slave" in the field "Address for virtual slot<br />
2".<br />
(3) Double-click on the DP Slave icon in the Master station, "General" tab; input is possible under<br />
"Addresses" in the "Diagnostic address" field.<br />
(4) Double-click on the DP Slave icon in the Master station, "General" tab; input is possible under<br />
"Addresses" in the field "Address for virtual slot 2".<br />
<strong>Configuring</strong> <strong>Hardware</strong> <strong>and</strong> <strong>Communication</strong> <strong>Connections</strong> with <strong>STEP</strong> 7<br />
3-68 A5E00706939-01
Summary<br />
<strong>Configuring</strong> the Distributed I/O (DP)<br />
With openly presented virtual slots, the configuration of the intelligent DP Slave<br />
looks as follows:<br />
<br />
<br />
<br />
<br />
<br />
<br />
Triggering <strong>Hardware</strong> Interrupts with SFC 7<br />
<br />
<br />
With SFC 7 you can trigger a hardware interrupt for any configured address via the<br />
user program of the I-Slave CPU. This also applies to user data addresses of the<br />
I/O range as well to the address of the virtual slot 2.<br />
In the I-Slave user program, for example, use the I/O addresses configured in the<br />
"Local..." column for the SFC 7.<br />
An hardware interrupt is then triggered in the user program of the Master. In the<br />
start information of the hardware interrupt OB (e.g., OB 40) the address you have<br />
configured in the column "PROFIBUS-DP-Partner" is passed on as the address<br />
that has triggered the interrupt.<br />
<strong>Configuring</strong> <strong>Hardware</strong> <strong>and</strong> <strong>Communication</strong> <strong>Connections</strong> with <strong>STEP</strong> 7<br />
A5E00706939-01 3-69
<strong>Configuring</strong> the Distributed I/O (DP)<br />
3.11 Diagnostic Repeater<br />
3.11.1 <strong>Configuring</strong> <strong>and</strong> Commissioning the Diagnostic Repeater<br />
This Diagnostic Repeater can monitor the segment of an RS485 PROFIBUS<br />
subnet (copper wire) during operation <strong>and</strong> report cable errors per diagnostics<br />
telegram to the DP Master. Via an HMI you can display the error location <strong>and</strong> the<br />
cause in plain-text.<br />
The Diagnostic Repeater with its line diagnostic feature offers the possibility to<br />
recognizing <strong>and</strong> localizing line errors at an early stage <strong>and</strong> while in operation, thus<br />
reducing system st<strong>and</strong>still.<br />
<strong>Configuring</strong> the Diagnostics Repeater<br />
You can locate the Diagnostic Repeater in the hardware catalog under<br />
"PROFIBUS DP\Network components\Diagnostic Repeater". The Diagnostic<br />
Repeater must be configured like any "St<strong>and</strong>ard Slave" (it is connected to the<br />
master system of a DP Master).<br />
Function of the Diagnostic Repeaters<br />
To locate anomalies during operation, the Diagnostic Repeater must know the<br />
topology of the PROFIBUS subnet to which it is connected. The Diagnostic<br />
Repeater measures the distance to all partners via "Prepare line diagnostics "<br />
function.<br />
The Diagnostic Repeater measures the partner distances <strong>and</strong> stores them<br />
internally in a table. The Diagnostic Repeater also memorizes in which segment it<br />
has detected the partner.<br />
After it has measured the distance to a segment error during operation, the table<br />
entries can be used to determine between which of the partners the segment fault<br />
is pending.<br />
The Diagnostic Repeater interconnects 3 segments. During operation the<br />
Diagnostic Repeater can determine the topology <strong>and</strong> localize segment errors only<br />
in Segments DP2 <strong>and</strong> DP3, because they are the only ones equipped with<br />
measuring lines. The figure below displays the Diagnostic Repeater (DR) <strong>and</strong> its<br />
connections.<br />
<br />
<br />
<br />
<br />
<br />
<br />
<strong>Configuring</strong> <strong>Hardware</strong> <strong>and</strong> <strong>Communication</strong> <strong>Connections</strong> with <strong>STEP</strong> 7<br />
3-70 A5E00706939-01
Prerequisites for Commissioning<br />
<strong>Configuring</strong> the Distributed I/O (DP)<br />
The following prerequisites must apply:<br />
• To be able to start capturing the topology, the PG must be connected to the<br />
PROFIBUS network.<br />
• The structure of the PROFIBUS subnet with connected Diagnostic Repeater<br />
corresponds with the specifications <strong>and</strong> rules of the Diagnostic Repeater<br />
documentation.<br />
Commissioning the Diagnostic Repeater with <strong>STEP</strong> 7<br />
In order to be able to locate a disturbance during operation, the Diagnostic<br />
Repeater must know the topology of the PROFIBUS subnet to which it is<br />
connected. The Diagnostic Repeater measures the distance to all partners via<br />
"Prepare line diagnostics " function.<br />
The Diagnostic Repeater measures the partner distances <strong>and</strong> stores them<br />
internally in a table. The Diagnostic Repeater also memorizes in which segment it<br />
has detected the partner.<br />
After it has measured the distance to an error during operation, the table entries<br />
can be used to determine between which of the partners the disturbance is<br />
pending.<br />
You must explicitly instruct the Diagnostic Repeater to determine the distance<br />
between PROFIBUS partners when you configure your hardware or network:<br />
1. Highlight the Diagnostic Repeater or the DP Master System to which it is<br />
connected (configure the hardware), or<br />
highlight the PROFIBUS subnet to which the Diagnostic Repeater is connected<br />
(network configuration)<br />
2. Select the menu comm<strong>and</strong> PLC > Prepare line diagnostics.<br />
3. Start the measurement via the subsequently opened dialog.<br />
Locating the Error During Operation<br />
During operation the Diagnostic Repeater reports the event "Found Error" to the<br />
DP Master CPU.<br />
You can view detailed information on pending diagnostic events in the dialog for<br />
the module status of the Diagnostic Repeater. The error is displayed visually in the<br />
dialog with additional information, for example, showing the error cause (provided it<br />
can be detected by the Diagnostic Repeater).<br />
<strong>Configuring</strong> <strong>Hardware</strong> <strong>and</strong> <strong>Communication</strong> <strong>Connections</strong> with <strong>STEP</strong> 7<br />
A5E00706939-01 3-71
<strong>Configuring</strong> the Distributed I/O (DP)<br />
Example of Visual Presentation in the Dialog "Module Status"<br />
If the functions of all segments to which the Diagnostic Repeater is connected are<br />
free of error, the corresponding tabs in the dialog "Module Status" are displayed as<br />
follows:<br />
If a segment is switched off (that is, it is not possible to diagnose it), the following<br />
symbol will appear at the side of the register title:<br />
Symbol for a switched off segment<br />
An error in segment "DP2" results in an error symbol at the side of the "DP2" tab<br />
identifier. The remaining segments are free of error:<br />
The "DP2" tab could show the disturbance in the following view: The Diagnostic<br />
Repeater is assigned to PROFIBUS address 4, the error is located between the<br />
partners assigned to the PROFIBUS addresses 16 <strong>and</strong> 21. In addition, the view<br />
shows the distance to the neighboring DP Slaves.<br />
<br />
<br />
<br />
<br />
<br />
In the figure below you can find an example of a simplified detailed presentation of<br />
the arrangement illustrated above.<br />
<br />
<br />
<br />
<br />
<strong>Configuring</strong> <strong>Hardware</strong> <strong>and</strong> <strong>Communication</strong> <strong>Connections</strong> with <strong>STEP</strong> 7<br />
3-72 A5E00706939-01
<strong>Configuring</strong> the Distributed I/O (DP)<br />
If <strong>STEP</strong> 7 does not localize the error in segment "DP2" or if, for example, this<br />
segment contains more than 32 partners <strong>and</strong> the Diagnostic Repeater cannot<br />
operate correctly anymore, you are shown the following image:<br />
<br />
Summary of all Symbols<br />
The symbols o the registers can be of the following forms:<br />
No segment error<br />
Segment error<br />
Segment is switched off<br />
Information cannot be retrieved from the segment<br />
3.11.2 Displaying the Topology With the Help of Diagnostic Repeaters<br />
As of <strong>STEP</strong> 7 V5.2, in combination with a PROFIBUS configuration with Class 2<br />
diagnostic repeaters 972-0AB01 it is not only possible to perform line diagnostics,<br />
but also to display the PROFIBUS DP network topology.<br />
In contrast to the network view under NetPro, this function does not display the<br />
"Logic" view of a PROFIBUS subnet, but rather the physical arrangement of the<br />
PROFIBUS nodes in their actual order as well as the distances to the nodes -<br />
provide the diagnostic repeater was able to determine these data. The actual<br />
nodes are displayed same as under NetPro.<br />
<strong>Configuring</strong> <strong>Hardware</strong> <strong>and</strong> <strong>Communication</strong> <strong>Connections</strong> with <strong>STEP</strong> 7<br />
A5E00706939-01 3-73
<strong>Configuring</strong> the Distributed I/O (DP)<br />
Function<br />
Prior to displaying the topology, the "Prepare line diagnostics" function must be<br />
called initially after each modification of the hardware structure, in order to enable<br />
the diagnostic repeater to measure the PROFIBUS subnet <strong>and</strong> generate internal<br />
distance tables.<br />
The "Display the PROFIBUS Network Topology" function is used to visualize these<br />
data.<br />
If you select a subnet in a opened project <strong>and</strong> then display the topology, the nodes<br />
in the subnet are displayed along with their configured names.<br />
In addition to the visualization, the entries in the diagnostics buffer of the diagnostic<br />
repeater as well as statistical data can be read <strong>and</strong> displayed.<br />
You can write these data to a file <strong>and</strong> print it.<br />
Requirements<br />
The diagnostic repeaters must support the "Display the PROFIBUS Network<br />
Topology" function (i.e. as of order no. 6ES7 972-0AB01).<br />
The structure of the PROFIBUS network must be in compliance with the guidelines<br />
in the diagnostic repeater manual, to be able to determine distances correctly.<br />
Cascaded diagnostic repeaters, for example, may only be connected to a master<br />
diagnostic repeater via a DP1 interface.<br />
To call the "Prepare line diagnostics" function, the PG must be connected directly<br />
to the same PROFIBUS as the diagnose repeater. The "Prepare line diagnostics"<br />
function can also be called without open project.<br />
To enable the "Display the PROFIBUS Network Topology" function, you can also<br />
connect the PROFIBUS network with its diagnostic repeaters via a "Data record<br />
router" (z. B. CP 443-5 Ext V3.2) to the PG. The PG must have been assigned in<br />
the <strong>STEP</strong> 7 project (Under NetPro, use menu comm<strong>and</strong> PLC > Assign PG/PC to<br />
configure the "PG/PC" object). To enable the display of a network topology via<br />
routed diagnostic repeater, you need to open the corresponding project <strong>and</strong> select<br />
the participating PROFIBUS subnet.<br />
Procedure<br />
Do one of the following:<br />
1. In NetPro or in HW Config, select the menu comm<strong>and</strong> PLC > Prepare Line<br />
Diagnostics.<br />
2. In the SIMATIC Manager, select the menu comm<strong>and</strong> PLC > PROFIBUS ><br />
Display Network Topology; or in NetPro, select the menu comm<strong>and</strong> PLC ><br />
Display PROFIBUS Topology.<br />
Alternative: In the user program, use SFC 103 ("DP_TOPOL") to determine the<br />
topology.<br />
<strong>Configuring</strong> <strong>Hardware</strong> <strong>and</strong> <strong>Communication</strong> <strong>Connections</strong> with <strong>STEP</strong> 7<br />
3-74 A5E00706939-01
3.11.3 Working With the Topology View<br />
Display of the Nodes<br />
<strong>Configuring</strong> the Distributed I/O (DP)<br />
The upper section of the "Topology display PROFIBUS DP" window shows the<br />
nodes that cannot be assigned.<br />
Representation Meaning<br />
Nodes cannot be assigned.<br />
The possible causes are indicated in a<br />
message in the window:<br />
Nodes have been added, node addresses<br />
have been changed <strong>and</strong> afterwards the<br />
function "Prepare Line Diagnostics" was not<br />
started. If diagnostic repeaters are connected<br />
that do not support the reading of topology<br />
data, this is also reported in the upper section<br />
of the window.<br />
An unknown node is indicated by a series of<br />
question marks.<br />
The lower section of the window shows the nodes that can be assigned as<br />
networked nodes along with the distance information determined not <strong>and</strong>, if<br />
necessary, other information.<br />
Representation Meaning<br />
Nodes can be assigned <strong>and</strong> represented in the<br />
PROFIBUS topology.<br />
Other information such as a faulty<br />
configuration (such as when the measuring<br />
segments of two diagnostic repeaters are<br />
directly connected) will be reported in a<br />
message.<br />
Representation of the cable lengths (in the<br />
example):<br />
The cable length between the DP slave with<br />
the PROFIBUS address 2 <strong>and</strong> the diagnostic<br />
repeater (PROFIBUS address 16) is 4 meters.<br />
The DP slave is connected at segment DP2.<br />
Node can be assigned, but cannot be reached<br />
by the diagnostic repeater at this time.<br />
Node can be assigned, but has been detected<br />
as faulty by the diagnostic repeater<br />
<strong>Configuring</strong> <strong>Hardware</strong> <strong>and</strong> <strong>Communication</strong> <strong>Connections</strong> with <strong>STEP</strong> 7<br />
A5E00706939-01 3-75
<strong>Configuring</strong> the Distributed I/O (DP)<br />
How to find nodes in the topology view<br />
In larger configurations you can locate a required node via the menu comm<strong>and</strong><br />
Options > Go To. The next dialog box "Go To" displays all nodes of the<br />
PROFIBUS network:<br />
1. Select the required node (e.g. a DP slave)<br />
2. Click on the "Node" button to display the node in the center of the window.<br />
Click on the "Diagnostic repeater" button to display the assigned in the center<br />
of the window.<br />
Display of the topology in tables<br />
If you prefer to display the topology in a table rather than graphically, call menu<br />
comm<strong>and</strong> View > Table > Topology.<br />
Preparing line diagnostics<br />
Use the same procedure as in HW Config or under NetPro. In the topology display,<br />
call menu comm<strong>and</strong> PLC > Prepare Line Diagnostics.<br />
Calling the module status<br />
Use the same procedure as in HW Config or under NetPro. In the topology display,<br />
call menu comm<strong>and</strong> PLC > Module Status.<br />
How to save <strong>and</strong> open topology data<br />
Select the menu comm<strong>and</strong> File > Save or File > Save As to save the current<br />
display. This function allows to easily save the data you have acquired online for<br />
the purpose of later diagnostics <strong>and</strong> error evaluation.<br />
How to export topology data<br />
You can use the following view to export topology data:<br />
• The "Table" view (after calling menu comm<strong>and</strong> View > Table)<br />
• The "Statistics" dialog box (after calling menu comm<strong>and</strong> PLC > Statistics)<br />
• The "Diagnostics buffer" dialog box (after calling menu comm<strong>and</strong> PLC ><br />
Diagnostics Buffer)<br />
The CSV (ASCII) export format can be read <strong>and</strong> edited with other applications.<br />
The topology display can no longer read exported data.<br />
<strong>Configuring</strong> <strong>Hardware</strong> <strong>and</strong> <strong>Communication</strong> <strong>Connections</strong> with <strong>STEP</strong> 7<br />
3-76 A5E00706939-01
<strong>Configuring</strong> the Distributed I/O (DP)<br />
How to find data on reflection errors <strong>and</strong> message frame errors (statistical data)<br />
Reflection errors occur in cases such as if a line is interrupted or faulty or if there is<br />
no terminating resistor or there is an accumulation of too much terminating<br />
resistance.<br />
Frame errors occur in cases such as when at least one bit (i.e. the parity bit) is<br />
corrupted due to faulty hardware.<br />
You can log reflection errors <strong>and</strong> message frame errors detected by the diagnostic<br />
repeater in a window. You can then print or export the logged data, for example.<br />
1. In the topology display, select the diagnose repeater whose data you want to<br />
read.<br />
2. Start this function with the menu comm<strong>and</strong> PLC > Statistics.<br />
The values will be displayed for 60 seconds, starting at the time the dialog is being<br />
opened. Further values will be accumulated internally across this interval. You can<br />
click on the "Export" button to export these values in CSV format.<br />
The color coding also helps you in determined the severity of the error. The color<br />
coding shown is determined by an evaluation of the statistical data.<br />
Click on "Print" to print the visible graphic object.<br />
Fetching data from the diagnostics buffer<br />
Similar to the diagnostics buffer function of the CPU, you can use this function to<br />
record a history of error events on the PROFIBUS. Select menu comm<strong>and</strong> PLC ><br />
Diagnostics Buffer to start this function. The next dialog displays the last 10<br />
events . Click on an event to display details in the lower section of the dialog box.<br />
If a "DPx" tab (i.e. the "DP2" tab) in the "Diagnostic Buffer" dialog box indicates that<br />
the segment is faulty, then there is an incoming error. Under certain conditions this<br />
error is no longer contained in the diagnostic buffer.<br />
To display the current status, select the men comm<strong>and</strong> PLC > Module Status.<br />
Printing the topology display<br />
Select File > Print to print the topology data. In the dialog box that is then<br />
displayed, you can set up the printer, select the area to printed <strong>and</strong> specify a notes<br />
field.<br />
<strong>Configuring</strong> <strong>Hardware</strong> <strong>and</strong> <strong>Communication</strong> <strong>Connections</strong> with <strong>STEP</strong> 7<br />
A5E00706939-01 3-77
<strong>Configuring</strong> the Distributed I/O (DP)<br />
3.12 Setting Constant Bus Cycle Times for PROFIBUS<br />
Subnets<br />
Introduction<br />
Bus Cycle Time<br />
For PROFIBUS subnets you can set constant (of equal length) bus cycle times in<br />
<strong>STEP</strong> 7.<br />
Constant bus cycle time is the property of the PROFIBUS-DP that guarantees bus<br />
cycles that are exactly the same length. "Bus cycles of the same length" means<br />
that the DP master always begins the DP bus cycle after the same time interval.<br />
From the viewpoint of the connected slaves, this means that they also receive their<br />
data from the master in time intervals of exactly the same duration.<br />
<br />
<br />
<br />
<br />
<br />
<br />
<br />
<br />
<br />
<br />
The following figure shows how the time for a bus cycle is made up.<br />
<br />
<br />
<br />
<br />
<br />
<br />
<br />
<br />
<br />
<br />
<br />
<br />
<br />
<br />
<br />
The "variable pause" shown in the figure is always minimal if communication jobs,<br />
for example, for other active nodes are still pending. The master (also known as<br />
the constant-bus-cycle-time master) controls the communication parts so that the<br />
same duration for a bus cycle is always achieved.<br />
<strong>Configuring</strong> <strong>Hardware</strong> <strong>and</strong> <strong>Communication</strong> <strong>Connections</strong> with <strong>STEP</strong> 7<br />
3-78 A5E00706939-01<br />
t<br />
t
Requirements<br />
<strong>Configuring</strong> the Distributed I/O (DP)<br />
• The constant-bus-cycle-time master must support the "Constant bus cycle time"<br />
function (see info text in the hardware catalog).<br />
• The constant-bus-cycle-time master must be a class 1 DP master. This means<br />
a PG/PC can never be a constant-bus-cycle-time master.<br />
• The constant-bus-cycle-time master is the only active station on the<br />
PROFIBUS-DP. Only one DP master system may be present on the<br />
PROFIBUS subnet. Programming devices or PCs can also be connected.<br />
• Constant bus cycle time is possible only for the "DP" <strong>and</strong> "User-Defined" bus<br />
profiles.<br />
• CiR must not be configured.<br />
• No H-CPU may be connected to the PROFIBUS subnet.<br />
• The PROFIBUS subnet must not be a cross-project one.<br />
Time for DP Constant Bus Cycle Time<br />
<strong>STEP</strong> 7 calculates a recommended time for the "DP constant bus cycle time(ms)"<br />
based on:<br />
• The PROFIBUS configuration (number of configured nodes, number of<br />
programming devices etc.)<br />
• Other information for the calculation which can be specified as an option (for<br />
example, any additional not configured programming devices to be taken into<br />
account)<br />
You can correct this time but not below the calculated <strong>and</strong> displayed minimum<br />
value.<br />
Influence of Connected Active Nodes (PGs/PCs <strong>and</strong> I Slaves)<br />
A PG/PC must only be taken into account if it is connected directly to the<br />
PROFIBUS via its PROFIBUS interface. It does not need to be taken into account if<br />
it is connected via the multipoint interface of the CPU, as shown in the following<br />
figure.<br />
<br />
<br />
<br />
If intelligent DP slaves (for example, CPU 315-2DP) are connected, the time for the<br />
DP constant bus cycle should be calculated generously.<br />
<strong>Configuring</strong> <strong>Hardware</strong> <strong>and</strong> <strong>Communication</strong> <strong>Connections</strong> with <strong>STEP</strong> 7<br />
A5E00706939-01 3-79
<strong>Configuring</strong> the Distributed I/O (DP)<br />
Constant Bus Cycle Time Behavior<br />
!<br />
When recalculating times, <strong>STEP</strong> 7 recommends a value for the constant bus cycle<br />
time. This value is based on the configuration in question. However, you can<br />
change this value.<br />
When <strong>STEP</strong> 7 calculates this value for the constant bus cycle time, it includes in its<br />
calculation the user data traffic of the DP master as well as an allowance for a few<br />
errors that may possibly occur.<br />
<strong>STEP</strong> 7 also calculates a minimum value for the constant DP bus cycle time. The<br />
cycle time cannot fall below this value. When <strong>STEP</strong> 7 calculates the minimum<br />
value, it considers only the normal message frames for each bus cycle. If errors<br />
occur, there may be violations of the constant bus cycle time.<br />
Times that are longer than the recommended times are possible without any<br />
problems.<br />
Caution<br />
If you select times that are shorter than the time that the system recommends,<br />
under certain circumstances the communication of the additional active nodes that<br />
are connected to the PROFIBUS subnet is delayed, or, in the worst case, comes to<br />
a st<strong>and</strong>still. If you set values close to the minimum possible constant bus cycle<br />
time that is displayed, bus faults can cause the entire PROFIBUS subnet to be shut<br />
down in certain cases.<br />
Relationship: Constant Bus Cycle Time <strong>and</strong> SYNC/FREEZE<br />
For PROFIBUS-DP, if you configure both "constant bus cycle time" <strong>and</strong><br />
SYNC/FREEZE groups, note the following:<br />
• Group 8 must not be used (reserved for constant bus cycle time clock). If you<br />
configure the group assignment first <strong>and</strong> have assigned group 8, you can no<br />
longer set constant bus cycle time.<br />
• If you configure group 7 when the constant bus cycle time is set, you cannot<br />
use the SYNC or FREEZE functions for the slaves in this group.<br />
<strong>Configuring</strong> <strong>Hardware</strong> <strong>and</strong> <strong>Communication</strong> <strong>Connections</strong> with <strong>STEP</strong> 7<br />
3-80 A5E00706939-01
Procedure<br />
<strong>Configuring</strong> the Distributed I/O (DP)<br />
1. Configure a PROFIBUS subnet with a DP master that supports the "constant<br />
bus cycle time" function (see the info text in the "<strong>Hardware</strong> Catalog" window of<br />
<strong>Hardware</strong> Configuration).<br />
2. In the Network view, double-click on the PROFIBUS subnet.<br />
3. In the Properties dialog box ("Network Settings" tab), select the "DP" profile<br />
<strong>and</strong> click the "Options" button.<br />
4. In the "Constant Bus Cycle Time" tab, set the constant bus cycle time behavior<br />
that is appropriate for your application <strong>and</strong>, where necessary, adapt the times<br />
to be considered <strong>and</strong> the connected programming devices/operator panels.<br />
You can find detailed information on the possible settings by clicking the Help<br />
button in the dialog box. If the "Constant bus cycle time" tab is not displayed,<br />
this means that not all the requirements for operation with constant bus cycle<br />
time have been met (see above).<br />
Additional Information<br />
You can find more detailed information on setting the constant bus cycle time in the<br />
Help for the tab dialogs.<br />
<strong>Configuring</strong> <strong>Hardware</strong> <strong>and</strong> <strong>Communication</strong> <strong>Connections</strong> with <strong>STEP</strong> 7<br />
A5E00706939-01 3-81
<strong>Configuring</strong> the Distributed I/O (DP)<br />
3.12.1 <strong>Configuring</strong> Short <strong>and</strong> Equal-Length Process Reaction Times on<br />
PROFIBUS DP<br />
Process Reaction Times Without Constant Bus Cycle Time <strong>and</strong> Isochnrone Mode<br />
If a drive engineering or other application requires short <strong>and</strong> reproducible (that is,<br />
repeatable, of equal length) process reaction times, then the individual free cycles<br />
of sub-components can have a negative effect on the overall reaction time.<br />
In the previous example, the behavior is depicted without constant bus cycle time<br />
<strong>and</strong> cycle synchronization by using a model structure with a DP master, two DP<br />
slaves, a programming device (PG) <strong>and</strong> an OP. This configuration yields the<br />
following subcycles, with their own cyclic <strong>and</strong> acyclic portions:<br />
• Free OB 1 cycle of the user program. A cyclic program branching can cause<br />
variations in cycle time length.<br />
• Free, variable DP cycle on the PROFIBUS subnet consisting of:<br />
- Cyclic master-slave data exchange, DP slave 1.<br />
- Cyclic master-slave data exchange, DP slave 2.<br />
- Acyclic portion for interrupts, bus acceptances or diagnostic services.<br />
- Forwarding the token to a programming device (PG), followed by its<br />
processing.<br />
- Forwarding the token to an OP, followed by its processing.<br />
• Free cycle on the DP slave backplane bus.<br />
• Free cycle for signal preparation <strong>and</strong> conversion within the electronic<br />
submodules on the DP slave.<br />
<strong>Configuring</strong> <strong>Hardware</strong> <strong>and</strong> <strong>Communication</strong> <strong>Connections</strong> with <strong>STEP</strong> 7<br />
3-82 A5E00706939-01
<strong>Configuring</strong> the Distributed I/O (DP)<br />
If especially short <strong>and</strong> secure process reaction times are desired, then free cycles<br />
with different lengths have a definite effect on process reaction times.<br />
With regard of the individual cycling of the input electronic module, signal or data<br />
exchange occurs through the DP slave backplane bus, the master-slave data<br />
exchange on the PROFIBUS subnet on to the OB 1 user program on the CPU.<br />
The process reaction is determined in the OB 1 user program <strong>and</strong> is then sent<br />
back over the same route to the output electronic submodule. The different lengths<br />
<strong>and</strong> the "r<strong>and</strong>om" position of individual cycles have a pronounced effect on process<br />
reaction time. Depending on the position of the individual cycles, information<br />
transmission can either occur immediately or after two cycles.<br />
<strong>Configuring</strong> <strong>Hardware</strong> <strong>and</strong> <strong>Communication</strong> <strong>Connections</strong> with <strong>STEP</strong> 7<br />
A5E00706939-01 3-83
<strong>Configuring</strong> the Distributed I/O (DP)<br />
Process Reaction Times with Constant Bus Cycle Time <strong>and</strong> Clock<br />
Synchronization<br />
SIMATIC produces reproducible (that is, repeatable, of equal length) reaction times<br />
by means of a constant (isochrone) DP bus cycle <strong>and</strong> synchronization of the<br />
individual cycles previously listed.<br />
In this case, the situation corresponds to the example given above with the<br />
difference that all cycles (up to the OB 1 cycle) are of equal length <strong>and</strong><br />
synchronously cycled. The clock pulse generator is comprised of the DP master<br />
constant bus cycle time clock that is sent as the global control frame to the DP<br />
slaves. A synchronous cycle interrupt OB 61 (or OB 61 to OB 64) ensures that it<br />
is synchronized with the user program.<br />
<strong>Configuring</strong> <strong>Hardware</strong> <strong>and</strong> <strong>Communication</strong> <strong>Connections</strong> with <strong>STEP</strong> 7<br />
3-84 A5E00706939-01
<strong>Configuring</strong> the Distributed I/O (DP)<br />
With constant bus cycle time <strong>and</strong> cycle synchronization, all cycles concerned have<br />
the same cycle time <strong>and</strong> length. This keeps the process reaction times of equal<br />
length <strong>and</strong>, because there are no cycle jumps, they are also shorter. This means<br />
that the previously described case in which information transmission can occur in<br />
the first or second cycle, depending on the position of individual cycles, now no<br />
longer applies.<br />
In the previous example, the DP master h<strong>and</strong>les the cyclic master-slave data<br />
exchange with slaves 1 <strong>and</strong> 2. After this comes the processing of the acyclic<br />
portions for interrupts, bus acceptances or diagnostic services. The DP master<br />
then retains it for a reserve time until the configured constant DP bus cycle time<br />
has expired in order to compensate for possible network disturbances <strong>and</strong> retrieve<br />
possible message frame repeats. At this point, a new DP cycle starts with the<br />
global frame (GC).<br />
To ensure that consistent status information for the DP inputs can be read at the<br />
start time of a new DP cycle, the read process must be moved up by the specified<br />
time Ti. This time Ti includes the time for signal preparation <strong>and</strong> conversion at the<br />
electronic submodules <strong>and</strong> the time for processing at the inputs on the DP slave<br />
backplane bus.<br />
When using a SIMATIC WinAC RTX (as of V3.1) the following applies: After the<br />
input data for all DP slaves have been read by the DP master, the cyclesynchronized<br />
user program is started automatically (OB 6x).<br />
When using a SIMATIC S7-300/400 the following applies: The start of the cyclesynchronized<br />
user program is influenced by a configured "time delay".<br />
The time To ensures that the process reactions for the user program are sent<br />
consistently <strong>and</strong> in the equal amounts of time to the terminals of the DP I/O<br />
devices. This time To includes the time for the cyclic master-slave data exchange<br />
for all DP slaves, the time for signal preparation <strong>and</strong> conversion at the electronic<br />
submodules <strong>and</strong> the time for processing at the outputs on the DP slave backplane<br />
bus.<br />
<strong>Configuring</strong> <strong>Hardware</strong> <strong>and</strong> <strong>Communication</strong> <strong>Connections</strong> with <strong>STEP</strong> 7<br />
A5E00706939-01 3-85
<strong>Configuring</strong> the Distributed I/O (DP)<br />
The period starting at the point when an input is detected at the electronic module<br />
to the reaction at an output results in a constant processing time of Ti + TDP +<br />
To. This condition ensures a constant process reaction time described by: TDP +<br />
Ti + TDP + To.<br />
Prerequisites <strong>and</strong> General Conditions<br />
• H-systems (redundant/fault-tolerant) do not support cycle synchronization.<br />
• In F-systems, cycle synchronization cannot be used for non-failsafe I/O<br />
devices/peripherals.<br />
• Cycle synchronization cannot be used on optical PROFIBUS networks.<br />
• Constant bus cycle time <strong>and</strong> cycle synchronization are only possible with the<br />
"DP" <strong>and</strong> "User-defined" bus profiles. However, using the "User-defined" profile<br />
is not recommended.<br />
• Cycle synchronization is only possible with DP interfaces integrated in the CPU.<br />
• At a cycle-synchronized PROFIBUS-DP, only the constant-bus-cycle-time<br />
master can be the active station. OPs <strong>and</strong> programming devices(PG) (or PCs<br />
with PG functionality) influence the timing of the constant-bus-cycle-time DPcycle.<br />
For this reason, they are not recommended.<br />
• Cycle synchronization among chains is not possible at this time.<br />
• Cycle-synchronized I/O devices can only be processed in process image<br />
partitions (part process images). Process image partitions are required to<br />
achieve consistent, cycle-synchronized data transmission. Without them,<br />
consistent, cycle-synchronized data transmission is not possible. To ensure that<br />
a process image partition remains consistent, <strong>STEP</strong> 7 monitors the quantity of<br />
data (the number of slaves <strong>and</strong> number of bytes per process image partition for<br />
the DP master system are limited). In addition, please observe the following<br />
points:<br />
- Within a station, input addresses must not be assigned to different process<br />
image partitions.<br />
- Within a station, output addresses must not be assigned to different<br />
process image partitions.<br />
- A common process image partition can be used for both input <strong>and</strong> output<br />
addresses.<br />
• In HW Config, the address of the cycle-synchronized analog I/O devices must<br />
be located in the address area of the process image partition.<br />
• Cycle synchronization is only possible with ET 200M <strong>and</strong> ET 200S devices;<br />
synchronization with centralized I/O devices is not possible.<br />
• Full cycle synchronization "from terminal to terminal" is only possible if all<br />
components in the chain support the "Isochrone mode" system property. When<br />
selecting devices in a catalog or in the hardware catalog, make sure that the<br />
information field for the modules contains the entry "Isochrone mode". The<br />
latest updated list is available in the Internet at<br />
http://www.ad.siemens.de/support, Entry ID 14747353.<br />
<strong>Configuring</strong> <strong>Hardware</strong> <strong>and</strong> <strong>Communication</strong> <strong>Connections</strong> with <strong>STEP</strong> 7<br />
3-86 A5E00706939-01
<strong>Configuring</strong> the Distributed I/O (DP)<br />
3.12.2 Assigning Parameters for Constant Bus Cycle Time <strong>and</strong><br />
Isochrone Mode in HW Config<br />
Introduction<br />
A station consists of the following isochrone components that you have to set up in<br />
HW Config:<br />
• CPUs with integrated DP interfaces (i.e. CPU 414-3 DP, V3.1)<br />
• DP interface modules (i.e. ET 200S interface module IM 151-1 High Feature)<br />
• Distributed I/O modules (i.e. DI 2xDC24V, High Feature [131-4BB00], DO<br />
2xDC24V/2A, High Feature [132-4BB30])<br />
The latest updated list is available in the Internet at<br />
http://www.ad.siemens.de/support, Entry ID 14747353.<br />
The following sections contain information on the special aspects of configuring<br />
these components for isochrone mode.<br />
Setting CPU Properties<br />
1. Select the "Synchronous Cycle Interrupt" tab.<br />
2. The following settings have to be made for each synchronous cycle interrupt<br />
OB:<br />
- Specify the DP master system in use.<br />
- Specify the desired process image partition(s)<br />
- For S7-400-CPUs: Set the time lag. This time lag is the time between the<br />
global control frame <strong>and</strong> the start of OB 6x. This is the time period in which<br />
the DP master completes the cyclical data exchange with the DP slaves.<br />
Tip: After you have finished assigning parameters to the distributed I/O<br />
devices, be sure to let <strong>STEP</strong> 7 calculate the default value.<br />
<strong>Configuring</strong> <strong>Hardware</strong> <strong>and</strong> <strong>Communication</strong> <strong>Connections</strong> with <strong>STEP</strong> 7<br />
A5E00706939-01 3-87
<strong>Configuring</strong> the Distributed I/O (DP)<br />
Settings at the DP Master System<br />
To activate the constant bus cycle time at the DP master system:<br />
1. Double-click the DP master system.<br />
2. In the "General" tab, click on the "Properties" button.<br />
3. In the "Properties - PROFIBUS" dialog box, select the "Network Settings" tab.<br />
4. Select the profile allowed (i.e. "DP")<br />
5. Click the "Options" button.<br />
6. In the "Options" dialog box, select the "Constant Bus Cycle Time" tab <strong>and</strong><br />
make the following settings:<br />
- Select the "Activate constant bus cycle" check box. This step activates the<br />
constant DP cycle as the basis for maintaining isochrone mode.<br />
- Select the "Times Ti <strong>and</strong> To same for all slaves" check box.<br />
- For the time being, leave the other parameters in their default settings.<br />
7. Close this dialog box <strong>and</strong> any other open dialog boxes as well by clicking "OK"<br />
in each case.<br />
Settings at the Modules in the DP Slave<br />
The address space for each module that is involved in isochrone processing must<br />
be assigned to a process image partition. Isochrone read-in <strong>and</strong> output is can only<br />
be done by means of process image partitions.<br />
1. Double-click the module.<br />
2. Select the "Addresses" tab.<br />
3. In the drop-down list, select the process image partition that you assigned to<br />
the synchronous cycle interrupt OB when you were assigning parameters to<br />
the CPU.<br />
If the addresses for the modules are outside the address range (i.e. for analog<br />
modules), then you can either select lower address that lies within the<br />
prescribed range of process image partition or change the size of the process<br />
image partition so that the address space for the module now lies in the<br />
process image partition. If choose to do the latter, go to the "Cycle/Clock<br />
Memory" tab <strong>and</strong> change the "Size of the Process Image" parameter. The<br />
value that you set here apples to all process image partitions.<br />
4. To the extent reasonable, keep the "Input delay" parameter for digital input<br />
modules as low as possible. This is because short input delays result in a<br />
shorter Time Ti <strong>and</strong> thus in shorter overall reaction times. The critical setting<br />
here the longest input delay time for the DP slaves.<br />
<strong>Configuring</strong> <strong>Hardware</strong> <strong>and</strong> <strong>Communication</strong> <strong>Connections</strong> with <strong>STEP</strong> 7<br />
3-88 A5E00706939-01
Settings at the DP Slave (DP Interface Module)<br />
<strong>Configuring</strong> the Distributed I/O (DP)<br />
Isochrone input <strong>and</strong> output modules have to be made known to the DR interface<br />
modules (i.e. IM 151-1 High Feature) as isochrone components. To do so, proceed<br />
as follows:<br />
1. Double-click the icon for the DP slave (i.e. IM 151-1 High Feature).<br />
2. In the "Properties - DP Slave" dialog box, select the "Isochrone Mode" tab <strong>and</strong><br />
make the following settings:<br />
- Select the "Synchronize DP slave to constant bus cycle time for DP<br />
cycle…" check box.<br />
- Select the modules desired for "isochrone operation." Modules that do not<br />
support isochrone mode or for which this option was not selected will not<br />
be included in a calculation of the Ti (read in process values) times <strong>and</strong> the<br />
To (output process values) times.<br />
3. Confirm your entries <strong>and</strong> close the dialog box by clicking "OK".<br />
After this, a message will appear to remind you that the Ti <strong>and</strong> To times in the<br />
configuration of the DP master system are not yet updated.<br />
Updating the Times (Ti, To <strong>and</strong> the lag time)<br />
To update the Ti <strong>and</strong> To times, go to the "Options" dialog box <strong>and</strong> select the<br />
"Constant Bus Cycle Time" tab, as previously described in the section "Settings at<br />
the DP Master System". Then click the "Recalculate" button.<br />
The calculation process will enter a cycle time in the "Constant DP Cycle" field.<br />
This cycle time is one that will ensure adherence to the DP cycle time even in the<br />
case of strong interference (i.e. EMC related disturbances). Under very stable<br />
conditions, this value can be reduced down to the minimum value. The system<br />
requires that new values be changed in terms of the specified interval. For this<br />
reason, use a stepping switch to change this value. A greater DP cycle time may<br />
be necessary to ensure that OB6x has enough calculation time available to it.<br />
During automatic calculation, the values for Ti <strong>and</strong> To are set to their minimum<br />
values. These values can also be changed <strong>and</strong> set within the limits shown. The<br />
maximum values for Ti <strong>and</strong> To can be extended by setting a greater constant DP<br />
cycle time.<br />
To update the lag time between the global control frame <strong>and</strong> the call of the<br />
synchronous cycle interrupt OB, open the properties sheet for the CPU, select the<br />
"Synchronous Cycle Interrupts" tab <strong>and</strong> then click the "Default" button to have the<br />
value recalculated. In some isolated cases, it may be necessary to move up the<br />
start of OB6x. In this case, correct the calculated value manually. The value<br />
entered is understood to be in milliseconds.<br />
<strong>Configuring</strong> <strong>Hardware</strong> <strong>and</strong> <strong>Communication</strong> <strong>Connections</strong> with <strong>STEP</strong> 7<br />
A5E00706939-01 3-89
<strong>Configuring</strong> the Distributed I/O (DP)<br />
Optimizing the Configuration<br />
To assist you in optimizing the configuration, the "Isochrone Mode" dialog box<br />
provides an overview of all clocking-related parameters. To open this dialog box,<br />
go to HW Config <strong>and</strong> select the Edit > Isochrone Mode menu comm<strong>and</strong>.<br />
The dialog box is divided into a hierarchy containing "PROFIBUS", "Slave" <strong>and</strong><br />
"Module" display areas. When you select a master system in the "PROFIBUS"<br />
area, the "Slave" area will automatically display the associated slaves. Similarly,<br />
when you select a DP slave, the "Module" area will automatically display the<br />
associated modules. For a detailed description of the columns displayed in the<br />
dialog box, see the relevant online help section.<br />
Creating a User Program<br />
Create the required synchronous cycle interrupt OBs (i.e. OB 61).<br />
At the start of the synchronous cycle interrupt OBs, the SFC 126 'SYNC_PI' must<br />
be called to update the process image partition for inputs, <strong>and</strong> at the end of OB 61,<br />
SFC 127 'SYNC_PO' must be called to update the process image partition for<br />
outputs. The process image partition to be used here is the one configured in the<br />
CPU ("Synchronous Cycle Interrupts" tab).<br />
Notes<br />
In particular, the following situation can arise with very short DP cycle times: The<br />
runtime of the user program (OB6x with SFC 126/127 called) is greater than the<br />
smallest cycle (see the technical data for the CPU, Section "Isochrone Mode"). In<br />
this case, you will have manually increase the DP cycle time that was automatically<br />
calculated by <strong>STEP</strong> 7.<br />
The runtime for individual OBs can be determined for different periods of time with<br />
SFC 78 'OB_RT' (WinAC RTX only).<br />
<strong>Configuring</strong> <strong>Hardware</strong> <strong>and</strong> <strong>Communication</strong> <strong>Connections</strong> with <strong>STEP</strong> 7<br />
3-90 A5E00706939-01
<strong>Configuring</strong> the Distributed I/O (DP)<br />
3.12.3 Connecting a PG/PC to a Constant-Cycle PROFIBUS network via<br />
Industrial Ethernet <strong>and</strong> an IE/PB Link<br />
The IE/PB link (Version 1.3) can be connected with the DP interface to a constantcycle<br />
PROFIBUS-DP.<br />
This configuration allows you to use the programming device/PC connected to the<br />
Industrial Ethernet to access stations on the constant-cycle PROFIBUS-DP<br />
(routing).<br />
<strong>Configuring</strong> the IE/PB Link as the S7 Router<br />
To configure the IE/PB link, proceed as follows:<br />
1. Create a station of type SIMATIC 300.<br />
2. Using drag & drop, add the IE/PB-Link (V1.3) to the station.<br />
3. When adding the link, you will have to edit dialog boxes as follows:<br />
- To set the properties for the Industrial Ethernet interface, <strong>and</strong><br />
- To set the properties for the PROFIBUS interface.<br />
After the IE/PB link has been added, it is in "DP master" operating mode.<br />
4. Double-click the "PROFIBUS/DP" line for the IE/PB link.<br />
5. Select the "Operating mode" tab.<br />
6. Select the "No DP" option.<br />
In this operating mode, the IE/PB link at the PROFIBUS behaves like a<br />
programming device/PC.<br />
<strong>Configuring</strong> <strong>Hardware</strong> <strong>and</strong> <strong>Communication</strong> <strong>Connections</strong> with <strong>STEP</strong> 7<br />
A5E00706939-01 3-91
<strong>Configuring</strong> the Distributed I/O (DP)<br />
3.12.4 Shortening the Process Reaction Time by Overlapping Ti <strong>and</strong> To<br />
If, in your configuration, you select DP slaves that allow overlapping of Ti <strong>and</strong> To,<br />
you can then shorten the DP cycle <strong>and</strong>, with it, the process reaction time even<br />
further.<br />
For example, IM 153-2 (as of 6ES7 153-2BAx1) supports overlapping of Ti <strong>and</strong> To.<br />
This has no influence on the selection process during configuration, since <strong>STEP</strong> 7<br />
automatically determines the times <strong>and</strong>, based on the configuration selected,<br />
calculates the shortest possible DP cycle time.<br />
Please note the following for the configuration:<br />
• In the tab "Constant Bus Cycle Time", deactivate the option "Times Ti <strong>and</strong> To<br />
same for all slaves" <strong>and</strong> set these times for each slave.<br />
• If modules using inputs as well as outputs are to be used in isochrone mode,<br />
then overlapping Ti <strong>and</strong> To times are possible.<br />
Overlapping Processing<br />
The principle governing the overlapping of Ti <strong>and</strong> To functions as follows.<br />
The peripheral input module is already reading the inputs while the peripheral<br />
output module is sending the process reaction from the user program on to the<br />
outputs.<br />
<strong>Configuring</strong> <strong>Hardware</strong> <strong>and</strong> <strong>Communication</strong> <strong>Connections</strong> with <strong>STEP</strong> 7<br />
3-92 A5E00706939-01
4 <strong>Configuring</strong> PROFINET IO Devices<br />
4.1 What You Should Know about PROFINET IO<br />
4.1.1 What is PROFINET IO?<br />
Objectives<br />
PROFINET is the Ethernet based automation st<strong>and</strong>ard of the German PROFIBUS<br />
User Organization [PROFIBUS Nutzerorganisation e.V. (PNO)] in Karlsruhe,<br />
Germany. It defines a communications, automation <strong>and</strong> engineering model that<br />
applies to all manufacturers.<br />
The objectives of PROFINET are:<br />
• Consistent, uniform communication over field bus <strong>and</strong> Ethernet<br />
• Open, distributed automation<br />
• Use of open st<strong>and</strong>ards<br />
Architecture<br />
The PROFIBUS User Organization (PROFIBUS International) specifies the<br />
following characteristics for PROFINET architecture:<br />
• <strong>Communication</strong> between controllers as components in distributed systems<br />
• <strong>Communication</strong> between field devices such as peripheral (I/O) devices <strong>and</strong><br />
drives<br />
Implementation by Siemens<br />
The requirement for "communication between controllers as components in<br />
distributed systems" is implemented by means of "Component-based Automation"<br />
(CbA). With "Component based Automation", you create a distributed automation<br />
solution based on prefabricated components <strong>and</strong> parts solutions. You can use<br />
SIMATIC iMap as a configuration tool.<br />
The requirement for "communication between field devices" is implemented by<br />
Siemens with "PROFINET IO". As with PROFIBUS DP, <strong>STEP</strong> 7 can be used to<br />
fully configure <strong>and</strong> program the components involved.<br />
The following sections discuss configuring the communication between field<br />
devices with PROFINET IO.<br />
<strong>Configuring</strong> <strong>Hardware</strong> <strong>and</strong> <strong>Communication</strong> <strong>Connections</strong> with <strong>STEP</strong> 7<br />
A5E00706939-01 4-1
<strong>Configuring</strong> PROFINET IO Devices<br />
4.1.2 PROFIBUS DP <strong>and</strong> PROFINET IO: Similarities <strong>and</strong> Differences<br />
Compatibility <strong>and</strong> continuity – <strong>and</strong>, in doing so, protecting system investments –<br />
characterizes the further development of field technology from PROFIBUS DP to<br />
PROFINET IO.<br />
The following section contains an introduction to the new concepts <strong>and</strong><br />
terminology. It concludes with information on the similarities <strong>and</strong> differences<br />
between PROFIBUS DP <strong>and</strong> PROFINET IO.<br />
For more detailed information, please refer to the brochure "From PROFIBUS DP<br />
to PROFINET IO".<br />
Comparison of the designations used with PROFIBUS DP <strong>and</strong> PROFINET IO<br />
The following graphic shows the general designations of the most important<br />
devices used for PROFIBUS <strong>and</strong> PROFINET. The table after the graphic lists the<br />
names of the individual components used in PROFINET <strong>and</strong> PROFIBUS.<br />
No. PROFINET PROFIBUS Comment<br />
(1) IO system DP master system All IO devices (DP slaves) assigned to<br />
an IO controller (DP master)<br />
(2) IO controller DP master Controller in which the user program<br />
runs<br />
(3) IO supervisor (PG/PC) PG/PC Initial start up, HMI <strong>and</strong> diagnostics<br />
(4) Industrial Ethernet PROFIBUS Subnet type<br />
(5) HMI HMI Device for operator control <strong>and</strong><br />
monitoring<br />
(6) IO device DP slave Distributed field device assigned to a<br />
controller (i.e. remote IO, valve terminal,<br />
frequency converter)<br />
Note: PG = "Programmiergerät" = "programming device"<br />
<strong>Configuring</strong> <strong>Hardware</strong> <strong>and</strong> <strong>Communication</strong> <strong>Connections</strong> with <strong>STEP</strong> 7<br />
4-2 A5E00706939-01
Similarities <strong>and</strong> differences<br />
<strong>Configuring</strong> PROFINET IO Devices<br />
The following table contains key words <strong>and</strong> phases pertaining to the fundamental<br />
characteristics of field bus systems along with explanations of the similarities <strong>and</strong><br />
differences between PROFIBUS DP <strong>and</strong> PROFINET IO from the st<strong>and</strong>point of<br />
PROFINET IO.<br />
Function Explanation<br />
Real-time communication Deterministic, with update times determined by <strong>STEP</strong> 7 based on the<br />
hardware configuration.<br />
With PROFINET IO, <strong>STEP</strong> 7 automatically determines the resulting<br />
update time, which can be manually increased, based on the hardware<br />
configuration.<br />
Since PROFINET IO, in contrast to PROFIBUS DP, is based on another<br />
communication process, you do not need to deal with profiles <strong>and</strong> bus<br />
parameters.<br />
Integration of field devices Done through installation of GSD files for both PROFIBUS DP <strong>and</strong><br />
PROFINET IO.<br />
With PROFINET IO, the GSD files are in XML format, but the files<br />
themselves are h<strong>and</strong>led in the same manner as for PROFIBUS DP.<br />
Configuration PROFINET IO is configured similarly to a DP master system. The only<br />
difference has to do with address assignment (due to Ethernet<br />
specifications).<br />
For detailed information on address assignment, refer to the section in<br />
which this topic is discussed.<br />
Slot model PROFINET IO is based on the slot model of PROFIBUS DP (DPV1):<br />
PROFINET interface modules plug into slot "0" of the IO device; the<br />
modules or submodules with user data start with slot "1".<br />
Download or download to<br />
programming device (PG)<br />
No difference in configuration between PROFINET IO <strong>and</strong> PROFIBUS<br />
DP<br />
Diagnosis Same diagnostic paths as for PROFIBUS DP (e.g. via station online, via<br />
accessible nodes) <strong>and</strong> options (i.e. module status).<br />
Diagnostic extent similar to that for PROFIBUS DP (only the structure of<br />
the diagnostic data is somewhat different; only channel diagnosis is<br />
possible).<br />
The structure of the diagnostic data records is, as with PROFIBUS DP,<br />
documented at the field devices (IO devices).<br />
Blocks for the S7 user program<br />
<strong>and</strong> the system status lists<br />
(SSL)<br />
Due to the larger data volumes for PROFINET IO, the system function<br />
blocks <strong>and</strong> the st<strong>and</strong>ard function blocks have to be adapted or reimplemented.<br />
Similar to the situation for the blocks, the system status lists (SSL) were<br />
also adapted.<br />
The new blocks <strong>and</strong> SSLs are also available for PROFIBUS DP.<br />
The list of the affected blocks <strong>and</strong> SSLs is in the From PROFIBUS DP<br />
to PROFINET IO programming manual.<br />
Note: PG = "Programmiergerät" = "programming device"<br />
<strong>Configuring</strong> <strong>Hardware</strong> <strong>and</strong> <strong>Communication</strong> <strong>Connections</strong> with <strong>STEP</strong> 7<br />
A5E00706939-01 4-3
<strong>Configuring</strong> PROFINET IO Devices<br />
4.1.3 Assigning Addresses <strong>and</strong> Names for PROFINET IO Devices<br />
IP addresses<br />
Device names<br />
All PROFINET devices use the TCP/IP protocol; for this reason, they need an IP<br />
address when operated on the Ethernet.<br />
To simplify configuration, you will only be prompted once to assign an IP address:<br />
when configuring the IO controller in HW Config.<br />
At this point, <strong>STEP</strong> 7 displays a dialog for selecting the IP address <strong>and</strong> the<br />
Ethernet subnet. If the network is an isolated one, you can accept the default IP<br />
address <strong>and</strong> subnet mask assigned by <strong>STEP</strong> 7. If the network is part of an existing<br />
Ethernet company network, then you will have to ask you network administrator for<br />
this data.<br />
The IP addresses of IO devices are generated by <strong>STEP</strong> 7 <strong>and</strong> normally assigned<br />
to the IO devices at the time the CPU is started up. The IP addresses of IO devices<br />
always have the same subnet mask as the IO controller <strong>and</strong> are assigned, starting<br />
from the IP address of the IO controller, in ascending order.<br />
An IO device must have a device name before it can be addressed by an IO<br />
controller. PROFINET uses this method because names are easier to use <strong>and</strong><br />
recall than complex IP addresses.<br />
Assigning a device name for a specific IO device is comparable to setting the<br />
PROFIBUS address for a DP slave.<br />
In their original, delivered condition, IO devices have no device names. IO devices<br />
can be addressed by an IO controller only after having been assigned a name by a<br />
programming device (PG)/PC, such as for transmitting configuration data (including<br />
the IP address ) at startup or for the exchanging user data in cyclical operation.<br />
Devices on an Ethernet subnet must have unique names.<br />
If an IO controller in another station is going to be operated at the same time as the<br />
IO device (e.g. CP 1616), then in the project the name assigned to this IO device<br />
must be the same as the name assigned to the IO controller on the hardware side.<br />
This is the only case in which two nodes will have the same device names on the<br />
configured Ethernet subnet.<br />
The device names must satisfy DNS conventions:<br />
• Names are limited to a total of 127 characters (letters, numbers, dashes or dots)<br />
• Any component part (that is, a character string between two dots) of the device<br />
name may only be up to 63 characters long.<br />
• Names cannot contain any special characters such as umlauts, parentheses,<br />
underscores, forward or backward slashes, empty spaces, etc. The dash is the<br />
only special character allowed.<br />
• Names must neither start nor end with the "-" sign.<br />
<strong>Configuring</strong> <strong>Hardware</strong> <strong>and</strong> <strong>Communication</strong> <strong>Connections</strong> with <strong>STEP</strong> 7<br />
4-4 A5E00706939-01
Structured device names<br />
<strong>Configuring</strong> PROFINET IO Devices<br />
You can also structure the device name according to DNS conventions. To help<br />
you in structuring the names, use a period (".") as shown.<br />
.....<br />
<strong>STEP</strong> 7 supports you here by providing a prompt-driven dialog for using the name<br />
of the IO system in the device name:<br />
.<br />
You can set the name of the IO system at central location in the property dialog of<br />
the IO system.<br />
When you copy an IO device to another IO system, <strong>STEP</strong> automatically applies the<br />
name of the IO system into which the device was inserted.<br />
Device number<br />
In addition to the device name, <strong>STEP</strong> 7 assigns a device number to the device<br />
when it is inserted. These numbers start with "1".<br />
These device numbers are used to identify IO devices (e.g. SFC 71 "LOG_GEO")<br />
in the user program. Unlike the device name, the device number is not visible in the<br />
user program.<br />
<strong>Configuring</strong> <strong>Hardware</strong> <strong>and</strong> <strong>Communication</strong> <strong>Connections</strong> with <strong>STEP</strong> 7<br />
A5E00706939-01 4-5
<strong>Configuring</strong> PROFINET IO Devices<br />
4.1.4 Integrating Existing PROFIBUS DP Configurations<br />
Connecting PROFINET <strong>and</strong> PROFIBUS<br />
PROFIBUS devices can be connected to the local PROFIBUS interface for a<br />
PROFINET device. In this way, you can integrate already existing PROFIBUS<br />
configurations into PROFINET.<br />
The following illustration shows the network types supported for PROFINET:<br />
Industrial Ethernet <strong>and</strong> PROFIBUS.<br />
No. Description<br />
(1) PROFINET device<br />
(2) PROFINET device with proxy functionality (e.g. IE/PB link)<br />
(3) PROFIBUS devices<br />
<strong>Configuring</strong> <strong>Hardware</strong> <strong>and</strong> <strong>Communication</strong> <strong>Connections</strong> with <strong>STEP</strong> 7<br />
4-6 A5E00706939-01
PROFINET devices with proxy functionality = Generic<br />
<strong>Configuring</strong> PROFINET IO Devices<br />
The PROFINET device with proxy functionality is the substitute equivalent of a<br />
PROFIBUS device on the Ethernet. The proxy functionality allows a PROFIBUS<br />
device to communicate not only with its master but also with all nodes on<br />
PROFINET.<br />
With this proxy functionality, there are no problems in integrating existing<br />
PROFIBUS systems into PROFINET communication.<br />
For example, if you connect a PROFIBUS device to PROFINET by means of an<br />
IE/PB link, the IE/PB link establishes the communication via PROFINET as a<br />
substitute for the PROFIBUS-components.<br />
<strong>Configuring</strong> <strong>Hardware</strong> <strong>and</strong> <strong>Communication</strong> <strong>Connections</strong> with <strong>STEP</strong> 7<br />
A5E00706939-01 4-7
<strong>Configuring</strong> PROFINET IO Devices<br />
4.1.5 Update Times For Cyclical Data Exchange<br />
Because of the fully different kind of communication process used with<br />
PROFINET IO, you do not have deal with a series of bus parameters, unlike with<br />
PROFIBUS DP.<br />
However, just like with PROFIBUS DP, <strong>STEP</strong> 7 automatically determines a time<br />
period within which a PROFINET IO device has exchanged its user data with the<br />
associated IO controller: this is known as the "update time".<br />
Based on the hardware configuration in use <strong>and</strong> the resulting amount of cyclical<br />
data, <strong>STEP</strong> 7 automatically calculates update times, which you can increase<br />
manually if necessary. You can set equal update times for all IO devices in the<br />
PROFINET IO system or set individual times for each IO device.<br />
If you consider a single IO device in the PROFINET IO system, the IO controller<br />
provides this IO device with new data (outputs) within this update time, <strong>and</strong> the<br />
IO device has sent its latest data (inputs) to the IO controller within this time.<br />
Properties of the update time<br />
The update times can only be set in certain fixed intervals (time bases). The values<br />
that are considered are determined by <strong>STEP</strong> 7 from the properties (that is, from the<br />
GSD files) of the IO devices concerned.<br />
If you change the hardware configuration, such as by adding new IO devices, the<br />
update time may have been changed. If so, the next time you open the dialog, a<br />
message will inform you that a change has been made.<br />
What factors influence the update time?<br />
• The number of IO devices<br />
• The number of inputs <strong>and</strong> outputs<br />
• The percentage of time reserved for PROFINET IO<br />
• The properties (performance) of the IO controller<br />
• The IRT time (if isochronous realtime communication was configured)<br />
<strong>Configuring</strong> <strong>Hardware</strong> <strong>and</strong> <strong>Communication</strong> <strong>Connections</strong> with <strong>STEP</strong> 7<br />
4-8 A5E00706939-01
<strong>Configuring</strong> PROFINET IO Devices<br />
Reading <strong>and</strong> setting the update time globally from a central location<br />
Tip<br />
To open the dialog to read <strong>and</strong> change the update time, proceed as follows:<br />
1. Double-click the IO system (the "railroad track").<br />
2. Select the "Update Time" tab.<br />
- If, in addition to PROFINET IO, other cyclical services (i.e. from<br />
Component-based Automation, CBA) have to be taken into consideration:<br />
Go to the "<strong>Communication</strong> Component (PROFINET IO)" field <strong>and</strong> select a<br />
percentage that should be reserved for PROFINET IO.<br />
If at least one IO device is configured, then the default setting is 100%.<br />
If no IO device is configured, then the default setting is 0%.<br />
- Select the desired option for setting the update time: for the entire IO<br />
system or for a specific device.<br />
3. If you like, you can increase the update time (for the entire IO system or for a<br />
specific IO device).<br />
Regardless of the option that you select: the dialog always shows the calculated or<br />
already configured update times. This applies to a setting for the entire IO system<br />
or a setting for a specific IO device.<br />
Reading <strong>and</strong> setting the update time at the IO device<br />
To open the dialog to read <strong>and</strong> change the update time for specific IO device,<br />
proceed as follows:<br />
1. Double-click the IO device.<br />
2. Select the "IO Cycle" tab.<br />
3. Check the current setting for the update time. If necessary, change it <strong>and</strong> then<br />
confirm the settings with "OK".<br />
<strong>Configuring</strong> <strong>Hardware</strong> <strong>and</strong> <strong>Communication</strong> <strong>Connections</strong> with <strong>STEP</strong> 7<br />
A5E00706939-01 4-9
<strong>Configuring</strong> PROFINET IO Devices<br />
4.1.6 Setting a Specific Update Time for an IO-Device<br />
Procedure<br />
Tip<br />
With <strong>STEP</strong> 7 V5.3, Service Pack 1, you can set an update time that applies to all<br />
IO devices in a PROFINET IO system. In this case, the slowest IO device will<br />
determine the update time, even if shorter update times would be possible for<br />
individual IO devices.<br />
As of <strong>STEP</strong> 7 V5.3, Service Pack 2, you have the option of setting separate update<br />
times for individual IO devices. This option is called "Set a specific update time for<br />
an IO device". The option of setting a uniform update time for all IO devices is still<br />
available. This option is called "Set update time for all IO systems".<br />
1. Double-click the IO system (the "railroad track").<br />
2. Select the "Update Time" tab.<br />
- If, in addition to PROFINET IO, other cyclical services (i.e. from<br />
Component-based Automation, CBA) have to be taken into consideration:<br />
Go to the "<strong>Communication</strong> Component (PROFINET IO)" field <strong>and</strong> select a<br />
percentage that should be reserved for PROFINET IO.<br />
If at least one IO device is configured, then the default setting is 100%.<br />
If no IO device is configured, then the default setting is 0%.<br />
- Select the "Set a specific update time for an IO device" (if it is not already<br />
selected by default).<br />
- The IO devices are listed in the field below. <strong>STEP</strong> 7 has already calculated<br />
an optimal update time for each IO device.<br />
The update times for IO devices that do not exchange user data (e.g. a<br />
switch) are identified with an asterisk (*). As a rule, the update times for<br />
these PROFINET devices are higher than those for the remaining IO<br />
devices.<br />
- If necessary, sort the information displayed in a column by clicking the<br />
column header. To display the information in the opposite sequence, click<br />
the column header again<br />
- To change the update time, double-click the row with the desired device<br />
number.<br />
To set the update time at once for several IO devices, select the IO devices<br />
concerned (multiple selection) <strong>and</strong> click the "Edit" button". To select multiple<br />
devices, you can select each one in sequence while holding the CTRL key down.<br />
Optimizing the update times for individual IO devices<br />
Based on the configuration, <strong>STEP</strong> 7 calculates the optimized (the shortest<br />
possible) update times. However, by increasing the update times for individual IO<br />
devices that supply data that do not have to be absolutely available at a definite<br />
time (not time-critical), you can exp<strong>and</strong> the leeway available in order to allow<br />
shorter update times for other IO devices.<br />
<strong>Configuring</strong> <strong>Hardware</strong> <strong>and</strong> <strong>Communication</strong> <strong>Connections</strong> with <strong>STEP</strong> 7<br />
4-10 A5E00706939-01
<strong>Configuring</strong> PROFINET IO Devices<br />
4.2 Steps For <strong>Configuring</strong> a PROFInet IO System<br />
4.2.1 Overview: From Configuration To Cyclical Data Exchange<br />
The following sections describe the basic steps required to place a PROFINET IO<br />
system in operation. It tells you how to configure PROFINET components, assign<br />
addresses <strong>and</strong> how the system starts.<br />
<strong>Configuring</strong> an IO system in HW Config<br />
Assign addresses<br />
Startup<br />
1. Assign parameters to an IO controller (i.e. CPU 317-2 PN/DP) in HW Config.<br />
While assigning the interface parameters, assign an Ethernet subnet <strong>and</strong> an IP<br />
address.<br />
2. Arrange all required IO devices in the IO system ("railroad track").<br />
3. For each IO device: check the device name, <strong>and</strong>, if necessary, change it <strong>and</strong><br />
set its parameters.<br />
1. Each IO device must have the configured device name assigned to it.<br />
2. Download the hardware configuration while the CPU is in STOP mode.<br />
The configured IP address is automatically assigned to the PN interface (e.g. a<br />
CPU) when the hardware configuration is downloaded.<br />
At startup, the CPU transfers the downloaded configuration via the PN interface to<br />
the IO devices. As with PROFIBUS DP, the "'Finished' message by modules" <strong>and</strong><br />
"Transfer of parameters to modules" monitoring times that are assigned as<br />
parameters apply here as well.<br />
At startup, the CPU can identify the IO devices by their device names <strong>and</strong><br />
automatically transfer the associated IP addresses.<br />
After the addresses <strong>and</strong> parameters have been successfully transferred within the<br />
monitoring times, the PROFINET devices start their cyclical data exchange.<br />
<strong>Configuring</strong> <strong>Hardware</strong> <strong>and</strong> <strong>Communication</strong> <strong>Connections</strong> with <strong>STEP</strong> 7<br />
A5E00706939-01 4-11
<strong>Configuring</strong> PROFINET IO Devices<br />
If the addresses <strong>and</strong> parameters were not successfully transferred, the CPU goes<br />
into STOP or RUN mode, depending on the setting of the "Startup when<br />
expected/actual config. differ" parameter.<br />
<strong>Configuring</strong> <strong>Hardware</strong> <strong>and</strong> <strong>Communication</strong> <strong>Connections</strong> with <strong>STEP</strong> 7<br />
4-12 A5E00706939-01
<strong>Configuring</strong> PROFINET IO Devices<br />
4.2.2 Basic Procedure for <strong>Configuring</strong> a PROFINET IO System<br />
If you know how to configure a PROFIBUS DP system, then you already know how<br />
to configure a PROFINET IO system – the procedure is largely the same.<br />
Station window as an image of the real IO system<br />
When have placed an IO controller (e.g. a CPU 317-2 PN/DP) in position, <strong>STEP</strong><br />
automatically draws a line that represents the IO system. You then place the IO<br />
devices to be assigned to this IO controller in position by using drag-<strong>and</strong>-drop to<br />
move them there from the "<strong>Hardware</strong> Catalog" window in "PROFINET IO".<br />
When an IO device is put in position, a name is automatically assigned to it (the<br />
default name is the name in the GSD file).<br />
<strong>STEP</strong> 7 also automatically assigns an IP address. Starting with the IP address of<br />
the IO controller, <strong>STEP</strong> 7 searches for the next available IP address. However, this<br />
IP address is not relevant when h<strong>and</strong>ling the objects when configuring the system.<br />
Nevertheless, it is necessary because all nodes on Ethernet with TCP/IP protocol<br />
must have an IP address.<br />
In addition, <strong>STEP</strong> 7 assigns device number that you can use to work with the<br />
device in the user program (e.g. with SFC 71 "LOG_GEO"). This number is also<br />
displayed in the symbol for the IO device.<br />
<strong>Configuring</strong> <strong>Hardware</strong> <strong>and</strong> <strong>Communication</strong> <strong>Connections</strong> with <strong>STEP</strong> 7<br />
A5E00706939-01 4-13
<strong>Configuring</strong> PROFINET IO Devices<br />
The IO device does not appear in the "<strong>Hardware</strong> Catalog" window<br />
If an IO device does not appear in the "<strong>Hardware</strong> Catalog" window, then you need<br />
to install the corresponding GSD file after <strong>STEP</strong> 7 has been started (menu<br />
comm<strong>and</strong>: Options > Install GSD File). Follow the dialog prompts to install the<br />
new GSD file. The newly installed IO device then appears in the "<strong>Hardware</strong><br />
Catalog" window under "PROFIBUS IO", either under the name of the device family<br />
(for Siemens devices) or under "Additional Field Devices."<br />
<strong>Configuring</strong> the IO device in the detailed view<br />
When you select an IO device, then the configuration (slots with<br />
modules/submodules) <strong>and</strong> I/O addresses are displayed in the detailed view of the<br />
station window.<br />
<strong>Configuring</strong> <strong>Hardware</strong> <strong>and</strong> <strong>Communication</strong> <strong>Connections</strong> with <strong>STEP</strong> 7<br />
4-14 A5E00706939-01
4.2.3 Creating a PROFINET IO System<br />
Requirement<br />
<strong>Configuring</strong> PROFINET IO Devices<br />
You have arranged a module rack in the station window, <strong>and</strong> it is now opened<br />
(slots in the rack are visible).<br />
PROFINET IO Controller<br />
You can use the following devices as an IO controller:<br />
• A CPU with an integral or insertable PROFINET interface (integral, such as<br />
CPU 317-2 PN/DP)<br />
• A CP along with a CPU (e.g. CP 443-1 Advanced connected to a suitable<br />
S7-400-CPU)<br />
• A PC station (e.g. with CP 1612)<br />
Procedure<br />
1. In the "<strong>Hardware</strong> Catalog" window, select an IO controller (e.g. CPU 317-2<br />
PN/DP).<br />
2. Drag-<strong>and</strong>-drop the module to a permissible row in the module rack. The<br />
"Properties – Ethernet Node" dialog box then opens.<br />
Here you can do the following:<br />
- Create a new Ethernet subnet or select <strong>and</strong> existing one<br />
- Set the properties for the Ethernet subnet (such as the name)<br />
- Set the IP address of the IO controller<br />
3. Confirm the settings with "OK"<br />
The following symbol appears for CPUs with an integral IO controller:<br />
This symbol is the "peg board" for the IO devices in the IO system.<br />
External IO Controllers<br />
CPs that can be used as external IO controllers support numerous options for<br />
communications. As such, they are not "predetermined" for use as IO controllers.<br />
If you use an external IO controller (e.g. CP 443-1 Advanced), then you have to<br />
insert an IO system after inserting the IO controller (context menu comm<strong>and</strong>:<br />
"Insert PROFINET IO System").<br />
<strong>Configuring</strong> <strong>Hardware</strong> <strong>and</strong> <strong>Communication</strong> <strong>Connections</strong> with <strong>STEP</strong> 7<br />
A5E00706939-01 4-15
<strong>Configuring</strong> PROFINET IO Devices<br />
4.2.4 Selecting <strong>and</strong> Arranging IO Devices<br />
Requirement<br />
Procedure<br />
The procedure for selecting <strong>and</strong> arranging IO devices is essentially the same as<br />
the one for PROFIBUS DP.<br />
An IO system must be available <strong>and</strong> visible in the station window.<br />
1. As with PROFIBUS DP, you will find the IO devices (correspond to the slaves<br />
used with PROFIBUS DP) in their own catalog section called "PROFINET IO".<br />
Open the folder desired under "PROFINET IO".<br />
2. Drag-<strong>and</strong>-drop the IO devices to position them or double-click an IO system.<br />
3. If you are dealing with a modular IO device, then insert the required modules or<br />
submodules into the IO device.<br />
The IO devices are represented with symbols in the station window, much like the<br />
slaves on PROFIBUS. A symbols contains the device number (possibly<br />
abbreviated) <strong>and</strong> the device name.<br />
<strong>Configuring</strong> IO devices<br />
Navigation options<br />
IO devices have property sheets in which you can change the address information<br />
(device number <strong>and</strong> device name) automatically assigned by <strong>STEP</strong> 7 when the<br />
device is inserted as well as the diagnostic address of the IO device.<br />
In such a property sheet you can start the dialog for changing the interface <strong>and</strong> the<br />
subnet properties. To do this, click the "Ethernet" button in the property sheet. The<br />
dialog box that then appears contains the IP address, which you can then change.<br />
Depending on the IO device, you can select a check box to disable the assignment<br />
of the IP address by the IO controller.<br />
Parameters that apply to the entire IO device can be set in this dialog box.<br />
The properties of an IO device are determined by its associated GSD file.<br />
To locate IO devices quickly, you can select the Edit > Go To > Ethernet Node<br />
menu comm<strong>and</strong>. The dialog box that is then displayed lists all IO systems <strong>and</strong> the<br />
IO devices connected to them. For IO systems, the associated subnet is shown.<br />
For IO devices, the designation (device name), device number <strong>and</strong> the IP address<br />
are shown.<br />
<strong>Configuring</strong> <strong>Hardware</strong> <strong>and</strong> <strong>Communication</strong> <strong>Connections</strong> with <strong>STEP</strong> 7<br />
4-16 A5E00706939-01
<strong>Configuring</strong> PROFINET IO Devices<br />
4.2.5 Where Are The IO Devices Located In The <strong>Hardware</strong> Catalog?<br />
All IO devices are shown in the <strong>Hardware</strong> Catalog under "PROFINET IO".<br />
The structure of the <strong>Hardware</strong> Catalog is determined only by the GSD files. If<br />
several GSD files for an IO device family are available in <strong>STEP</strong> 7 data<br />
management (e.g. caused by importing different file versions), then the last (that is,<br />
the most recent) version is always used to display the device properties.<br />
IO devices made by Siemens appear directly in "PROFINET IO" below the folder<br />
with the name for the respective device family (e.g. ET 200S).<br />
If other GSD files are available for the device family, they are also displayed in the<br />
<strong>Hardware</strong> Catalog under their family name in a "GSD" subfolder. The non-GSD<br />
variants offer easy <strong>and</strong> convenient options for configuring (such as easier packing<br />
of addresses, etc.).<br />
Other IO devices installed with a GSD are displayed under "Additional Field<br />
Devices".<br />
In the case of modular IO devices, the insertable modules/submodules are located<br />
below the IO device interface modules.<br />
<strong>Configuring</strong> <strong>Hardware</strong> <strong>and</strong> <strong>Communication</strong> <strong>Connections</strong> with <strong>STEP</strong> 7<br />
A5E00706939-01 4-17
<strong>Configuring</strong> PROFINET IO Devices<br />
4.2.6 H<strong>and</strong>ling PROFINET IO Systems<br />
Designations for IO Systems<br />
The designations of IO systems are structured similarly to those used for DP<br />
master systems:<br />
The first part of the name designates the Ethernet subnet. This part is followed by a<br />
colon (":").<br />
The second part of the name consists of the designation "IO system", followed by<br />
the number of the IO system in parentheses. While the numbering for DP master<br />
systems starts with "1",<br />
<strong>STEP</strong> 7 starts numbering IO systems with "100".<br />
Changing the settings of an IO system<br />
In addition to the name <strong>and</strong> number, the changeable properties of an IO systems<br />
also include the update time.<br />
To change the settings, proceed as follows:<br />
1. Double-click the IO system ("railroad track")<br />
2. Select the appropriate tab<br />
(the "General" tab to change the name <strong>and</strong> the IO system number,<br />
or the "Update Time" tab to read or change the update time for the IO system).<br />
Disconnecting an IO system<br />
As with a DP master system, you can also disconnect an IO system. To do so,<br />
select the Edit > PROFINET IO > PROFINET IO System > Disconnect menu<br />
comm<strong>and</strong>.<br />
The IO system then remains as an "orphaned" IO system <strong>and</strong> is visible in the<br />
station.<br />
If the IO system has no IO devices on it, the IO system is deleted.<br />
Inserting an IO system<br />
If you have configured one or more IO systems <strong>and</strong> then disconnected them from<br />
the PROFINET interface, you can insert one of the "orphaned" IO systems back<br />
into the selected PROFINET interface. To do so, select the Edit > PROFINET IO ><br />
PROFINET IO System > Insert menu comm<strong>and</strong>.<br />
<strong>Configuring</strong> <strong>Hardware</strong> <strong>and</strong> <strong>Communication</strong> <strong>Connections</strong> with <strong>STEP</strong> 7<br />
4-18 A5E00706939-01
<strong>Configuring</strong> PROFINET IO Devices<br />
4.3 Examples of Configurations with PROFINET IO<br />
• Configuration with an Integrated IO Controller<br />
• Configuration with an External IO Controller<br />
• Configuration with IE/PB Link<br />
• Configuration with SIMATIC PC Stations<br />
4.3.1 Configuration with an Integrated IO Controller<br />
Whenever a CPU is inserted into an integrated IO controller (e.g. CPU 317-2<br />
PN/DP), <strong>STEP</strong> 7 automatically creates an IO system. You can then drag-<strong>and</strong>-drop<br />
the desired IO devices from the <strong>Hardware</strong> Catalog to this PROFINET IO system.<br />
<strong>Configuring</strong> <strong>Hardware</strong> <strong>and</strong> <strong>Communication</strong> <strong>Connections</strong> with <strong>STEP</strong> 7<br />
A5E00706939-01 4-19
<strong>Configuring</strong> PROFINET IO Devices<br />
4.3.2 Configuration with an External IO Controller<br />
CPs that can be used as external IO controllers, support numerous<br />
communications options. For this reason, they are not "predetermined" to be used<br />
as IO controllers.<br />
If you use an external IO controller (e.g. CP 443-1 Advanced), then after inserting<br />
the controller, you must insert an IO system (context menu comm<strong>and</strong>: "Insert<br />
PROFINET IO System").<br />
You can then drag-<strong>and</strong>-drop the desired IO devices from the <strong>Hardware</strong> Catalog to<br />
this PROFINET IO system.<br />
<strong>Configuring</strong> <strong>Hardware</strong> <strong>and</strong> <strong>Communication</strong> <strong>Connections</strong> with <strong>STEP</strong> 7<br />
4-20 A5E00706939-01
4.3.3 Configuration with IE/PB Link<br />
<strong>Configuring</strong> PROFINET IO Devices<br />
You can use the IE/PB link to connect PROFIBUS DP configurations to<br />
PROFINET IO.<br />
From the st<strong>and</strong>point of the CPU, PROFIBUS DP slaves are on the same network<br />
as the IE/PB link. These slaves have the same device names <strong>and</strong> IP addresses as<br />
the IE/PB link, but do have different device numbers. In addition, they also still<br />
have specific PROFIBUS addresses.<br />
In addition to the device number, the symbol for the IE/PB link also shows the<br />
PROFIBUS address, since this device has two address schemas.<br />
(1) Device number of the IE/PB link<br />
(2) Device number <strong>and</strong> PROFIBUS address of the DP slave<br />
H<strong>and</strong>ling device numbers <strong>and</strong> PROFIBUS addresses at the master system<br />
When IO devices are positioned, <strong>STEP</strong> 7 assigns the same number for the device<br />
number <strong>and</strong> the PROFIBUS address.<br />
To get an overview of the device numbers <strong>and</strong> the PROFIBUS addresses being<br />
used, double-click the symbol for the IE/PB link <strong>and</strong> select the "Device Numbers"<br />
tab.<br />
Each line in the "Device Numbers" tab represents a DP slave. If you select a line<br />
<strong>and</strong> then click the "Change" button or double-click a line, a dialog box is displayed<br />
in which you can change the device number.<br />
You can change the PROFIBUS address in the usual manner:<br />
1. Double-click the symbol for the DP slave to display its properties dialog.<br />
2. In the "General" tab, click the "PROFIBUS" button.<br />
3. In the next dialog box, change the PROFIBUS address.<br />
Restrictions<br />
The configuration described above applies to DP slaves on the PROFIBUS subnet<br />
of an IE/PB link, subject to the following restrictions:<br />
• No IE/PB link can be inserted<br />
• No DP/PA link can be inserted<br />
• No Y-link can be inserted<br />
• No CiR compatibility<br />
• No redundant slaves can be inserted<br />
• No isochrone mode/constant bus cycle time cane be configured<br />
<strong>Configuring</strong> <strong>Hardware</strong> <strong>and</strong> <strong>Communication</strong> <strong>Connections</strong> with <strong>STEP</strong> 7<br />
A5E00706939-01 4-21
<strong>Configuring</strong> PROFINET IO Devices<br />
4.3.4 Configuration with SIMATIC PC Stations<br />
A "PC station" is a PC with communications modules <strong>and</strong> software components<br />
within an automation solution with SIMATIC.<br />
By using appropriate communications modules <strong>and</strong> software components you can<br />
operate a PC stations as a PROFINET IO controller.<br />
Your PC applications in the PC station can access the PROFINET IO controller in<br />
the following ways:<br />
• As an OPC client over the PROFINET IO OPC server<br />
• Directly over the PROFINET IO user interface (RTE base programming<br />
interface)<br />
Only one of these access options can be used by PC applications at any one time<br />
(open/close sequence).<br />
Functions PROFINET IOOPC<br />
Server<br />
RTE Base Programming Interface<br />
Read <strong>and</strong> write IO data Yes Yes<br />
Read <strong>and</strong> write data records Yes Yes<br />
Receive <strong>and</strong> acknowledge interrupts No Yes<br />
The following illustration shows a PC station with the components described. The<br />
lower illustration shows the corresponding configuration of the station in<br />
HW Config.<br />
<strong>Configuring</strong> <strong>Hardware</strong> <strong>and</strong> <strong>Communication</strong> <strong>Connections</strong> with <strong>STEP</strong> 7<br />
4-22 A5E00706939-01
<strong>Configuring</strong> in HW Config<br />
<strong>Configuring</strong> PROFINET IO Devices<br />
As with other types of stations, the IO devices to be addressed are assigned to the<br />
IO system of the IO controller (here CP 1612).<br />
<strong>Configuring</strong> <strong>Hardware</strong> <strong>and</strong> <strong>Communication</strong> <strong>Connections</strong> with <strong>STEP</strong> 7<br />
A5E00706939-01 4-23
<strong>Configuring</strong> PROFINET IO Devices<br />
4.4 Placing PROFINET IO Devices in Operation<br />
4.4.1 Accessing PROFINET IO Devices Online via Ethernet<br />
Requirements<br />
You have set up the programming device (PG)/PC interface to work with a TCP/IP<br />
interface card, which means that the Ethernet interface of your programming<br />
device (PG)/PC can be accessed from <strong>STEP</strong> 7.<br />
Be sure to observe the guidelines for connecting your programming device<br />
(PG)/PC to the CPU. For CPU 317-2 PN/DP, both devices (CPU <strong>and</strong> PG/PC) must<br />
be connected to one switch.<br />
It may be necessary to adjust the properties of the Ethernet interface in the Control<br />
Panel of the programming device (PG) (the properties of the Internet Protocol<br />
(TCP/IP)). If, in addition to the programming device (PG), you have only connected<br />
S7-CPUs <strong>and</strong> PROFINET IO devices, you must not enable the "Obtain an IP<br />
address automatically" option in Windows.<br />
Online access as with MPI or PROFIBUS<br />
The comm<strong>and</strong>s in the "PLC" menu used to establish online access to IO devices<br />
can be used in all applications that provide this menu, such as in HW Config, in the<br />
SIMATIC Manager <strong>and</strong> in NetPro.<br />
In general, you have the same options via Ethernet (PROFINET) as you do with<br />
other online paths (MPI or PROFIBUS).<br />
Exceptions<br />
Special functions not available over PROFINET:<br />
• The menus available through PLC > PROFIBUS only apply to PROFIBUS<br />
• Prepare line diagnostics (only suitable for diagnostic repeaters on PROFIBUS<br />
DP)<br />
<strong>Configuring</strong> <strong>Hardware</strong> <strong>and</strong> <strong>Communication</strong> <strong>Connections</strong> with <strong>STEP</strong> 7<br />
4-24 A5E00706939-01
<strong>Configuring</strong> PROFINET IO Devices<br />
4.4.2 Displaying Ethernet Nodes in the "Accessible Nodes" Window<br />
Requirements<br />
You have set up the programming device (PG)/PC interface to work with a TCP/IP<br />
interface card, which means that the Ethernet interface of your programming<br />
device (PG)/PC can be accessed from <strong>STEP</strong> 7.<br />
For an online connection via the "Accessible Nodes" window, the programming<br />
device (PG)/PC <strong>and</strong> "Accessible Nodes" must be connected to the same physical<br />
Ethernet subnet.<br />
If nodes are only accessible via intermediate switches or routers (with the use of a<br />
protocol), they will not be displayed in the list of "Accessible Nodes".<br />
Nodes displayed<br />
The following components are shown in the "Accessible Nodes" window:<br />
• S7-CPs<br />
• S7-CPUs<br />
• SIMATIC PC stations<br />
• SIMATIC network components (PROFINET devices)<br />
• All PROFINET devices (in general, all devices that support the DCP protocol)<br />
• IE/PB link with its subordinate DP slaves<br />
Depending on the type of component, there may be more less information<br />
displayed in the detailed view of the "Accessible Nodes" window.<br />
<strong>Configuring</strong> <strong>Hardware</strong> <strong>and</strong> <strong>Communication</strong> <strong>Connections</strong> with <strong>STEP</strong> 7<br />
A5E00706939-01 4-25
<strong>Configuring</strong> PROFINET IO Devices<br />
The following table shows what information is displayed in the "Object Name"<br />
column:<br />
Accessible Nodes is... Displayed in the "Object<br />
Name ,,," column<br />
PROFINET IO device with assigned<br />
device name<br />
PROFINET IO device without<br />
assigned device name<br />
Explanation<br />
Device name IP address <strong>and</strong> MAC address can<br />
be determined in a properties<br />
dialog. The "Details" view also<br />
shows the device type as well as<br />
status information (e.g. IP<br />
addresses inadvertently assigned<br />
twice ("doubled-up"), errors, etc.).<br />
IP address As a substitute (for an unassigned<br />
IP address) the MAC address is<br />
displayed.<br />
S7 CP Name (of the station) Only if an IP address was<br />
assigned to the CP; otherwise,<br />
MAC address. The "Details" view<br />
also shows the operating mode<br />
<strong>and</strong> the module type.<br />
S7 CPU, PC stations Name (of the station) The "Details" view also shows the<br />
operating mode <strong>and</strong> the module<br />
type, <strong>and</strong>, if available, information<br />
from the associated <strong>STEP</strong> 7<br />
project (station name, CPU name,<br />
plant designation).<br />
IE/PB link See PROFINET device Special issue: if you select the<br />
IE/PB link in the "Accessible<br />
Nodes" list, the detailed list then<br />
displays the connected DP slaves<br />
along with their PROFIBUS<br />
addresses as well as other<br />
information.<br />
Other nodes (no S7 nodes or<br />
devices with DCP protocol)<br />
---- Cannot be displayed<br />
Calling diagnostic functions<br />
You can perform system diagnostics from the "Accessible Nodes" window. To do<br />
so, proceed as follows:<br />
1. Select the component to be diagnosed.<br />
2. Select the appropriate menu comm<strong>and</strong> (menu: PLC > Diagnostics/Settings ><br />
...).<br />
As of <strong>STEP</strong> 7 V5.3 Service Pack 2, the "Module Information" diagnostic function<br />
can also be used for DP slaves "behind" the IE/PB link; that is, for those devices<br />
that are not directly connected to the Ethernet.<br />
<strong>Configuring</strong> <strong>Hardware</strong> <strong>and</strong> <strong>Communication</strong> <strong>Connections</strong> with <strong>STEP</strong> 7<br />
4-26 A5E00706939-01
4.4.3 Downloading to PROFINET IO Devices<br />
<strong>Configuring</strong> PROFINET IO Devices<br />
Downloading to the CPU serving as IO controller for the first time in HW Config<br />
After you have configured the whole IO system, you now have to download this<br />
configuration to the CPU. In this way, the IP address is assigned to the CPU (or<br />
more exactly: the IO controller).<br />
Before starting the download, you should perform a consistency check in order to<br />
have the configuration checked for addresses that have been used twice <strong>and</strong><br />
names that are not unique.<br />
Find out if the CPU to receive the download can be downloaded to for the first time<br />
via the PROFINET interface. If not, you will then have to first download the<br />
hardware configuration via the MPI interface.<br />
The following description of the procedure presumes that there is a connection<br />
existing between the programming device (PG) <strong>and</strong> the CPU via Ethernet.<br />
1. Select the PLC > Download menu comm<strong>and</strong>.<br />
2. Select the modules to be downloaded to.<br />
3. If necessary, in the "Select Station Address" dialog box, click the "Display"<br />
button to display the modules that are actually accessible (including the CPU to<br />
receive the download with its current IP address or its MAC address if an IP<br />
address is still not available).<br />
4. In the accessible modules, select the CPU to receive the download .<br />
This module is then displayed in the "Enter connection to target station" field.<br />
5. Start the download by clicking the "OK" button.<br />
During this process, the CPU (i.e. the IO controller) also gets its configured IP<br />
address assigned to it.<br />
Downloading to the CPU serving as IO controller for the first time in the SIMATIC<br />
Manager or NetPro<br />
As an alternative method, you can download to the station (with the CPU of the IO<br />
controller) in the SIMATIC Manager or NetPro (menu comm<strong>and</strong>: PLC ><br />
Download).<br />
If you trigger the download in the SIMATIC Manager, the configuration must have<br />
already been compiled (in HW Config or NetPro).<br />
If you download in the SIMATIC Manager or in NetPro, the "Select Station<br />
Address" dialog box is also displayed since the configured IP address no longer<br />
matches the actual IP address. In this case, proceed as described in the previous<br />
section in order to reach the modules to be downloaded.<br />
Assigning a device name to an IO device (online)<br />
In order for the configured CPU to be able to address the PROFINET IO devices,<br />
you must assign the configured device name to each individual IO device.<br />
In order to use the following procedure, the IO devices must be accessible online<br />
for the programming device (PG)/PC on the Ethernet.<br />
<strong>Configuring</strong> <strong>Hardware</strong> <strong>and</strong> <strong>Communication</strong> <strong>Connections</strong> with <strong>STEP</strong> 7<br />
A5E00706939-01 4-27
<strong>Configuring</strong> PROFINET IO Devices<br />
Procedure<br />
1. In HW Config or in NetPro, select the PLC > Ethernet > Assign Device Name<br />
menu comm<strong>and</strong><br />
2. In the "Assign Device Name" dialog box, go to the "Device Name" field <strong>and</strong><br />
select a device. Then, in the "Available Devices" field, select the device to<br />
receive the selected device name.<br />
3. To make the device easier to identify, click the "Flashing" button to cause a<br />
display LED in the selected device to flash.<br />
4. Click the "Assign Name" button.<br />
5. Repeat steps 2 through 4 until you have assigned a name to all the devices.<br />
Starting the CPU<br />
After the names are all assigned, you can put the CPU into RUN mode.<br />
At startup, the CPU distributes the configuration information to the IO devices <strong>and</strong><br />
then goes into cyclical operation.<br />
<strong>Configuring</strong> <strong>Hardware</strong> <strong>and</strong> <strong>Communication</strong> <strong>Connections</strong> with <strong>STEP</strong> 7<br />
4-28 A5E00706939-01
<strong>Configuring</strong> PROFINET IO Devices<br />
4.4.4 Assigning Device Names via a Memory Card (MMC)<br />
Requirements<br />
Procedure<br />
As of <strong>STEP</strong> 7 V5.3 SP2, you can also configure the device names of PROFINET<br />
IO devices offline.<br />
To do this, you save a configured device name to an MMC <strong>and</strong> then insert the<br />
MMC into the appropriate IO device.<br />
If a device becomes defective <strong>and</strong> an IO device has to be completely exchanged,<br />
the IO controller automatically assigns the parameters to the new device <strong>and</strong><br />
configures it. With an MMC card, a device can be exchanged without using a<br />
programming device (PG).<br />
• The programming device (PG)/PC has a prommer for MMCs.<br />
• The IO device must support the "Assign the device name via MMC" function.<br />
• The station with its PROFINET IO system is configured.<br />
1. Insert the MMC in the prommer.<br />
2. In HW Config or in NetPro, select the IO device to be assigned the device<br />
name via MMC.<br />
3. Select the PLC > Save Device Name to Memory Card menu comm<strong>and</strong>.<br />
4. If the MMC has other data on it, a message will inform you of this condition so<br />
that you can delete the MMC before saving the device name.<br />
<strong>Configuring</strong> <strong>Hardware</strong> <strong>and</strong> <strong>Communication</strong> <strong>Connections</strong> with <strong>STEP</strong> 7<br />
A5E00706939-01 4-29
<strong>Configuring</strong> PROFINET IO Devices<br />
4.4.5 Changing the IP-Address or the Device Name During Operation<br />
Assigning an IP address or device name for a single node<br />
Before a new IP address or a device name can be assigned, the following<br />
conditions must be met:<br />
There is no data being exchanged with the IO controller.<br />
If the SIMATIC Manager or the list of accessible nodes is open, you can assign<br />
each PROFINET-device an/another IP address another device name. To do this,<br />
select the PLC > Assign Ethernet Address menu comm<strong>and</strong>.<br />
Changing IP addresses from a central location<br />
If you have to check or change the IP addressees for several IO devices, proceed<br />
as follows:<br />
1. In HW Config, select the PROFINET IO system (the "railroad track") <strong>and</strong> then<br />
select Edit > PROFINET IO > PROFINET IO System > IP Addresses menu<br />
comm<strong>and</strong>. Alternative method: you can also find this function by selecting an<br />
IO system <strong>and</strong> then right-clicking to display the context menu.<br />
2. The dialog box that is then displayed shows all the IO devices with their current<br />
device names <strong>and</strong> IP addresses. You can change all the IP addresses from<br />
this central location.<br />
3. Download the changed IP addresses (menu comm<strong>and</strong>: PLC > Download to<br />
Module).<br />
When an IO controller or an IO device is selected, you can also call this function in<br />
NetPro by selecting the Edit > PROFINET IO > PROFINET IO System > IP<br />
Addresses menu comm<strong>and</strong>.<br />
<strong>Configuring</strong> <strong>Hardware</strong> <strong>and</strong> <strong>Communication</strong> <strong>Connections</strong> with <strong>STEP</strong> 7<br />
4-30 A5E00706939-01
4.4.6 Diagnosing PROFINET IO Devices<br />
<strong>Configuring</strong> PROFINET IO Devices<br />
The same diagnostic paths available to you in <strong>STEP</strong> 7 for PROFIBUS DP<br />
components are also available for PROFINET IO. The procedures used are<br />
identical.<br />
When you click the Station > Open Online menu comm<strong>and</strong> in HW Config, you can<br />
then diagnose PROFINET IO devices in addition to S7 stations. This view also<br />
shows the slaves "behind" an IE/PB link.<br />
However, the procedure for evaluating diagnostic information by means of<br />
SFBs/SFCs in the user program is somewhat different.<br />
For PROFINET IO, there a consistent structure for data records with diagnostic<br />
information for all device manufacturers. Diagnostic information is only collected for<br />
faulty channels<br />
The system status lists (SSLs), SFB 54 <strong>and</strong> SFB 52 have been exp<strong>and</strong>ed in order<br />
to also make the status of PROFINET IO systems <strong>and</strong> the diagnostic information<br />
available for an S7 user program.<br />
• For example, to get a complete overview of the status of the PROFINET IO<br />
system, you can read SSL 0x0X91 (SFC 51).<br />
• To read out diagnostic records directly from a faulty module, use SFB 52 (read<br />
data record) to get detailed error information on its current status.<br />
• To read event-related (e.g. triggered by an error OB) diagnostic records, use<br />
SFB 54 in the corresponding error OB (read additional information on interrupt).<br />
SFB 52 <strong>and</strong> SFB 54 can also continue to be used for PROFIBUS DP.<br />
For information on which SSLs <strong>and</strong> which diagnostic records are defined for<br />
PROFINET IO <strong>and</strong> how diagnostic data records are structured, please refer to the<br />
programming manual From PROFIBUS DP to PROFINET IO.<br />
<strong>Configuring</strong> <strong>Hardware</strong> <strong>and</strong> <strong>Communication</strong> <strong>Connections</strong> with <strong>STEP</strong> 7<br />
A5E00706939-01 4-31
<strong>Configuring</strong> PROFINET IO Devices<br />
4.4.7 <strong>Configuring</strong> the Watchdog Time<br />
Procedure<br />
You can configure a watchdog time for PROFINET IO devices.<br />
If the IO device does not receive IO data from the IO controller within the<br />
configured watchdog time, the device goes into safe mode.<br />
You do not enter the watchdog time directly, but as a "Number of accepted update<br />
cycles with missing IO data". This makes it easier to make the setting because the<br />
update time can be shorter or longer, depending on the performance of the IO<br />
device or the setting.<br />
<strong>STEP</strong> 7 uses the "Number of accepted update cycles without IO data" to calculate<br />
the resulting watchdog time.<br />
To set the update time for an individual IO device, proceed as follows:<br />
1. Double-click an IO device.<br />
2. Select the "IO Cycle" tab.<br />
3. Check the set watchdog time <strong>and</strong> change it, if necessary. To do this, change<br />
the factor for "Number of accepted update cycles without IO data". Confirm<br />
your settings with "OK".<br />
You only change the default setting in special cases, such as when placing a<br />
device in service.<br />
<strong>Configuring</strong> <strong>Hardware</strong> <strong>and</strong> <strong>Communication</strong> <strong>Connections</strong> with <strong>STEP</strong> 7<br />
4-32 A5E00706939-01
5 <strong>Configuring</strong> IRT <strong>Communication</strong><br />
5.1.1 Introduction: Isochronous Realtime Ethernet<br />
In <strong>STEP</strong> 7 V5.4 you can configure PROFINET devices that support data exchange<br />
over Isochronous Realtime Ethernet (IRT). IRT frames are transmitted in a<br />
deterministic manner over planned communications paths in a specified sequence<br />
in order to achieve the best possible synchronization <strong>and</strong> performance.<br />
Topology-based IRT requires special network components that support planned<br />
data transmission.<br />
Constant Bus Cycle Time <strong>and</strong> Isochrone Mode now also with PROFINET<br />
The constant bus cycle times <strong>and</strong> isochrone mode with PROFIBUS DP are now<br />
available for PROFINET IO.<br />
With PROFIBUS DP, all nodes operated with constant bus cycle times are<br />
synchronized by a global control signal generated by the DP master.<br />
With PROFINET IO with IRT, a "sync master" generates a signal with which the<br />
"sync slaves" are synchronized. The sync master <strong>and</strong> the sync slaves belong to a<br />
"sync domain", which is assigned a name during configuration. In principle, an IO<br />
controller or an IO device can serve as a sync master. A sync domain has exactly<br />
one sync master.<br />
Correlation: Sync Domain <strong>and</strong> IO Systems<br />
The important thing to recognize here is that sync domains do not have to be<br />
restricted to one PROFINET IO system: The devices in several IO systems can be<br />
synchronized by a single sync master, as along as they are all connected on the<br />
same Ethernet subnet.<br />
Conversely, the following also applies: An IO system may only belong to a single<br />
sync domain.<br />
Propagation Delay Cannot Be Neglected<br />
With these extremely precise synchronization intervals, the lengths of the<br />
connecting lines, that is, the related delay times, must be taken into account. By<br />
using a topology editor, you can enter the properties of the lines between the ports<br />
on the switches. Using this data along with the other data in the configuration,<br />
<strong>STEP</strong> 7 will then calculate an optimized run-time for IRT communication <strong>and</strong> the<br />
resulting update time.<br />
<strong>Configuring</strong> <strong>Hardware</strong> <strong>and</strong> <strong>Communication</strong> <strong>Connections</strong> with <strong>STEP</strong> 7<br />
A5E00706939-01 5-1
<strong>Configuring</strong> IRT <strong>Communication</strong><br />
Limiting Network Load<br />
To limit the load on the network caused by extremely short update times, update<br />
groups are configured for IRT data. If a only a few devices require the shortest<br />
update time, they are assigned to the first update group. Each additional update<br />
group has an update time that is "n times" the previous update group (the factor "n"<br />
can be configured). This means that their data are updated less often, thus<br />
reducing the network load.<br />
In <strong>STEP</strong> 7 V5.4 there is only one update group.<br />
IRT Runs in Parallel to Realtime <strong>and</strong> TCP/IP <strong>Communication</strong><br />
In addition to IRT communication, for which a specified b<strong>and</strong>width within the<br />
update time is reserved, RT communication <strong>and</strong> TCP/IP communication are also<br />
allowed during the update time "n".<br />
With RT communication (realtime communication), the cyclical data is transmitted<br />
between the IO controller <strong>and</strong> the IO device, but without the "best-possible<br />
synchronization".<br />
Unsynchronized IO devices exchange their data automatically using RT<br />
communication.<br />
Since TCP/IP communication is also possible, other non-realtime data or<br />
configuration data or diagnostic data can also be transported.<br />
<strong>Configuring</strong> <strong>Hardware</strong> <strong>and</strong> <strong>Communication</strong> <strong>Connections</strong> with <strong>STEP</strong> 7<br />
5-2 A5E00706939-01
<strong>Configuring</strong> IRT <strong>Communication</strong><br />
5.2 Overview: Basic Procedure For <strong>Configuring</strong> IRT<br />
If you want to exp<strong>and</strong> a plant with PROFINET IO by adding IRT for motion control<br />
applications, proceed in the following three steps:<br />
1. Configure stations with PROFINET IO controllers <strong>and</strong> PROFINET IO devices.<br />
PROFINET devices that you need for motion control applications must support<br />
IRT.<br />
2. Now specify what is synchronized with what. To do this, you must configure a<br />
sync domain with a sync master with several sync slaves.<br />
3. Now configure the topology; that is, specify how the ports for the individual<br />
devices are interconnected.<br />
4. Download the configuration to the devices.<br />
This basic description is extremely simplified. For detailed instructions, refer to the<br />
information available through the links listed below.<br />
5.3 Creating a PROFINET IO Configuration<br />
A PROFINET IO configuration is required to configure IRT; that is, one or more<br />
stations have to be configured with an IO controller <strong>and</strong> IO devices.<br />
IRT communication is limited to components designed for it. In the <strong>Hardware</strong><br />
Catalog, you will recognize such components by a reference in the infotext.<br />
<strong>Configuring</strong> <strong>Hardware</strong> <strong>and</strong> <strong>Communication</strong> <strong>Connections</strong> with <strong>STEP</strong> 7<br />
A5E00706939-01 5-3
<strong>Configuring</strong> IRT <strong>Communication</strong><br />
5.4 Creating a Sync Domain<br />
Procedure<br />
All components included in IRT communication must belong to what is known as a<br />
"sync domain".<br />
A sync domain is a group of PROFINET devices that are synchronized to a<br />
common cycle. Only one device can serve as the sync master (cycle clock); all the<br />
other devices function as sync slaves.<br />
1. Open the station with PROFINET devices that are to take part in IRT<br />
communication.<br />
2. Select the Edit > PROFINET IO > Manage Sync Domain menu comm<strong>and</strong>.<br />
The "Manage Sync Domain" dialog box is displayed showing a tab with a list of<br />
all devices that support synchronization.<br />
3. Double-click the device to be configured as the sync master.<br />
The property sheet for this device is displayed.<br />
4. Enter a suitable name for the sync domain <strong>and</strong> set the synchronization type to<br />
"sync master".<br />
Confirm your settings with "OK".<br />
5. Now select all devices to be configured as sync slaves (to select these devices<br />
as a group, hold the CTRL key down <strong>and</strong> select each device one after the<br />
other).<br />
Now click the "Device Properties" button.<br />
6. In the dialog box that is then displayed, set the synchronization type to "sync<br />
slave".<br />
Confirm your settings with "OK".<br />
All devices that are set to "not synchronized" will not be included in IRT<br />
communication but will automatically take part in RT communication.<br />
<strong>Configuring</strong> <strong>Hardware</strong> <strong>and</strong> <strong>Communication</strong> <strong>Connections</strong> with <strong>STEP</strong> 7<br />
5-4 A5E00706939-01
5.5 Setting Update Times<br />
<strong>Configuring</strong> IRT <strong>Communication</strong><br />
Update times are set for a group of PROFINET devices. Since <strong>STEP</strong> 7 V5.4 only<br />
provides for one update group, there is no need to manually assign devices to an<br />
update group. All devices are assigned to the same update group <strong>and</strong> will have the<br />
same update time.<br />
1. In the "Manage Sync Domain" dialog box, select the "Update Groups" tab.<br />
2. If possible select a suitable transmission cycle time. The transmission cycle<br />
time is smallest possible transmission interval.<br />
If there are IO devices that do not support IRT communication configured, then<br />
the transmission cycle time has a default setting of 1 ms (this setting cannot be<br />
changed).<br />
3. Click the "Update" button.<br />
Based on the specified transmission cycle time, <strong>STEP</strong> calculates the length of<br />
time for RT communication <strong>and</strong> TCP/IP communication.<br />
4. Double-click the update group.<br />
In the "Update Group..." dialog box you can change the name of the update<br />
group <strong>and</strong> specify whether the Ti <strong>and</strong> To times for all IO devices should be the<br />
same (Ti/To same = "Yes") or whether these times should be set for each<br />
individual IO device (Ti /To same = "No").<br />
5. Confirm your settings with "OK".<br />
Times Ti <strong>and</strong> To with IRT<br />
In PROFINET with IRT, the mechanism for isochronous reading <strong>and</strong> outputting of<br />
IO signals functions in a way similar to that for isochronous PROFIBUS DP. With<br />
PROFINET, the times Ti <strong>and</strong> To are also derived from the constant bus cycle time,<br />
<strong>and</strong> the IO devices with their modules ensure that the signals are read in <strong>and</strong><br />
output at equal intervals. However, the mechanism is different in that with<br />
PROFINET there is no "Global Control" that serves as the time clock. Instead, the<br />
times are multiples of the transmission cycle time - yielding the same result as for<br />
PROFIBUS DP.<br />
The diagrams showing the flow of the isochronous data exchange for PROFIBUS<br />
DP also similarly apply to PROFINET IO.<br />
Note<br />
IO devices that are only involved in IRT data exchange are not included in the list<br />
shown in the "Update Time" tab (double-click the IO system in HW Config to<br />
display the "Properties PROFINET IO System" dialog box).<br />
<strong>Configuring</strong> <strong>Hardware</strong> <strong>and</strong> <strong>Communication</strong> <strong>Connections</strong> with <strong>STEP</strong> 7<br />
A5E00706939-01 5-5
<strong>Configuring</strong> IRT <strong>Communication</strong><br />
5.6 <strong>Configuring</strong> the Topology<br />
IRT communication requires a topology configuration.<br />
There are two ways to specify the properties of the lines between the ports of the<br />
switches:<br />
• Use the topology editor. It provides an overview of all ports in the project <strong>and</strong> a<br />
central location for interconnecting them.<br />
To start the topology editor, select the Edit > PROFINET IO > Topology menu<br />
comm<strong>and</strong> in HW Config or NetPro.<br />
• Alternate method: Use the "Port Properties... " dialog box (property sheet) for a<br />
port to select a partner port. This specifies the line between two ports. You can<br />
also edit the properties for this line here as well.<br />
To open the property sheet, go to HW Config <strong>and</strong> select a port. Then select the<br />
Edit > Object Properties menu comm<strong>and</strong>. You can also simply double-click<br />
the port.<br />
After property sheet is opened, select the "Topology" tab.<br />
<strong>Configuring</strong> <strong>Hardware</strong> <strong>and</strong> <strong>Communication</strong> <strong>Connections</strong> with <strong>STEP</strong> 7<br />
5-6 A5E00706939-01
5.7 <strong>Configuring</strong> Direct Data Exchange<br />
Principle<br />
<strong>Configuring</strong> IRT <strong>Communication</strong><br />
Data ranges can be cyclically exchanged between two IO controllers that are in a<br />
sync domain <strong>and</strong> take part in IRT communication by means of direct data<br />
exchange.<br />
Like with PROFIBUS DP, data ranges (I/O areas) are configured by CPUs. A CPU<br />
uses these areas to send or receive data.<br />
The CPU with a data range that is configured as the "Sender" sends data via<br />
outputs.<br />
The CPU with a data range that is configured as the "Receiver" receives data via<br />
inputs.<br />
Recommendation<br />
We recommend that the sender ranges for all IO controllers be configured first, <strong>and</strong><br />
then the receiver ranges.<br />
<strong>Configuring</strong> the Sender<br />
1. Open the property sheet for the IO controller (double-click the corresponding<br />
row in the configuration table in HW Config).<br />
2. Select the "Sender" tab.<br />
3. Click the "New" button.<br />
4. In the property sheet for the sender, enter the start address of the sender <strong>and</strong><br />
the length of the address area that will be used when sending.<br />
Add some comments about this data range so that the data sent using this<br />
range can be identified later on.<br />
5. Confirm your settings with "OK".<br />
6. Repeat steps 3 to 5 for additional sender ranges.<br />
7. If you like, change the default address for the sender ranges .<br />
For communication in which an IO controller is used as sender for direct data<br />
exchange, only one diagnostic address can be assigned.<br />
<strong>Configuring</strong> <strong>Hardware</strong> <strong>and</strong> <strong>Communication</strong> <strong>Connections</strong> with <strong>STEP</strong> 7<br />
A5E00706939-01 5-7
<strong>Configuring</strong> IRT <strong>Communication</strong><br />
<strong>Configuring</strong> the Receiver<br />
1. Open the property sheet for the IO controller (double-click the corresponding<br />
row in the configuration table in HW Config).<br />
2. Select the "Receiver" tab.<br />
3. Click the "New" button.<br />
4. In the property sheet for the receiver, click the "Assign Sender" button.<br />
5. In the "Assign Sender" dialog box that is displayed, select the data range of the<br />
desired station. This is the data range to be received by the local CPU.<br />
6. Confirm your settings with "OK".<br />
7. In the property sheet for the receiver, enter the start address of the address<br />
area that will be used when receiving.<br />
The length of the address area should not be changed since it will be<br />
automatically adjusted to the length of the sender range.<br />
Note: The configuration can only be compiled if the sender range <strong>and</strong> the<br />
receiver range have the same lengths!<br />
8. Repeat steps 3 to 7 for additional receiver ranges .<br />
9. Each assigned sender has a diagnostic address reserved for it. The receiver<br />
can detect failure of the sender by means of its diagnostic address.<br />
Click the "Diagnostic Addresses" button to edit these addresses<br />
5.8 Downloading an IRT Configuration<br />
The configuration data must be downloaded to all devices that are involved in IRT<br />
communication.<br />
Before downloading, first perform a consistency check <strong>and</strong> eliminate any errors<br />
that may exist.<br />
Recommendation<br />
Sync domains are not limited to one station. Download the IRT configuration from<br />
the network configuration (NetPro).<br />
To do this, select the Ethernet subnet <strong>and</strong> then select the PLC > Download to<br />
Current Project> Stations on the Subnet menu comm<strong>and</strong>.<br />
<strong>Configuring</strong> <strong>Hardware</strong> <strong>and</strong> <strong>Communication</strong> <strong>Connections</strong> with <strong>STEP</strong> 7<br />
5-8 A5E00706939-01
5.9 Media Redundancy<br />
5.9.1 What You Should Know a About Media Redundancy<br />
<strong>Configuring</strong> IRT <strong>Communication</strong><br />
Media redundant transmission means that the data in IRT communication are<br />
transmitted in two frames over two separate paths. A frame is the unit in which data<br />
are transmitted over the Ethernet.<br />
The "media-redundant transmission" property can the configured as follows:<br />
• For an entire IO device<br />
• For each individual address area in a controller-controller communication<br />
relationship (direct data exchange)<br />
Media Redundancy for an Entire IO Device<br />
All data in the communication relationship between the IO controller <strong>and</strong> the IO<br />
device are transmitted in a media-redundant manner.<br />
Media Redundancy for an Individual Address Area in a Controller-Controller<br />
<strong>Communication</strong> Relationship (Direct Data Exchange)<br />
Media-redundant transmission is configured for each address area between sender<br />
<strong>and</strong> receiver. This means that, in each case, this corresponds to one row in the<br />
"Sender/Receiver" tab in the property sheet for an IO controller interface.<br />
<strong>Configuring</strong> <strong>Hardware</strong> <strong>and</strong> <strong>Communication</strong> <strong>Connections</strong> with <strong>STEP</strong> 7<br />
A5E00706939-01 5-9
<strong>Configuring</strong> IRT <strong>Communication</strong><br />
Default Setting<br />
When the communication relationship is created, media-redundant transmission is<br />
disabled. This means that the data in an IRT communication relationship are<br />
transmitted over precisely one path of the IRT network. If media redundancy is not<br />
enabled, this means that the data are transmitted over exactly one path between<br />
the IO controller <strong>and</strong> the IO device of the IRT network. If this path is interrupted,<br />
then the data transfer will come to a halt.<br />
Topology for Media-Redundant Transmission<br />
To increase the reliability of data transmission, media-redundant transmission may<br />
be used. When doing so, the topology must be configured so that there are at least<br />
two different paths available between the sender switch <strong>and</strong> the receiver switch.<br />
These paths are different when the switches for one path are not used by the other<br />
one.<br />
A ring topology would fulfill this need 100%. The device to be used as a switch<br />
should be one that supports the planned IRT communication.<br />
In addition, several rings can be combined with each other as long as the condition<br />
is met that a switch is used in only precisely one path. If the topology of the<br />
network will not allow this, then the paths must be as "resource-independent" as<br />
possible. In case, however, media redundancy is not fully ensured.<br />
The consistency check in HW Config will indicate whether switches between the<br />
sender <strong>and</strong> the receiver are being used by more than one path.<br />
In addition to being configured for media redundant transmission, the network also<br />
requires a redundancy manager.<br />
Function of the Redundancy Manager<br />
The redundancy manager is an IO device that supports the planned IRT<br />
communication <strong>and</strong> for which IRT topology must also be configured. This manager<br />
is necessary in order to open the ring structures, which are necessary for mediaredundant<br />
transmission, for TCP/IP frames. Otherwise, the TCP/IP frames would<br />
continually circulate in the network. As far as IRT is concerned, the redundancy<br />
manager is "porous" since IRT communication is running as planned <strong>and</strong> there are<br />
thus no frames circulating in the network.<br />
<strong>Configuring</strong> <strong>Hardware</strong> <strong>and</strong> <strong>Communication</strong> <strong>Connections</strong> with <strong>STEP</strong> 7<br />
5-10 A5E00706939-01
The redundancy manager functions as an intelligent switch:<br />
• It sends test frames to both ring connection points.<br />
<strong>Configuring</strong> IRT <strong>Communication</strong><br />
• If the ring is still closed <strong>and</strong> functioning correctly, these frames are received<br />
again at the respective other sides.<br />
If no test frames arrive within a time interval, the manager lets TCP/IP frames<br />
through again. In this way, a communications path for TCP/IP frames, which had<br />
been previously interrupted for the reason cited above, is created again. If the ring<br />
opens, the redundancy manager generates a redundancy interrupt.<br />
Note<br />
Enabling media-redundant transmission will increase the communications load<br />
since the data now have to be transmitted twice over two pathways.<br />
<strong>Configuring</strong> <strong>Hardware</strong> <strong>and</strong> <strong>Communication</strong> <strong>Connections</strong> with <strong>STEP</strong> 7<br />
A5E00706939-01 5-11
<strong>Configuring</strong> IRT <strong>Communication</strong><br />
5.9.2 <strong>Configuring</strong> Media Redundancy<br />
<strong>Configuring</strong> Media Redundancy for an Entire IO Device<br />
Requirements<br />
Procedure<br />
All data in the communications relationship between the IO controller <strong>and</strong> the IO<br />
device are transmitted in a media-redundant manner.<br />
• A topology with two independent paths has been configured.<br />
• The IO device supports the function.<br />
• A redundancy manager has also been configured.<br />
1. In HW Config, select the relevant IO device.<br />
2. In the detail view of the IO device, double-click "Interface Submodule" for the<br />
IO device to open the property sheet.<br />
3. Select the "Media Redundancy" tab.<br />
<strong>Configuring</strong> Media Redundancy for an Individual Address Area in a Controller-<br />
Controller <strong>Communication</strong> Relationship (Direct Data Exchange)<br />
Requirements<br />
Procedure<br />
Media-redundant transmission is configured for each address area between sender<br />
<strong>and</strong> receiver.<br />
• A topology with two independent paths has been configured.<br />
• A redundancy manager has also been configured.<br />
1. Double-click "Interface Submodule" for the IO controller (e.g. IF1).<br />
2. Select the "Receiver" tab.<br />
3. Create a new row ("New" button) <strong>and</strong> assign a sender to the receiver.<br />
4. In the "Receiver Properties" dialog box, select the "Media Redundancy" check<br />
box.<br />
<strong>Configuring</strong> <strong>Hardware</strong> <strong>and</strong> <strong>Communication</strong> <strong>Connections</strong> with <strong>STEP</strong> 7<br />
5-12 A5E00706939-01
6 <strong>Configuring</strong> a SIMATIC PC Station<br />
(SIMATIC PC based)<br />
6.1 Creating <strong>and</strong> Assigning Parameters to SIMATIC PC<br />
Stations<br />
Introduction<br />
The SIMATIC PC station (referred to here simply as "PC station") represents a PC<br />
or an operator station that includes the SIMATIC components as applications (such<br />
as WinCC), slot PLCs, or software PLCs for automation tasks. These components<br />
are configured within the PC station, or they can be the end point of a connection.<br />
Overview: <strong>Configuring</strong> a SIMATIC PC Station <strong>and</strong> the <strong>Connections</strong> for It<br />
The complete configuration of a PC station is h<strong>and</strong>led with the "SIMATIC PC<br />
Station" station type. The components that are configured there are then available<br />
for configuring connections. You can configure the following components in a<br />
SIMATIC PC station:<br />
• Software PLC WinLC (Version V3.0 <strong>and</strong> higher)<br />
• Slot PLC CPU 41x-2 PCI (WinAC Slot 412 <strong>and</strong> WinAC Slot 416)<br />
• SIMATIC communication processor for the PC<br />
• SIMATIC HMI: WinCC <strong>and</strong> ProTool Pro<br />
• Applications (such as user applications based on SAPI)<br />
• OPC-Server<br />
For PC-based components such as WinLC (< V2.x) or CPU 416-2 DP ISA, you<br />
must continue to use the SIMATIC 300 or SIMATIC 400 station type. You can find<br />
the components in the "<strong>Hardware</strong> Catalog" window under SIMATIC PC Based<br />
Control 300/400.<br />
<strong>Configuring</strong> <strong>Hardware</strong> <strong>and</strong> <strong>Communication</strong> <strong>Connections</strong> with <strong>STEP</strong> 7<br />
A5E00706939-01 6-1
<strong>Configuring</strong> a SIMATIC PC Station (SIMATIC PC based)<br />
Procedure<br />
The following figure shows the structure of the <strong>Hardware</strong> Catalog for SIMATIC PC<br />
stations:<br />
1. In the SIMATIC Manager, insert a SIMATIC PC station in your project) menu<br />
comm<strong>and</strong> Insert > SIMATIC PC Station).<br />
2. Change the name of the SIMATIC PC station as you see fit.<br />
If the computer that you are now using for configuration <strong>and</strong> for loading stations<br />
is identical with the SIMATIC PC station inserted in the SIMATIC Manager,<br />
then the name of this station must be identical with the name specified in the<br />
Component Configuration Editor. Only then is the SIMATIC PC station properly<br />
"assigned" in the project; in other words, it is then recognized in the SIMATIC<br />
Manager <strong>and</strong> in the network view as an assigned SIMATIC PC station.<br />
3. Double-click the SIMATIC PC station object <strong>and</strong> then the Configuration object.<br />
HW Config opens for editing the station configuration. Row 125 of the<br />
configuration table is occupied by the station manager (cannot be deleted).<br />
4. Use a drag-<strong>and</strong>-drop operation to insert those components into the<br />
configuration table of the SIMATIC PC station that represent the configuration<br />
of the real PC. The components are located in the "<strong>Hardware</strong> Catalog" window<br />
under SIMATIC PC Station:<br />
- Software PLC WinLC in slot 2 (for information on exp<strong>and</strong>ed configuration<br />
options, see Slot Rules for PC-based SIMATIC Controllers)<br />
- Slot PLC CPU 41x-2 PCI (WinAC Slot 412 <strong>and</strong> WinAC Slot 416) in slot 3<br />
(for information on exp<strong>and</strong>ed configuration options, see Slot Rules for PCbased<br />
SIMATIC Controllers)<br />
- CPs in one of the slots from 1 to 32 (if necessary, observe the restrictions<br />
in the Product Information for the current slot-CP!)<br />
- SW placeholder for configuring connections such as "User Application" or<br />
HMI components (if installed) also in slots 1 to 32<br />
- OPC Server for OPC Clients accessing the variables of remote automation<br />
systems via configured connections also in slots 1 to 32.<br />
<strong>Configuring</strong> <strong>Hardware</strong> <strong>and</strong> <strong>Communication</strong> <strong>Connections</strong> with <strong>STEP</strong> 7<br />
6-2 A5E00706939-01
<strong>Configuring</strong> a SIMATIC PC Station (SIMATIC PC based)<br />
5. Call up the Properties dialog of the PC station (menu comm<strong>and</strong> Station ><br />
Properties), select the Configuration tab, <strong>and</strong> put the path for storing the<br />
configuration file (*.XDB file) there.<br />
The connection data <strong>and</strong> addresses for CPs <strong>and</strong> applications are stored in this<br />
file (see step 6).<br />
6. Select the menu comm<strong>and</strong> PLC > Save <strong>and</strong> Compile.<br />
When the configuration of a SIMATIC PC station is saved <strong>and</strong> compiled,<br />
system data <strong>and</strong> a configuration file (*.XDB file) are created. This system data<br />
<strong>and</strong> the configuration file must then be downloaded to the programmable logic<br />
controller or installed (see Downloading a PC Station).<br />
You set the location of the configuration file on the PC station by means of the<br />
"Set PG/PC Interface" program ("<strong>Configuring</strong> <strong>STEP</strong> 7" tab).<br />
You can find more information on installing on a programming device/PC in the<br />
description "SIMATIC NET, S7 Programming Interface" <strong>and</strong> in the online Help<br />
on the "<strong>Configuring</strong> <strong>STEP</strong> 7" tab.<br />
7. If you want to configure connections for the SIMATIC PC station:<br />
- Select the menu comm<strong>and</strong> Options > Configure Network. In NetPro, you<br />
can configure S7 connections for the control components <strong>and</strong> for<br />
applications. You can also configure redundant S7 connections for the<br />
OPC server. If you want to edit the SIMATIC PC configuration from NetPro,<br />
double-click the SIMATIC PC station object (as you would for<br />
SIMATIC 300/400 stations).<br />
If you want to download the configuration:<br />
- Select the menu comm<strong>and</strong> PLC > Download. Only PC-based controls will<br />
be offered for the download (see Downloading a PC Station).<br />
Special Features of <strong>Configuring</strong> WinLC V3.0 <strong>and</strong> Applications<br />
The PROFIBUS-DP interface for WinLC is already included in WinLC as an<br />
integrated interface of WinLC (DP-Master in slot 2.1). Accordingly, the card<br />
required for this function (communications module such as CP 5613) is not placed<br />
<strong>and</strong> configured explicitly in HW Config. The configuration is h<strong>and</strong>led by means of<br />
the DP Master entry in slot 2.1.<br />
Configuration with Applications <strong>and</strong> PROFIBUS CPs<br />
Applications can access distributed I/O by means of PROFIBUS-DP configuration.<br />
To create the configuration, proceed as follows:<br />
1. Place an application <strong>and</strong> a PROFIBUS-DP CP in the configuration table for the<br />
SIMATIC PC station.<br />
2. Double-click the CP to call up the Properties dialog.<br />
3. In the Properties dialog, assign an application to the CP.<br />
<strong>Configuring</strong> <strong>Hardware</strong> <strong>and</strong> <strong>Communication</strong> <strong>Connections</strong> with <strong>STEP</strong> 7<br />
A5E00706939-01 6-3
<strong>Configuring</strong> a SIMATIC PC Station (SIMATIC PC based)<br />
6.2 Slot Rules for a SIMATIC PC Station<br />
SoftPLC<br />
SlotPLC<br />
Components such as CPs, PC-based user programs for configuring connections<br />
<strong>and</strong> OPC servers can be inserted in slots (index) 1 to 32.<br />
Up to <strong>STEP</strong> 7 V 5.2 Service Pack 1, the software PLC WinLC can only be inserted<br />
in Index 2. As of <strong>STEP</strong> 7 V 5.3, the WinLC variant V 4.1 is supported. It can be<br />
inserted in all slots <strong>and</strong> can be operated with up to four SlotPLCs (CPU 41x-2 PCI<br />
as of V 3.4).<br />
Up to <strong>STEP</strong> 7 V 5.2 Service Pack 1, the SlotPLC CPU 41x-2 PCI (WinAC Slot 412<br />
<strong>and</strong> WinAC Slot 416) can only be inserted in Index 3.<br />
As of <strong>STEP</strong> 7 V 5.3, the CPU 41x-2 PCI V 3.4 is supported. It can be inserted in all<br />
slots. Up to 4 of these CPUs can be inserted, even together with the new SoftPLC<br />
WinLC V 4.1.<br />
Address Areas with Multi-PLC Operation<br />
Further Information<br />
If there are several WinAC controllers inserted in a PC station, then each of them<br />
has its own I/O address areas. The controllers (e.g. SlotPLCs) can communicate<br />
with each other by means of S7 communications mechanisms (BSEND/BRCV);<br />
otherwise, however, they function independently of each other, comparable to the<br />
operation of S7-400 CPUs in a segmented rack, such CR1. This property allows<br />
the compactness <strong>and</strong> integration density of a PLC to be increased.<br />
For further information, please refer to the manuals for the SoftPLCs <strong>and</strong> SlotPLCs<br />
as well as the manual "Commissioning PC Stations - Manual <strong>and</strong> Quick Start".<br />
6.3 Comparison: S7 Station - PC Station<br />
The configuration of S7 stations is represented in the SIMATIC Manager by the<br />
<strong>Hardware</strong> object; if you double-click <strong>Hardware</strong>, you start the application for<br />
configuring an S7 station. End points of a connection are modules that are plugged<br />
in to the real station. Configurable CPUs, CPs, or interface modules form the<br />
interfaces to subnets.<br />
The configuration of PC stations is represented in the SIMATIC Manager by the<br />
Configuration object; if you double-click Configuration, you start the application for<br />
configuring a PC station (as of <strong>STEP</strong> 7 V5.0 Service Pack 3).<br />
<strong>Configuring</strong> <strong>Hardware</strong> <strong>and</strong> <strong>Communication</strong> <strong>Connections</strong> with <strong>STEP</strong> 7<br />
6-4 A5E00706939-01
<strong>Configuring</strong> a SIMATIC PC Station (SIMATIC PC based)<br />
6.4 Appending SIMATIC PC Configurations of Previous<br />
Versions<br />
PC Configurations of <strong>STEP</strong> 7 V5.1 Projects (up to SP 1)<br />
As of <strong>STEP</strong> 7 V5.1, Service Pack 2 you can download communications to the PC<br />
station in the same way as to an S7-300 or S7-400 station (without having to take<br />
the roundabout via configuration file). Nevertheless, a configuration file is always<br />
generated during a storing or compiling operation in order to enable the<br />
transmission of the configuration to the target PC station using this method.<br />
This bears the consequence that "older" PC stations cannot interpret some of the<br />
information included in the newly generated configuration files. <strong>STEP</strong> 7<br />
automatically adapts itself to this circumstance:<br />
• If you create a new SIMATIC PC station configuration with <strong>STEP</strong> 7 as of V5.1,<br />
Service Pack 2, <strong>STEP</strong> 7 assumes that the target PC station was configured with<br />
the help of SIMATIC NET CD as of 7/2001, that is, under the presumption that<br />
S7RTM (Runtime Manager) is installed. The configuration files are generated in<br />
such a way that they can be interpreted by a "new" PC station.<br />
• If you append a SIMATIC PC station configuration of a previous version (for<br />
example, the PC station was configured with <strong>STEP</strong> 7 V5.1, Service Pack 1),.<br />
<strong>STEP</strong> 7 does not presume that the target PC station was configured with the<br />
help of SIMATIC NET CD as of 7/2001. Those configuration files are then<br />
generated in such a way that they can be interpreted by an "old" PC station.<br />
If this default behavior does not match your requirements, you can modify it as<br />
described below:<br />
Setting in the Context Menu "<strong>Configuring</strong> <strong>Hardware</strong> ":<br />
1. Open the PC station hardware configuration<br />
2. Right-click on the station window (white area)<br />
3. Select the context-sensitive menu "Station Properties"<br />
4. Check or clear the "Compatibility" checkbox.<br />
Setting in the Context Menu "<strong>Configuring</strong> Networks"<br />
1. Open the network configuration<br />
2. Highlight the PC station<br />
3. Select the menu comm<strong>and</strong> Edit > Object properties<br />
4. In the dialog, select the "Configuration" tab<br />
5. Check or clear the "Compatibility" checkbox.<br />
<strong>Configuring</strong> <strong>Hardware</strong> <strong>and</strong> <strong>Communication</strong> <strong>Connections</strong> with <strong>STEP</strong> 7<br />
A5E00706939-01 6-5
<strong>Configuring</strong> a SIMATIC PC Station (SIMATIC PC based)<br />
PC Configurations of <strong>STEP</strong> 7 V5.0 Projects<br />
You must convert the station if you want to edit a SIMATIC PC station configuration<br />
with <strong>STEP</strong> 7 as of V5.0, Service Pack 3 to configure new components that are only<br />
supported by Service Pack 3 or higher:<br />
1. In the SIMATIC Manager, highlight the SIMATIC PC station <strong>and</strong> select the<br />
menu comm<strong>and</strong> Edit > Object properties.<br />
2. In the "Functions" tab of the properties dialog, click on the "Exp<strong>and</strong>" button.<br />
The SIMATIC PC station is then converted. Now, it can only be edited with<br />
<strong>STEP</strong> 7 V5.0, Service Pack 3 or later versions.<br />
<strong>Configuring</strong> <strong>Hardware</strong> <strong>and</strong> <strong>Communication</strong> <strong>Connections</strong> with <strong>STEP</strong> 7<br />
6-6 A5E00706939-01
<strong>Configuring</strong> a SIMATIC PC Station (SIMATIC PC based)<br />
6.5 Highlighting the SIMATIC PC Station to be Configured<br />
in the Network View<br />
If the SIMATIC PC station that you are using to create the <strong>STEP</strong> 7 project is to be<br />
have a highlighted display in the network view <strong>and</strong> in the SIMATIC manager for the<br />
project, the following prerequisites must be met:<br />
• No programming device (PG)/PC can be assigned<br />
• The PG/PC interface must be set to "PC internal (local)"<br />
• The PC station must be configured with the Component Configurator, which is<br />
available on the SIMATIC NET CD as of 7/2001.<br />
• The name of the PC station entered must be identical in the Component<br />
Configurator <strong>and</strong> in <strong>STEP</strong> 7 (station properties of the SIMATIC PC station).<br />
Since this name is then identical everywhere, <strong>STEP</strong> 7 can then make the correct<br />
association <strong>and</strong> highlight the assigned PC station. Should any one of the abovementioned<br />
prerequisites not be met, then the "st<strong>and</strong>ard" icon for the PC station is<br />
displayed.<br />
Meaning Icon<br />
SIMATIC PC station highlighted<br />
SIMATIC PC station not highlighted<br />
<strong>Configuring</strong> <strong>Hardware</strong> <strong>and</strong> <strong>Communication</strong> <strong>Connections</strong> with <strong>STEP</strong> 7<br />
A5E00706939-01 6-7
<strong>Configuring</strong> a SIMATIC PC Station (SIMATIC PC based)<br />
<strong>Configuring</strong> <strong>Hardware</strong> <strong>and</strong> <strong>Communication</strong> <strong>Connections</strong> with <strong>STEP</strong> 7<br />
6-8 A5E00706939-01
7 Saving, Importing <strong>and</strong> Exporting<br />
Configurations<br />
7.1 Saving a Configuration <strong>and</strong> Checking the Consistency<br />
To save a configuration with all set parameters <strong>and</strong> addresses, select the menu<br />
comm<strong>and</strong> Station > Save or Station > Save <strong>and</strong> Compile.<br />
If you use the menu comm<strong>and</strong> Station > Save <strong>and</strong> Compile, the configuration is<br />
saved in the active project as a "Station" object <strong>and</strong> if valid system data blocks<br />
(SDB) could be created, they are stored in the (offline) "Blocks" folder for the<br />
associated modules ("SDB carrier," for example, CPU). The system data blocks<br />
are represented by the "System Data" folder/symbol.<br />
Symbol for system data<br />
To be able to save incomplete configurations, select the menu comm<strong>and</strong> Station ><br />
Save. Using this comm<strong>and</strong> no system data blocks are created when saving. The<br />
save procedure takes less time than if you save <strong>and</strong> compile, but you should be<br />
aware that there may be inconsistencies between the configuration saved in the<br />
"Station" object <strong>and</strong> the configuration saved in the system data.<br />
Before downloading, you should check your station configuration for errors using<br />
the menu comm<strong>and</strong> Station > Consistency Check.<br />
<strong>Configuring</strong> <strong>Hardware</strong> <strong>and</strong> <strong>Communication</strong> <strong>Connections</strong> with <strong>STEP</strong> 7<br />
A5E00706939-01 7-1
Saving, Importing <strong>and</strong> Exporting Configurations<br />
7.2 Importing <strong>and</strong> Exporting a Configuration<br />
Introduction<br />
Applications<br />
From <strong>STEP</strong> 7 V5 you can h<strong>and</strong>le station configurations not only together with the<br />
whole project (for example, save or open them), but also export <strong>and</strong> import them<br />
independently of the project in text form (ASCII file).<br />
• You can distribute files by electronic means (for example, by e-mail)<br />
• You can save files for use with future <strong>STEP</strong> 7 versions<br />
• You can print export files using word processing systems or process them for<br />
documentation purposes.<br />
What is exported/imported?<br />
During hardware configuration the data that can be exported or imported are those<br />
data required for the configuration <strong>and</strong> parameter assignment of modules. As of<br />
<strong>STEP</strong> 7 V5.1, Service Pack 1, it is also possible to export <strong>and</strong> import subnet data.<br />
The following data are not acquired:<br />
• Data which are managed via other applications (for example, programs,<br />
connections, shared data)<br />
• The CPU password which was set (for this reason, with F-CPUs the setting<br />
"CPU contains safety program" is reset since it cannot be made without a<br />
password).<br />
• Data not specific to one station (for example, links to intelligent DP slaves or<br />
configuration for direct data exchange)<br />
Note<br />
If your configuration contains modules from earlier optional packages, it is possible<br />
that not all module data will be acquired when you use the "Export Station"<br />
function. In this case, you should check that the module data are complete after<br />
importing.<br />
<strong>Configuring</strong> <strong>Hardware</strong> <strong>and</strong> <strong>Communication</strong> <strong>Connections</strong> with <strong>STEP</strong> 7<br />
7-2 A5E00706939-01
Export File<br />
!<br />
Saving, Importing <strong>and</strong> Exporting Configurations<br />
You can set what is stored in the exported text file <strong>and</strong> in what form it is stored<br />
when you export (Station > Export menu comm<strong>and</strong>):<br />
• Legible or Compact Format<br />
Important: If you export the station configuration in order to read it in with other<br />
<strong>STEP</strong> 7 versions, select the "Compact" option.<br />
• The name of the file can be (*.cfg) freely selected<br />
• With or without symbols<br />
• With or without subnets<br />
• Default values for module parameters can be left out (<strong>STEP</strong> 7 "knows" the<br />
default values <strong>and</strong> adds them from the internal module data when you import)<br />
Caution<br />
If you export a station configuration with symbols, you can no longer import this file<br />
with <strong>STEP</strong> 7 V5, SP 1 or an older <strong>STEP</strong> 7 version.<br />
Procedure (Exporting)<br />
1. Open a station configuration or save the station configuration you are currently<br />
editing (Station > Save menu comm<strong>and</strong>).<br />
2. With a station configuration open, select the menu comm<strong>and</strong> Station ><br />
Export.<br />
3. In the dialog box that appears, enter the path <strong>and</strong> name of the export file, the<br />
format, <strong>and</strong> other options.<br />
4. Confirm your settings with "OK."<br />
Procedure (Importing)<br />
Recommendation: Do not import an exported station configuration from the same<br />
project. In this case, <strong>STEP</strong> 7 cannot resolve the network assignment. For the<br />
import, select a different or new project.<br />
1. Make sure that you have the same Windows language setting for the import as<br />
for the preceding export. Different Windows language settings for export <strong>and</strong><br />
import may lead to errors during imports.<br />
2. With an empty station configuration open, select the menu comm<strong>and</strong> Station<br />
>Import<br />
If no station configuration is open, a dialog box appears for the selection of a<br />
project. In this case, navigate to the project into which you want to import the<br />
station configuration.<br />
3. In the dialog box that appears, navigate to the text file you want to import.<br />
4. Confirm your settings with "OK."<br />
On importing, <strong>STEP</strong> 7 checks the imported file for errors <strong>and</strong> consistency <strong>and</strong><br />
outputs messages.<br />
<strong>Configuring</strong> <strong>Hardware</strong> <strong>and</strong> <strong>Communication</strong> <strong>Connections</strong> with <strong>STEP</strong> 7<br />
A5E00706939-01 7-3
Saving, Importing <strong>and</strong> Exporting Configurations<br />
Importing into an Existing Station<br />
You can also import a station into an open station configuration. On importing,<br />
<strong>STEP</strong> 7 queries whether already configured modules/interface submodules should<br />
be overwritten. For every component you can decide whether you want to keep it<br />
or overwrite it.<br />
When a component is overwritten, all settings (parameters) in the import file<br />
become valid. Any settings that are not included in the import file remain in the<br />
station configuration.<br />
<strong>Configuring</strong> <strong>Hardware</strong> <strong>and</strong> <strong>Communication</strong> <strong>Connections</strong> with <strong>STEP</strong> 7<br />
7-4 A5E00706939-01
7.3 Exporting <strong>and</strong> Importing CAx Data<br />
Saving, Importing <strong>and</strong> Exporting Configurations<br />
As of <strong>STEP</strong> 7 V5.4, you can export stations in a format that is "understood" by CAx<br />
systems, where they can be processed further.<br />
Similarly, you can also export station data from a compatible CAx system <strong>and</strong><br />
import them into a station in an <strong>STEP</strong> 7 project.<br />
In this sense, "CAx" st<strong>and</strong>s for CAD, CAE, E-CAD <strong>and</strong> E-CAE <strong>and</strong> refers to the<br />
data used in these special programs.<br />
This feature saves you from having to enter the same data twice.<br />
What is Exported?<br />
• SIMATIC stations (S7-300, S7-400, S7-400H, PC stations)<br />
• GSD-based modules (PROFIBUS DP, PROFINET IO)<br />
• Subnets<br />
What is Not Exported?<br />
The CAx interface does not supply parameters of objects. For this reason, the<br />
export is not complete, which means that you will have to expect data loss after a<br />
station has been exported <strong>and</strong> then imported. The export is intended to make data<br />
from <strong>Hardware</strong> Configuration in <strong>STEP</strong> 7 usable in CAx systems.<br />
In particular, the following items are not exported:<br />
• Blocks, parameters <strong>and</strong> connections<br />
• CiR submodules (for configuration changes in RUN mode)<br />
• Intelligent DP slaves (I slaves) that are configured in their own station<br />
Export Files<br />
For each station, an export file is created in XML format. This XML file follows the<br />
SimaticML-CAx-v1.0-xsd scheme.<br />
If there are slaves or IO devices in the station that are integrated by means for<br />
GSD files, these files are also copied into the target folder.<br />
<strong>Configuring</strong> <strong>Hardware</strong> <strong>and</strong> <strong>Communication</strong> <strong>Connections</strong> with <strong>STEP</strong> 7<br />
A5E00706939-01 7-5
Saving, Importing <strong>and</strong> Exporting Configurations<br />
Procedure: Exporting CAx Data<br />
Import<br />
1. Open the project containing the stations to be exported.<br />
2. If you want to export an individual station, select it in the SIMATIC Manager. If<br />
you want to export several stations, then select the project (no station<br />
selected).<br />
3. In the SIMATIC Manager, select the Options > CAx Data > Export menu<br />
comm<strong>and</strong>.<br />
4. In the "Export CAx Data" dialog box, select the destination folder, <strong>and</strong>, if<br />
applicable, the stations to be exported.<br />
5. Click the "Export" button.<br />
If an export file from a station is already present in the destination folder, select<br />
the appropriate option in the dialog that is displayed (Replace, Don't<br />
Replace...).<br />
The status (success or failure) of the export process is displayed in the "Status"<br />
column.<br />
An import can be made into an "empty" station or into an already configured<br />
station.<br />
If the station already contains objects (racks, modules, slaves, ...) then a<br />
comparison of the incoming <strong>and</strong> existing objects is carried out during the import.<br />
The result of this comparison are shown in the import dialog box. The following<br />
criteria apply during the comparison:<br />
• Modules/submodules are compared in terms of their slots.<br />
• Subnets are compared in terms of their names <strong>and</strong> types.<br />
• Racks <strong>and</strong> slaves are compared in terms of their numbers.<br />
Procedure: Importing CAx Data<br />
1. Open the station to receive data imported from a CAx system.<br />
2. In the SIMATIC Manager, select the Options > CAx Data > Import menu<br />
comm<strong>and</strong>.<br />
3. In the dialog that is then displayed, go to the XML file that was generated by<br />
the CAx system.<br />
4. Confirm your selection with "OK".<br />
5. In the "Import CAx Data" dialog box, select the objects to be imported<br />
("Selection" column).<br />
If the station to receive data imported from a CAx system already contains<br />
objects, then these objects may have other properties than the objects in the<br />
XML file. In this case, you will have to decide which properties are to apply<br />
(see the Help on the dialog box).<br />
6. Click the "Import" button.<br />
<strong>Configuring</strong> <strong>Hardware</strong> <strong>and</strong> <strong>Communication</strong> <strong>Connections</strong> with <strong>STEP</strong> 7<br />
7-6 A5E00706939-01
Saving, Importing <strong>and</strong> Exporting Configurations<br />
7. After the import is completed, evaluate the status of the objects. If necessary,<br />
take a look at the log of the import process. To do so, click the "Show Log"<br />
button. The log file contains status information on the complete import process.<br />
This log will be overwritten during the next import.<br />
8. If components with GSD files were used in the CAx system, you will have to<br />
install these components for the corresponding stations.<br />
Error Analysis after Import<br />
Errors during imports are shown in red.<br />
If a module or an object cannot be created, check whether the values are set for<br />
the following attributes:<br />
• Order number<br />
• Version<br />
• Submodule<br />
• Slot<br />
• Subslot (for a submodule)<br />
If the modules still cannot be imported, then it is probably incompatible with an<br />
existing configuration.<br />
After the import is complete, you should run a consistency check <strong>and</strong> eliminate any<br />
inconsistencies found.<br />
<strong>Configuring</strong> <strong>Hardware</strong> <strong>and</strong> <strong>Communication</strong> <strong>Connections</strong> with <strong>STEP</strong> 7<br />
A5E00706939-01 7-7
Saving, Importing <strong>and</strong> Exporting Configurations<br />
<strong>Configuring</strong> <strong>Hardware</strong> <strong>and</strong> <strong>Communication</strong> <strong>Connections</strong> with <strong>STEP</strong> 7<br />
7-8 A5E00706939-01
8 Synchronous Operation of Multiple CPUs<br />
(Multicomputing)<br />
8.1 What You Should Know About Multicomputing<br />
What is Multicomputing Operation?<br />
Example<br />
Multicomputing means the simultaneous operation of more than one CPU with<br />
multicomputing capability (up to a maximum of four) in one central rack of the<br />
S7-400.<br />
The participating CPUs automatically change their operating modes synchronously,<br />
meaning the CPUs start up together <strong>and</strong> go into STOP mode together. The user<br />
program for each CPU executes independently of the user programs in the other<br />
CPUs. This means control tasks can be run in parallel.<br />
The following figure shows a programmable controller that will operate in<br />
multicomputing mode. Each CPU can access the modules assigned to it (FM, CP,<br />
SM).<br />
<br />
<br />
<br />
<br />
<br />
<br />
<br />
<br />
<br />
<br />
<br />
<br />
<br />
<br />
<br />
<br />
<br />
<br />
<br />
<br />
<br />
<br />
<br />
<br />
<br />
<br />
<br />
<br />
<br />
<br />
<br />
<br />
<br />
<br />
<br />
<br />
<br />
<br />
<br />
<br />
<br />
<br />
<br />
<br />
<br />
<br />
<br />
<br />
<br />
<br />
<br />
<br />
<br />
<br />
<br />
<br />
<br />
<br />
<br />
<br />
<strong>Configuring</strong> <strong>Hardware</strong> <strong>and</strong> <strong>Communication</strong> <strong>Connections</strong> with <strong>STEP</strong> 7<br />
A5E00706939-01 8-1
Synchronous Operation of Multiple CPUs (Multicomputing)<br />
Difference Between Multicomputing <strong>and</strong> Operation in Segmented Racks<br />
Simultaneous unsynchronized operation of more than one CPU in a segmented<br />
rack CR2 (physically segmented, cannot be set by user) is also possible. This is,<br />
however, not multicomputing. The CPUs in a segmented rack form their own<br />
independent subsystem <strong>and</strong> behave like single processors. There is no shared<br />
address area.<br />
"Multicomputing mode" <strong>and</strong> "unsynchronized operation in a segmented rack" at the<br />
same time is not possible.<br />
<strong>Configuring</strong> <strong>Hardware</strong> <strong>and</strong> <strong>Communication</strong> <strong>Connections</strong> with <strong>STEP</strong> 7<br />
8-2 A5E00706939-01
8.1.1 Special Features of Multicomputing<br />
Slot Rules<br />
Bus Connection<br />
Synchronous Operation of Multiple CPUs (Multicomputing)<br />
In multicomputing mode up to four CPUs can be inserted simultaneously in a<br />
central rack in any order.<br />
If you use CPUs that can manage only module start addresses that are divisible by<br />
four (generally CPUs before 10/98), you must follow this rule for all configured<br />
CPUs when you assign the addresses. The rule applies to a case where you are<br />
also using CPUs that permit byte-by-byte assignment of module start addresses in<br />
single-computing operation.<br />
The CPUs are interconnected via the communication bus (corresponds to a<br />
connection via MPI).<br />
Behavior During Startup <strong>and</strong> Operation<br />
During startup the CPUs in multicomputing operation check automatically whether<br />
they can synchronize. Synchronization is only possible:<br />
• If all (<strong>and</strong> only) the configured CPUs are inserted <strong>and</strong> not defective<br />
• If correct configuration data (SDBs) were created <strong>and</strong> downloaded for all<br />
inserted CPUs.<br />
If one of these prerequisites is not met, the event is entered in the diagnostic<br />
buffer under the ID 0x49A4. You will find explanations of the event IDs in the<br />
reference online help on st<strong>and</strong>ard <strong>and</strong> system functions (SFBs/SFCs).<br />
When the CPUs exit STOP mode, the startup types are compared (COLD<br />
RESTART/WARM RESTART/HOT RESTART). This ensures that all the CPUs in<br />
the programmable controller execute the same type of startup <strong>and</strong> all CPUs have<br />
the same operating mode.<br />
<strong>Configuring</strong> <strong>Hardware</strong> <strong>and</strong> <strong>Communication</strong> <strong>Connections</strong> with <strong>STEP</strong> 7<br />
A5E00706939-01 8-3
Synchronous Operation of Multiple CPUs (Multicomputing)<br />
Address <strong>and</strong> Interrupt Assignment<br />
In multicomputing mode the individual CPUs can access the modules assigned to<br />
them during configuration with <strong>STEP</strong> 7. The address area of a module is always<br />
exclusively assigned to a CPU.<br />
All CPUs share the same address space; this means that the logical address of a<br />
module is only present once in the multi-computing station.<br />
An interrupt input is assigned to every CPU. Interrupts received at this input cannot<br />
be received by the other CPUs. The assignment of the interrupt line is made<br />
automatically during parameter assignment of the modules.<br />
The following rules apply to interrupt servicing:<br />
• <strong>Hardware</strong> interrupts <strong>and</strong> diagnostic interrupts are sent to only one CPU.<br />
• If there is a module failure, the interrupt is serviced by the CPU to which the<br />
module was assigned with <strong>STEP</strong> 7.<br />
• If a rack fails, OB86 is called on every CPU.<br />
You will find more detailed information on OB86 in the reference online help on<br />
organization blocks.<br />
8.1.2 When to Use Multicomputing<br />
Multicomputing has advantages in the following situations:<br />
• When your user program is too large for one CPU <strong>and</strong> memory is used up,<br />
distribute your program among more than one CPU.<br />
• If part of your system must be processed quickly, take these program sections<br />
out of the main program <strong>and</strong> run them on a separate fast CPU.<br />
• If your system consists of various parts that can be clearly delineated <strong>and</strong> can<br />
be controlled relatively autonomously, run the program for system section 1 on<br />
CPU 1 <strong>and</strong> system section 2 on CPU 2 etc.<br />
<strong>Configuring</strong> <strong>Hardware</strong> <strong>and</strong> <strong>Communication</strong> <strong>Connections</strong> with <strong>STEP</strong> 7<br />
8-4 A5E00706939-01
Synchronous Operation of Multiple CPUs (Multicomputing)<br />
8.2 <strong>Configuring</strong> Multicomputing Operation<br />
Setting Multicomputing Operation<br />
Requirements<br />
Basic Procedure<br />
Multicomputing operation results implicitly when you insert a second (third or<br />
fourth) multicomputing CPU in a rack suitable for this kind of operation (for<br />
example, the rack UR1). When a module is selected, the info text in the "<strong>Hardware</strong><br />
Catalog" window tells you whether the CPU has multicomputing capability.<br />
Before you can configure modules in your programmable controller for<br />
multicomputing mode, the following conditions must be satisfied:<br />
• You must have set up your programmable controller as described in the<br />
"S7-400, M7-400 Programmable Controllers, <strong>Hardware</strong> <strong>and</strong> Installation"<br />
manual.<br />
• You must have opened the configuration table in the project window by doubleclicking<br />
the "<strong>Hardware</strong>" object.<br />
• You must have arranged a rack in the station window <strong>and</strong> the rack is shown as<br />
being open (the rack slots are visible).<br />
<br />
<br />
<br />
<br />
Note when Downloading <strong>and</strong> Uploading<br />
Only the complete station configuration should be downloaded to all CPUs. This<br />
avoids inconsistent configurations.<br />
When uploading to a programming device, the station configuration is loaded from<br />
all programmable modules, one after another (CPU by CPU). You have the option<br />
of aborting the upload process even if not all the configuration data (SDBs) were<br />
uploaded. In this case, parameter assignment information will be lost.<br />
<strong>Configuring</strong> <strong>Hardware</strong> <strong>and</strong> <strong>Communication</strong> <strong>Connections</strong> with <strong>STEP</strong> 7<br />
A5E00706939-01 8-5
Synchronous Operation of Multiple CPUs (Multicomputing)<br />
8.2.1 <strong>Configuring</strong> Modules for Multicomputing Operation<br />
To configure the programmable controller in multicomputing mode, proceed as<br />
follows:<br />
1. Use the drag & drop function to copy the CPUs you want to work in<br />
multicomputing operation from the "<strong>Hardware</strong> Catalog" window to the<br />
appropriate rows of the rack.<br />
2. Double-click on a CPU <strong>and</strong> set the CPU number in the "Multicomputing" tab<br />
(when you insert the CPU, the CPU numbers are assigned automatically in<br />
ascending order).<br />
3. For all modules to be assigned to CPU1, proceed as follows:<br />
- Arrange the modules at the intended position in the rack.<br />
- Double-click on the module <strong>and</strong> select the "Addresses" tab.<br />
- In the "CPU No." box select CPU 1.<br />
Note: The CPU assignment is displayed for modules that can trigger<br />
interrupts in the "Inputs" or "Outputs" tab as the "Target CPU for interrupt."<br />
4. Repeat the steps listed under 3 for the modules that are to be assigned to the<br />
remaining CPUs.<br />
8.2.2 Displaying the CPU Assignment<br />
You have a choice of two methods of highlighting the modules that are assigned to<br />
a specific CPU:<br />
• Select the menu comm<strong>and</strong> View > Filter > CPU No. x - Modules (x = CPU<br />
number).<br />
All module names in the configuration table that are not assigned to this CPU<br />
are grayed out (exception: distributed I/O modules, interface modules, <strong>and</strong><br />
power supplies).<br />
• Select the relevant CPU <strong>and</strong> select the pop-up menu comm<strong>and</strong> Filter<br />
Assigned Modules.<br />
Note<br />
The filter you set has no effect on the print function or the "Address Overview"<br />
dialog box.<br />
You can modify the CPU assignment via the "Addresses" tab (exception: interface<br />
modules <strong>and</strong> power supplies).<br />
<strong>Configuring</strong> <strong>Hardware</strong> <strong>and</strong> <strong>Communication</strong> <strong>Connections</strong> with <strong>STEP</strong> 7<br />
8-6 A5E00706939-01
8.2.3 Changing the CPU Number<br />
Synchronous Operation of Multiple CPUs (Multicomputing)<br />
If you have inserted several CPUs <strong>and</strong> want to change the CPU number, proceed<br />
as follows:<br />
1. If four CPUs are inserted: Delete one of the inserted CPUs.<br />
If two or three CPUs are inserted: Continue with the next step.<br />
2. Double-click the CPU whose number you want to change.<br />
3. Select the "Multicomputing" tab.<br />
4. Select the required CPU number.<br />
<strong>Configuring</strong> <strong>Hardware</strong> <strong>and</strong> <strong>Communication</strong> <strong>Connections</strong> with <strong>STEP</strong> 7<br />
A5E00706939-01 8-7
Synchronous Operation of Multiple CPUs (Multicomputing)<br />
8.3 Programming CPUs<br />
Programming<br />
Programming for the multicomputing mode is essentially the same as programming<br />
a single CPU.<br />
Extra steps are, however, necessary if you want to synchronize the CPUs so that<br />
they react to events together.<br />
Calling SFC35<br />
If you want all the CPUs to react to events (for example, interrupts) together in the<br />
multicomputing mode, you program an SFC35 "MP_ALM" call. Calling SFC35<br />
triggers a multicomputing interrupt that causes a synchronized request for OB60 on<br />
all CPUs. This OB contains local variables that specify the triggering event in<br />
greater detail.<br />
When SFC35 is called, the information about the events is transferred to all CPUs<br />
in a job identifier. The job identifier allows 16 different events to be distinguished.<br />
When they service the multicomputing interrupt, both the sending user program<br />
<strong>and</strong> the user programs on the other CPUs check whether or not they recognize the<br />
job <strong>and</strong> then react as programmed.<br />
You can call SFC35 at any point in your program. Since the call is only of practical<br />
use in RUN mode, the multicomputing interrupt is suppressed if it is triggered in<br />
STARTUP mode.<br />
The multicomputing interrupt can only be triggered again after the current<br />
multicomputing interrupt has been serviced (acknowledged).<br />
You will find more detailed information on SFC35 in the reference online help on<br />
SFBs/SFCs.<br />
Programming OB60<br />
You can program a specific OB60 for each separate CPU <strong>and</strong> download it to the<br />
CPU. This means that the execution times can differ from CPU to CPU. This leads<br />
to the following behavior:<br />
• The interrupted priority classes on the CPUs are continued at different times.<br />
• A multicomputing interrupt is not serviced if it occurs during the execution of<br />
OB60 on any of the CPUs. A message is, however, generated <strong>and</strong> you can<br />
check this <strong>and</strong> react accordingly.<br />
If OB60 is not loaded on one of the CPUs, this CPU returns immediately to the last<br />
priority class <strong>and</strong> continues the program there.<br />
You will find more detailed information on OB86 in the reference online help on<br />
organization blocks.<br />
<strong>Configuring</strong> <strong>Hardware</strong> <strong>and</strong> <strong>Communication</strong> <strong>Connections</strong> with <strong>STEP</strong> 7<br />
8-8 A5E00706939-01
9 Modifying the System during Operation<br />
(CiR)<br />
CiR (Configuration in RUN) represents a method you can use to modify a system<br />
that is operated with a st<strong>and</strong>ard S7-400 CPU or an S7-400-H-CPU in single<br />
operation. Modifications are made while your system is in operation, that is, except<br />
for a small interval of at most 2.5 seconds, your CPU will remain in RUN mode.<br />
For more information, refer to the "Modifying the System During Operation via CiR"<br />
manual. It is also available electronically as a PDF file.<br />
<strong>Configuring</strong> <strong>Hardware</strong> <strong>and</strong> <strong>Communication</strong> <strong>Connections</strong> with <strong>STEP</strong> 7<br />
A5E00706939-01 9-1
Modifying the System during Operation (CiR)<br />
<strong>Configuring</strong> <strong>Hardware</strong> <strong>and</strong> <strong>Communication</strong> <strong>Connections</strong> with <strong>STEP</strong> 7<br />
9-2 A5E00706939-01
10 <strong>Configuring</strong> H-Systems<br />
Overview<br />
H-systems ("high-availability" systems) are fault-tolerant automation systems that<br />
are employed to increase system availability <strong>and</strong> thus reduce production stops <strong>and</strong><br />
downtimes.<br />
For more information, refer to the "Automation System S7-400H - Fault-tolerant<br />
Systems" manual.<br />
<strong>Configuring</strong> <strong>Hardware</strong> <strong>and</strong> <strong>Communication</strong> <strong>Connections</strong> with <strong>STEP</strong> 7<br />
A5E00706939-01 10-1
<strong>Configuring</strong> H-Systems<br />
<strong>Configuring</strong> <strong>Hardware</strong> <strong>and</strong> <strong>Communication</strong> <strong>Connections</strong> with <strong>STEP</strong> 7<br />
10-2 A5E00706939-01
11 Networking Stations<br />
11.1 Networking Stations within a Project<br />
Context: Network Configuration <strong>and</strong> <strong>STEP</strong> 7 Projects<br />
Subnets lie directly beneath a project in the object hierarchy <strong>and</strong> can therefore only<br />
be managed within a project. You can, however, connect nodes together that were<br />
configured in different projects.<br />
If possible, you should create <strong>and</strong> configure nodes that you want to connect in<br />
networks in the same project.<br />
Subnets <strong>and</strong> Stations<br />
You can create the subnets <strong>and</strong> stations in a <strong>STEP</strong> 7 project <strong>and</strong> then configure<br />
the stations for communication very easily.<br />
As a result of the different tasks of the stations or the fact that the plant has<br />
increased in size <strong>and</strong> scope, it may be necessary to run a number of subnets.<br />
These subnets can also be managed in one project. A station can be assigned to a<br />
number of subnets by assigning the communication nodes (for example, CPs)<br />
accordingly.<br />
<br />
<br />
<br />
<br />
<br />
<br />
<br />
<br />
<br />
<br />
<br />
<strong>Configuring</strong> <strong>Hardware</strong> <strong>and</strong> <strong>Communication</strong> <strong>Connections</strong> with <strong>STEP</strong> 7<br />
A5E00706939-01 11-1
Networking Stations<br />
11.2 Properties of Subnets <strong>and</strong> <strong>Communication</strong> Nodes<br />
Setting the Properties of Subnets <strong>and</strong> <strong>Communication</strong> Nodes in a Project<br />
It does not matter whether you are intending to communicate in the network using<br />
global data or communication connections: the basis for communication is always<br />
a configured network.<br />
With <strong>STEP</strong> 7:<br />
• You create a graphic view of your network (comprising one or more subnets)<br />
• You set the subnet properties/parameters for each subnet<br />
• You set the node properties for each networked module<br />
• You document your network configuration.<br />
The following table shows how you are given support by <strong>STEP</strong> 7 when configuring<br />
your communication task.<br />
<strong>Communication</strong> Method Configured How? Remarks<br />
PROFIBUS-DP <strong>Configuring</strong> the hardware Also possible in NetPro<br />
Actuator-sensor interface (AS-i) <strong>Configuring</strong> the hardware Linked to S7 stations via the<br />
DP/AS-i Link<br />
<strong>Communication</strong> by means of non- <strong>Configuring</strong> the hardware Set the properties of the MPI<br />
configured connections (S7<br />
subnet <strong>and</strong> the MPI nodes.<br />
St<strong>and</strong>ard communication)<br />
The user program provides special<br />
system functions for nonconfigured<br />
connections.<br />
<strong>Communication</strong> by means of NetPro (<strong>Configuring</strong> Networks S7 <strong>and</strong> point-to-point (PTP)<br />
configured connections (S7 <strong>and</strong> <strong>Connections</strong>)<br />
connections can be configured<br />
communication)<br />
with the <strong>STEP</strong> 7 St<strong>and</strong>ard<br />
package. Optional packages are<br />
required for other connection types<br />
(for example, FMS for<br />
PROFIBUS).<br />
Global data communication Defining Global Data Set the properties of the MPI<br />
subnet <strong>and</strong> the MPI nodes <strong>and</strong><br />
configure address areas for data<br />
exchange in the GD table<br />
<strong>Configuring</strong> <strong>Hardware</strong> <strong>and</strong> <strong>Communication</strong> <strong>Connections</strong> with <strong>STEP</strong> 7<br />
11-2 A5E00706939-01
11.3 Rules for Network Configuration<br />
You should observe the following rules for configuring networks:<br />
Networking Stations<br />
Every node in a subnet must have a different node address.<br />
CPUs are shipped with the default node address 2. However, you can only use this<br />
address once in a subnet, so you will have to change the default address for any<br />
other CPUs.<br />
For S7-300 stations, the following applies: When planning the MPI addresses for a<br />
number of CPUs you must leave "MPI address gaps" for FMs <strong>and</strong> CPs with their<br />
own MPI addresses to avoid double address assignments.<br />
Only when all the modules in a subnet have unique addresses <strong>and</strong> when your<br />
actual structure matches the network configuration you have created should you<br />
load the settings via the network.<br />
Assigning MPI Addresses<br />
• Assign the MPI addresses in ascending order.<br />
• Reserve the MPI address 0 for a programming device.<br />
• You can connect up to 126 (addressable) nodes in an MPI network; up to 8<br />
nodes for a transmission rate of 19.2 kbits/s.<br />
• All MPI addresses in an MPI subnet must be unique.<br />
Refer to the S7-300 or S7-400 <strong>Hardware</strong> Installation Manuals for other rules<br />
concerning the installation of a network.<br />
Assigning PROFIBUS Addresses<br />
• Every DP master <strong>and</strong> DP slave in the PROFIBUS network must be assigned a<br />
unique PROFIBUS address in the range 0 through 125.<br />
• Assign the PROFIBUS addresses in ascending order.<br />
• Reserve the "0" PROFIBUS address for a programming device that you later<br />
connect briefly to the PROFIBUS network for service purposes.<br />
<strong>Configuring</strong> <strong>Hardware</strong> <strong>and</strong> <strong>Communication</strong> <strong>Connections</strong> with <strong>STEP</strong> 7<br />
A5E00706939-01 11-3
Networking Stations<br />
11.4 Ethernet Address Assignment<br />
To configure an Ethernet CP, you must assign a MAC address or IP address to the<br />
Ethernet interface.<br />
You can find extensive information on Ethernet CPs in the SIMATIC NCM<br />
documentation. In this documentation you can find principal information on how to<br />
configure an Ethernet partner in <strong>STEP</strong> 7.<br />
<strong>Configuring</strong> Partners <strong>and</strong> Determining the Interface Properties<br />
1. In the opened hardware configuration, select an Ethernet CP from the<br />
hardware catalog. Drag <strong>and</strong> drop it to a suitable row of the configuration table.<br />
2. Double-click on the CP symbol in the configuration table<br />
3. In the "General" tab, click on "Properties" (this button is located in the area of<br />
the interface parameters).<br />
4. Establish a network assignment, that is, in the "Subnet" field, highlight an<br />
existing Ethernet subnet or click on "New" to create a new Ethernet subnet.<br />
5. Enter the MAC address or IP address in the "Parameter" tab.<br />
The appearance of this part of the tab depends on the type of CP.<br />
MAC Address<br />
Every Ethernet CP requires a unique MAC address that must be entered when a<br />
CP is configured. As a rule, the manufacturer has imprinted this address on the<br />
module.<br />
The box looks as follows for CP requiring the input of a MAC address:<br />
The box looks as follows for new CPs equipped with a fixed factory set MAC<br />
address - <strong>and</strong> therefore not requiring the input of a MAC address:<br />
You must check the checkbox <strong>and</strong> enter the module MAC address only if you are<br />
using the ISO protocol (for example, for ISO network-independent transport<br />
connections), or if you are using the ISO as well as the TCP/IP protocol.<br />
You must not activate the checkbox if you want to configure only communication<br />
types that require TCP/IP protocol (TCP connections, ISO-over-TCP connections,<br />
UDP connections). In this case, you can not enter a MAC address <strong>and</strong> the address<br />
that is imprinted on the module is maintained.<br />
<strong>Configuring</strong> <strong>Hardware</strong> <strong>and</strong> <strong>Communication</strong> <strong>Connections</strong> with <strong>STEP</strong> 7<br />
11-4 A5E00706939-01
IP Address<br />
Networking Stations<br />
The IP parameters are only visible if the Ethernet CP supports the TCP/IP protocol.<br />
The IP address consists of 4 decimal numbers, value range from 0 to 255. The<br />
decimal numbers are separated by a dot.<br />
The IP address consists of<br />
• The (sub)net address<br />
• The partner address (generally referred to as host or network node)<br />
The subnet mask separates those two addresses. It determines the IP address<br />
sections used to address the network <strong>and</strong> the node IP.<br />
The set bits of the subnet mask determine the network component of the IP<br />
address.<br />
In the example above:<br />
Subnet mask: 255.255.0.0 = 11111111.11111111.00000000.00000000<br />
Meaning: the first 2 bytes of the IP address determine the subnet - that is, 140.80.<br />
The last two bytes address the node - that is, 2.<br />
Generally valid is:<br />
• The network address is the result of the logic operation IP address AND subnet<br />
mask.<br />
• The node address is the result of the logic operation IP address AND NOT<br />
subnet mask.<br />
<strong>Configuring</strong> <strong>Hardware</strong> <strong>and</strong> <strong>Communication</strong> <strong>Connections</strong> with <strong>STEP</strong> 7<br />
A5E00706939-01 11-5
Networking Stations<br />
Relationship between the IP address <strong>and</strong> the default subnet mask<br />
The relationship between the IP address areas <strong>and</strong> the so-called "Default Subnet<br />
Masks" is defined. The first decimal of the (left to right) determines the (binary)<br />
structure of the default, that is, the number of "1" values as follows:<br />
IP address (dec.) IP address (bin.) Address class Default subnet mask<br />
0 to 126 0xxxxxxx.xxxxxxxx.... A 255.0.0.0<br />
128 to 191 10xxxxxx.xxxxxxxx... B 255.255.0.0<br />
192 to 223 110xxxxx.xxxxxxxx... C 255.255.255.0<br />
Note<br />
The first decimal number of the IP address can also have a value between 224 <strong>and</strong><br />
255 (address class D etc). However, we recommend you do not use these values,<br />
as <strong>STEP</strong> 7 does not check them.<br />
Forming further subnet masks<br />
The subnet mask allows you to extend the structure of a subnet that is assigned to<br />
address class A, B or C <strong>and</strong> to create "private" subnets by setting the least<br />
significant bits of the subnet mask to "1". The number of "private" networks will<br />
double with each bit that is set to "1" <strong>and</strong> reduces the number of network nodes to<br />
half. Seen from the outside this still network has the same effect as a single<br />
network.<br />
Example:<br />
In an address class B subnet (e.g.. IP address 129.80.xxx.xxx) you change the<br />
default subnet mask as follows:<br />
Masks Decimal Binary<br />
Default subnet mask 255.255.0.0 11111111.11111111.00000000.00000000<br />
Subnet mask 255.255.128.0 11111111.11111111.10000000.00000000<br />
Result:<br />
All nodes at the addresses 129.80.001.xxx to 129.80.127.xxx are assigned to the<br />
same subnet, whereas all nodes at the addresses 129.80.128.xxx to<br />
129.80.255.xxx are assigned to a different subnet.<br />
Network gateway (Router)<br />
Network gateways (routers) interconnect subnets. An IP datagram sent to another<br />
network must first be passed on to a router. To enable this feature, you must enter<br />
the router address for each one of the network nodes.<br />
The IP address of a subnet node <strong>and</strong> of the network gateway (router) may only<br />
differ at the "0" bits of the subnet mask.<br />
<strong>Configuring</strong> <strong>Hardware</strong> <strong>and</strong> <strong>Communication</strong> <strong>Connections</strong> with <strong>STEP</strong> 7<br />
11-6 A5E00706939-01
Networking Stations<br />
11.5 Importing <strong>and</strong> Exporting Stations in the Network View<br />
Introduction<br />
As of <strong>STEP</strong> 7 V5.1, Service Pack 1, in the network view, you can export <strong>and</strong> import<br />
as a text file (ASCII file) those station configurations that have network data but do<br />
not have connection data.<br />
If you export several stations of a <strong>STEP</strong> 7 project that are networked with each<br />
other <strong>and</strong> then import them into another project, these stations are again<br />
networked with each other as they were in the original project.<br />
Applications<br />
• Can be distributed by means of electronic media (for example, e-mail)<br />
• Can be read into future <strong>STEP</strong> 7 versions<br />
• Export file can be printed out with word processing systems or processed<br />
further for documentation purposes<br />
Which Network Objects Can Be Exported Or Imported?<br />
You can export <strong>and</strong> import SIMATIC 300, SIMATIC 400, SIMATIC 400H, <strong>and</strong><br />
SIMATIC PC stations.<br />
What Is Exported/Imported?<br />
With import <strong>and</strong> export from the network view, data can be exported/imported that<br />
are required for configuration <strong>and</strong> parameter assignment of the modules, as well as<br />
the network configuration.<br />
The network configuration includes:<br />
• Interface parameter assignments (for example, subnet screen <strong>and</strong> router<br />
settings of an Industrial Ethernet interface, bus parameters of a PROFIBUS<br />
interface)<br />
• Assignment to the subnets<br />
• <strong>Connections</strong><br />
Not included:<br />
• Data that are managed by means of other applications (for example, programs,<br />
global data)<br />
• <strong>Connections</strong><br />
• CPU password assigned as parameter<br />
• Data that apply to more than one station (for example, the linking of intelligent<br />
DP slaves or configuration for direct data exchange)<br />
Note<br />
If your configuration contains modules from older option packages, it is possible<br />
that not all data of the module are included in the export function. In this case,<br />
check to see if the module data are complete after the import is finished.<br />
<strong>Configuring</strong> <strong>Hardware</strong> <strong>and</strong> <strong>Communication</strong> <strong>Connections</strong> with <strong>STEP</strong> 7<br />
A5E00706939-01 11-7
Networking Stations<br />
Export Files<br />
!<br />
A text file (*.cfg) is created for each exported station. The default name is "[station<br />
name].cfg".<br />
For each station, you can set separately during export what is stored in the<br />
exported text file <strong>and</strong> in what form the information is stored (menu comm<strong>and</strong> Edit ><br />
Export):<br />
• Readable or compact form<br />
Important: If you are exporting the station configuration in order to read it in<br />
with other <strong>STEP</strong> 7 versions, select the option "Compact"!<br />
• Name of the file (*.cfg) for each individual station can be anything you want<br />
• With or without symbols<br />
• Preset values for module parameters can be left out optionally (<strong>STEP</strong> 7<br />
"recognizes" preset values <strong>and</strong> supplements them during import from the<br />
internal module knowledge pool)<br />
• Option "Export Subnets" - by selecting this option, you can also read in the<br />
station configuration with older <strong>STEP</strong> 7 versions (<strong>STEP</strong> 7 => V5.0).<br />
• Option "Export <strong>Connections</strong>" - you can select this option to download the station<br />
configuration with older <strong>STEP</strong> 7 versions (<strong>STEP</strong> 7 => V5.0).<br />
In order to simplify h<strong>and</strong>ling the import procedure already during export, you can<br />
import all exported stations together later with the option "With Reference File." To<br />
do this, you must select a name for this reference file (also a *.cfg file) that contains<br />
references to all the stations that were exported together. When you select this file<br />
later during import, all the stations that were exported together are imported again<br />
automatically.<br />
Caution<br />
If you export a station configuration with symbols, you can no longer import this file<br />
with <strong>STEP</strong> 7 V5, SP 1, or an older <strong>STEP</strong> 7 version.<br />
<strong>Configuring</strong> <strong>Hardware</strong> <strong>and</strong> <strong>Communication</strong> <strong>Connections</strong> with <strong>STEP</strong> 7<br />
11-8 A5E00706939-01
Procedure (Export)<br />
Procedure (Import)<br />
Networking Stations<br />
1. Open the network view or save the network configuration that you just edited<br />
(menu comm<strong>and</strong> Network > Save).<br />
2. Select one or more stations that you want to export.<br />
The Export dialog box opens. In this dialog box, you can select from a list the<br />
stations of the project to be exported.<br />
3. Select the menu comm<strong>and</strong> Edit > Export.<br />
4. In the dialog box that appears, enter the path <strong>and</strong> name of the export files, the<br />
format, <strong>and</strong> other options.<br />
5. Format <strong>and</strong> options can be customized for each station separately.<br />
Select the "Compact" format if you intend to use the export file for other<br />
<strong>STEP</strong> 7 versions.<br />
6. Acknowledge the settings with OK.<br />
1. With the network view open, select the menu comm<strong>and</strong> Edit > Import.<br />
2. In the dialog box that appears, navigate to the text file that you want to import.<br />
If you exported several stations together by using the option "With Reference<br />
File," select only this reference file to import all stations with their network<br />
assignment together again.<br />
3. Acknowledge the settings with OK.<br />
During import, <strong>STEP</strong> 7 checks the imported files for errors <strong>and</strong> consistency <strong>and</strong><br />
outputs messages.<br />
If both connection partners are imported into a project, <strong>STEP</strong> 7 will then attempt to<br />
restore the connections between these partners.<br />
<strong>Configuring</strong> <strong>Hardware</strong> <strong>and</strong> <strong>Communication</strong> <strong>Connections</strong> with <strong>STEP</strong> 7<br />
A5E00706939-01 11-9
Networking Stations<br />
11.6 How to Configure <strong>and</strong> Save a Subnet<br />
11.6.1 Procedure for <strong>Configuring</strong> a Subnet<br />
Method 1: <strong>Configuring</strong> <strong>Hardware</strong><br />
You have the possibility of creating subnets <strong>and</strong> connecting modules (or rather,<br />
their interfaces) to a subnet when you configure a station.<br />
<br />
<br />
<br />
<br />
<br />
<br />
<br />
<br />
<br />
<br />
<br />
<br />
<br />
<br />
<br />
<strong>Configuring</strong> <strong>Hardware</strong> <strong>and</strong> <strong>Communication</strong> <strong>Connections</strong> with <strong>STEP</strong> 7<br />
11-10 A5E00706939-01
Method 2: <strong>Configuring</strong> Networks<br />
Networking Stations<br />
For complex networked systems it is more advantageous to work in the network<br />
view.<br />
<br />
<br />
<br />
<br />
<br />
<br />
<br />
<br />
<br />
<br />
<br />
<br />
<br />
<br />
<br />
Exp<strong>and</strong>ing the Network Configuration in NetPro<br />
You have the possibility in NetPro of inserting all network objects such as subnets<br />
or stations by dragging them from a catalog <strong>and</strong> dropping them in the network<br />
view.<br />
What else is to be done after you have inserted the objects:<br />
• Set the object properties by double-clicking the objects<br />
• For an inserted station: start the <strong>Hardware</strong> Configuration application by doubleclicking<br />
the station <strong>and</strong> place the modules.<br />
<strong>Configuring</strong> <strong>Hardware</strong> <strong>and</strong> <strong>Communication</strong> <strong>Connections</strong> with <strong>STEP</strong> 7<br />
A5E00706939-01 11-11
Networking Stations<br />
Opening the Graphic Network View (Starting NetPro)<br />
You can use the following methods to start the network configuration application:<br />
From the SIMATIC Manager From <strong>Configuring</strong> <strong>Hardware</strong><br />
1. Open the project<br />
2. Double-click a subnet symbol (having created a<br />
subnet using the menu comm<strong>and</strong> Insert > Subnet ><br />
... if necessary)<br />
Alternatively you can also double-click the "<strong>Connections</strong>" object<br />
(icon found under a module that is a connection end point, for<br />
example, a CPU). In this case the connection table for the<br />
module is opened for editing when NetPro is started.<br />
Example of a Graphic Network View<br />
Menu comm<strong>and</strong> Options > Configure<br />
Network<br />
When you have opened the network configuration application, the window for the<br />
graphic view of the network is displayed. The first time you select it, the following<br />
are visible:<br />
• All the existing subnets created in the project<br />
• All the existing stations configured in the project<br />
<br />
<br />
<br />
<br />
<br />
<br />
<br />
<br />
<br />
<br />
<br />
<br />
<br />
<strong>Configuring</strong> <strong>Hardware</strong> <strong>and</strong> <strong>Communication</strong> <strong>Connections</strong> with <strong>STEP</strong> 7<br />
11-12 A5E00706939-01
Editing a Station in NetPro<br />
Networking Stations<br />
If you double-click an area of the station symbol you can further edit the station:<br />
<br />
<br />
<br />
<br />
<br />
<br />
<br />
Color Coding in the Network View<br />
<br />
<br />
After their configurations have been changed (in NetPro or in HW Config), S7<br />
stations are color-coded to indicate their status:<br />
• An orange-colored S7 station means that the configuration was changed (i.e.<br />
that the changes have to be compiled).<br />
• An red-colored S7 station means that the changed configuration is not<br />
consistent <strong>and</strong> thus cannot be compiled. In this case, you will have to eliminate<br />
the errors detected <strong>and</strong> logged during a consistency check.<br />
An inconsistent station is colored red only after a consistency check has been<br />
carried out; that is, after you have selected the Network > Check Consistency<br />
or Network > Save <strong>and</strong> Compile menu comm<strong>and</strong>.<br />
The red color coding is not saved when the station is saved. This means that<br />
this color coding will be current <strong>and</strong> complete only after a consistency check<br />
has been carried out again.<br />
<strong>STEP</strong> 7 does not detect every need for a compilation after the configuration has<br />
been changed:<br />
• If more than one master is connected to a PROFIBUS subnet <strong>and</strong> a slave that<br />
causes a change in the bus parameters is being connected to the subnet: The<br />
need for a compilation is only detected for the station of the master system to<br />
which the newly added slave is assigned. The other master system that is also<br />
connected to the same PROFIBUS subnet will not be color coded.<br />
• If you change the node address of an interface in an S7 station <strong>and</strong> this station<br />
functions as a router (S7 routing) for accesses by programming devices (PG):<br />
In this case, the other S7 stations on the subnet will also have to be compiled<br />
<strong>and</strong> downloaded so that they receive the routing information. However, these<br />
stations will not be color coded.<br />
<strong>Configuring</strong> <strong>Hardware</strong> <strong>and</strong> <strong>Communication</strong> <strong>Connections</strong> with <strong>STEP</strong> 7<br />
A5E00706939-01 11-13
Networking Stations<br />
11.6.2 Creating <strong>and</strong> Assigning Parameters to a New Subnet<br />
Requirement<br />
Procedure<br />
Tips:<br />
NetPro must be open.<br />
Note<br />
<strong>STEP</strong> 7 automatically <strong>and</strong> centrally sets consistent subnet properties (e.g.<br />
transmission rate) for all nodes in a given subnet.<br />
If you set or modify subnet properties in <strong>STEP</strong> 7, you must make sure that each<br />
node in the system subnet adopts these settings (Downloading a Configuration to a<br />
Programmable Controller ).<br />
1. If the "Catalog" window is not visible:<br />
Open the "Catalog" window using the menu comm<strong>and</strong> View > Catalog.<br />
2. Click on "Subnets" in the "Catalog" window.<br />
3. Click on the required subnet, hold the mouse button pressed, <strong>and</strong> use the drag<br />
& drop function to copy the subnet to the window for the graphic network view.<br />
Invalid positions for subnets in the view window are shown by a sign instead<br />
of the cursor.<br />
Result: The subnet appears as a horizontal line.<br />
4. Double-click the symbol for the subnet.<br />
Result: The properties dialog box for the subnet is displayed.<br />
5. Assign parameters to the subnet.<br />
You can open an information window giving details about the subnet properties by<br />
holding the mouse on the symbol for the subnet.<br />
<strong>Configuring</strong> <strong>Hardware</strong> <strong>and</strong> <strong>Communication</strong> <strong>Connections</strong> with <strong>STEP</strong> 7<br />
11-14 A5E00706939-01
11.6.3 Creating <strong>and</strong> Assigning Parameters to a New Station<br />
Requirement<br />
Procedure<br />
NetPro must be open.<br />
Networking Stations<br />
1. If the "Catalog" window is not visible:<br />
Open the "Catalog" window using the menu comm<strong>and</strong> View > Catalog.<br />
2. Click on "Stations" in the "Catalog" window.<br />
3. Click on the required type of station, hold the mouse button pressed, <strong>and</strong> use<br />
the drag & drop function to copy the station to the window for the graphic<br />
network view.<br />
Invalid positions for stations in the view window are shown by a sign instead<br />
of the cursor.<br />
4. Double-click the station (station symbol or station name).<br />
You can now enter the whole hardware configuration for the station <strong>and</strong> assign<br />
its parameters, but you must assign the CPU, <strong>and</strong> any FMs <strong>and</strong> CPs to a<br />
suitable slot. Only these modules can be networked <strong>and</strong> appear in the graphic<br />
network view.<br />
5. Save the hardware configuration.<br />
6. Switch back to NetPro using the taskbar (in Windows).<br />
Result: The node interfaces available are displayed in the station.<br />
Important:<br />
Before you switch between the station configuration <strong>and</strong> NetPro, you must save<br />
the data you entered, otherwise the database will not be updated.<br />
Tip<br />
You can open an information window giving details about the station properties by<br />
holding the mouse on the symbol for the station.<br />
<strong>Configuring</strong> <strong>Hardware</strong> <strong>and</strong> <strong>Communication</strong> <strong>Connections</strong> with <strong>STEP</strong> 7<br />
A5E00706939-01 11-15
Networking Stations<br />
11.6.4 Creating <strong>and</strong> Assigning Parameters to a Network Connection<br />
Requirement<br />
Procedure<br />
NetPro must be open <strong>and</strong> the existing configured stations must be visible.<br />
1. Click on the symbol for the interface of a node ( ), hold the mouse button<br />
pressed, <strong>and</strong> drag the mouse pointer to the subnet.<br />
In the case of invalid connection options (for example, connecting an MPI<br />
interface to an Ethernet-type subnet), the mouse cursor changes its shape to<br />
indicate that the action is prohibited.<br />
Prohibited action:<br />
Result: The network connection appears as a vertical line between the<br />
station/DP slave <strong>and</strong> the subnet. If the View > Reduced Subnet Lengths<br />
menu comm<strong>and</strong> is selected, the subnet automatically increases in length so<br />
that the network connection is located vertically above the interface.<br />
2. Double-click the symbol for the network connection or the symbol for the<br />
interface.<br />
Result: The properties dialog box for the subnet node is displayed.<br />
3. Assign the node properties (for example, the name <strong>and</strong> address of the node).<br />
The following illustration shows the dragging movement of the mouse cursor when<br />
the View > Reduced Subnet Lengths option is selected.<br />
<strong>Configuring</strong> <strong>Hardware</strong> <strong>and</strong> <strong>Communication</strong> <strong>Connections</strong> with <strong>STEP</strong> 7<br />
11-16 A5E00706939-01
Tips<br />
Networking Stations<br />
You can open an information window giving details about the interface properties<br />
(module name, subnet type, <strong>and</strong>, if networked, the node address) by holding the<br />
mouse on the interface symbol.<br />
You can show or hide this brief information ("quick info"). To do so, select the<br />
Options > Customize menu comm<strong>and</strong>. In the "Customize" dialog box that is then<br />
displayed, go to the "Editor" tab <strong>and</strong> select or clear the "Display brief information"<br />
check box as required.<br />
<strong>Configuring</strong> <strong>Hardware</strong> <strong>and</strong> <strong>Communication</strong> <strong>Connections</strong> with <strong>STEP</strong> 7<br />
A5E00706939-01 11-17
Networking Stations<br />
11.6.5 Creating <strong>and</strong> Assigning Parameters to a New DP Slave<br />
Requirement:<br />
Procedure<br />
Tips<br />
• You must have assigned a DP master to a station when you configured the<br />
hardware in the configuration table.<br />
• DP slaves are displayed in the network view (if not: select the menu comm<strong>and</strong><br />
View > with DP Slaves).<br />
1. If the "Catalog" window is not visible:<br />
Open the "Catalog" window using the menu comm<strong>and</strong> View > Catalog.<br />
2. In the network view, select the DP master in a station to which you want to<br />
assign the DP slave.<br />
3. In the "Catalog" window click on the required DP slave (under "PROFIBUS-<br />
DP"), hold the mouse button pressed, <strong>and</strong> use the drag & drop function to copy<br />
it to the window for the graphic network view.<br />
Invalid positions for DP slaves in the view window are shown by a sign<br />
instead of the cursor.<br />
Alternatively you can also double-click the required DP slave in the "Catalog"<br />
window.<br />
4. In the properties dialog box which opens automatically, assign a node address<br />
for the DP slave.<br />
Result: The DP slave appears in the network view together with its network<br />
connection.<br />
5. To assign parameters/set addresses: double-click the DP slave.<br />
Result: <strong>Configuring</strong> <strong>Hardware</strong> is started <strong>and</strong> the DP slave is selected.<br />
6. Set the properties for the DP slave.<br />
You can open an information window giving details about the DP slave properties<br />
by holding the mouse on the symbol for the DP slave.<br />
To find slaves faster in the NetPro catalog, use the "Find" box in the Catalog. This<br />
search tool functions just like the one in the <strong>Hardware</strong> Catalog in HW Config.<br />
<strong>Configuring</strong> <strong>Hardware</strong> <strong>and</strong> <strong>Communication</strong> <strong>Connections</strong> with <strong>STEP</strong> 7<br />
11-18 A5E00706939-01
11.6.6 Creating <strong>and</strong> Assigning Parameters to Programming<br />
Devices/PCs, 'Other' Stations, <strong>and</strong> S5 Stations<br />
Overview<br />
Networking Stations<br />
What do you do with network nodes that cannot be configured in the current<br />
<strong>STEP</strong> 7 project such as programming devices (PGs), operator stations (OSs),<br />
devices made by other manufacturers with their own configuration tool, or S5<br />
devices?<br />
These devices are represented in NetPro by objects such as PG/PC, "other<br />
station," <strong>and</strong> S5 station.<br />
Selecting the Correct Object<br />
The following table shows which object should be inserted in which case:<br />
Object Purpose Remarks<br />
PG/PC To represent in the network view your<br />
"own" programming device from which<br />
you want to access every node in the<br />
subnet online.<br />
For PGs/PCs that are the target for an<br />
S7 connection.<br />
SIMATIC PC station For PC stations that are the end point<br />
of a (two-way) S7 connection; also<br />
suitable for redundant S7 connections.<br />
For WinLC as of V3.0<br />
Use the "Assignment" tab to<br />
establish an assignment between<br />
your PG/PC (programming device)<br />
<strong>and</strong> the "PG/PC" object inserted in<br />
NetPro. In NetPro the symbol for<br />
the PG/PC is specially highlighted.<br />
For PGs/PCs with S7-SAPI<br />
interface<br />
The end point of a connection in<br />
SIMATIC PC stations is an<br />
application such as S7-SAPI ** or<br />
WinCC. For a SIMATIC PC station<br />
a number of connection end points<br />
can be configured.<br />
S5 station For S5 stations in the subnet -<br />
Other station For devices made by other<br />
manufacturers which are connected to<br />
the subnet.<br />
-<br />
* SIMATIC NET products on CD up to 10/98.<br />
** SIMATIC NET Products on CD as from 10/98, also refer to the Product Information on this CD or S7-<br />
REDCONNECT<br />
<strong>Configuring</strong> <strong>Hardware</strong> <strong>and</strong> <strong>Communication</strong> <strong>Connections</strong> with <strong>STEP</strong> 7<br />
A5E00706939-01 11-19
Networking Stations<br />
Procedure<br />
1. If the "Catalog" window is not visible:<br />
Open the "Catalog" window using the menu comm<strong>and</strong> View > Catalog.<br />
2. In the "Catalog" window click on the required object (under "Stations"), hold the<br />
mouse button pressed, <strong>and</strong> use the drag & drop function to copy it to the<br />
window for the graphic network view.<br />
Invalid positions in the view window are shown by a sign instead of the<br />
cursor.<br />
Alternatively you can also double-click the required object in the "Catalog"<br />
window.<br />
3. Double-click the object.<br />
Result: A dialog box with tabs for setting the properties is displayed.<br />
4. Set the properties:<br />
- For all objects except SIMATIC PC stations: in the "Interfaces" tab, create<br />
the type of interface that the real object has (for example, PROFIBUS). Via<br />
the "Properties" button, set the node <strong>and</strong> subnet properties.<br />
Result: The object receives an interface symbol for every newly created<br />
interface.<br />
- For the "PG/PC" object: In the "Assignment" tab, set an assignment to an<br />
existing module parameter assignment (PC card) if necessary. With this<br />
assignment you link the "PG/PC" object in the network view with the actual<br />
module parameters of your PG/PC. Advantage: If you, for example,<br />
change the transmission rate of the subnet, the module parameters for<br />
your PG/PC card change automatically.<br />
<strong>Configuring</strong> <strong>Hardware</strong> <strong>and</strong> <strong>Communication</strong> <strong>Connections</strong> with <strong>STEP</strong> 7<br />
11-20 A5E00706939-01
Networking Stations<br />
11.6.7 Taking <strong>Connections</strong> for Programming Devices/PCs into Account<br />
in the Network Configuration<br />
If you have a networked project with a number of different subnets, you can set up<br />
a number of wildcards in the network configuration for a PG (PC) you want to<br />
connect up later on. The "PG/PC" object in the network view assumes this<br />
"wildcard" function.<br />
This allows you to disconnect a programming device from a subnet <strong>and</strong> connect it<br />
to another subnet. You tell <strong>STEP</strong> 7 about the PG relocation when you use the<br />
"PLC > Assign PG/PC menu comm<strong>and</strong>.<br />
The figure below illustrates the setup:<br />
<br />
<br />
<br />
<strong>Configuring</strong> <strong>Hardware</strong> <strong>and</strong> <strong>Communication</strong> <strong>Connections</strong> with <strong>STEP</strong> 7<br />
A5E00706939-01 11-21
Networking Stations<br />
The connection points in the network view look like this ("PG/PC(1))" <strong>and</strong><br />
("PG/PC(2)"):<br />
You can now assign your PG one of the "PG/PC" symbols (to identify the device<br />
you intend to use for accessing stations online). Assignment updates the interfaces<br />
in the programming device (PG or PC) to match the configured settings. If you<br />
change your configured settings (e.g. by modifying the transmission rate or another<br />
network property), the interface in your PG or PC will be updated automatically.<br />
Procedure<br />
1. If the PG/PC has already been assigned: Reverse the assignment by selecting<br />
the "PG/PC" symbol <strong>and</strong> activating the PLC > Remove PG/PC Assignment<br />
menu comm<strong>and</strong>. The assigned PG/PC symbol differs from the symbol for nonassigned<br />
PGs/PCs.<br />
2. Select a "PG/PC" symbol in the network view to represent the programming<br />
device you have connected.<br />
3. Select the PLC > Assign PG/PC menu comm<strong>and</strong>.<br />
4. Use the "Assignment" tab to assign a set of interface parameters in your<br />
programming device (your PG/PC)to an interface of the "PG/PC" symbol.<br />
<strong>Configuring</strong> <strong>Hardware</strong> <strong>and</strong> <strong>Communication</strong> <strong>Connections</strong> with <strong>STEP</strong> 7<br />
11-22 A5E00706939-01
<strong>STEP</strong> 7 on a SIMATIC PC Station<br />
Networking Stations<br />
SIMATIC PC stations as of <strong>STEP</strong> 7 V5.1, Servicepack 2 are capable of routing.<br />
With <strong>STEP</strong> 7 on a SIMATIC PC station you can reach all nodes online which are<br />
connected to this station. In this case, you do not require a PG/PC assignment to<br />
reach the nodes of different subnets.<br />
Conditions to make a SIMATIC PC station routing capable:<br />
• To configure the SIMATIC PC station:<br />
- <strong>STEP</strong> 7, version 5.1, Servicepack 2 or<br />
- SIMATIC NCM PC, version 5.1 including Servicepack 2 (from the<br />
SIMATIC NET CD as of 7/2001)<br />
• Runtime conditions for the PC station<br />
- Installed drivers for CPs: SIMATIC NET CD, as of 7/2001<br />
- Installed components for WinAC Slot: WinAC Slot 41x, version 3.2<br />
<strong>Configuring</strong> <strong>Hardware</strong> <strong>and</strong> <strong>Communication</strong> <strong>Connections</strong> with <strong>STEP</strong> 7<br />
A5E00706939-01 11-23
Networking Stations<br />
11.6.8 Checking the Consistency of the Network<br />
Before you save, you should check the network configuration for consistency. The<br />
following are reported, for example:<br />
• Nodes that are not connected to a subnet<br />
(exception: non-networked MPI nodes)<br />
• Subnets that have only one node<br />
• Inconsistent connections<br />
Requirement<br />
NetPro must be open.<br />
Procedure<br />
• Select the menu comm<strong>and</strong> Network > Check Consistency.<br />
Result: A window "Outputs for Consistency Check" with hints for configuring<br />
conflict-free networks <strong>and</strong> connections is displayed.<br />
Inconsistent stations are color-coded in red.<br />
Tip<br />
You can select the window containing the results of the last consistency check at<br />
any time using the menu comm<strong>and</strong> View > Errors <strong>and</strong> Warnings.<br />
Alternative Procedure<br />
1. Select the menu comm<strong>and</strong> Network > Save <strong>and</strong> Compile.<br />
2. In the dialog box, select the option "Check <strong>and</strong> compile all."<br />
The "Outputs for Consistency Check" Window<br />
Messages <strong>and</strong> warnings are entered in this window if the consistency check found<br />
incorrect project planning/configuration (can refer to the hardware configuration,<br />
network or connection planning). A consistency check is carried out during the<br />
following actions:<br />
• Menu comm<strong>and</strong> Network > Check Consistency<br />
• Menu comm<strong>and</strong> Network > Network > Check Cross-Project Consistency<br />
• Menu comm<strong>and</strong> Network > Save <strong>and</strong> Compile<br />
• Download to PLC (consistency check for the stations or connections to which<br />
downloading is to be carried out)<br />
<strong>Configuring</strong> <strong>Hardware</strong> <strong>and</strong> <strong>Communication</strong> <strong>Connections</strong> with <strong>STEP</strong> 7<br />
11-24 A5E00706939-01
Networking Stations<br />
Messages in the window "Outputs for Consistency Check" are displayed as errors,<br />
if no system data (SDBs) could be created during saving <strong>and</strong> compiling or before<br />
downloading to the PLC. Without generated system data it is possible to download<br />
the hardware/network <strong>and</strong> connection configuration cannot be downloaded to the<br />
PLC.<br />
Messages in the window "Outputs for Consistency Check" are displayed as<br />
warnings, if the signaled state allows the generation of system data (SDBs).<br />
If you select a line in the upper section of the output window, this line is repeated in<br />
the lower section of the window in word-wrapped text. You do not need to scroll to<br />
see all the text.<br />
Selecting a Faulty/Inconsistent Object<br />
Double-click on the corresponding message or warning in the window "Outputs for<br />
Consistency Check", or select the Edit > Go to Error Location menu comm<strong>and</strong><br />
for this window.<br />
Help on a Message/Warning<br />
Select the message or warning <strong>and</strong> press F1, or select the Edit > Show Help on<br />
Message menu comm<strong>and</strong>.<br />
Saving Messages/Warnings<br />
Select the File > Save Messages menu comm<strong>and</strong> in the output window.<br />
<strong>Configuring</strong> <strong>Hardware</strong> <strong>and</strong> <strong>Communication</strong> <strong>Connections</strong> with <strong>STEP</strong> 7<br />
A5E00706939-01 11-25
Networking Stations<br />
11.6.9 Saving the Network Configuration<br />
Introduction<br />
Saving<br />
To save the connection table, you can choose either of the menu comm<strong>and</strong>s<br />
Network > Save <strong>and</strong> Network > Save <strong>and</strong> Compile.<br />
If you have created the network objects in NetPro or changed their properties in<br />
NetPro, NetPro saves the following using the menu comm<strong>and</strong> Network > Save:<br />
• Node addresses<br />
• Subnet properties (such as transmission rate)<br />
• <strong>Connections</strong><br />
• Modified module parameters (for example, of CPUs)<br />
Saving <strong>and</strong> Compiling<br />
When you select the menu comm<strong>and</strong> Network > Save <strong>and</strong> Compile you must<br />
specify in a dialog box whether you want to compile everything or just the changes:<br />
Independent of the selected option, NetPro checks the consistency of the<br />
configuration data throughout the project; any messages are displayed in a<br />
separate window.<br />
• "Check <strong>and</strong> compile all" option<br />
The loadable system data blocks (SDBs) for the entire network configuration<br />
are created; they contain all connections, node addresses, subnet properties,<br />
input/output addresses, <strong>and</strong> module parameters.<br />
• "Compile changes only" option<br />
Loadable system data blocks (SDBs) for modified connections, node<br />
addresses, subnet properties, input/output addresses, <strong>and</strong> module parameters<br />
are created.<br />
<strong>Configuring</strong> <strong>Hardware</strong> <strong>and</strong> <strong>Communication</strong> <strong>Connections</strong> with <strong>STEP</strong> 7<br />
11-26 A5E00706939-01
11.6.10 Tips for Editing the Network Configuration<br />
Displaying the Network Address Overview<br />
Networking Stations<br />
If you want to have an overview of all the assigned node addresses, then select a<br />
subnet in the network view.<br />
Depending on the subnet type selected, the lower section of the network view will<br />
then show a tabular overview of the MPI, PROFINUS or Ethernet addresses. The<br />
remaining columns show the name of the station, the interface <strong>and</strong>, if a<br />
multiproject-oriented network view is open, the project name as well.<br />
Special considerations:<br />
• If an Ethernet subnet is selected, then, depending on the configuration, the IP<br />
address, the MAC address or both are shown. If a PROFINET IO system is<br />
configured, the device numbers of the nodes are also shown.<br />
• If the multiproject-oriented network view is open <strong>and</strong> a merged subnet is<br />
selected, then the lower section of the window will show all the node addresses<br />
for the merged subnet.<br />
• If doubled addresses were issued on the subnet, then they are indicated by an<br />
asterisk (*).<br />
• To open the properties sheet for an interface, double-click the corresponding<br />
row in the address overview. You cannot change the network address here.<br />
<strong>Configuring</strong> <strong>Connections</strong><br />
If you select a component in the network view that can be an end point of a<br />
connection (for example, a CPU), the connection table in which you can configure<br />
connections is displayed automatically.<br />
Starting Global Data Configuration<br />
1. In the network view, select an MPI subnet for which you want to configure<br />
global data communication.<br />
2. Select the Options > Define Global Data menu comm<strong>and</strong>.<br />
Result: The GD table for the MPI subnet is opened.<br />
Highlighting the <strong>Communication</strong> Partners of a Module<br />
If you have already configured connections:<br />
1. Select a programmable module (CPU, FM) in the network view.<br />
2. Select the View > Highlight > <strong>Connections</strong> menu comm<strong>and</strong>.<br />
Note: The communication partners of only one programmable module can be<br />
highlighted at any one time.<br />
<strong>Configuring</strong> <strong>Hardware</strong> <strong>and</strong> <strong>Communication</strong> <strong>Connections</strong> with <strong>STEP</strong> 7<br />
A5E00706939-01 11-27
Networking Stations<br />
Displaying/Changing the Properties of Components<br />
To display or change the properties of stations or modules, proceed as follows:<br />
1. Select the component (station symbol or module).<br />
2. Select the Edit > Object Properties menu comm<strong>and</strong>.<br />
Copying Subnets <strong>and</strong> Stations<br />
1. Select the network objects you want to copy by clicking them with the left<br />
mouse button. If you want to copy more than one network object at the same<br />
time, select additional network objects with SHIFT + left mouse button.<br />
2. Select the Edit > Copy menu comm<strong>and</strong>.<br />
3. Click the position in the network view (place the cursor there) where you want<br />
to place the copy <strong>and</strong> select the Edit > Paste menu comm<strong>and</strong>.<br />
Note: You can copy individual network objects or whole subnets with network<br />
connections, stations, <strong>and</strong> DP slaves. When copying, remember that every<br />
node in a subnet must have a unique node address. You should therefore<br />
change the node addresses if necessary.<br />
Deleting Network <strong>Connections</strong>, Stations, <strong>and</strong> Subnets<br />
1. Select the symbol for the network connection, the station, the DP slave or the<br />
subnet.<br />
2. Select the Edit > Delete menu comm<strong>and</strong>.<br />
When you delete a subnet, the stations which were previously connected to the<br />
subnet are retained <strong>and</strong> can be connected to another subnet if required.<br />
Positioning Stations <strong>and</strong> Subnets<br />
You can move subnets, stations, <strong>and</strong> DP slaves (with or without a network<br />
connection) anywhere in the view window. This means you can replicate your<br />
hardware structure visually on the screen.<br />
• Click the subnet or station/DP slave, hold the mouse button down, <strong>and</strong> use<br />
"drag & drop" to move the subnet or station/DP slave to the required position.<br />
Invalid positions for subnets or stations/DP slaves in the view window are<br />
shown by a sign instead of the cursor.<br />
You can also move stations/DP slaves that are already connected to a subnet. The<br />
network connections of the stations/DP slaves are retained.<br />
<strong>Configuring</strong> <strong>Hardware</strong> <strong>and</strong> <strong>Communication</strong> <strong>Connections</strong> with <strong>STEP</strong> 7<br />
11-28 A5E00706939-01
Reducing Subnet Lengths<br />
Networking Stations<br />
In NetPro, subnets are displayed in a horizontal line that extends "infinitely." To<br />
reduce the length of the subnets so that stations can be grouped with their subnets<br />
<strong>and</strong> arranged in a clearer <strong>and</strong> more underst<strong>and</strong>able manner, select the View ><br />
Reduced Subnet Lengths menu comm<strong>and</strong>. The length shown is determined by<br />
the distance between the networked interfaces <strong>and</strong> is adapted automatically. The<br />
subnet will extend a little bit beyond the networked modules.<br />
If the subnet does not yet have a node connected to it, such as after a new subnet<br />
has been inserted, the length shown is "infinite" <strong>and</strong> is dependent on the setting<br />
selected in the "View" menu.<br />
Note<br />
If you change the view, connect stations to subnets or arrange subnets <strong>and</strong><br />
stations, then it may happen that the subnets overlap each other. In this case, you<br />
will have to arrange the stations <strong>and</strong> subnets again.<br />
Arranging the Network View - Assigning DP Slaves to Their DP Masters<br />
In the graphical network view, in order to rearrange a network configuration that<br />
has become confusing, you can assign the DP slaves to their respective DP<br />
master stations visually:<br />
Requirement: The "with DP Slaves" view is activated (menu comm<strong>and</strong>: View ><br />
With DP Slaves).<br />
Select the View > Rearrange menu comm<strong>and</strong> (as of <strong>STEP</strong> 7 V5.1,<br />
Service Pack 1).<br />
Selecting a Master System<br />
You can select a whole master system to copy it, for example.<br />
1. Select a master or a slave in the network view.<br />
2. Select the Edit > Select > Master System menu comm<strong>and</strong>.<br />
Highlighting a Master System<br />
1. Select a DP master or a DP slave in the network view.<br />
2. Select the View > Highlight > Master System menu comm<strong>and</strong>.<br />
Online Access to Modules<br />
You have access to the following functions via the "PLC" menu:<br />
• Display module information<br />
• Change the operating mode of a module<br />
• Clear/reset a module<br />
• Set the date <strong>and</strong> time for a module<br />
• Download <strong>and</strong> upload<br />
<strong>Configuring</strong> <strong>Hardware</strong> <strong>and</strong> <strong>Communication</strong> <strong>Connections</strong> with <strong>STEP</strong> 7<br />
A5E00706939-01 11-29
Networking Stations<br />
11.7 Networking Stations that Represent Network Gateways<br />
11.7.1 Networking Stations that Represent Network Gateways<br />
Overview<br />
Network Gateway<br />
For most programmable logic controller systems, you can operate the<br />
programming device exclusively by means of the bus cable (subnet) that is<br />
connected to the programmable logic controller directly. For relatively large<br />
networked systems, this situation requires that the programming device be<br />
connected to various bus cables (subnets) before a remote programmable logic<br />
controller can be reached online.<br />
From <strong>STEP</strong> 7 V5 on, it is possible for you to access programmable logic controllers<br />
online with the programming device/PC beyond the limits of a subnet in order, for<br />
example, to download user programs or a hardware configuration or to execute<br />
test <strong>and</strong> diagnostics functions.<br />
The "PG Routing" function makes it possible to reach programmable logic<br />
controllers from a fixed location in the system beyond the different subnets without<br />
having to reconnect the bus connectors. For this purpose, special "routing tables"<br />
are generated automatically for the network gateways during network configuration<br />
with <strong>STEP</strong> 7. These routing tables are special system data <strong>and</strong> must be loaded to<br />
the individual network gateways, that is, S7 CPUs or communication processors<br />
(CPs). Afterward, when the programming device goes online, the way to the<br />
selected programmable logic controller can be found by means of the network<br />
gateways.<br />
The gateway from a subnet to one or more other subnets lies in a SIMATIC station<br />
that has interfaces to the respective subnets.<br />
<br />
<br />
<br />
<br />
<br />
<br />
<br />
<br />
<br />
<br />
<br />
<strong>Configuring</strong> <strong>Hardware</strong> <strong>and</strong> <strong>Communication</strong> <strong>Connections</strong> with <strong>STEP</strong> 7<br />
11-30 A5E00706939-01
Requirements<br />
• <strong>STEP</strong> 7 as of Version 5<br />
Networking Stations<br />
• The modules with communication capability (CPUs or CPs) that are supposed<br />
to establish network gateways between the subnets must be capable of routing<br />
(the info text on the respective component can be found in the hardware<br />
catalog).<br />
As of <strong>STEP</strong> 7 Version 5.1, Servicepack 2, SIMATIC PC stations can also be<br />
capable of routing.<br />
• All reachable programmable logic controllers or communication partners in a<br />
system network must be configured <strong>and</strong> loaded within an S7 project.<br />
• The desired S7 station is networked <strong>and</strong> can actually be reached by means of<br />
the network gateways.<br />
• The modules must be loaded with the configuration information that contains<br />
the current "knowledge" of the entire network configuration for the project.<br />
Reason: All the modules involved in the network gateway must receive<br />
information about which subnets can be accessed via which routes (routing<br />
tables).<br />
• The programming device/PC with which you want to establish an online<br />
connection by means of a gateway must be configured <strong>and</strong> assigned to your<br />
programming device in the network configuration.<br />
Additional Information for Network Gateways<br />
In addition to node address, subnet properties, <strong>and</strong> connections, <strong>STEP</strong> 7 V5 also<br />
generates routing information that must be loaded onto the corresponding<br />
modules.<br />
Routing information includes:<br />
• Module interfaces<br />
• Assignment to connected subnets<br />
• The next network gateways in order to be able to access a remote subnet from<br />
one of the connected subnets<br />
This information is generated automatically by <strong>STEP</strong> 7 when the network or station<br />
configuration is compiled (menu comm<strong>and</strong>: ... > Save <strong>and</strong> Compile).<br />
<strong>Configuring</strong> <strong>Hardware</strong> <strong>and</strong> <strong>Communication</strong> <strong>Connections</strong> with <strong>STEP</strong> 7<br />
A5E00706939-01 11-31
Networking Stations<br />
Which Modules or Stations Must Be Loaded After a Change to a Network<br />
Configuration?<br />
If you change a configuration as follows ... ... you have to reload<br />
Delete or add a network connection to a station (station All network gateways<br />
equals network gateway)<br />
Modify an interface address on the subnet (station equals Network gateways on the same subnet<br />
network gateway) or<br />
plug a module with its own MPI address into an S7-300<br />
station in such a way that the MPI address of a network<br />
gateway (next module inserted) is changed<br />
Add or delete a network gateway All network gateways<br />
Insert a module with a network connection in another slot All modules for this station<br />
(station equals network gateway)<br />
Add a subnet -<br />
Delete a subnet (where network gateways are configured All network gateways<br />
on this subnet)<br />
Change a subnet ID If any network gateways are connected to<br />
this subnet: All network gateways<br />
S7 Subnet ID for an Online Connection via Network Gateways<br />
If the network configuration together with all the routing information was<br />
downloaded to the affected stations, you must also specify an S7 subnet ID to<br />
access the remote station.<br />
The S7 subnet ID that is requested by <strong>STEP</strong> 7 using dialog boxes is formed from<br />
two numbers:<br />
• A number for the project<br />
• A number for the subnet<br />
Both numbers can be determined via the properties dialog box of the subnet with<br />
an existing network configuration. If you want to go online with a programming<br />
device without a consistent project, you must know the subnet ID. The subnet ID is<br />
printed out with the network configuration.<br />
<strong>Configuring</strong> <strong>Hardware</strong> <strong>and</strong> <strong>Communication</strong> <strong>Connections</strong> with <strong>STEP</strong> 7<br />
11-32 A5E00706939-01
11.7.2 Programming Devices / PCs Connected to a Subnet via<br />
TeleService or WAN<br />
Networking Stations<br />
A programming device or PC that accesses nodes in a remote subnet via<br />
TeleService or WAN (Wide Area Network) is dealt with as follows in the network<br />
configuration:<br />
The "PG/PC" object is connected directly to the remote subnet in the network<br />
configuration of <strong>STEP</strong> 7. The network gateway via a TS adapter or router is not<br />
visible in the configuration.<br />
Example: Connecting a Programming Device via TeleService<br />
<br />
<br />
<br />
<br />
<br />
<br />
<br />
<br />
<br />
<br />
<br />
<br />
<br />
<br />
<strong>Configuring</strong> <strong>Hardware</strong> <strong>and</strong> <strong>Communication</strong> <strong>Connections</strong> with <strong>STEP</strong> 7<br />
A5E00706939-01 11-33
Networking Stations<br />
Example: Connecting a Programming Device via WAN<br />
<br />
<br />
<br />
<br />
<br />
<br />
<br />
<br />
<br />
<br />
<br />
<br />
<strong>Configuring</strong> <strong>Hardware</strong> <strong>and</strong> <strong>Communication</strong> <strong>Connections</strong> with <strong>STEP</strong> 7<br />
11-34 A5E00706939-01
11.8 Networking Stations from Different Projects<br />
Introduction<br />
Networking Stations<br />
In complex networked systems, it may be advantageous to manage the stations in<br />
more than project.<br />
As of <strong>STEP</strong> 7 V5.2, you can configure several projects by using a multiproject. This<br />
procedure is recommended for new projects.<br />
In the figure below, a networked system is divided into two system parts (projects)<br />
"Manuf1" <strong>and</strong> "Manuf2."<br />
Without a multiproject, the following problem arises: for the project "Manuf1,"<br />
stations that were configured in the project "Manuf2" are unknown.<br />
<strong>Configuring</strong> Without a Multiproject<br />
• You must insert the symbol "Other Station" in the project "Manuf1" to represent<br />
a station in the project "Manuf2." The "Other Station" as a "st<strong>and</strong>-in object" is<br />
restricted to the properties that are relevant for the network view.<br />
• You must program the subnet to which both parts of the system are connected<br />
twice in identical form: once in the project "Manuf1" <strong>and</strong> once in the project<br />
"Manuf2."<br />
The responsibility for the consistency of the network data in the different projects<br />
lies with you in this case; <strong>STEP</strong> 7 cannot ensure consistency "beyond project<br />
boundaries."<br />
<br />
<br />
<br />
<br />
<br />
<br />
<br />
<br />
<br />
<strong>Configuring</strong> <strong>Hardware</strong> <strong>and</strong> <strong>Communication</strong> <strong>Connections</strong> with <strong>STEP</strong> 7<br />
A5E00706939-01 11-35
Networking Stations<br />
<strong>Configuring</strong> <strong>Hardware</strong> <strong>and</strong> <strong>Communication</strong> <strong>Connections</strong> with <strong>STEP</strong> 7<br />
11-36 A5E00706939-01
12 <strong>Configuring</strong> <strong>Connections</strong><br />
12.1 Introduction to <strong>Configuring</strong> <strong>Connections</strong><br />
Introduction<br />
<strong>Communication</strong> connections are always required when you want to exchange data<br />
using special communication blocks (SFBs, FBs, or FCs) in the user program.<br />
This section describes how you define connections with <strong>STEP</strong> 7, which particular<br />
features you should note, <strong>and</strong> which communication blocks you can use in the user<br />
program.<br />
What is a Connection?<br />
A connection is a logical assignment of two communication partners to execute<br />
communications. A connection determines the following:<br />
• The partners involved in communication<br />
• The type of connection (for example, S7, point-to-point, FDL, or ISO transport<br />
link)<br />
• Special properties (such as whether a connection remains permanently<br />
configured, or whether it is established <strong>and</strong> disconnected dynamically in the<br />
user program, <strong>and</strong> whether operating mode messages should be sent).<br />
What Happens When You Configure <strong>Connections</strong>?<br />
When you configure connections, a unique "local ID" is assigned for each<br />
connection. Only this local ID is required when you assign parameters to<br />
communication blocks. Every programmable module that can be an end point in a<br />
connection has its own connection table.<br />
<strong>Configuring</strong> <strong>Hardware</strong> <strong>and</strong> <strong>Communication</strong> <strong>Connections</strong> with <strong>STEP</strong> 7<br />
A5E00706939-01 12-1
<strong>Configuring</strong> <strong>Connections</strong><br />
12.2 <strong>Configuring</strong> <strong>Communication</strong> with an Ethernet CP<br />
Type of <strong>Communication</strong><br />
The Ethernet CP supports the following types of communication, depending on the<br />
CP type:<br />
• S7 communication<br />
S7 communication forms a simple <strong>and</strong> efficient interface between SIMATIC S7<br />
stations <strong>and</strong> PGs/PCs using communication function blocks.<br />
The CP functions as an "S7 communication relay", that passes on the block<br />
communication on Industrial Ethernet.<br />
• S5 compatible communication<br />
• SEND-RECEIVE interface<br />
Depending on the CP type, the SEND-RECEIVE interface allows programcontrolled<br />
communication on a configured connection from a SIMATIC S7 PLC<br />
to another SIMATIC S7 PLC, to a SIMATIC S5 PLC, to PCs/PGs, <strong>and</strong> to any<br />
other station.<br />
• FETCH/WRITE services (Server)<br />
FETCH/WRITE services (Server) allow direct access to system memory areas<br />
of a SIMATIC S7 CPU from a SIMATIC S5 system or from third-party devices.<br />
• HTML Process Control<br />
With the IT-CP, you use the included functions <strong>and</strong> HTML pages to enquire<br />
about important system data by means of a web browser (see the guide to the<br />
IT-CP).<br />
• File management <strong>and</strong> file access via FTP<br />
The IT-CP provides additional functions for FTP services.<br />
<strong>Communication</strong> Services on the SEND/RECEIVE Interface<br />
Depending on the CP type, the following communication services are available:<br />
• ISO Transport<br />
optimized for top performance at the self-contained manufacturing level<br />
• TCP/IP for internet communication with<br />
- ISO-on-TCP connections (RFC 1006) <strong>and</strong><br />
- UDP datagram service.<br />
• Sending E-Mail<br />
The controller can send messages depending on process events (see the guide<br />
to the IT-CP).<br />
<strong>Configuring</strong> <strong>Hardware</strong> <strong>and</strong> <strong>Communication</strong> <strong>Connections</strong> with <strong>STEP</strong> 7<br />
12-2 A5E00706939-01
<strong>Configuring</strong> <strong>Connections</strong><br />
12.3 <strong>Configuring</strong> <strong>Communication</strong> with a PROFIBUS CP<br />
Type of <strong>Communication</strong><br />
The PROFIBUS CP supports the following types of communication (depending on<br />
the CP being used):<br />
• PG/OP communication<br />
PG/OP communication is used to download programs <strong>and</strong> configuration data, to<br />
perform testing <strong>and</strong> diagnostics functions as well as for operator control <strong>and</strong><br />
monitoring of a system via OPs.<br />
• S7 communication<br />
The S7 communication forms a simple <strong>and</strong> efficient interface between SIMATIC<br />
S7 stations <strong>and</strong> PGs/PCs using communication function blocks.<br />
The CP functions as an "S7 communication relay", that passes on the<br />
communication on PROFIBUS.<br />
• S5 compatible communication (SEND-RECEIVE interface)<br />
The SEND/RECEIVE interface allows program-controlled communication on a<br />
configured connection from a SIMATIC S7 PLC to another SIMATIC S7 PLC, a<br />
SIMATIC S5 PLC <strong>and</strong> to PCs/PGs.<br />
• St<strong>and</strong>ard communication (FMS interface)<br />
(complying with EN 50170 Vol. 2; FMS client <strong>and</strong> server function)<br />
The FMS interface allows the program-controlled, neutral transmission of<br />
structured data via a configured connection from SIMATIC S7 PLCs to devices<br />
that support the FMS protocol.<br />
• PROFIBUS DP<br />
(complying with EN 50170 Vol. 2, DP master or DP slave)<br />
The distributed peripheral I/Os (DP) allow you to use a large number of analog<br />
<strong>and</strong> digital input/output modules in the immediate vicinity of the process in a<br />
distributed configuration.<br />
<strong>Configuring</strong> <strong>Hardware</strong> <strong>and</strong> <strong>Communication</strong> <strong>Connections</strong> with <strong>STEP</strong> 7<br />
A5E00706939-01 12-3
<strong>Configuring</strong> <strong>Connections</strong><br />
12.4 What You Should Know About the Different<br />
Connection Types<br />
Introduction<br />
S7 <strong>Connections</strong><br />
The following sections provide a brief overview of the connection types you can<br />
configure with <strong>STEP</strong> 7. The "Communicating with SIMATIC" manual provides a<br />
more detailed description of the communications possibilities in SIMATIC.<br />
S7 connections offer the following features:<br />
• Can be configured in all S7/M7 devices<br />
• Can be used in all types of subnet (MPI, PROFIBUS, Industrial Ethernet)<br />
• When using the SFBs BSEND/BRCV: secure transfer of data between SIMATIC<br />
S7/M7-400 stations; for example, exchanging data block contents (up to 64<br />
Kbytes)<br />
• Using CPU 317-2 PN/DP as well as CPU 31x <strong>and</strong> a CP with the FBs<br />
BSEND/BRCV from the SIMATIC_NET_CP library or St<strong>and</strong>ard Library also<br />
allows secure transmission of data to S7-300 <strong>and</strong> S7-400.<br />
• When using the SFBs USEND/URCV: fast, unsecured transfer of data<br />
independent of the time processing of the communication partner, for example,<br />
for event messages <strong>and</strong> messages.<br />
• Acknowledgement of data transfer from the communication partner via layer 7<br />
of the ISO reference model<br />
S7 <strong>Connections</strong>, Redundant<br />
• Properties as for S7 connections; however, restricted to S7 H CPUs as well as<br />
SIMATIC PC stations (such as OPC servers) <strong>and</strong> not on MPI subnets<br />
• Depending on the network topology, at least two connection paths between the<br />
connection end points are possible with a redundant S7 connection.<br />
<strong>Configuring</strong> <strong>Hardware</strong> <strong>and</strong> <strong>Communication</strong> <strong>Connections</strong> with <strong>STEP</strong> 7<br />
12-4 A5E00706939-01
Point-to-Point Connection<br />
<strong>Configuring</strong> <strong>Connections</strong><br />
The local CP 441 provides the link for the connection between an S7-400 CPU <strong>and</strong><br />
a communication partner connected via a point-to-point connection. On the CP, a<br />
conversion is made to the addressing mechanisms of the selected transfer<br />
procedure. For this reason, the point-to-point connection ends in the CP 441 <strong>and</strong><br />
not at the communication partner as for other connection types.<br />
The number of connections to the CP depends on the set procedure.<br />
FMS Connection<br />
PROFIBUS FMS (Field bus Message Specification) has the following features:<br />
• For the transfer of structured data (FMS variables)<br />
• Fulfills the European st<strong>and</strong>ard EN 50170 Vol.2 PROFIBUS<br />
• For open communication with non-Siemens devices on PROFIBUS<br />
• Application on the remote communication partner acknowledges receipt of the<br />
data<br />
• Can be ordered in layer 7 of the ISO reference model<br />
• FMS services are provided on the PC as C functions<br />
FDL Connection<br />
PROFIBUS FDL (Field bus Data Link) has the following features:<br />
• For the transfer of data to a communication partner (for example, SIMATIC S5<br />
or PC) that supports sending <strong>and</strong> receiving in accordance with the SDA function<br />
(Send Data with Acknowledge)<br />
• The receipt of data is confirmed by the FDL service of the communication<br />
partner with an acknowledgement<br />
• For PROFIBUS subnets only<br />
• Fulfills the European st<strong>and</strong>ard EN 50170 Vol.2 PROFIBUS<br />
• Can be ordered in layer 2 of the ISO reference model<br />
• FDL services are provided on the PC as C functions<br />
<strong>Configuring</strong> <strong>Hardware</strong> <strong>and</strong> <strong>Communication</strong> <strong>Connections</strong> with <strong>STEP</strong> 7<br />
A5E00706939-01 12-5
<strong>Configuring</strong> <strong>Connections</strong><br />
ISO Transport Connection<br />
The ISO Transport connection has the following features:<br />
• Suitable for large quantities of data owing to "data blocking"<br />
• Allows communication to a partner (for example, SIMATIC S5 or PC) that<br />
supports sending <strong>and</strong> receiving of data in accordance with ISO Transport<br />
• You can use the Send/Receive utilities <strong>and</strong> the Fetch <strong>and</strong> Write utilities to<br />
transmit data.<br />
• For Industrial Ethernet only<br />
• The receipt of data is confirmed by the ISO Transport service of the<br />
communication partner with an acknowledgement<br />
• ISO Transport (ISO 8073 class 4) corresponds to layer 4 of the ISO reference<br />
model<br />
• ISO Transport services are provided on the PC as C functions<br />
ISO-on-TCP Connection<br />
The ISO-on-TCP connection has the following features:<br />
• Fulfills the TCP/IP (Transmission Control Protocol/Internet Protocol) st<strong>and</strong>ard<br />
with the extension RFC 1006 in accordance with layer 4 of the ISO reference<br />
model. RFC 1006 describes how the services of ISO layer 4 can be mapped<br />
onto TCP<br />
• Allows communication to a partner (for example, SIMATIC S5 or PC) that<br />
supports sending <strong>and</strong> receiving of data in accordance with ISO-on-TCP<br />
• You can use the Send/Receive utilities <strong>and</strong> the Fetch <strong>and</strong> Write utilities to<br />
transmit data.<br />
• The receipt of data is confirmed with an acknowledgement<br />
• For Industrial Ethernet only<br />
• ISO-on-TCP services are provided on the PC as C functions<br />
<strong>Configuring</strong> <strong>Hardware</strong> <strong>and</strong> <strong>Communication</strong> <strong>Connections</strong> with <strong>STEP</strong> 7<br />
12-6 A5E00706939-01
TCP Connection<br />
<strong>Configuring</strong> <strong>Connections</strong><br />
The TCP connection has the following features:<br />
• Complies with the TCP/IP st<strong>and</strong>ard (Transmission Control Protocol/Internet<br />
Protocol)<br />
• Enables communication to a partner (such as a PC or non-Siemens device) that<br />
supports sending or receiving data according to TCP/IP.<br />
• You can transmit data by means of the utilities Send/Receive or Fetch <strong>and</strong><br />
Write.<br />
• For Industrial Ethernet only<br />
• As a rule, you can use the TCP/IP implementation in the operating system of<br />
the PC.<br />
UDP Connection<br />
The UDP (User Datagram Protocol) connection has the following features:<br />
• For Industrial Ethernet (TCP/IP protocol)<br />
• Allows unsecured transfer of contiguous blocks of data between two nodes<br />
E-Mail Connection<br />
The e-mail connection has the following features:<br />
• For Industrial Ethernet (TCP/IP protocol)<br />
• Enables process data, for example, to be sent from data blocks via e-mail using<br />
an IT communications processor<br />
• Using the e-mail connection, you define the mail server via which all e-mails<br />
sent by an IT communications processor are delivered<br />
<strong>Configuring</strong> <strong>Hardware</strong> <strong>and</strong> <strong>Communication</strong> <strong>Connections</strong> with <strong>STEP</strong> 7<br />
A5E00706939-01 12-7
<strong>Configuring</strong> <strong>Connections</strong><br />
12.5 What You Should Know About Assigning Connection<br />
Resources<br />
Introduction<br />
S7 <strong>Connections</strong><br />
At the stations involved, each connection requires connection resources for its<br />
endpoint <strong>and</strong> its transition point (i.e. CP). The actual number of connection<br />
resources available depends on the CPU/CP in use.<br />
If all the connection resources for a communication partner occupied, then a new<br />
connection will not be able to be established. The following discussion treats each<br />
type of communication individually. Within the limits imposed by the amount of<br />
resources available, combinations of any type are possible.<br />
For S7 connections established through the integrated MPI-/PROFIBUS DP/PN<br />
interface, one connection resource for the end point is occupied at the CPU for<br />
each S7 connection. This applies to all S7/M7-300/400 <strong>and</strong> C7-600 CPUs.<br />
(1) Available connection resource<br />
(2) Assigned connection resource<br />
(3) MPI, PROFIBUS DP or Industrial Ethernet (PROFINET)<br />
For S7 connections established through an external CP interface, a connection<br />
resource is occupied at the CPU for (the end point) <strong>and</strong> at the CP (transition point)<br />
for each <strong>STEP</strong> 7 connection. This applies to all S7/M7-300/400 <strong>and</strong> C7-600-CPUs.<br />
Tip: Connection resources for an S7-300 CPU can be reserved for OP/<br />
programming device (PG) communication <strong>and</strong> S7 basic communication in the<br />
properties dialog of the CPU ("<strong>Communication</strong>" tab). The already configured S7<br />
connections are displayed there as well ("S7 <strong>Communication</strong>").<br />
(1) Available connection resource<br />
(2) Assigned connection resource<br />
(3) Industrial Ethernet, PROFIBUS<br />
<strong>Configuring</strong> <strong>Hardware</strong> <strong>and</strong> <strong>Communication</strong> <strong>Connections</strong> with <strong>STEP</strong> 7<br />
12-8 A5E00706939-01
<strong>Configuring</strong> <strong>Connections</strong><br />
Note<br />
To execute programming device functions on CPs for the S7-400 through the MPI<br />
or through the integrated DP interface, two connection resources are needed at the<br />
CPU (for two transition points). This requirement must be taken into account in<br />
determining the total number of configured <strong>STEP</strong> 7 connections.<br />
SEND/RECEIVE Interface<br />
<strong>Communication</strong> through the SEND/RECEIVE interface takes place only through<br />
CPs. Each connection (i.e. FDL, ISO-transport, ISO-on-TCP, UDP <strong>and</strong> TCP<br />
connections) takes up one resource at the CP for the end point.<br />
At an S7-300 CPU <strong>and</strong> a C7-600 CPU, no connection resources are required for<br />
the connection.<br />
(1) Available connection resource<br />
(2) Assigned connection resource<br />
(3) Industrial Ethernet, PROFIBUS<br />
At a S7-400 CPU, no connection resources are required for SEND/RECEIVE<br />
connections (i.e. FDL, ISO-transport, ISO-on-TCP connections.<br />
(1) Available connection resource<br />
(2) Assigned connection resource<br />
(3) Industrial Ethernet, PROFIBUS<br />
Note<br />
To execute programming device functions on CPs for the S7-400 through the MPI<br />
or through the integrated DP interface, two connection resources are needed at the<br />
CPU (for two transition points). This requirement must be taken into account in<br />
determining the total number of configured <strong>STEP</strong> 7 connections.<br />
<strong>Configuring</strong> <strong>Hardware</strong> <strong>and</strong> <strong>Communication</strong> <strong>Connections</strong> with <strong>STEP</strong> 7<br />
A5E00706939-01 12-9
<strong>Configuring</strong> <strong>Connections</strong><br />
FMS Interface<br />
<strong>Communication</strong> through the FMS interface takes place only through CPs. Each<br />
FMS connection takes up one resource at the CP for the end point. At the CPU,<br />
each CP requires a connection resource for communication to it.<br />
(1) Available connection resource<br />
(2) Assigned connection resource<br />
(3) PROFIBUS<br />
Note<br />
To execute programming device functions on CPs for the S7-400 through the MPI<br />
or through the integrated DP interface, two connection resources are needed at the<br />
CPU (for two transition points). This requirement must be taken into account in<br />
determining the total number of configured <strong>STEP</strong> 7 connections.<br />
S7 <strong>Connections</strong> through S7/M7-300 <strong>and</strong> C7-600<br />
For S7 connections established via the MPI interface, only one connection<br />
resource for the end point is occupied at the FM for an S7/M7-300 (for CPU 312-<br />
316 only) <strong>and</strong> C7-600.<br />
(1) Available connection resource<br />
(2) Assigned connection resource<br />
<strong>Configuring</strong> <strong>Hardware</strong> <strong>and</strong> <strong>Communication</strong> <strong>Connections</strong> with <strong>STEP</strong> 7<br />
12-10 A5E00706939-01
<strong>Configuring</strong> <strong>Connections</strong><br />
For S7 connections established via the internal MPI-/PROFIBUS DP interface, two<br />
connection resources (for two transition points) at the CPU are occupied; at the<br />
FM, one is required in each case (for the end point).<br />
(1) Available connection resource<br />
(2) Assigned connection resource<br />
(3) PROFIBUS DP<br />
S7 <strong>Connections</strong> through S7/M7-400<br />
For S7 connections established through the internal MPI-/PROFIBUS DP interface,<br />
two connection resources (for two transition points) at the CPU are occupied; at the<br />
FM, one is required in each case (for the end point). This also applies for each<br />
additional CPU (multicomputing) within the same station since this node is on the<br />
MPI.<br />
(1) Available connection resource<br />
(2) Assigned connection resource<br />
(3) MPI or MPI/PROFIBUS DP<br />
<strong>Configuring</strong> <strong>Hardware</strong> <strong>and</strong> <strong>Communication</strong> <strong>Connections</strong> with <strong>STEP</strong> 7<br />
A5E00706939-01 12-11
<strong>Configuring</strong> <strong>Connections</strong><br />
S7 <strong>Connections</strong> through M7 FMs<br />
For S7 connections established through the internal MPI-/PROFIBUS DP interface,<br />
each S7 connection at the FM requires two connection resources (for two transition<br />
points); at an S7/M7 CPU or C7-600 CPU, one is required in each case (for the<br />
end point).<br />
(1) Available connection resource<br />
(2) Assigned connection resource<br />
(3) PROFIBUS DP<br />
.<br />
<strong>Configuring</strong> <strong>Hardware</strong> <strong>and</strong> <strong>Communication</strong> <strong>Connections</strong> with <strong>STEP</strong> 7<br />
12-12 A5E00706939-01
<strong>Configuring</strong> <strong>Connections</strong><br />
12.6 Using Connection Resources with Fault-Tolerant S7<br />
<strong>Connections</strong><br />
For H-systems, there are a number of possible configurations that differ with<br />
respect to the number of H-CPUs, number of CPs <strong>and</strong> number of subnets.<br />
Depending on the configuration, two or four partial connections are possible for<br />
each fault-tolerant S7 connection. These connections ensure communication is<br />
maintained even if a component should fail.<br />
The following sections describe the most common configurations <strong>and</strong> how they use<br />
connection resources for a fault-tolerant connection.<br />
Basic Information<br />
At each H-CPU, a connection resource is occupied for each of the endpoints of a<br />
fault-tolerant S7 connection (that is, for redundant connections on both H-CPUs<br />
concerned).<br />
For each fault-tolerant S7 connection, <strong>STEP</strong> 7 establishes two partial connections<br />
as alternative communication paths. To ensure the availability of both paths, each<br />
path must have resources reserved for it. If both partial connections run through<br />
the same intermediate CP, then two connection resources are also reserved on<br />
this CP.<br />
The following sections explain this situation in detail.<br />
Notes on the Illustrations<br />
For redundant H-stations, the two CPUs are labeled "H-CPU 0" <strong>and</strong> "H-CPU 1".<br />
The CPs are numbered sequentially (CP 0, CP1, ...).<br />
<strong>Configuring</strong> <strong>Hardware</strong> <strong>and</strong> <strong>Communication</strong> <strong>Connections</strong> with <strong>STEP</strong> 7<br />
A5E00706939-01 12-13
<strong>Configuring</strong> <strong>Connections</strong><br />
Case 1: Configuration with redundant H-stations (local <strong>and</strong> remote), two partial<br />
connections possible<br />
As shown in the following illustrations, each of the two CPUs has one resource<br />
assigned on it, <strong>and</strong> each of the CPs involved has one connection resource<br />
assigned on it as well.<br />
(1) Partial connection<br />
(2) Fault-tolerant S7 connection<br />
<strong>Configuring</strong> <strong>Hardware</strong> <strong>and</strong> <strong>Communication</strong> <strong>Connections</strong> with <strong>STEP</strong> 7<br />
12-14 A5E00706939-01
<strong>Configuring</strong> <strong>Connections</strong><br />
Case 2: Configuration with non-redundant H-Station (local) <strong>and</strong> redundant H-<br />
Station (remote)<br />
In this case, there is a difference whether the redundant partner station is fitted<br />
with a total of two or four CPs.<br />
If the partner station is fitted with a total of two CPs, then one connection resource<br />
is reserved on the local H-CPU <strong>and</strong> two connection resources are reserved on the<br />
local CP.<br />
If the partner station is fitted with a total of four CPs <strong>and</strong> the "Enable max. CP<br />
redundancy" option was selected, then a total of four connection paths is possible.<br />
Even so, one connection resource is reserved the local H-CPU, <strong>and</strong> two<br />
connection resources are reserved for the local CP. The reason for this is that a<br />
maximum of two partial connections can be active.<br />
(1) Partial connection<br />
(2) Fault-tolerant S7 connection<br />
<strong>Configuring</strong> <strong>Hardware</strong> <strong>and</strong> <strong>Communication</strong> <strong>Connections</strong> with <strong>STEP</strong> 7<br />
A5E00706939-01 12-15
<strong>Configuring</strong> <strong>Connections</strong><br />
Case 3: Configuration with redundant H-stations (local <strong>and</strong> remote), four partial<br />
connections possible<br />
If redundant H-stations are connected in a subnet, then a maximum of four partial<br />
connections is possible. One connection resource is reserved for each of the H-<br />
CPUs, <strong>and</strong> two connection resources are reserved for each of the CPs involved<br />
The following partial connections are possible:<br />
From H-CPU0/CP0 (local station) to CP0 /H-CPU0 (partner station)<br />
From H-CPU1/CP1 (local station) to CP1 /H-CPU1 (partner station)<br />
From H-CPU0/CP0 (local station) to CP1 /H-CPU1 (partner station)<br />
From H-CPU1/CP1 (local station) to CP0 /H-CPU0 (partner station)<br />
(1) Partial connection<br />
(2) Fault-tolerant S7 connection<br />
Case 4: Configuration with non-redundant H-Station <strong>and</strong> two CPs (local) <strong>and</strong> a<br />
redundant H-Station (remote)<br />
If the local station is fitted with a total of two CPs, then one connection resource is<br />
reserved on the local H-CPU <strong>and</strong> one connection resource is reserved on each of<br />
the local CPs.<br />
(1) Partial connection<br />
(2) Fault-tolerant S7 connection<br />
<strong>Configuring</strong> <strong>Hardware</strong> <strong>and</strong> <strong>Communication</strong> <strong>Connections</strong> with <strong>STEP</strong> 7<br />
12-16 A5E00706939-01
<strong>Configuring</strong> <strong>Connections</strong><br />
Call 5: Configuration with redundant H-Station (local) <strong>and</strong> redundant H-Station<br />
(remote) with maximum CP redundancy<br />
If the local station <strong>and</strong> the partner station are fitted with a total of four CPs <strong>and</strong> the<br />
"Enable max. CP redundancy" option was selected, then a total of four connection<br />
paths is possible. <strong>STEP</strong> 7 reserves one connection resource for the local H-CPU<br />
<strong>and</strong> connection resource for each of the local CPs.<br />
The following partial connections are possible:<br />
From H-CPU0/CP0 (local station) to CP0 /H-CPU0 (partner station)<br />
From H-CPU1/CP2 (local station) to CP2 /H-CPU1 (partner station)<br />
From H-CPU0/CP1 (local station) to CP1 /H-CPU0 (partner station)<br />
From H-CPU1/CP3 (local station) to CP3 /H-CPU1 (partner station)<br />
(1) Partial connection<br />
(2) Fault-tolerant S7 connection<br />
<strong>Configuring</strong> <strong>Hardware</strong> <strong>and</strong> <strong>Communication</strong> <strong>Connections</strong> with <strong>STEP</strong> 7<br />
A5E00706939-01 12-17
<strong>Configuring</strong> <strong>Connections</strong><br />
12.7 Blocks for Different Connection Types<br />
Blocks for Use with S7 <strong>Connections</strong><br />
The system function blocks are integrated in the CPUs of the S7-400.<br />
For S7-300, with newer CPUs <strong>and</strong> CPs, you can operate S7 communication<br />
actively (that is, as client) by means of the interface of the CP. The blocks (FBs)<br />
have the same number <strong>and</strong> designation as the SFBs of the S7-400; however, they<br />
must be called up cyclically in the user program of the S7-300-CPU. You can find<br />
the blocks in the SIMATIC_NET_CP library.<br />
The CP must support the client function for S7 communication.<br />
The CPU 317-2 PN/DP with PROFINET interface can also be configured as a<br />
client for S7 communication. In this case, the same blocks are used as in the case<br />
for the S7-300 with CP mentioned above. These blocks are also in the St<strong>and</strong>ard<br />
Library (<strong>Communication</strong> Blocks/CPU_300). The client function is only available with<br />
the PROFINET interface.<br />
SFB/FB/FC Designation Brief Description<br />
SFB8/FB8 USEND Uncoordinated data exchange using a send <strong>and</strong> a receive SFB<br />
SFB9/FB9 URCV<br />
Max. length SFB 8/9: 440 bytes, split into 4x100 bytes.<br />
Max. length FB 8/9: 160 bytes<br />
SFB12/FB12 BSEND Exchange blocks of data of variable length between a send SFB <strong>and</strong><br />
SFB13/FB13 BRCV<br />
a receive SFB<br />
Max. length SFB 12/13: 64 KB<br />
Max. length FB 12/13: 32 KB<br />
SFB14/FB14 GET Read data from a remote device<br />
Max. length SFB 14: 400 bytes, split into 4x100 bytes<br />
Max. length FB 14: 160<br />
SFB15/FB15 PUT Write data to a remote device<br />
Max. length SFB 15: 400 bytes, split into 4x100 bytes<br />
Max. length FB 15: 160<br />
SFB19 START Execute a restart (warm restart) on a remote device<br />
SFB20 STOP Switch a remote device to STOP mode<br />
SFB21 RESUME Execute a hot restart in a remote device<br />
SFB22 STATUS Specific query of the status of a remote device<br />
SFB23 USTATUS Receive status messages from remote devices<br />
SFC62 CONTROL Query the status of the connection that belongs to an SFB instance<br />
FC62 C_CNTRL Query the status of a connection (for S7- 300 CPUs)<br />
<strong>Configuring</strong> <strong>Hardware</strong> <strong>and</strong> <strong>Communication</strong> <strong>Connections</strong> with <strong>STEP</strong> 7<br />
12-18 A5E00706939-01
Blocks for Use with Point-to-Point <strong>Connections</strong><br />
<strong>Configuring</strong> <strong>Connections</strong><br />
For the PtP connection type you can use the SFBs BSEND, BRCV, GET, PUT, <strong>and</strong><br />
STATUS (see above table).<br />
You can also use the SFB PRINT:<br />
SFB Designation Brief Description<br />
SFB16 PRINT Send data to a printer<br />
Blocks for Use with FMS <strong>Connections</strong><br />
FB Designation<br />
Brief Description<br />
FB 2 IDENTIFY Identify the remote device for the user<br />
FB 3 READ Read a variable from a remote device<br />
FB 4 REPORT Report a variable to the remote device<br />
FB 5 STATUS Provide the status of a remote device on request from the user<br />
FB 6 WRITE Write variables to a remote device<br />
Blocks for Use with FDL, ISO-on-TCP, UDP <strong>and</strong> ISO Transport <strong>Connections</strong> as<br />
well as Email <strong>Connections</strong><br />
FC Designation Brief Description<br />
FC 5 AG_SEND Send data by means of a configured connection to the communication<br />
partner (
<strong>Configuring</strong> <strong>Connections</strong><br />
12.8 Working with the Connection Table<br />
Displaying <strong>and</strong> Hiding Columns of the Connection Table<br />
1. Place the pointer in the connection table <strong>and</strong> click with the right mouse button<br />
to display a pop-up menu.<br />
2. In the pop-up menu, select Show/Hide Columns >…. In the next pop-up<br />
menu, select the name of the column that you want to show or hide.<br />
The names of the visible columns are indicated with a check mark. If you select<br />
a visible column, the check mark disappears <strong>and</strong> the column is hidden.<br />
Optimizing the Column Width<br />
In order to adapt the width of a column to its contents so that all the text in the rows<br />
is legible, proceed as follows:<br />
1. Place the pointer in the header of the connection table to the right of the<br />
column that you want to optimize until the pointer assumes the shape of two<br />
parallel lines (as though you wanted to change the width of the column by<br />
dragging with the pointer).<br />
2. Double-click this position.<br />
Tip: For columns that are set too narrowly, you can display the complete contents if<br />
you allow the pointer to rest for a short time on the filed in question.<br />
Sorting the Connection Table<br />
In order to sort the connection table in ascending order according to a column, click<br />
the heading of the column.<br />
An additional click on the heading sorts the connection table in descending order.<br />
Further Information<br />
Note<br />
The column width <strong>and</strong> which columns are visible are saved for each project when<br />
you exit the project. This means that when you open the project on another<br />
computer, the settings are also valid on that computer.<br />
For further information on the columns of the connection table please refer to the<br />
context help (for example for the menu comm<strong>and</strong> View > Display/Hide Columns<br />
...).<br />
<strong>Configuring</strong> <strong>Hardware</strong> <strong>and</strong> <strong>Communication</strong> <strong>Connections</strong> with <strong>STEP</strong> 7<br />
12-20 A5E00706939-01
Navigating with Cursor Keys <strong>and</strong> Calling Up Dialogs for Editing<br />
<strong>Configuring</strong> <strong>Connections</strong><br />
You can use the UP ARROW <strong>and</strong> the DOWN ARROW keys to select a connection<br />
in the connection table. The selected connection is highlighted.<br />
If you use the RIGHT ARROW key or the LEFT ARROW key to navigate to the<br />
field in the "Partner" column <strong>and</strong> you press ENTER, the Change Connection<br />
Partner dialog appears. If you navigate to a different field (such as Local ID) <strong>and</strong><br />
you press ENTER, the "Properties - Connection dialog appears.<br />
If you have selected multiple connections, that is, if you have highlighted several<br />
columns (by holding down the CTRL key <strong>and</strong> selecting one column after another),<br />
<strong>and</strong> by so doing have called up the accompanying dialog (Change Connection<br />
Partner or Properties of the Connection), the dialogs of the highlighted connections<br />
appear one after the other.<br />
Changing the Properties of the Connection<br />
If you want to change a connection that has already been configured, for example,<br />
to set a different connection path (interface), proceed as follows:<br />
1. Select the connection that you want to change.<br />
2. Select the menu comm<strong>and</strong> Edit > Object Properties.<br />
In the dialog box that appears, you can change the properties that can be<br />
edited.<br />
Changing local data only: As of <strong>STEP</strong> 7 V5.1, Service Pack 1, you can change<br />
the local ID directly in the Local ID column of the connection table.<br />
Go To Partner Station<br />
As of <strong>STEP</strong> 7 V5.2 you can easily move to the connection table of a connection<br />
partner when you edit the connection table:<br />
1. Select a connection from the connection table.<br />
2. Select menu comm<strong>and</strong> Edit > Go To Partner Connection.<br />
This function is also available for interproject connections in the multiproject. The<br />
project that contains the connection partner must be open.<br />
<strong>Configuring</strong> <strong>Hardware</strong> <strong>and</strong> <strong>Communication</strong> <strong>Connections</strong> with <strong>STEP</strong> 7<br />
A5E00706939-01 12-21
<strong>Configuring</strong> <strong>Connections</strong><br />
12.9 Inconsistent <strong>Connections</strong><br />
If a connection is inconsistent, the structure of the connection data is disrupted, or<br />
the connection would not be capable of functioning in the context of the project.<br />
Inconsistent connections cannot be compiled <strong>and</strong> loaded - no operation is possible<br />
with such a connection.<br />
Inconsistent connections are identified in the connection table by the color red <strong>and</strong><br />
italics.<br />
Possible Causes of Inconsistent <strong>Connections</strong><br />
• Deleting or altering the hardware configuration<br />
Remedies<br />
• Missing networking of interfaces in the project that are necessary for a<br />
connection<br />
• Exceeding connection resources<br />
• Error in saving data due to insufficient memory<br />
• <strong>Connections</strong> to an unspecified partner without specifying the partner address<br />
• <strong>Connections</strong> to a "partner in an unknown project ", whereby the connections<br />
have yet to be configured<br />
Detailed information about the causes of inconsistent connections are listed in the<br />
Outputs on Consistency Check window (after the consistency check has been run,<br />
menu comm<strong>and</strong> Network > Check Consistency or Network > Check Cross-<br />
Project Consistency).<br />
Detailed information on the cause of the inconsistency can be obtained by editing<br />
the connection properties (highlight the connection <strong>and</strong> select the menu comm<strong>and</strong><br />
Edit > Object Properties).<br />
For many causes, it is enough to edit the connection properties to reestablish<br />
consistency, that is, to correct the connection data. The inconsistent connection<br />
can be corrected when the new properties are assumed.<br />
If the connection cannot be repaired by opening the connection properties,<br />
changing or reversing the configuration, it may be necessary to delete <strong>and</strong> recreate<br />
the connection.<br />
<strong>Configuring</strong> <strong>Hardware</strong> <strong>and</strong> <strong>Communication</strong> <strong>Connections</strong> with <strong>STEP</strong> 7<br />
12-22 A5E00706939-01
12.10 Displaying the Connection Status<br />
Connection Status<br />
Requirements<br />
<strong>Configuring</strong> <strong>Connections</strong><br />
In order to start up a system or to diagnose errors, you can display the status of the<br />
communication connections for a module in the connection table.<br />
Possible Status of a Connection:<br />
• Established<br />
• Not established<br />
• Is being established now<br />
• Not available<br />
Note<br />
The "Connection Status" column has a yellow background if the connection is only<br />
available online, meaning that it is not available offline in the project. The cause<br />
can be that this connection was downloaded to the module without first having<br />
been saved in the project.<br />
• Displaying the connection status is possible only for the local endpoint of a<br />
connection, for example, for a CPU that is selected in the network view.<br />
• The module must support the connection status.<br />
(Possible as of 10/99, this performance feature is documented in the<br />
instruction list of the CPU. The CPU must support the SSL ID 0x36<br />
"Connection-Specific Diagnostics.")<br />
• There is an online connection to the connection end point.<br />
• If the connections that are involved are connections that were configured with<br />
an optional package, you will need the optional package in order to display the<br />
status.<br />
• There is a project for the network configuration on the programming device, or<br />
you have uploaded the station to the programming device (menu comm<strong>and</strong><br />
PLC > Upload).<br />
<strong>Configuring</strong> <strong>Hardware</strong> <strong>and</strong> <strong>Communication</strong> <strong>Connections</strong> with <strong>STEP</strong> 7<br />
A5E00706939-01 12-23
<strong>Configuring</strong> <strong>Connections</strong><br />
Procedure<br />
1. Select the module for which you want to display the connection status.<br />
2. Select the menu comm<strong>and</strong> PLC > Activate Connection Status.<br />
The window becomes an ONLINE window <strong>and</strong> the Connection Status column<br />
is placed in front of the connection table.<br />
The status information for each connection is displayed in this column.<br />
The text of the executed menu comm<strong>and</strong> changes to "Deactivate Connection<br />
Status." You use this menu comm<strong>and</strong> to return to the (offline) connection table<br />
so that you can configure connections.<br />
3. To get more detailed information concerning the current connection status,<br />
double-click the appropriate row of the connection table or select the menu<br />
comm<strong>and</strong> Edit > Object Properties (alternatively, click with the right mouse<br />
button to get a pop-up menu <strong>and</strong> select Object Properties or Status<br />
Information).<br />
The Status Information tab appears with additional information on the<br />
connection status.<br />
Exiting Connection Status<br />
Use the menu comm<strong>and</strong> PLC > Deactivate Connection Status to exit the function<br />
<strong>and</strong> return to the (offline) connection table.<br />
<strong>Configuring</strong> <strong>Hardware</strong> <strong>and</strong> <strong>Communication</strong> <strong>Connections</strong> with <strong>STEP</strong> 7<br />
12-24 A5E00706939-01
<strong>Configuring</strong> <strong>Connections</strong><br />
12.11 Access to Connection IDs during Programming<br />
When programming (for example, in the Statement List Editor), you can perform<br />
the following functions while being prompted by dialogs:<br />
• Access already configured connections<br />
• Create new connections<br />
• Change the connection partner<br />
To call up the dialog, proceed as follows:<br />
1. Program the block call (for example, SFB12, BSEND)<br />
2. Position the mouse pointer on a block parameter (for example, "ID")<br />
3. Click the right mouse button to get a pop-up menu. In the pop-up menu, select<br />
"<strong>Connections</strong>."<br />
A dialog with all the connections that apply in this context appears (depending<br />
on the associated stations, already configured connections)<br />
<strong>Configuring</strong> <strong>Hardware</strong> <strong>and</strong> <strong>Communication</strong> <strong>Connections</strong> with <strong>STEP</strong> 7<br />
A5E00706939-01 12-25
<strong>Configuring</strong> <strong>Connections</strong><br />
12.12 <strong>Configuring</strong> <strong>Connections</strong> to Partners in the Same<br />
Project<br />
12.12.1 Connection Types for Connection Partners in the Same Project<br />
Selecting the Connection Type for Connection Partners in the Same Project<br />
The connection type is dependent on the subnet <strong>and</strong> the transfer protocol via<br />
which the connection is established, <strong>and</strong> on the automation family to which the<br />
connection partners belong.<br />
The blocks (SFBs, FBs, or FCs) you can use depend on the connection type.<br />
The following table should make it easier for you to select the connection type for<br />
the connection you want to establish.<br />
Connection Type Subnet Type Connection between<br />
SIMATIC...<br />
S7 connection MPI,<br />
PROFIBUS,<br />
Industrial Ethernet<br />
S7 connection, faulttolerant<br />
PTP<br />
Connection<br />
PROFIBUS,<br />
Industrial Ethernet<br />
Point-to-point<br />
(computer protocol<br />
RK 512/3964(R))<br />
FMS connection PROFIBUS<br />
(FMS protocol)<br />
FDL connection<br />
ISO<br />
transport link<br />
PROFIBUS<br />
(FDL protocol)<br />
Industrial Ethernet<br />
(ISO Transport<br />
protocol)<br />
S7 - S7, S7 - PG/PC,<br />
S7 - PG/PC with WinCC<br />
with MPI also: M7 - M7,<br />
M7 - S7, M7 - PG/PC<br />
S7 - partner in another project<br />
(S7, PG/PC with WinCC)<br />
S7(H) - S7(H),<br />
S7(H) - PC station (H)<br />
S7 - S7, S7 - S5,<br />
S7 - non-Siemens device<br />
S7 - partner in another project<br />
(S7, no Siemens device)<br />
S7 - S7, S7 - S5, S7 - PG/PC, S7<br />
- no Siemens device, S7 -<br />
broadcast to all nodes<br />
S7 - partner in another project<br />
(S7, S5, PG/PC, no Siemens<br />
device)<br />
S7 - S7, S7 - S5, S7 - PC/PG, S7<br />
-non-Siemens device<br />
S7 - partner in another project<br />
(S7, S5, PG/PC, non-Siemens<br />
device)<br />
S7 - S7, S7 - S5, S7 - PC/PG, S7<br />
- non-Siemens device, S7 -<br />
unspecified<br />
S7 - partner in another project<br />
(S7, S5, PG/PC, non-Siemens<br />
device, unspecified)<br />
SFB/FB/FC<br />
SFBs USEND,<br />
URCV, BSEND,<br />
BRCV, GET,<br />
PUT, START,<br />
STOP, RESUME,<br />
STATUS,<br />
USTATUS<br />
SFBs USEND,<br />
URCV, BSEND,<br />
BRCV, START,<br />
STOP, RESUME,<br />
STATUS,<br />
USTATUS<br />
SFBs BSEND,<br />
BRCV, GET,<br />
PUT, STATUS,<br />
PRINT<br />
FBs READ,<br />
WRITE,<br />
IDENTIFY,<br />
OSTATUS,<br />
REPORT<br />
FCs AG_SEND,<br />
AG_RECV,<br />
AG_LSEND,<br />
AG_LRECV<br />
FCs AG-SEND,<br />
AG-RECEIVE<br />
AG_LSEND,<br />
AG_LRECV,<br />
AG_LOCK,<br />
AG_UNLOCK;<br />
<strong>Configuring</strong> <strong>Hardware</strong> <strong>and</strong> <strong>Communication</strong> <strong>Connections</strong> with <strong>STEP</strong> 7<br />
12-26 A5E00706939-01
Connection Type Subnet Type Connection between<br />
SIMATIC...<br />
ISO-on-TCP<br />
connection<br />
Industrial Ethernet<br />
(TCP/IP protocol)<br />
TCP connection Industrial Ethernet<br />
(TCP/IP protocol)<br />
UDP connection<br />
Industrial Ethernet<br />
(TCP/IP protocol)<br />
S7 - S7, S7 - S5,<br />
S7 - PC/PG,<br />
S7 - non-Siemens device,<br />
S7 - unspecified<br />
S7 - partner in another project<br />
(S7, S5, PG/PC, non-Siemens<br />
device, unspecified)<br />
S7 - S7, S7 - S5,<br />
S7 - PC/PG,<br />
S7 - non-Siemens device,<br />
S7 - unspecified<br />
S7 - partner in another project<br />
(S7, S5, PG/PC, non-Siemens<br />
device, unspecified)<br />
S7 - S7, S7 - S5, S7 - PG/PC, S7<br />
- non-Siemens device, S7 -<br />
unspecified<br />
S7 - partner in another project<br />
(S7, S5, PG/PC, non-Siemens<br />
device, unspecified)<br />
S7 - unspecified (S7 - mail<br />
<strong>Configuring</strong> <strong>Connections</strong><br />
SFB/FB/FC<br />
FCs AG-SEND,<br />
AG-RECEIVE<br />
AG_LSEND,<br />
AG_LRECV,<br />
AG_LOCK,<br />
AG_UNLOCK<br />
FCs AG_SEND*,<br />
AG_RECV*,<br />
AG_LSEND**,<br />
AG_LRECV**<br />
AG_LOCK<br />
AG_UNLOCK<br />
FCs AG-SEND,<br />
AG-RECEIVE<br />
AG_LSEND,<br />
AG_LRECV<br />
E-mail connection Industrial Ethernet<br />
FCs AG-SEND,<br />
(TCP/IP protocol) server)<br />
AG_LSEND<br />
* The FCs AG_SEND <strong>and</strong> AG_RECV here can only be used for S7-300 (this<br />
depends on release number of the CP, see the documentation for the CP).<br />
** The FCs AG_LSEND <strong>and</strong> AG_LRECV here can generally be used for<br />
S7-400, <strong>and</strong> in addition for S7-300 (this depends on release number of the<br />
CP, see the documentation for the CP).<br />
Special Feature: Connection to Broadcast <strong>and</strong> Multicast Nodes<br />
For special connection types there is the option of selecting not just one connection<br />
partner, but several ones (broadcast <strong>and</strong> multicast nodes). These options are<br />
described in the SIMATIC NET (NCM S7) manuals. The connection partners "all<br />
broadcast nodes" or "all multicast nodes" are listed in the dialog box for entering a<br />
new connection.<br />
• You can set up a connection to "all broadcast nodes" (simultaneous sending to<br />
all broadcast receivers) for the connection types FDL connection <strong>and</strong> UDP<br />
connection.<br />
• You can set up a connection to "all multicast nodes" (simultaneous sending to<br />
several nodes) for the connection types FDL connection <strong>and</strong> UDP connection.<br />
<strong>Configuring</strong> <strong>Hardware</strong> <strong>and</strong> <strong>Communication</strong> <strong>Connections</strong> with <strong>STEP</strong> 7<br />
A5E00706939-01 12-27
<strong>Configuring</strong> <strong>Connections</strong><br />
12.12.2 Rules for Creating <strong>Connections</strong><br />
Selecting a Connection Path with More Than One Subnet in the Project<br />
If stations are connected to a number of subnets, <strong>STEP</strong> 7 chooses a connection<br />
path via one of the subnets. This connection path was found by <strong>STEP</strong> 7 to be more<br />
efficient than the others. <strong>STEP</strong> 7 selects a preferred subnet in the following order:<br />
Industrial Ethernet before Industrial Ethernet/TCP/IP before MPI before<br />
PROFIBUS.<br />
Example: Two stations are networked together via MPI <strong>and</strong> Industrial Ethernet.<br />
<strong>STEP</strong> 7 chooses the route via Industrial Ethernet.<br />
Note that the route selected by <strong>STEP</strong> 7 remains even if the connection to the<br />
subnet is lost. <strong>STEP</strong> 7 does not select an alternative route via another subnet<br />
(exception: redundant S7 connections).<br />
In an S7 connection, the connection path set automatically by <strong>STEP</strong> 7 can be<br />
changed by the user in the properties dialog box for the connection, for example,<br />
from MPI to PROFIBUS.<br />
Number of Possible <strong>Connections</strong><br />
The number of possible connections which can be entered in the connection table<br />
depends on the resources of the selected module <strong>and</strong> is monitored by <strong>STEP</strong> 7.<br />
Information on the connection resources of a module is available in the "Module<br />
state" dialog box, "<strong>Communication</strong>" tab card.<br />
12.12.3 <strong>Configuring</strong> <strong>Connections</strong> for Modules in a SIMATIC Station<br />
Special Feature<br />
The following section shows you how to create connections for a connection end<br />
point (for example, a CPU) in the network view.<br />
<strong>STEP</strong> 7 automatically assigns a local ID for each end point of the connection under<br />
either of the following conditions:<br />
• If both communication partners are S7-400 stations<br />
• If one communication partner is an S7-400 <strong>and</strong> the other is a SIMATIC station<br />
In this case, you configure only the connection in the connection table of a partner<br />
that has other communication partners, then automatically the matching entry in its<br />
connection table.<br />
<strong>Configuring</strong> <strong>Hardware</strong> <strong>and</strong> <strong>Communication</strong> <strong>Connections</strong> with <strong>STEP</strong> 7<br />
12-28 A5E00706939-01
12.12.3.1 Inserting a New Connection<br />
Requirement<br />
Procedure<br />
<strong>Configuring</strong> <strong>Connections</strong><br />
A connection defines the communication relationship between two nodes. It<br />
defines the following:<br />
• The two communication nodes involved<br />
• The connection type (for example, S7, point-to-point, FMS, ISO-on-TCP, FDL,<br />
or ISO Transport)<br />
• Special properties which depend on the type of connection (such as whether a<br />
connection remains permanently configured, or whether it is set up/broken<br />
dynamically in the user program)<br />
You must be in the network view of NetPro.<br />
1. In the network view, select the module for which you want to create a<br />
connection.<br />
Result: The connection table for the selected module is displayed in the lower<br />
half of the network view.<br />
2. Double-click an empty row in the connection table, or select a row <strong>and</strong> select<br />
the menu comm<strong>and</strong> Insert > Connection.<br />
3. In the "New Connection" dialog box select the required connection partner.<br />
You can obtain help with selecting a connection partner in the online help for<br />
this dialog box.<br />
4. Specify the type of connection.<br />
5. Activate the "Show Properties dialog box" check box if you want to view or<br />
change the properties for the connection after clicking "OK" or "Add:"<br />
The contents of the "Properties" dialog box is dependent on the connection<br />
selected; you can obtain help with filling it out in the online help for the dialog<br />
box.<br />
Result: <strong>STEP</strong> 7 enters the connection in the connection table of the local<br />
(selected) node <strong>and</strong> assigns the local ID <strong>and</strong> a partner ID if required for this<br />
connection which you will need when programming the communication function<br />
blocks (value for the block parameter "ID").<br />
<strong>Configuring</strong> <strong>Hardware</strong> <strong>and</strong> <strong>Communication</strong> <strong>Connections</strong> with <strong>STEP</strong> 7<br />
A5E00706939-01 12-29
<strong>Configuring</strong> <strong>Connections</strong><br />
12.12.3.2 Changing the Connection Partner<br />
Requirement<br />
Procedure<br />
Notes:<br />
You can change the connection partner for a previously configured connection.<br />
The local ID <strong>and</strong> the connection type are retained.<br />
You must be in the network view of NetPro.<br />
1. In the network view, select the module for which you want to modify a<br />
connection.<br />
2. Select the row in the connection table containing the connection you want to<br />
modify.<br />
3. Double-click the selected area of the "Partner" column or select the menu<br />
comm<strong>and</strong> Edit > Connection Partner.<br />
Result: The "Modify Connection" dialog box appears.<br />
4. In the "Connection Partner" box, select the end point (i.e. a module in the<br />
current project or in another project in the multiproject). If the new connection<br />
partner that you have selected is a partner "in an unknown project", you will<br />
then be prompted to enter a connection name (reference) for this connection.<br />
5. Confirm your entries by clicking "OK."<br />
Note that the configured properties of the connection will be returned to the default<br />
setting when the connection partner is modified. Use the menu comm<strong>and</strong> Edit ><br />
Object Properties if you wish to change the properties of the connection.<br />
The following applies to S7 connections: You can change an "unspecified"<br />
connection partner from <strong>STEP</strong> 7 V5 onwards (for example, to a SIMATIC 300/400<br />
station). You can also change the SIMATIC station partner to "unspecified."<br />
<strong>Configuring</strong> <strong>Hardware</strong> <strong>and</strong> <strong>Communication</strong> <strong>Connections</strong> with <strong>STEP</strong> 7<br />
12-30 A5E00706939-01
12.12.3.3 Reserving a Connection<br />
Requirement<br />
Procedure<br />
Note<br />
<strong>Configuring</strong> <strong>Connections</strong><br />
If you wish to reserve the communication resources of a node to exp<strong>and</strong> your<br />
project at a later date, or if you do not wish to specify a connection partner yet, you<br />
can enter "Unspecified" for the connection partner. Reserving connections is<br />
currently not possible for all connection types.<br />
You must be in the network view of NetPro. The properties dialog box for the<br />
connection is open.<br />
1. In the "Station" box, select the option "Unspecified."<br />
Result: The entry in the "Module" box is deactivated.<br />
2. Select the connection type in the "Type" box.<br />
3. Activate the "Show Properties dialog box" check box if you want to view or<br />
change the properties for the connection after clicking "OK" or "Add."<br />
4. Confirm your entries by clicking "OK."<br />
Result: <strong>STEP</strong> 7 enters the connection in the connection table of the local node<br />
<strong>and</strong> assigns the local ID for this connection which you will require for<br />
programming the communication blocks.<br />
Note that you can also assign special properties for each connection. To do this,<br />
select the menu comm<strong>and</strong> Edit > Object Properties.<br />
<strong>Configuring</strong> <strong>Hardware</strong> <strong>and</strong> <strong>Communication</strong> <strong>Connections</strong> with <strong>STEP</strong> 7<br />
A5E00706939-01 12-31
<strong>Configuring</strong> <strong>Connections</strong><br />
12.12.3.4 Deleting One or More <strong>Connections</strong><br />
Requirement:<br />
Procedure<br />
You must be in the network view of NetPro.<br />
1. Select the connections you wish to delete.<br />
2. Select the menu comm<strong>and</strong> Edit > Delete.<br />
If local ID <strong>and</strong> partner ID for the connection were entered in the connection<br />
table, <strong>STEP</strong> 7 also deletes the connection in the table for the connection<br />
partner.<br />
3. Download the connection tables with the deleted connections to the relevant<br />
programmable module. (To delete all the connections of a programmable<br />
module, you must download an empty connection table to the module.)<br />
12.12.3.5 Copying <strong>Connections</strong><br />
Introduction<br />
<strong>Connections</strong> are not copied individually but always in context with the project or the<br />
station.<br />
You can copy the following:<br />
• Entire projects<br />
• One or more stations within a project or beyond the boundaries of a project<br />
Requirement<br />
The SIMATIC Manager must be open.<br />
Copying a Project<br />
When you copy a project, all configured connections are also copied. There are no<br />
settings required for the copied connections because the connections remain<br />
consistent.<br />
Copying a Station<br />
When you copy one or more stations within the project boundaries or beyond them,<br />
you may have to reassign the connection partners to the local node (modifying a<br />
connection).<br />
If no connection partner exists for a connection, you will see this in the connection<br />
table, since the row of the connection partner will be displayed in bold.<br />
<strong>Connections</strong> between stations that are copied beyond the project boundaries<br />
remain in tact <strong>and</strong> consistent if the relevant subnets between these stations are<br />
copied along with them.<br />
<strong>Configuring</strong> <strong>Hardware</strong> <strong>and</strong> <strong>Communication</strong> <strong>Connections</strong> with <strong>STEP</strong> 7<br />
12-32 A5E00706939-01
12.12.4 <strong>Configuring</strong> <strong>Connections</strong> for a SIMATIC PC Station<br />
<strong>Configuring</strong> <strong>Connections</strong><br />
You can configure connections for SIMATIC PC stations. Depending on which<br />
interfaces are available on your PC (communication processors, CPs), you can<br />
configure the corresponding connection types.<br />
If you want to create or modify connection types other than S7 connections (such<br />
as fault-tolerant S7 connections), you must make sure you have installed the<br />
corresponding optional package.<br />
Requirements<br />
You have configured a SIMATIC PC station with all the communication end points<br />
(applications, OPC servers, software PLCs or slot CPUs) <strong>and</strong> PC communication<br />
cards. You have also configured all the stations that are supposed to be the<br />
communication end points of the connections.<br />
To configure connections, you must note the following, depending on the<br />
components that you are using:<br />
• WinLC (V3.0): This version does not support any configured connections.<br />
• Slot PLCs (CPU 41x-2 PCI): You can configure connections for these CPUs<br />
only by means of exactly one of the configured CPs.<br />
• Applications <strong>and</strong> OPC servers: Please see the documentation for the<br />
applications or programming interfaces that you are using.<br />
How to Configure a Connection<br />
1. Select the communication end point in the SIMATIC PC station in the network<br />
view, so that the connection table is visible.<br />
2. Double-click an empty row in the connection table or highlight a row <strong>and</strong> select<br />
the menu comm<strong>and</strong> Insert > Connection.<br />
3. Select the required connection partner in the "New Connection" dialog box.<br />
You can find help on selecting the connection partner in the online help for this<br />
dialog box.<br />
4. Define the type of connection.<br />
Special property of the connection: In contrast to S7 stations, <strong>STEP</strong> 7 assigns<br />
a name instead of a numerical value for the local ID (connection ID). You can<br />
change this name in the object properties of the connection.<br />
New connections are always two-way connections; that is, <strong>STEP</strong> 7<br />
automatically enters a connection to the local station in the connection table of<br />
the partner.<br />
5. Select the menu comm<strong>and</strong> Network > Save <strong>and</strong> Compile.<br />
On compilation, a configuration file ("XDB file") is generated for the PC station.<br />
This contains the name of the PC station, the connection descriptions, <strong>and</strong> the<br />
assigned parameters <strong>and</strong> subnet information for the PC communication cards.<br />
You enter the path for the configuration file in the "Configuration" tab (object<br />
properties of the SIMATIC PC Station).<br />
6. If the PC stations are configured with the Station Configuration Editor, you can<br />
load the PC station (see Downloading a PC Station).<br />
Otherwise, continue with step 7.<br />
<strong>Configuring</strong> <strong>Hardware</strong> <strong>and</strong> <strong>Communication</strong> <strong>Connections</strong> with <strong>STEP</strong> 7<br />
A5E00706939-01 12-33
<strong>Configuring</strong> <strong>Connections</strong><br />
7. Copy the configuration file to the PC station (programmable logic controller).<br />
The location of the configuration file is to be set on the PC station by means of<br />
the "Set PG/PC Interface" program ("<strong>STEP</strong> 7 Configuration" tab).<br />
You can find additional information concerning installation on a programming<br />
device/PC in the description "SIMATIC NET, S7 Programming Interface" <strong>and</strong> in<br />
the online Help for the "<strong>STEP</strong> 7 Configuration" tab.<br />
12.12.4.1 <strong>Configuring</strong> Routed S7 <strong>Connections</strong> for a SIMATIC PC Station<br />
For OPC servers (part of the CD SIMATIC NET PC software products as of<br />
Version 6.1) you can configure S7 connections between a SIMATIC PC<br />
station/SIMATIC HMI station <strong>and</strong> an S7 station that is connected to a different<br />
subnet.<br />
<strong>Configuring</strong> <strong>Hardware</strong> <strong>and</strong> <strong>Communication</strong> <strong>Connections</strong> with <strong>STEP</strong> 7<br />
12-34 A5E00706939-01
Requirements<br />
<strong>Configuring</strong> <strong>Connections</strong><br />
Both of the subnets must be interconnected across a router, for example IE/PB<br />
Link. Routing functions can also be performed by an S7 station or a SIMATIC PC<br />
station that is interconnected to both subnets via CPs or CPU.<br />
The end point in the SIMATIC PC/HMI station (currently only an OPC server) must<br />
support routed subnets.<br />
The connection partner must be located in the same project.<br />
What to do if only one-way S7 connections can be configured<br />
The S7 station can only be operated as communication server for configured oneway<br />
S7 connections on interconnected subnets.<br />
In this case, use NetPro to configure a one-way S7 connection for a SIMATIC PC<br />
station/HMI station at the other subnet. This enables you to access data of the S7<br />
station in the user program of the SIMATIC PC station, via the functions PUT (write<br />
access) <strong>and</strong> GET (read access).<br />
<strong>Configuring</strong> <strong>Hardware</strong> <strong>and</strong> <strong>Communication</strong> <strong>Connections</strong> with <strong>STEP</strong> 7<br />
A5E00706939-01 12-35
<strong>Configuring</strong> <strong>Connections</strong><br />
12.12.5 Programming Devices / PCs as Connection Partners<br />
If you want to configure connections for an end point on a programming device or<br />
PC, you have various options. Select either the "PG/PC" object or the "SIMATIC<br />
PC Station" object in the network view:<br />
• "SIMATIC PC Station" for applications that use configuration files (*.xdb files)<br />
for communication to a SIMATIC S7 station, for example:<br />
- For redundant connections with the optional package S7-REDCONNECT<br />
(fail-safe S7 communication) or<br />
- For SAPI-S7 interface<br />
- For OPC server<br />
Please check in the product information of the SIMATIC NET product to see if<br />
configuration by means of a configuration file is possible.<br />
• "PG/PC" for applications that use LDB files for communication to a SIMATIC S7<br />
station (SAPI-S7 interface)<br />
12.12.5.1 S7 Connection to a PG/PC<br />
An S7 connection from an S7 station to a PG/PC is only possible if the PG/PC has<br />
an SAPI-S7 programming interface (C programming interface for access to<br />
SIMATIC S7 components) or an OPC Server.<br />
You will find more information on filling out the dialog box in the online help for this<br />
dialog.<br />
For the Connection Partner "PG/PC"<br />
One method of configuring connections is by creating an LDB (local database):<br />
1. Configure the PG/PC in the network view.<br />
2. Configure the station from which a connection should go to the PG/PC.<br />
3. When you create the S7 connection you must select "PG/PC" as the<br />
connection partner.<br />
4. Edit the "Address Details" dialog box (accessible via the properties of the<br />
connection). In this dialog box you enter the name of the connection <strong>and</strong> the<br />
virtual field device name of the programming device/PC. You will find more<br />
information in the online help for this dialog box.<br />
5. Then double-click the configured programming device/PC <strong>and</strong> generate the<br />
local database (LDB).<br />
6. Transfer the database to the programming device/PC.<br />
7. Download the connection(s) to the station.<br />
For the Connection Partner "SIMATIC PC Station"<br />
For the programming device/PC you create a SIMATIC PC station in the network<br />
view. The "Application" forms the end point of a connection with this station type.<br />
<strong>Configuring</strong> <strong>Hardware</strong> <strong>and</strong> <strong>Communication</strong> <strong>Connections</strong> with <strong>STEP</strong> 7<br />
12-36 A5E00706939-01
12.12.5.2 S7 Connection to a PG/PC with WinCC<br />
For the Connection Partner "Unspecified"<br />
<strong>Configuring</strong> <strong>Connections</strong><br />
You can create S7 connections to PGs/PCs with WinCC within a project or beyond<br />
project boundaries. When you create the S7 connection you must select<br />
"Unspecified" as the connection. You enter special address information for WinCC<br />
in the "Address Details" dialog box.<br />
For the Connection Partner "SIMATIC PC Station"<br />
For the programming device/PC you create a SIMATIC PC station in the network<br />
view. WinCC forms the end point of a connection with this station type.<br />
<strong>Configuring</strong> <strong>Hardware</strong> <strong>and</strong> <strong>Communication</strong> <strong>Connections</strong> with <strong>STEP</strong> 7<br />
A5E00706939-01 12-37
<strong>Configuring</strong> <strong>Connections</strong><br />
12.13 <strong>Configuring</strong> <strong>Connections</strong> to Partners in Other Projects<br />
12.13.1 Connection Types for Partners in Other Projects<br />
Selecting the Connection Type to <strong>Communication</strong> Partners in Other Projects<br />
When you have set up a multiproject, you can then configure interproject<br />
connections.<br />
The connection type is dependent on the subnet <strong>and</strong> the transfer protocol through<br />
which the connection is established <strong>and</strong> on the automation family to which the<br />
connection partners belong.<br />
The blocks (SFBs, FBs, or FCs) you can use depend on the connection type.<br />
The following table should make it easier for you to select the connection type for<br />
the connection you want to establish.<br />
Connection Type Subnet Type Connection Between SIMATIC<br />
...<br />
S7 connection MPI,<br />
PROFIBUS,<br />
Industrial Ethernet<br />
S7 connection, faulttolerant<br />
PROFIBUS,<br />
Industrial Ethernet<br />
S7 - S7, S7 - PG/PC,<br />
S7 - PG/PC with WinCC<br />
with MPI also: M7 - M7, M7 - S7,<br />
M7 - PG/PC<br />
S7(H) - S7(H), S7(H)- PC-Station<br />
(H)<br />
FDL connection PROFIBUS S7 - S7, S7 - S5, S7 - PC/PG, S7<br />
– non-Siemens device, S7 -<br />
broadcast to all nodes<br />
ISO<br />
Transport connection<br />
ISO-on-TCP<br />
connection<br />
Industrial Ethernet<br />
(ISO-transport<br />
protocol)<br />
Industrial Ethernet<br />
(TCP/IP protocol)<br />
S7 - S7, S7 - S5, S7 - PC/PG, S7<br />
– non-Siemens device,<br />
S7 – unspecified<br />
S7 - S7, S7 - S5,<br />
S7 - PC/PG,<br />
S7 – non-Siemens device<br />
S7 – unspecified<br />
S7 - partner in another project<br />
(S7, S5, PG/PC, non-Siemens<br />
device, unspecified)<br />
SFB/FB/FC<br />
SFBs USEND,<br />
URCV, BSEND,<br />
BRCV, GET,<br />
PUT, START,<br />
STOP, RESUME,<br />
STATUS,<br />
USTATUS<br />
SFBs USEND,<br />
URCV, BSEND,<br />
BRCV, START,<br />
STOP, RESUME,<br />
STATUS,<br />
USTATUS<br />
FBs READ,<br />
WRITE,<br />
IDENTIFY,<br />
OSTATUS,<br />
REPORT<br />
FCs AG_SEND,<br />
AG_RECV,<br />
AG_LSEND,<br />
AG_LRECV<br />
FCs AG_SEND,<br />
AG_RECV,<br />
AG_LSEND,<br />
AG_LRECV<br />
AG_LOCK<br />
AG_UNLOCK<br />
<strong>Configuring</strong> <strong>Hardware</strong> <strong>and</strong> <strong>Communication</strong> <strong>Connections</strong> with <strong>STEP</strong> 7<br />
12-38 A5E00706939-01
Connection Type Subnet Type Connection Between SIMATIC<br />
...<br />
TCP connection Industrial Ethernet S7 - S7, S7 - S5,<br />
(TCP/IP protocol) S7 - PC/PG,<br />
S7 - non-Siemens device,<br />
S7 - unspecified<br />
UDP connection<br />
Industrial Ethernet<br />
(TCP/IP protocol)<br />
S7 - S7, S7 - S5, S7 - PC/PG, S7<br />
– non-Siemens device, S7 –<br />
unspecified<br />
<strong>Configuring</strong> <strong>Connections</strong><br />
SFB/FB/FC<br />
FCs AG_SEND*,<br />
AG_RECV*,<br />
AG_LSEND**,<br />
AG_LRECV**<br />
AG_LOCK<br />
AG_UNLOCK<br />
FCs AG_SEND,<br />
AG_RECV,<br />
AG_LSEND,<br />
AG_LRECV<br />
* The FCs AG_SEND <strong>and</strong> AG_RECV here can only be used for S7-300 (this<br />
depends on release number of the CP, see the documentation for the CP).<br />
** The FCs AG_LSEND <strong>and</strong> AG_LRECV here can generally be used for<br />
S7-400, <strong>and</strong> in addition for S7-300 (this depends on release number of the<br />
CP, see the documentation for the CP).<br />
Special Feature: Connection to Broadcast <strong>and</strong> Multicast Nodes<br />
For special connection types there is the option of selecting not just one connection<br />
partner, but several ones (broadcast <strong>and</strong> multicast nodes). These options are<br />
described in the SIMATIC NET (NCM S7) manuals. The connection partners "all<br />
broadcast nodes" or "all multicast nodes" are listed in the dialog box for entering a<br />
new connection.<br />
• You can set up a connection to "all broadcast nodes" (simultaneous sending to<br />
all broadcast receivers) for the connection types FDL connection <strong>and</strong> UDP<br />
connection.<br />
• You can set up a connection to "all multicast nodes" (simultaneous sending to<br />
several nodes) for the connection types FDL connection <strong>and</strong> UDP connection.<br />
<strong>Configuring</strong> <strong>Hardware</strong> <strong>and</strong> <strong>Communication</strong> <strong>Connections</strong> with <strong>STEP</strong> 7<br />
A5E00706939-01 12-39
<strong>Configuring</strong> <strong>Connections</strong><br />
12.13.2 Basic Procedure for <strong>Configuring</strong> <strong>Connections</strong> between Projects<br />
<strong>Configuring</strong> <strong>Connections</strong> with Multiproject<br />
AS of <strong>STEP</strong> 7 V5.2 you can easily create interproject connections with the help of<br />
the multiproject (see also the section: What you Should Know About Multiprojects).<br />
Possible Connection Partners in the Other Project (without Multiproject)<br />
There are two methods of setting up connections to connection partners in other<br />
<strong>STEP</strong> 7 projects (without multiproject):<br />
• Set up a connection to an "other station," a "PG/PC," or a "SIMATIC S5 station"<br />
• Set up a connection to an "unspecified" connection partner<br />
Note:<br />
<strong>Connections</strong> to "other stations," "SIMATIC S5 stations," "PG/PC," <strong>and</strong><br />
"unspecified" connection partners are also possible within a <strong>STEP</strong> 7 project. To<br />
which of these connection partners connections can be set up depends, among<br />
other things, on the connection type.<br />
Differences Between the Two Methods<br />
• You must configure an "other station", a "PG/PC", or a "SIMATIC S5 station" as<br />
subnet nodes in the current <strong>STEP</strong> 7 project. Restriction: For "other stations"<br />
<strong>and</strong> SIMATIC S5 stations you cannot configure S7 connections. All other<br />
connection types are possible.<br />
• No subnet node needs to be configured in the current <strong>STEP</strong> 7 project for an<br />
unspecified partner. You can set up S7 connections, PTP connections, ISO<br />
Transport connections, <strong>and</strong> ISO-on-TCP connections to unspecified connection<br />
partners.<br />
Special Case for PtP <strong>Connections</strong><br />
In contrast to the case for <strong>STEP</strong> 7 connections, the configuration of PtP<br />
connections to an unspecified partner does not require networking of the local<br />
node. You only have to network the communication partners in an actual plant<br />
before you place the connection in operation.<br />
<strong>Configuring</strong> <strong>Hardware</strong> <strong>and</strong> <strong>Communication</strong> <strong>Connections</strong> with <strong>STEP</strong> 7<br />
12-40 A5E00706939-01
12.13.3 Creating a New Connection to an Unspecified Partner<br />
FMS, FDL, ISO-Transport, <strong>and</strong> ISO-on-TCP <strong>Connections</strong><br />
S7 <strong>Connections</strong><br />
Requirement<br />
Procedure<br />
<strong>Configuring</strong> <strong>Connections</strong><br />
FMS, FDL, ISO-Transport, <strong>and</strong> ISO-on-TCP connections are described in the<br />
SIMATIC NET, <strong>and</strong> SIMATIC NCM manuals.<br />
You can use unspecified connection partners in order to configure S7 connections<br />
to a connection partner in a different project.<br />
You must be in the connection table view (NetPro).<br />
You create an S7 or point-to-point connection to an "unspecified" connection<br />
partner as follows:<br />
1. Select a module from which you want to run the connection (local node).<br />
2. Double-click an empty row in the connection table, or select a row <strong>and</strong> select<br />
the menu comm<strong>and</strong> Insert > Connection.<br />
3. In the "New Connection" dialog box select "Unspecified" as the connection<br />
partner.<br />
4. Set the properties for the connection:<br />
For PtP connections: in the properties dialog box for the PtP connection<br />
change the name of the partner from "unspecified" to a suitable name (the<br />
name is also entered in the connection table).<br />
For S7 connections: enter the address of the interface of the connection<br />
partner <strong>and</strong> click the Address Details button in the properties dialog box.<br />
Depending on the connection partner, different settings are necessary in the<br />
"Address Details" dialog box. You will find more information on filling out the<br />
dialog box in the online help.<br />
<strong>Configuring</strong> <strong>Hardware</strong> <strong>and</strong> <strong>Communication</strong> <strong>Connections</strong> with <strong>STEP</strong> 7<br />
A5E00706939-01 12-41
<strong>Configuring</strong> <strong>Connections</strong><br />
"Address Details" Dialog Box for S7 <strong>Connections</strong> to a Partner in a different<br />
Project<br />
In the dialog boxes for the connection properties (Properties S7 Connection dialog<br />
box <strong>and</strong> Address Details dialog box) of an unspecified partner, you have to enter or<br />
select the address (of the interface), the end point of the connection (rack/slot), <strong>and</strong><br />
the connection resources of each "Other Side" (that is, of the connection partner).<br />
Example: The following configuration is a prerequisite:<br />
The stations are in different projects. The CPU as connection end point is in the<br />
central controller (rack 0) slot 4 in both projects. Both stations are networked by<br />
means of the PROFIBUS interface of a CP.<br />
The following table shows which supplementary information is required for the<br />
configuration shown in order to enable a connection setup in operation.<br />
Information in Dialog Boxes on<br />
the Unspecified Connection<br />
Partner...<br />
... for Project 1 ...for Project 2 Comments<br />
Active connection setup Yes No Dialog box: Properties S7<br />
Connection<br />
Address (interface) Local/Partner Local: 2 Local: 3 Dialog box: Properties S7<br />
Partner: 3 Partner: 2 Connection, under Connection<br />
Path; the addresses have to<br />
match "crosswise".<br />
Rack/slot Local: 0/4 Local: 0/4 Dialog box: Address Details"<br />
Partner: 0/4 Partner: 0/4<br />
Connection resource (hex) Local: 10 Local: 11 Dialog box: Address Details;<br />
(Local/Partner)<br />
Partner: 11 Partner: 10 connection resources cannot be<br />
assigned twice <strong>and</strong> must match<br />
"crosswise".<br />
TSAP (Transport Service Access<br />
Point)<br />
Is displayed<br />
(cannot be<br />
changed)<br />
Is displayed<br />
(cannot be<br />
changed)<br />
Dialog box: Address Details;<br />
for station-internal addressing of<br />
the interface, by means of the<br />
connection "Running" (is made<br />
up of the address details)<br />
<strong>Configuring</strong> <strong>Hardware</strong> <strong>and</strong> <strong>Communication</strong> <strong>Connections</strong> with <strong>STEP</strong> 7<br />
12-42 A5E00706939-01
<strong>Configuring</strong> <strong>Connections</strong><br />
12.13.4 Creating a Connection to an 'Other Station', a 'PG/PC', or a<br />
'SIMATIC S5 Station'<br />
Requirement<br />
You must have created the entire network configuration in both projects.<br />
Stations that were configured in one project must be entered in the other project as<br />
an "other station."<br />
The network view (NetPro) must be open.<br />
Procedure<br />
The procedure is the same as for creating connections to a partner (PG/PC, "other<br />
station," <strong>and</strong> SIMATIC S5) within one project.<br />
12.14 Saving <strong>Connections</strong><br />
NetPro saves connections (menu comm<strong>and</strong> Network > Save) implicitly with all<br />
network <strong>and</strong> station data that are relevant for a functioning network configuration.<br />
For further information please refer to the section "Saving <strong>and</strong> Downloading the<br />
Network Configuration <strong>and</strong> Consistency Check".<br />
<strong>Configuring</strong> <strong>Hardware</strong> <strong>and</strong> <strong>Communication</strong> <strong>Connections</strong> with <strong>STEP</strong> 7<br />
A5E00706939-01 12-43
<strong>Configuring</strong> <strong>Connections</strong><br />
<strong>Configuring</strong> <strong>Hardware</strong> <strong>and</strong> <strong>Communication</strong> <strong>Connections</strong> with <strong>STEP</strong> 7<br />
12-44 A5E00706939-01
13 <strong>Configuring</strong> Global Data <strong>Communication</strong><br />
13.1 Overview: Global Data <strong>Communication</strong><br />
Introduction<br />
Global data communication (GD communication) is a simple method of<br />
communication integrated in the operating system of the S7-300 <strong>and</strong> S7-400<br />
CPUs.<br />
GD communication allows the cyclic exchange of data between CPUs via the<br />
multipoint interface. Cyclic data exchange takes place with the normal process<br />
image.<br />
Global data communication is configured with <strong>STEP</strong> 7; transferring global data is<br />
done by the system <strong>and</strong> is not therefore programmed.<br />
The following sections show how you can estimate using the technical<br />
specifications as given for every CPU (number of GD circles, size <strong>and</strong> number of<br />
GD packets etc.) what quantities of data can be exchanged between CPUs using<br />
the "GD communication" process.<br />
The following are also listed:<br />
• Send <strong>and</strong> receive conditions to be observed<br />
• The formula for estimating the approximate response time<br />
What Are Global Data?<br />
Global data as they are used in the GD communication process are the following<br />
address areas in the CPU:<br />
• Inputs, outputs (from the process image)<br />
• Bit memory<br />
• Data block areas<br />
• Timers, counters (not recommended because the values are no longer current<br />
at the receiver; can only be configured as send address areas)<br />
Peripheral areas (PI <strong>and</strong> PQ) <strong>and</strong> local data cannot be used for global data<br />
communication.<br />
<strong>Configuring</strong> <strong>Hardware</strong> <strong>and</strong> <strong>Communication</strong> <strong>Connections</strong> with <strong>STEP</strong> 7<br />
A5E00706939-01 13-1
<strong>Configuring</strong> Global Data <strong>Communication</strong><br />
Data Transfer Process<br />
Global data communication functions according to the broadcast method, meaning<br />
the receipt of the global data is not acknowledged. The sender does not receive<br />
information as to whether a receiver <strong>and</strong> which receiver has received the sent<br />
global data. If the process requires secure data exchange, use another service<br />
such as S7 functions.<br />
Subnets for Global Data <strong>Communication</strong><br />
GD communication is possible:<br />
• Via an MPI subnet only (between different stations) or<br />
• Via the backplane bus only (for example, between S7 CPUs in a rack in<br />
multicomputing)<br />
How Does an Address Area Become a Send/Receive Area?<br />
The address areas that are involved in global data communication are configured<br />
in a global data table (GD table) using <strong>STEP</strong> 7:<br />
• Every column is assigned to exactly one CPU which means the columns<br />
represent the CPUs involved in the data exchange (maximum 15 CPUs)<br />
• Every row (or more exactly: every cell that can be edited in a row) represents<br />
the address areas via which one CPU only sends <strong>and</strong> one or more CPUs<br />
receive<br />
When you have filled out the table, compiled it, <strong>and</strong> downloaded it to the CPUs<br />
involved, these CPUs send <strong>and</strong> receive cyclically via these address areas at the<br />
scan cycle checkpoint (meaning at the time at which the process image update<br />
takes place).<br />
Special Feature: With the S7-400, configured global data can also be sent using<br />
SFC60 (GD_SND) for event-driven sending <strong>and</strong> received using SFC61 (GD_RCV).<br />
<strong>Configuring</strong> <strong>Hardware</strong> <strong>and</strong> <strong>Communication</strong> <strong>Connections</strong> with <strong>STEP</strong> 7<br />
13-2 A5E00706939-01
<strong>Configuring</strong> Global Data <strong>Communication</strong><br />
13.2 Determining the <strong>Communication</strong> Capabilities from the<br />
GD Resources<br />
Tip<br />
You can determine how high the performance of an S7 CPU is with regard to GD<br />
communication using the following technical specifications ("GD resources"):<br />
• The number of GD circles (in which the CPU can participate)<br />
• The maximum number of net data per GD packet<br />
• The maximum number of receive GD packets per GD circle<br />
• The length of the consistent data per packet<br />
The remaining documented GD resources are identical for all S7 CPUs <strong>and</strong> are not<br />
therefore relevant for selecting a CPU.<br />
The technical data listed above provide indirect information about how much data<br />
the CPUs that are connected together via an MPI subnet or S7-400 backplane bus<br />
can exchange cyclically. How send data are "bundled up" to form GD packets <strong>and</strong><br />
how many GD circles are used is illustrated in the following sections.<br />
If you only want to transfer small amounts of data (only a few bytes) between a few<br />
CPUs, simply enter the address areas in the GD table <strong>and</strong> compile the table.<br />
<strong>STEP</strong> 7 packs the data <strong>and</strong> allocates the resources automatically. You can see the<br />
total resources (GD circles <strong>and</strong> GD packets) used up after compilation in the first<br />
column ("GD Identifier") of the GD table.<br />
The following sections outline the principle according to which GD packets <strong>and</strong> GD<br />
circles are used up.<br />
<strong>Configuring</strong> <strong>Hardware</strong> <strong>and</strong> <strong>Communication</strong> <strong>Connections</strong> with <strong>STEP</strong> 7<br />
A5E00706939-01 13-3
<strong>Configuring</strong> Global Data <strong>Communication</strong><br />
13.2.1 Required Number of GD Packets<br />
A GD packet is a data frame that is sent from one CPU only to one or more other<br />
CPUs "in one shot."<br />
A GD packet contains the following maximum number of net data (see also the<br />
technical specifications of the CPUs):<br />
• A maximum of 22 bytes in S7-300<br />
• A maximum of 54 bytes in S7-400<br />
Example 1:<br />
You want to use the maximum send area for an S7-300 CPU to send from a data<br />
block. The bit memory area is to be used for the receiver CPU.<br />
Rules<br />
Example 2:<br />
You enter the following in the GD table as the send area for an S7-300 CPU:<br />
• DB8.DBB0:22 (that is an area of 22 data bytes in DB8 from data byte 0)<br />
You enter the following in the GD table as the receive area for another CPU (must<br />
always be exactly the same size as the send area):<br />
• MW100:11 (that is 11 memory words from MW100)<br />
• If you want to send from more than one address area, you must take off two<br />
bytes from the maximum number of net data for each additional address area<br />
used.<br />
• A bit address (for example, M 4.1) uses one byte of net data in the GD packet.<br />
You want to send from a data block <strong>and</strong> from the process image of the outputs.<br />
The GD packet can then only be 20 bytes in size.<br />
You enter the following in the GD table as the send areas for an S7-300 CPU:<br />
• DB8.DBB0:10 (that is an area of 10 data bytes in DB8 from data byte 0)<br />
• QW0:10 (that is an area of 10 output words from QW0)<br />
You enter the receive areas for the other CPUs similarly to the first example; the<br />
width of the receive area must be identical to the send area.<br />
<strong>Configuring</strong> <strong>Hardware</strong> <strong>and</strong> <strong>Communication</strong> <strong>Connections</strong> with <strong>STEP</strong> 7<br />
13-4 A5E00706939-01
13.2.2 Required Number of GD Circles<br />
What is a GD Circle?<br />
<strong>Configuring</strong> Global Data <strong>Communication</strong><br />
All CPUs participating as sender or receiver in exchanging a common data packet<br />
form a GD circle.<br />
<br />
<br />
Example for Converting to a GD Table (After Compiling)<br />
GD Identifier CPU 1 CPU 2 CPU 3<br />
GD 1.1.1 > MW0 IW0 IW0<br />
Legend for GD table:<br />
">" indicates the sender<br />
<br />
<br />
<br />
<br />
<br />
<br />
<strong>Configuring</strong> <strong>Hardware</strong> <strong>and</strong> <strong>Communication</strong> <strong>Connections</strong> with <strong>STEP</strong> 7<br />
A5E00706939-01 13-5
<strong>Configuring</strong> Global Data <strong>Communication</strong><br />
When is Another GD Circle Required? (Case 1)<br />
If more data are to be sent <strong>and</strong> received than can fit in one GD packet, an<br />
additional GD circle is required.<br />
<br />
<br />
<br />
Example for Converting to a GD Table (After Compiling)<br />
GD Identifier CPU 300 (1) CPU 300 (2) CPU 300 (3)<br />
GD 1.1.1 >MW0:10 IW0:10 IW0:10<br />
GD 2.1.1 > MW100:4 IW30:4 IW20:4<br />
When is Another GD Circle Required? (Case 2)<br />
An additional GD circle is also required if the send <strong>and</strong> receive CPUs are not the<br />
same (then a new GD packet must be created).<br />
<br />
<br />
<strong>Configuring</strong> <strong>Hardware</strong> <strong>and</strong> <strong>Communication</strong> <strong>Connections</strong> with <strong>STEP</strong> 7<br />
13-6 A5E00706939-01
Example for Converting to a GD Table (After Compiling)<br />
<strong>Configuring</strong> Global Data <strong>Communication</strong><br />
GD Identifier CPU 300 (1) CPU 300 (2) CPU 300 (3) CPU 300 (4)<br />
GD 1.1.1 > MW0 IW0 IW0<br />
GD 2.1.1 > MW100:4 IW30:4 IW20:4 IW30:4<br />
Tip<br />
It may be advisable to determine a CPU as the receiver for a GD packet although<br />
the packet is not required for these CPUs (as CPU 4 in the example above). If the<br />
sender <strong>and</strong> the receiver CPUs are the same, the number of GD circles can be<br />
reduced in this way, for example, for the sender CPU. In the example above, CPUs<br />
1,2, <strong>and</strong> 3 would then only form one GD circle because both GD packets would be<br />
grouped together to form one GD packet.<br />
Maximum Number of GD Circles<br />
The number of GD circles is limited to 16. CPUs that have a GD circle number<br />
greater than 16 cannot be loaded with the global data configuration. However,<br />
<strong>STEP</strong> 7 does not prevent saving <strong>and</strong> compiling GD tables with a greater number of<br />
GD circles.<br />
<strong>Configuring</strong> <strong>Hardware</strong> <strong>and</strong> <strong>Communication</strong> <strong>Connections</strong> with <strong>STEP</strong> 7<br />
A5E00706939-01 13-7
<strong>Configuring</strong> Global Data <strong>Communication</strong><br />
13.2.3 Exceptions for Calculating the GD Circles Required<br />
For S7-300:<br />
Under certain conditions, the number of GD circles required can be reduced:<br />
If an S7-300 CPU ("sender CPU") sends one GD packet only to one other S7-300<br />
CPU ("receiver CPU") only <strong>and</strong> this receiver CPU sends only one GD packet back<br />
to the sender CPU, only one GD circle is used.<br />
This property reflects the technical data "max. number of receive GD packets per<br />
GD circle = 1."<br />
In the example below you will see from the GD identifier (GD packet number) that<br />
only one GD circle is required.<br />
Example (GD Table After Compiling)<br />
GD Identifier CPU 300 (1) CPU 300 (2)<br />
GD 1.1.1 > MW100 IW2<br />
GD 1.2.1 IW4:3 >MW10:3<br />
For S7-400:<br />
If a maximum of three CPUs exchange GD packets <strong>and</strong> each of the three CPUs<br />
only sends one GD packet to the other two, only one GD circle is required here<br />
too.<br />
This property reflects the technical data "max. number of receive GD packets per<br />
GD circle = 2."<br />
In the example below you will see from the GD identifier (GD packet number) that<br />
only one GD circle is required.<br />
Example (GD Table After Compiling)<br />
GD Identifier CPU 400 (1) CPU 400 (2) CPU 400 (3)<br />
GD 1.1.1 > MW0 IW0 IW0<br />
GD 1.2.1 IW2 IW2 > MW0<br />
GD 1.3.1 IW0 > MW0 IW2<br />
<strong>Configuring</strong> <strong>Hardware</strong> <strong>and</strong> <strong>Communication</strong> <strong>Connections</strong> with <strong>STEP</strong> 7<br />
13-8 A5E00706939-01
13.3 Conditions for Sending <strong>and</strong> Receiving<br />
Example:<br />
Sender Scan Rate<br />
<strong>Configuring</strong> Global Data <strong>Communication</strong><br />
With the aid of a scan rate you can set the following for every CPU participating in<br />
the exchange of a GD packet:<br />
• After how many cycles the GD packet is sent (only for the CPU designated as<br />
sender)<br />
• After how many cycles the GD packet is received<br />
Special Case: scan rate "0" means that the sending of the GD packet is eventdriven<br />
(not cyclic) (only possible in S7-400 with SFC60/SFC61).<br />
A scan rate of 20 entered for a GD packet at the sender CPU means that the CPU<br />
sends the GD packet at the scan cycle checkpoint after every 20 cycles.<br />
A scan rate of 8 entered for a GD packet at the receiver CPU means that the CPU<br />
receives the GD packet at the scan cycle checkpoint after every 8 cycles (or more<br />
exactly, enters the received GD packet into the address area).<br />
The following conditions should be maintained, however, to keep the<br />
communication load on the CPU at a low level:<br />
S7-300 CPUs: scan rate × scan cycle time >= 60 milliseconds<br />
S7-400 CPUs: scan rate × scan cycle time >= 10 milliseconds<br />
Receiver Scan Rate<br />
To prevent the loss of GD packets, they must be received more often than they are<br />
sent.<br />
To guarantee this, the following must apply:<br />
Scan rate (receiver) × scan cycle time (receiver) × scan rate (sender) × scan cycle<br />
time (sender).<br />
<strong>Configuring</strong> <strong>Hardware</strong> <strong>and</strong> <strong>Communication</strong> <strong>Connections</strong> with <strong>STEP</strong> 7<br />
A5E00706939-01 13-9
<strong>Configuring</strong> Global Data <strong>Communication</strong><br />
13.3.1 Relationship between the Scan Rate <strong>and</strong> Scan Cycle Time<br />
Valid Scan Rates<br />
Valid scan rates for senders as well as for receivers are 0 <strong>and</strong> values between 1<br />
<strong>and</strong> 255. Note that scan rates which are too small overload the CPU.<br />
Recommendation: Maintain the default scan rate or make sure that the product of<br />
scan cycle time x scan rate is greater than 0.5 s. For higher communication<br />
requirements, you should use different communication mechanisms, such as<br />
connection by means of PROFIBUS-DP.<br />
The scan rate 0 identifies event-driven data transmission using system functions<br />
(SFCs) in a user program (not possible with all CPUs).<br />
If you do not enter any scan rates, the default settings are used.<br />
Example for Scan Rates<br />
The product of scan cycle time x scan rate determines the time interval of global<br />
data exchange.<br />
Assumption: The user program in a CPU 412 has a scan cycle time of<br />
approximately 50 ms. The default scan rate is 22.<br />
50 ms x 22 = 1100 ms<br />
Global data are thus sent or received by this CPU every 1.1 s.<br />
If the scan cycle time is increased by the user program to 80 ms, for example,<br />
global data will be sent or received every 80 ms x 22 = 1760 s.<br />
If the value 1100 s is reached again, you must recalculate the scan rate.<br />
Scan rate (new) = 1100 ms/80 ms = 13.75<br />
That is, because of the extension of the scan cycle, you have to set the scan rate<br />
to 14 in order to maintain the time interval.<br />
<strong>Configuring</strong> <strong>Hardware</strong> <strong>and</strong> <strong>Communication</strong> <strong>Connections</strong> with <strong>STEP</strong> 7<br />
13-10 A5E00706939-01
13.4 Response Time<br />
<strong>Configuring</strong> Global Data <strong>Communication</strong><br />
The response time for two stations that exchange GD packets via an MPI subnet<br />
can be calculated approximately.<br />
Requirement for Calculating the Response Time<br />
Calculation<br />
Tip<br />
• Transmission rate 187.5 kbit/s<br />
• No other communication by means of MPI (for example, by connected<br />
programming devices or operator panels)<br />
response time ≈ scan rate (sender) × scan cycle time (sender) + scan rate<br />
(receiver) × scan cycle time (receiver) + number (of MPI nodes) × 10 ms<br />
For higher transmission rates, the factor "× 10 ms" is smaller; however, this factor<br />
does not diminish linearly with an increase in transmission speed.<br />
Because the response time is very dependent on the scan cycle times <strong>and</strong> on the<br />
other communication load over the MPI, you must determine the response time in<br />
your system empirically <strong>and</strong>, where appropriate, adapt the scan rate.<br />
<strong>Configuring</strong> <strong>Hardware</strong> <strong>and</strong> <strong>Communication</strong> <strong>Connections</strong> with <strong>STEP</strong> 7<br />
A5E00706939-01 13-11
<strong>Configuring</strong> Global Data <strong>Communication</strong><br />
13.5 How to Configure <strong>and</strong> Save Global Data<br />
<strong>Communication</strong><br />
13.5.1 Procedure for <strong>Configuring</strong> Global Data <strong>Communication</strong><br />
Requirement<br />
Overview Procedure<br />
You must have configured an MPI subnet with all the required stations.<br />
<br />
<br />
<br />
<br />
<br />
<br />
<br />
<strong>Configuring</strong> <strong>Hardware</strong> <strong>and</strong> <strong>Communication</strong> <strong>Connections</strong> with <strong>STEP</strong> 7<br />
13-12 A5E00706939-01
13.5.2 Opening the GD Table<br />
There are two ways of opening a global data table:<br />
• Open the entire GD table for a subnet<br />
• Open the GD table for a CPU<br />
<strong>Configuring</strong> Global Data <strong>Communication</strong><br />
Opening the GD Table for a Subnet (Recommended)<br />
• In the SIMATIC Manager select an MPI subnet <strong>and</strong> select the menu comm<strong>and</strong><br />
Options > Define Global Data.<br />
Result: The GD table for the selected subnet is opened.<br />
Opening the GD Table for a CPU<br />
The following option for opening a global data table is recommended if you want to<br />
retrieve the GD table from the CPU during servicing <strong>and</strong> when searching for faults.<br />
1. Select the menu comm<strong>and</strong> GD Table > Open > Global Data for CPU. The<br />
dialog box "Open" appears, in which you can select the project <strong>and</strong> station for<br />
the required CPU.<br />
2. Select one of the following options:<br />
- "Online" to read the data directly from the CPU, or<br />
- "Offline" to obtain the system data for the CPU from the offline project<br />
3. Select the project <strong>and</strong> double-click the station in which the required CPU is<br />
located to open it.<br />
4. Select the "Blocks" object of the CPU whose GD table you wish to display.<br />
5. Confirm your selection by clicking "OK."<br />
Result: A global data table appears in which all CPUs participating in global<br />
data communication are entered in the column headers. However, the table<br />
only contains the values for the selected CPU.<br />
To complete the empty cells of the GD table, you must update the table.<br />
• Select the menu comm<strong>and</strong> View > Update. The GD table is now displayed with<br />
all entries.<br />
<strong>Configuring</strong> <strong>Hardware</strong> <strong>and</strong> <strong>Communication</strong> <strong>Connections</strong> with <strong>STEP</strong> 7<br />
A5E00706939-01 13-13
<strong>Configuring</strong> Global Data <strong>Communication</strong><br />
13.5.3 Tips for Working with GD Tables<br />
Inserting Global Data Rows<br />
• Select the menu comm<strong>and</strong> Insert > GD Row<br />
Deleting Global Data Rows<br />
• Select a row <strong>and</strong> select the menu comm<strong>and</strong> Edit > Delete.<br />
Inserting <strong>and</strong> Deleting CPU Columns<br />
• Select the menu comm<strong>and</strong> Insert > CPU Column.<br />
Deleting CPU Columns<br />
• Select a column <strong>and</strong> select the menu comm<strong>and</strong> Edit > Delete.<br />
Note on Deleting CPU Columns<br />
If you delete a CPU column from a global data table, the corresponding system<br />
data of the CPU (offline) are deleted. Bear in mind that you must also delete the<br />
online data in the CPU for the deleted CPU column.<br />
Requirement: The programming device must be connected to the CPU via the<br />
multipoint interface <strong>and</strong> the CPU must be in STOP mode.<br />
Select the menu comm<strong>and</strong> GD Table > Delete Global Data for CPU <strong>and</strong> in the<br />
dialog box that follows, select the option "Online." Select the "Blocks" folder <strong>and</strong><br />
confirm by clicking "OK."<br />
Modifying the Column Width<br />
The width of each CPU column can be modified. You can also make a column so<br />
narrow that it cannot be seen.<br />
• Position the cursor on the right-h<strong>and</strong> side of the CPU cell in the table header,<br />
press <strong>and</strong> hold down the left mouse button, <strong>and</strong> drag the border horizontally to<br />
resize the column.<br />
<strong>Configuring</strong> <strong>Hardware</strong> <strong>and</strong> <strong>Communication</strong> <strong>Connections</strong> with <strong>STEP</strong> 7<br />
13-14 A5E00706939-01
13.5.4 Filling Out the GD Table<br />
Requirement<br />
<strong>Configuring</strong> Global Data <strong>Communication</strong><br />
The scan rates <strong>and</strong> the GD status must be toggled off in the GD table.<br />
Entering CPUs in the Table Header<br />
1. In the global data table, click on a column in the table header. The column is<br />
then selected.<br />
2. Select the menu comm<strong>and</strong> Edit > Assign CPU. The dialog box "Open" will<br />
then appear. Alternatively, you can open this box by double-clicking the column<br />
header.<br />
3. Select the current project <strong>and</strong> double-click to open the station for the required<br />
CPU.<br />
4. Select the CPU <strong>and</strong> confirm your selection by clicking "OK."<br />
Result: The name of the selected CPU is displayed in the table header.<br />
Entering Data in GD Rows<br />
Requirement: You must have entered the relevant CPU in the table header (see<br />
above).<br />
1. Position the cursor in a table cell <strong>and</strong> enter the required address. You can only<br />
enter absolute addresses (for example, IW0); symbolic entries are not<br />
possible.<br />
Tip: A set of continuous addresses of the same data type requires only one<br />
entry in the global data table. In this case, enter a colon after the address <strong>and</strong><br />
then the repetition factor. The repetition factor defines the size of the data area.<br />
Example: IW4: 3 means: 3 words from IW4.<br />
2. Switch from overwrite to insert mode by pressing the F2 key.<br />
3. Edit the table as you would normally. You can also use the menu comm<strong>and</strong>s<br />
Edit > Cut, Edit > Copy, or Edit >Paste.<br />
4. Finish your entries with RETURN.<br />
Note<br />
In a GD circle, use only either the communication bus (within an S7-400 station) or<br />
the MPI subnet (outside the stations). Mixed operation is not possible.<br />
<strong>Configuring</strong> <strong>Hardware</strong> <strong>and</strong> <strong>Communication</strong> <strong>Connections</strong> with <strong>STEP</strong> 7<br />
A5E00706939-01 13-15
<strong>Configuring</strong> Global Data <strong>Communication</strong><br />
Defining Sender <strong>and</strong> Receiver Cells<br />
Each global data row contains only one sender <strong>and</strong> one or more receivers. ">"<br />
indicates a sender. All cells in the global data table are preset as receivers.<br />
• To define a data cell as a sender, highlight the cell <strong>and</strong> select the menu<br />
comm<strong>and</strong> Edit > Sender.<br />
• To define a data cell as a receiver, highlight the cell <strong>and</strong> select the menu<br />
comm<strong>and</strong> Edit > Receiver.<br />
Note<br />
Cells that contain timers <strong>and</strong> counters can be used only as senders.<br />
<strong>Configuring</strong> <strong>Hardware</strong> <strong>and</strong> <strong>Communication</strong> <strong>Connections</strong> with <strong>STEP</strong> 7<br />
13-16 A5E00706939-01
<strong>Configuring</strong> Global Data <strong>Communication</strong><br />
13.5.5 Saving <strong>and</strong> Compiling the GD Table for the First Time<br />
Saving<br />
When saving, you store the data which you have entered in your global data table<br />
in a source file.<br />
• Select the menu comm<strong>and</strong> GD Table > Save<br />
or<br />
1. Select the menu comm<strong>and</strong> GD Table > Save As<br />
2. Navigate to the project in which you want to save the global data table.<br />
3. Confirm with "OK."<br />
Note<br />
In order for the changes you made in the global data table to be saved in the<br />
system data as well, you must compile the global data table.<br />
The data will automatically be saved in the system data of the relevant CPUs<br />
directly after compiling.<br />
The data consistency between the source file <strong>and</strong> the system data can only be<br />
guaranteed if each change to the GD table is saved both in the source file (save)<br />
<strong>and</strong> in the system data (compile).<br />
Compiling<br />
A compiler run is necessary in order to compile the data you enter in the global<br />
data table into a language that the CPUs can underst<strong>and</strong>.<br />
The tabular data in the global data table are compiled into system data that the<br />
CPUs can process.<br />
For each CPU column, the compiler creates the exact system data necessary for<br />
communicating with that particular CPU. For this reason, each CPU has its own<br />
GD configuration.<br />
• Click the appropriate button in the toolbar or select the menu comm<strong>and</strong> GD<br />
Table > Compile. The global data table will be compiled to phase 1.<br />
Result: <strong>STEP</strong> 7 checks:<br />
- The validity of the CPU specified in the CPU column headers<br />
- The syntax of the addresses you entered in the table cells.<br />
- The size of the data areas for the sender <strong>and</strong> receiver (the data areas for<br />
the sender <strong>and</strong> receiver must be of equal size)<br />
- That the global data in a row are exchanged either via the communication<br />
bus only or via the MPI subnet only. Mixed operation is not possible.<br />
After the first compilation has been completed successfully, the GD table is in<br />
phase 1. In phase 1 you can edit the status rows <strong>and</strong> scan rates in the GD table.<br />
<strong>Configuring</strong> <strong>Hardware</strong> <strong>and</strong> <strong>Communication</strong> <strong>Connections</strong> with <strong>STEP</strong> 7<br />
A5E00706939-01 13-17
<strong>Configuring</strong> Global Data <strong>Communication</strong><br />
13.5.6 Entering Scan Rates<br />
Introduction<br />
Global data exchange occurs as follows:<br />
• The sender CPU sends the global data at the end of a cycle.<br />
• The receiver CPU reads the data at the start of a cycle.<br />
With the aid of the scan rate, you can determine after how many cycles the data<br />
will be sent or received.<br />
Procedure<br />
1. Compile the global data table if it is not already in phase 1 (you can view this<br />
information in the status bar at the bottom edge of the screen).<br />
2. If no scan rates are displayed in the GD table, select the menu comm<strong>and</strong><br />
View > Scan Rates.<br />
3. Enter the required scan rates. You can enter data only in the columns in which<br />
the GD packet in question has entries.<br />
Note: When you view status rows <strong>and</strong>/or scan rate rows, you can edit these<br />
rows only.<br />
4. Compile the global data table again (phase 2).<br />
<strong>Configuring</strong> <strong>Hardware</strong> <strong>and</strong> <strong>Communication</strong> <strong>Connections</strong> with <strong>STEP</strong> 7<br />
13-18 A5E00706939-01
13.5.7 Entering Status Rows<br />
Introduction<br />
Group Status<br />
<strong>Configuring</strong> Global Data <strong>Communication</strong><br />
For each global data (GD) packet you can specify a status double word for each<br />
participating CPU. Status double words have the ID "GDS" in the table. If you<br />
assign the status double word (GDS) to a CPU address of the same format, you<br />
can evaluate the status in the user program or in the status row.<br />
<strong>STEP</strong> 7 creates a group status (GST) for all global data packets.<br />
The group status, which is also a double word with an identical structure to the<br />
status double word (GDS), is formed by linking all the status double words with an<br />
OR logic operation.<br />
Procedure<br />
1. Compile the global data table if it is not already in phase 1 (you can view this<br />
information in the status bar at the bottom edge of the screen).<br />
2. If no GD status rows are displayed in the GD table, select the menu comm<strong>and</strong><br />
View > GD Status.<br />
3. Enter the required status double words. You can enter data only in the columns<br />
in which the GD packet in question has entries. Enter addresses according to<br />
the syntax of the <strong>STEP</strong> 7 programming languages.<br />
Note: When you view status rows <strong>and</strong>/or scan rate rows, you can edit these<br />
rows only.<br />
4. Compile the global data table again (phase 2).<br />
<strong>Configuring</strong> <strong>Hardware</strong> <strong>and</strong> <strong>Communication</strong> <strong>Connections</strong> with <strong>STEP</strong> 7<br />
A5E00706939-01 13-19
<strong>Configuring</strong> Global Data <strong>Communication</strong><br />
Structure of the Status Double Word<br />
<br />
<br />
The following figure shows the structure of the status double word <strong>and</strong> an<br />
explanation of the bits set.<br />
A bit remains set until it is reset by the user program or via a programming device<br />
operation.<br />
Any bits not listed are reserved <strong>and</strong> have no significance at present. The global<br />
data status occupies a double word; to make it clearer, MD120 has been used in<br />
the figure.<br />
<br />
<br />
<br />
<br />
<br />
<br />
<br />
<br />
<br />
<br />
<br />
<br />
<br />
<br />
<br />
<br />
<br />
13.5.8 Compiling the GD Table for a Second Time<br />
After editing the status rows <strong>and</strong>/or scan rate rows, recompile the global data table<br />
to ensure that the new information is incorporated in the system data.<br />
The system data generated in phase 1 are sufficient for running global data<br />
communication. You can download this data to the CPUs from the programming<br />
device. Phase 2 is necessary only if you want to change default values for the scan<br />
rates or make entries in the status rows.<br />
<strong>Configuring</strong> <strong>Hardware</strong> <strong>and</strong> <strong>Communication</strong> <strong>Connections</strong> with <strong>STEP</strong> 7<br />
13-20 A5E00706939-01
<strong>Configuring</strong> Global Data <strong>Communication</strong><br />
13.6 Global Data Transmission Using System Functions<br />
Event-driven data transmission is supported for S7-400 CPUs. A comm<strong>and</strong> from<br />
the system functions (SFC) in the user program determines when the data<br />
exchange occurs. SFC60 "GD_SND" (send global data) is available to send global<br />
data <strong>and</strong> SFC61 "GD_RCV" (receive global data) is available to receive global<br />
data. If the CPU supports event-driven data transmission, you must enter the scan<br />
rate "0" in the global data table. If a value greater than "0" is entered, global data<br />
transmission is cyclic <strong>and</strong> event-driven.<br />
<strong>Configuring</strong> <strong>Hardware</strong> <strong>and</strong> <strong>Communication</strong> <strong>Connections</strong> with <strong>STEP</strong> 7<br />
A5E00706939-01 13-21
<strong>Configuring</strong> Global Data <strong>Communication</strong><br />
<strong>Configuring</strong> <strong>Hardware</strong> <strong>and</strong> <strong>Communication</strong> <strong>Connections</strong> with <strong>STEP</strong> 7<br />
13-22 A5E00706939-01
14 Downloading<br />
14.1 Downloading a Configuration to a Programmable<br />
Controller<br />
Tip<br />
Before downloading, use the Station > Check Consistency menu comm<strong>and</strong> to<br />
make sure there are no errors in your station configuration. <strong>STEP</strong> 7 then checks to<br />
see whether downloadable system data can be created from the present<br />
configuration. Any errors found during consistency checking are displayed in a<br />
window.<br />
Requirements for Downloading<br />
• The programming device (PG) is connected to the MPI interface of the CPU<br />
using an MPI cable.<br />
• In a networked system (programming device is connected to a subnet):<br />
All modules in a subnet must have different node addresses <strong>and</strong> the actual<br />
configuration must match the network configuration you created.<br />
• The present configuration must match the actual station structure.<br />
A configuration can only be downloaded to the station if it is consistent <strong>and</strong> free<br />
of errors. Only then can system data blocks (SDBs) be created which can in<br />
turn be downloaded to the modules.<br />
• If the station structure contains modules that were configured <strong>and</strong> assigned<br />
parameters using optional software packages: The optional package must be<br />
authorized.<br />
<strong>Configuring</strong> <strong>Hardware</strong> <strong>and</strong> <strong>Communication</strong> <strong>Connections</strong> with <strong>STEP</strong> 7<br />
A5E00706939-01 14-1
Downloading<br />
Procedure<br />
• Select the menu comm<strong>and</strong> PLC > Download To Module.<br />
<strong>STEP</strong> 7 guides you by means of dialog boxes to the result.<br />
The configuration for the complete programmable controller is downloaded to the<br />
CPU. The CPU parameters become active immediately. The parameters for the<br />
other modules are transferred to the modules during startup.<br />
Note<br />
Partial configurations, for example, the configuration of individual racks, cannot be<br />
downloaded to a station. For consistency reasons, <strong>STEP</strong> 7 always downloads the<br />
whole configuration to the station.<br />
Changing the CPU Operating Mode During Downloading<br />
When you trigger the function PLC > Download, you can execute the following<br />
actions on the programming device guided by the dialog boxes:<br />
• Switch the CPU to STOP<br />
(if the mode selector is set to RUN-P or the connection to the CPU is authorized<br />
by password)<br />
• Compress the memory<br />
(if not enough continuous free memory is available)<br />
• Switch the CPU back to RUN<br />
<strong>Configuring</strong> <strong>Hardware</strong> <strong>and</strong> <strong>Communication</strong> <strong>Connections</strong> with <strong>STEP</strong> 7<br />
14-2 A5E00706939-01
Downloading<br />
14.2 Downloading the Network Configuration for the First<br />
Time<br />
Before you download for the first time, the modules connected to the subnet do not<br />
yet have their configured node address, but a default address. In order that your<br />
network functions correctly, each node in a subnet must have a different node<br />
address.<br />
• MPI subnet with connection via the CPU<br />
CPUs are supplied with the default address 2. However, you can only use this<br />
address once in a subnet, so you will have to change the default node address<br />
for any other CPUs.<br />
• PROFIBUS <strong>and</strong> Industrial Ethernet subnets with CPs<br />
The CPs of the stations that are run via these subnets must be configured <strong>and</strong><br />
assigned a node address. You should, for example, assign the address via the<br />
MPI of the station before you can download <strong>and</strong> communicate via the subnet<br />
(you will find more information in the SIMATIC NET <strong>and</strong> SIMATIC NCM<br />
manuals).<br />
• There are also Industrial Ethernet CPs (e.g. CP 443-1EX11) or CPUs with an<br />
integrated PN interface that have a fixed MAC address. These modules support<br />
the direct download of an initial configuration via Industrial Ethernet. There is no<br />
need to "name" the station via MPI. All PG functions can be executed via the<br />
Ethernet.<br />
If the Network Node is Not an S7 Station...<br />
If the network node is not an S7 station, the network <strong>and</strong> node properties must be<br />
assigned using the tool or switches intended for this purpose. This is the case for<br />
DP slaves, for example, whose PROFIBUS address must be set using switches.<br />
Ensure that these settings match the settings for the objects in the network view<br />
(PG/PC, Other Station, S5 Station).<br />
Changing the PROFIBUS Address of DP Slaves<br />
DP slaves connected to a PROFIBUS subnet must also have a unique PROFIBUS<br />
address. If the DP slave you want to connect supports the function<br />
"Set_Slave_Add" (for example, ET 200C), you can assign the address with<br />
<strong>STEP</strong> 7:<br />
In the SIMATIC Manager <strong>and</strong> in <strong>Configuring</strong> <strong>Hardware</strong> you can assign a new<br />
PROFIBUS address using the menu comm<strong>and</strong> PLC > PROFIBUS > Assign<br />
PROFIBUS Address.<br />
Tip: If you are not entirely certain of the current address assignment, you should<br />
connect the DP slaves to the PG/PC one by one <strong>and</strong> re-address them.<br />
<strong>Configuring</strong> <strong>Hardware</strong> <strong>and</strong> <strong>Communication</strong> <strong>Connections</strong> with <strong>STEP</strong> 7<br />
A5E00706939-01 14-3
Downloading<br />
Changing the Node Address of S7 Stations<br />
To change the preset node address, proceed as follows for S7 stations:<br />
1. Configure the station; set the node address of the connected module (for<br />
example, a CPU) in the "General" tab ("Properties" button under "Interface").<br />
2. Switch the module to STOP <strong>and</strong> connect your programming device to the<br />
interface on the module via a connecting cable.<br />
3. Determine the preset node address of the connected module (using, for<br />
example, the menu comm<strong>and</strong> PLC > Display Accessible Nodes in the<br />
SIMATIC Manager).<br />
4. Download the configuration with the new node address to the programmable<br />
controller (that is, to the connected module):<br />
- In the station view (<strong>Configuring</strong> <strong>Hardware</strong>) using the menu comm<strong>and</strong> PLC<br />
> Download<br />
- In the network view (NetPro) select the station you want to download <strong>and</strong><br />
select the menu comm<strong>and</strong> PLC > Download > In The Current Project<br />
>Selected Stations. Enter the "old" (still valid) preset address.<br />
<strong>Configuring</strong> <strong>Hardware</strong> <strong>and</strong> <strong>Communication</strong> <strong>Connections</strong> with <strong>STEP</strong> 7<br />
14-4 A5E00706939-01
14.3 Downloading the Network Configuration to a<br />
Programmable Controller<br />
Requirement<br />
Downloading<br />
Here we shall assume that the entire project was already configured, meaning you<br />
have:<br />
• Configured all stations<br />
• Created all subnets <strong>and</strong> set their properties<br />
• Configured connections (if required)<br />
• Set the PG/PC interface so that communication between the PG/PC <strong>and</strong> the<br />
programmable controller is possible via the connected subnet.<br />
• Checked the configuration for consistency<br />
Only when a configuration is free of errors, meaning when all networked modules<br />
in a subnet have unique node addresses <strong>and</strong> when their actual configuration<br />
matches the network configuration you have created should you download the<br />
configuration via the subnet (Industrial Ethernet, PROFIBUS or MPI) to the<br />
programmable controllers.<br />
<strong>Configuring</strong> <strong>Hardware</strong> <strong>and</strong> <strong>Communication</strong> <strong>Connections</strong> with <strong>STEP</strong> 7<br />
A5E00706939-01 14-5
Downloading<br />
14.4 Downloading to a PC Station<br />
Prerequisites<br />
As of <strong>STEP</strong> 7 V5.1, Service Pack 2, you can completely load PC stations - such as<br />
S7-300 or S7-400 stations.<br />
• To download <strong>STEP</strong> 7 completely to the PC station, you must configure the PC<br />
station as target system via Component Configurator (this Component<br />
Configurator is part of the SIMATIC NET CD as of 7/2001). An index is here<br />
assigned to the PC component. This procedure corresponds with the insertion<br />
of modules into an S7-300/400 station.<br />
Once you have entered your configuration of the PC station, you can use the<br />
SIMATIC NCM PC wizards to store it as a project for subsequent reuse in <strong>STEP</strong><br />
7 (for example, you can copy it by drag-<strong>and</strong>-drop to your <strong>STEP</strong> 7 project <strong>and</strong><br />
then configure connections to other stations).<br />
• The PC Station must be accessible online: either <strong>STEP</strong> 7 is installed on the PC<br />
station or the PC station is accessible for the creating system (PG/PC with<br />
<strong>STEP</strong> 7) via subnet <strong>and</strong> respective interfaces (CPs or integrated interfaces).<br />
Downloading while <strong>Configuring</strong> Networks<br />
You can carry out all load functions while you configure networks with <strong>STEP</strong> 7 (for<br />
example Download > Selected <strong>and</strong> Partner Station, ... Subnet Stations etc.).<br />
The procedure is the same as for loading S7-300/400 stations.<br />
System files <strong>and</strong> a configuration file (*.XDB file) are still generated when a<br />
SIMATIC PC configuration is compiled <strong>and</strong> stored. However, you do not need this<br />
configuration file to 'convey' the communication configuration to the PC station.<br />
Routing information for Slot PLCs <strong>and</strong> Software PLCs (WinLC) is automatically<br />
downloaded to the PC station if it represents a network interface.<br />
Previously, download to a PC station was only possible via the integrated<br />
interfaces of Slot PLCs or via a CP on Index (slot) 9.<br />
Downloading While <strong>Configuring</strong> <strong>Hardware</strong><br />
Note the following, especially when you download a hardware configuration:<br />
Index (row) 125 in the configuration table of a PC station contains the fixed entry of<br />
the 'Station Manager'. The Station Manager represents, on the project side (<strong>STEP</strong><br />
7), the entire configuration of the SIMATIC PC station.<br />
On the target system side (PC station), a SIMATIC NCM runtime component<br />
function interprets the downloaded configuration data (SDBs). This runtime<br />
component is created with the Component Configurator (on the SIMATIC NET CD<br />
as of approx. 7/2001). In this way, the PC station can compare the downloaded<br />
configuration with the actual configuration <strong>and</strong>, in case of error, for example,<br />
transmit messages relating to differences between the default <strong>and</strong> actual<br />
configuration.<br />
<strong>Configuring</strong> <strong>Hardware</strong> <strong>and</strong> <strong>Communication</strong> <strong>Connections</strong> with <strong>STEP</strong> 7<br />
14-6 A5E00706939-01
Downloading<br />
14.5 Downloading Changes to the Network Configuration<br />
Requirements<br />
All networked modules in a subnet must have unique node addresses <strong>and</strong> the<br />
actual configuration must match the network configuration you created.<br />
If you connect a new station to a subnet <strong>and</strong> the preset node address is already<br />
present in the subnet, you should proceed as described under "Downloading for<br />
the First Time."<br />
What is Downloaded Where?<br />
After compiling the network configuration (menu comm<strong>and</strong> Network > Save <strong>and</strong><br />
Compile) or after PLC > Download > ... NetPro creates system data blocks<br />
(SDBs) for modules that can interpret the information in the SDBs. The SDBs can<br />
contain connection tables, node addresses, subnet properties, input/output<br />
addresses, <strong>and</strong> module parameters.<br />
Depending on which menu comm<strong>and</strong> you choose for downloading, different<br />
contents are downloaded to different programmable control systems.<br />
Note<br />
When the CPUs concerned are in RUN-P mode, you can only download by using<br />
the option PLC > Download > <strong>Connections</strong> <strong>and</strong> Gateways. For all other options<br />
the CPU must be switched to STOP.<br />
For S7-300 CPUs, connections can only be downloaded when the CPU is in STOP<br />
mode. Individual connections cannot be downloaded.<br />
Menu Comm<strong>and</strong> PLC ><br />
Download ><br />
What is Downloaded? Where?<br />
... Selected Station(s) Connection tables, node<br />
addresses, subnet properties,<br />
input/output addresses, <strong>and</strong><br />
module parameters for the<br />
selected stations<br />
... Selected <strong>and</strong> Partner<br />
Stations<br />
Connection tables, node<br />
addresses, subnet properties,<br />
input/output addresses, <strong>and</strong><br />
module parameters for the<br />
selected station <strong>and</strong> the<br />
connection partners of the<br />
selected station<br />
... Stations on Subnet Connection tables, node<br />
addresses, subnet properties,<br />
input/output addresses, <strong>and</strong><br />
module parameters<br />
... Selected <strong>Connections</strong> Selected connections (multiple<br />
selections possible)<br />
To the selected stations<br />
To the selected station <strong>and</strong> to all<br />
stations that are connection<br />
partners of this station<br />
One after another to all stations on<br />
the selected subnet<br />
To the local station <strong>and</strong> (for twoway<br />
connections) to the<br />
corresponding partner stations<br />
<strong>Configuring</strong> <strong>Hardware</strong> <strong>and</strong> <strong>Communication</strong> <strong>Connections</strong> with <strong>STEP</strong> 7<br />
A5E00706939-01 14-7
Downloading<br />
Menu Comm<strong>and</strong> PLC ><br />
Download ><br />
... <strong>Connections</strong> <strong>and</strong> Network<br />
Gateways<br />
Procedure<br />
Further Information<br />
What is Downloaded? Where?<br />
<strong>Connections</strong> (an empty<br />
connection table is also possible)<br />
<strong>and</strong> network gateway information<br />
To the selected module<br />
(possible in RUN-P mode)<br />
1. Connect the programming device to the subnet to which the node you want to<br />
load is connected.<br />
2. Open NetPro.<br />
3. Select the station you want to download or the subnet (for PLC > Download ><br />
Stations on Subnet) in the network view.<br />
4. Select one of the above options for the menu comm<strong>and</strong> PLC > Download.<br />
Further information on the menu comm<strong>and</strong>s related to downloading can be found<br />
in the context-specific help (select the menu comm<strong>and</strong> <strong>and</strong> press F1).<br />
<strong>Configuring</strong> <strong>Hardware</strong> <strong>and</strong> <strong>Communication</strong> <strong>Connections</strong> with <strong>STEP</strong> 7<br />
14-8 A5E00706939-01
14.6 Downloading a Changed HW Configuration to an<br />
S7-400H Station<br />
Downloading<br />
With an H-station, you can download a changed HW configuration, without the Hstation<br />
having to go in STOP mode. To ensure that the H-station can modify the<br />
process without interruption during the download; that is, that one of the two CPUs<br />
is always in RUN mode, you must absolutely follow the prescribed sequence of<br />
operations. For a complete, detailed description of the functions <strong>and</strong> procedures,<br />
refer to the following manual: Automation System S7-400H Fault-Tolerant<br />
Systems.<br />
As of <strong>STEP</strong> 7 V5.3 Service Pack 2, you have the option of letting the download<br />
procedure after changing the hardware configuration run almost completely<br />
automatically. <strong>STEP</strong> 7 will automatically prepare the next action required. To have<br />
this action carried out, you will only have to confirm the step by clicking the "Next"<br />
button.<br />
You can also configure this function so that the switchover from one CPU to the<br />
other happens mostly automatically.<br />
Requirements <strong>and</strong> Restrictions for an Automatic Download<br />
• Downloading a changed HW configuration to an S7-400 H-station can only be<br />
done in HW Config.<br />
• The changed configuration can only be downloaded to CPUs. The configuration<br />
will not be downloaded to any modules that receive their configuration data<br />
directly (FM 456-2, FM 456-4).<br />
• When downloading, you cannot reconfigure node addressees; the node<br />
addresses configured for the H-CPUs must match the existing node addresses.<br />
• At least one of the two H-CPUs must be able to be reached online.<br />
• The H-station does not necessarily have to be in redundant mode; it is sufficient<br />
to have one of the CPUs in RUN mode. For an automated download, the Hstation<br />
will be placed in redundant mode when the reserve CPU is restarted.<br />
• The operating mode switch for both CPUs must be in RUN position (RUN-P for<br />
CPUs with a keyswitch).<br />
If all of these requirements are not met, then the "Download station configuration in<br />
RUN mode" option will not be available.<br />
<strong>Configuring</strong> <strong>Hardware</strong> <strong>and</strong> <strong>Communication</strong> <strong>Connections</strong> with <strong>STEP</strong> 7<br />
A5E00706939-01 14-9
Downloading<br />
Procedure<br />
1. In HW Config, select the PLC > Download to Module menu comm<strong>and</strong>.<br />
2. In the "Download to Module" dialog box that is then displayed, select the<br />
"Download station configuration in RUN mode" option.<br />
Note: With the "Download in STOP mode" option, select the "not automated"<br />
variant of the download procedure.<br />
3. Confirm the selection with "OK".<br />
The "Download to H-Station" dialog box is now displayed.<br />
4. If both CPUs in the H-station can be reached online, then select one of the<br />
CPUs shown that is to receive the download of the new configuration (system<br />
data blocks). By default, the reserve CPU is preselected to receive the<br />
download. The prompt to select a CPU is also displayed in the "Next Action"<br />
field.<br />
If only one of the two CPUs can be reached online, then this CPU is<br />
automatically selected to receive the download. This default selection cannot<br />
be changed.<br />
5. If you want the actions to be switched over from one CPU to the other without<br />
interruption, then you should select the "Automatic switchover" check box.<br />
6. Click the "Next" button.<br />
During the download, each action that has been started is displayed in the<br />
"Next Action" field.<br />
All completed actions are identified in the "Status" field by a checkmark.<br />
7. Regardless of whether the "Automatic switchover" check box is selected or not,<br />
you will have to manually confirm the "Switch to CPU with changed HW<br />
configuration" action by clicking "Next".<br />
After this, the CPU with the changed HW configuration automatically goes into<br />
RUN mode <strong>and</strong> the other CPU into STOP mode. After the HW configuration on<br />
both CPUs has been brought up to the same, updated version, the system<br />
then automatically goes into redundant mode.<br />
14.7 Downloading the Global Data Configuration<br />
During the compiler run, the data in the global data table are converted into system<br />
data. If no errors are displayed during compiling, you can transfer the system data<br />
to the CPUs:<br />
• Select the menu comm<strong>and</strong> PLC > Download.<br />
Maximum Number of GD Circles<br />
The number of GD circles is limited to 16. CPUs that have a GD circle number<br />
greater than 16 cannot be loaded with the global data configuration.<br />
<strong>Configuring</strong> <strong>Hardware</strong> <strong>and</strong> <strong>Communication</strong> <strong>Connections</strong> with <strong>STEP</strong> 7<br />
14-10 A5E00706939-01
14.8 Uploading a Configuration from a Station<br />
Requirement<br />
Tips<br />
Procedure<br />
Downloading<br />
You have used an MPI cable to connect the programming device (PG) to the MPI<br />
interface of the CPU.<br />
Upload stations to a newly created, empty project.<br />
Stations that are dependent on other stations in a particular way (I slave on a DP<br />
master station, receiver <strong>and</strong> sender in a configuration with direct data<br />
exchange/lateral communication link) should always be uploaded together to one<br />
project. Reason: Without the particular "partners" for a station of this type, the<br />
project would remain inconsistent.<br />
1. Select the menu comm<strong>and</strong> PLC > Upload.<br />
The dialog box to open the configuration appears.<br />
2. Select the project in which the configuration will be stored later <strong>and</strong> confirm<br />
with "OK."<br />
3. In the dialog box which then appears, set the node address, rack number, <strong>and</strong><br />
slot in the module from which the configuration should be read (generally<br />
CPU). Confirm with "OK."<br />
You can use the Station > Properties menu comm<strong>and</strong> to assign a station name to<br />
this configuration <strong>and</strong> then store it in the default project (Station > Save menu<br />
comm<strong>and</strong>).<br />
<strong>Configuring</strong> <strong>Hardware</strong> <strong>and</strong> <strong>Communication</strong> <strong>Connections</strong> with <strong>STEP</strong> 7<br />
A5E00706939-01 14-11
Downloading<br />
14.9 Uploading a Network Configuration<br />
Overview<br />
You have the possibility of uploading the real network structure of your project<br />
station by station to your programming device.<br />
Firstly you can upload the whole configuration for a project station by station to the<br />
programming device in the SIMATIC Manager (menu comm<strong>and</strong> PLC > Upload).<br />
<strong>STEP</strong> 7 then creates a new station object in the current project for each station you<br />
want to upload.<br />
Alternatively you can upload a station configuration when you configure the<br />
hardware (menu comm<strong>and</strong> PLC > Upload).<br />
Below is a description of how you can upload the whole network configuration<br />
station by station in NetPro.<br />
Requirements<br />
The PG/PC is connected to the same subnet as the stations you want to upload or<br />
the stations are accessible via network gateways. The node addresses <strong>and</strong><br />
racks/slots of the modules connected to the subnet are known.<br />
Procedure<br />
1. Connect the programming device to the subnet to which the node you want to<br />
load is connected.<br />
2. Create a new project for the loaded network configuration if necessary.<br />
3. Open NetPro via a project to which you want to save the uploaded network<br />
configuration at a later stage (for example, via a newly created project).<br />
4. Select the menu comm<strong>and</strong> PLC > Upload Station.<br />
The menu comm<strong>and</strong> can be selected only when a project is open.<br />
5. In the following dialog box, specify the station to be uploaded by giving its node<br />
address <strong>and</strong> rack/slot.<br />
The "Station" object appears in the network view with all modules that have a<br />
network connection. The subnets to which the station is connected are also<br />
displayed. You can change the name of the station assigned by the system<br />
using the menu comm<strong>and</strong> Edit > Object Properties.<br />
The configured connections are also uploaded <strong>and</strong> are visible when you select<br />
a module that is the end point of connections.<br />
6. You can modify the station configuration or the connections as well <strong>and</strong> then<br />
load the changes into the station. For connections that were created using<br />
optional packages, the optional package must be installed so that these<br />
connections can be edited <strong>and</strong> loaded into the station again.<br />
7. Proceed as described above until you have loaded all the required stations.<br />
8. If required, you can save the network configuration in the current project (menu<br />
comm<strong>and</strong> Network > Save or Network > Save <strong>and</strong> Compile).<br />
<strong>Configuring</strong> <strong>Hardware</strong> <strong>and</strong> <strong>Communication</strong> <strong>Connections</strong> with <strong>STEP</strong> 7<br />
14-12 A5E00706939-01
Special Features of <strong>Connections</strong> Uploaded to the Programming Device<br />
Downloading<br />
In the connection table, the connection partner configured offline is missing - the<br />
connection partner is "unspecified." However, address details are available in the<br />
dialog box that follows the properties dialog box.<br />
The communication direction of PTP connections cannot be determined by <strong>STEP</strong> 7<br />
in every case; but a message informs you of which communication directions are<br />
likely.<br />
If both connection partners are uploaded to the programming device (PG), <strong>STEP</strong> 7<br />
will then attempt to restore the connections between these partners.<br />
<strong>Configuring</strong> <strong>Hardware</strong> <strong>and</strong> <strong>Communication</strong> <strong>Connections</strong> with <strong>STEP</strong> 7<br />
A5E00706939-01 14-13
Downloading<br />
<strong>Configuring</strong> <strong>Hardware</strong> <strong>and</strong> <strong>Communication</strong> <strong>Connections</strong> with <strong>STEP</strong> 7<br />
14-14 A5E00706939-01
15 Multi-User Editing Projects<br />
15.1 Multi-User Configuration in a Network<br />
Overview<br />
In <strong>STEP</strong> 7 you can work in Windows 2000/XP work groups <strong>and</strong> on 2000/2003<br />
Servers in a multi-user configuration. You can either work with the multiproject or<br />
consider one of the following configurations:<br />
• The project is on a local drive <strong>and</strong> is also used from another workstation.<br />
Example: Workstations 1 <strong>and</strong> 2 access project A on workstation 1.<br />
• The project is on a network server.<br />
Example: Workstations 1 <strong>and</strong> 2 access project C on the network server.<br />
• The projects are distributed among the local drives <strong>and</strong> one or more network<br />
servers.<br />
Example: Workstations 1 <strong>and</strong> 2 access projects A, B, <strong>and</strong> C.<br />
<strong>Configuring</strong> <strong>Hardware</strong> <strong>and</strong> <strong>Communication</strong> <strong>Connections</strong> with <strong>STEP</strong> 7<br />
A5E00706939-01 15-1
Multi-User Editing Projects<br />
Guidelines for Storing Projects on Network Servers<br />
• As of Version 5.2 you can use the UNC notation when you store your projects<br />
on network servers, that is, it is no longer required to assign the project path to<br />
a drive.<br />
• When you store your projects on network servers or on enabled drives of other<br />
network users, the Windows operating system can only be shut down on those<br />
servers or network nodes when all <strong>STEP</strong> 7 applications that access the projects<br />
are closed.<br />
• If you store your projects on network servers or on shared drives of other<br />
network stations, ensure that <strong>STEP</strong> 7 is installed on the network server or the<br />
computer of the network station.<br />
Guidelines for Multi-User Editing of S7 Programs<br />
You should note the following:<br />
• Before more than one user can work on one S7 program, you must set the<br />
workstation configuration (menu comm<strong>and</strong> Start > Simatic > <strong>STEP</strong> 7 ><br />
Configure SIMATIC Workspace). Note the corresponding Help on the dialog<br />
box.<br />
• Blocks <strong>and</strong> STL source files:<br />
Each user should program a different block or source file. If two users attempt<br />
to edit a block or source file at the same time, a message is displayed, <strong>and</strong><br />
access is denied for the second user.<br />
• Symbol table:<br />
Several users can open the symbol table at the same time but only one user<br />
can edit it. If two users attempt to edit the symbol table at the same time, a<br />
message is displayed, <strong>and</strong> access is denied for the second user.<br />
• Variable tables:<br />
Several users can open the variable table at the same time but only one user<br />
can edit it. If two users attempt to edit the variable table at the same time, a<br />
message is displayed, <strong>and</strong> access is denied for the second user. There can be<br />
a number of variable tables in an S7 program. These can, of course, be edited<br />
separately <strong>and</strong> independently of each other.<br />
Guidelines for Multi-User Editing of Stations<br />
You should note the following:<br />
• The hardware configuration <strong>and</strong> the network configuration of a station should<br />
only be edited centrally by one user.<br />
<strong>Configuring</strong> <strong>Hardware</strong> <strong>and</strong> <strong>Communication</strong> <strong>Connections</strong> with <strong>STEP</strong> 7<br />
15-2 A5E00706939-01
15.1.1 Setting the Workstation Configuration<br />
Multi-User Editing Projects<br />
To work on a project from different <strong>STEP</strong> 7 workstations, you must make the<br />
following settings at each workstation.<br />
1. In the Windows start bar, select the menu comm<strong>and</strong> Start > Simatic > <strong>STEP</strong> 7<br />
> Configure SIMATIC Workstation.<br />
2. Select the option "Multi-terminal system” <strong>and</strong> the network protocol you want to<br />
use.<br />
<strong>Configuring</strong> <strong>Hardware</strong> <strong>and</strong> <strong>Communication</strong> <strong>Connections</strong> with <strong>STEP</strong> 7<br />
A5E00706939-01 15-3
Multi-User Editing Projects<br />
15.2 Single Terminal Configuration on Non-Networked<br />
Workstations<br />
15.2.1 Merging Several S7 Programs into One<br />
<strong>STEP</strong> 7 does not offer support with merging S7 programs on non-networked<br />
workstations. The only way to merge S7 programs in this case is to copy individual<br />
blocks or source files. Shared data for the project such as the symbol table or the<br />
variable table must be edited manually after copying.<br />
1. Copy blocks <strong>and</strong> source files to their respective folders in an S7 program.<br />
2. Export the symbol tables of the individual S7 programs to ASCII format <strong>and</strong><br />
import them into the symbol table of the merged S7 program.<br />
3. Check whether symbols have been used more than once.<br />
Tip: You can also integrate short symbol tables using the clipboard (copy <strong>and</strong><br />
paste).<br />
4. Copy the variable tables you want to use or integrate the various variable<br />
tables using the clipboard<br />
15.2.2 Copying S7 Programs with Message Attributes<br />
If you have assigned message attributes to blocks, note the following restrictions<br />
when you copy S7 programs:<br />
Assigning Project-Oriented Messsage Numbers<br />
Message numbers could overlap. To avoid conflicts:<br />
• Use the menu comm<strong>and</strong> Edit > Special Object Properties > Message<br />
Numbers to allocate a fixed message number range to each S7 program.<br />
• When you copy S7 programs, make sure they do not overwrite other S7<br />
programs.<br />
• Note that only message types (FBs) can be programmed separately from the<br />
S7 program.<br />
<strong>Configuring</strong> <strong>Hardware</strong> <strong>and</strong> <strong>Communication</strong> <strong>Connections</strong> with <strong>STEP</strong> 7<br />
15-4 A5E00706939-01
Assigning CPU-Oriented Messsage Numbers<br />
Multi-User Editing Projects<br />
• Programs can be copied within a project to interprojects without a change of<br />
message number.<br />
• The message number will change when you copy single blocks. Here you need<br />
to recompile the block in order to implement the changed message number in<br />
the program.<br />
Copying a Program with Project-Oriented Message Number Assignment into a<br />
Project with CPU-Oriented Message Number Assignment<br />
• To copy a program whose message numbers were assigned project oriented to<br />
another project that contains a program whose message numbers were<br />
assigned CPU oriented, select the required program, call menu comm<strong>and</strong> File ><br />
Save As... <strong>and</strong> enable the "Reorganize" check box in the pop-up dialog box.<br />
• Message attributes are assigned by default when copying. Inconsistent<br />
assignments are displayed in a pop-up dialog box. In this box you can choose<br />
your assignment.<br />
Copying a Program with CPU-Oriented Message Number Assignment into a<br />
Project with Project-Oriented Message Number Assignment<br />
You can only copy single FBs with messages.<br />
Caution<br />
The assignment of message numbers in the program of a project must be<br />
uniform!<br />
When you copy a message-type block that contains a cross-reference to a text<br />
library to another program, you must include the corresponding text libraries or<br />
create another text library of the same name, or modify the cross-reference in the<br />
message text.<br />
<strong>Configuring</strong> <strong>Hardware</strong> <strong>and</strong> <strong>Communication</strong> <strong>Connections</strong> with <strong>STEP</strong> 7<br />
A5E00706939-01 15-5
Multi-User Editing Projects<br />
<strong>Configuring</strong> <strong>Hardware</strong> <strong>and</strong> <strong>Communication</strong> <strong>Connections</strong> with <strong>STEP</strong> 7<br />
15-6 A5E00706939-01
16 Working With Projects in the Multiproject<br />
16.1 What You Should Know About Multiprojects<br />
What is a multiproject?<br />
The term multiproject refers to the folder containing all projects <strong>and</strong> libraries of an<br />
automation solution with one or several <strong>STEP</strong> 7 projects as well as the (optional)<br />
libraries. The projects of a multiproject can contain objects linked to other objects<br />
(e.g. S7 cross-project connections).<br />
What are the benefits of a multiproject?<br />
Projects as part of a multiproject can be split into smaller objects that are much<br />
easier to survey.<br />
You can also use the multiproject, for example, to create projects for distributed<br />
authoring <strong>and</strong> assign a station to each author for offline editing of the project.<br />
Functions linked to other projects (cross-project functions) allow you to h<strong>and</strong>le a<br />
multiproject almost in the same way as a single project.<br />
Examples of cross-project functions<br />
<strong>STEP</strong> 7 cross-project functions (st<strong>and</strong>ard software package):<br />
• Save As (storing a multiproject with all projects at other locations)<br />
• Archiving (multiproject with all projects)<br />
• Adjustment of the cross-project network (e.g. merging subnets)<br />
• Update of views (all projects of a multiproject)<br />
Further cross-project functions (with PCS 7, BATCH flexible)<br />
• Transfer of AS-OS connection data<br />
• Exporting BATCH flexible system data<br />
<strong>Configuring</strong> <strong>Hardware</strong> <strong>and</strong> <strong>Communication</strong> <strong>Connections</strong> with <strong>STEP</strong> 7<br />
A5E00706939-01 16-1
Working With Projects in the Multiproject<br />
Project structure without multiproject<br />
In a usual project structure without multiproject all objects must be available in a<br />
central project, for example, to allow the transfer of AS-OS connection data.<br />
<br />
<br />
<br />
<br />
<br />
<strong>Configuring</strong> <strong>Hardware</strong> <strong>and</strong> <strong>Communication</strong> <strong>Connections</strong> with <strong>STEP</strong> 7<br />
16-2 A5E00706939-01
Project structure with multiproject<br />
Working With Projects in the Multiproject<br />
<strong>STEP</strong> 7 projects are edited at distributed locations <strong>and</strong> can therefore be shared by<br />
several authors.<br />
Cross-project functions allow the user to split the projects of a multiproject into<br />
smaller objects that are much easier to survey.<br />
You can configure one or several automation systems for a project.<br />
<br />
<br />
<br />
<br />
<br />
<br />
<br />
Access protection<br />
<br />
<br />
<br />
<br />
<br />
<br />
<strong>Configuring</strong> <strong>Hardware</strong> <strong>and</strong> <strong>Communication</strong> <strong>Connections</strong> with <strong>STEP</strong> 7<br />
A5E00706939-01 16-3<br />
<br />
<br />
<br />
<br />
<br />
• When working on a password-protected multiproject, you can only open those<br />
projects to which you have been allowed access a project editor or<br />
administrator. All the other project names in the SIMATIC Manager have a gray<br />
(dimmed) background.<br />
• To synchronize users, you must be authenticated as a project administrator in<br />
the "SIMATIC Logon" administration tool.<br />
• To open an access-protected project or library, you must be authenticated as a<br />
project editor or administrator in the SIMATIC Logon administration tool or know<br />
the project password.
Working With Projects in the Multiproject<br />
16.2 Multiproject - Requirements <strong>and</strong> Recommendations<br />
Different methods of working with the multiproject<br />
Basic requirements<br />
The multiproject lets you configure a flexible system. In the foreground is timesaving,<br />
parallel creation of projects that can be merged by the system.<br />
Basically we can differentiate between two working methods:<br />
• Several members of a user group in a network environment share a<br />
multiproject. The projects of the multiproject are stored in different network<br />
folders.<br />
- In this case, all communication partners are available online for the<br />
configuration of connections, for example.<br />
- Only the execution of cross-project functions on the networks must be<br />
agreed upon between the partners, because read/write access to the<br />
projects is not permitted while these functions are active.<br />
• The project administrator manages the multiproject at the master database,<br />
defines the structure of projects (locally, if required), controls distributed<br />
transactions for external authors, then transfers the incoming projects to the<br />
multiproject, adjusts the cross-project data via the system functions ( file update<br />
synchronization ) <strong>and</strong> executes necessary cross-project functions.<br />
- In this case, for example, you must declare connection names, because<br />
during the adjustment of projects the S7 connections could easily be<br />
merged due to identical names.<br />
- The user can also combine those two working methods. <strong>STEP</strong> 7 supports<br />
the distribution of projects across the network as well as the simple<br />
insertion <strong>and</strong> removal of projects of the multiproject, regardless of the<br />
method used.<br />
Prerequisite for the distribution of projects to different network folders is:<br />
• The projects are stored in folders with read/write attribute. This implies in<br />
particular:<br />
- Read/write access to drives storing the multiproject or projects must have<br />
been granted prior to the creation of the multiproject.<br />
- Release names must be unique within the network. We recommend you<br />
choose a release name that consists of the computer name <strong>and</strong> the drive<br />
name (e.g. PC52_D).<br />
- Access rights <strong>and</strong> release names must not be modified for any resources<br />
(folders) participating in the multiproject. The reason is: When a project is<br />
inserted into the multiproject, <strong>STEP</strong> 7 will generate a reference to the<br />
location of this project. This reference is determined by access rights <strong>and</strong><br />
the release name of the corresponding resources.<br />
- A project can only be found under the release name it was assigned when<br />
it was implemented in the multiproject.<br />
<strong>Configuring</strong> <strong>Hardware</strong> <strong>and</strong> <strong>Communication</strong> <strong>Connections</strong> with <strong>STEP</strong> 7<br />
16-4 A5E00706939-01
Working With Projects in the Multiproject<br />
- Access to the complete drive hierarchy must be denied. Access rights to a<br />
folder may only be granted at one hierarchy level.<br />
• <strong>STEP</strong> 7 or PCS 7 must be installed on computers that contain the project<br />
folders. The reason being: <strong>STEP</strong> 7 or PCS 7 provides the required database<br />
functions on the server for access to the projects.<br />
• When you implement projects for which you have configured messages into a<br />
multiproject, note the following:<br />
- When assigning message numbers for the project (project-oriented<br />
message numbers), the message number ranges for the CPUs must not<br />
overlap. If you insert several subprojects with project-oriented message<br />
numbers into a multiproject, no automatic redundancy check of message<br />
numbers is carried out. You yourself have to check to make sure that<br />
message numbers only occur once.<br />
Requirements for cross-project functions<br />
When initiating cross-project functions within such a constellation, you must ensure<br />
that:<br />
• All computers containing projects or the multiproject must be available online on<br />
the network as long as any projects are being processed.<br />
• Processing of projects is not allowed while these cross-project functions are<br />
being executed.<br />
If this can not be ensured, we recommend that you transfer all projects to a PG/PC<br />
<strong>and</strong> then execute the cross-project functions locally.<br />
Multiple users editing to the same object:<br />
• A station should always be edited only by one author at a given time (not only in<br />
the multiproject).<br />
• When you split the projects into projects containing only one station, you can be<br />
sure that only one author is accessing a project at a given time.<br />
<strong>Configuring</strong> <strong>Hardware</strong> <strong>and</strong> <strong>Communication</strong> <strong>Connections</strong> with <strong>STEP</strong> 7<br />
A5E00706939-01 16-5
Working With Projects in the Multiproject<br />
Recommendations <strong>and</strong> rules for project size<br />
Generally speaking, there is really no way to say how many stations a project<br />
should have. Nonetheless, here are a few points that may make it easier for you to<br />
make a decision:<br />
• The more complex the station, the less stations the project should have.<br />
• The number of team members available for configuring the system can also be<br />
a criterion for specifying your distributed transactions. Each author could work in<br />
parallel on a project of the multiproject, independently of others. You could then<br />
optimize the size of each project to meet all deadlines for the completion of all<br />
projects.<br />
• Stations interconnected via Direct Data Exchange ("cross-traffic") must be<br />
located in the same project. Note that you can not configure Direct Data<br />
Exchange across project boundaries.<br />
• Stations that are operating in global data communication via an MPI subnet also<br />
must be located in the same project.<br />
• Stations you want to include in your network visualization (NetPro) must also be<br />
located in the same project.<br />
• Important for commissioning is: Download functions available under NetPro<br />
have no cross-project effect, but rather take effect only within the project.<br />
Affected are the functions:<br />
- Download in the Current Project > Selected <strong>and</strong> Partner Stations<br />
- Download in the Current Project > Stations on the Subnet<br />
- Download in the Current Project > Selected <strong>Connections</strong><br />
• Compile <strong>and</strong> save operations are also restricted to the currently active project.<br />
If an S7 connection is a cross-project connection, for example, the network<br />
configuration of both participating projects must be compiled.<br />
<strong>Configuring</strong> <strong>Hardware</strong> <strong>and</strong> <strong>Communication</strong> <strong>Connections</strong> with <strong>STEP</strong> 7<br />
16-6 A5E00706939-01
16.3 H<strong>and</strong>ling Multiprojects<br />
Creating a new multiproject<br />
1. Select menu comm<strong>and</strong> File > New.<br />
Working With Projects in the Multiproject<br />
2. In the "Name" box of the "New" dialog box, assign a name to the multiproject<br />
<strong>and</strong> select a "Multiproject" type.<br />
Click on "Find" or edit the path to determine a storage location for the<br />
multiproject.<br />
Example:<br />
1. Confirm the dialog with "OK".<br />
Notes on path definitions<br />
Wherever possible you should use UNC conventions to specify your paths. This<br />
allows you flexible <strong>and</strong> future-proof h<strong>and</strong>ling of <strong>STEP</strong> 7 projects.<br />
Example: UNC path definition under Windows 2000:<br />
UNC path: \\Computer\Share\Path<br />
\\ double backslash ( )<br />
Computer Server name: max. string length = 15 characters<br />
Name of the computer that supplies the resource (File, directory, ..).<br />
Share Release name: Under Windows, access to resources of other Windows<br />
computers is only possible if corresponding rights have been granted.<br />
Path This is an optional setting.<br />
<strong>Configuring</strong> <strong>Hardware</strong> <strong>and</strong> <strong>Communication</strong> <strong>Connections</strong> with <strong>STEP</strong> 7<br />
A5E00706939-01 16-7
Working With Projects in the Multiproject<br />
Creating a new project for the multiproject<br />
While you create a new project, you can also assign a new project to the current<br />
multiproject in the same step.<br />
The multiproject to be inserted in the new project must already be open.<br />
1. Select menu comm<strong>and</strong> File > New.<br />
2. In the "Name" box of the "New" dialog box, assign a name to the project <strong>and</strong><br />
select the type "Project".<br />
Activate the "Insert project in current Multiproject" check box.<br />
Click the "Browse" button to determine a storage location for the project. If you<br />
are operating in a computer network, you can store the project file on a<br />
network drive to provide access to other team members.<br />
3. Confirm the dialog with "OK".<br />
As an alternative, you can also use menu comm<strong>and</strong> File > Multiproject > Create<br />
in Multiproject to generate a multiproject in the current multiproject.<br />
Separating a project from a multiproject or removing a project for editing<br />
For distributed authoring (for example, by external authors) you can also remove<br />
projects from the multiproject <strong>and</strong> reinsert them after they have been edited.<br />
When you remove the project, the dependencies to other projects will be<br />
maintained (e.g. cross-project connections) <strong>and</strong> the projects will still be available<br />
for compilation.<br />
1. Select the project(s) you want to remove from the multiproject.<br />
2. Select menu comm<strong>and</strong> File > Multiproject > Remove From Multiproject or<br />
the menu comm<strong>and</strong> File > Multiproject > Remove for Editing<br />
You can now save the project to a storage medium with "Save As" <strong>and</strong> distribute it<br />
to external authors.<br />
Tip<br />
Another method of preparing projects for external editing:<br />
Create a copy of the project for the external authors with File > Save As <strong>and</strong> keep<br />
this "unprocessed" copy in the multiproject, for example, so that you will still be<br />
able to debug the cross-project functions.<br />
Then, after the external project has been completed, you can call menu comm<strong>and</strong><br />
File > Add to Multiproject <strong>and</strong> replace the original with the edited project.<br />
In this case, you must ensure that only the project copy is edited, rather than both<br />
the copy <strong>and</strong> the original project!<br />
<strong>Configuring</strong> <strong>Hardware</strong> <strong>and</strong> <strong>Communication</strong> <strong>Connections</strong> with <strong>STEP</strong> 7<br />
16-8 A5E00706939-01
Working With Projects in the Multiproject<br />
Inserting projects into a multiproject or returning projects to a multiproject after<br />
editing<br />
Any existing project can be newly inserted into or returned to a multiproject. For<br />
this procedure it is irrelevant whether the object in question had been moved<br />
previously or whether a "third-party" or new project is added.<br />
1. Open a multiproject.<br />
2. Select File > Multiproject > Insert into Multiproject menu comm<strong>and</strong> or the<br />
File > Multiproject > Reapply After Editing menu comm<strong>and</strong>.<br />
3. In the next dialog, select the project you want to add.<br />
4. Confirm the dialog with "OK".<br />
Now you can call the "Adjusting Projects in a Multiproject" wizard to merge crossproject<br />
subnets <strong>and</strong> to adjust the connection configurations.<br />
Note<br />
SIMATIC Manager identifies an open project that is part of a multiprojects with a<br />
grayed out multiproject icon:<br />
Adjusting projects in a multiproject<br />
The "Adjusting Projects in a Multiproject" wizard merges the subnets <strong>and</strong> adjusts<br />
cross-project connection data.<br />
Start this wizard in SIMATIC Manager under menu comm<strong>and</strong> File > Multiproject ><br />
Adjust Projects.<br />
The adjustment is carried out automatically (as far as possible) <strong>and</strong> step by step.<br />
The wizard logs all inconsistencies. Open NetPro to debug errors that might have<br />
occurred.<br />
Copying the multiproject ("Save As")<br />
Regardless whether or not the projects of a multiprojects are distributed to network<br />
locations: Whenever you copy the multiproject (use menu comm<strong>and</strong> File > Save<br />
As to save the multiproject), all objects of the multiproject, that is, the actual<br />
multiproject <strong>and</strong> all its projects will be saved to this location. It is here not possible<br />
to distribute the projects to several different target folders!<br />
<strong>Configuring</strong> <strong>Hardware</strong> <strong>and</strong> <strong>Communication</strong> <strong>Connections</strong> with <strong>STEP</strong> 7<br />
A5E00706939-01 16-9
Working With Projects in the Multiproject<br />
Copying a project in a multiproject ("Save As")<br />
Depending on the current arrangement in the SIMATIC Manager, you have<br />
different options available for copying a project that is part of a multiproject:<br />
Case 1: The multiproject is open <strong>and</strong> a project in the multiproject is selected:<br />
1. Select the menu comm<strong>and</strong> File > Save As.<br />
2. In the dialog box that appears, select from the following options:<br />
- "Add to multiproject":<br />
By default, the copy is inserted in the current multiproject. You can also<br />
insert the project in another multiproject selected from the list.<br />
If this option is not selected, then the copy is saved as a "normal" project<br />
with no relationship to a multiproject. The original project remains in the<br />
multiproject.<br />
- "Replace current project":<br />
The copy is inserted in the current multiproject. The original project is<br />
removed from the multiproject <strong>and</strong> remains in <strong>STEP</strong> 7 database as a<br />
"normal" project with no relationship to a multiproject.<br />
3. Exit the dialog with "OK".<br />
Case 2: The project in a multiproject is open:<br />
1. Select the menu comm<strong>and</strong> File > Save As.<br />
2. In the dialog box that appears, select from the following options:<br />
- "Add to multiproject":<br />
By default, the copy is inserted in the first multiproject in the list of<br />
multiprojects. You can also insert the project in another multiproject<br />
selected from the list.<br />
If this option is not selected, then the copy is saved as a "normal" project<br />
with no relationship to a multiproject. The original project remains in the<br />
multiproject.<br />
The option "Replace current project" is not available.<br />
3. Exit the dialog with "OK".<br />
Copying projects of a multiproject to an MMC<br />
You can archive the multiproject with all its projects (menu comm<strong>and</strong> File ><br />
Archive) <strong>and</strong> then save these data to a Micro Memory Card (MMC) that is<br />
equipped with sufficient memory space.<br />
Multiproject data you have not archived can not be written to a single Micro<br />
Memory Card (MMC).<br />
However, you have the option of "spanning" all projects of the multiproject across<br />
multiple MMCs. When you save the data to MMC, the multiproject component is<br />
automatically included, so that the multiproject structure can be "restored"<br />
completely from these volumes at a later time.<br />
We recommend you create a text file to log the multiproject components <strong>and</strong> their<br />
respective storage locations (e.g. CPU IDs), <strong>and</strong> to include this log file in your data<br />
transfer to the MMCs. When service tasks are to be carried out (PG without project<br />
information), this procedure saves you a tiresome search to find relevant CPUs<br />
that have saved the multiproject objects to the MMC.<br />
<strong>Configuring</strong> <strong>Hardware</strong> <strong>and</strong> <strong>Communication</strong> <strong>Connections</strong> with <strong>STEP</strong> 7<br />
16-10 A5E00706939-01
Working With Projects in the Multiproject<br />
How to move projects from one multiproject to another multiproject<br />
You can move a project that is part of a multiproject to another multiproject. To do<br />
this, proceed as follows:<br />
1. Open the multiproject to which you want to move the project<br />
2. Select menu comm<strong>and</strong> File > Multiproject > Add to Multiproject<br />
3. In the dialog box that appears, select the project to be moved.<br />
4. A message is displayed asking you if the project should be added to the<br />
current multiproject<br />
Select "Yes" to move the project to the current multiproject.<br />
Moving stations within a multiproject<br />
You can move stations (e.g. S7-400 or SIMATIC PC stations) to other locations in<br />
the multiproject.<br />
When a station is moved between projects of a multiproject (e.g. via drag-<strong>and</strong>drop),<br />
the cross-project connections among the projects will be maintained.<br />
Setting a Library as Master Data Library<br />
You can not only add projects to a multiproject, but also implement libraries, one of<br />
which you can identify as master data library. In this master data library you can<br />
store blocks used globally for all projects. This function is especially useful for<br />
PCS 7 engineering, for example.<br />
The master data library may contain only one program of each type (S7, M7, etc.)<br />
1. Open the library you want to identify as master data library.<br />
2. Select menu comm<strong>and</strong> File > Multiproject > Set as Master Data Library.<br />
This is the icon for master data library:<br />
<strong>Configuring</strong> <strong>Hardware</strong> <strong>and</strong> <strong>Communication</strong> <strong>Connections</strong> with <strong>STEP</strong> 7<br />
A5E00706939-01 16-11
Working With Projects in the Multiproject<br />
16.4 Online Access to PLCs in a Multiproject<br />
Cross-project access with an assigned PG/PC<br />
The "Assign PG/PC" function for the objects "PG/PC" <strong>and</strong> "SIMATIC PC Station"<br />
are also available for the multiproject.<br />
You can specify the target module for online access in any project of the<br />
multiproject. This procedure is the same as if you were working with one project<br />
only.<br />
Requirements<br />
• PGs/PCs or PC stations you want to use for online access to PLCs must have<br />
been assigned in any one project of the multiproject.<br />
Note: The assigned PG/PC or PC station is highlighted in yellow color when the<br />
corresponding project is open.<br />
The PG/PC assignment is only visible if the PG that opens the project is<br />
properly assigned.<br />
• The cross-project subnets are merged.<br />
• All projects of the multiproject have been compiled <strong>and</strong> configuration data have<br />
been downloaded to the participating stations; for example, to provide routing<br />
information to all participating modules for establishing connections between the<br />
PG/PC <strong>and</strong> the target module.<br />
• The target modules can be accessed across the networks.<br />
<strong>Configuring</strong> <strong>Hardware</strong> <strong>and</strong> <strong>Communication</strong> <strong>Connections</strong> with <strong>STEP</strong> 7<br />
16-12 A5E00706939-01
Possible problems when working with distributed projects<br />
Working With Projects in the Multiproject<br />
The PG/PC assignment is not visible if the allocation of projects is changed <strong>and</strong> a<br />
project is opened on a PG/PC on which it was not created.<br />
Nonetheless, the configured PG/PC object still maintains the "assigned" status -<br />
but with the "wrong" PG/PC.<br />
In this case you must clear the existing assignment <strong>and</strong> then reassign the PG/PC<br />
object. Online access to modules available within the multiproject is then possible<br />
without any problem.<br />
Tip for working with distributed projects<br />
If more than one of the team members want to access the PLCs online on their<br />
PG, it would be useful to create one "PG/PC" or "SIMATIC PC station" object in the<br />
multiproject <strong>and</strong> then set up an assignment for each one of the PGs.<br />
Depending on which PG has opened the project, SIMATIC Manager indicates only<br />
the object assigned to this PG with a yellow arrow.<br />
<strong>Configuring</strong> <strong>Hardware</strong> <strong>and</strong> <strong>Communication</strong> <strong>Connections</strong> with <strong>STEP</strong> 7<br />
A5E00706939-01 16-13
Working With Projects in the Multiproject<br />
16.5 Creating Cross-Project Subnets<br />
Concept of cross-project subnets<br />
Under <strong>STEP</strong> 7 V5.2 you can configure cross-project subnets that you can use to<br />
configure connections.<br />
Subnets "that run across several projects" (that is, are cross-project subnets) are<br />
not created in a single operation. Rather, already configured subnets in the<br />
different projects of the multiproject are merged!<br />
Individual subnets of a merged subnet will be maintained as usual. When grouped,<br />
they are assigned to a logical "Subnet Group" that represents the properties that<br />
are common to all assigned subnets.<br />
Merged subnets (that is, cross-project subnets) are of the same subnet type, with<br />
identical S7 subnet IDs. They are identified under NetPro by their name suffix<br />
"(cross-project)".<br />
In the SIMATIC Manager merged subnets are represented by the following special<br />
icons.<br />
Small icon<br />
Large icon<br />
Subnets that can be merged<br />
Industrial Ethernet, PROFIBUS <strong>and</strong> MPI subnets can be merged.<br />
Subnets that cannot be merged<br />
• PtP subnets cannot be merged.<br />
Requirements<br />
• Constant-cycle PROFIBUS subnets also cannot be merged. Reason: Constant<br />
bus cycle time can only be configured for mono-master systems, which means<br />
that cross-project communications connections do not make sense in this<br />
configuration.<br />
• For this same reason, PROFIBUS subnets that have H stations connected to<br />
them as DP masters also cannot be merged.<br />
• If a subnet with a configured sync domain is located in an Ethernet subnet<br />
group, no other Ethernet subnet with a sync domain may be added to this<br />
group.<br />
To merge subnets, write access must have been granted to the participating<br />
projects <strong>and</strong> their subnets.<br />
<strong>Configuring</strong> <strong>Hardware</strong> <strong>and</strong> <strong>Communication</strong> <strong>Connections</strong> with <strong>STEP</strong> 7<br />
16-14 A5E00706939-01
How to merge subnets in NetPro<br />
Working With Projects in the Multiproject<br />
To merge or unmerge subnets, proceed as follows:<br />
1. Select the menu comm<strong>and</strong> Edit > Merge / Unmerge Subnets > ...<br />
Select the type of subnet in the last part of this menu comm<strong>and</strong>.<br />
2. In the next dialog, assign the multiproject subnets to a merged subnet.<br />
- In the right-h<strong>and</strong> field ("Merged"), select a whole subnet.<br />
- In the left-h<strong>and</strong> field ("Subnets in the multiproject"), select subnet that is to<br />
be made part of the merged subnet.<br />
- Click the button with the arrow pointing to the right.<br />
Subnets are grouped so that you can maintain an overview of the subnets you<br />
are going to assign common properties (e.g. an identical S7 subnet ID).<br />
All subnets are merged to form a "Merged Subnet" (Default name, for example:<br />
PROFIBUS_merged(1)). You can change the default name of the merged<br />
subnet.<br />
The properties of the first subnet you add to the subnet group determine the<br />
properties of all subnets you subsequently add to the group. You can later<br />
specify another "leading" subnet, that is, the one that determines the properties<br />
of all others via the "Select" button. The icon for the leading subnet has green<br />
border to clearly identify it.<br />
3. If you need more merged subnets, click the "New" button <strong>and</strong> assign subnets<br />
from the field ("Subnets in the multiproject") to this merged subnet, as<br />
described above.<br />
4. If required, you can change the subnet properties via the "Properties" button.<br />
This may be necessary, for example, for changing the bus parameters of<br />
PROFIBUS subnets you are going to merge.<br />
5. Confirm the settings with "OK" or "Apply".<br />
The transferable subnet properties of a leading subnet are then applied to all<br />
other subnets of the group.<br />
<strong>Configuring</strong> <strong>Hardware</strong> <strong>and</strong> <strong>Communication</strong> <strong>Connections</strong> with <strong>STEP</strong> 7<br />
A5E00706939-01 16-15
Working With Projects in the Multiproject<br />
The picture below highlights the context:<br />
How to unmerge subnets<br />
To unmerge subnets, proceed as follows:<br />
1. Select the menu comm<strong>and</strong> Edit > Merge / Unmerge Subnets > ...<br />
Select the type of subnet in the last part of this menu comm<strong>and</strong>.<br />
2. In the next dialog, select a subnet in the right-h<strong>and</strong> field ("Merged") that is to be<br />
removed from the merged subnet.<br />
3. Click the button with the arrow pointing to the left.<br />
The selected subnet now appears in the left-h<strong>and</strong> field ("Subnets in the<br />
multiproject").<br />
Properties of merged subnets<br />
When you merge subnets, the transferable properties of the master subnet are<br />
transferred to the other subnets of the same group.<br />
In addition to the S7 subnet ID, these properties are (for example, with PROFIBUS<br />
subnets) the profile, transmission speed, highest address, <strong>and</strong> the number of<br />
nodes to be taken into account.<br />
The following subnet parameters will not be adapted - which means that the<br />
individual subnets of a group will maintain their own subnet properties:<br />
• Name<br />
• Author<br />
• Comment<br />
<strong>Configuring</strong> <strong>Hardware</strong> <strong>and</strong> <strong>Communication</strong> <strong>Connections</strong> with <strong>STEP</strong> 7<br />
16-16 A5E00706939-01
Working With Projects in the Multiproject<br />
16.6 Display Of Merged Subnets In The Network View<br />
The "Multiproject" Window<br />
Network View<br />
NetPro displays the "Multiproject" window when you open a project that is part of<br />
the multiproject.<br />
Use menu comm<strong>and</strong> View > Multiproject to hide or show this window. You can<br />
also control the view with an icon.<br />
The upper section of the window displays the projects of the multiproject. The<br />
lower section displays all cross-project subnets of the multiproject under their<br />
master subnet name.<br />
After you have selected the projects in the upper section of the window (multiple<br />
selection is also possible), the lower section of this window displays exactly those<br />
cross-project subnets that are routed through all the selected projects.<br />
Tip: You can quickly navigate 'through the projects' of a multiprojects by doubleclicking<br />
on the corresponding project in the "Multiproject" window. <strong>STEP</strong> 7 will then<br />
open the network view of the corresponding project in a separate window.<br />
The network view displays all cross-project subnets with the name suffix "...(crossproject)".<br />
<strong>Configuring</strong> <strong>Hardware</strong> <strong>and</strong> <strong>Communication</strong> <strong>Connections</strong> with <strong>STEP</strong> 7<br />
A5E00706939-01 16-17
Working With Projects in the Multiproject<br />
16.7 Multiproject-Oriented Network View<br />
The multiproject-oriented network view provides an overview of all stations in a<br />
multiproject with the connections to their respective subnets.<br />
Cross-project subnets are only shown in this view in context (i.e. like a subnet).<br />
The name of the displayed cross-project subnet is the name of the subnet group.<br />
You can print out the multiproject-oriented network view, <strong>and</strong> you can download to<br />
all stations from this view. However, you cannot edit or save projects in this view.<br />
Requirements<br />
• This function can only be started from a project that is part of a multiproject.<br />
• All changes made to projects in the multiproject must be saved. If necessary,<br />
you will be prompted to do so.<br />
• All project in the multiproject must be accessible (this is relevant for distributed<br />
projects).<br />
• Projects in a multiproject must not be write-protected (read-only).<br />
• No connection status must be activated in an opened project (from which<br />
multiproject-oriented network view is supposed to be started).<br />
Procedure<br />
1. In the network view, select a project with the View > Multiproject-Oriented<br />
Network View menu comm<strong>and</strong>.<br />
After this, the menu comm<strong>and</strong> is enabled with a check mark.<br />
2. Position the objects as you like. You can also print out the multiproject-oriented<br />
network view.<br />
3. From this view, you can download to all stations in the multiproject (comm<strong>and</strong>:<br />
PLC > Download ...)<br />
4. To return to the "normal" network view of the project, select the View ><br />
Multiproject-Oriented Network View menu comm<strong>and</strong> once again.<br />
When you close the project, all positions of the object are automatically saved as<br />
well.<br />
<strong>Configuring</strong> <strong>Hardware</strong> <strong>and</strong> <strong>Communication</strong> <strong>Connections</strong> with <strong>STEP</strong> 7<br />
16-18 A5E00706939-01
Properties of the multiproject-oriented network view<br />
Working With Projects in the Multiproject<br />
• After this function is called for the first time from a project, all objects are<br />
rearranged. You can change the positions of the objects. If you deactivate the<br />
multiproject-oriented network view <strong>and</strong> then call it again from another project in<br />
the multiproject, the objects will again be shown in the same arrangement.<br />
• Features of the multiproject-oriented network view such has the zoom factor,<br />
the subnet lengths (reduced or not reduced), with or without DP slaves/IO<br />
devices, etc. are all determined by the project from which the multiprojectoriented<br />
network view has been called.<br />
• When the multiproject-oriented network view is active, you can not make any<br />
changes to the projects. However, you can trigger a cross-project consistency<br />
test. For this reason, you cannot use the Save comm<strong>and</strong> (Network > Save) in<br />
the multiproject-oriented network view. If you do select the Network > Save<br />
Compile menu comm<strong>and</strong>, the network configuration will only be compiled.<br />
• In the multiproject-oriented network view, a configuration can be downloaded to<br />
all stations in the multiproject.<br />
• Only one multiproject-oriented network view can opened at one time. If another<br />
<strong>STEP</strong> 7 user attempts to start the multiproject-oriented network view from<br />
another project, this action will be canceled <strong>and</strong> an error message will be<br />
displayed.<br />
<strong>Configuring</strong> <strong>Hardware</strong> <strong>and</strong> <strong>Communication</strong> <strong>Connections</strong> with <strong>STEP</strong> 7<br />
A5E00706939-01 16-19
Working With Projects in the Multiproject<br />
16.8 <strong>Configuring</strong> Cross-Project <strong>Connections</strong><br />
Introduction<br />
After you have configured cross-project subnets, <strong>STEP</strong> 7 also allows you to<br />
configure connections with such master subnets. The end points of these<br />
connections may be located in different projects.<br />
<strong>STEP</strong> 7 offers support for the creation of cross-project connections within the<br />
multiproject as well as for the adjustment of connections configured with no<br />
multiproject context.<br />
Connection types of cross-project connections<br />
Under <strong>STEP</strong> 7 you can create cross-project connections for redundant <strong>and</strong> S7<br />
connections.<br />
Under SIMATIC NET you can also configure further cross-project connection types<br />
- with the exception of FMS connections. For further information, refer to the<br />
SIMATIC NET documentation.<br />
Cross-project connections to a specified partner<br />
Cross-project connections to a to a specified partner (e.g. a CPU) are created<br />
same as internal connections of a project (identical procedure). The dialog for<br />
selecting the connection partner has been exp<strong>and</strong>ed <strong>and</strong> now lets you select -<br />
apart from selecting the end point (e.g. a module) - a project in the multiproject in<br />
which the end point is located.<br />
The condition is, that the projects are part of a multiproject <strong>and</strong> that the subnets<br />
have been merged (e.g. by using the "Adjusting Projects in a Multiproject" wizard of<br />
SIMATIC Manager).<br />
<strong>Configuring</strong> <strong>Hardware</strong> <strong>and</strong> <strong>Communication</strong> <strong>Connections</strong> with <strong>STEP</strong> 7<br />
16-20 A5E00706939-01
Properties of cross-project connections<br />
Tip<br />
Working With Projects in the Multiproject<br />
Consistency of cross-project connections is maintained when projects of a<br />
multiproject are h<strong>and</strong>led. Cross-project connections within a multiproject stay fully<br />
operational a can be compiled, even if the project that contains the connection<br />
partner is removed from the multiproject.<br />
The following applies to <strong>STEP</strong> 7 connections: <strong>STEP</strong> 7 prompts you to split the<br />
connection before the properties dialog pops up only when you call this dialog to<br />
view the connection properties. You can only modify the connection properties<br />
after you have confirmed this prompt with "Yes". You must adjust the connection<br />
properties manually when you change the properties, same as with S7 connections<br />
to an unspecified connection partner. Whenever you change connection properties,<br />
there is a risk of malfunctions during runtime.<br />
Only the local ID for a connection can be changed without terminating the<br />
connection.<br />
Fault-tolerant <strong>STEP</strong> 7 connections cannot be terminated.<br />
<strong>STEP</strong> 7 uses the S7 subnet ID - an object property of a subnet - to adjust crossproject<br />
connections.<br />
When you attempt to configure cross-project connections without having merged<br />
both of the corresponding subnets (which are to form the connection path), for<br />
example because other, similarly affected projects are temporarily unavailable, you<br />
can help yourself in the following way:<br />
Adjust the S7 subnet ID at all subnets. Select the respective subnet <strong>and</strong> view its<br />
object properties via the context-sensitive menu. Enter identical S7 subnet IDs for<br />
both of the subnets.<br />
You can then specify that the nodes on "manually adjusted" subnets of the other<br />
project form the connection end point. However, this process still does not confirm<br />
the uniqueness of individual subnets from the viewpoint of NetPro. The consistency<br />
test would report an error if the projects are connected through a common, crossproject<br />
subnet. In this case, the same subnet IDs in different projects will be<br />
detected <strong>and</strong> recognized as errors.<br />
For this reason, merge the subnets in NetPro.<br />
<strong>Configuring</strong> <strong>Hardware</strong> <strong>and</strong> <strong>Communication</strong> <strong>Connections</strong> with <strong>STEP</strong> 7<br />
A5E00706939-01 16-21
Working With Projects in the Multiproject<br />
Cross-project connections to a partner in an "unknown" projects<br />
If you can not "lay your h<strong>and</strong>s" on the connection partner in the multiproject, simply<br />
because the corresponding project was created at another location or is currently<br />
being edited <strong>and</strong> therefore locked, you can select a connection with "Partner In<br />
Unknown Project". Repeat this selection at the partner project.<br />
This procedure generates a st<strong>and</strong>by connection in both projects. You can use this<br />
connection later to automatically adjust the partner project, after it has been<br />
incorporated into the multiproject.<br />
In this case you need to configure an identical connection name (reference) in<br />
the connection properties of both projects. Using the connection name, you can<br />
assign a connection partner <strong>and</strong> also adjust the connection properties (Menu<br />
comm<strong>and</strong> Edit > Merge <strong>Connections</strong>).<br />
<strong>Configuring</strong> <strong>Hardware</strong> <strong>and</strong> <strong>Communication</strong> <strong>Connections</strong> with <strong>STEP</strong> 7<br />
16-22 A5E00706939-01
Special considerations for downloads<br />
Working With Projects in the Multiproject<br />
After you have configured cross-project subnets <strong>and</strong> connections, you must<br />
download the network configuration to all participating modules. They represent the<br />
end points of the connection as well as the participating routers.<br />
When you upload these data to the PG (Download to PG) the network<br />
configurations <strong>and</strong> the connections are merged automatically as soon as all<br />
conditions for this action have been met (e.g. both end points have been<br />
uploaded).<br />
The download functions provided under NetPro do not affect cross-project data.<br />
rather, they only have an effect within a project. Functions affected are:<br />
• Download in the Current Project > Selected <strong>and</strong> Partner Stations<br />
• Download in the Current Project > Stations on the Subnet<br />
• Download in the Current Project > Selected <strong>Connections</strong><br />
Save <strong>and</strong> compile functions are also restricted to the currently active project.<br />
An S7 cross-project connection requires of you to compile both participating<br />
projects.<br />
These restrictions apply to the "st<strong>and</strong>ard" network view of a project. You can also<br />
download throughout the entire project ("cross-project") in the cross-project<br />
(multiproject-oriented) network view.<br />
<strong>Configuring</strong> <strong>Hardware</strong> <strong>and</strong> <strong>Communication</strong> <strong>Connections</strong> with <strong>STEP</strong> 7<br />
A5E00706939-01 16-23
Working With Projects in the Multiproject<br />
16.9 Options for Merging Cross-Project <strong>Connections</strong><br />
You can merge cross-project connections such as <strong>STEP</strong> 7 connections.<br />
• When adjusting projects within a multiproject in the SIMATIC Manager (menu<br />
comm<strong>and</strong> File > Multiproject > Adjust Projects)<br />
• In NetPro with the menu comm<strong>and</strong> Edit > Merge Connection<br />
However there are the following difference between both procedures:<br />
In the SIMATIC Manager, only those connections are merged that were configured<br />
in the affected projects as "Connection partners in unknown project" with the<br />
identical connection names (reference). In NetPro, however, you can relate<br />
connections that have similar or different connection names to each other.<br />
When merging in the SIMATIC Manager, you cannot know in advance which<br />
connection partner has which connection properties or which connection partner is<br />
the one that adapts its connection properties (i.e. is the active connection partner).<br />
When merging in NetPro, the partner adapts its connection properties to those of<br />
the local module. In addition, the properties of the connections can be changed in a<br />
dialog for merging the connections.<br />
<strong>STEP</strong> 7 connections to an unspecified partner can only be merged to a crossproject<br />
S7 connection in NetPro. Such connections are not h<strong>and</strong>led in the SIMATIC<br />
Manager.<br />
16.10 S7 <strong>Connections</strong> to Unspecified Connection Partners<br />
When you insert a project that contains unspecified S7 connections in a<br />
multiproject, you can use a simple method to merge these S7 connections with<br />
cross-project S7 connections:<br />
1. Merge the subnets across which the unspecified S7 connection is routed.<br />
2. Call menu comm<strong>and</strong> Edit > Merge <strong>Connections</strong>.<br />
<strong>STEP</strong> 7 will automatically merge the matching unspecified S7 connections.<br />
16.11 Adjusting Projects in the Multiproject<br />
After projects were inserted into a multiproject, the projects must be adjusted in the<br />
multiproject. You also call this function after you have modified subnets <strong>and</strong><br />
connections in a multiproject. Always execute this function when you prepare your<br />
configuration for commissioning.<br />
<strong>Configuring</strong> <strong>Hardware</strong> <strong>and</strong> <strong>Communication</strong> <strong>Connections</strong> with <strong>STEP</strong> 7<br />
16-24 A5E00706939-01
16.12 Archiving <strong>and</strong> Retrieving Multiprojects<br />
Archiving multiproject data<br />
Working With Projects in the Multiproject<br />
You can add multiprojects, individual projects or libraries to a compressed (packed)<br />
archive file that can be stored on a hard disk drive or on a mobile storage medium<br />
(e.g. Zip disk).<br />
If segments of the multiproject are stored on network drives, you can only use the<br />
following file compression tools to create an archive for multiproject data:<br />
• PKZip Comm<strong>and</strong>line V4.0 (supplied with the <strong>STEP</strong> 7 package)<br />
• WinZip from version 6.0<br />
• JAR from version 1.02<br />
Prerequisite for archiving:<br />
Since the archiving function affects all projects of the multiproject (that is, is a<br />
cross-project function), the relevant projects must not be accessed by any other<br />
processes.<br />
Procedure<br />
1. In SIMATIC Manager, select the multiproject<br />
2. Select menu comm<strong>and</strong> File > Archive<br />
3. Confirm the multiproject in the next dialog <strong>and</strong> click "OK".<br />
4. In the next dialog, select the archive name <strong>and</strong> path as well as the archiving<br />
program (e.g. PKZip 4.0)<br />
5. Confirm the dialog with "OK".<br />
How to retrieve multiproject archives<br />
1. In the SIMATIC Manager, select menu comm<strong>and</strong> File > Retrieve<br />
2. In the next dialog, select the multiproject archive <strong>and</strong> click on "Open".<br />
3. In the "Select destination directory" dialog that appears, select the target<br />
directory for unpacking the archive files.<br />
A new directory is generated in the selected directory. The complete project<br />
directory structure of the unpacked multiproject will then appear on the same<br />
level below this directory.<br />
<strong>Configuring</strong> <strong>Hardware</strong> <strong>and</strong> <strong>Communication</strong> <strong>Connections</strong> with <strong>STEP</strong> 7<br />
A5E00706939-01 16-25
Working With Projects in the Multiproject<br />
<strong>Configuring</strong> <strong>Hardware</strong> <strong>and</strong> <strong>Communication</strong> <strong>Connections</strong> with <strong>STEP</strong> 7<br />
16-26 A5E00706939-01
17 Commissioning <strong>and</strong> Service<br />
Preparations for commissioning<br />
For initial commissioning of networked stations you must initially download<br />
configuration data to each one of the PLCs separately via menu comm<strong>and</strong> PLC ><br />
Download (SIMATIC Manager). This supplies the PLCs with their required<br />
hardware configuration as well as their network node address. After that you can<br />
access the network with the menu comm<strong>and</strong> PLC > Compile And Download<br />
Objects.<br />
What has to be done if modifications were made during a commissioning or<br />
service phase<br />
If a multiproject is affected, we recommend that you adjust the projects before you<br />
download them to the PLC (In SIMATIC Manager, call menu comm<strong>and</strong> File ><br />
Multiproject > Adjust projects). After that you can call the central function<br />
"Compile <strong>and</strong> download objects" to download the changes to the PLC.<br />
17.1 Commissioning PROFIBUS Nodes<br />
As of <strong>STEP</strong> 7 V5.2 you can use your PG for online access to PROFIBUS nodes,<br />
even if only DP slaves <strong>and</strong> are connected to the PROFIBUS apart from the PG.<br />
At these nodes you can perform diagnostics, monitor their inputs <strong>and</strong> modify the<br />
outputs. You can also reconfigure the nodes <strong>and</strong> save the currently displayed<br />
configuration as the new configuration (select the menu comm<strong>and</strong> PLC ><br />
PROFIBUS > Save PROFIBUS Online Configuration as).<br />
You can use the configuration saved in this manner as a basis for configuring new<br />
station (in HW Config, select the menu comm<strong>and</strong> Station > Open).<br />
How to start online access<br />
In SIMATIC Manager, start this function with menu comm<strong>and</strong> PLC > PROFIBUS ><br />
Operator Control/Monitoring And Diagnosis Of Nodes, or, when you configure<br />
the hardware for an open offline station, with menu comm<strong>and</strong> PLC > Operator<br />
Control/Monitoring And Diagnosis Of Nodes.<br />
You will be displayed a view similar to that of HW Config (Station > Open Online).<br />
The difference is here that you can specify nodes (e.g. via the context-sensitive<br />
menu Specify Module), modify parameters <strong>and</strong> save the new configuration as<br />
new station.<br />
<strong>Configuring</strong> <strong>Hardware</strong> <strong>and</strong> <strong>Communication</strong> <strong>Connections</strong> with <strong>STEP</strong> 7<br />
A5E00706939-01 17-1
Commissioning <strong>and</strong> Service<br />
Offline <strong>and</strong> online views<br />
After you open the stored configuration ("Offline view") <strong>and</strong> then start the "Online<br />
view" under menu comm<strong>and</strong> PLC > Operator Control/Monitoring And Diagnosis<br />
Of Nodes, the following relationship is applied:<br />
• The Online view displays all nodes found, irrespective of the number of nodes in<br />
the offline configuration.<br />
• <strong>STEP</strong> 7 uses the manufacturer ID <strong>and</strong> the configuration data as base for an<br />
attempt to find a corresponding node in the offline view for each node in the<br />
online view.<br />
If successful, (that is, all nodes are identical), the offline view parameters are<br />
applied to the online view.<br />
This method ensures that changes made <strong>and</strong> saved during the commissioning<br />
phase are immediately available again when the online is opened.<br />
Operator control <strong>and</strong> monitoring<br />
In the online view you can read inputs <strong>and</strong> control outputs. Here, the programming<br />
device (PG) functions as the DP master.<br />
1. Select the required node.<br />
2. Call menu comm<strong>and</strong> PLC > Operator Control/Monitoring.<br />
The operator control/monitoring dialog box pops up. The path definition indicates<br />
that online access was performed directly via PROFIBUS services.<br />
The difference of calling this function during the hardware configuration (online via<br />
assigned CPU services) to direct access via PROFIBUS services is that triggering<br />
conditions can not be applied to DP slaves.<br />
The dialog displays all inputs/outputs of a module in one line.<br />
<strong>Configuring</strong> <strong>Hardware</strong> <strong>and</strong> <strong>Communication</strong> <strong>Connections</strong> with <strong>STEP</strong> 7<br />
17-2 A5E00706939-01
Using a saved configuration as a basis for configuring a new station<br />
Commissioning <strong>and</strong> Service<br />
The PROFIBUS nodes determined online can be saved as a station configuration<br />
(menu comm<strong>and</strong> PLC > PROFIBUS > Save PROFIBUS Online Configuration<br />
As... ). Any changes made (in "Specify Module" or "Change Properties") are also<br />
saved.<br />
This newly saved configuration does not, however, contain any specific<br />
configuration data for the DP master connected to the PROFIBUS. For this reason,<br />
the DP masters are only shown symbolically, in a way similar to DP slaves.<br />
You have the option of configuring DP masters at a later time <strong>and</strong> then replacing a<br />
DP master determined online (<strong>and</strong> represented symbolically) with the newly<br />
configured one.<br />
Procedure:<br />
1. Open the saved PROFIBUS online configuration.<br />
2. Configure the same number of DP masters as the number of DP master<br />
systems that were determined online<br />
(the complete rack with CPU <strong>and</strong> PROFIBUS CP or CPUs with integral DP<br />
interfaces).<br />
3. Select one of the DP masters determined online that you want to replace with a<br />
newly configured DP master.<br />
4. Select the menu comm<strong>and</strong> Options > Assign Master.<br />
5. In the dialog that is displayed, assign a configured master to a master that was<br />
determined online.<br />
6. Repeat steps 3 to 5 until all of the DP masters determined online are replaced<br />
by configured ones.<br />
<strong>Configuring</strong> <strong>Hardware</strong> <strong>and</strong> <strong>Communication</strong> <strong>Connections</strong> with <strong>STEP</strong> 7<br />
A5E00706939-01 17-3
Commissioning <strong>and</strong> Service<br />
17.2 Identification <strong>and</strong> Maintenance (I&M)<br />
I&M functions are information functions that you can use to retrieve information<br />
about a device, such as the manufacturer, version, ordering information. I&M<br />
functions let you find out information about a device concerning its configuration,<br />
placement in service, diagnostics <strong>and</strong> repair.<br />
What Devices Support I&M Data?<br />
In general, PROFIBUS DPV1 slaves can support I&M data. No I&M data are<br />
defined for PROFIBUS DPV0 slaves.<br />
What's New about I&M Functions<br />
I Data<br />
M Data<br />
I&M functions are an integral part of S7 components, known by the designation<br />
"Module Identification."<br />
What's new about I&M functions is that accessing this information is now<br />
st<strong>and</strong>ardized by the German PROFIBUS User Organization [PROFIBUS<br />
Nutzerorganisation e.V. (PNO)]. Since <strong>STEP</strong> 7 also supports this access, you can<br />
also process I&M data from non-S7 components.<br />
I data are information on the module. Some of this information may also be printed<br />
on the module housing.<br />
You can read I data by using the module diagnosis function in <strong>STEP</strong> 7 (in "Module<br />
Information" go to the "General" tab <strong>and</strong> the "Identification" tab).<br />
M data are plant-dependent information such as the Plant ID (AKZ), Location ID<br />
(OKZ), installation data <strong>and</strong> any comments.<br />
M data can be written to the module online.<br />
<strong>Configuring</strong> <strong>Hardware</strong> <strong>and</strong> <strong>Communication</strong> <strong>Connections</strong> with <strong>STEP</strong> 7<br />
17-4 A5E00706939-01
17.3 Changing M-Data in the SIMATIC Manager<br />
Requirements<br />
Procedure<br />
• The module must support I&M data.<br />
Commissioning <strong>and</strong> Service<br />
• Τhere is an online connection through PROFIBUS ("Accessible Nodes") to the<br />
module.<br />
To edit M data (such as the Plant ID), proceed as follows:<br />
1. Select the module in the "Accessible Nodes" window, <strong>and</strong> then select the<br />
PLC > Change Module Identification menu comm<strong>and</strong>.<br />
2. In the "Change Module Identification" dialog, change the M-data as required.<br />
For redundant modules, you must edit the data for both the left <strong>and</strong> right<br />
module.<br />
3. To transfer this new data to the module, select the "Include" check box.<br />
4. Confirm your settings with "OK".<br />
The M data will be transferred to the module<br />
<strong>Configuring</strong> <strong>Hardware</strong> <strong>and</strong> <strong>Communication</strong> <strong>Connections</strong> with <strong>STEP</strong> 7<br />
A5E00706939-01 17-5
Commissioning <strong>and</strong> Service<br />
17.4 Entering or Changing M-Data in HW Config<br />
Requirements<br />
Procedure<br />
• The module must support I&M data.<br />
• There is an online connection through PROFIBUS to the module.<br />
To edit M data (such as the Plant ID), proceed as follows:<br />
1. Double-click the module. In the property sheet that is displayed, select the<br />
"Identification" tab.<br />
2. Enter the M data <strong>and</strong> then confirm your entries with "OK".<br />
3. Select the PLC > Download Module Identification menu comm<strong>and</strong>.<br />
4. In the "Download Module Identification" dialog box, compare the offline data in<br />
the <strong>STEP</strong> 7 database with the data at the module ("ONLINE").<br />
5. To overwrite the online data with the offline data, select the "Include" check<br />
box.<br />
6. Confirm your settings with "OK".<br />
The M data will be transferred to the module<br />
<strong>Configuring</strong> <strong>Hardware</strong> <strong>and</strong> <strong>Communication</strong> <strong>Connections</strong> with <strong>STEP</strong> 7<br />
17-6 A5E00706939-01
Index<br />
*<br />
*.cfg File 7-2, 11-7<br />
A<br />
ACCESS 12-19<br />
Accessible Nodes 4-26<br />
Accessing Connection IDs during<br />
Programming 12-25<br />
Accessing IO Devices Online via Ethernet<br />
4-24<br />
Active Connection Setup 12-42<br />
Additional Field Devices (Folder in the HW<br />
Catalog) 3-4<br />
Address (Interface) 12-42<br />
Address Assignment for Multicomputing<br />
Operation 8-3<br />
Address Details (for an Unspecified<br />
Connection Partner) 12-41<br />
Address Overview 2-13<br />
Addresses 2-12, 2-14, 3-17, 3-18, 14-3<br />
Assigning Symbols to I/O Addresses 2-<br />
14<br />
Packing (ET 200S) 3-17<br />
Setting Addresses of <strong>Communication</strong><br />
Nodes 14-3<br />
Adjusting Projects in the Multiproject 16-24<br />
AG_LOCK 12-19<br />
AG_LRECV 12-19<br />
AG_LSEND 12-19<br />
AG_RECV 12-19<br />
AG_SEND 12-19<br />
AG_UNLOCK 12-19<br />
Application 6-3<br />
Archiving <strong>and</strong> Retrieving Multiprojects 16-<br />
25<br />
Arranging C7 Complete Systems (Special<br />
Features) 2-10<br />
Arranging C7 Control Systems (Special<br />
Features) 2-10<br />
Arranging Modules in a Module Group (M7-<br />
300) 2-3<br />
Arranging Modules in a Rack 2-8<br />
Arranging the Central Rack 2-8<br />
Arranging the Expansion Rack (SIMATIC<br />
400) 2-20<br />
Arranging the Network View 11-27, 11-29<br />
Assigning a Password 1-6<br />
Assigning a PC station 6-7<br />
Assigning a SIMATIC PC station in the<br />
network view 6-7<br />
Assigning Addresses 2-12<br />
Assigning Addresses <strong>and</strong> Names for<br />
PROFINET IO Devices 4-4<br />
Assigning Device Names via a Memory<br />
Card (MMC) 4-29<br />
Assigning DP Slaves to SYNC/FREEZE<br />
Groups 3-15<br />
Assigning I/O Addresses 2-13<br />
Assigning Parameters 1-1<br />
Assigning Parameters for Constant Bus<br />
Cycle Time <strong>and</strong> Isochrone Mode in HW<br />
Config 3-87<br />
Assigning Parameters in the User Program<br />
1-6<br />
Assigning Parameters to CPU Interfaces 1-<br />
6<br />
Assigning Parameters to Interrupts 1-6<br />
Assigning PG/PC 11-21<br />
Assigning Properties to Modules/Interfaces<br />
2-11<br />
Auto-positioning in the Network View 11-27<br />
<strong>Configuring</strong> <strong>Hardware</strong> <strong>and</strong> <strong>Communication</strong> <strong>Connections</strong> with <strong>STEP</strong> 7<br />
A5E00706939-01 1<br />
B<br />
Basic Procedure for <strong>Configuring</strong> a DP<br />
Master System 3-1<br />
Basic Procedure for <strong>Configuring</strong> a<br />
PROFINET IO System 4-13<br />
Basic Procedure for <strong>Configuring</strong> <strong>Hardware</strong><br />
1-3<br />
Basic Steps for <strong>Configuring</strong> a Station 1-3<br />
Blocks for Configured <strong>Connections</strong> 12-26<br />
Blocks for Different Connection Types 12-<br />
18<br />
BRCV 12-18, 12-19, 12-26<br />
Broadcast Node 12-26<br />
BSEND 12-18, 12-19, 12-26<br />
Bus Cycle Time 3-78, 3-79, 3-80, 3-81<br />
Bus error 3-70<br />
Bus Profile 3-78<br />
C<br />
C7 Complete Systems<br />
<strong>Configuring</strong> 2-10<br />
Cascade 2-19<br />
Catalog (HW Config) 1-9
Index<br />
Catalog (NetPro) 11-14<br />
Catalog Profile 1-9<br />
Causes of Inconsistent <strong>Connections</strong> 12-<br />
22<br />
Central Rack 2-4, 2-8<br />
Changing in the Connection Table 12-20<br />
Changing the Connection Partner 12-30<br />
Changing the CPU Number 8-7<br />
Changing the IP-Address or the Device<br />
Name During Operation 4-30<br />
Changing the Name of a DP Master System<br />
3-12<br />
Changing the Node Address 14-4<br />
Changing the Node Address for <strong>STEP</strong> 7<br />
Stations 14-3<br />
Changing the Number of a DP Master<br />
System 3-12<br />
Changing the Operating Mode of CPU<br />
during a Download 14-1<br />
Changing the PROFIBUS Address for DP<br />
Slaves 14-3<br />
Changing the Properties of a DP Master<br />
System 3-12<br />
Checking Consistency 12-22<br />
Checking the Consistency of a Station<br />
Configuration 14-1<br />
Checking the Consistency of the Network<br />
11-24<br />
CiR 9-1<br />
Color Coding in the Network View 11-13<br />
Color Coding of Changes in the Network<br />
View 11-10<br />
Column Width 12-20<br />
Commissioning <strong>and</strong> Service 17-1<br />
Commissioning PROFIBUS Nodes 17-1<br />
<strong>Communication</strong> 3-78, 3-80, 11-2, 11-3, 11-<br />
24, 11-27, 11-30, 11-31, 14-3, 14-5, 14-7<br />
Blocks for Configured <strong>Connections</strong> 12-<br />
26<br />
<strong>Communication</strong> (GD <strong>Communication</strong>) 13-1<br />
<strong>Communication</strong> Nodes<br />
Properties 11-2<br />
<strong>Communication</strong> Processors 2-17<br />
Comparison S7 Station - PC Station 6-4<br />
Comparison of Startup Types<br />
Multicomputing 8-3, 8-4<br />
Compatibility for Import/Export of a<br />
Configuration 7-2<br />
Compiling the GD Table 13-17<br />
Compiling the GD Table for a Second Time<br />
13-20<br />
Component configurator 6-7<br />
Conditions for Sending <strong>and</strong> Receiving 13-9<br />
Configuration 4-14<br />
Importing <strong>and</strong> Exporting 7-2<br />
Importing/Exporting 7-2<br />
PROFINET IO System 4-13<br />
Saving 7-1<br />
Uploading 14-11<br />
Configuration File (for SIMATIC PC Station)<br />
6-1<br />
Configuration of <strong>Hardware</strong> (Introduction) 1-<br />
1<br />
Configuration Table as a Representation of<br />
a Rack 1-5<br />
Configuration with an External IO Controller<br />
4-20<br />
Configuration with an Integrated IO<br />
Controller 4-19<br />
Configuration with IE/PB Link 4-21<br />
Configuration with Intelligent DP Slaves<br />
(Data Exchange I Slave Master) 3-7<br />
Configuration with Intelligent DP Slaves<br />
(Direct Data Exchange<br />
Slave > I Slave) 3-8<br />
Configuration with SIMATIC PC Stations 4-<br />
22<br />
Configuration with 'Simple' (Modular or<br />
Compact) DP Slaves (Data Exchange<br />
Slave Master) 3-6<br />
Configuration with Two DP Master Systems<br />
(Direct Data Exchange<br />
Slave > I Slave) 3-9<br />
Configuration with Two DP Master Systems<br />
(Direct Data Exchange Slave > Master)<br />
3-10<br />
Configurations for PROFIBUS-DP 3-6<br />
<strong>Configuring</strong> 11-10, 11-11, 11-12, 12-33<br />
<strong>Connections</strong> 12-33<br />
Subnets (NetPro) 11-10<br />
<strong>Configuring</strong> (When Required?) 1-1<br />
<strong>Configuring</strong> <strong>and</strong> Commissioning the<br />
Diagnostic Repeater 3-70<br />
<strong>Configuring</strong> <strong>Communication</strong> with a<br />
PROFIBUS-CP 12-3<br />
<strong>Configuring</strong> <strong>Communication</strong> with an<br />
Ethernet CP 12-2<br />
<strong>Configuring</strong> Compact DP Slaves 3-14<br />
<strong>Configuring</strong> <strong>Connections</strong> 12-1, 12-33<br />
In a SIMATIC PC Station 12-33<br />
Introduction 12-1<br />
to a PG/PC 12-36<br />
to a PG/PC with WinCC 12-37<br />
to Partners in Another Project 12-38, 12-<br />
40<br />
<strong>Configuring</strong> <strong>Connections</strong> for Modules in a<br />
SIMATIC Station 12-28<br />
<strong>Configuring</strong> consistent data areas(> 4<br />
bytes) 3-5<br />
<strong>Configuring</strong> Cross-Project <strong>Connections</strong> 16-<br />
20<br />
<strong>Configuring</strong> Direct Data Exchange 5-7<br />
<strong>Configuring</strong> Direct Data Exchange between<br />
PROFIBUS-DP Nodes 3-45<br />
<strong>Configuring</strong> <strong>Hardware</strong> <strong>and</strong> <strong>Communication</strong> <strong>Connections</strong> with <strong>STEP</strong> 7<br />
Index-2 A5E00706939-01
<strong>Configuring</strong> DP-Slaves (GSD Rev. 5) as a<br />
Receiver for Direct Data Exchange 3-50<br />
<strong>Configuring</strong> DPV1 Devices 3-59<br />
<strong>Configuring</strong> Expansion Racks in<br />
SIMATIC 300 2-19<br />
<strong>Configuring</strong> Expansion Racks in<br />
SIMATIC 400 2-19<br />
<strong>Configuring</strong> GD <strong>Communication</strong> 13-12<br />
<strong>Configuring</strong> <strong>Hardware</strong> (Introduction) 1-1<br />
<strong>Configuring</strong> <strong>Hardware</strong> (Starting the<br />
Application) 2-7<br />
<strong>Configuring</strong> H-Systems 10-1<br />
<strong>Configuring</strong> Intelligent DP Slaves 3-30<br />
<strong>Configuring</strong> IO Controllers 4-15<br />
<strong>Configuring</strong> IO Devices 4-16<br />
<strong>Configuring</strong> Locally 1-8<br />
<strong>Configuring</strong> Modular DP Slaves 3-14<br />
<strong>Configuring</strong> Modules for Multicomputing<br />
Operation 8-6<br />
<strong>Configuring</strong> Multicomputing Operation 8-5<br />
<strong>Configuring</strong> Point-to-Point CPs 2-17<br />
<strong>Configuring</strong> S5 Modules 2-18<br />
<strong>Configuring</strong> short <strong>and</strong> equal-length process<br />
reaction times on PROFIBUS DP 3-82<br />
<strong>Configuring</strong> Software Redundancy 3-26<br />
<strong>Configuring</strong> the Clock Memory 1-6<br />
<strong>Configuring</strong> the CP 342-5 as a DP Slave 3-<br />
30<br />
<strong>Configuring</strong> the CPU 315-2 DP as a DP<br />
Slave 3-30<br />
<strong>Configuring</strong> the Distributed I/O (DP) 3-1<br />
<strong>Configuring</strong> the ET 200S 3-17<br />
<strong>Configuring</strong> the ET 200S (IM 151/CPU) as<br />
a DP slave 3-34<br />
<strong>Configuring</strong> the ET 200X (BM 147/CPU)<br />
as a DP Slave 3-33<br />
<strong>Configuring</strong> The Topology 5-6<br />
<strong>Configuring</strong> the Watchdog Time 4-32<br />
Connecting a PG/PC to a Constant-Cycle<br />
PROFIBUS network via Industrial<br />
Ethernet <strong>and</strong> an IE/PB Link 3-91<br />
Connecting an IE/PB-Link to a Constant-<br />
Cycle PROFIBUS network 3-91<br />
Connection<br />
Reserving 12-31<br />
Connection Partner<br />
Changing 12-30<br />
in Another Project 12-41<br />
Unspecified 12-41, 12-42<br />
Connection Partners<br />
in Another Project 12-38<br />
Connection Properties<br />
Changing 12-20<br />
Connection Resource 12-8, 12-9, 12-10,<br />
12-11, 12-12, 12-13, 12-14, 12-15, 12-16,<br />
12-17, 12-42<br />
Connection Resources 12-28<br />
Index<br />
Connection Table 12-20, 12-21, 12-22, 12-<br />
23, 12-24, 12-29<br />
Editing with Keyboard 12-20<br />
Optimizing Column Width 12-20<br />
Showing <strong>and</strong> Hiding Columns 12-20<br />
Sorting 12-20<br />
Connection Types 12-4, 12-5<br />
Blocks That Can Be Used 12-18<br />
for Partners in Another Projects 12-38<br />
for Partners in the Same Project 12-26<br />
<strong>Connections</strong> 12-9, 12-10, 12-25, 12-28<br />
Accessing Connection IDs during<br />
Programming 12-25<br />
Assigning Connection Resources 12-8<br />
Changing 12-21<br />
<strong>Configuring</strong> 12-1<br />
Copying 12-32<br />
Creating 12-43<br />
Deleting 12-32<br />
Downloading to a Programming Device<br />
(PG) 14-12<br />
Exporting 11-8<br />
Inserting 12-29<br />
Merging (Multiproject) 16-24<br />
Consistency<br />
Checking a Station Configuration 14-1<br />
Consistency Check (NetPro) 11-24<br />
Constant Bus Cycle Time 3-81<br />
Control <strong>and</strong> Feedback Interface 3-20, 3-21<br />
Controlling DP slaves 17-1<br />
Copying <strong>Connections</strong> 12-32<br />
Copying Multiple DP Slaves 3-13<br />
Copying Subnets <strong>and</strong> Stations 11-28<br />
Coupler 3-26<br />
CP 342-5 as a DP Slave 3-32<br />
CPs <strong>and</strong> FMs with MPI Addresses (S7-300)<br />
2-12<br />
CPU 317-2 PN/DP 12-18<br />
CPU 31x2 DP as a DP Slave 3-30<br />
CR2 Rack<br />
Exp<strong>and</strong>ing 2-20<br />
Creating a Connection to an "Other Station<br />
" a "PG/PC<br />
" or a "SIMATIC S5 Station" 12-43<br />
Creating a DP Master System 3-11<br />
Creating a New Connection to an<br />
Unspecified Partner 12-41<br />
Creating a PROFINET IO Configuration 5-<br />
3<br />
Creating a PROFINET IO System 4-15<br />
Creating a Station 2-7<br />
Creating a Sync Domain 5-4<br />
Creating an Alarm in the I Slave with<br />
SFB75 'SALRM' 3-42<br />
Creating <strong>and</strong> Assiging Parameters to<br />
Programming Devices (PGs)/PCs<br />
<strong>Configuring</strong> <strong>Hardware</strong> <strong>and</strong> <strong>Communication</strong> <strong>Connections</strong> with <strong>STEP</strong> 7<br />
A5E00706939-01 3
Index<br />
To 'Other Stations' <strong>and</strong> S5-Stations 11-<br />
19<br />
Creating <strong>and</strong> Assigning Parameters to a<br />
Network Connection 11-16<br />
Creating <strong>and</strong> Assigning Parameters to a<br />
New DP Slave 11-18<br />
Creating <strong>and</strong> Assigning Parameters to a<br />
New Station 11-15<br />
Creating <strong>and</strong> Assigning Parameters to a<br />
New Subnet 11-14<br />
Creating <strong>and</strong> Assigning Parameters to<br />
SIMATIC PC Stations 6-1<br />
Creating <strong>Connections</strong> (Rules) 12-28<br />
Creating Cross-Project Subnets 16-14<br />
Cross-Project Subnets 16-18<br />
Current Modules 1-9<br />
Customizing the <strong>Hardware</strong> Catalog 1-9<br />
D<br />
Deleting One or More <strong>Connections</strong> 12-32<br />
Determining the <strong>Communication</strong><br />
Capabilities from the GD Resources 13-<br />
3<br />
Device Name 4-4, 4-5, 4-13, 4-30<br />
Assigning 4-27<br />
Device Number 4-5, 4-13, 4-21<br />
Diagnosing IO Devices 4-31<br />
Diagnosing PROFINET IO Devices 4-31<br />
Diagnosis 4-25<br />
Diagnostic address 3-60<br />
Diagnostic Repeater 3-73, 3-74<br />
Digital Simulation Module SIM 374 IN/OUT<br />
16 2-2<br />
Direct <strong>Communication</strong> (Lateral<br />
<strong>Communication</strong>) 3-47<br />
Direct Slave to Slave <strong>Communication</strong> 3-45<br />
Disconnecting IO Systems 4-18<br />
Display of Merged Subnets in the Network<br />
View 16-17<br />
Displaying Information on Components in<br />
the <strong>Hardware</strong> Catalog 1-17<br />
Displaying Module Information 1-17<br />
Displaying the Address Overview 2-13<br />
Displaying the Address Table for a Subnet<br />
11-27<br />
Displaying the Connection Status 12-23<br />
Displaying the CPU Assignment 8-6<br />
Displaying the Node Addresses for a<br />
Subnet 11-27<br />
Displaying the Overview of the Node<br />
Addresses for a Subnet 11-27<br />
Displaying the Topology with the Help of<br />
Diagnostic Repeaters 3-73<br />
Displaying the Version of the CPU<br />
Operating System in the '<strong>Hardware</strong><br />
Catalog' Window 2-9<br />
Displaying/Changing the Properties of<br />
Components in the Network View 11-27<br />
Distributed I/O 3-7, 3-8, 3-9, 3-10, 3-47<br />
<strong>Configuring</strong> 3-1<br />
Distributed reading <strong>and</strong> writing of consistent<br />
data (> 4 bytes) 3-5<br />
Download (Network Configuration) 14-7<br />
Downloading 14-1, 14-2, 14-7, 14-8, 14-10<br />
a <strong>Hardware</strong> Configuration to a<br />
Programmable Controller 14-1<br />
<strong>Connections</strong> 14-7, 14-8<br />
Network Configuration to a<br />
Programmable Controller 14-5<br />
Downloading a Changed HW Configuration<br />
to an S7-400H Station 14-9<br />
Downloading a Configuration to a CPU 14-<br />
1<br />
Downloading a Configuration to a<br />
Programmable Controller 14-1<br />
Downloading a Network Configuration 14-7<br />
Downloading a Station Configuration to a<br />
Programmable Controller 14-1<br />
Downloading an IRT Configuration 5-8<br />
Downloading Changes to the Network<br />
Configuration 14-7<br />
Downloading Configuration changes to an<br />
H-Station 14-9<br />
Downloading <strong>Connections</strong> 14-7<br />
Downloading the Global Data Configuration<br />
14-10<br />
Downloading the Network Configuration<br />
14-3<br />
Downloading the Network Configuration for<br />
the First Time 14-3<br />
Downloading the Network Configuration to<br />
a Programmable Controller 14-5<br />
Downloading to a PC Station 14-6<br />
Downloading to PROFINET Devices 4-27<br />
DP Cycle 3-82, 3-85<br />
DP Cylce Time 3-92<br />
DP Interface of the CPU 1-6<br />
DP Master 3-11<br />
DP Master System 3-11<br />
<strong>Configuring</strong> 3-3<br />
Inserting 3-12<br />
Separating 3-12<br />
DP Slave 11-18<br />
DP Slave is an Intelligent DP Slave 3-4<br />
DP Slave is bought separately (with new<br />
GSD file) 3-4<br />
DP Slaves<br />
Copying 3-13<br />
Selecting <strong>and</strong> Arranging 3-13<br />
DP Slaves (Compact) 3-14<br />
DP Slaves (Modular) 3-14<br />
DP V0 Slaves 3-4<br />
DP/AS-i Link<br />
<strong>Configuring</strong> <strong>Hardware</strong> <strong>and</strong> <strong>Communication</strong> <strong>Connections</strong> with <strong>STEP</strong> 7<br />
Index-4 A5E00706939-01
<strong>Configuring</strong> 3-17<br />
DP/PA Coupler 3-25<br />
DP/PA Link 3-25<br />
DPV0 3-4<br />
DPV1 3-58, 3-59, 3-60, 3-61, 3-62, 3-63<br />
Dummy Module (DM 370 Dummy) 2-2<br />
E<br />
Editing 11-12, 11-13<br />
a Station in NetPro 11-13<br />
Editing the Local ID in the Connection<br />
Table 12-20<br />
Editing the Network View 11-10<br />
E-Mail 12-2<br />
E-Mail Connection 12-27<br />
E-Mail <strong>Connections</strong> 12-4<br />
Entering Scan Rates 13-18<br />
Entering Status Rows 13-19<br />
Errors 11-24<br />
ET 200 X (BM 147/CPU) as a DP Slave 3-<br />
30<br />
ET 200iS 3-23, 3-24<br />
ET 200L<br />
<strong>Configuring</strong> 3-17<br />
ET 200M 3-27, 3-28<br />
ET 200S 3-17, 3-19<br />
ET 200S (IM 151/CPU) as a DP slave 3-30<br />
ET 200S in DPV1 mode 3-22<br />
ET 200S with Option H<strong>and</strong>ling 3-20<br />
Ethernet 4-2, 4-3, 4-24, 4-25, 4-26<br />
Ethernet Address Assignment 11-4<br />
Ethernet CP 12-2<br />
Example of <strong>Configuring</strong> an S7-400 as I-<br />
Slave 3-35<br />
Example of <strong>Configuring</strong> Direct Data<br />
Exchange 3-47<br />
Examples of Configurations with<br />
PROFINET IO 4-19<br />
Exceptions for Calculating the GD Circles<br />
Required 13-8<br />
Exchanging <strong>and</strong> Moving Modules 1-13<br />
Exchanging Racks<br />
C7 Devices<br />
<strong>and</strong> DP Slaves 1-14<br />
Exp<strong>and</strong>ing the Central Rack with Expansion<br />
Racks 2-19<br />
Expansion Rack 2-4<br />
Expansion Racks<br />
<strong>Configuring</strong> 2-19<br />
Export File 7-3<br />
Exporting 7-2<br />
<strong>Connections</strong> 11-7, 11-9<br />
Station 7-2, 7-3, 7-4<br />
Stations in the Network View 11-7<br />
Exporting <strong>and</strong> Importing CAx Data 7-5<br />
Extending the Network Configuration in<br />
NetPro 11-10<br />
Index<br />
<strong>Configuring</strong> <strong>Hardware</strong> <strong>and</strong> <strong>Communication</strong> <strong>Connections</strong> with <strong>STEP</strong> 7<br />
A5E00706939-01 5<br />
F<br />
Fault-Tolerant PLC Systems 10-1<br />
Fault-Tolerant S7 <strong>Connections</strong> 12-26<br />
FDL <strong>Connections</strong> 12-4, 12-18, 12-26<br />
Filling Out the GD Table 13-15<br />
Finding FAQs on the Internet 1-17<br />
Finding Manuals on the Internet 1-17<br />
Finding Module Manuals on the Internet 1-<br />
17<br />
Finding Product Support Information on the<br />
Internet 1-17<br />
First Assignment of Network Nodes 14-3<br />
FMs <strong>and</strong> CPs with MPI Addresses (S7-300)<br />
2-12<br />
FMS <strong>Connections</strong> 12-4, 12-19, 12-26<br />
FMS Interface 12-3<br />
FREEZE 3-15, 3-16, 3-80<br />
From Configuration To Cyclical Data<br />
Exchange (PROFINET IO) 4-11<br />
G<br />
GC (Global Control) 3-82<br />
GD Circle 13-5, 13-6<br />
GD Circle (Calculation) 13-8<br />
GD <strong>Communication</strong> 13-10<br />
<strong>Configuring</strong> 13-12<br />
Scan Rate <strong>and</strong> Scan Cycle Time 13-10<br />
GD Packet 13-4<br />
GD Resources 13-3<br />
GD Table 13-14, 13-17<br />
Compiling 13-20<br />
Opening 13-13<br />
GET 12-18, 12-19, 12-26<br />
Global Control Frame 3-84<br />
Global Data <strong>Communication</strong> 13-12<br />
Global Data <strong>Communication</strong> (Overview)<br />
13-1<br />
Global Data Configuration<br />
Downloading 14-10<br />
Global Data Transmission Using System<br />
Functions 13-21<br />
Gobal Data <strong>Communication</strong> 16-4<br />
GSD file 3-55<br />
GSD File 3-4, 3-50, 3-53, 3-54<br />
GSD Files for IO Devices 3-57<br />
GSD revison 3-55<br />
GSDML Schema 3-57<br />
H<br />
H<strong>and</strong>ling DP Master Systems 3-12<br />
H<strong>and</strong>ling IO Systems 4-18<br />
H<strong>and</strong>ling Multiprojects 16-7
Index<br />
<strong>Hardware</strong> Catalog 1-3, 1-10, 2-9, 3-4, 4-<br />
17<br />
Customizing 1-9<br />
HART Modules 3-26<br />
Highlighting the <strong>Communication</strong> Partners of<br />
a Module in the Network View 11-27<br />
Highlighting the DP Master System 11-27<br />
Highlighting the SIMATIC PC station to be<br />
configured in the network view 6-7<br />
Hot Restart 12-18<br />
H-Station 14-9, 14-10<br />
H-Systems 10-1, 12-13<br />
HTML Process Control 12-2<br />
HW Catalog 1-9, 1-10<br />
HW Config 1-1<br />
I<br />
I Slave 3-42, 3-43<br />
I/O Addresses 2-12<br />
IDENTIFY 12-19<br />
IE/PB Link 4-21, 12-35<br />
IM 153 3-26<br />
IM 153-2 as of V4 3-27<br />
Importing 7-2, 7-3, 7-4<br />
Station 7-2<br />
Importing <strong>and</strong> Exporting a Configuration 7-<br />
2<br />
Importing <strong>and</strong> Exporting Stations in the<br />
Network View 11-7<br />
Importing/Exporting a <strong>Hardware</strong><br />
Configuration 7-2<br />
Inconsistent <strong>Connections</strong> 11-24, 12-22<br />
Industrial Ethernet 4-2<br />
Inserting<br />
a New Connection 12-29<br />
Inserting a DP Master System 3-12<br />
Inserting a New Connection 12-29<br />
Inserting IO Systems 4-18<br />
Installing a *.GSD File 3-53<br />
Installing <strong>Hardware</strong> Components 1-18<br />
Installing <strong>Hardware</strong> Updates 1-18<br />
Integrating Existing PROFIBUS DP<br />
Configurations 4-6<br />
Intelligent DP Slave 3-4, 3-7, 3-37, 3-38<br />
Intelligent DP Slaves 3-32, 3-33, 3-34<br />
Interface Submodules <strong>and</strong> Interfaces<br />
(Representation in HW Config) 2-8<br />
Interproject <strong>Connections</strong> 12-38<br />
Interrupt H<strong>and</strong>ling<br />
Multicomputing Operation 8-3<br />
Introduction<br />
Isochronous Realtime Ethernet 5-1<br />
Introduction to <strong>Configuring</strong> <strong>Hardware</strong> 1-1<br />
IO Controller 4-2, 4-13, 4-15, 4-19, 4-20, 4-<br />
22, 4-23<br />
IO Device 3-57, 4-2, 4-3, 4-8, 4-9, 4-13, 4-<br />
14, 4-16, 4-17, 4-27, 4-31, 4-32<br />
IO Supervisor (PG/PC) 4-2<br />
IO System 4-2<br />
IO Systems 4-18<br />
IO-Controller 4-27<br />
IO-System 4-11<br />
IP Address 4-4, 11-4, 11-5, 11-6<br />
IRT 5-9, 5-10, 5-12<br />
Media Redundancy 5-9, 5-12<br />
I-Slave 3-35, 3-41<br />
ISO Transport 12-2<br />
ISO Transport <strong>Connections</strong> 12-4, 12-19,<br />
12-26<br />
Isochrone Mode 3-87, 3-88, 3-89<br />
Isochrone Mode with PROFIBUS DP 3-82,<br />
3-87<br />
Isochronous Mode 3-92<br />
Isochronous mode (see Constant bus cycle<br />
time) 3-55<br />
ISO-on-TCP <strong>Connections</strong> 12-4, 12-18, 12-<br />
26<br />
IT-CP 12-2<br />
<strong>Configuring</strong> <strong>Hardware</strong> <strong>and</strong> <strong>Communication</strong> <strong>Connections</strong> with <strong>STEP</strong> 7<br />
Index-6 A5E00706939-01<br />
L<br />
Lag Time 3-89<br />
Language Setting 7-3<br />
Lateral <strong>Communication</strong> 3-45<br />
Lateral <strong>Communication</strong> (Direct Data<br />
Exchange) 3-6, 3-8, 3-9, 3-10, 3-45<br />
Lateral <strong>Communication</strong> (Example) 3-47<br />
Layout of the Station Window 1-4<br />
LDB 12-36<br />
LDB (Local Database) 12-36<br />
Line diagnostics 3-70, 3-71<br />
Linking PROFINET <strong>and</strong> PROFIBUS 4-6<br />
Loadable <strong>STEP</strong> 7 <strong>Communication</strong> (S7-300<br />
as Client) 12-18<br />
Local Data Area 1-6<br />
Local Database (LDB) 12-36<br />
Local End Point of a Connection 12-23<br />
Local ID of a Connection<br />
Changing 12-20<br />
M<br />
M7-300 2-3<br />
M7-400<br />
Slot Rules 2-5<br />
MAC Address 11-4<br />
Manufacturer Specific Interrupt 3-61<br />
Master System 3-12<br />
Media Redundancy 5-9, 5-10, 5-12<br />
Merging <strong>Connections</strong> 16-20<br />
Merging <strong>Connections</strong> (Multiproject) 16-20,<br />
16-24<br />
Merging Cross-Project <strong>Connections</strong> 16-24
Merging Subnets (Multiproject) 16-14<br />
Merging/Unmerging Subnets 16-14<br />
Message Frame Error 3-75<br />
Modifying Outputs 2-14<br />
Modifying the System during Operation via<br />
CiR 9-1<br />
Modifying Variables 2-15<br />
Modular DP Slaves<br />
<strong>Configuring</strong> 3-14<br />
Module Catalog (see <strong>Hardware</strong> Catalog) 1-<br />
9, 2-8<br />
Module Group (M7-300) 2-3<br />
Module Information<br />
for the Diagnostic Repeater 3-70<br />
Module status 3-71<br />
Modules 1-6, 2-14, 2-16<br />
Exchanging <strong>and</strong> Moving 1-13<br />
Monitoring/Modifying 2-14<br />
Moving 1-13<br />
Setting Properties 1-6<br />
Subsequent Installation 1-18<br />
Monitoring Inputs 2-14<br />
Monitoring Variables 2-14<br />
Mono-Master System 3-6, 3-7, 3-8<br />
Moving Modules 1-13<br />
MPI Addresses 2-12<br />
MPI Addresses of FMs <strong>and</strong> CPs (S7-300)<br />
2-12<br />
MPI Interface of the CPU 1-6<br />
Multicast Nodes 12-27<br />
Multicomputing 2-20, 8-1, 8-2, 8-4<br />
Comparison of Startup Types 8-3<br />
Interrupt H<strong>and</strong>ling 8-3<br />
Programming 8-8<br />
Rules for Address Assignment 8-3<br />
Multi-PLC Operation 6-4<br />
Multiple Master System 3-9, 3-10<br />
Multiproject 16-14, 16-15<br />
Archiving <strong>and</strong> Retrieving 16-25<br />
<strong>Configuring</strong> Cross-Project <strong>Connections</strong><br />
16-20<br />
Creating Cross-Project Subnets 16-14<br />
Display of Merged Subnets in the<br />
Network View 16-17<br />
H<strong>and</strong>ling 16-7<br />
Online Access to PLCs in 16-12<br />
Multiproject - Requirements <strong>and</strong><br />
Recommendations 16-4<br />
Multiproject-Oriented Network View 16-18<br />
N<br />
NetPro 11-1, 11-14, 11-29<br />
Network Address Overview 11-27<br />
Network Configuration<br />
Rules 11-3<br />
Saving 11-26<br />
Index<br />
Network Configuration <strong>and</strong> <strong>STEP</strong> 7 Project<br />
11-1<br />
Network Gateways 11-30, 11-31, 11-32<br />
Network View 12-23, 16-18, 16-19<br />
Networking Stations<br />
that Represent Network Gateways 11-30<br />
Networking Stations from Different Projects<br />
11-35<br />
Networking Stations within a Project 11-1<br />
Node Addresses 2-12<br />
<strong>Configuring</strong> <strong>Hardware</strong> <strong>and</strong> <strong>Communication</strong> <strong>Connections</strong> with <strong>STEP</strong> 7<br />
A5E00706939-01 7<br />
O<br />
OB 56 3-61<br />
OB 57 3-61<br />
OB 61 3-84<br />
OB 62 3-82<br />
OB 63 3-82<br />
OB 64 3-82<br />
OB55 3-61<br />
OB61 to OB 64 3-87<br />
Online Access to Ethernet Nodes in the<br />
"Accessible Nodes" Window 4-25<br />
Online Access to Modules in NetPro 11-27<br />
Online Access to PLCs in a Multiproject<br />
16-12<br />
OPC Client 4-22<br />
OPC Server 6-2, 6-3, 12-34, 12-36<br />
OPC Server PROFINET IO 4-22<br />
Opening More Stations 2-7<br />
Opening Stations 2-7<br />
Opening the GD Table 13-13<br />
Opening the Graphical Network View<br />
(Starting NetPro) 11-10<br />
Operator Control/Monitoring of Distributed<br />
I/O 17-1<br />
Operator Control/Monitoring of DP slaves<br />
17-1<br />
Operator Control/Monitoring of DP Slaves<br />
17-1<br />
Optimized Speed 3-78<br />
Optimizing The DP Cycle Time For<br />
Isochronous Processing 3-92<br />
Option H<strong>and</strong>ling 3-20, 3-21<br />
Optional Package 10-1<br />
Optional Software 2-17<br />
Orange-Colored S7 Station 11-13<br />
Organization Blocks for Synchronous Cycle<br />
Interrupts (OB 61 to OB 64) 3-82<br />
Orphaned DP Master System 3-12<br />
OSTATUS 12-18<br />
Other Station 11-19, 12-43<br />
Object in NetPro 11-19<br />
Outdoor 1-9<br />
Overlapping Ti <strong>and</strong> T 3-92<br />
Overview Basic Procedure For <strong>Configuring</strong><br />
IRT 5-3
Index<br />
P<br />
PA Coupler 3-26<br />
PA Link 3-26<br />
PA Master 3-25<br />
PA Master System 3-25<br />
Packing Address Spaces (ET 200S) 3-17<br />
Password 7-2<br />
PBK (See Blocks for Configured<br />
<strong>Connections</strong>) 12-26<br />
PC Application 4-22<br />
PC Station 4-22, 6-4, 6-5, 6-6, 11-23, 12-<br />
33, 12-34<br />
PC Station (SIMATIC PC Station) 6-1<br />
PC-based SIMATIC Controllers 6-4<br />
PDM 3-24<br />
PG/PC 11-19, 11-20, 12-43<br />
PG/PC with SAPI-S7 Interface 12-36<br />
Point-to-Point Connection 2-17<br />
Point-to-Point <strong>Connections</strong> 12-4, 12-19,<br />
12-26<br />
Point-to-Point CPs 2-17<br />
Pop-Up Menu 12-20<br />
Positioning Stations <strong>and</strong> Subnets in NetPro<br />
11-27<br />
Power Supply Modules<br />
Redundant 2-5<br />
PRINT 12-19<br />
Printer 2-17<br />
Priorities for Interrupts 1-6<br />
Procedure for <strong>Configuring</strong> <strong>and</strong> Assigning<br />
Parameters to a Local Configuration 1-8<br />
Process Image Partition 3-88, 3-90<br />
Process Reaction Times 3-82, 3-83, 3-<br />
84, 3-85<br />
PROFIBUS DP 3-4, 3-12<br />
PROFIBUS DP <strong>and</strong> PROFINET IO<br />
(Similarities <strong>and</strong> Differences) 4-2<br />
PROFIBUS DP Interface of the CPU 1-6<br />
PROFIBUS PA 3-25<br />
PROFIBUS-CPs 12-3<br />
PROFIBUS-DP 3-1, 3-6, 3-47, 3-78, 3-79,<br />
3-80, 3-86<br />
Configurations 3-6<br />
Direct Data Exchange (Lateral<br />
<strong>Communication</strong>) 3-6<br />
Intelligent DP Slave 3-6<br />
Shared Input 3-6<br />
PROFIBUS-DP Partners 3-45<br />
Profile (DP) 3-78<br />
Profile (<strong>Hardware</strong> Catalog) 1-9<br />
PROFINET Device with Proxy Functionality<br />
4-6, 4-7<br />
PROFINET IO 3-57, 4-1, 4-2, 4-3, 4-6, 4-8,<br />
4-9, 4-11, 4-13, 4-15, 4-18, 4-19, 4-20, 4-<br />
21, 4-22, 4-24, 4-26, 4-27, 4-30, 4-31, 4-<br />
32<br />
PROFINET IO Controller 4-15, 4-19, 4-20,<br />
4-22<br />
PROFINET IO Device 4-16<br />
PROFINET IO Systems 4-18<br />
Programming CPUs 8-8<br />
Programming Device Access by Means of<br />
Integrated PROFIBUS-DP Interface 3-12<br />
Programming Devices (PGs)/PCs<br />
Object in NetPro 11-19<br />
Representing as Programming Device in<br />
the Network View 11-19<br />
Programming Devices / PCs as Connection<br />
Partners 12-36<br />
Programming DPV1 Devices 3-61<br />
Programming DPV1 Slaves (OB55 to<br />
OB57) 3-61<br />
Programming the CPUs 8-8<br />
Properties of Subnets <strong>and</strong><br />
<strong>Communication</strong> Nodes 11-2<br />
PtP Connection 2-17<br />
Publisher 3-51, 3-52<br />
Publisher (Publisher in Lateral<br />
<strong>Communication</strong>) 3-45<br />
PUT 12-18, 12-19, 12-26<br />
<strong>Configuring</strong> <strong>Hardware</strong> <strong>and</strong> <strong>Communication</strong> <strong>Connections</strong> with <strong>STEP</strong> 7<br />
Index-8 A5E00706939-01<br />
R<br />
READ 12-18, 12-19<br />
Reading Diagnostics with SFC13 3-61<br />
Reading the System Status List 3-63<br />
Reading/writing Data Records 3-62<br />
Rearranging DP Slaves in the Network<br />
View 11-27<br />
Receiving Global Data 13-9<br />
Red-Colored S7 Station 11-13<br />
Reducing Subnet Lengths 11-16, 11-27,<br />
11-29<br />
Redundant Power Supply Modules 2-5<br />
Redundant S7 <strong>Connections</strong> 12-4<br />
Reference Junctions 3-19<br />
Reflection Error 3-75<br />
REPORT 12-19<br />
Representation of Interfaces <strong>and</strong> Interface<br />
Submodules 2-8<br />
Representing the Programming Device in<br />
the Network View 11-19<br />
Required Number of GD Circles 13-5<br />
Required Number of GD Packets 13-4<br />
RESERVE Module 3-20<br />
Reserving a Connection 12-31<br />
Resource 12-28<br />
Resources 12-13, 12-15, 12-16<br />
Response Time for GD <strong>Communication</strong> 13-<br />
11<br />
Results of the Consistency Check 11-24<br />
RESUME 12-18, 12-26<br />
Routed S7 <strong>Connections</strong> 12-34
Router 11-6, 12-35<br />
Routers 11-30<br />
Routing 3-91<br />
RTD Module 3-19<br />
RTE Base Programming Interface 4-22<br />
Rules for Arranging Modules (SIMATIC<br />
300) 2-1<br />
Rules for Arranging Modules (SIMATIC<br />
400) 2-4<br />
Rules for <strong>Configuring</strong> an ET 200S 3-17<br />
Rules for Connecting Expansion Racks<br />
(SIMATIC 400) 2-20<br />
Rules for Creating <strong>Connections</strong> 12-28<br />
Rules for Network Configuration 11-3<br />
S<br />
S5 Station 11-19<br />
Object in NetPro 11-19<br />
S7 <strong>Communication</strong> 12-18<br />
S7 <strong>Connections</strong> 12-4, 12-8, 12-10, 12-11,<br />
12-12, 12-34, 12-35, 12-36, 12-37, 16-24<br />
Assigning Connection Resources 12-8<br />
Blocks That Can Be Used 12-18<br />
Interconnected Subnets for a PC Station<br />
Through a Router 12-34<br />
to a PG/PC 12-36<br />
to a PG/PC with WinCC 12-37<br />
S7 <strong>Connections</strong> (Interconnected Subnets)<br />
12-34<br />
S7 <strong>Connections</strong> (Redundant) 12-4<br />
S7 <strong>Connections</strong> (Unspecified) 16-24<br />
S7 <strong>Connections</strong> to Unspecified Connection<br />
Partners 16-24<br />
S7 Functions (S7 <strong>Communication</strong>) 12-2<br />
S7 Slaves 3-4<br />
S7 Subnet ID 16-16<br />
S7-400H 10-1, 14-9<br />
S7-<strong>Connections</strong> 12-41<br />
S7RTM (see Component Configurator) 6-7<br />
SAPI-S7 Interface 12-36<br />
Saving a Configuration 7-1<br />
Saving <strong>and</strong> Compiling 13-17<br />
Saving <strong>and</strong> Compiling the GD Table for the<br />
First Time 13-17<br />
Saving <strong>Connections</strong> 12-43<br />
Saving the Network Configuration 11-26<br />
Scan Rates<br />
Entering 13-18<br />
Searching 1-10<br />
in the <strong>Hardware</strong> Catalog 1-10<br />
Searching in the Catalog (NetPro) 11-18<br />
Searching in the <strong>Hardware</strong> Catalog 1-10<br />
Segment 3-70, 3-71, 3-72, 3-73<br />
Segment error 3-70, 3-73<br />
Selecting a DP Mastersystem 11-27<br />
Selecting <strong>and</strong> Arranging DP Slaves 3-13<br />
Index<br />
Selecting <strong>and</strong> Arranging IO Devices 4-16<br />
Selecting Nodes on the Subnet (NetPro)<br />
11-19<br />
SEND/RECEIVE Interface 12-2, 12-9<br />
Sending Global Data 13-9<br />
SEND-RECEIVE Interface 12-3<br />
Separating a DP Master System from the<br />
PROFIBUS Interface 3-12<br />
Setting a Specific Update Time for an IO-<br />
Device 4-10<br />
Setting Constant Bus Cycle Times<br />
(PROFIBUS) 3-78<br />
Setting Constant Bus Cycle Times for<br />
PROFIBUS Subnets 3-78<br />
Setting Priority Classes 1-6<br />
Setting the Level of Protection 1-6<br />
Setting the Properties of Components 1-6<br />
Setting the Retentive Characteristics 1-6<br />
Setting the System Reaction 1-6<br />
Setting Update Times 5-5<br />
SFB 12-26<br />
BRCV 12-26<br />
BSEND 12-26<br />
GET 12-26<br />
PUT 12-26<br />
RESUME 12-26<br />
START 12-26<br />
STATUS 12-26<br />
STOP 12-26<br />
URCV 12-26<br />
USEND 12-26<br />
USTATUS 12-26<br />
SFB 52 (read data record) 4-31<br />
SFB 54 (read additional information on<br />
interrupt) 4-31<br />
SFB54 RALRM 3-61<br />
SFB75 'SALRM' 3-42<br />
SFC 126 'SYNC_PI' 3-82<br />
SFC 127 'SYNC_PO' 3-82<br />
SFC 78 'OB_RT' 3-82, 3-90<br />
SFC126 'SYNC_PI' 3-87<br />
SFC127 'SYNC_PO' 3-87<br />
Shortening the Process Reaction Time by<br />
Overlapping Ti <strong>and</strong> To 3-92<br />
Showing <strong>and</strong> Hiding Columns 12-20<br />
SIMATIC PC - Appending Configurations of<br />
Previous Versions 6-5<br />
SIMATIC PC Station 4-22, 6-1, 6-2, 6-3, 6-<br />
4, 6-5, 11-19, 11-21, 12-33<br />
Object in NetPro 11-19<br />
SIMATIC PC Stations 4-22<br />
SIMATIC PC-Station 12-34, 12-36<br />
SIMATIC PDM 3-23, 3-24, 3-26<br />
SIMATIC S5 12-43<br />
Simulation Module SIM 374 IN/OUT 16 2-2<br />
SIPROM (see SIMATIC PDM) 3-26<br />
Slave 11-18<br />
<strong>Configuring</strong> <strong>Hardware</strong> <strong>and</strong> <strong>Communication</strong> <strong>Connections</strong> with <strong>STEP</strong> 7<br />
A5E00706939-01 9
Index<br />
Slot PLC 6-1, 6-2, 6-4<br />
Slot Rules (S7-300) 2-1<br />
Slot Rules <strong>and</strong> Other Rules (<strong>Configuring</strong><br />
<strong>Hardware</strong>) 1-7<br />
Slot Rules for a SIMATIC PC Station 6-4<br />
Soft PLC 6-4<br />
Software PLC 6-1, 6-2<br />
Software Redundancy 3-27<br />
Software Redundancy <strong>Configuring</strong> 3-26<br />
Special Features of Multicomputing 8-3<br />
Special Rules for M7-400 2-5<br />
Special Rules for Power Supply Modules<br />
with Redundant Capability (S7-400) 2-5<br />
Special Rules for PROFIBUS-DP Interface<br />
Submodules (M7-400) 2-6<br />
Special Rules for the Digital Simulation<br />
Module SIM 374 IN/OUT 16 2-2<br />
Special Rules for the Dummy Module (DM<br />
370 Dummy) 2-2<br />
St<strong>and</strong>ard 3-78<br />
St<strong>and</strong>ard Slave 3-4, 3-50<br />
START 12-18, 12-26<br />
Starting a Global Data Configuration from<br />
NetPro 11-27<br />
Starting the Application to Configure the<br />
<strong>Hardware</strong> 2-7<br />
Startup Characteristics 1-6<br />
Station<br />
Editing in Netpro 11-10<br />
Importing/Exporting 7-2<br />
Station Configuration<br />
Uploading 14-11<br />
Stations from Different Projects<br />
Networking 11-35<br />
Statistical Data 3-77<br />
STATUS 12-18, 12-19, 12-26<br />
Status Information 12-24<br />
Status Interrupt 3-61<br />
Status of the <strong>Communication</strong> <strong>Connections</strong><br />
12-23<br />
Status of the Global Data <strong>Communication</strong><br />
13-19<br />
Status Rows<br />
Entering 13-19<br />
<strong>STEP</strong> 7 <strong>Connections</strong> 12-18, 12-26<br />
to an Unspecified Partners 12-41<br />
<strong>STEP</strong> 7 <strong>Connections</strong> (Cross-Project) 16-20<br />
<strong>STEP</strong> 7 <strong>Connections</strong>(Redundant) 12-26<br />
STOP 12-26<br />
Structure of a DPV1 Slave 3-59<br />
Subnet 11-27, 11-28, 11-29<br />
Properties 11-2<br />
Subnet ID 11-32, 16-14<br />
Subnet Length<br />
Reducing 11-16<br />
Subnet mask 11-5, 11-6<br />
Subnets <strong>and</strong> Stations 11-1<br />
Subscriber 3-50, 3-51, 3-52, 3-55<br />
Subscriber (Subscriber in Lateral<br />
<strong>Communication</strong>) 3-45<br />
Subsequent Installation of Components 1-<br />
18<br />
Switch 4-24, 4-25<br />
Switching over the DP Master Interface 3-<br />
59<br />
Symbols<br />
Assigning Symbols to I/O Addresses<br />
When <strong>Configuring</strong> Modules 2-14<br />
Symbols (Diagnostic Repeater) 3-70<br />
SYNC 3-15, 3-16<br />
Sync Domain 5-1<br />
Sync Master 5-1<br />
Sync Slave 5-1<br />
SYNC/FREEZE 3-80<br />
Synchronous Cycle Interrupts 3-87<br />
System Data Block (SDB) 7-1<br />
<strong>Configuring</strong> <strong>Hardware</strong> <strong>and</strong> <strong>Communication</strong> <strong>Connections</strong> with <strong>STEP</strong> 7<br />
Index-10 A5E00706939-01<br />
T<br />
Taking <strong>Connections</strong> for Programming<br />
Devices/PCs into Account in the Network<br />
Configuration 11-21<br />
TC Module 3-17<br />
TCP/IP 12-2<br />
TeleService 11-33<br />
Terminating <strong>STEP</strong> 7 <strong>Connections</strong><br />
(Multiproject) 16-20<br />
Testing DP Slaves 17-1<br />
Testing Inputs/Outputs 2-14<br />
That's me - Function for PC stations 6-7<br />
That's me (see Assigning PG/PC) 11-21<br />
The Slot Model of DPV1 Slaves with I-<br />
Slaves 3-65<br />
Thermocouple 3-19<br />
Ti 3-86<br />
Ti <strong>and</strong> To 3-92<br />
Tips for Editing Station Configurations 1-11<br />
Tips for Editing the Network Configuration<br />
11-27<br />
Tips for Working with GD Tables 13-14<br />
To 3-83, 3-84, 3-85, 3-86<br />
Topology 3-70, 3-71<br />
Topology Data 3-75, 3-76, 3-77<br />
Topology View 3-76<br />
TSAP (Transport Service Access Point)<br />
12-42<br />
Type File 3-4<br />
Type File (see GSD File) 3-53<br />
U<br />
UDP <strong>Connections</strong> 12-4, 12-26<br />
Unmerging Cross-Project Subnets 16-14<br />
Unmerging Subnets (Multiproject) 16-14
Unspecified Connection Partner 12-31, 12-<br />
37, 12-42<br />
Update Interrupt 3-61<br />
Update Times For Cyclical Data Exchange<br />
(PROFINET) 4-8<br />
Upload (Uploading a Network Configuration<br />
to a Programming Device) 14-12<br />
Uploading 14-11<br />
Configuration from a Station 14-11<br />
<strong>Hardware</strong> Configuration to a<br />
Programmable Controller 14-11<br />
Uploading a Configuration to a<br />
Programmable Controller 14-11<br />
Uploading a <strong>Hardware</strong> Configuration to a<br />
Programmable Controller 14-11<br />
Uploading a Network Configuration 14-12<br />
Uploading a Station Configuration to a<br />
Programmable Controller 14-11<br />
Uploading to a Programming Device (PG)<br />
(Network Configuration <strong>and</strong> <strong>Connections</strong>)<br />
14-12<br />
URC 12-18<br />
URCV 12-26<br />
USEND 12-18, 12-26<br />
User Application 6-1<br />
Using Connection Resources with Fault-<br />
Tolerant S7 <strong>Connections</strong> 12-13<br />
USTATUS 12-18, 12-26<br />
W<br />
WAN 11-33, 11-34<br />
Warm Restart 12-18<br />
Warning 11-25<br />
Watchdog 4-32<br />
Watchdog Time 4-32<br />
What Is PROFINET IO? 4-1<br />
Index<br />
What You Should Know a About Media<br />
Redundancy 5-9<br />
What You Should Know About Assigning<br />
Connection Resources 12-8<br />
What You Should Know about GSD Files<br />
for IO Devices 3-57<br />
What you should know about GSD<br />
revisions 3-55<br />
What You Should Know About<br />
Multicomputing 8-1<br />
What You Should Know About Multiprojects<br />
16-1<br />
What You Should Know About PROFIBUS<br />
DPV1 3-58<br />
What You Should Know About Slot Rules<br />
<strong>and</strong> Other Rules 1-7<br />
What You Should Know About the Different<br />
Connection Types 12-4<br />
When to Use Multicomputing 8-4<br />
Where Are the DP Slaves in the <strong>Hardware</strong><br />
Catalog Window? 3-4<br />
Where Are The IO Devices Located In The<br />
<strong>Hardware</strong> Catalog? 4-17<br />
WinAC 6-1, 6-2, 6-4<br />
WinCC (configuring connections to…) 12-<br />
37<br />
Windows Language Setting 7-2<br />
WinLC 6-1, 6-2, 6-3<br />
Working with *.GSD Files 3-53<br />
Working with the Connection Table 12-20<br />
Working With the Topology View 3-75<br />
WRITE 12-18, 12-19<br />
<strong>Configuring</strong> <strong>Hardware</strong> <strong>and</strong> <strong>Communication</strong> <strong>Connections</strong> with <strong>STEP</strong> 7<br />
A5E00706939-01 11<br />
X<br />
XDB file (see Configuration File) 6-1
Index<br />
<strong>Configuring</strong> <strong>Hardware</strong> <strong>and</strong> <strong>Communication</strong> <strong>Connections</strong> with <strong>STEP</strong> 7<br />
Index-12 A5E00706939-01