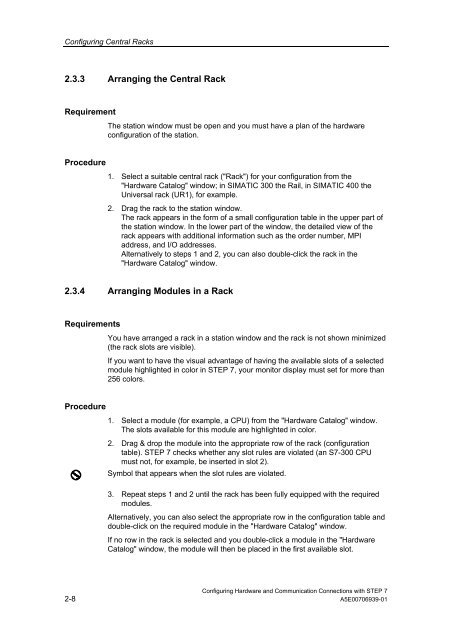
- Page 1 and 2: s SIMATIC Configuring Hardware and
- Page 3 and 4: Preface Purpose This manual provide
- Page 5 and 6: Online Help Preface The manual is c
- Page 7 and 8: Technical Support You can reach the
- Page 9 and 10: Contents 1 Basics of Configuring Ha
- Page 11 and 12: Contents 3.11 Diagnostic Repeater .
- Page 13 and 14: Contents 12 Configuring Connections
- Page 15 and 16: 1 Basics of Configuring Hardware wi
- Page 17 and 18: Basics of Configuring Hardware with
- Page 19 and 20: Basics of Configuring Hardware with
- Page 21 and 22: 1.2.5 Opening Objects in HW Config
- Page 23 and 24: 1.4 Working with the Hardware Catal
- Page 25 and 26: 1.5 Tips for Editing Station Config
- Page 27 and 28: 1.5.1 Exchanging and Moving Modules
- Page 29 and 30: When Is a Rack "Compatible"? Basics
- Page 31 and 32: Basics of Configuring Hardware with
- Page 33 and 34: 2 Configuring Central Racks 2.1 Rul
- Page 35 and 36: 2.1.3 Special Rules for M7-300 Conf
- Page 37 and 38: Configuring Central Racks 2.2.2 Spe
- Page 39: 2.3 How to Configure Central Racks
- Page 43 and 44: 2.3.7 Assigning Properties to Modul
- Page 45 and 46: 2.3.9 Assigning I/O Addresses Requi
- Page 47 and 48: Monitor Modify Configuring Central
- Page 49 and 50: 2.3.12 Configuring Point-to-Point C
- Page 51 and 52: Configuring Central Racks 2.4 Expan
- Page 53 and 54: 3 Configuring the Distributed I/O (
- Page 55 and 56: Configuring the Distributed I/O (DP
- Page 57 and 58: Configuring the Distributed I/O (DP
- Page 59 and 60: 3.4.2 Configuration with Intelligen
- Page 61 and 62: Configuring the Distributed I/O (DP
- Page 63 and 64: 3.5 How to Configure Distributed I/
- Page 65 and 66: 3.5.3 Selecting and Arranging DP Sl
- Page 67 and 68: 3.5.7 Assigning DP Slaves to SYNC o
- Page 69 and 70: 3.6 Other DP Slave Configurations 3
- Page 71 and 72: Rules for Configuring an ET 200S
- Page 73 and 74: Functionality: Option Handling Duri
- Page 75 and 76: Interrupts for Modules with Packed
- Page 77 and 78: 3.6.6 PROFIBUS PA DP/PA Coupler DP/
- Page 79 and 80: Concept Behind Configuring Software
- Page 81 and 82: Sample Configuration Configuring th
- Page 83 and 84: Basic Procedure Configuring the Dis
- Page 85 and 86: Procedure Configuring the Distribut
- Page 87 and 88: 3.7.2 Example of Configuring an S7-
- Page 89 and 90: How to Assign Addresses Configuring
- Page 91 and 92:
DP Slave from the View of the DP Ma
- Page 93 and 94:
Configuring the Distributed I/O (DP
- Page 95 and 96:
Basic Method of Creating Interrupts
- Page 97 and 98:
Configuring the Distributed I/O (DP
- Page 99 and 100:
3.8.2 Example of Configuring Direct
- Page 101 and 102:
Calling SFC15 in the Publisher (CPU
- Page 103 and 104:
The following illustration shows an
- Page 105 and 106:
3.9 Working with *.GSD Files Device
- Page 107 and 108:
3.9.2 What You Should Know About GS
- Page 109 and 110:
Configuring the Distributed I/O (DP
- Page 111 and 112:
3.10.2 Configuring DPV1 Devices Cha
- Page 113 and 114:
3.10.3 Programming DPV1 Devices New
- Page 115 and 116:
Function What is to be checked? Rea
- Page 117 and 118:
3.10.4 The Slot Model of DPV1 Slave
- Page 119 and 120:
Example of an Address Assignment fo
- Page 121 and 122:
Summary Configuring the Distributed
- Page 123 and 124:
Prerequisites for Commissioning Con
- Page 125 and 126:
Configuring the Distributed I/O (DP
- Page 127 and 128:
3.11.3 Working With the Topology Vi
- Page 129 and 130:
Configuring the Distributed I/O (DP
- Page 131 and 132:
Requirements Configuring the Distri
- Page 133 and 134:
Procedure Configuring the Distribut
- Page 135 and 136:
Configuring the Distributed I/O (DP
- Page 137 and 138:
Configuring the Distributed I/O (DP
- Page 139 and 140:
Configuring the Distributed I/O (DP
- Page 141 and 142:
Settings at the DP Slave (DP Interf
- Page 143 and 144:
Configuring the Distributed I/O (DP
- Page 145 and 146:
4 Configuring PROFINET IO Devices 4
- Page 147 and 148:
Similarities and differences Config
- Page 149 and 150:
Structured device names Configuring
- Page 151 and 152:
PROFINET devices with proxy functio
- Page 153 and 154:
Configuring PROFINET IO Devices Rea
- Page 155 and 156:
Configuring PROFINET IO Devices 4.2
- Page 157 and 158:
Configuring PROFINET IO Devices 4.2
- Page 159 and 160:
4.2.3 Creating a PROFINET IO System
- Page 161 and 162:
Configuring PROFINET IO Devices 4.2
- Page 163 and 164:
Configuring PROFINET IO Devices 4.3
- Page 165 and 166:
4.3.3 Configuration with IE/PB Link
- Page 167 and 168:
Configuring in HW Config Configurin
- Page 169 and 170:
Configuring PROFINET IO Devices 4.4
- Page 171 and 172:
4.4.3 Downloading to PROFINET IO De
- Page 173 and 174:
Configuring PROFINET IO Devices 4.4
- Page 175 and 176:
4.4.6 Diagnosing PROFINET IO Device
- Page 177 and 178:
5 Configuring IRT Communication 5.1
- Page 179 and 180:
Configuring IRT Communication 5.2 O
- Page 181 and 182:
5.5 Setting Update Times Configurin
- Page 183 and 184:
5.7 Configuring Direct Data Exchang
- Page 185 and 186:
5.9 Media Redundancy 5.9.1 What You
- Page 187 and 188:
The redundancy manager functions as
- Page 189 and 190:
6 Configuring a SIMATIC PC Station
- Page 191 and 192:
Configuring a SIMATIC PC Station (S
- Page 193 and 194:
Configuring a SIMATIC PC Station (S
- Page 195 and 196:
Configuring a SIMATIC PC Station (S
- Page 197 and 198:
7 Saving, Importing and Exporting C
- Page 199 and 200:
Export File ! Saving, Importing and
- Page 201 and 202:
7.3 Exporting and Importing CAx Dat
- Page 203 and 204:
Saving, Importing and Exporting Con
- Page 205 and 206:
8 Synchronous Operation of Multiple
- Page 207 and 208:
8.1.1 Special Features of Multicomp
- Page 209 and 210:
Synchronous Operation of Multiple C
- Page 211 and 212:
8.2.3 Changing the CPU Number Synch
- Page 213 and 214:
9 Modifying the System during Opera
- Page 215 and 216:
10 Configuring H-Systems Overview H
- Page 217 and 218:
11 Networking Stations 11.1 Network
- Page 219 and 220:
11.3 Rules for Network Configuratio
- Page 221 and 222:
IP Address Networking Stations The
- Page 223 and 224:
Networking Stations 11.5 Importing
- Page 225 and 226:
Procedure (Export) Procedure (Impor
- Page 227 and 228:
Method 2: Configuring Networks Netw
- Page 229 and 230:
Editing a Station in NetPro Network
- Page 231 and 232:
11.6.3 Creating and Assigning Param
- Page 233 and 234:
Tips Networking Stations You can op
- Page 235 and 236:
11.6.6 Creating and Assigning Param
- Page 237 and 238:
Networking Stations 11.6.7 Taking C
- Page 239 and 240:
STEP 7 on a SIMATIC PC Station Netw
- Page 241 and 242:
Networking Stations Messages in the
- Page 243 and 244:
11.6.10 Tips for Editing the Networ
- Page 245 and 246:
Reducing Subnet Lengths Networking
- Page 247 and 248:
Requirements • STEP 7 as of Versi
- Page 249 and 250:
11.7.2 Programming Devices / PCs Co
- Page 251 and 252:
11.8 Networking Stations from Diffe
- Page 253 and 254:
12 Configuring Connections 12.1 Int
- Page 255 and 256:
Configuring Connections 12.3 Config
- Page 257 and 258:
Point-to-Point Connection Configuri
- Page 259 and 260:
TCP Connection Configuring Connecti
- Page 261 and 262:
Configuring Connections Note To exe
- Page 263 and 264:
Configuring Connections For S7 conn
- Page 265 and 266:
Configuring Connections 12.6 Using
- Page 267 and 268:
Configuring Connections Case 2: Con
- Page 269 and 270:
Configuring Connections Call 5: Con
- Page 271 and 272:
Blocks for Use with Point-to-Point
- Page 273 and 274:
Navigating with Cursor Keys and Cal
- Page 275 and 276:
12.10 Displaying the Connection Sta
- Page 277 and 278:
Configuring Connections 12.11 Acces
- Page 279 and 280:
Connection Type Subnet Type Connect
- Page 281 and 282:
12.12.3.1 Inserting a New Connectio
- Page 283 and 284:
12.12.3.3 Reserving a Connection Re
- Page 285 and 286:
12.12.4 Configuring Connections for
- Page 287 and 288:
Requirements Configuring Connection
- Page 289 and 290:
12.12.5.2 S7 Connection to a PG/PC
- Page 291 and 292:
Connection Type Subnet Type Connect
- Page 293 and 294:
12.13.3 Creating a New Connection t
- Page 295 and 296:
Configuring Connections 12.13.4 Cre
- Page 297 and 298:
13 Configuring Global Data Communic
- Page 299 and 300:
Configuring Global Data Communicati
- Page 301 and 302:
13.2.2 Required Number of GD Circle
- Page 303 and 304:
Example for Converting to a GD Tabl
- Page 305 and 306:
13.3 Conditions for Sending and Rec
- Page 307 and 308:
13.4 Response Time Configuring Glob
- Page 309 and 310:
13.5.2 Opening the GD Table There a
- Page 311 and 312:
13.5.4 Filling Out the GD Table Req
- Page 313 and 314:
Configuring Global Data Communicati
- Page 315 and 316:
13.5.7 Entering Status Rows Introdu
- Page 317 and 318:
Configuring Global Data Communicati
- Page 319 and 320:
14 Downloading 14.1 Downloading a C
- Page 321 and 322:
Downloading 14.2 Downloading the Ne
- Page 323 and 324:
14.3 Downloading the Network Config
- Page 325 and 326:
Downloading 14.5 Downloading Change
- Page 327 and 328:
14.6 Downloading a Changed HW Confi
- Page 329 and 330:
14.8 Uploading a Configuration from
- Page 331 and 332:
Special Features of Connections Upl
- Page 333 and 334:
15 Multi-User Editing Projects 15.1
- Page 335 and 336:
15.1.1 Setting the Workstation Conf
- Page 337 and 338:
Assigning CPU-Oriented Messsage Num
- Page 339 and 340:
16 Working With Projects in the Mul
- Page 341 and 342:
Project structure with multiproject
- Page 343 and 344:
Working With Projects in the Multip
- Page 345 and 346:
16.3 Handling Multiprojects Creatin
- Page 347 and 348:
Working With Projects in the Multip
- Page 349 and 350:
Working With Projects in the Multip
- Page 351 and 352:
Possible problems when working with
- Page 353 and 354:
How to merge subnets in NetPro Work
- Page 355 and 356:
Working With Projects in the Multip
- Page 357 and 358:
Properties of the multiproject-orie
- Page 359 and 360:
Properties of cross-project connect
- Page 361 and 362:
Special considerations for download
- Page 363 and 364:
16.12 Archiving and Retrieving Mult
- Page 365 and 366:
17 Commissioning and Service Prepar
- Page 367 and 368:
Using a saved configuration as a ba
- Page 369 and 370:
17.3 Changing M-Data in the SIMATIC
- Page 371 and 372:
Index * *.cfg File 7-2, 11-7 A ACCE
- Page 373 and 374:
Configuring DP-Slaves (GSD Rev. 5)
- Page 375 and 376:
Configuring 3-17 DP/PA Coupler 3-25
- Page 377 and 378:
Merging Subnets (Multiproject) 16-1
- Page 379 and 380:
Router 11-6, 12-35 Routers 11-30 Ro
- Page 381 and 382:
Unspecified Connection Partner 12-3


