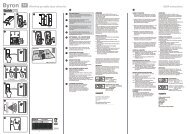
ERB2504SE - Free-Instruction-Manuals.com
ERB2504SE - Free-Instruction-Manuals.com
ERB2504SE - Free-Instruction-Manuals.com

Create successful ePaper yourself
Turn your PDF publications into a flip-book with our unique Google optimized e-Paper software.
<strong>ERB2504SE</strong><br />
2 WARRANTY WARRANTY<br />
YEARS<br />
ERBAUER 250MM TABLE SAW
ERBAUER 250MM TABLE SAW
Congratulations on your purchase of a quality power tool from screwfi x<br />
Direct Ltd. This product should give you reliable service but your peace of<br />
mind this power tool does carry a 24-month guarantee, the terms<br />
of which are detailed below.<br />
If this product develops a fault within the guarantee period contact<br />
Screwfi x Direct Ltd on <strong>Free</strong>hpone 0500 41 41 41.<br />
Please retain this handbook in case you need to refer to safety, care or<br />
guarantee information in the future.<br />
This product carries a<br />
Screwfi x Direct Ltd guarantee of 24 months. If your<br />
product develops a fault within this period, you should, in the fi rst instance contact<br />
Screwfi x Direct Ltd on <strong>Free</strong>phone 0500 41 41 41. If the fault occurs within the fi rst 24<br />
months, you may return the goods for a full refund or we will repair or replace the goods<br />
if you prefer. When repair is not practical or identical goods are not available, alternative<br />
goods of similar specifi cation and quality will usually be provided but, failing this, you will<br />
be offered a partial or full refund depending on the time period since purchase.<br />
This guarantee specifi cally excludes losses caused due to:<br />
- Fair wear and tear<br />
- Misuse or abuse<br />
- Lack of routine maintenance<br />
- Failure of consumable items (such as batteries)<br />
- Accidental damage<br />
- Cosmetic damage<br />
- Failure to follow manufacture’s guidelines<br />
- Loss of use of the goods<br />
- Repairs attempted by anyone, unless authorised by Screwfi x Direct Ltd.<br />
This guarantee does not affect your statutory rights. This guarantee is only valid in the UK.<br />
For further technical advice and spare parts, Please contact the customer helpline<br />
number on 01709 876611 quoting your Erbauer model number.<br />
ERBAUER 250MM TABLE SAW
Read all instructions. Failure to follow all instructions listed<br />
below may result in electric shock, fi re and/or serious injury.<br />
SAVE THESE INSTRUCTIONS<br />
SAVE THESE INSTRUCTIONS<br />
1. Work area<br />
a. Keep work area clean and well lit. Cluttered and dark areas invite<br />
accidents.<br />
b. Do not operate power tools in explosive atmospheres, such as in the<br />
presence of fl ammable liquids, gases or dust. Power tools create sparks<br />
which may ignite the dust or fumes.<br />
c. Keep children and bystanders away while operating a power tool.<br />
Distractions can cause you to lose control.<br />
2. Electrical safety<br />
a. Power tool plugs must match the outlet. Never modify the plug in<br />
any way. Do not use any adapter plugs with earthed (grounded) power<br />
tools. Unmodifi ed plugs and matching outlets will reduce risk of electric shock.<br />
b. Avoid body contact with earthed or grounded surfaces such as<br />
pipes, radiators, ranges and refrigerators. There is an increased risk of<br />
electric shock if your body is earthed or grounded.<br />
c. Do not expose power tools to rain or wet conditions. Water entering a<br />
power tool will increase the risk of electric shock.<br />
d. Do not abuse the cord. Never use the cord for carrying, pulling or<br />
unplugging the power tool. Keep cord away from heat, oil, sharp edges<br />
or moving parts. Damaged or entangled cords increase the risk of electric<br />
shock.<br />
e. When operating a power tool outdoors, use an extension cord<br />
suitable for outdoor use. Use of a cord suitable for outdoor use reduces the risk<br />
of electric shock.<br />
3. Personal safety<br />
a. Stay alert, watch what you are doing and use <strong>com</strong>mon sense when<br />
operating a power tool. Do not use a power tool while you are tired<br />
or under the infl uence of drugs, alcohol or medication. A moment of<br />
inattention while operating power tools may result in serious personal injury.<br />
b. Use safety equipment. Always wear eye protection. Safety equipment<br />
such as dust mask, non-skid safety shoes, hard hat, or hearing protection used for<br />
appropriate conditions will reduce personal injuries.<br />
c. Avoid accidental starting. Ensure the switch is in the off-position<br />
before plugging in. Carrying power tools with your fi nger on the switch or plugging<br />
in power tools that have the switch on invites accidents.<br />
d. Remove any adjusting key or spanner before turning the power tool<br />
on. A spanner or a key left attached to a rotating part of the power tool may result in<br />
personal injury.<br />
e. Do not overreach. Keep proper footing and balance at all times. This<br />
enables better control of the power tool in unexpected situations.<br />
ERBAUER 250MM TABLE SAW
f. Dress properly. Do not wear loose clothing or jewellery. Keep your<br />
hair, clothing and gloves away from moving parts. Loose clothes, jewellery<br />
or long hair can be caught in moving parts.<br />
g. If devices are provided for the connection of dust extraction and<br />
collection facilities, ensure these are connected and properly used. Use<br />
of these devices can reduce dust related hazards.<br />
4. Power tool use and care<br />
a. Do not force the power tool. Use the correct power tool for your<br />
application.<br />
The correct power tool will do the job better and safer at the rate for which it was<br />
designed.<br />
b. Do not use the power tool if the switch does not turn it on and off.<br />
Any power tool that cannot be controlled with the switch is dangerous and must<br />
be repaired.<br />
c. Disconnect the plug from the power source before making any<br />
adjustments, changing accessories, or storing power tools. Such<br />
preventive safety measures reduce the risk of starting the power tool accidentally.<br />
d. Store idle power tools out of the reach of children and do not allow<br />
persons unfamiliar with the power tool or these instructions to operate<br />
the power tool. Power tools are dangerous in the hands of untrained users.<br />
e. Maintain power tools. Check for misalignment or binding of moving<br />
parts, breakage of parts and any other condition that may affect the<br />
power tools operation. If damaged, have the power tool repaired before<br />
use. Many accidents are caused by poorly maintained power tools.<br />
f. Keep cutting tools sharp and clean. Properly maintained cutting tools with<br />
sharp cutting edges are less likely to bind and are easier to control.<br />
g. Use the power tool, accessories and tool bits etc., in accordance<br />
with these instructions and in the manner intended for the particular<br />
type of power tool, taking into account the working conditions and<br />
the work to be performed. Use of the power tool for operations different from<br />
intended could result in a hazardous situation.<br />
5. Service<br />
a. Have your power tool serviced by a qualifi ed repair person using<br />
only identical replacement parts.<br />
This will ensure that the safety of the power tool is maintained.<br />
HEALTH ADVICE<br />
Warning! When drilling, sanding, sawing or grinding, dust particles will be produced.<br />
In some instances, depending on the materials you are working with, this dust can<br />
be particularly harmful to you (e.g. lead from old gloss paint). You are advised to consider<br />
the risks associated with the materials you are working with and to reduce the risk of<br />
exposure. You should:<br />
- Work in a well-ventilated area.<br />
- Work with approved safety equipment, such as those dust masks that are specially<br />
designed to fi lter microscopic particles.<br />
ERBAUER 250MM TABLE SAW
6. Safety precautions<br />
a. Do not use saw blades which are damaged or deformed.<br />
b. Replace table insert when worn.<br />
c. Use only saw blades re<strong>com</strong>mended by the manufacturer and which<br />
are the exact bore and diameter required for this machine. When<br />
changing the saw blade beware that the width of the groove cut of the saw blade<br />
shall not less than and thickness of the body of the saw blade shall not be more than<br />
the thickness of the riving blade.<br />
d. Take care that the selection of the saw blade is suitable for the<br />
material to be cut.<br />
e. Wear suitable personal protective equipment when necessary, this<br />
could include:<br />
- Hearing protection to reduce the risk of induced hearing loss.<br />
- Respiratory protection to reduce the risk of inhalation of harmful<br />
dust.<br />
- Wear gloves when handling saw blades and rough material. Saw blade<br />
shall carried in a holder whenever practicable.<br />
i. Connect circular saws to a dust-collecting device when sawing<br />
wood. The operator shall be informed of the factors that infl uence exposure of dust<br />
e.g. type of material being machined and importance of local extraction (capture or<br />
source) and proper adjustment of hoods/baffi es/chutes.<br />
j. Do not use high speed steel (HS) blades.<br />
k. The push-stick or push block should always be stored with the<br />
machine when not in use.<br />
7. Safe operation<br />
a. Use push-sticks or push blocks to feed the workpiece past the saw<br />
blade.<br />
b. Use correct adjustment of the riving blade.<br />
c. Use correct adjustment of the upper saw blade guard.<br />
d. Saws shall not be used for slotting (stopped groove).<br />
e. Use only saw blades for which the maximum possible speed is not<br />
less than the maximum spindle speed of the tool and the material to be<br />
cut.<br />
f. When transporting the machine use only transportation devices and<br />
do never use guards for handling or transportation.<br />
g. During transportation the upper part of the saw blade should be<br />
covered , for example by the guard.<br />
ERBAUER 250MM TABLE SAW
Before using your table saw, it is critical that you read<br />
and understand these safety rules. Failure to follow these rules could<br />
result in serious injury or damage to the table saw.<br />
1.ALWAYS USE SAW BLADE GUARD for every operation<br />
2.ALWAYS HOLD WORK FIRMLY against the mitre gauge or rip fence.<br />
3.ALWAYS USE a push stick, especially when ripping narrow stock.<br />
4.NEVER PERFORM ANY OPERATION FREEHAND, which means using only<br />
your hands to support or guide the workpiece. Always use either the fence<br />
or the mitre gauge to position and guide the work.<br />
WARNING: FREEHAND CUTTING IS THE MAJOR CAUSE OF<br />
KICKBACK AND FINGER/HAND AMPUTATIONS.<br />
5.NEVER STAND or have any part of your body in line with the path of the saw blade.<br />
Keep your hands out of the saw blade path.<br />
6.NEVER REACH behind or over the cutting tool for any reason.<br />
7.REMOVE the rip fence when crosscutting.<br />
8.DO NOT USE a molding head with this saw.<br />
9.FEED WORK INTO THE BLADE against the direction of rotation only.<br />
10. NEVER use the rip fence as a cut-off gauge when crosscutting.<br />
11. NEVER ATTEMPT TO FREE A STALLED SAW BLADE without fi rst turning the<br />
saw OFF. Turn power switch OFF immediately to prevent motor damage.<br />
12. PROVIDE ADEQUATE SUPPORT to the rear and the sides of the saw table for<br />
long or wide workpieces.<br />
13. AVOID AWKWARD OPERATIONS and hand positions where a sudden slip could<br />
cause your hand to move into the saw blade.<br />
14. NEVER USE SOLVENTS to clean plastic parts. Solvents could possibly dissolve<br />
or otherwise damage the material. Only a soft damp cloth should be used to clean plastic<br />
parts.<br />
ERBAUER 250MM TABLE SAW
15. NEVER CUT METALS or materials that may make hazardous dust.<br />
16. ALWAYS USE IN A WELL-VENTILATED AREA. Remove sawdust frequently.<br />
Clean out sawdust from the interior of the saw to prevent a potential fi re hazard. Attach a<br />
vacuum to the dust port for additional sawdust removal.<br />
17. NEVER LEAVE THE SAW RUNNING UNATTENDED. Do not leave the saw<br />
until the blade <strong>com</strong>es to a <strong>com</strong>plete stop.<br />
WARNING: the operation of any table saw can result in foreign objects being thrown<br />
into your eyes, which can result in severe eye damage. Before beginning power tool<br />
operation, always wear safety goggles or safety glasses with side shield and a full face<br />
shield when needed.<br />
Warning: If any parts are missing, do not operate your table saw until the missing<br />
parts are replaced. failure to follow this rule could result in serious personal injury.<br />
Caution: Do not let familiarity with your table saw makes you careless. Remember<br />
that a careless fraction of a second is suffi cient to cause severe injury.<br />
ERBAUER 250MM TABLE SAW
Double insulation:<br />
The tool is double insulated. This means that all the external metal parts are electrically<br />
insulated from the mains power supply. This is done by placing insulation barriers<br />
between the electrical and mechanical <strong>com</strong>ponents making it unnecessary for the tool to<br />
be earthed.<br />
Important note<br />
Be sure the supply is the same as the voltage given on the rating plate. The tool is fi tted<br />
with a two-core cable and plug. Remove the mains plug from socket before carrying out<br />
any adjustment or servicing.<br />
SYMBOLS<br />
Read the manual Warning Wear gloves<br />
Wear dust mask, eye & ear protection<br />
Conforms to relevant safety standards<br />
Symbol for transportation<br />
position<br />
ERBAUER 250MM TABLE SAW
Fig 1<br />
1. UPPER BLADE GUARD<br />
2.<br />
3. RIGHT SIDE TABLE EXTENSION<br />
4.<br />
5. BLADE BEVEL LOCK KNOB<br />
6. BLADE TILTING HANDWHEEL<br />
7. STAND ASSEMBLY<br />
8.<br />
9. ADJUSTABLE STAND PAD<br />
10.<br />
11. NO-VOLT-RELEASE (NVR) SWITCH<br />
12. BEVEL ANGLE POINTER & SCALE<br />
13.<br />
14.<br />
10<br />
13<br />
16<br />
15<br />
AUXILIARY FENCE<br />
FENCE STORAGE<br />
9<br />
14<br />
11<br />
ERBAUER 250MM TABLE SAW<br />
1<br />
12<br />
2<br />
3<br />
5<br />
6<br />
7<br />
8<br />
4
Fig 2<br />
20<br />
17. TABLE INSERT<br />
MITRE GAUGE STORAGE<br />
20. DUST PORT<br />
17<br />
ERBAUER 250MM TABLE SAW<br />
18<br />
19
TECHNICAL DATA<br />
Volts: 230V-50Hz<br />
Power input: 1700W (S6, 25%,10min)<br />
No-load speed: 4800min -1<br />
Double insulation:<br />
Overload protection: YES<br />
SAW<br />
Table size with extension: 970mm X 670mm<br />
Table extension: left, right<br />
Rip capacity with extension: 130mm R x 185mm L<br />
Blade size: Outside Dia. 250 mm<br />
NOISE AND VIBRATION DATA<br />
Bore Dia. 30 mm<br />
Sound pressure level: 95.4 dB (A)<br />
Sound power level: 108.4 dB (A)<br />
ERBAUER 250MM TABLE SAW<br />
T 1.8 mm<br />
Rip scale YES<br />
Rip fence<br />
YES<br />
Mitre gauge YES<br />
Maximum cut depth @ 900 Maximum cut depth @ 90<br />
73mm<br />
Maximum cut depth @ 450 Maximum cut depth @<br />
63mm<br />
Machine weight: 26.5 kg
ACCESSORIES<br />
Table saw assembly 1 pc<br />
Blade guard assembly 1 pc<br />
Riving blade hardware bag 1 pc<br />
Rip fence assembly 1 pc<br />
Blade 1 pc<br />
Blade spanner 2 pc<br />
Push stick 1 pc<br />
Mitre gauge assembly 1 pc<br />
Push stick storage 1 pc<br />
Handwheel assembly 1 pc<br />
Auxiliary fence assembly 1pc<br />
Auxiliary fence hardware bag 1 pc<br />
Table side extension 2 pc<br />
Left side table extension support 2 pc<br />
Right side table extension support 2 pc<br />
Table side extension hardware bag 1 pc<br />
Dust port adapter 1 pc<br />
STAND<br />
Leg 4 pc<br />
Foot pad 3 pc<br />
Fence storage clip hardware bag 1 pc<br />
Stand hardware bag 1 pc<br />
ERBAUER 250MM TABLE SAW
ASSEMBLY INSTRUCTIONS<br />
Warning: or your own safety, never<br />
connect the plug to power source outlet until<br />
all assembly steps are <strong>com</strong>pleted and you have<br />
read and understood the safety and operational<br />
instructions.<br />
1. Installing table side extension<br />
1) Place protective corrugated cardboard or old<br />
blanket on fl oor to protect the saw table surface.<br />
2) Place the saw up-side down on the protective<br />
material.<br />
3) Place the right table extension next to the saw<br />
table, aligning the mounting holes (1).<br />
4) Insert the bolts (4) through the mounting holes<br />
and attach the nuts (2).<br />
5) Place a straight edge or <strong>com</strong>bination square on<br />
the saw table, across the table extension.<br />
6) Adjust the nut (2) until the extension is fl ush with<br />
the saw table. Tighten.<br />
7) Place the extension supports (3) to the right<br />
table extension and secure them on the stand with<br />
bolts (5) and nuts (6).<br />
8) Repeat these procedures for the left extension<br />
table (See fi g. 1).<br />
Description Size QTY<br />
bolts (4) M6*1.0-12 4<br />
nuts (2) M6*1.0 T=5 4<br />
bolt (5) M6*1.0-12 8<br />
nut (6) M6*1.0 T=6 8<br />
Fig 1<br />
ERBAUER 250MM TABLE SAW<br />
3<br />
5<br />
4<br />
1<br />
2
2. Stand assembly<br />
1) Attach four legs (1) to stand base assembly<br />
(2) using hex bolts (3) washers (4) and nuts (5).<br />
Note:<br />
Do not tighten bolts until stand is properly aligned<br />
(see step #3 before tightening).<br />
2) Insert foot pad (6) into bottom of leg. Repeat<br />
for the other two legs as shown.<br />
3) Carefully set the saw in its upright position on<br />
a clean level surface and adjust the adjustable<br />
foot pad (7), so all legs are contacting the fl oor<br />
and are at similar angles to the fl oor, and tighten<br />
all bolts (See fi g. 2).<br />
Note: To avoid rocking, tighten all bolts.<br />
4) Thread the long screw (8) through the hole (9)<br />
on foot pad (10) to fasten the stand<br />
(See fi g. 2-1).<br />
Note: The tools to mount this saw is not<br />
supplied with the saw.<br />
Description Size QTY<br />
hex bolt (3) M6*1.0-45 8<br />
washer (4) φ6*18-1.5 16<br />
nut (5) M6*1.0 T=4 8<br />
1<br />
Fig 2<br />
4<br />
2<br />
7<br />
ERBAUER 250MM TABLE SAW
2<br />
Fig 2-1<br />
Fig 3<br />
Fig 4<br />
3 4<br />
1 2<br />
10<br />
3<br />
8<br />
9<br />
3. Installing the rip fence storage<br />
1) Attach the fence storage clips (1) to the left of the<br />
stand assembly with screws (2) washers (3) and<br />
nuts (4) for rip fence storage (See fi g. 2-1).<br />
Description Size QTY<br />
screws (2) M6*1.0-12 2<br />
washers (3) φ6*18-1.5 2<br />
nut (4) M6*1.0 T=4 2<br />
4. Installing and changing the blade<br />
Warning:<br />
● To avoid injury from accidental starting, always<br />
turn the switch off (“0”) and remove the power plug<br />
from the power source before changing the blades.<br />
● The riving blade must have constant clearance<br />
along its length and not be in contact with the<br />
blade.<br />
● Keep wearing the gloves during removing and<br />
installing the blade.<br />
● Ensure that the saw blade bore is exactly the<br />
correct size for this machine and the diameter<br />
does not exceed 250mm.<br />
1) Loosen the screws (3) on the table insert by a<br />
screwdriver and remove the table insert (See fi g. 3).<br />
2) Raise the saw blade to its maximum height.<br />
3) Use the supplied open end spanner (1) to keep<br />
the arbor from turning and place the supplied<br />
box-end spanner (2) on the arbor nut, and turn<br />
counterclockwise to loosen the arbor nut (See<br />
fi g. 4).<br />
4) Remove the arbor nut and outer fl ange.<br />
5) Replace the saw blade. Make sure the teeth of<br />
the blade point down at the front of the table.<br />
6) Assemble the arbor fl ange and arbor nut back to<br />
the saw arbor and tighten the arbor nut by turning<br />
the supplied box-end spanner (2) clockwise (to the<br />
rear of the saw table).<br />
7) Replace the table insert and retighten the two<br />
screws.<br />
ERBAUER 250MM TABLE SAW
5. Installing the riving blade<br />
1) Rise the blade to its highest position by turning<br />
the handwheel and tilt the blade to 45° bevel angle.<br />
2) Loosen the screws on the table insert and<br />
remove the table insert.<br />
3) Place the bolts (3), and fl at washers (4) on the<br />
riving blade (6) and the riving blade bracket (5).<br />
4) Tighten the bolts (3).<br />
5) Replace the table insert and tighten the screw.<br />
Warning:<br />
● The riving blade thickness of 2.5 mm. Make<br />
sure the blade and riving blade are aligned on<br />
the same line. If not, adjust the riving blade by<br />
loosening the bolts. It should be less than 5 mm at<br />
all positions (See fi g. 5).<br />
● Keep wearing the gloves during removing and<br />
installing the blade.<br />
Description Size QTY<br />
bolts (3) M6*1.0-16 2<br />
fl at washers (4) 1/4*3/4-1/16 2<br />
6. Blade guard assembly<br />
1) Place the blade guard on the riving blade and<br />
secure it with the bolt (1), fl at washer (2), and nut<br />
(3) (See fi g. 6).<br />
Description Size QTY<br />
bolt (1) M6*1.0-40 1<br />
fl at washer (2) φ6*13-1 1<br />
nut (3) M6*1.0 1<br />
7. Aligning the riving blade<br />
1) If the blade and riving blade are not correctly<br />
aligned:<br />
● Remove the table insert by removing the screws.<br />
● Remove the blade guard by removing the bolt,<br />
fl at washer and nut that lock the guard in place.<br />
● Loosen the two bolts (3) from the riving blade<br />
bracket (5).<br />
2) Insert the supplied spacers (7) between the<br />
riving blade (6) and bracket (5).<br />
3) Retighten the two mounting bolts (3) securely.<br />
4) Replace the blade guard assembly using the<br />
bolt, fl at washer and nut.<br />
5) Check the riving blade and blade alignment<br />
again at both 90° and 45°.<br />
6) Add or remove the spacers until the alignment<br />
is correct.<br />
7) Replace the table insert. (See fi g. 7).<br />
Fig 5<br />
Fig 6<br />
Fig 7<br />
6 4<br />
ERBAUER 250MM TABLE SAW<br />
5<br />
1<br />
7<br />
3<br />
4<br />
6<br />
3<br />
6 3<br />
5
Fig 8<br />
Fig 9<br />
2<br />
1<br />
3 4<br />
2<br />
Fig 10<br />
4<br />
3<br />
Fig 11<br />
2<br />
5<br />
2<br />
5<br />
3<br />
1<br />
1<br />
1<br />
Note: This tool is accurately adjusted before<br />
shipping from the factory. Check the following<br />
accuracy and readjust them if necessary in order<br />
to obtain the best results in operation.<br />
8. Installing the push stick and blade<br />
spanner storage<br />
1) Attach the hook (1) into the hole (2) of the side<br />
table for push stick and blade spanner storage<br />
(See fi g. 8).<br />
9. Using auxiliary fence on the rip fence<br />
A auxiliary fence should be used when ripping<br />
material such as thin paneling to prevent the<br />
material from catching between the bottom of<br />
the fence and the table. When performimg some<br />
special cutting operations, you can add a auxiliary<br />
fence (3) to the either side of the rip fence (4).<br />
1) Attach the square nuts to the rip fence with the<br />
clamp handles (1) through the washers (5) and<br />
holes in the rip fence.<br />
2) Slide the auxiliary fence (3) to the square nuts (2).<br />
3) Tighten the clamp handles (See fi g. 9).<br />
10. Using auxiliary fence on the mitre<br />
gauge<br />
When performimg some special cutting<br />
operations, you can add a auxiliary fence (2) to<br />
the mitre gauge (1).<br />
1) Attach the square nuts to the mitre gauge with<br />
the washers (3) and screws (4).<br />
2) Slide the auxiliary fence (2) to the square nuts (5).<br />
3) Tighten the screws (See fi g. 10).<br />
11. Installing the rip fence and mitre<br />
gauge<br />
1) Lift upward on the rip fence handle (1) so the<br />
rear holding clamp (2) is fully extended.<br />
2) Place the rip fence on the saw table, lowering<br />
the front of the fence onto the table fi rst.<br />
3) Push down on the fence handle (1) to lock<br />
4) Place the mitre gauge (3) in the groove (4) on<br />
the table top. (See fi g. 11).<br />
ERBAUER 250MM TABLE SAW
INSTRUCTIONS<br />
1. Adjusting the blade parallel to the<br />
mitre gauge groove<br />
Warning: This adjustment must be<br />
correct or kickback could result and<br />
accurate cuts cannot be made.<br />
1) Raise the blade to its highest position and set<br />
it to 0° bevel angle.<br />
2) Select a tooth on the saw blade which is<br />
bent to the right. Mark that tooth with a pencil or<br />
permanent marker.<br />
3) Place the mitre gauge (1) in the right hand<br />
groove (2) on the table top. Set the mitre gauge<br />
to 90° and tighten the gauge handle to lock it in<br />
that position.<br />
4) Rotate the blade to bring the marked tooth in<br />
the front and about 13 mm above the table top.<br />
Place the bar of square (3) fl at against the mitre<br />
gauge and move the bar toward the saw blade<br />
until it just touches the tip of the marked saw<br />
blade tooth (See fi g. 12).<br />
5) Without disturbing the bar clamped to the<br />
mitre gauge (1), move the mitre gauge to the<br />
centre of the saw blade. Rotate the blade so the<br />
marked tooth is at the rear and about 13 mm<br />
above the table top.<br />
6) Slide the mitre gauge rearward until the<br />
clamped bar is closest to the tip of the marked<br />
tooth (See fi g. 13).<br />
7) If the bar just touches the tooth when the<br />
gauge was in the front position, it should touch<br />
the tooth in the rear position.<br />
8) If the front and rear clearance are not<br />
identical, remove the mitre gauge, loosen four<br />
screws (1) and carefully grasp the saw blade.<br />
Make necessary correction until measurements<br />
taken at the front and rear are identical. Tighten<br />
the four screws (1) (See fi g. 14).<br />
Fig 12<br />
Fig 13<br />
Fig 14<br />
ERBAUER 250MM TABLE SAW<br />
2<br />
1<br />
3<br />
2<br />
3<br />
1<br />
1
Fig 15<br />
Fig 16<br />
1 2<br />
5<br />
1 3<br />
6 7 4<br />
2<br />
2. Adjusting 90° positive stop of blade<br />
1) Raise the saw blade to its maximum height.<br />
2) Loosen the saw blade tilt lock handle and move<br />
the saw blade tilting mechanism to the left until<br />
it hits against the stopper. Then tighten the saw<br />
blade tilt lock handle.<br />
3) Use a square (1) to check the saw blade is at<br />
90° (See fi g. 15).<br />
4) If the saw blade is not at 90°, loosen the saw<br />
blade tilt lock handle. Adjust the screws (2) a few<br />
turns and move the saw blade tilting mechanism<br />
until the blade is at 90° to the table (See fi g. 14).<br />
5) Tighten the saw blade tilt lock handle after<br />
adjustment.<br />
6) Loosen the screw of the tilt pointer and set the<br />
pointer to 0°.<br />
3. Adjusting 45° positive stop of blade<br />
1) Raise the saw blade to its maximum height.<br />
2) Loosen the saw blade tilt lock handle and move<br />
the saw blade tilting mechanism to the right until<br />
it hits against the stopper. Then tighten the saw<br />
blade tilt lock handle.<br />
3) Use a 45° gauge (2) to check the saw blade is at<br />
45° (See fi g. 15).<br />
4) If the saw blade is not at 45°, loosen the saw<br />
blade tilt lock handle. Adjust the screws (3) a few<br />
turns and move the saw blade tilting mechanism<br />
until the blade is at 45° to the table (See fi g. 14).<br />
5) Tighten the saw blade tilt lock handle after<br />
adjustment.<br />
6) Loosen the screw of the tilt pointer and set the<br />
pointer to 45°.<br />
4. Adjusting rip fence<br />
1) The fence (1) is moved by lifting the handle<br />
(2) and sliding the fence to the desired location.<br />
Pushing down on the handle locks the fence in<br />
place.<br />
2) Position the fence on the right side of the table,<br />
along the edge of the mitre gauge groove.<br />
3) Lock the fence handle. The fence should be<br />
parallel with the mitre gauge groove.<br />
4) If adjustment is needed in order to make the<br />
fence parallel to the groove, follow these steps:<br />
● Loosen the two bolts (3), and lift the handle (2).<br />
● Hold the fence bracket (4) fi rmly against the front<br />
of the saw table. Move the far end of the fence until<br />
it is parallel with the mitre gauge groove.<br />
● Push the handle down to lock it, and tighten both<br />
screws.<br />
ERBAUER 250MM TABLE SAW
5) If fence is loose when the handle is in the<br />
locked (down) position, follow these steps:<br />
● Lift the handle (2) and turn the adjusting nut<br />
(5) clockwise until the rear clamp is snug. Do<br />
not turn the adjusting screw more than 1/4 turn<br />
at a time.<br />
● Over-tightening the adjusting screw could<br />
bend the rear clamping lever, which may cause<br />
the fence to <strong>com</strong>e out of alignment (See fi g. 16).<br />
5. Adjusting the pointer of rip fence<br />
1) The rip fence indicator (6) points to the<br />
measurement scale. The scale shows the<br />
distance from the side of the fence closest to<br />
the blade.<br />
2) Measure the actual distance with a ruler.If<br />
there is a difference between the measurement<br />
and the indicator, adjust the indicator (6).<br />
3) Loosen the screw (7), and slide the indicator<br />
to the correct measurement on the scale.<br />
Tighten the screw, and remeasure with the<br />
ruler (See fi g. 16).<br />
6. Adjusting the mitre gauge<br />
1) To adjust pointer 90° setting, loosen the<br />
clamp handle (1) and place a square (2)<br />
against both the saw blade (3) and mitre gauge<br />
(4). The pointer (5) should indicate 90° on the<br />
mitre gauge.<br />
2) If the pointer does not point to 90° on the<br />
mitre gauge, tighten the clamp handle, loosen<br />
the pointer screw (6) on the bar, adjust the<br />
pointer to the 90° position and retighten the<br />
pointer screw (See fi g. 17).<br />
Fig 17<br />
ERBAUER 250MM TABLE SAW<br />
3<br />
4<br />
2<br />
1<br />
5<br />
6
3<br />
Fig 18<br />
1<br />
2<br />
INSTRUCTIONS<br />
efore using your table<br />
saw be sure to read the instruction<br />
manual carefully.<br />
Operating instructions<br />
1. Switches of the table saw<br />
The main switch (3), No Volt Release (NVR)<br />
switch, is on the front of saw base. Press “ I ”<br />
to turn on the power; press “O” to turn off the<br />
power (See fi g. 18).<br />
Warning: Never connect the plug to the<br />
power source outlet until all installations<br />
and adjustments are <strong>com</strong>pleted and you<br />
have read and understood the safety and<br />
operational instructions.<br />
2. Raising And Lowering The Saw Blade<br />
Warning: Never operate while saw<br />
blade rotating.<br />
1) To raise the saw blade, rotate the handwheel<br />
(1) anticlockwise.<br />
2) To lower the saw blade, rotate the handwheel<br />
(1) clockwise.<br />
Note: The saw blade height is re<strong>com</strong>mended<br />
about 3.2 mm above the top of the workpiece.<br />
3. Tilting the saw blade<br />
Warning: Always lock the saw blade tilt<br />
lock handle during operations.<br />
Loosen the saw blade tilt lock handle (2),<br />
move the hand wheel until the saw blade is at<br />
the desired angle and tighten the saw blade tilt<br />
lock handle (See fi g. 18).<br />
4. Moving the rip fence<br />
Note:<br />
●The rip fence can be used on either side of<br />
the saw blade.<br />
●The pointer on the rip fence indicates the<br />
distance between the saw blade and rip fence.<br />
●To move the rip fence, loosen the clamp<br />
handle while pressing the fence bracket<br />
against the table surface and set the desired<br />
distance from the saw blade, retighten the<br />
clamp handle.<br />
ERBAUER 250MM TABLE SAW
5. Operating the mitre gauge<br />
Note:<br />
● The mitre gauge can be used on either side<br />
of the saw blade.<br />
● Because the mitre gauge groove is a T-type<br />
slot, to install the mitre gauge, insert the gauge<br />
bar from the end of the groove.<br />
● To set the mitre cut angle, loosen the clamp<br />
handle, turn the mitre gauge to the desired<br />
angle, retighten the clamp handle.<br />
6. Ripping<br />
Note:<br />
● Generally ripping is cutting with the grain.<br />
● Do not perform ripping “free hand”. Use<br />
the rip fence for ripping and remove the mitre<br />
gauge from the table.<br />
Warning:<br />
● Before ripping, confi rm the following items:<br />
a) Rip fence is securely fi xed and parallel to<br />
the saw blade.<br />
b) Riving blade is properly aligned with the<br />
saw blade.<br />
c) The workpiece must have a straight edge<br />
against the rip fence and must not be warped,<br />
twisted or bowed.<br />
● Keep both hands away from the saw blade<br />
and away from the path of the saw blade.<br />
1) Adjust the saw blade height so it is about<br />
3.2 mm above the top of the workpiece.<br />
2) Hold the workpiece fl at on the table and<br />
against the rip fence. Keep the workpiece<br />
about 25 mm away from the saw blade.<br />
3) Turn on the switch and allow the saw blade<br />
to <strong>com</strong>e up to speed.<br />
4) Keep the workpiece against the table<br />
and rip fence, slowly feed the workpiece<br />
rearward all the way through the saw blade.<br />
Continuously push the workpiece until it<br />
passes the blade guard and clears the rear of<br />
the table.<br />
5) When ripping long boards or large panels,<br />
always use an adequate support.<br />
6) When the width of rip is more than 150 mm,<br />
feed the workpiece with one or both hands<br />
continuously until it is beyond the saw blade<br />
and riving blade (See fi g. 19).<br />
Fig 19<br />
ERBAUER 250MM TABLE SAW
Fig 20<br />
3 2<br />
1<br />
Warning: Never operate while saw<br />
blade rotating.<br />
7) When the width of rip 50 mm to 150 mm<br />
wide, use the supplied push stick to feed the<br />
workpiece.<br />
8) When perform bevel ripping, only work with<br />
the work piece and rip fence on the right side<br />
of the saw blade.<br />
7. Crosscutting<br />
Note:<br />
● Generally cross cutting is cutting across the<br />
grain.<br />
● Do not perform cross cutting “free hand”<br />
. Use the mitre gauge for cross cutting and<br />
remove the rip fence from the table.<br />
Warning:<br />
● Before cross cutting, confi rm the following<br />
items:<br />
a) Riving blade is properly aligned with the<br />
saw blade.<br />
b) The workpiece must have a straight edge<br />
against the mitre gauge and must not be<br />
warped, twisted or bowed.<br />
● Keep both hands away from the saw blade<br />
and away from the path of the saw blade.<br />
1) Adjust the saw blade (1) height so it is<br />
about 3.2 mm above the top of the workpiece.<br />
2) Hold the workpiece fl at on the table and<br />
against the mitre gauge. Keep the workpiece<br />
about 25 mm away from the saw blade.<br />
3) Turn on the switch and allow the saw blade<br />
(1) to <strong>com</strong>e up to full speed.<br />
4) Keep the workpiece (2) against the table<br />
and mitre gauge (3), slowly feed the workpiece<br />
rearward all the way through the saw blade.<br />
Continuously push the workpiece until it is<br />
clear of the blade guard and it falls off the rear<br />
of the table.<br />
5) When performing bevel cross cutting, only<br />
work with the workpiece and mitre gauge on<br />
the right side of the saw blade (See fi g. 20).<br />
ERBAUER 250MM TABLE SAW
8. Bevel crosscuting<br />
This cutting operation is the same as<br />
crosscutting except the blade is at bevel angle<br />
other than 0°.<br />
Warning: Always work to the right side<br />
of the blade during this type of cut. The<br />
mitre gauge (3) must be in the right side<br />
groove (2) because the bevel angle may<br />
cause the blade guard to interfere with the cut<br />
if used on the left side groove.<br />
1) Adjust the blade (1) to the desired angle,<br />
and tighten the blade bevel lock knob.<br />
2) Tighten mitre lock handle at 90°.<br />
3) Hold workpiece fi rmly against the face of<br />
the mitre gauge (3) throughout the cutting<br />
operation (See fi g. 21).<br />
Note: When tilting the blade to 45°, the mitre<br />
gauge handle will hit the blade guard.<br />
9. Compound mitre crosscutting<br />
This sawing operation is <strong>com</strong>bining a mitre<br />
angle with a bevel angle.<br />
Warning: Always work to the right side<br />
of the blade during this type of cut. The<br />
mitre gauge (3) must be in the right side<br />
groove because the bevel angle may cause<br />
the blade guard to interfere with the cut if<br />
used on the left side groove. When tilting the<br />
workpiece to 45° and push it toward the blade,<br />
the blade guard may hit the blade. To avoid<br />
injury, stop the work at that time.<br />
1) Set the mitre gauge (3) to the desired angle.<br />
2) Place the mitre gauge (3) in the right side<br />
groove (2) of the table.<br />
3) Set the blade (1) bevel to the desired bevel<br />
angle and tighten the blade bevel lock knob.<br />
4) Hold workpiece fi rmly against the face of<br />
the mitre gauge (3) throughout the cutting<br />
operation (See fi g. 22).<br />
Fig 21<br />
Fig 22<br />
1 2 3<br />
ERBAUER 250MM TABLE SAW<br />
2<br />
3
3<br />
Fig 23<br />
Fig 24<br />
Fig 25<br />
1<br />
2<br />
3<br />
2<br />
1<br />
10. Mitre cuts<br />
This sawing operation is the same as<br />
crosscutting except the mitre gauge is locked<br />
at an angle other than 90°.<br />
1) Set the blade (1) to 0° bevel angle and<br />
tighten the blade bevel lock knob.<br />
2) Set the mitre gauge (3) at the desired mitre<br />
angle and lock in position by tightening the<br />
mitre gauge locking handle.<br />
3) Hold the workpiece (2) fi rmly against the<br />
face of the mitre gauge throughout the cutting<br />
operation (See fi g. 23).<br />
11. Using the dust port<br />
Warning:<br />
● To prevent fi re hazard, clean and<br />
remove sawdust from under the saw<br />
frequently.<br />
● To prevent sawdust build up inside the saw<br />
housing, attach a vacuum hose (1) to the dust<br />
port (2) at the rear of the table saw. DO NOT<br />
operate the saw with the hose in place unless<br />
the vacuum is turned on (See fi g. 24).<br />
Note: A 58-37 mm dust port adapter (3) is<br />
provided for your convenience.<br />
12. Transportation the machine<br />
1) Symbol for transportation position<br />
(See fi g. 25).<br />
Warning:<br />
When transporting the machine use only<br />
transportation devices and do never use<br />
guards for handling or transportation.<br />
ERBAUER 250MM TABLE SAW
MAINTENANCE<br />
GENERAL MAINTENANCE<br />
Warning: Before maintaining or<br />
lubricating the saw, turn switch off,<br />
remove the switch key, and unplug the saw.<br />
1) Clean out all sawdust that has<br />
accumulated inside the saw cabinet and<br />
the motor.<br />
2) Polish the saw table with an automotive<br />
wax to keep it clean and to make it easier<br />
to slide the workpiece.<br />
3) Clean cutting blades with pitch and gum<br />
remover.<br />
4) Immediately replace a worn, cut, or<br />
damaged power cord.<br />
Warning: All electrical or mechanical<br />
repairs should be attempted only by<br />
a trained repair technician. Contact the<br />
nearest Service Centre for service. Use<br />
only identical replacement parts. Any other<br />
parts may create a hazard.<br />
5) Use liquid dish washing detergent and<br />
water to clean all plastic parts.<br />
Note: Certain cleaning chemicals can<br />
damage plastic parts.<br />
6) Avoid use of the following cleaning<br />
chemicals or solvents: ammonia and<br />
household detergents containing ammonia.<br />
Blade raising and tilting mechanism<br />
After each fi ve full hours of operation,<br />
the blade raising mechanism and tilting<br />
mechanism should be checked for<br />
looseness, binding, or other abnormalities.<br />
With the saw disconnected from the power<br />
source, turn the saw upside down and<br />
alternately pull upward and downward on<br />
the motor unit. Observe any movement of<br />
the motor mounting mechanism. Adjust<br />
looseness or play in the blade raising<br />
screw (1) as follows:<br />
1) Using a 14 mm spanner, loosen the<br />
check-nut (2).<br />
2) Adjust nut (3) until it is fi nger-tight<br />
against the bracket (4), and then back off<br />
the nut (3) 1/6 turn.<br />
3) Tighten nut (2) with a second 14 mm<br />
spanner, while holding nut (3) with the fi rst<br />
spanner in place. Maximum allowable play<br />
of screw rod (1) is 0.16 in. (4 mm)<br />
(See fi g. 26).<br />
You can place a small amount of dry<br />
lubricant on bevel angle adjustment rod<br />
also. This rod (1) must be kept clean and<br />
free of sawdust, gum, pitch, and other<br />
contaminants for smooth operation.<br />
If excessive looseness is observed in any<br />
parts of the blade raising mechanism or<br />
tilting mechanism, take the <strong>com</strong>plete unit<br />
to a Service Centre.<br />
LUBRICATION<br />
All motor bearings are permanently<br />
lubricated at the factory and require no<br />
additional lubrication.<br />
On all mechanical parts of your table saw<br />
where a pivot or threaded rod are present,<br />
lubricate using graphite or silicone. These<br />
dry lubricants will not hold sawdust as<br />
would oil or grease.<br />
ERBAUER 250MM TABLE SAW<br />
4<br />
Fig 26<br />
3<br />
2<br />
1
ENVIRONMENTAL PROTECTION<br />
Waste electrical products should not be<br />
disposed of with household waste.<br />
Please recycle where facilities exist.<br />
Check with your Local Authority or<br />
retailer for recycling advice.<br />
PLUG REPLACEMENT<br />
The fuse in the main plug of your power tool<br />
should always be replaced with one of<br />
identical rating.<br />
Check the voltage given on your power tool<br />
matches the supply voltage.<br />
The power tool is supplied with a fi tted plug,<br />
however if you should need to fi t a new plug<br />
follows the instruction below.<br />
IMPORTANT<br />
The wire in the mains lead are coloured in<br />
accordance with the following code:<br />
Blue ---Neutral<br />
Brown ---Live<br />
The wire that is coloured blue must be<br />
connected to the terminal that is marked with<br />
the letter N. The wire that is coloured brown<br />
must be connected to the terminal that is<br />
marked with the letter L. A 13AMP (BS1363<br />
or BS1363/A) plug must be used and a 5 AMP<br />
fuse must be fi tted.<br />
A 13AMP (BS1363 or BS1363/A) plug must be<br />
used and a 5 AMP fuse must be fi tted.<br />
BLUE<br />
N (NEUTRAL)<br />
OUTER<br />
SLEEVE<br />
5 AMP<br />
FUSE<br />
BROWN<br />
L (LIVE)<br />
CABLE GRIP<br />
ERBAUER 250MM TABLE SAW
Authorised Signatory<br />
Date: 2/14/07<br />
Signature:<br />
Name: Peter Harries<br />
Erbauer (UK) Ltd<br />
Quality Manager<br />
Declaration of Conformity<br />
We, Importer<br />
Erbauer (UK) Ltd.<br />
BA22 8RT<br />
Declare that the product<br />
<strong>ERB2504SE</strong><br />
250MM TABLE SAW<br />
Complies with the essential health and safety requirements of the following directives:<br />
89/336 EEC – EMC Directive.<br />
2006/95/EC – Low Voltage Directive<br />
98/37/EC – Machinery Directive.<br />
Standards and technical specifi cations referred to:<br />
EN 55014-1:2000/+A1:2001/+A2:2002<br />
EN 55014-2:1997/+A1:2001<br />
EN 61000-3-2:2006<br />
EN 61000-3-3:1995/+A1:2001/+A2:2005<br />
EN 61029-2-9:2002<br />
EN 61029-1:2000<br />
ERBAUER 250MM TABLE SAW<br />
2007
ERBAUER 250MM TABLE SAW