ERB30Y - Free-Instruction-Manuals.com
ERB30Y - Free-Instruction-Manuals.com
ERB30Y - Free-Instruction-Manuals.com
You also want an ePaper? Increase the reach of your titles
YUMPU automatically turns print PDFs into web optimized ePapers that Google loves.
<strong>ERB30Y</strong><br />
WARRANTY<br />
YEARS<br />
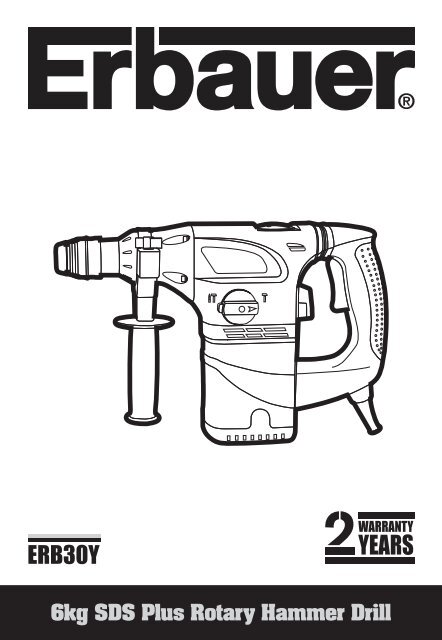
6kg SDS Plus Rotary Hammer Drill
Congratulations on your purchase of a quality power tool from Screwfix<br />
Direct Ltd. This product should give you reliable service but for your peace<br />
of mind this power tool does carry a 24-month guarantee, the terms<br />
of which are detailed below.<br />
If this product develops a fault within the guarantee period contact Screwfix<br />
Direct Ltd on <strong>Free</strong>phone 0500 41 41 41.<br />
Please retain this handbook in case you need to refer to safety, care or<br />
guarantee information in the future.<br />
GUARANTEE<br />
This product carries a Screwfix Direct Ltd guarantee of 24 months. If your<br />
product develops a fault within this period, you should, in the first instance contact<br />
Screwfix Direct Ltd on <strong>Free</strong>phone 0500 41 41 41. If the fault occurs within the first 24<br />
months, you may return the goods for a full refund or we will repair or replace the goods<br />
if you prefer. When repair is not practical or identical goods are not available, alternative<br />
goods of similar specification and quality will usually be provided but, failing this, you<br />
will be offered a partial or full refund depending on the time period since purchase.<br />
This guarantee specifically excludes losses caused due to:<br />
- Fair wear and tear<br />
- Misuse or abuse<br />
- Lack of routine maintenance<br />
- Failure of consumable items (such as batteries)<br />
- Accidental damage<br />
- Cosmetic damage<br />
- Failure to follow manufacturer’s guidelines<br />
- Loss of use of the goods<br />
- Repairs attempted by anyone, unless authorised by Screwfix Direct Ltd.<br />
This guarantee does not affect your statutory rights. This guarantee is only valid in the UK.<br />
For further technical advice and spare parts please contact the customer helpline<br />
number on 0845 607 6380.
SAFETY INSTRUCTIONS<br />
WARNING! Read all instructions. Failure to follow all instructions listed below<br />
may result in electric shock, fire and/or serious injury.<br />
SAVE THESE INSTRUCTIONS<br />
1. Work area<br />
a. Keep work area clean and well lit.Cluttered and dark areas invite<br />
accidents.<br />
b. Do not operate power tools in explosive atmospheres, such as in the<br />
presence of flammable liquids, gases or dust. Power tools create sparks<br />
which may ignite the dust or fumes.<br />
c. Keep children and bystanders away while operating a power tool.<br />
Distractions can cause you to lose control.<br />
2. Electrical safety<br />
a. Power tool plugs must match the outlet. Never modify the plug in<br />
any way. Do not use any adapter plugs with earthed (grounded) power<br />
tools. Unmodified plugs and matching outlets will reduce risk of electric shock.<br />
b. Avoid body contact with earthed or grounded surfaces such as pipes,<br />
radiators, ranges and refrigerators. There is an increased risk of electric<br />
shock if your body is earthed or grounded.<br />
c. Do not expose power tools to rain or wet conditions.Water entering a<br />
power tool will increase the risk of electric shock.<br />
d. Do not abuse the cord. Never use the cord for carrying, pulling or<br />
unplugging the power tool. Keep cord away from heat, oil, sharp edges<br />
or moving parts. Damaged or entangled cords increase the risk of electric<br />
shock.<br />
e. When operating a power tool outdoors, use an extension cord suitable<br />
for outdoor use. Use of a cord suitable for outdoor use reduces the risk of<br />
electric shock.<br />
f. Use a Residual Circuit Breaker on all 230V Power tools. This can help<br />
minimise the risk of an electrical shock if an earth fault or short circuits occurs.<br />
g. If using a power cable extension ensure that the cable is fully unwound<br />
and that its length is less than 30m. Lengths over 30 m will effect the tools<br />
performance as a result of voltage drop.<br />
3. Personal safety<br />
a. Stay alert, watch what you are doing and use <strong>com</strong>mon sense when<br />
operating a power tool. Do not use a power tool while you are tired<br />
or under the influence of drugs, alcohol or medication. A moment of<br />
inattention while operating power tools may result in serious personal injury.<br />
b. Use safety equipment. Always wear eye protection. Safety equipment<br />
such as dust mask, non-skid safety shoes, hard hat, or hearing protection used<br />
for appropriate conditions will reduce personal injuries.<br />
c. Avoid accidental starting. Ensure the switch is in the off-position<br />
6kg SDS Plus Rotary Hammer Drill
efore plugging in. Carrying power tools with your finger on the switch or<br />
plugging in power tools that have the switch on invites accidents.<br />
d. Remove any adjusting key or wrench before turning the power tool<br />
on. A wrench or a key left attached to a rotating part of the power tool may result<br />
in personal injury.<br />
e. Do not overreach. Keep proper footing and balance at all times. This<br />
enables better control of the power tool in unexpected situations.<br />
f. Dress properly. Do not wear loose clothing or jewellery. Keep your<br />
hair, clothing and gloves away from moving parts. Loose clothes, jewellery<br />
or long hair can be caught in moving parts.<br />
g. If devices are provided for the connection of dust extraction and<br />
collection facilities, ensure these are connected and properly used. Use<br />
of these devices can reduce dust related hazards.<br />
4. Power tool use and care<br />
a. Do not force the power tool. Use the correct power tool for your<br />
application. The correct power tool will do the job better and safer at the rate<br />
for which it was designed.<br />
b. Do not use the power tool if the switch does not turn it on and off.<br />
Any power tool that cannot be controlled with the switch is dangerous and must<br />
be repaired.<br />
c. Disconnect the plug from the power source before making any<br />
adjustments, changing accessories, or storing power tools. Such preventive<br />
safety measures reduce the risk of starting the power tool accidentally.<br />
d. Store idle power tools out of the reach of children and do not allow<br />
persons unfamiliar with the power tool or these instructions to operate<br />
the power tool.Power tools are dangerous in the hands of untrained users.<br />
e. Maintain power tools. Check for misalignment or binding of moving<br />
parts, breakage of parts and any other condition that may affect the<br />
power tools operation. If damaged, have the power tool repaired before<br />
use. Many accidents are caused by poorly maintained power tools.<br />
f. Keep cutting tools sharp and clean. Properly maintained cutting tools<br />
with sharp cutting edges are less likely to bind and are easier to control.<br />
g. Use the power tool, accessories and tool bits etc., in accordance with<br />
these instructions and in the manner intended for the particular type of<br />
power tool, taking into account the working conditions and the work<br />
to be performed.Use of the power tool for operations different from intended<br />
could result in a hazardous situation.<br />
5. Service<br />
a. Have your power tool serviced by a qualified repair person using only<br />
Safety <strong>Instruction</strong>s identical replacement parts.This will ensure that the<br />
safety of the power tool is maintained.
HEALTH ADVICE<br />
WARNING! When drilling, sanding, sawing or grinding, dust particles will be<br />
produced. In some instances, depending on the materials you are working with,<br />
this dust can be particularly harmful to you (e.g. lead from old gloss paint).<br />
You are advised to consider the risks associated with the materials you are working<br />
with and to reduce the risk of exposure. You should:<br />
- Work in a well-ventilated area.<br />
- Work with approved safety equipment, such as those dust masks that are specially<br />
designed to filter microscopic particles.<br />
ADDITIONAL SAFETY RULES FOR YOUR HAMMER DRILL<br />
This is a powerful hammer drill. Caution needs to be observed when operating.<br />
1.If the supply cord is damaged have it replaced by a qualified person.<br />
2.Always wear a dust mask.<br />
3.Dress in suitable overalls.<br />
4.Safety boots are re<strong>com</strong>mended at all times especially when using the chisel action.<br />
5.Proper safety gloves are also re<strong>com</strong>mended.<br />
6.When using chisel a dust mask is necessary because of the dust created by the<br />
action.<br />
7.Wear ear protectors. Exposure to noise can cause hearing loss.<br />
8.This heavy duty high torque machine should not be used, while standing on a<br />
ladder.<br />
9.Watch out for the initial torque reaction of the drill, especially when drill bit is tight.<br />
10.Do not use damaged or worn drills.<br />
11.Do not run the machine with any part of the casing missing or damaged.<br />
12.Check walls for hidden electric cable, gas and electric pipe before you start any<br />
drilling task.<br />
13.Chisel bits and drill bits may be flung out of the machine accidentally and cause<br />
serious injury.<br />
14.Before starting to work, always check that the chisel or drill bit is properly locked<br />
in the chuck.<br />
15.Vibrations can injure the hand-arm system. Keep exposure to vibrations as short<br />
as possible.<br />
16.When carrying out work, always hold the drill with both hands and ensure that you<br />
have a stable standing position.<br />
17. Lubricating the gear box.The gear box must be lubricated after approximately 5<br />
hours of use to ensure it works efficiently.A small container of grease is supplied with<br />
the drill.Go to section “Maintenance“ for the details.<br />
18. Always use the appropriate safety equipment that is required for the product. e.g.<br />
Goggles / Safety Spectacles, Ear defenders (essential with tools with a noise rating of<br />
over 85 dbA), Gloves and face masks. In all cases ensure that the safety equipment is<br />
in good condition.<br />
19. Ensure that if a side handle or stabilising handle is provided with the power tool<br />
then these are adjusted into a <strong>com</strong>fortable position and that both handles are used to<br />
securely grip the power tool when in use.<br />
6kg SDS Plus Rotary Hammer Drill
Double insulation:<br />
The tool is double insulated. This means that all the external metal parts are<br />
electrically insulated from the mains power supply. This is done by placing insulation<br />
barriers between the electrical and mechanical <strong>com</strong>ponents making it unnecessary<br />
for the tool to be earthed.<br />
SYMBOLS<br />
Read the manual Warning Wear gloves<br />
Wear dust mask,eye & ear protection
1. ON/OFF SWITCH<br />
2. FUNCTION SELECTOR<br />
3. MODE SELECTOR<br />
4. AUXILIARY HANDLE<br />
5. FASTENING SLEEVE<br />
6. MAINS POWER CABLE<br />
7. SPANNER<br />
8. SDS DRILL BITS (8, 10, 12MM)<br />
9. GREASE POT<br />
<br />
<br />
6kg SDS Plus Rotary Hammer Drill
10. 13MM KEY CHUCK AND ADAPTER<br />
11. 250MM SDS CHISEL BIT (20MM FLAT HEAD, POINTED HEAD)<br />
12. DEPTH GAUGE<br />
13. CHUCK KEY<br />
14. DUST COVER<br />
TECHNICAL DATA<br />
Voltage: 230V~50Hz<br />
Wattage: 1020W<br />
No load speed: 800min-1 Drilling capacity Steel: 13mm<br />
Concrete: 30mm<br />
Wood: 40mm<br />
Double insulation:<br />
Weight: 5.6Kg<br />
NOISE AND VIBRATION DATA<br />
Sound pressure level: 85dB (A)<br />
Sound power level: 96dB (A)<br />
Vibration level: 5.2m/s2 ACCESSORIES<br />
Spanner: 1pc<br />
SDS drill bits: 3pcs<br />
Gease pot: 1pc<br />
13mm key Chuck and adapter: 1pc<br />
SDS Chisel bit: 2pcs<br />
Depth gauge: 1pc<br />
Chuck key: 1pc<br />
Dust cover: 1pc
GENERAL DESCRIPTION<br />
This ROTARY HAMMER DRILL can be used for<br />
drilling wood, metal and masonry. It is supplied<br />
with a keyed chuck for smaller drill bits. Contained<br />
in the case is a selection of larger SDS Plus<br />
masonry bits. These fit directly into the rotary<br />
hammer. Using the hammer setting the supplied<br />
chisels can be used to break brick work. The<br />
machine uses a single phase alternating current<br />
230V, 50Hz motor, its <strong>com</strong>pact and robust format<br />
makes it versatile and efficient for uses described<br />
in specific safety instructions. It <strong>com</strong>plies to<br />
current regulations and the optimum quality of<br />
materials used will ensure a long working life in<br />
<strong>com</strong>plete safety.<br />
OPERATION INSTRUCTIONS<br />
Familiarize yourself with the rotary hammer drill<br />
before use.<br />
Note:<br />
Make sure the rotary hammer is isolated from the<br />
mains supply before fitting accessories. Before<br />
undertaking any maintenance or operations on<br />
the rotary hammer isolate the plug from the 13<br />
amp socket.<br />
1. FITTING THE AUXILIARY HANDLE<br />
Attach the handle as shown in Fig 2 depending<br />
on being left handed or right handed.<br />
2. FITTING SDS TOOLS OR CHUCK<br />
The rotary hammer is equipped with an SDS-plus<br />
attachment system. The chuck/SDS tools have<br />
slots in the shank. These locate with tabs in the<br />
rotary hammer. Hold the rotary hammer with one<br />
hand facing away from yourself. See Fig 3.<br />
Grip and pull back the fastening sleeve and insert<br />
the chuck/SDS tool.<br />
Push inwards until a resistance is felt. It may be<br />
necessary to spin the chuck/SDS tool until the<br />
shaft drops <strong>com</strong>pletely into place.<br />
Once you are satisfied it has seated release the<br />
black fastening sleeve. This should lock the chuck<br />
or SDS tool into position.<br />
3. REMOVE SDS TOOL OR CHUCK<br />
Pull back fastening sleeve, hold and remove tool/<br />
<br />
Fig 2<br />
Fig 3<br />
6kg SDS Plus Rotary Hammer Drill
Fig 4<br />
<br />
Fig 5<br />
Fig 6<br />
Fig 7<br />
Fig 8<br />
chuck. See Fig 3.<br />
Note:<br />
The SDS tools or chuck will be gripped firmly by<br />
its shank and will not be able to be removed.<br />
See Fig 3. If the chuck/SDS tool is not located<br />
repeat the installation operation again.<br />
4. OPERATING THE ON/OFF SWITCH<br />
Hold the Rotary Hammer with both hands<br />
and press the single speed on/off switch in for<br />
operation (see Fig 4), release switch to stop.<br />
5. USING THE CHUCK<br />
The hammer <strong>com</strong>es supplied with a 1.5-13mm<br />
chuck, which is used for smaller drill bits. After<br />
deciding if hammer or normal drilling is required<br />
proceed with following instructions. See Fig 5.<br />
Inserting a drill bit into chuck. See<br />
Fig5. Before installing drill bit, remove<br />
mains plug from mains supply.<br />
Place chuck key into chuck, turn key anti-clockwise<br />
to undo/loosen chuck, insert drill/tool and firmly<br />
tighten chuck by turning key clockwise. Remove<br />
key and replace in Blow Mould Case.<br />
WARNING!<br />
If the hammer/drill selector can not<br />
go into position, turn the gearbox.<br />
Before operating, select the required mode<br />
by aligning the symbol on the housing<br />
with the arrow on the function selecter.<br />
The mode selecter should be positioned to<br />
the correct symbol.<br />
6. HAMMER DRILL FUNCTION<br />
1 Adjust the function selector to position<br />
“ “ to provide rotation of the chuck (see Fig 6)<br />
2 Adjust the mode selector to position<br />
“ “ to provide the hammer action (see Fig 7)<br />
3 You are now set up for hammer drilling into<br />
masonry.<br />
7. DRILLING FUNCTION<br />
1 Adjust the function selector to position<br />
“ “ to provide rotation of the chuck (see Fig 8)<br />
2 Adjust the mode selector to position
“ “ to stop the hammer action (see Fig 9)<br />
3 You are now set up for drilling function.<br />
WARNING<br />
Only use 13mm key chuck for drilling<br />
function mode, never use to hammer<br />
action.<br />
8. CHISEL FUNCTION<br />
1 Adjust the function selector to position<br />
“ “ to stop rotation of the chuck (see Fig 10)<br />
2 Adjust the mode selector to position<br />
“ “ to provide the hammer action (see Fig 11)<br />
3 You are now set up for chisel work using hammer<br />
action.<br />
To fit a chisel bit, see FITTING SDS TOOLS OR<br />
CHUCK. The chisel will be gripped firmly by its<br />
shank.<br />
9. USING THE DEPTH GAUGE:<br />
1. Loosen the screw on the handle, insert depth<br />
gauge into the handle (see Fig 12).<br />
2. Adjust the depth gauge to desired depth.<br />
3. Rotate the screw to fix the depth gauge.<br />
10. SAFETY WHEN USING THE ROTARY<br />
HAMMER<br />
This is a powerful tool. Caution needs to be<br />
observed when operating. Dress in suitable<br />
overalls. Safety boots are re<strong>com</strong>mended at all<br />
times especially when using the chisel actions.<br />
Proper safety gloves are also re<strong>com</strong>mended.<br />
When using chisel mode, a dust mask is<br />
necessary because of the cement dust created by<br />
the action.<br />
NOTE: DO NOT USE THE HAMMER<br />
WHEN STANDING ON A LADDER.<br />
CAUTION! Care should be taken if asbestos<br />
is suspected of being drilled or chiseled.<br />
This is highly dangerous to the user and<br />
people in the vicinity. Professional help<br />
should be sought for its removal and<br />
disposal.<br />
11. GEARBOX MAINTENANCE<br />
Fig 9<br />
Fig 10<br />
Fig 11<br />
Fig 12<br />
<br />
6kg SDS Plus Rotary Hammer Drill
Fig 13<br />
<br />
Always check there is sufficient grease in the<br />
grease box before usage. Check every 5 hrs of<br />
usage. Open the grease box lid at the top of the<br />
drill using the pin spanner provided. Then top<br />
up the grease box (capacity 20gms max) using<br />
the grease provided with your tool. The grease<br />
specification is general purpose lithium based.<br />
See Fig 13<br />
12. CHANGING THE CARBON BRUSHES<br />
When the carbon brushes need replacing call the<br />
help line.<br />
13. CHISEL AND DRILL BITS<br />
Do not use damaged/chipped/blunt drill bits.<br />
Inspect drill bits and chisel bits regularly for sign<br />
of damage and sharpness and replace where<br />
necessary.<br />
MAINTENANCE<br />
1 Your power tool requires no additional<br />
lubrication or maintenance.<br />
2 There are no user serviceable parts in your<br />
power tool.<br />
3 Never use water or chemical cleaners to clean<br />
your power tool. Wipe clean with a dry cloth.<br />
4 Always store your power tool in a dry place.<br />
5 Keep the motor ventilation slots clean.<br />
6 If you see some sparks flashing in the ventilation<br />
slots, this is normal and will not damage your<br />
power tool.<br />
HANDY HINTS<br />
Always use sharp good quality drill bits and<br />
chisels. The performance of the drill is dependant<br />
on the quality of the bits used.<br />
• Reduce the pressure on the drill bit when it is<br />
about to break through. This will prevent the drill<br />
from jamming.<br />
• When drilling a large hole, first drill a pilot hole<br />
using a smaller drill bit.<br />
• Always apply pressure to your drill bit in a<br />
straight line, and if possible at right angles to the<br />
workpiece.<br />
• When drilling holes into walls, floors etc., always<br />
make sure that there are no live electrical wires,
or pipe work in the path of the bit.<br />
• Always operate your drill using both the handle<br />
and the front handle.<br />
• Never change the operating mode whilst the<br />
drill is running.<br />
• When using the product in the hammer only<br />
mode, or when chiseling masonry, make sure that<br />
you wear safety glasses and protective gloves.<br />
• Do not apply excessive pressure to the tool<br />
when chiseling. Excessive force does not speed<br />
up the work.<br />
ENVIRONMENTAL PROTECTION<br />
Waste electrical products should not be<br />
disposed of with household waste. Please<br />
recycle where facilities exist. Check with<br />
your Local Authority or retailer for recycling<br />
advice.<br />
PLUG REPLACEMENT<br />
The fuse in the main plug of your power tool<br />
should always be replaced with one of identical<br />
rating.<br />
Check the voltage given on your power tool<br />
matches the supply voltage.<br />
The power tool is supplied with a fitted plug,<br />
however if you should need to fit a new plug<br />
follows the instruction below.<br />
IMPORTANT<br />
The wire in the mains lead are coloured in<br />
accordance with the following code:<br />
Blue ---Neutral<br />
Brown ---Live<br />
The wire that is coloured blue must be connected<br />
to the terminal that is marked with the letter N.<br />
The wire that is coloured brown must be<br />
connected to the terminal that is marked with the<br />
letter L.<br />
A 13AMP (BS1363 or BS1363/A) plug must be<br />
used and a 13 AMP fuse must be fitted.<br />
6kg SDS Plus Rotary Hammer Drill
BLUE<br />
N (NEUTRAL)<br />
13 AMP<br />
FUSE<br />
BROWN<br />
L (LIVE)<br />
OUTER<br />
SLEEVE CABLE GRIP
Declaration of Conformity<br />
We, Importer<br />
Screwfix Direct Ltd<br />
Mead Avenue<br />
Houndstone Business Park<br />
Yeovil<br />
BA 22 8RT<br />
Declare that the product<br />
6kg SDS Plus Rotary Hammer Drill<br />
<strong>ERB30Y</strong><br />
Complies with the essential health and safety requirements of the following directives:<br />
89/336 EEC, 93/68 EEC - EMC Directive.<br />
73/23 EEC, 93/68 EEC – Low Voltage Directive<br />
98/37 EC – Machinery Directive.<br />
Authorised Signatory<br />
Date: 03/15/05<br />
Signature:<br />
Name: Peter Harries<br />
Screwfix Direct Ltd<br />
Quality Manager<br />
Standards and technical specifications referred to:<br />
EN 60745-1:2003/+A1:2003<br />
EN 60745-2-6:2003<br />
EN 55014-1:2000/+A1:2001/+A2:2002<br />
EN 55014-2:1997/+A1:2001<br />
EN 61000-3-2:2000<br />
EN 61000-3-3:1995/+A1:2001<br />
6kg SDS Plus Rotary Hammer Drill<br />
2005


