- Page 1 and 2:
2009 Chevrolet Express Owner Manual
- Page 3 and 4:
Index To quickly locate information
- Page 5 and 6:
Section 1 Seats and Restraint Syste
- Page 7 and 8:
Power Seat Reclining Seatbacks { CA
- Page 9 and 10:
{ CAUTION: CAUTION: (Continued) Sit
- Page 11 and 12:
3. Pull the pin handle up to diseng
- Page 13 and 14:
Three Passenger Seat Shown 4. Push
- Page 15 and 16:
In most states and in all Canadian
- Page 17 and 18:
The person keeps going until stoppe
- Page 19 and 20:
Q: If my vehicle has airbags, why s
- Page 21 and 22:
Q: What is wrong with this? { CAUTI
- Page 23 and 24:
Q: What is wrong with this? { CAUTI
- Page 25 and 26:
Q: What is wrong with this? { CAUTI
- Page 27 and 28:
Q: What is wrong with this? { CAUTI
- Page 29 and 30:
5. To make the lap part tight, pull
- Page 31 and 32:
Rear Safety Belt Comfort Guides Rea
- Page 33 and 34:
Safety Belt Use During Pregnancy Sa
- Page 35 and 36:
The manufacturer’s instructions t
- Page 37 and 38:
{ CAUTION: Children can be seriousl
- Page 39 and 40:
{ CAUTION: Never do this. Children
- Page 42 and 43:
Securing an Add-On Child Restraint
- Page 44 and 45:
A label on the sun visor says, “N
- Page 46 and 47:
Top Tether Anchor Your child restra
- Page 48 and 49:
The second, third and fourth row wi
- Page 50 and 51:
{ CAUTION: Children can be seriousl
- Page 52 and 53:
Securing a Child Restraint in a Rea
- Page 54 and 55:
6. If the child restraint has a top
- Page 56 and 57:
If the child restraint has the LATC
- Page 58 and 59:
7. If the vehicle does not have a r
- Page 60 and 61:
You will be using the lap-shoulder
- Page 62 and 63:
7. If the vehicle does not have a r
- Page 64 and 65:
{ CAUTION: Where Are the Airbags? C
- Page 66 and 67:
For passenger vans with a sliding d
- Page 68 and 69:
In addition, the vehicle may have d
- Page 70 and 71:
The parts of the airbag that come i
- Page 72 and 73:
Medical Condition. A passenger has
- Page 74 and 75:
Passenger Sensing System If the ins
- Page 76 and 77:
The passenger sensing system is des
- Page 78 and 79:
If the Off Indicator is Lit for an
- Page 80 and 81:
Servicing Your Airbag-Equipped Vehi
- Page 82 and 83:
Restraint System Check Checking the
- Page 84 and 85:
✍ NOTES 1-80
- Page 86 and 87:
Keys { CAUTION: Leaving children in
- Page 88 and 89:
Remote Keyless Entry (RKE) System O
- Page 90 and 91:
Doors and Locks Door Locks { CAUTIO
- Page 92 and 93:
Automatic Door Lock The doors will
- Page 94 and 95:
60/40 Swing-Out Side Door To open t
- Page 96 and 97:
Rear Doors To open the rear doors f
- Page 98 and 99:
Manual Windows Operate the manual w
- Page 100 and 101:
Enhanced Technology Glass The vehic
- Page 102 and 103:
If the engine still does not start,
- Page 104 and 105:
B (ACC/ACCESSORY): This is the posi
- Page 106 and 107:
Engine Coolant Heater If the vehicl
- Page 108 and 109:
R (Reverse): Use this gear to back
- Page 110 and 111:
While activated, the indicator ligh
- Page 112 and 113:
Leaving the Vehicle With the Engine
- Page 114 and 115:
Engine Exhaust CAUTION: (Continued)
- Page 116 and 117:
Mirrors Manual Rearview Mirror Hold
- Page 118 and 119:
Outside Heated Mirrors Vehicles wit
- Page 121 and 122:
✍ NOTES 3-3
- Page 123 and 124:
The main components of the instrume
- Page 125 and 126:
Turn Signal/Multifunction Lever The
- Page 127 and 128:
Windshield Washer The windshield wi
- Page 129 and 130:
Resuming a Set Speed If the cruise
- Page 131 and 132:
The exterior lamps control has four
- Page 133 and 134:
Automatic Headlamp System When it i
- Page 135 and 136:
Electric Power Management The vehic
- Page 137 and 138:
Climate Controls Climate Control Sy
- Page 139 and 140:
Outlet Adjustment Use the outlets l
- Page 141 and 142:
9 (Fan Control): Turn clockwise or
- Page 143 and 144:
Speedometer and Odometer The speedo
- Page 145 and 146:
Airbag Readiness Light The system c
- Page 147 and 148:
{ CAUTION: If the airbag readiness
- Page 149 and 150:
Voltmeter Gage When the engine is n
- Page 151 and 152:
StabiliTrak ® Indicator Light Engi
- Page 153 and 154:
Notice: If the vehicle is continual
- Page 155 and 156:
Emissions Inspection and Maintenanc
- Page 157 and 158:
This light comes on briefly while s
- Page 159 and 160:
Driver Information Center (DIC) You
- Page 161 and 162:
Fuel Range Press the trip/fuel butt
- Page 163 and 164:
Units Press the vehicle information
- Page 165 and 166:
To adjust for compass variance, use
- Page 167 and 168:
AUTOMATIC LIGHT CONTROL OFF This me
- Page 169 and 170:
ENGINE OVERHEATED STOP ENGINE Notic
- Page 171 and 172:
SERVICE A/C SYSTEM This message dis
- Page 173 and 174:
STABILITRAK OFF If your vehicle has
- Page 175 and 176:
WAIT TO START This message displays
- Page 177 and 178:
AUTO DOOR UNLOCK This feature allow
- Page 179 and 180:
EXIT LIGHTING This feature allows y
- Page 181 and 182:
EXIT FEATURE SETTINGS This feature
- Page 183 and 184:
MP3 Radio with a Single CD Player I
- Page 185 and 186:
Radio(s) AM-FM Radio shown, Radio w
- Page 187 and 188:
Speed Compensated Volume (SCV): Rad
- Page 189 and 190:
The number of favorites pages can b
- Page 191 and 192:
Playing a CD(s) (Six-Disc CD Player
- Page 193 and 194:
To use random on the Base Radio wit
- Page 195 and 196:
Using the Auxiliary Input Jack Your
- Page 197 and 198:
Root Directory The root directory o
- Page 199 and 200:
c T (Next Folder): Press the pushbu
- Page 201 and 202:
Audio Steering Wheel Controls Vehic
- Page 203 and 204:
Section 4 Driving Your Vehicle Your
- Page 205 and 206:
Police records show that almost 40
- Page 207 and 208:
ABS can change the brake pressure t
- Page 209 and 210:
StabiliTrak System Operation The St
- Page 211 and 212:
Steering in Emergencies There are t
- Page 213 and 214:
Loss of Control Let us review what
- Page 215 and 216:
Driving in Rain and on Wet Roads Ra
- Page 217 and 218:
Hill and Mountain Roads Driving on
- Page 219 and 220:
{ CAUTION: CAUTION: (Continued) Sno
- Page 221 and 222:
Rocking Your Vehicle to Get It Out
- Page 223 and 224:
4. The resulting figure equals the
- Page 225 and 226:
Certification/Tire Label the inflat
- Page 227 and 228:
Towing Towing Your Vehicle To avoid
- Page 229 and 230:
All-Wheel-Drive Vehicles The vehicl
- Page 231 and 232:
Use the following chart to determin
- Page 233 and 234:
Weight of the Trailer Tongue The to
- Page 235 and 236:
If the vehicle has many options and
- Page 237 and 238:
If a step-bumper hitch will be used
- Page 239 and 240:
Driving with a Trailer { CAUTION: W
- Page 241 and 242:
Driving On Grades Reduce speed and
- Page 243 and 244:
The seven-wire harness connector co
- Page 245 and 246: Section 5 Service and Appearance Ca
- Page 247 and 248: Service For service and parts needs
- Page 249 and 250: If doing some of your own service w
- Page 251 and 252: Additives To provide cleaner air, a
- Page 253 and 254: E85 has less energy per gallon than
- Page 255 and 256: { CAUTION: Fuel can spray out on yo
- Page 257 and 258: Hood Release To open the hood: 1. P
- Page 259 and 260: A. Battery. See Battery on page 5-3
- Page 261 and 262: What Kind of Engine Oil to Use Look
- Page 264 and 265: Engine Air Cleaner/Filter If your v
- Page 266 and 267: How to Check Automatic Transmission
- Page 268 and 269: How to Add Automatic Transmission F
- Page 270 and 271: What to Use { CAUTION: Adding only
- Page 272 and 273: How to Add Coolant to the Radiator
- Page 274 and 275: 4. Then fill the coolant recovery t
- Page 276 and 277: If Steam Is Coming From The Engine
- Page 278 and 279: Power Steering Fluid The power stee
- Page 280 and 281: Brakes Brake Fluid The brake master
- Page 282 and 283: Brake Wear This vehicle has disc br
- Page 284 and 285: Jump Starting If the vehicle batter
- Page 286 and 287: { CAUTION: Using a match near a bat
- Page 288 and 289: Notice: If the jumper cables are co
- Page 290 and 291: If you have the 1500 Series, the pr
- Page 292 and 293: Bulb Replacement For the proper typ
- Page 294 and 295: Front Turn Signal, Sidemarker and P
- Page 298 and 299: Tires Your new vehicle comes with h
- Page 300 and 301: (G) Maximum Cold Inflation Load Lim
- Page 302 and 303: (A) Light Truck (LT-Metric) Tire: T
- Page 304 and 305: Intended Outboard Sidewall: The sid
- Page 306 and 307: Inflation - Tire Pressure Tires nee
- Page 308 and 309: Tire Pressure Monitor System The Ti
- Page 310 and 311: The low tire pressure warning light
- Page 312 and 313: The TPMS sensor matching process is
- Page 314 and 315: { CAUTION: Dual Rear Wheels If the
- Page 316 and 317: Buying New Tires GM has developed a
- Page 318 and 319: Uniform Tire Quality Grading Qualit
- Page 320 and 321: Wheel Alignment and Tire Balance Th
- Page 322 and 323: Tire Chains CAUTION: (Continued) {
- Page 324 and 325: Changing a Flat Tire If a tire goes
- Page 326 and 327: To access the equipment, remove the
- Page 328 and 329: Removing the Flat Tire and Installi
- Page 330 and 331: Front Position Rear Position 5-86
- Page 332 and 333: 6. Remove all the wheel nuts. 7. Ta
- Page 334 and 335: 10. Lower the vehicle by turning th
- Page 336 and 337: Secondary Latch System Your vehicle
- Page 338 and 339: 6. Lower the jack by turning the wh
- Page 340 and 341: Spare Tire 6. Make sure the tire is
- Page 342 and 343: Do not clean the vehicle using: •
- Page 344 and 345: Care of Safety Belts Keep belts cle
- Page 346 and 347:
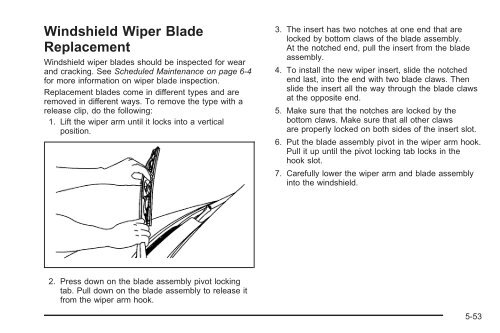
Windshield and Wiper Blades Clean t
- Page 348 and 349:
Vehicle Identification Vehicle Iden
- Page 350 and 351:
Fuse Usage 1 Climate Control 2 (HVA
- Page 352 and 353:
Fuse Usage 1 Left High-Beam Headlam
- Page 354 and 355:
Fuse Usage 47 Transmission Control
- Page 356 and 357:
Application Capacities English Metr
- Page 358 and 359:
Maintenance Schedule Introduction T
- Page 360 and 361:
To purchase service information, se
- Page 362 and 363:
Additional Required Services This m
- Page 364 and 365:
Maintenance Footnotes (Gasoline Eng
- Page 366 and 367:
Owner Checks and Services These own
- Page 368 and 369:
Automatic Transmission Shift Lock C
- Page 370 and 371:
Usage Windshield Washer Parking Bra
- Page 372 and 373:
Engine Drive Belt Routing V6 Engine
- Page 374 and 375:
Maintenance Record (cont’d) Date
- Page 376 and 377:
Maintenance Record (cont’d) Date
- Page 378 and 379:
Customer Assistance and Information
- Page 380 and 381:
STEP THREE — Canadian Owners: In
- Page 382 and 383:
Customer Assistance for Text Teleph
- Page 384 and 385:
Calling for Assistance When calling
- Page 386 and 387:
• Trip Interruption Benefits and
- Page 388 and 389:
Collision Damage Repair If your veh
- Page 390 and 391:
• Gather the important informatio
- Page 392 and 393:
Reporting Safety Defects to General
- Page 394 and 395:
Vehicle Data Recording and Privacy
- Page 396 and 397:
✍ NOTES 7-20
- Page 398 and 399:
Automatic Headlamp System .........
- Page 400 and 401:
Door 60/40 Swing-Out Side Door ....
- Page 402 and 403:
H Hazard Warning Flashers .........
- Page 404 and 405:
Message DIC Warnings and Messages .
- Page 406 and 407:
S Safety Belt Reminders ...........
- Page 408:
V Vehicle Control .................


