
You also want an ePaper? Increase the reach of your titles
YUMPU automatically turns print PDFs into web optimized ePapers that Google loves.
4-420-038-11(2)<br />
<strong>LCD</strong> <strong>TV</strong><br />
Operating Instructions<br />
Introducing Your New BRAVIA ®<br />
Getting Started<br />
Operating the <strong>TV</strong><br />
Using Features<br />
Using the Menus<br />
Other Information<br />
Sony Customer Support<br />
U.S.A.: http://www.sony.com/tvsupport<br />
Canada: http://www.sony.ca/support<br />
United States<br />
1.800.222.SONY<br />
Please Do Not Return<br />
the Product to the Store<br />
Canada<br />
1.877.899.SONY<br />
KDL-32BX330 / 32BX331
Owner’s Record<br />
The model and serial numbers are located at the side and rear of<br />
the <strong>TV</strong>. Record these numbers in the spaces provided below.<br />
Refer to them whenever you call upon your Sony dealer<br />
regarding this <strong>TV</strong>.<br />
Model Name<br />
Serial No.<br />
CAUTION<br />
To prevent electric shock and blade exposure, do not use<br />
this AC plug with an extension cord, receptacle or other<br />
outlet unless the blades can be fully inserted.<br />
❑ Operating on 120 V AC.<br />
❑ Avoid operating the <strong>TV</strong> at temperatures below 41°F<br />
(5°C).<br />
Licensing Information<br />
Macintosh is a trademark of Apple Inc., registered in the U.S. and<br />
other countries.<br />
HDMI, the HDMI logo, and High-Definition Multimedia Interface<br />
are trademarks or registered trademarks of HDMI Licensing, LLC<br />
in the United States and other countries.<br />
Manufactured under license from Dolby Laboratories. Dolby and<br />
the double-D symbol are trademarks of Dolby Laboratories.<br />
Blu-ray Disc is a trademark.<br />
“BRAVIA” and and are trademarks or registered<br />
marks of Sony Corporation.<br />
“PlayStation” is a registered trademark and “P<strong>S3</strong>” is a trademark of<br />
Sony Computer Entertainment Inc.<br />
Cleaning<br />
When cleaning, be sure to unplug the power cord to avoid<br />
any chance of electric shock.<br />
• Wipe the <strong>LCD</strong> screen gently with a soft cloth.<br />
• Stubborn stains may be removed with a cloth slightly<br />
moistened with a solution of mild soap and warm water.<br />
• If using a chemically pretreated cloth, please follow the<br />
instruction provided on the package.<br />
• Never use strong solvents such as a thinner, alcohol or<br />
benzine for cleaning.<br />
• See the supplied Safety Booklet for additional<br />
information.<br />
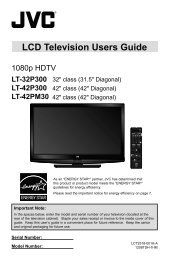
The 32 class has a 31.5 inch viewable image size (measured diagonally).<br />
2
Contents<br />
Introducing Your New BRAVIA ®<br />
Welcome to the World of BRAVIA ® . . . . . . . .4<br />
Experiencing Stunning HD with Your<br />
BRAVIA . . . . . . . . . . . . . . . . . . . . . . . . . . .4<br />
The Four Steps to a Stunning HD<br />
Experience . . . . . . . . . . . . . . . . . . . . . . . . .5<br />
Getting Started<br />
Setting Up Your <strong>TV</strong> . . . . . . . . . . . . . . . . . . . . .6<br />
Attaching the Table-Top Stand . . . . . . . . . . . .7<br />
Locating Inputs and Outputs . . . . . . . . . . . . . .8<br />
Connecting the <strong>TV</strong> . . . . . . . . . . . . . . . . . . . .10<br />
Connecting Other Equipment . . . . . . . . . . . .14<br />
When Installing the <strong>TV</strong> Against a Wall or<br />
Enclosed Area . . . . . . . . . . . . . . . . . . . . .15<br />
Securing the <strong>TV</strong> . . . . . . . . . . . . . . . . . . . . . .16<br />
Running Initial Setup. . . . . . . . . . . . . . . . . . .17<br />
Operating the <strong>TV</strong><br />
Using the Remote Control. . . . . . . . . . . . . . .18<br />
Remote Control Button Description . . . . . . .19<br />
<strong>TV</strong> Controls and Indicators . . . . . . . . . . . . . .21<br />
Using Features<br />
Favorites . . . . . . . . . . . . . . . . . . . . . . . . . . . .22<br />
Wide Mode . . . . . . . . . . . . . . . . . . . . . . . . . .22<br />
Wide Mode with PC . . . . . . . . . . . . . . . . . . .23<br />
Inputs . . . . . . . . . . . . . . . . . . . . . . . . . . . . . .23<br />
Playing back Photo/Music via USB (Playing<br />
back Music for KDL-32BX330 only) . . . . .24<br />
Using the Menus<br />
Navigating through <strong>TV</strong> Menus . . . . . . . . . . .25<br />
Using the Picture Settings. . . . . . . . . . . . . . .26<br />
Using the Sound Settings . . . . . . . . . . . . . . .27<br />
Using the Screen Settings . . . . . . . . . . . . . .28<br />
Using the Channel Settings . . . . . . . . . . . . .29<br />
Using the Parental Lock Settings . . . . . . . . .30<br />
Using the Setup Settings . . . . . . . . . . . . . . .33<br />
Other Information<br />
PC Input Signal Reference Chart for<br />
PC and HDMI IN. . . . . . . . . . . . . . . . . . . .35<br />
Using a Wall-Mount Bracket . . . . . . . . . . . . .36<br />
Installing the Wall-Mount Bracket . . . . . . . . .37<br />
Troubleshooting . . . . . . . . . . . . . . . . . . . . . .42<br />
Important Notices . . . . . . . . . . . . . . . . . . . . .46<br />
Specifications . . . . . . . . . . . . . . . . . . . . . . . .47<br />
Customer Support<br />
United States<br />
http://www.sony.com/tvsupport<br />
Canada<br />
http://www.sony.ca/support<br />
On-line Registration<br />
United States<br />
http://productregistration.sony.com<br />
Canada<br />
http://www.sony.ca/registration<br />
3
Introducing Your New BRAVIA ®<br />
Welcome to the World of BRAVIA ®<br />
Thank you for choosing this Sony BRAVIA ® high-definition television. Use the<br />
documentation listed below to get the most out of your <strong>TV</strong>.<br />
Safety Booklet<br />
Contains precautionary<br />
measures to keep you and<br />
your <strong>TV</strong> safe. Read this<br />
information prior to setting up<br />
your <strong>TV</strong>.<br />
Operating Instructions<br />
Provides the most detailed<br />
information to operate your<br />
<strong>TV</strong>.<br />
Quick Setup Guide<br />
Provides <strong>TV</strong> setup information with sample<br />
connection diagrams.<br />
Experiencing Stunning HD with Your BRAVIA<br />
The quality of the image you see on your BRAVIA <strong>TV</strong> is only as good as the quality of the<br />
signal it receives. To experience the stunning detail of your new BRAVIA <strong>TV</strong>, you need<br />
access to HD programming. Your BRAVIA <strong>TV</strong> can receive and display HD programming<br />
from:<br />
• Over-the-air broadcasting via HD-quality antenna<br />
• HD cable subscription<br />
• HD satellite subscription<br />
• Blu-ray Disc player or other HD compatible external equipment<br />
Contact your cable, satellite or HD service provider for information on upgrading to HD<br />
programming.<br />
4
The Four Steps to a Stunning HD Experience<br />
Set, Source, Sound, and Setup<br />
Along with your BRAVIA <strong>TV</strong> set, a complete HD system requires a source of HD<br />
programming, an HD sound system, and a proper connection setup. Refer to the Quick<br />
Setup Guide, enclosed separately, for connecting optional equipment.<br />
You can enjoy crisp, clear images, smooth<br />
movement, and high-impact visuals from<br />
1080 HD signals as shown here.<br />
When you compare a high-definition signal<br />
to a standard analog signal, you will notice<br />
a big difference in picture quality. If black<br />
bars appear as shown here, press WIDE<br />
on the remote control to fill the screen.<br />
Introducing Your New BRAVIA ®<br />
5
Getting Started<br />
Setting Up Your <strong>TV</strong><br />
Some <strong>TV</strong> models are packaged with a detached Table-Top Stand so you can mount your <strong>TV</strong> to a<br />
wall right away. If you are not mounting the <strong>TV</strong> to a wall, you will need to attach the Table-Top<br />
Stand. You will need a Phillips screwdriver and the supplied screws to complete the task. Look for<br />
the attachment instructions provided with the <strong>TV</strong>.<br />
Be sure to consider the following while setting up your <strong>TV</strong>:<br />
• Disconnect all cables when carrying the <strong>TV</strong>.<br />
• Carry the <strong>TV</strong> with the adequate number of people; larger size <strong>TV</strong>s require two or more people.<br />
• Correct hand placement while carrying the <strong>TV</strong> is very important for safety and to avoid<br />
damage.<br />
• Ensure your <strong>TV</strong> has adequate ventilation, see page 15.<br />
• For best picture quality, do not expose the screen to direct illumination or sunlight.<br />
• Avoid installing the <strong>TV</strong> in a room with reflective wall and floor materials.<br />
• Avoid moving the <strong>TV</strong> from a cold area to a warm area. Sudden room temperature changes may<br />
cause moisture condensation. This may cause the <strong>TV</strong> to show poor picture and/or poor color.<br />
Should this occur, allow moisture to evaporate completely before powering the <strong>TV</strong> on.<br />
6
Attaching the Table-Top Stand<br />
1 Release the AC power cord from the <strong>TV</strong>.<br />
2 Place the <strong>TV</strong> with its screen facing up on a level and stable surface covered with a thick and<br />
soft cloth. Use the supplied three screws to attach the Table-Top Stand to the <strong>TV</strong>. Make sure<br />
that you carry out this task with at least two or three people (see page 6 for details).<br />
Getting Started<br />
Thick and soft cloth<br />
Screw (+PSW 5 x 16)<br />
(Supplied)<br />
• To detach the Table-Top Stand from the <strong>TV</strong>, remove the three screws guided by the allow mark<br />
on the Table-Top Stand. Do not remove any other screws.<br />
Two of removed screws are needed to install the Wall-Mount Bracket (see page 39 for details).<br />
7
Locating Inputs and Outputs<br />
Rear Panel<br />
Item<br />
Description<br />
1 HDMI IN 1/2 HDMI (High-Definition Multimedia Interface) provides an uncompressed, alldigital<br />
audio/video interface between this <strong>TV</strong> and any HDMI-equipped audio/video<br />
equipment, such as a set-top box, DVD player, and A/V receiver. HDMI supports<br />
enhanced, or high-definition video, plus digital audio. Be sure to use only an HDMI<br />
cable that bears the HDMI logo.<br />
Use the HDMI IN 1 port when connecting DVI equipment. Use a DVI-to-HDMI<br />
cable or adapter (not supplied). Equipment using a DVI connection also requires an<br />
additional audio connection using an audio cable connected to PC/HDMI 1 AUDIO<br />
IN of PC IN.<br />
2 PC IN (RGB) Connects to a personal computer’s video and audio output connector. Can also be<br />
connected to other analog RGB equipment. See “PC Input Signal Reference Chart”<br />
on page 35 for the signals that can be displayed.<br />
For some Apple Macintosh computers, it may be necessary to use an adapter (not<br />
supplied). If an adapter is used, connect the adapter to the computer before<br />
connecting the HD15-HD15 cable.<br />
You may need to adjust the <strong>TV</strong> settings or your PC’s resolution and timing. See<br />
page 13 for information on how to setup your PC to this <strong>TV</strong>.<br />
3 VIDEO IN/<br />
COMPONENT<br />
IN/R-AUDIO-L<br />
(MONO)<br />
This input port can be used as a composite video input (VIDEO) or as a component<br />
video input (COMPONENT). For composite use, connect the yellow jack to Y for<br />
video and use audio L (mono) and R for audio signal. For component connection,<br />
use Y, PB, PR for video signals and also connect the audio L (mono) and R for audio<br />
signal.<br />
This <strong>TV</strong> can auto detect and switch between the VIDEO and COMPONENT when<br />
VIDEO or COMPONENT is connected.<br />
8
Item<br />
Description<br />
4 DIGITAL AUDIO Connects to the optical audio input of digital audio equipment that is PCM/Dolby* 1<br />
OUT (OPTICAL) Digital compatible.<br />
5 AUDIO OUT<br />
(FIX)<br />
6 CABLE/<br />
ANTENNA<br />
Connects to the audio input jack of your analog audio equipment. You can use these<br />
outputs to listen to your <strong>TV</strong>’s audio through your stereo system.<br />
RF input that connects to your Cable or VHF/UHF antenna.<br />
7 USB Connects to USB equipment to access photo and music files (for KDL-32BX330),<br />
photo files (for KDL-32BX331).<br />
* 1 Manufactured under license from Dolby Laboratories. Dolby and the double-D symbol are trademarks of Dolby<br />
Laboratories.<br />
• An HDMI or Component video (YPBPR) connection is required to view 480i, 480p, 720p, 1080i<br />
and 1080p video formats. 1080/24p is available only with HDMI connection.<br />
Getting Started<br />
9
Connecting the <strong>TV</strong><br />
Cable System or VHF/UHF Antenna System<br />
You can enjoy high-definition and standard-definition digital programming (if available in your<br />
area) along with standard-definition analog programming.<br />
This <strong>TV</strong> is capable of receiving unscrambled digital programming for both cable (QAM and<br />
8VSB) and external VHF/UHF antenna (ATSC).<br />
Cable or VHF/UHF (or VHF only)<br />
75-ohm coaxial cable<br />
Rear of <strong>TV</strong><br />
CABLE/ANTENNA<br />
• It is strongly recommended that you connect the CABLE/ANTENNA input using a 75-ohm<br />
coaxial cable to receive optimum picture quality. A 300-ohm twin lead cable can easily be affected<br />
by radio frequency interference, resulting in signal degradation.<br />
Cable System and VHF/UHF Antenna System<br />
Use an optional A-B RF switch (not supplied) to switch between the cable and over-the-air antenna<br />
programming, as indicated below.<br />
A/B RF Switch<br />
Cable<br />
Antenna<br />
A<br />
B<br />
Rear of <strong>TV</strong><br />
CABLE/ANTENNA<br />
• Be sure to set the Signal Type setting to Cable or Antenna found under the Channel settings<br />
for your input signal (page 29).<br />
10
HD Cable Box/HD Satellite Box<br />
You can enjoy high-definition programming by subscribing to a high-definition cable service or a<br />
high-definition satellite service. For the best possible picture, make sure you connect this equipment<br />
to your <strong>TV</strong> via the HDMI or component video (with audio) input located on the back of your <strong>TV</strong>.<br />
Shown with HDMI Connection<br />
Rear of <strong>TV</strong><br />
HD cable box/<br />
HD satellite box<br />
CA<strong>TV</strong>/Satellite antenna cable<br />
HDMI cable<br />
Getting Started<br />
Shown with DVI Connection<br />
Rear of <strong>TV</strong><br />
DVI-to-HDMI cable<br />
CA<strong>TV</strong>/Satellite<br />
antenna cable<br />
HD cable box/<br />
HD satellite box<br />
Audio cable<br />
(stereo mini plugs)<br />
(Continued)<br />
11
Shown with Component Connection<br />
Rear of <strong>TV</strong><br />
CA<strong>TV</strong>/Satellite antenna cable<br />
HD cable box/<br />
HD satellite box<br />
AUDIO-R (red)<br />
AUDIO-L (white)<br />
P R (red)<br />
P B (blue)<br />
Y (green)<br />
Component video cable<br />
Audio cable<br />
• If your equipment has a DVI output and not an HDMI output, connect the DVI output to the<br />
HDMI IN 1 (with DVI-to-HDMI cable or adapter) and connect the audio output to the AUDIO<br />
IN of PC IN. For details, see page 8.<br />
12
PC<br />
Use the <strong>TV</strong> as a monitor for your PC by connecting an HD15-HD15 cable connection as shown<br />
below. This <strong>TV</strong> can also be connected to a PC with a DVI or HDMI output. (Refer to the separate<br />
Quick Setup Guide.)<br />
Rear of <strong>TV</strong><br />
HD15-HD15 cable<br />
(analog RGB)<br />
Getting Started<br />
Audio cable (stereo mini plugs)<br />
• Connect the PC IN jack to the PC using an HD15-HD15 cable with ferrite core (analog RGB) and<br />
audio cable (page 8).<br />
13
Connecting Other Equipment<br />
Blu-ray Disc Player/<br />
“P<strong>S3</strong>”<br />
DVD<br />
player<br />
Digital satellite<br />
receiver<br />
Digital<br />
cable box<br />
Audio<br />
system<br />
Personal<br />
computer<br />
VCR/Game<br />
system/<br />
Camcorder<br />
or<br />
Digital<br />
recorder<br />
Digital audio<br />
equipment<br />
(A/V<br />
Receiver/<br />
Home<br />
Theater)<br />
Analog<br />
audio<br />
equipment<br />
(A/V<br />
Receiver/<br />
Home<br />
Theater)<br />
CABLE/ USB<br />
ANTENNA<br />
• Refer to the Quick Setup Guide (supplied) when connecting other equipment to your <strong>TV</strong>.<br />
14
When Installing the <strong>TV</strong> Against a Wall or Enclosed Area<br />
Make sure that your <strong>TV</strong> has adequate ventilation. Allow enough space around the <strong>TV</strong> as shown<br />
below. Avoid operating the <strong>TV</strong> at temperatures below 41 °F (5 °C).<br />
Installed with stand<br />
Installed on the wall<br />
4 inches<br />
(10 cm)<br />
11 7 / 8 inches<br />
(30 cm)<br />
4 inches<br />
(10 cm) 2 3 / 8 inches<br />
(6 cm)<br />
Leave at least this much space around the set.<br />
Never install the <strong>TV</strong> set as follows:<br />
Air circulation is blocked.<br />
Air circulation is blocked.<br />
4 inches<br />
(10 cm)<br />
11 7/8 inches<br />
(30 cm)<br />
4 inches (10 cm)<br />
4 inches<br />
(10 cm)<br />
Leave at least<br />
this much space<br />
around the set.<br />
Getting Started<br />
Wall<br />
Wall<br />
• Inadequate ventilation can lead to overheating of the <strong>TV</strong> and may cause <strong>TV</strong> damage or cause<br />
a fire.<br />
15
Securing the <strong>TV</strong><br />
Sony strongly recommends taking measures to prevent the <strong>TV</strong> from toppling over.<br />
Unsecured <strong>TV</strong>s may topple and result in property damage, serious bodily injury or even<br />
death.<br />
Preventing the <strong>TV</strong> from Toppling<br />
❑<br />
❑<br />
❑<br />
❑<br />
❑<br />
❑<br />
Secure the <strong>TV</strong> to a wall.<br />
Do not allow children to play or climb on furniture and <strong>TV</strong> sets.<br />
Avoid placing or hanging items on the <strong>TV</strong>.<br />
Never install the <strong>TV</strong> on:<br />
• slippery, unstable and/or uneven surfaces.<br />
• furniture that can easily be used as steps, such as a chest of drawers.<br />
Install the <strong>TV</strong> where it cannot be pulled, pushed, or knocked over.<br />
Route all AC power cords and connecting cables so that they are not accessible to curious children.<br />
Recommended Measures to Secure the <strong>TV</strong><br />
Consider the following measures when securing your <strong>TV</strong> to a <strong>TV</strong> stand (not supplied).<br />
1 Secure the stand for the <strong>TV</strong>.<br />
Make sure the <strong>TV</strong> stand can adequately support the weight of the <strong>TV</strong>. Use two angle braces<br />
(not supplied) to secure the stand.<br />
For each angle brace use the appropriate hardware to:<br />
• attach one side of the angle brace to the wall stud.<br />
• attach the other side to the <strong>TV</strong> stand.<br />
Angle braces<br />
Stand<br />
2 Anchor the <strong>TV</strong> to the wall.<br />
Anchor the <strong>TV</strong> to the wall by using bolts, wall anchor and chain (or rope).<br />
Wall-mount holes<br />
Wall-anchor<br />
(not supplied)<br />
Anchor bolts<br />
(not supplied)<br />
Rope or chain<br />
(not supplied)<br />
16
Running Initial Setup<br />
During initial setup, you will perform the following:<br />
• Set the language for the On Screen Display (OSD) text<br />
• Choose your viewing environment<br />
• Scan for digital and analog channels<br />
Complete your cable connections before beginning the Initial Setup. Refer to the Quick Setup<br />
Guide (supplied) for sample connection diagrams.<br />
Initial Setup<br />
Confirm<br />
Please select your language:<br />
English<br />
Español<br />
Français<br />
1 Turn on the <strong>TV</strong>. The Initial Setup screen will<br />
appear.<br />
2 Use the remote control buttons described below to<br />
navigate through the Initial Setup.<br />
Getting Started<br />
V/v/B/b buttons:<br />
Allow you to navigate and highlight options where applicable.<br />
button:<br />
Allows you to select the highlighted option and advance to the next screen.<br />
3 Auto Program will scan for available channels from the signal source directly connected to<br />
the <strong>TV</strong>’s CABLE/ANTENNA input. Follow the help text provided on the screen to run the<br />
Auto Program.<br />
• Select Cancel to stop or cancel the Auto Program. The Auto Program can be done at later<br />
time. To run Auto Program at a later time, press HOME and select Auto Program under<br />
Channel settings.<br />
• Connect either your cable or antenna to the <strong>TV</strong> (you can connect both using an A-B RF switch (not<br />
supplied)); for more details see page 10.<br />
17
Operating the <strong>TV</strong><br />
Using the Remote Control<br />
To Insert Batteries into the Remote Control<br />
Insert two size AA batteries (supplied) by matching e and E on the batteries to the diagram<br />
inside the battery compartment of the remote control.<br />
Push to open<br />
Guidelines to follow<br />
• Point your remote control directly at the IR sensor<br />
located on your <strong>TV</strong>.<br />
• Make sure that no objects are blocking the path<br />
between the remote control and the IR sensor on your<br />
<strong>TV</strong>.<br />
• Fluorescent lamps can interfere with your remote<br />
control; try turning off the fluorescent lamps.<br />
• If you are having problems with the remote control,<br />
reinsert or replace your batteries and make sure that<br />
they are correctly inserted.<br />
18
Remote Control Button Description<br />
Button<br />
Description<br />
1 INPUT Press to display the list of External Inputs and <strong>TV</strong><br />
mode. Press repeatedly to toggle through the inputs.<br />
See page 23.<br />
2 CC Press to cycle through the available settings for<br />
Closed Captions (CC) : On, Off, and On when<br />
Muting.<br />
3 WIDE Press repeatedly to cycle through the available Wide<br />
Mode settings. See page 22.<br />
4 RETURN Press to go back to the previous screen or exit from the<br />
screen when displaying menu items and settings.<br />
5 HOME/<br />
MENU<br />
Press to display the menu with <strong>TV</strong> functions and<br />
settings. See “Using the Menus” on page 25.<br />
6 0-9 ENT Press 0-9 to select a channel. Press ENT to change<br />
channels immediately.<br />
7 Use with 0-9 to select digital channels.<br />
For example, to enter 2.1, press 2 , , 1 and .<br />
8 MUTING Press to mute the sound. Press again or press VOL + to<br />
restore the sound.<br />
9 VOL (2) Press to adjust the volume.<br />
+/–<br />
Operating the <strong>TV</strong><br />
•The 5 and CH + buttons have a tactile dot. Use them as a reference when operating the <strong>TV</strong>.<br />
19
Button<br />
0 POWER<br />
"/1<br />
qa DISPLAY<br />
Description<br />
Press to turn on and off the <strong>TV</strong>.<br />
Press once to display the banner with channel/program<br />
information you are watching. The banner will time<br />
out in a few seconds or press again to exit.<br />
qs V/v/B/b Press V/v/B/b to move focus/highlight. Press to<br />
select/confirm an item.<br />
qd OPTIONS Press to display a list of convenient functions and<br />
menu shortcuts. The OPTIONS menu items vary<br />
based on current input and content.<br />
qf JUMP<br />
Press to jump back and forth between two channels<br />
and external inputs. The <strong>TV</strong> alternates between the<br />
current/last channel or external input selected.<br />
qg CH +/–<br />
Press to scan through channels. To scan quickly<br />
through channels, press and hold down either CH +/–.<br />
20
<strong>TV</strong> Controls and Indicators<br />
Item<br />
Description<br />
1 HOME Press to display menu with <strong>TV</strong> functions and settings (see “Using the Menus” on page 25).<br />
2<br />
t (Input)<br />
Press to display the list of external inputs. Press repeatedly to toggle through the inputs.<br />
In the menu screen, this button serves as confirming the selection or setting.<br />
3 – 2 + Press to adjust the volume. In the menu screen, these buttons serve as left/right buttons.<br />
Operating the <strong>TV</strong><br />
4 – CH + Press to scan through channels. To scan quickly through channels, press and hold down<br />
either CH –/+. In the menu screen, these buttons serve as up/down buttons.<br />
5 1 (Power) Press to turn on and off the <strong>TV</strong>.<br />
6 " (Power) LED Lights up in green when the <strong>TV</strong> is turned on.<br />
7 1 (Standby) Lights up in red when the <strong>TV</strong> is in standby mode.<br />
LED<br />
8 (Picture<br />
Off)/<br />
(Timer) LED<br />
9 (IR) Infrared<br />
Receiver<br />
Lights up in orange when the sleep timer is set.<br />
Lights up in green when the Power Saving is set to Picture Off.<br />
Receives IR signal from the remote control. Do not put anything over the sensor, doing<br />
so may affect its function.<br />
0 Speaker Outputs audio signal.<br />
• For more information about setting up the external inputs labels and the Skip feature, see page 34.<br />
• Make sure that the <strong>TV</strong> is completely switched off before unplugging the power cord.<br />
21
Using Features<br />
Favorites<br />
Your favorite channels and external inputs can<br />
be accessed by pressing the HOME button<br />
once they are added to the list.<br />
1 Press HOME and select the Channel<br />
settings.<br />
2 Select Favorites, then press .<br />
Favorites<br />
Add to Favorites<br />
Cable 4.61 ABC<br />
Antenna 12 BBCNEWS<br />
Component 3<br />
DVD<br />
Antenna 24.6 BBO<br />
Cable 34 ESPN HD<br />
Cable 36.1 STAR Ch<br />
HDMI 1<br />
BD<br />
HDMI 2<br />
Recorder<br />
Antenna 52.5 NHKHi<br />
Cable 88.6 NHK BS2<br />
Set<br />
The favorites list appears.<br />
3 Press V/v to select a channel or input, then<br />
press .<br />
Wide Mode<br />
The Wide Mode feature allows you to select<br />
the screen display of your preference. Based<br />
on the original signal source, you may see<br />
black bars around the picture or just on the<br />
both sides of the screen. Sometimes you will<br />
see the picture fill the full screen. This is due to<br />
the signals your <strong>TV</strong> receives.<br />
You can manually select available Wide<br />
Mode settings as you watch your <strong>TV</strong> by<br />
pressing the WIDE button on your remote<br />
control or you can set your <strong>TV</strong> to Auto Wide.<br />
To set Auto Wide<br />
Press HOME and select the Screen settings.<br />
Select Auto Wide and set to On.<br />
To change the Wide Screen Mode<br />
Press WIDE repeatedly to cycle through the<br />
available modes.<br />
4:3 Original source 16:9 Original source<br />
Standarddefinition<br />
High-definition source<br />
source<br />
Adding to Favorites<br />
While tuned to the channel you want to watch<br />
or viewing connected equipment, press HOME<br />
and select Favorites in the Channel settings<br />
to display the list. Highlight Add to<br />
Favorites, then press . Your newly added<br />
item will be listed at the top of the list. When<br />
you continue to add items beyond the 10th<br />
item, the item listed at the bottom of the list<br />
will be automatically removed from the list.<br />
m<br />
Wide Zoom<br />
Normal<br />
Full<br />
m<br />
Wide Zoom<br />
Normal<br />
This mode is not available.<br />
Full<br />
• Favorite channels and external inputs<br />
can also be added using the OPTIONS<br />
button on the remote control.<br />
•Your Favorites list will be cleared each<br />
time you run the Auto Program.<br />
Zoom<br />
Zoom<br />
Normal is available with 480i or 480p sources<br />
only.<br />
22
Wide Mode with PC<br />
Wide Mode is also available for the PC<br />
settings. When a PC is connected to the <strong>TV</strong><br />
and PC input is selected, you can change the<br />
PC Screen settings.<br />
Screen<br />
Set<br />
To change the Wide Screen Mode for<br />
PC Timing<br />
Press WIDE repeatedly to cycle through the<br />
available modes while in the PC input mode.<br />
Incoming PC signal<br />
m<br />
Normal<br />
PC Settings<br />
Wide Mode<br />
Auto Adjustment<br />
Phase<br />
Pitch<br />
Horizontal Center<br />
Vertical Center<br />
800 × 600<br />
Normal<br />
0<br />
0<br />
0<br />
0<br />
PC<br />
Inputs<br />
Press INPUT to display the Input menu and<br />
toggle through the external inputs to select<br />
your video signal for viewing including the <strong>TV</strong><br />
mode. The inputs list consists of <strong>TV</strong> mode and<br />
other equipment connected to the <strong>TV</strong>.<br />
You can label your external inputs to identify<br />
them easily.<br />
To Label an Input<br />
1 Press HOME and select the Setup<br />
settings. Select the Label Video Inputs<br />
option. Press V/v to highlight the video<br />
input (HDMI, Video, Component, PC)<br />
to which you want to assign a label; press<br />
to select the input of your choice.<br />
2 Press V/v to highlight one of the<br />
displayed labels that corresponds to your<br />
connected equipment, then press .<br />
3 If you have an open input where no<br />
equipment is connected, you can label it as<br />
Skip. When you assign Skip, your <strong>TV</strong><br />
will skip over this input when you press<br />
the INPUT button. The Skip labeled input<br />
is grayed out in the input list.<br />
Using Features<br />
Full 1<br />
Full 2<br />
•Use the Auto Adjustment to adjust<br />
the display position and phase of the<br />
picture when the <strong>TV</strong> receives an input<br />
signal from the connected PC.<br />
23
Playing back Photo/Music<br />
via USB (Playing back<br />
Music for KDL-32BX330<br />
only)<br />
You can enjoy photo/music files stored in a<br />
Sony digital still camera or camcorder through<br />
a USB cable or USB storage device on your<br />
<strong>TV</strong>.<br />
1 Connect a supported USB device to the<br />
<strong>TV</strong>.<br />
2 The file or the folder list automatically<br />
appears.<br />
You can show the file or the folder list by<br />
selecting USB in the Input menu if the<br />
<strong>TV</strong> is in the other input after connecting<br />
the digital still camera or other device to<br />
the USB port.<br />
3 Press V/v/B/b to select a file or folder,<br />
then press .<br />
When you select a folder, select a file,<br />
then press .<br />
Playback starts.<br />
• USB playback is supported for the following<br />
music file format:<br />
– MP3 (files with the extension “.mp3” that<br />
have not been copyrighted)<br />
• Playback may not start automatically when<br />
some digital still cameras (such as cameras<br />
with internal memory) are connected.<br />
• The file name and folder name support only<br />
English.<br />
• When you connect a Sony digital still<br />
camera, set the camera’s USB connection<br />
mode to “Auto” or “Mass Storage.” For more<br />
information about USB connection mode,<br />
refer to the instructions supplied with your<br />
digital camera.<br />
• Use a USB storage device that is compliant<br />
with USB Mass Storage Class standards.<br />
Notes when playing back files<br />
• While the <strong>TV</strong> is accessing the data on the<br />
USB device, observe the following:<br />
– Do not turn off the <strong>TV</strong> or connected USB<br />
device.<br />
– Do not disconnect the USB cable.<br />
– Do not remove the USB device.<br />
The data on the USB device may be<br />
damaged.<br />
• Sony will not be held liable for any damage<br />
to, or loss of, data on the recording media due<br />
to a malfunction of any connected devices or<br />
the <strong>TV</strong>.<br />
• USB playback is supported for the following<br />
photo file formats:<br />
– JPEG (JPEG format files with the<br />
extension “.jpg” and conforming to DCF<br />
2.0 or Exif 2.21)<br />
24
Using the Menus<br />
The HOME button allows you to access a variety of <strong>TV</strong> settings.<br />
Navigating through <strong>TV</strong> Menus<br />
2, 3<br />
1, 4<br />
1 Press on the remote control to display the menu<br />
options.<br />
2 Press V/v/B/b to navigate on the menu or adjust the<br />
settings.<br />
3 Press to select or confirm.<br />
4 Press to exit.<br />
The following icons contain all of the necessary configurations to customize your <strong>TV</strong> settings.<br />
The options you can select may vary. Unavailable options are grayed out or not displayed.<br />
Picture: adjust the picture on your <strong>TV</strong> to fit your viewing preference.<br />
Sound: customize your sound settings to suit your audio preference. You can also change<br />
the settings to output the sound to your connected audio equipment.<br />
Screen: adjust the size and shape of the images you see on the screen.<br />
Channel: navigate your favorite channels and inputs and select the signal type, as well as<br />
autoprogram channels. You can also customize the channels you see and the labels assigned<br />
to them.<br />
Parental Lock: set the password and limit access to programming based on rating levels.<br />
You can also block channels and inputs.<br />
Setup: modify and customize a variety of general setting options.<br />
Using the Menus<br />
25
Using the Picture Settings<br />
Option<br />
Description<br />
Picture Mode Vivid<br />
Select for enhanced picture contrast and sharpness.<br />
Customized picture Standard Select for standard picture settings. Recommended for home<br />
viewing<br />
entertainment.<br />
Custom Select to store your preferred settings.<br />
Video This option is available for PC timing (HDMI or PC input) signal to<br />
enhance the video shown on the screen.<br />
Text<br />
This option is available for PC timing (HDMI or PC input) signal to<br />
enhance the text shown on the screen.<br />
Reset<br />
Resets the current Picture settings to their defaults, except Picture Mode.<br />
Picture<br />
Adjust to increase or decrease picture contrast.<br />
Brightness Adjust to brighten or darken the picture.<br />
Color<br />
Adjust to increase or decrease color intensity.<br />
Hue<br />
Adjust to increase or decrease the green tones.<br />
Color<br />
Cool<br />
Select to give the white colors a bluish tint.<br />
Temperature Neutral Select to give the white colors a neutral tint.<br />
White adjustment<br />
Warm 1/Warm Select to give the white colors a reddish tint. Warm 2 gives a redder<br />
2<br />
tint than Warm 1.<br />
Sharpness Adjust to sharpen or soften the picture.<br />
Noise Reduction Select to reduce the picture noise level. Select from High, Medium, Low and Off.<br />
Live Color Makes colors more vivid. Select from High, Medium, Low and Off.<br />
Adv. Contrast<br />
Enhancer<br />
Automatically adjusts contrast to the most suitable settings judging from the brightness<br />
of the screen. This setting is especially effective for dark scenes, and will increase the<br />
contrast distinction of the darker picture scenes. Select from High, Medium, Low and<br />
Off.<br />
26
Using the Sound Settings<br />
Option<br />
Sound Mode<br />
Customized<br />
sound listening<br />
Reset<br />
Equalizer<br />
Balance<br />
Steady Sound<br />
MTS Audio<br />
Enjoy stereo,<br />
bilingual and mono<br />
programs<br />
Alternate Audio<br />
Digital channels only<br />
Description<br />
Dynamic Enhances treble and bass.<br />
Standard Standard sound optimized for home use.<br />
Custom Select to store your preferred settings.<br />
Resets the current Sound settings to their defaults, except MTS Audio and Alternate<br />
Audio.<br />
Adjust allows you to select your frequency response curve. Select Reset to reset the<br />
Equalizer settings to the default values. (Available when Sound Mode is set to<br />
Custom.)<br />
Adjust to emphasize left or right speaker balance.<br />
Select On to stabilize the volume across all programs and commercials.<br />
Select Off to disable this function.<br />
Stereo Select for stereo reception when viewing a program broadcast in<br />
stereo.<br />
Auto SAP Select to automatically switch the <strong>TV</strong> to second audio programs<br />
when a signal is received. If no SAP signal is present, the <strong>TV</strong><br />
remains in Stereo mode.<br />
Mono Select for mono reception. Use to reduce noise during weak stereo<br />
broadcasts.<br />
Select among the available options to switch among the alternate audio streams. The<br />
program you are tuned to may be broadcasted in a different language in the alternate<br />
audio streams.<br />
Speakers <strong>TV</strong> Speakers Select to use the <strong>TV</strong> speakers.<br />
Audio System Select to use an external audio system for the <strong>TV</strong> sound. By<br />
selecting this option you are disabling the <strong>TV</strong> speakers.<br />
Using the Menus<br />
• MTS Audio is only available for analog programs.<br />
• Alternate Audio is only available if the program is broadcast with alternate audio streams.<br />
• You can also access Sound Mode, MTS Audio and Alternate Audio by using the OPTIONS<br />
button on the remote control.<br />
27
Option<br />
Wide Mode<br />
Using the Screen Settings<br />
Description<br />
Wide Zoom Fills the screen with minimum distortion.<br />
Normal Select to display 4:3 picture in original size when the original source is 4:3.<br />
Full Select to enlarge the picture horizontally to fill the screen when the<br />
original source is 4:3 (Standard definition source). When the original<br />
source is 16:9 (High-definition source), select this mode to display the<br />
16:9 picture in its original size.<br />
Zoom Select to enlarge the original picture without distorting the aspect ratio.<br />
Auto Wide On Select On to automatically change Wide Mode setting based on the<br />
content.<br />
Off If frequent screen changes are disturbing to you, select Off. Choose one<br />
of the Wide Mode options when this function is set to Off.<br />
PC Settings When a PC is connected to the <strong>TV</strong> and the PC input is selected, the PC settings screen<br />
appears instead of the Screen settings.<br />
Wide Mode Normal Select to display in the original image size.<br />
Full 1 Select to enlarge the picture to fill the display area,<br />
keeping its original aspect ratio.<br />
Full 2 Select to enlarge the picture to fill the display area.<br />
Auto Select to automatically adjust the display position and phase of the<br />
Adjustment picture when the <strong>TV</strong> receives an input signal from the connected PC.<br />
Note that Auto Adjustment may not work well with certain input<br />
signals. In such cases, manually adjust the options below.<br />
Phase Adjust after Pitch to fine tune overall sharpness.<br />
Pitch Adjust uneven sharpness on screen.<br />
Horizontal Allows you to move the position of the picture left and right.<br />
Center<br />
Vertical Allows you to move the position of the picture up and down.<br />
Center<br />
• Normal is not available when you are watching a 720p, 1080i or 1080p source.<br />
• For the PC Input Signal Reference Chart, see page 35.<br />
• Auto Adjustment, Phase and Pitch are not available with PC signal connected to HDMI input.<br />
28
Option<br />
Using the Channel Settings<br />
Description<br />
Favorites Select favorite channels and external inputs (page 22).<br />
Signal Type Cable Select if you are receiving cable channels via Cable <strong>TV</strong> provider.<br />
Antenna Select if you are using an antenna.<br />
Auto Program<br />
Show/Hide<br />
Channels<br />
Automatically sets up the channel list on the <strong>TV</strong> for all receivable channels.<br />
1 Select Auto Program.<br />
2 Select OK to start Auto Program.<br />
Allows you to show or hide channels that appear when you use the CH +/– buttons.<br />
1 Press V/v to scroll through the channels until you find the channel you want to<br />
show or hide. Then press to select it.<br />
2 Press V/v to determine if the channel will be shown or hidden. Then press to<br />
select it.<br />
Using the Menus<br />
• You should run Auto Program after changing the Signal Type setting.<br />
• Running Auto Program will clear the Favorites list.<br />
• Channels that you set to be hidden can be accessed by the 0-9 and buttons.<br />
• You can set channels to be hidden that are automatically set in Auto Program.<br />
29
Option<br />
Enter password<br />
Using the Parental Lock Settings<br />
Description<br />
The Parental Lock settings allow you to set up the <strong>TV</strong> to block programs according to<br />
their content and rating levels. Use 0-9 on the remote control to enter a four-digit<br />
password. The first time you create a password, confirm the password by entering it again.<br />
Change Password Select to change your password.<br />
Country U.S.A. Select to use U.S.A. ratings (page 31).<br />
Canada Select to use Canadian ratings (page 32).<br />
Rating Off Turn Parental Lock off. No programs are blocked from viewing.<br />
Child<br />
Maximum ratings permitted are:<br />
U.S.: <strong>TV</strong>-Y, <strong>TV</strong>-G, G<br />
Canada: C, G, <strong>TV</strong>-Y<br />
Youth<br />
Maximum ratings permitted are:<br />
U.S.: <strong>TV</strong>-PG, PG<br />
Canada: C8+, PG, 8 ans+, <strong>TV</strong>-PG<br />
Young Adult Maximum ratings permitted are:<br />
U.S.: <strong>TV</strong>-14, PG-13<br />
Canada: 14+, 13 ans+, <strong>TV</strong>-14<br />
Custom Select to set ratings manually.<br />
U.S.: See page 31 for details.<br />
Canada: See page 32 for details.<br />
Downloadable<br />
U.S. Rating<br />
Off<br />
Turn Downloadable U.S. Rating off. No programs that contain<br />
downloadable ratings are blocked from viewing.<br />
(Available only Custom Select to block programs based on downloadable ratings.<br />
in U.S.A. Clear All Select to clear the entire downloadable rating system.<br />
where advanced<br />
ratings exist)<br />
Unrated Allow<br />
Allows programs and movies that are broadcasted without a rating.<br />
(Available only<br />
when Country is<br />
Block<br />
Blocks all programs and movies that are broadcasted without a rating.<br />
set to U.S.A.)<br />
Channel Block Allows you to block channels regardless of program ratings.<br />
To View a Blocked Channel<br />
Press when tuned to the blocked channel then enter the password.<br />
30<br />
• You need your password for any future access into the Parental Lock settings. If you lose your<br />
password, see “Lost password” on page 45.<br />
• Selecting Clear All will delete the current Downloadable U.S. Rating menu and the menu will<br />
no longer be available until the <strong>TV</strong> is tuned to a channel that contains downloadable ratings.<br />
• If you block unrated <strong>TV</strong> programs, be aware that the following types of programs may be blocked:<br />
programs broadcasted from another country, emergency broadcasts, political programs, sports,<br />
news, public service announcements, religious programs and weather.
US Models: Selecting Custom Parental Lock Rating Options<br />
To select custom rating options for the U.S., select U.S.A. in the Country setting (page 30).<br />
Option<br />
Description<br />
Movie Rating G All children and general audience.<br />
PG<br />
Parental guidance suggested.<br />
PG-13 Parental guidance for children under 13.<br />
R<br />
Restricted viewing, parental guidance is suggested for children<br />
under 17.<br />
NC-17 and X No one 17 or under allowed.<br />
<strong>TV</strong> Rating Age-Based Ratings<br />
Block programs by <strong>TV</strong>-Y<br />
All children.<br />
their rating, content <strong>TV</strong>-Y7 Directed to children age 7 and older.<br />
or both<br />
<strong>TV</strong>-G<br />
General audience.<br />
<strong>TV</strong>-PG Parental guidance suggested.<br />
<strong>TV</strong>-14 Parents strongly cautioned.<br />
<strong>TV</strong>-MA Mature audience only.<br />
Content-Based Ratings<br />
FV<br />
Fantasy violence.<br />
D<br />
Suggestive dialogue.<br />
L<br />
Strong language.<br />
S<br />
Sexual situations.<br />
V<br />
Violence.<br />
Using the Menus<br />
• To ensure maximum blocking capability, set the Age-Based Ratings.<br />
(Continued)<br />
31
Canadian Models: Selecting Custom Parental Lock Rating Options<br />
To select custom rating options for Canada, select Canada in the Country setting (page 30).<br />
Option<br />
Description<br />
English Rating C All children.<br />
C8+ Children 8 years and older.<br />
G<br />
General programming.<br />
PG<br />
Parental guidance.<br />
14+ Viewers 14 and older.<br />
18+ Adult programming.<br />
French Rating G General programming.<br />
8 ans+ Not recommended for young children.<br />
13 ans+ Not recommended for ages under 13.<br />
16 ans+ Not recommended for ages under 16.<br />
18 ans+ Programming restricted to adults.<br />
U.S.A. Rating See “US Models” on page 31 for details.<br />
Viewing Blocked Programs<br />
You can view blocked programs by entering your password. Press when tuned to a blocked<br />
program, then enter the password. This temporarily deactivates the parental control feature. To<br />
reactivate the Parental Lock settings, turn off the <strong>TV</strong>. When the <strong>TV</strong> is turned on again, your<br />
Parental Lock settings are reactivated.<br />
32
Option<br />
Closed<br />
Captions<br />
(CC)<br />
Using the Setup Settings<br />
Description<br />
Allows you to select from several closed caption modes (for programs that are broadcast<br />
with closed captioning).<br />
CC Display On Closed Captions (CC) is turned on.<br />
Off Closed Captions (CC) is turned off.<br />
On when Closed Captions (CC) is turned on when the <strong>TV</strong> is<br />
Muting muted.<br />
Analog CC Allows you to select basic analog (EIA-608) closed caption options.<br />
CC1, CC2, Displays a printed version of the dialogue or sound effects<br />
CC3, CC4 of a program. (Should be set to CC1 for most programs.)<br />
Text1, Text2, Displays network/station information presented using<br />
Text3, Text4 either half or the whole screen (if available).<br />
Digital CC When the digital closed caption service is available, select from the<br />
Service 1-6 or CC1-4.<br />
Digital CC Allows you to make additional settings for digital closed caption<br />
Options options. Select As Broadcast or Custom. The Custom option is<br />
available on the Digital CC setting.<br />
Custom Allows you to customize the following settings:<br />
Character Small, Standard, Large<br />
Size<br />
Character Style 1-7<br />
Style<br />
Character Color 1-8<br />
Color<br />
Character Solid, Translucent<br />
Opacity<br />
Edge Type None, Raised, Depressed, Outline,<br />
Left Shadow, Right Shadow<br />
Edge Color Color 1-8<br />
Background Color 1-8<br />
Color<br />
Background Solid, Translucent<br />
Opacity<br />
Using the Menus<br />
• You can turn on Closed Captions (CC) options (On, Off or On when Muting) by pressing the<br />
CC button on the remote control.<br />
(Continued)<br />
33
Option Description<br />
Sleep Timer Set the time in minutes (Off, 15, 30, 45, 60, 90, or 120) that you would like the <strong>TV</strong> to<br />
remain on before shutting off automatically.<br />
Language Select to display all on-screen settings in your language of choice: English, Español,<br />
Français.<br />
Label Video<br />
Inputs<br />
Allows you to identify A/V equipment you connected to the <strong>TV</strong>, such as a VCR, DVD, etc.<br />
For example, if you have a DVD player connected to the COMPONENT IN jack, you can<br />
select the label DVD for the Component input. Then when you press INPUT to change<br />
inputs, the video label you assigned to that input appears on screen.<br />
1 Press V/v to highlight the video input (HDMI, Video, Component, PC) to which<br />
you want to assign a label. Then press to select the input.<br />
2 Press V/v to highlight one of the displayed labels. Then press to select the label.<br />
Power Saving Select from Off, Low, High, Picture Off to adjust your <strong>TV</strong>’s power consumption. By<br />
selecting the High option, you will reduce the power consumption more than the other<br />
available settings.<br />
While Picture Off is set, pressing VOL +/– or MUTING buttons will not disable this<br />
function. Press other buttons to disable it.<br />
Auto Shut Off Select On to automatically power off the <strong>TV</strong> when no input signal is detected for a certain<br />
period of time. Select Off to disable this function.<br />
Product<br />
Support<br />
Initial Setup<br />
Contact Sony Sony contact information is available on this screen for your<br />
convenience. <strong>TV</strong> specific information such as Model Name, Serial<br />
Number, Software Version and downloadable ratings (if available from<br />
the <strong>TV</strong>) are displayed here.<br />
Signal Press to display the diagnostics information for the current signal.<br />
Diagnostics<br />
If you missed the Initial Setup when you first connected the <strong>TV</strong> or if you want to scan all<br />
receivable channels, select Initial Setup. Follow the instructions on the screen. Some<br />
settings such as Picture, Sound, and Parental Lock will not be affected by this Initial<br />
Setup. If you wish to return your <strong>TV</strong> to factory settings, please see the Troubleshooting<br />
section on page 45.<br />
34<br />
• You can assign following labels for each input:<br />
–, Cable, Receiver, Satellite, VCR, DVD/BD, DVR, Audio System, Home Theater,<br />
Game, Camcorder, Digital Camera, PC, Skip (except PC IN)<br />
–, Skip (for PC IN)<br />
•“–” indicates that no labels are assigned.<br />
• If you select Skip, your <strong>TV</strong> skips this input when you press the INPUT button.<br />
• The Skip label is useful for inputs to which no equipment is connected.<br />
• Favorite channel list will be cleared each time you run the Initial Setup.
Other Information<br />
PC Input Signal Reference Chart for PC and HDMI IN<br />
After connecting the PC to the <strong>TV</strong>, set the output signal from the PC according to the chart below.<br />
Resolution<br />
Signals<br />
Horizontal<br />
(Pixel)<br />
× Vertical<br />
(Line)<br />
Horizontal<br />
frequency (kHz)<br />
Vertical<br />
frequency (Hz)<br />
Standard<br />
VGA 640 × 480 31.5 60 VGA<br />
SVGA 800 × 600 37.9 60 VESA Guidelines<br />
XGA 1,024 × 768 48.4 60 VESA Guidelines<br />
WXGA 1,280 × 768 47.4 60 VESA<br />
1,280 × 768 47.8 60 VESA<br />
1,360 × 768 47.7 60 VESA<br />
* The 1080p timing when applied to the HDMI input will be treated as a video timing and not PC timing.<br />
This affects Picture settings and Wide Mode settings.<br />
Other Information<br />
• This <strong>TV</strong>’s PC input does not support Sync on Green or Composite Sync.<br />
• This <strong>TV</strong>’s PC VGA input does not support interlaced signals.<br />
• Your PC must support one of the above PC input signals to display on the television.<br />
• In plug and play, signals with a 60 Hz vertical frequency will be detected automatically. (PC<br />
reboot may be necessary.)<br />
35
Using a Wall-Mount Bracket<br />
Your <strong>TV</strong> can be mounted on a wall using a Wall-Mount Bracket (not supplied) out of the box as<br />
packaged. Some larger size <strong>TV</strong> may require removing the Table-Top Stand; refer to the<br />
instructions provided with the <strong>TV</strong>.<br />
Prepare the <strong>TV</strong> for the Wall-Mount Bracket before making cable connections.<br />
For product protection and safety reasons, Sony strongly recommends that you use the Wall-<br />
Mount Bracket designed for your <strong>TV</strong> and the installation should be performed by a Sony<br />
dealer or licensed contractor.<br />
• Follow the instruction guide provided with the Wall-Mount Bracket for your model. Sufficient<br />
expertise is required in installing this <strong>TV</strong>, especially to determine the strength of the wall for<br />
withstanding the <strong>TV</strong>’s weight.<br />
• Be sure to use the screws supplied with the Wall-Mount Bracket when attaching the mounting<br />
hooks to the <strong>TV</strong> set.<br />
The supplied screws are designed as indicated by illustration when measured from the attaching<br />
surface of the mounting hook.<br />
The diameter and length of the screws differ depending on the Wall-mount bracket model. Use of<br />
screws other than those supplied may result in internal damage to the <strong>TV</strong> set or cause it to fall,<br />
etc.<br />
8-12 mm<br />
Screw (supplied with the Wall-Mount Bracket)<br />
Mounting Hook<br />
Hook attachment on rear of <strong>TV</strong> set<br />
• Be sure to store the unused screws and Table-Top Stand in a safe place until you are ready to<br />
attach the Table-Top Stand. Keep the screws away from small children.<br />
36<br />
• Read the supplied Safety Booklet for additional safety information.
Installing the Wall-Mount Bracket<br />
To Customers<br />
Your <strong>TV</strong> can be wall-mounted using SU-WL500 Wall-Mount Bracket (sold separately).<br />
Please provide this installation information as well as the instruction supplied with SU-WL500<br />
Wall-Mount Bracket to your installer.<br />
To Sony Dealers and Licensed Contractors<br />
To avoid injury and property damage, read these instructions carefully. Periodic inspection and<br />
maintenance is highly recommended to ensure that <strong>TV</strong> is securely mounted.<br />
Note when installing<br />
When using the SU-WL500 Wall-Mount Bracket, the space between the wall and the <strong>TV</strong> will be 6<br />
cm (2 3 /8 inches). Use this space to route cables to the <strong>TV</strong>.<br />
6 cm (2 3 /8 inches)<br />
Other Information<br />
(Continued)<br />
37
For SU-WL500<br />
Step 1: Checking the parts required for the installation<br />
Open the Wall-Mount Bracket package and check the contents for all required parts along with the<br />
Instructions.<br />
Step 2: Deciding on the installation location<br />
Decide where you want to install your <strong>TV</strong>. Refer to the <strong>TV</strong> installation dimensions table.<br />
Refer to the Instructions for SU-WL500.<br />
Dimension Table<br />
Unit: mm<br />
(inches)<br />
<strong>TV</strong><br />
Dimensions<br />
Screen<br />
center<br />
dimensions<br />
Figures in the above table may differ slightly depending on the installation.<br />
CAUTION<br />
The wall that the <strong>TV</strong> will be installed on should be capable of supporting a weight of at least four<br />
times that of the <strong>TV</strong>. Refer to your <strong>TV</strong>’s operating instructions for its weight.<br />
Step 3: Installing the Base Bracket on the wall<br />
Refer to the Instructions for SU-WL500.<br />
Length for each mounting angle<br />
Angle (0°) Angle (20°)<br />
Weight<br />
<strong>TV</strong> Model A B C D E F G H <strong>TV</strong> ×4<br />
KDL-32BX330/<br />
KDL-32BX331<br />
Screen center point<br />
772<br />
(30 1 /2)<br />
484<br />
(19 1 /8)<br />
166<br />
(6 5 /8)<br />
419<br />
(16 1 /2)<br />
142<br />
(5 5 /8)<br />
287<br />
(11 3 /8)<br />
457<br />
(18)<br />
453<br />
(17 7 /8)<br />
5.8 kg<br />
(12.8 lb.)<br />
23.2 kg<br />
(51.2 lb.)<br />
38
Step 4: Preparing the <strong>TV</strong> for wall mount installation<br />
Follow the steps below to prepare for installing the <strong>TV</strong>.<br />
1 Secure the Mounting Hook to the rear of the <strong>TV</strong>.<br />
Determine the screw locations and secure the Mounting Hooks to the rear of the <strong>TV</strong>. Refer to<br />
the “Screw and Hook Locations Diagram/Table” (see page 40).<br />
1 Secure the Attachment Parts to the rear of the <strong>TV</strong> using the two screws. Screws (+PSW 5 ×<br />
16) are common for attaching the Table-Top Stand.<br />
Attachment Parts (supplied)<br />
Screw<br />
(+PSW 5 × 16)<br />
(supplied)<br />
Thick and soft cloth<br />
Other Information<br />
• When installing the <strong>TV</strong> on the wall, one screw will be remained.<br />
Be sure to store it in safe place, keeping it away from children.<br />
(Continued)<br />
39
2 Secure the Mounting Hooks to the rear of the <strong>TV</strong> using the four screws supplied with the<br />
Wall-Mount Bracket.<br />
Screw<br />
(+PSW 6 × 16)<br />
Mounting Hook<br />
3 Be sure to tighten the screws with equal torque strength.<br />
Screw and Hook Locations Diagram/Table<br />
<strong>TV</strong> Model Screw location Hook location<br />
KDL-32BX330/32BX331 d, g c<br />
Screw location<br />
When installing the Mounting Hooks on the <strong>TV</strong>.<br />
Hook location<br />
When installing the <strong>TV</strong> onto Base Bracket.<br />
Wall<br />
<strong>TV</strong><br />
40
2 Adjust the angle of the Mounting Hook.<br />
Refer to the Instructions for SU-WL500.<br />
Step 5: Installing the <strong>TV</strong> on the wall<br />
Refer to the Instructions for SU-WL500.<br />
~<br />
• When you put the <strong>TV</strong> back on the Table-Top Stand, reverse the above steps.<br />
• When moving the <strong>TV</strong>, do not squeeze the bottom of the front panel too tight.<br />
• Remove the screws or install the Mounting Hook on a stable and level surface.<br />
Other Information<br />
41
Troubleshooting<br />
Many of the poor pictures and poor sound conditions are related to improper connection of the cables; refer to<br />
the Quick Setup Guide provided for connections.<br />
If you have questions, service needs, or require technical assistance related to the use of your Sony <strong>TV</strong> even<br />
after you read this operating instructions manual, contact the following:<br />
For US Support:<br />
http://www.sony.com/tvsupport or call 1-800-222-SONY (7669)<br />
For Canadian Support:<br />
http://www.sony.ca/support or call 1-877-899-SONY (7669)<br />
Things to consider<br />
• Check the input selection by pressing the INPUT button. You may be watching the wrong input.<br />
• If you cannot hear sound from the <strong>TV</strong>, you may have accidentally pressed the MUTING button on your<br />
remote control; press the MUTING button again or press VOL + to deactivate muting.<br />
• If the remote control is not functioning properly, the batteries may be installed incorrectly or may be low or<br />
an object or light may be interfering with the remote control.<br />
• To reset the <strong>TV</strong> to factory default settings:<br />
1 Turn on the <strong>TV</strong>.<br />
2 Press and hold down the V button on the remote, press the 1 button on the <strong>TV</strong> set. (The <strong>TV</strong> will turn<br />
itself off, then back on again.)<br />
3 Release the V button when the <strong>TV</strong> is turn on.<br />
IMPORTANT: The factory reset will clear all of your customized settings including the Parental Lock<br />
setting.<br />
When the Password is lost or cannot remember, enter the master password: 4357. This password clears your<br />
previous password and allows you to enter a new password.<br />
Condition<br />
Explanation/Solution<br />
No picture<br />
No picture • Check the Power Saving settings (see page 34).<br />
Cannot receive any • Make sure the power cord is connected securely.<br />
channels<br />
• Turn on the power of the <strong>TV</strong>.<br />
• Check cable/antenna connections.<br />
• Make sure the Signal Type setting is correct for your <strong>TV</strong> signal source.<br />
<strong>TV</strong> is locked to one channel • Perform Auto Program to add receivable channels that are not present<br />
in the <strong>TV</strong>’s memory (see pages 17 and 29).<br />
Cannot receive or select<br />
channels<br />
The <strong>TV</strong> turns off<br />
automatically<br />
No picture from some video<br />
sources<br />
• Perform Auto Program to add receivable channels that are not present<br />
in the <strong>TV</strong>’s memory (see pages 17 and 29).<br />
• To receive or select cable channels, make sure that Signal Type in the<br />
Channel settings is set to Cable (see page 29). To receive or select<br />
UHF channels over an antenna, make sure Signal Type is set to<br />
Antenna.<br />
•Check if Sleep Timer is activated (see page 34).<br />
•Check the Auto Shut Off settings (see page 34).<br />
• Check the connection between the optional video equipment and the <strong>TV</strong>.<br />
•Press INPUT on the remote control (see page 23).<br />
42
Condition<br />
Poor picture<br />
Picture quality not as good<br />
as viewed at the store<br />
Broadcast HD formats have<br />
poor quality<br />
Double images or ghosts<br />
Only snow and noise appear<br />
on the screen<br />
Dotted lines or stripes<br />
No color / Dark picture /<br />
Color is not correct / The<br />
picture is too bright<br />
Noisy picture<br />
Blurry picture / Poor color<br />
No sound / Noisy sound<br />
No sound but good picture<br />
Audio noise<br />
No audio or low audio with<br />
Home Theater System<br />
Explanation/Solution<br />
• Picture quality depends on the signal content. See Quick Setup Guide<br />
(supplied) to display the best possible picture for that signal.<br />
• Content and signal quality are controls by the signal provider. Many HD<br />
channels and content are actually upscaled versions of standarddefinition<br />
broadcasts. The picture is affected by the quality of the signal<br />
received, which varies between channel and program.<br />
• Check cable/antenna connections.<br />
• Check the antenna location and direction.<br />
• Check if the antenna is broken or bent.<br />
• Check if the antenna has reached the end of its serviceable life. (3-5 years<br />
in normal use, 1-2 years at the seaside.)<br />
• Keep the <strong>TV</strong> away from noise sources such as cars, motorcycles, or hairdryers.<br />
• If using 300 ohm twin lead, move the excess lead away from the <strong>TV</strong> or<br />
try using 75-ohm coaxial cable instead.<br />
•Adjust the Picture Mode options in the Picture settings (see page 26).<br />
• If you set the Power Saving mode to Low or High, it will enhance the<br />
black level.<br />
• Make sure that the antenna is connected using a 75-ohm coaxial cable<br />
(not supplied).<br />
• Keep the antenna cable away from other connecting cords.<br />
• To avoid <strong>TV</strong> interference, make sure to use an undamaged antenna cable.<br />
• Transporting the <strong>TV</strong> from a cold to a warm location or a sudden change<br />
in room temperature may cause moisture condensation, resulting in a<br />
blurry picture or poor color. Turn off your <strong>TV</strong> and wait a few hours<br />
before powering on again.<br />
• Check the volume control.<br />
• Press MUTING or VOL + so that “Muting” disappears from the screen (see<br />
page 19).<br />
•Set Speakers to <strong>TV</strong> Speakers in the Sound settings (see pages 27). If it is<br />
set to Audio System, sound is not output from the <strong>TV</strong>’s speakers regardless<br />
of the <strong>TV</strong>’s volume control.<br />
• When using HDMI input with Super Audio CD or DVD-Audio,<br />
DIGITAL AUDIO OUT (OPTICAL) may not provide an audio signal.<br />
• When tuned to a digital channel with Alternate Audio, the broadcaster<br />
may not be broadcasting your preferred Alternate Audio language.<br />
Press OPTIONS, highlight and select Alternate Audio, and change the<br />
Alternate Audio language (see page 27).<br />
• Make sure that the antenna is connected using a 75-ohm coaxial cable<br />
(not supplied).<br />
• Keep the antenna cable away from other connecting cords.<br />
• To avoid <strong>TV</strong> interference, make sure to use an undamaged antenna cable.<br />
•Set Speakers to Audio System in the Sound settings (see page 27).<br />
Other Information<br />
(Continued)<br />
43
Condition<br />
PC Input<br />
No picture / No signal<br />
• Confirm the PC is correctly connected to the <strong>TV</strong> with either the PC IN<br />
(with an HD15 cable) or with the HDMI IN.<br />
• Ensure the output signal from the PC is one of the formats listed on page<br />
35.<br />
• Turn the PC off. Confirm the PC connection and restart the PC. Plug-andplay<br />
will auto-detect the <strong>TV</strong> and correctly set up PC timing.<br />
• Verify the PC is not in standby or hibernation mode.<br />
Poor Picture • Adjust the resolution (see page 35).<br />
• Adjust Pitch and Phase.<br />
General<br />
<strong>TV</strong> screen/the rear of the<br />
<strong>TV</strong> feels warm<br />
Wide Mode changes<br />
automatically<br />
Suddenly the picture gets<br />
smaller<br />
“Black box” on screen<br />
Black bands appear at the<br />
edges of the screen<br />
Certain programs on DVD<br />
or other digital sources<br />
display a loss of detail,<br />
especially during fastmotion<br />
or dark scenes<br />
Explanation/Solution<br />
• Due to the thin profile of this television, the heat generated by the <strong>LCD</strong><br />
panel backlight and supporting electronics will be more noticeable. This<br />
is normal operation and not a cause for concern.<br />
•Check the Auto Wide option in the Screen settings (see page 28).<br />
• The picture gets smaller during the commercials due to the method in<br />
which the provider broadcasts their content. When HD content channels<br />
switch to SD content (commercials), the picture may be small with a<br />
black border.<br />
• Auto Wide will not expand the picture during these content changes<br />
since the content information is regulated by the channel signal provider.<br />
You can manually change the Wide Mode if you prefer (see page 22).<br />
This setting will remain in effect until you change the channel or input or<br />
manually change the Wide Mode again.<br />
• You have selected a text option and no text is available (see page 33). To<br />
turn off this feature, set the CC Display option to Off. If you were<br />
trying to select closed captioning, select CC1 instead of Text1-4.<br />
• Some wide screen programs are filmed in aspect ratios that are greater<br />
than 16:9 (this is especially common with theatrical releases). Your <strong>TV</strong><br />
will show these programs with black bands at the top and bottom of the<br />
screen. For more details, check the documentation that came with your<br />
DVD/Blu-ray (or contact your program provider).<br />
• Programs in 4:3 aspect ratio will have bands on left and right sides of the<br />
screen.<br />
• Programs broadcast in HD formats (720p and 1080i) with 4:3 content<br />
will commonly have black bands on the left and right sides of the screen<br />
which are added by the broadcaster (see image on left).<br />
• Auto Wide will not expand the picture when the black bands on the<br />
sides of the screen are added by the broadcaster. You can manually<br />
change the Wide Mode to Wide Zoom, or Zoom to fill the screen,<br />
which will remain in affect until you change the channel or input or<br />
manually change the Wide Mode again.<br />
• This is due to the digital compression of the source content used by<br />
certain digital broadcasts and DVDs which may cause your <strong>TV</strong>’s screen<br />
to display less detail than usual, or cause artifacts (small blocks or dots,<br />
pixelations) to appear on your screen. These signal compressions are<br />
more visible and are dependent on the clarity and resolution of the <strong>TV</strong>.<br />
44
Condition<br />
Remote control does not<br />
operate<br />
Some digital cable channels<br />
are not being displayed<br />
Some photo or music files<br />
are not displaying from my<br />
USB equipment<br />
Photo images appear small<br />
in the screen<br />
Photo images or folders<br />
take time to display<br />
Lost password<br />
How to reset the <strong>TV</strong> to<br />
factory settings<br />
Explanation/Solution<br />
• To determine if the problem is with the remote control or not, press a<br />
button on the <strong>TV</strong>.<br />
• Check the polarity of the batteries or replace the batteries.<br />
• Point the remote control at the remote control sensor located at the front of<br />
the <strong>TV</strong>.<br />
• Keep the remote control sensor area clear from obstacles.<br />
• Fluorescent lamps can interfere with your remote control operation; try<br />
turning off the fluorescent lamps.<br />
• Certain cable companies have limitations on the broadcast of digital<br />
cable channels. Check with your cable company for more information.<br />
• The digital cable channel may be set to Hidden in the Show/Hide<br />
Channels setting (see page 29).<br />
• The accessible file or folder limit in a directory is 1,000 for USB<br />
connected equipment. This limit includes non-supported files or just<br />
folders. Files or folders are populated based on their time stamps. Photo,<br />
music files or folders exceeding the limit will not be displayed.<br />
• Set display size to expanded.<br />
• Whether or not photo images can or cannot be displayed in full-screen<br />
depends on the resolution or aspect ratio of the file.<br />
• Depending on the image dimension, file size, and number of files in a<br />
folder, some photo images or folders take time to display.<br />
• The first time a camera is connected to the <strong>TV</strong> via USB cable, it may take<br />
up to a couple of minutes for the photos to display.<br />
• Select the Password settings on the Parental Lock settings, then enter<br />
the following master password: 4357. This password clears your previous<br />
password and allows you to enter a new password (see page 30).<br />
• Turn on the <strong>TV</strong>. While holding down V on the remote control, press 1 on<br />
the <strong>TV</strong>. (The <strong>TV</strong> will turn itself off, then back on again.) Release V.<br />
IMPORTANT: The reset will clear all of your customized settings<br />
including the Parental Lock setting.<br />
Other Information<br />
45
Important Notices<br />
Declaration of Conformity<br />
Trade Name: SONY<br />
Model: KDL-32BX330 / 32BX331<br />
Responsible Party: Sony Electronics Inc.<br />
Address: 16530 Via Esprillo,<br />
San Diego, CA 92127 U.S.A.<br />
Telephone Number: 858-942-2230<br />
This device complies with part 15 of the FCC rules.<br />
Operation is subject to the following two conditions: (1)<br />
This device may not cause harmful interference, and (2)<br />
this device must accept any interference received,<br />
including interference that may cause undesired<br />
operation.<br />
For Customers in Canada<br />
This Class B digital apparatus complies with Canadian<br />
ICES-003.<br />
FCC Related Information<br />
This equipment has been tested and found to comply with<br />
the limits for a Class B digital device, pursuant to Part 15<br />
of the FCC Rules. These limits are designed to provide<br />
reasonable protection against harmful interference in a<br />
residential installation. This equipment generates, uses and<br />
can radiate radio frequency energy and, if not installed and<br />
used in accordance with the instructions, may cause<br />
harmful interference to radio communications. However,<br />
there is no guarantee that interference will not occur in a<br />
particular installation. If this equipment does cause<br />
harmful interference to radio or television reception, which<br />
can be determined by turning the equipment off and on, the<br />
user is encouraged to try to correct the interference by one<br />
or more of the following measures:<br />
❑ Reorient or relocate the receiving antenna.<br />
❑ Increase the separation between the equipment and<br />
receiver.<br />
❑ Connect the equipment into an outlet on a circuit<br />
different from that to which the receiver is connected.<br />
❑ Consult the dealer or an experienced radio/<strong>TV</strong><br />
technician for help.<br />
Pursuant to FCC regulations, you are cautioned that any<br />
changes or modifications not expressly approved in this<br />
manual could void your authority to operate this<br />
equipment.<br />
The shielded interface cable recommended in this manual<br />
must be used with this equipment in order to comply with<br />
the limits for a digital device pursuant to Subpart B of Part<br />
15 of FCC Rules.<br />
Compatible Wall-Mount Bracket Information<br />
Use SU-WL500 Sony Wall-Mount Bracket with your <strong>TV</strong><br />
model.<br />
Use with other Wall-Mount Brackets may cause instability<br />
and could result in property damages or injury.<br />
Note<br />
This television includes a QAM demodulator which should<br />
allow you to receive unscrambled digital cable television<br />
programming via subscription service to a cable service<br />
provider. Availability of digital cable television<br />
programming in your area depends on the type of<br />
programming and signal provided by your cable service<br />
provider.<br />
For Customers in the United States<br />
The lamp in this product contains mercury.<br />
Disposal of these materials may be regulated<br />
due to environmental considerations. For<br />
disposal or recycling information, please<br />
contact your local authorities or the<br />
Telecommunications Industry Association<br />
(www.eiae.org).<br />
To Customers<br />
Sufficient expertise is required for <strong>TV</strong> installations. Be<br />
sure to subcontract the installation to a Sony dealer or<br />
licensed contractor and pay adequate attention to safety<br />
during the installation.<br />
Pour les clients résidant au Canada<br />
Cet appareil numérique de la classe B est conforme à la<br />
norme NMB-003 du Canada.<br />
Information sur le support de fixation murale<br />
compatible<br />
Utilisez le support de fixation murale SU-WL500 Sony<br />
avec votre modèle de téléviseur.<br />
L’utilisation d’un autre support de fixation murale peut<br />
provoquer l’instabilité de l’appareil et causer des blessures<br />
ou des dommages matériels.<br />
46
Specifications<br />
Model name KDL-32BX330 KDL-32BX331<br />
System<br />
Television system<br />
NTSC: American <strong>TV</strong> standard<br />
ATSC (8VSB terrestrial): ATSC compliant 8VSB<br />
QAM on cable: ANSI/SCTE 07 2000 (Does not include CableCARD functionality)<br />
Channel coverage Analog terrestrial: 2 - 69 / Digital terrestrial: 2 - 69<br />
Analog Cable: 1 - 135 / Digital Cable: 1 - 135<br />
Panel system<br />
<strong>LCD</strong> (Liquid Crystal Display) Panel<br />
Speaker output 6 W + 6 W 8 W + 8 W<br />
Input/Output jacks<br />
CABLE/ANTENNA<br />
75-ohm external terminal for RF inputs<br />
VIDEO IN<br />
VIDEO: 1 Vp-p, 75 ohms unbalanced, sync negative<br />
AUDIO: 500 mVrms (Typical) / Impedance: 47 kilohms<br />
COMPONENT IN<br />
YPBPR (Component Video): Y: 1.0 Vp-p, 75 ohms unbalanced, sync negative / PB: 0.7 Vp-p, 75 ohms<br />
PR: 0.7 Vp-p, 75 ohms / Signal format: 480i, 480p, 720p, 1080i, 1080p<br />
AUDIO: 500 mVrms (Typical) / Impedance: 47 kilohms<br />
HDMI IN 1/2 HDMI: Video: 480i, 480p, 720p, 1080i, 1080p, 1080/24p<br />
Audio: Two channel linear PCM 32, 44.1 and 48 kHz, 16, 20 and 24bits, Dolby Digital<br />
PC Input (see page 35)<br />
DIGITAL AUDIO OUT<br />
PCM/Dolby Digital optical signal<br />
(OPTICAL)<br />
AUDIO OUT (FIX)<br />
Stereo mini jack, 500 mVrms, (Typical)<br />
PC IN<br />
D-sub 15-pin, analog RGB, 0.7 Vp-p, 75 ohms, positive<br />
See the PC Input Signal Reference Chart for PC and HDMI IN on page 35.<br />
PC/HDMI IN 1 AUDIO INPUT Stereo mini jack, 500 mVrms, (Typical) / Impedance: 47 kilohms<br />
USB JPEG, MP3 JPEG<br />
Power and others<br />
Power requirement<br />
120 V AC, 60 Hz<br />
Power consumption<br />
in use<br />
84 W<br />
in standby<br />
Less than 0.3 W with 120 V AC<br />
Screen size<br />
(inches measured diagonally)<br />
31.5<br />
(32 class)<br />
Display resolution<br />
1,388 dots (horizontal) × 768 lines (vertical)<br />
Speaker/Full range (2) (mm)<br />
(inches)<br />
30 × 100<br />
(1 1 /5 × 4)<br />
Dimensions with stand (mm)<br />
(inches)<br />
772 × 526 × 207<br />
30 1 /2 × 20 3 /4 × 8 1 /4<br />
without stand (mm)<br />
(inches)<br />
• Optional accessories availability depends on its stock.<br />
• Design and specifications are subject to change without notice.<br />
772 × 484 × 82<br />
30 1 /2 × 19 1 /8 × 3 1 /4<br />
wall-mount hole pattern (mm) 200 × 300<br />
wall-mount screw size (mm) M6 (length: refer to diagram on page 36)<br />
Mass<br />
with stand (kg)<br />
(lb.)<br />
6.3<br />
13.9<br />
without stand (kg)<br />
(lb.)<br />
5.8<br />
12.8<br />
Supplied accessories<br />
Remote control RM-YD072 (1)/Size AA batteries (2)/Operating Instructions (1)/Quick Setup Guide<br />
(1)/Warranty Card (1)/Safety and Regulatory Booklet (1)/Software License (1)/Stand installation<br />
guide (1)/Table-Top Stand (1)/Screw (3)/Attachment Parts (2)<br />
Optional accessories<br />
Connecting cables / Wall-Mount Bracket: SU-WL500<br />
Other Information<br />
47
Online<br />
Registration:<br />
For Your Convenience<br />
Be sure to register your <strong>TV</strong>.<br />
United States<br />
Canada<br />
http://productregistration.sony.com<br />
http://www.sony.ca/registration<br />
4-420-038-11(2)<br />
© 2012 Sony Corporation Printed in U.S.A