2118 Quick Vision - Mitutoyo America Corporation
2118 Quick Vision - Mitutoyo America Corporation
2118 Quick Vision - Mitutoyo America Corporation
You also want an ePaper? Increase the reach of your titles
YUMPU automatically turns print PDFs into web optimized ePapers that Google loves.
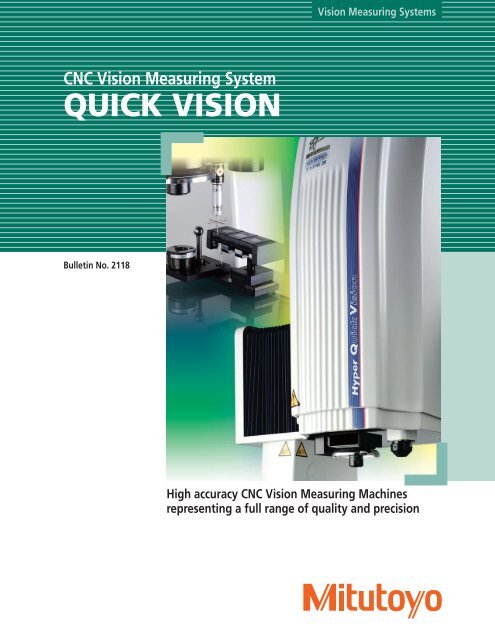
<strong>Vision</strong> Measuring Systems<br />
CNC <strong>Vision</strong> Measuring System<br />
QUICK VISION<br />
Bulletin No. <strong>2118</strong><br />
High accuracy CNC <strong>Vision</strong> Measuring Machines<br />
representing a full range of quality and precision
QUICK VISION:<br />
Focusing on the essentials<br />
VISION MEASURING<br />
MACHINES<br />
On the production line, in the quality control room or<br />
the laboratory, <strong>Mitutoyo</strong> offers innovative solutions<br />
for all your optical measurement requirements using<br />
state-of-the-art image processing technology. Even the<br />
most demanding customers will find an off-the-shelf<br />
instrument that suits their needs, or one that can be<br />
customized to do the job.<br />
This brochure gives you a summary of <strong>Mitutoyo</strong>’s versatile<br />
range of vision measuring machines and points you<br />
straight to the perfect device or system for your individual<br />
measuring tasks. In this brochure you will find all the<br />
essential facts on device specifications, configurations,<br />
add-ons and software.<br />
This quick, sure and efficient guide will help you to find<br />
the system you need. More detailed individual product<br />
brochures will then give you further information on the<br />
system of your choice.<br />
Whichever machine you choose, with vision measurement<br />
technology from <strong>Mitutoyo</strong>, you can be sure of the<br />
experience, competence and performance of one of the<br />
world’s leading measurement technology specialist and<br />
customer-oriented service without comparison.<br />
<strong>Mitutoyo</strong>: Right in the picture when it comes to precision
<strong>Quick</strong> <strong>Vision</strong> Series Evolving Toward Providing<br />
True Solutions<br />
Continuous Evolution<br />
With sophisticated edge detection capabilities, an illumination wizard and advanced user-friendly software the <strong>Quick</strong> <strong>Vision</strong> Series<br />
satisfies the demand for compactness, high accuracy and high throughput in the field of non-contact dimensional measurement.<br />
<strong>Mitutoyo</strong> has marketed CNC vision measuring machines, including the <strong>Quick</strong> <strong>Vision</strong> Series, since the mid-1980s and is proud of its superb delivery record in<br />
the global marketplace.<br />
Today, measurement professionals are becoming more and more sophisticated, demanding higher accuracy, compactness and a smaller footprint. <strong>Mitutoyo</strong><br />
has recently relaunched the <strong>Quick</strong> <strong>Vision</strong> Series, which already has a good reputation, to address such demands. The new <strong>Quick</strong> <strong>Vision</strong> Series highly<br />
integrates advanced optical, sensing, software and vision measuring technologies which <strong>Mitutoyo</strong> has developed to help customers solve the challenges they<br />
face today and beyond.<br />
Traceability<br />
<strong>Mitutoyo</strong> provides calibration services accredited in three length fields (laser<br />
sources, end standards, and line standards).<br />
Also, being the manufacturer of the most comprehensive range of precision<br />
measuring instruments available, <strong>Mitutoyo</strong> provides a number of measuring<br />
instruments traceable to national standards, such as coordinate measuring<br />
machines, optical measuring instruments, and form measuring instruments,<br />
as well as vision measuring machines.<br />
Optical<br />
The optical system employed in the <strong>Quick</strong> <strong>Vision</strong> Series is based on optical<br />
technology that <strong>Mitutoyo</strong> has accumulated over many years.<br />
This is a practically ideal optical system where the image is flat across the<br />
entire view field of view with minimal flare. This is achieved with <strong>Mitutoyo</strong><br />
designed and manufactured objectives.<br />
Production of linear scales<br />
Iodine absorption stabilized<br />
He-Ne (633 nm) laser for length<br />
measurement<br />
Design and production of lenses<br />
Software<br />
Knowledge-Based Software to Control <strong>Quick</strong> <strong>Vision</strong><br />
QVPAK is a constantly evolving software package.<br />
In combination with various other applications, QVPAK delivers multifunctional<br />
analysis along with high-speed processing and simple operation.<br />
Kawasaki Research and<br />
Development Center<br />
Laser Beam Safety Precautions<br />
This machine uses a low-power Laser beam which conforms to the provisions of<br />
CLASS 2 (visible light) of JIS C6802 “Safety of laser products” for measurement.<br />
The CLASS 2 warning/<br />
description label as shown<br />
at right is attached to the<br />
main unit.<br />
3
<strong>Quick</strong> <strong>Vision</strong> Mea<br />
QV ELF 2.0 µm<br />
Standard Accuracy<br />
• Stage Size: 250 x 200 x 200mm<br />
(9.84” x 7.87” x 7.87”)<br />
• 0.1 µm High Resolution Glass Scales<br />
• White LED Programmable Ring Light<br />
• <strong>Mitutoyo</strong> High Resolution Optics<br />
Highest Range in the Industry (16x-4800x)<br />
• Pattern Focus is Standard<br />
• Patented automatic lighting tools<br />
QV APEX 1.5 µm<br />
High Accuracy<br />
• Stage Size for the 302: 300 x 200 x 200mm<br />
(11.81” x 7.87” x 7.87”)<br />
• Stage Size for the 404: 400 x 400 x 250mm<br />
(15.75” x 15.75” x 9.84”)<br />
• Stage Size for the 606: 600 x 650 x 250mm<br />
(23.62” x 25.59” x 9.84”)<br />
• 0.1 µm High Resolution Glass Scales<br />
• Multi-Colored LED Ring Light<br />
• <strong>Mitutoyo</strong> High Resolution Optics<br />
Highest Range in the Industry (16x-4800x)<br />
• Pattern Focus is Standard<br />
• Easy to Use Windows ® Interface<br />
4
suring Machines<br />
QV HYPER 0.8 µm<br />
Hyper Accuracy<br />
• Stage Size for the 302: 300 x 200 x 200mm<br />
(11.81” x 7.87” x 7.87”)<br />
• Stage Size for the 404: 400 x 400 x 250mm<br />
(15.75” x 15.75” x 9.84”)<br />
• Stage Size for the 606: 600 x 650 x 250mm<br />
(23.62” x 25.59” x 9.84”)<br />
• 0.02 µm High Resolution Glass Scales<br />
• Multi-Colored Ring Light<br />
• <strong>Mitutoyo</strong> High Resolution Optics<br />
Highest Range in the Industry (16x-4800x)<br />
• Pattern Focus is Standard<br />
• 3-D Standard Functionality<br />
Sensor Systems<br />
• QV Touch Probe<br />
• Laser Probes (LIH Type 1) or (CPS Type 4)<br />
• UMAP Probe (micro-probe technology from 15µm - 300µm)<br />
• White Light Interferometry (WLI)<br />
• Points From Focus (PFF) Video based (available on all <strong>Quick</strong> <strong>Vision</strong> Systems)<br />
QV Touch Probe<br />
Laser Probe<br />
UMAP Probe<br />
White Light Interferometry (WLI)<br />
Points From Focus (PFF)<br />
5
Compact <strong>Vision</strong> Measuring Machine<br />
<strong>Quick</strong> <strong>Vision</strong> ELF<br />
QV-ELF<br />
QV-ELF<br />
Compact device for powerful and<br />
economic vision measurement.<br />
Accuracy:<br />
2.0 µm<br />
• CNC-controlled<br />
• Triangular pattern focusing for low-contrast surfaces<br />
• Programmable magnification changer 1X, 2X and 6X<br />
• High-precision measurement lens system 1X, 2.5X, 5X, 10X and 25X<br />
• High-resolution CCD black and white camera<br />
• Resolution 0.1 µm (0.0001mm)<br />
• “One-click tool” technology for optimum edge detection<br />
• User-friendly QVPAK software<br />
Specifications<br />
Name<br />
<strong>Quick</strong> <strong>Vision</strong> - ELF<br />
Model No. QV-E202 QV-E202 LAF<br />
Measuring range (X × Y × Z)<br />
9.84"x 7.87"x 7.87" (250 × 200 × 200mm)<br />
Resolution / scale unit<br />
0.1μm / reflective-type linear encoder<br />
CCD camera<br />
B & W<br />
Vertical reflected stage light<br />
White LED<br />
Illumination<br />
unit<br />
Coaxial<br />
White LED<br />
Programmable Ring light<br />
White LED<br />
Measuring E 1<br />
X / Y axes<br />
(2+3L / 1000) μm<br />
accuracy E 1<br />
Z axis<br />
(3+5L / 1000) μm<br />
LAF repeatability* 1 – s : 0.4μm<br />
Stage glass size<br />
12.28" x 10.59" (312 x 269mm)<br />
Maximum stage loading<br />
33lbs. (15kg)<br />
Dimensions of main unit<br />
23.07" x 33.35" x 60.16" (586 x 847 x 1528mm)<br />
Mass of main unit (including mounting stand)<br />
595lbs. (270kg)<br />
Coaxial and transmitted<br />
light (white)<br />
*1: Applicable to the LAF model only. (Optional)<br />
Remarks: The measuring accuracy is evaluated according to a <strong>Mitutoyo</strong> inspection method. “L” indicates an<br />
arbitrary measuring length (unit: mm).<br />
The accuracy is guaranteed under the following optical conditions: (QV-HR2.5X or QV-SL2.5X) + tube lens 1X.<br />
White ring light<br />
6
High Accuracy CNC <strong>Vision</strong> Measuring Machine<br />
<strong>Quick</strong> <strong>Vision</strong><br />
QV-APEX<br />
QV-APEX<br />
Floor-standing CNC model designed for demanding<br />
tasks in vision-based measurement and featuring a<br />
choice of accuracy specifications. Incorporates<br />
four-color LED Coaxial and ring lights.<br />
Accuracy:<br />
1.5 µm<br />
• CNC-controlled<br />
• Triangular pattern focusing for low-contrast surfaces<br />
• Programmable magnification changer 1X, 2X and 6X<br />
• White LED transmitted stage light<br />
• LED Coaxial light with variable light color<br />
• Programmable 4-quadrant LED ring light with variable light color<br />
• High-precision measurement lens system 1X, 2.5X,<br />
5X, 10X and 25X<br />
• High-resolution CCD black and white camera<br />
• Resolution: 0.1 µm (0.0001 mm)<br />
• “One-click tool” technology for optimum edge detection<br />
• User-friendly QVPAK software<br />
White LED transmitted light<br />
4-color LED Coaxial light<br />
(RGB + white)<br />
4-color LED ring light<br />
(RGB + white)<br />
Specifications<br />
Name QV-APEX302 QV-APEX404 QV-APEX606<br />
Optical System PRO/PRO LAF PRO/PRO LAF PRO/PRO LAF<br />
Measuring range (X × Y × Z) 11.81"x7.87"x7.87" (300 × 200 × 200mm) 15.75"x15.75"x9.84"(400 × 400 × 250mm) 23.62"x25.59"x9.84"(600 × 650 × 250mm)<br />
Resolution / scale unit<br />
0.1μm / reflective-type linear encoder<br />
CCD camera<br />
B & W<br />
Vertical reflected stage<br />
White LED<br />
Illumination<br />
unit<br />
Coaxial<br />
Color LED<br />
PRL (Ring Light)<br />
Color LED<br />
E 1<br />
X/Y axes<br />
(1.5+3L / 1000) μm<br />
Measuring<br />
E<br />
accuracy 1<br />
Z axis<br />
(1.5+4L / 1000) μm<br />
E 2<br />
X-Y plane<br />
(2+4L / 1000) μm<br />
LAF repeatability* 1<br />
s : 0.4μm<br />
Maximum stage loading 44lbs.(20kg) 88lbs.(40kg) 110lbs.(50kg)<br />
Mass of main unit (including mounting stand) 794lbs.(360kg) 1,276lbs.(579kg) 3,197lbs.(1450kg)<br />
*1: Applicable to the LAF model only. (Optional)<br />
Remark: The measuring accuracy is evaluated according to a <strong>Mitutoyo</strong> inspection method. “L” indicates an arbitrary measuring length (unit: mm).<br />
Accuracy is guaranteed under the following optical conditions: (QV-HR2.5X or QV-SL2.5X) + tube lens 1X for PRO.<br />
7
Hyper Accuracy CNC <strong>Vision</strong> Measuring Machine<br />
<strong>Quick</strong> <strong>Vision</strong><br />
QV-HYPER<br />
QV-HYPER<br />
QUICK VISION HYPER<br />
• CNC-controlled<br />
• Triangular pattern focusing for low-contrast surfaces<br />
• Programmable magnification changer 1X, 2X and 6X<br />
• A choice of measuring range similar to the QV-APEX combined with higher accuracy.<br />
• QV-HYPER is equipped with RGB color LED illumination, a programmable power turret<br />
(PPT), and a programmable ring light (PRL) as standard.<br />
The laser auto focus (LAF) option is also available.<br />
• A low-expansion glass scale with a linear thermal expansion coefficient of only<br />
(0 ±0.02) × 10 −6 /K helps provide the exceptional accuracy specification. Errors due<br />
to temperature fluctuation have been minimized. (resolution 0.02 µm)<br />
• “One-click tool” technology for optimum edge detection<br />
• User-friendly QVPAK software<br />
* LAF (Laser Auto Focus) is available as an option<br />
Accuracy:<br />
0.8 µm<br />
Conventional glass scale<br />
White LED transmitted light<br />
4-color LED Coaxial light<br />
(RGB + white)<br />
Ultra-high accuracy crystallized glass scale<br />
4-color LED ring light<br />
(RGB + white)<br />
Specifications<br />
Name QV-HYPER302 QV-HYPER404 QV-HYPER606<br />
Optical System<br />
PRO/PRO LAF<br />
Measuring range (X × Y × Z)<br />
11.81" x 7.87" x 7.87"<br />
(300 × 200 × 200mm)<br />
15.75" x 15.75" x 9.84"<br />
(400 × 400 × 250mm)<br />
Programmable Power Turret 1X, 2X, 6X<br />
23.62" x 25.59" x 9.84"<br />
(600 × 650 × 250mm)<br />
Variable magnification unit<br />
Resolution / scale unit 0.02μm / reflective-type linear encoder* 1<br />
CCD camera<br />
B & W<br />
E 1<br />
X / Y axes<br />
(0.8+2L / 1000) μm<br />
Measuring<br />
E<br />
accuracy<br />
1<br />
Z axis<br />
(1.5+2L / 1000) μm<br />
E 2<br />
X-Y plane<br />
(1.4+3L / 1000) μm<br />
LAF repeatability* 2<br />
s : 0.4μm<br />
Maximum Stage Loading 33 lbs. (15kg) 66 lbs. (30kg) 88 lbs (40kg)<br />
Mass of main unit (including mounting stand) 794 lbs. (360kg) 1,276 lbs. (579kg) 3,197 lbs (1450kg)<br />
*1: Low-expansion glass scale: (0 ±0.02) × 10 −6 /K<br />
*2: Applicable to the LAF model only. (Optional)<br />
Remark: The measuring accuracy is evaluated according to a <strong>Mitutoyo</strong> inspection method.<br />
For other specifications, refer to the QV-APEX specifications.<br />
The accuracy is guaranteed under the following optical conditions: (QV-HR2.5X or QV-SL2.5X) + tube lens 1X.<br />
8
External Dimensions and Dimensions of Measuring Tables<br />
QV-ELF<br />
60.16”(1528)<br />
22.28”(566) 37.87”(962)<br />
9.21”(234)<br />
18.50”(470)<br />
23.07”(586)<br />
9.84”(250)(X work envelope)<br />
7.87”(200)(Z work envelope)<br />
31.50”(800)<br />
26.06”(662)<br />
33.35”(847)<br />
7.87” (200)(Y work envelope)<br />
Unit: Inch (mm)<br />
10.5<br />
270<br />
10.5<br />
(10.5)<br />
25.5 60 60 60 60 25.5<br />
(10.5)<br />
190<br />
Column<br />
(37)<br />
280<br />
(10.5) 46.5 60 120 60 46.5 (10.5)<br />
(17.5) 319<br />
(17.5)<br />
22 22<br />
(21)<br />
(33)<br />
18-M6 depth 12<br />
5-ø level adjusting bolt<br />
(52) 250 (Measuring range) (52)<br />
312 (Stage glass set-in dimensions)<br />
354<br />
420 (Dimension between columns)<br />
(37)<br />
(21)<br />
(33)<br />
2-Glass fixing screw<br />
Column<br />
(61)<br />
43.5 190<br />
(17.5)<br />
Unit: mm<br />
(56) 200 (Measuring range) (56)<br />
312<br />
QV-APEX/HYPER 302<br />
Unit: Inch (mm)<br />
47.24”(1200)<br />
6 2660 60 60 60 60 6026<br />
6<br />
Unit: mm<br />
63.35”(1609)<br />
22.28”(566) 41.06”(1043)<br />
9.23”(234.5)<br />
27.56”(700)<br />
6<br />
82 6<br />
6 272<br />
6 82 60 60<br />
Column<br />
LC<br />
5- 14 (Level adjustment bolt)<br />
Measuring range<br />
19-M6 Depth 12(tapped hole for fixing jig)<br />
CL<br />
62 300 (Measuring range) 62<br />
Column<br />
48<br />
200 (Measuring range)<br />
48<br />
296<br />
21.65”(550)<br />
33.82”(859)<br />
81.50” 2070 (2460)<br />
26.06”(662)<br />
37.44”(951)<br />
6<br />
400<br />
20 424 20<br />
464 (Dimension between columns)<br />
6<br />
QV-APEX/HYPER 404<br />
Unit: Inch (mm)<br />
7 92 50 86 50 86 50 92 7<br />
Unit: mm<br />
70.00”(1778)<br />
54.37”(1381)<br />
15.63”(397)<br />
47.24”(1200)<br />
21.65”(550)<br />
40.43”(1027)<br />
88.58” 2250 (2560)<br />
27.56”(700)<br />
29.72”(755)<br />
55.39”(1407)<br />
6<br />
12<br />
552<br />
50 86 50 86 50 146<br />
6<br />
12 96<br />
Column<br />
60<br />
C L<br />
8- 14 (Level adjustment bolt)<br />
24-M6 Depth 12 (tapped hole for fixing jig)<br />
LC<br />
400 (Measuring range)<br />
Column<br />
60<br />
13 494 13<br />
30<br />
520<br />
30<br />
580 (Dimension between columns)<br />
119<br />
400 (Measuring range)<br />
57<br />
588<br />
QV-APEX/HYPER 606<br />
70.24”(1794)<br />
8.82”(224) 61.82”(1570)<br />
23.47”(596)<br />
47.24”(1200)<br />
32.28”(820)<br />
51.54”(1309)<br />
100.39” 2550 (2850)<br />
27.56”(700)<br />
Unit: Inch (mm)<br />
45.59”(1158)<br />
78.15”(1985)<br />
6 759<br />
6 64<br />
19 145.5 50 165 50 175 50135.5<br />
Column<br />
7.5 79 50 201 50 201 50 79 7.5<br />
31<br />
LC<br />
Measuring range<br />
24-M6 Depth 12 (tapped hole for fixing jig)<br />
12- 14 (Level adjustment bolt)<br />
CL<br />
62.5 600 (Measuring range) 62.5<br />
13.5 698<br />
13.5<br />
725<br />
787 (Dimension between columns)<br />
Column<br />
31<br />
54.5<br />
650 (Measuring range)<br />
54.5<br />
854<br />
Unit: mm<br />
9
<strong>Quick</strong> <strong>Vision</strong> Advanced Optics<br />
CCD camera<br />
<strong>Quick</strong>ly change magnification without<br />
calibration or refocusing.<br />
All QUICK <strong>Vision</strong> models feature programmable switchover between<br />
1X, 2X and 6X magnification to let you select the optimum image size during the<br />
measurement cycle – and it's fast, with no need to calibrate and re-focus.<br />
Depending on the magnification, the pixel size and light intensity are adapted to<br />
each new adjustment. This allows for 16x to 4800x magnification screen,<br />
depending on the objective lens used (0.5X, 1X, 2.5X, 5X, 10X, 25X).<br />
QV Objective Lenses<br />
Objective Lens QV-SL0.5× QV-HR1× QV-SL1× QV-HR2.5× QV-SL2.5× QV-5× QV-HR10× ※<br />
Code No. 02AKT199 02AKT250 02ALA150 02AKT300 02ALA170 02ALA420 02AKT650<br />
Optical Magnification 0.5× 1× 2.5× 5× 10×<br />
Working Distance 30.5mm 40.6mm 52.5mm 40.6mm 60mm 33.5mm 20mm<br />
1× 12.54×9.4mm 6.27×4.7mm 2.49×1.86mm 1.24×0.93mm 0.62×0.47mm<br />
Field of View 2× 6.27×4.7mm 3.13×2.35mm 1.24×0.93mm 0.62×0.47mm 0.31×0.23mm<br />
6× 2.09×1.56mm 1.04×0.78mm 0.41×0.31mm 0.20×0.15mm 0.10×0.07mm<br />
QV-SL0.5× QV-HR10× QV-10× QV-25× offered in addition to the system included objective.<br />
Parabolic mirror<br />
of the programmable<br />
ring light<br />
Points From Focus Objective Lenses<br />
Objective Lens QV-HR2.5× QV-5× QV-HR10× QV-25×<br />
Code No. 02AKX895 02AKX900 02AKX905 02AKX910<br />
Optical Magnification 2.5× 5× 10× 25×<br />
Working Distance 40.6mm 33.5mm 20mm 13mm<br />
1× 2.49×1.86mm 1.24×0.93mm 0.62×0.47mm 0.25×0.18mm<br />
Field of View 2× 1.24×0.93mm 0.62×0.47mm 0.31×0.23mm 0.10×0.07mm<br />
6× 0.41×0.31mm 0.20×0.15mm 0.10×0.07mm 0.04×0.03mm<br />
PFF objectives are factory mapped and include compensation data.<br />
Calibration chart<br />
(for vision optical head & WLI optical head) Used for pixel size<br />
compensation of CCDs and for compensating autofocusing<br />
accuracy and optical axis offset at various magnifications of variable<br />
magnification PPT/zooming.<br />
Note: There are some limitations to the function of each lens. Please<br />
contact one of our sales offices for details.<br />
QV compensation chart (for vision optical head)<br />
Glass chart designed for “in-screen<br />
compensation” to compensate for the distortion<br />
occurring in the screen caused by the optical<br />
system and for“auto-focusing compensation”<br />
to minimize auto-focusing fluctuations caused<br />
by the object’ pattern and texture.<br />
Note: There are some limitations to the function of each lens.<br />
Please contact one of our sales offices for details.<br />
10
<strong>Quick</strong> <strong>Vision</strong> Advanced Illumination<br />
Programmable Ring Light (PRL)<br />
Changing the positions of the two curved mirrors sets the ring light's obliquity to any chosen value between 30° and 80°.<br />
This is effective for enhancing the edges of inclined surfaces or very small steps.<br />
Furthermore, the PRL light's illumination can be controlled independently in every direction, front and back, right and left.<br />
This makes it possible to configure highly variable lighting settings to match measurement locations.<br />
Measuring the top and bottom widths of<br />
metallization patterns on an IC package<br />
Objective lens<br />
PRL illumination<br />
Four-quadrant LED light<br />
Parabolic mirror<br />
Toroidal mirror<br />
Objective lens<br />
Uniform illumination can be obtained<br />
from the four-quadrant LEDs,<br />
whose brightness is independently controllable.<br />
Top<br />
Left Right<br />
Bottom<br />
Workpiece top face<br />
Obliquity can be set by controlling the positions of the two types<br />
of mirrors that move independently of the Z-Axis.<br />
Quadrant of the<br />
LED ring light<br />
Top<br />
Left Right<br />
Bottom<br />
Top<br />
Left Right<br />
Bottom<br />
Parabolic mirror<br />
Workpiece surface 30°<br />
60°<br />
80°<br />
Top<br />
RGB Color LED Illumination<br />
Left<br />
Bottom<br />
Right<br />
Changing the illumination color between red, green, blue, and white allows for the detection of edges that were not able to be viewed<br />
using conventional white light.<br />
Color LED usage example:<br />
Resist aperture dimensions on a<br />
printed circuit board<br />
Resist aperture dimension<br />
Resist<br />
Edge enhancement<br />
11
High Accuracy CNC <strong>Vision</strong> Measuring Machine<br />
with Touch Probe for ELF - APEX - HYPER<br />
QV TP<br />
Accuracy (TP):<br />
2.4 µm ELF<br />
1.8 µm APEX<br />
1.7 µm HYPER<br />
QV-TP<br />
• Contact and non-contact measurement is possible with a single QV-TP series<br />
system.<br />
• A singular coordinate system can be used between the tactile and optical systems.<br />
• Ideal for three-dimensional measurement of press and injection molding, medical<br />
devices, electronics and automotive applications<br />
• Available changing rack allows interchanging of probes for increased versatility.<br />
• That provides multiple measurements utilizing several different styli.<br />
Specifications<br />
Name QVTP 202 QVTP 302 QVTP 404 QVTP 606<br />
Optical System ELF/ELF LAF PRO/PRO LAF HYPER/HYPER LAF PRO/PRO LAF HYPER/HYPER LAF PRO/PRO LAF HYPER/HYPER LAF<br />
Measuring range (X × Y × Z)<br />
9.84"x 7.87"x 7.87"<br />
(250 × 200 × 200mm)<br />
11.81"x7.87"x7.87" (300 × 200 × 200mm) 15.75"x15.75"x9.84"(400 × 400 × 250mm) 23.62"x25.59"x9.84"(600 × 650 × 250mm)<br />
Variable magnification unit<br />
Programmable Power Turret 1X, 2X, 6X<br />
Resolution / scale unit<br />
0.1 μm (0.02 μm for HYPER) / reflective-type linear encoder<br />
CCD camera<br />
B & W<br />
Coaxial Light White LED — — — — — —<br />
Stage Light White LED — — — — — —<br />
Illumination<br />
Vertical reflected — Color LED Color LED Color LED Color LED Color LED Color LED<br />
unit<br />
Contour — White LED White LED White LED White LED White LED White LED<br />
PRL (Ring Light) White LED Color LED Color LED Color LED Color LED Color LED Color LED<br />
E 1<br />
X/Y axis (2.0+3L/1000) µm (1.5+3L / 1000) μm (0.8+2L / 1000) μm (1.5+3L / 1000) μm (0.8+2L / 1000) μm (1.5+3L / 1000) μm (0.8+2L / 1000) μm<br />
Measuring<br />
E<br />
accuracy 1<br />
Z axis (3.0+5L/1000) µm (1.5+4L / 1000) μm (1.5+2L / 1000) μm (1.5+4L / 1000) μm (1.5+2L / 1000) μm (1.5+4L / 1000) μm (1.5+2L / 1000) μm<br />
E 2<br />
X/Y axis — (2.0+4L / 1000) μm (1.4+3L / 1000) μm (2.0+4L / 1000) μm (1.4+3L / 1000) μm (2.0+4L / 1000) μm (1.4+3L / 1000) μm<br />
TP E, X-Y-Z plane (2.4+3L/1000) µm (1.8+3L / 1000) μm (1.7+3L / 1000) μm (1.8+3L / 1000) μm (1.7+3L / 1000) μm (1.8+3L / 1000) μm (1.7+3L / 1000) μm<br />
QV Objective lenses<br />
2.5 QV-HR 2.5x QV-SL2.5x<br />
LAF repeatability* 1<br />
s : 0.4μm<br />
Stage glass size<br />
12.28"x10.59"<br />
(312 × 269mm)<br />
15.71"x10.67"(399 × 271mm) 12.41"x21.69"(493 × 551mm) 27.44"x29.84"(697 × 758mm)<br />
Maximum stage loading 33 lbs.(15kg) 44 lbs.(20kg) 33 lbs.(15kg) 88 lbs.(40kg) 66 lbs.(30kg) 110 lbs.(50kg) 88 lbs.(40kg)<br />
Dimensions of main unit<br />
23.07"x33.35"x60.16<br />
"(586×847×1528mm)<br />
33.82"x37.44"x63.35"(859×951×1609mm) 40.43"x55.39"x70.00"(1027×1407×1778mm) 51.54"x78.15"x70.63"(1309×1985×1794mm)<br />
Mass of main unit<br />
(including mounting stand)<br />
595 lbs.(270 kg) 794 lbs.(360kg) 1,276 lbs.(579kg) 3,197 lbs.(1450kg)<br />
*1: Applicable to the LAF model only. (Laser Auto Focus) Optional<br />
Remark: The measuring accuracy is evaluated according to a <strong>Mitutoyo</strong> inspection method. “L” indicates an arbitrary measuring length (unit: mm).<br />
Accuracy is guaranteed under the following optical conditions: (QV-HR2.5X or QV-SL2.5X) + tube lens 1X for PRO.<br />
Note: This machine incorporates a startup system (relocation detection system), which disables operation when an unexpected vibration is applied or the machine is relocated.<br />
Be sure to contact your nearest <strong>Mitutoyo</strong> prior to relocating this machine after initial installation.<br />
12
Optional Accessories<br />
Laser Auto Focus<br />
Rotary Index<br />
TTL Laser AF<br />
Laser autofocus system for fast and accurate<br />
measurement in the Z-axis<br />
Except for HYBRID models, all QUICK VISION models can be equipped<br />
with a laser autofocus system for much faster and more repeatable<br />
Z-axis measurements compared to conventional autofocus technology.<br />
A TTL (through the lens) technique is used in which measuring range<br />
losses due to adjacent sensors are avoided. In addition, the visible laser<br />
point can also be used for fast and simple workpiece positioning.<br />
QV Index<br />
Software-controlled rotary indexer for<br />
QUICK VISION machines<br />
The horizontal QV Index rotary table turns the measured parts in<br />
0.1 degree increments and thereby allows measurement of several<br />
workpiece sides without re-chucking. The software enables<br />
fully-automatic CNC operation of the additional axes. Consecutive<br />
measurements of the sides and bottom of a workpiece can be<br />
made without having to perform refixturing.This leads to a decrease<br />
in the production costs related to fixturing, which results in an<br />
improvement in measurement efficiency.<br />
Supported models: QV302, 404, 606<br />
Laser autofocus system.<br />
The Coaxial laser auto focus that uses the double pinhole<br />
method and has low directivity, the <strong>Quick</strong> <strong>Vision</strong><br />
Series is suited to perform high-speed height measurements.<br />
Item<br />
Maximum workpiece size<br />
Maximum faceplate loading<br />
Specifications<br />
ø140mm (Max)<br />
2kg (Max)<br />
Resolution 0.1˚<br />
Laser auto focus (LAF)<br />
<strong>Mitutoyo</strong> offers models featuring the LAF system which enables<br />
high-speed Z axis focusing. This system allows focusing at 20 mm/<br />
second and thus is optimal for high-speed height measurement.<br />
Measurement efficiency is greatly increased when there are many<br />
measurement points such as when measuring the heights of<br />
connector terminals, for example.<br />
*Factory-installed option<br />
CLASS 1 LASER PRODUCT<br />
Safety Precautions for the Laser Beam<br />
Used by the Laser Auto Focus Function<br />
(Models with the LAF Specification)<br />
This model uses a low-output visible<br />
laser beam (690 nm) for measurement<br />
and conforms to the provisions of class<br />
1 (visible light) of JIS C 6802 "Safety of<br />
laser products." A class 1 laser warning<br />
and description label, like the one shown<br />
above, is attached to the main unit.<br />
Rotational positioning accuracy<br />
Rotational speed<br />
External dimensions (W×D×H)<br />
±0.5˚<br />
10 r.p.m<br />
118×150×105mm<br />
13
Standard Software<br />
More Powerful, User Friendly Windows ® Interface Software<br />
Integrated dual and<br />
large monitor support<br />
Brightness<br />
Dual Area Contrast<br />
Patented automatic lighting tools<br />
Automatically sets optimal light intensity<br />
Enhanced Toolbar<br />
Graphic-View<br />
Program List<br />
(Easy Editor)<br />
Measurement<br />
Result<br />
Contour illumination<br />
Surface illumination<br />
PRL illumination<br />
Illumination direction:<br />
From right at 45°<br />
Step and Repeat<br />
Easily programs<br />
multi-part/multifeatures<br />
using graphical<br />
representations<br />
Edge to be measured<br />
Lighting Illumination Wizard<br />
Sets up the optimal illumination conditions<br />
PRL illumination<br />
Illumination<br />
direction:<br />
From left at 60°<br />
Smart Recovery<br />
Automatically adjusts part program<br />
parameters to enhance program<br />
robustness. Greatly reduces part to part<br />
workpiece variation concerns.<br />
Easy Editor<br />
Intuitive graphical tree style part<br />
programming<br />
14
Optional Software<br />
Online Teaching<br />
QV3DCAD-OnLine<br />
QV3DCAD-OnLine uses 3D CAD models to easily create QVPAK part programs. QV<br />
measurements can be performed by specifying an element in the CAD data. This<br />
improves program creation efficiency more than using a joystick to perform teaching.<br />
Form Evaluation and Analysis Software<br />
FORMPAK-QV<br />
FORMPAK-QV performs contour tolerancing and form analysis from data<br />
obtained with the QVPAK edge detection tools and laser probe data points.<br />
Primary display: QVPAK<br />
Secondary display: QV3DCAD-OnLine<br />
Tolerancing example<br />
Example of using QV-WLI to perform line and<br />
space and conductor thickness measurements<br />
on a printed circuit board<br />
Offline Teaching<br />
EASYPAG/PRO<br />
EASYPAG/PRO creates measurement part programs for QVPAK using 2D CAD<br />
data. It reduces the number of man-hours for creating part programs, thus<br />
allowing a decrease in lead time.<br />
Line-to-arbitrary point distance<br />
measurement<br />
QV-CAD I/F<br />
DXF<br />
DXF IGES GERBER data<br />
IGES<br />
Off-line teaching operation display<br />
Displays CAD Data on graphic window to enhance ease-of-measurement and<br />
nominal value extraction.<br />
Measuring Support<br />
A real-time display of measurement<br />
results and statistical analysis on the<br />
shop floor, with data saved in a database.<br />
Includes SPC and statistical<br />
analysis, data filtering and reporting<br />
systems for complete control of your manufacturing<br />
processes. MeasurLink includes modules for shop floor<br />
data collection, QC room data analysis and reporting,<br />
gage R&R studies, and gage tracking.<br />
PFF (Points from Focus)<br />
<strong>Mitutoyo</strong> developed optical data collection method that stitches images together<br />
with high resolution Z axis data.<br />
CAD Export function<br />
Drawing a graphic of the<br />
measurement result<br />
Generated CAD data<br />
Collect an image stack<br />
during vertical (Z)<br />
motion of the camera<br />
For each pixel, local<br />
contrast measure<br />
is calculated<br />
The Z coordinates of the<br />
contrast peak gives the location<br />
of surface at that point<br />
3D CAD Import function<br />
QV3DPAK<br />
QV3DPAK is a software application<br />
that composes 3D forms from PFF<br />
(points from focus) or WLI (white<br />
light interferometer) data.<br />
3D CAD data display<br />
Illustrating flatness using 3D CAD data<br />
QV3DPAK<br />
QVPAK<br />
15
Note: All information regarding our products, and in particular the illustrations, drawings, dimensional and performance data<br />
contained in this printed matter as well as other technical data are to be regarded as approximate average values. We therefore<br />
reserve the right to make changes to the corresponding designs. The stated standards, similar technical regulations, descriptions<br />
and illustrations of the products were valid at the time of printing. In addition, the latest applicable version of our General Trading<br />
Conditions will apply. Only quotations submitted by ourselves may be regarded as definitive.<br />
<strong>Mitutoyo</strong> products are subject to US Export Administration Regulations (EAR). Re-export or relocation of <strong>Mitutoyo</strong> products may<br />
require prior approval by an appropriate governing authority.<br />
Trademarks and Registrations<br />
Designations used by companies to distinguish their products are often claimed as trademarks. In all instances where <strong>Mitutoyo</strong><br />
<strong>America</strong> <strong>Corporation</strong> is aware of a claim, the product names appear in initial capital or all capital letters. The appropriate companies<br />
should be contacted for more complete trademark and registration information.<br />
We reserve the right to change specifications and prices without notice.<br />
One One Number to to Serve You You Better<br />
1-888-MITUTOYO One Number to Serve (1-888-648-8869) You Better<br />
1-888-MITUTOYO (1-888-648-8869)<br />
Aurora,<br />
Aurora,<br />
Illinois<br />
Illinois<br />
(Corporate Headquarters)<br />
(Corporate Headquarters)<br />
Westford, Aurora, Illinois<br />
Westford,<br />
Massachusetts<br />
Massachusetts<br />
(Corporate Headquarters)<br />
Huntersville,<br />
Huntersville,<br />
North Carolina<br />
Westford, Massachusetts<br />
North Carolina<br />
Mason,<br />
Mason,<br />
Ohio<br />
Huntersville,<br />
Ohio<br />
North Carolina<br />
Plymouth,<br />
Plymouth,<br />
Michigan<br />
Mason, Ohio<br />
Michigan<br />
City<br />
City<br />
of Industry, California<br />
Plymouth,<br />
of Industry,<br />
Michigan<br />
California<br />
Birmingham,<br />
City of Industry,<br />
Alabama<br />
California<br />
Renton, Washington<br />
© 2013 <strong>Mitutoyo</strong> <strong>America</strong> <strong>Corporation</strong>, Aurora IL 5M 0413-05 • Printed in USA • July 2013


