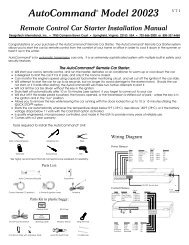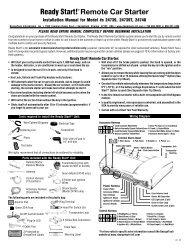
Remote Control Car Starter Installation Manual for ... - Ready Remote
Remote Control Car Starter Installation Manual for ... - Ready Remote
Remote Control Car Starter Installation Manual for ... - Ready Remote

You also want an ePaper? Increase the reach of your titles
YUMPU automatically turns print PDFs into web optimized ePapers that Google loves.
Option #14 Normal Lock Follow Ignition<br />
Selecting this option will automatically lock the doors when the key is turned on,<br />
doors closed and the brake is depressed.<br />
Option #15 Normal Unlock Follow Ignition<br />
Selecting this option will automatically unlock doors when key is removed from<br />
ignition.<br />
Option #16 Normal Double Pulse Lock<br />
This option will pulse the lock output wire twice instead of once <strong>for</strong> normal mode.<br />
Option #17 Normal Double Pulse Unlock<br />
This option will pulse the unlock output wire twice instead of once <strong>for</strong> normal mode.<br />
Option #18 Short lock pulse Long lock pulse<br />
This option will increase the door lock pulse time from 0.6 second to 3 seconds <strong>for</strong><br />
vehicles with vacuum locking systems (older European vehicles).<br />
Option #19 Alarm Disable <strong>Starter</strong> Kill<br />
The factory setting of Alarm Disable will give you a quick pulse whenever the<br />
transmitter unlocks the doors or the transmitter is used to start the vehicle. The <strong>Starter</strong><br />
Kill option comes on and stays on whenever the remote starter is running or the<br />
alarm is armed. This wire controls a relay which opens up the path of the starter wire<br />
(refer to section 15).<br />
Option #20 Accessory Pulse Dome Lamp<br />
Accessory pulse puts out a brief pulse output after the remote starter starts or stops<br />
the vehicle. When set, this output can be used to turn on a defroster that requires a<br />
momentary pulse or could be used to control GM R.A.P. (retained accessory power)<br />
output. Dome lamp option will turn this output on when you unlock the door <strong>for</strong> 25<br />
seconds. (Refer to section 18).<br />
Option #24 Alarm No Alarm<br />
This feature can disable all alarm functions if the alarm features are not desired.<br />
Option #31<br />
Reset all Options<br />
This option resets all options back to the factory settings.<br />
PROGRAMMING AN OPTION<br />
If you want the factory setting, DO NOTHING and skip this section. If you want to<br />
change one or more of the features, TURN THE ON/OFF CONTROL SWITCH TO THE<br />
“OFF” POSITION. Wait <strong>for</strong> the red LED light to stop flashing, then continue<br />
with the following procedures:<br />
A. For options 1-9: Push the white code button on the remote start module. Each<br />
time you push the button the red LED light will flash 1 to 9 times signifying at<br />
which feature you are (press it once, the LED light flashes once. Press it again<br />
and it will flash two times. Press it again and it will flash three times, etc., to<br />
show what feature you are at).<br />
For options 10-19: Push the red code button on the remote start module. You<br />
will see the LED light flash a long blink. This is option 10. You can scroll to<br />
option 11 by pressing the white button once – you will see a long blink followed<br />
by one short blink. You can scroll to option 12 by pushing the white button<br />
again – one long and two short blinks brings you to option 12.<br />
For options 20-29: Push the red code button twice to get the two long blinks –<br />
you are now at option 20. Push the white button to jump ahead to option 21 –<br />
two long blinks and one short blink. Push three more times to get to option 24<br />
– two long and four short blinks.<br />
For options 30-31: Push the red code button three times to get three long blinks<br />
– you are now at option 30. Push the white button once to jump to option 31<br />
(three long blinks and one short blink).<br />
B. When you are at the feature level you desire, push the start button on the<br />
transmitter <strong>for</strong> one second and the red LED light will flash once to signify you are<br />
at the Option setting. You can push the transmitter button again and it will flash<br />
twice to signify you are at the Factory setting. Push the transmitter button again<br />
and you will go back to the Option setting.<br />
C. You can choose to change another feature by starting over again at Step A. After<br />
six seconds, the remote starter automatically exits the programming mode<br />
(three LED light flashes).<br />
D. When finished – switch the <strong>Control</strong> Switch back ON. The red LED light will flash<br />
once.<br />
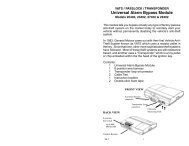
25. External shock sensor hook up (included with model 2xx28<br />
only):<br />
Plug the shock sensor unit into the 3 wire connector on the front side of the remote<br />
start module. Use one or two cable ties to tightly fasten the shock sensor unit to the<br />
steering column of the vehicle. Make sure that the sensor does not affect the<br />
driver's ability to steer the vehicle.<br />
This placement gives the best overall<br />
coverage <strong>for</strong> a vehicle. Adjust the<br />
screw(s) so that a hard impact on the<br />
vehicle triggers the full alarm and light<br />
impacts just trigger the warn away.<br />
(This input may not work with all types<br />
of alarm sensors.)<br />
SPECIAL CASES<br />
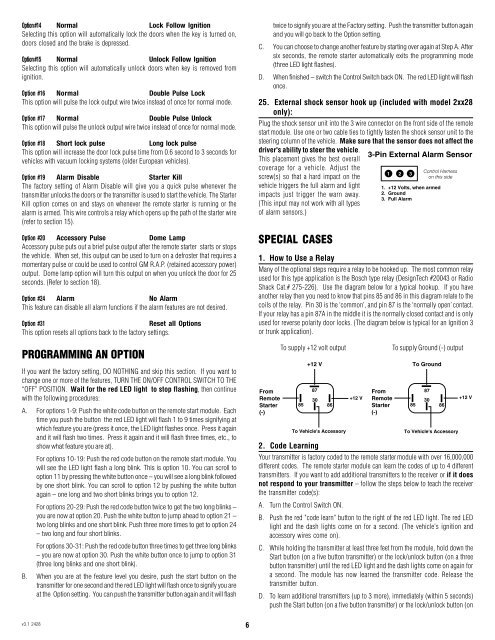
1. How to Use a Relay<br />
Many of the optional steps require a relay to be hooked up. The most common relay<br />
used <strong>for</strong> this type application is the Bosch type relay (DesignTech #20043 or Radio<br />
Shack Cat.# 275-226). Use the diagram below <strong>for</strong> a typical hookup. If you have<br />
another relay then you need to know that pins 85 and 86 in this diagram relate to the<br />
coils of the relay. Pin 30 is the ‘common’, and pin 87 is the ‘normally open’ contact.<br />
If your relay has a pin 87A in the middle it is the normally closed contact and is only<br />
used <strong>for</strong> reverse polarity door locks. (The diagram below is typical <strong>for</strong> an Ignition 3<br />
or trunk application).<br />
From<br />
<strong>Remote</strong><br />
<strong>Starter</strong><br />
(-)<br />
To supply +12 volt output<br />
85<br />
+12 V<br />
87<br />
30<br />
2. Code Learning<br />
86<br />
To Vehicle's Accessory<br />
+12 V<br />
3-Pin External Alarm Sensor<br />
From<br />
<strong>Remote</strong><br />
<strong>Starter</strong><br />
(-)<br />
1 2 3<br />
To supply Ground (-) output<br />
To Ground<br />
85<br />
<strong>Control</strong> Harness<br />
on this side<br />
1. +12 Volts, when armed<br />
2. Ground<br />
3. Full Alarm<br />
87<br />
30<br />
86<br />
To Vehicle's Accessory<br />
+12 V<br />
Your transmitter is factory coded to the remote starter module with over 16,000,000<br />
different codes. The remote starter module can learn the codes of up to 4 different<br />
transmitters. If you want to add additional transmitters to the receiver or if it does<br />
not respond to your transmitter – follow the steps below to teach the receiver<br />
the transmitter code(s):<br />
A. Turn the <strong>Control</strong> Switch ON.<br />
B. Push the red "code learn" button to the right of the red LED light. The red LED<br />
light and the dash lights come on <strong>for</strong> a second. (The vehicle's ignition and<br />
accessory wires come on).<br />
C. While holding the transmitter at least three feet from the module, hold down the<br />
Start button (on a five button transmitter) or the lock/unlock button (on a three<br />
button transmitter) until the red LED light and the dash lights come on again <strong>for</strong><br />
a second. The module has now learned the transmitter code. Release the<br />
transmitter button.<br />
D. To learn additional transmitters (up to 3 more), immediately (within 5 seconds)<br />
push the Start button (on a five button transmitter) or the lock/unlock button (on<br />
v3.1 2428<br />
6