
You also want an ePaper? Increase the reach of your titles
YUMPU automatically turns print PDFs into web optimized ePapers that Google loves.
English<br />
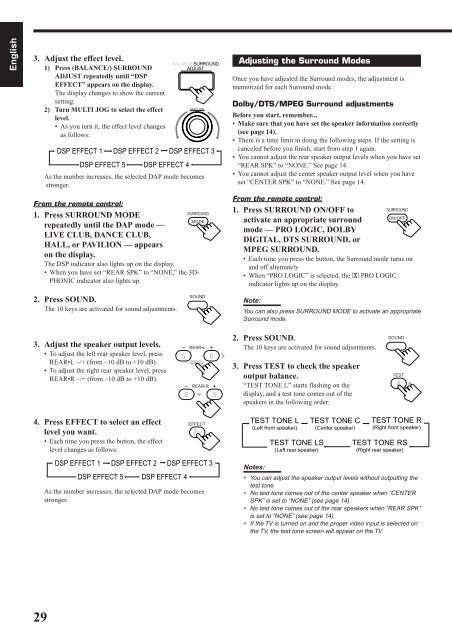
3. Adjust the effect level.<br />
1) Press (BALANCE/) SURROUND<br />
ADJUST repeatedly until “DSP<br />
EFFECT” appears on the display.<br />
The display changes to show the current<br />
setting.<br />
2) Turn MULTI JOG to select the effect<br />
level.<br />
• As you turn it, the effect level changes<br />
as follows:<br />
BALANCE/SURROUND<br />
ADJUST<br />
MULTI JOG<br />
DSP EFFECT 1 DSP EFFECT 2 DSP EFFECT 3<br />
DSP EFFECT 5 DSP EFFECT 4<br />
As the number increases, the selected DAP mode becomes<br />
stronger.<br />
Adjusting the Surround Modes<br />
Once you have adjusted the Surround modes, the adjustment is<br />
memorized for each Surround mode.<br />
Dolby/DTS/MPEG Surround adjustments<br />
Before you start, remember...<br />
• Make sure that you have set the speaker information correctly<br />
(see page 14).<br />
• There is a time limit in doing the following steps. If the setting is<br />
canceled before you finish, start from step 1 again.<br />
• You cannot adjust the rear speaker output levels when you have set<br />
“REAR SPK” to “NONE.” See page 14.<br />
• You cannot adjust the center speaker output level when you have<br />
set “CENTER SPK” to “NONE.” See page 14.<br />
From the remote control:<br />
1. Press SURROUND MODE<br />
repeatedly until the DAP mode —<br />
LIVE CLUB, DANCE CLUB,<br />
HALL, or PAVILION — appears<br />
on the display.<br />
The DSP indicator also lights up on the display.<br />
• When you have set “REAR SPK” to “NONE,” the 3D-<br />
PHONIC indicator also lights up.<br />
SURROUND<br />
MODE<br />
From the remote control:<br />
1. Press SURROUND ON/OFF to<br />
SURROUND<br />
ON/OFF<br />
activate an appropriate surround<br />
mode — PRO LOGIC, DOLBY<br />
DIGITAL, DTS SURROUND, or<br />
MPEG SURROUND.<br />
• Each time you press the button, the Surround mode turns on<br />
and off alternately<br />
• When “PRO LOGIC” is selected, the Ÿ PRO LOGIC<br />
indicator lights up on the display.<br />
2. Press SOUND.<br />
The 10 keys are activated for sound adjustments.<br />
SOUND<br />
Note:<br />
You can also press SURROUND MODE to activate an appropriate<br />
Surround mode.<br />
3. Adjust the speaker output levels.<br />
• To adjust the left rear speaker level, press<br />
REAR•L –/+ (from –10 dB to +10 dB).<br />
• To adjust the right rear speaker level, press<br />
REAR•R –/+ (from –10 dB to +10 dB).<br />
REAR•L<br />
5 6<br />
ENTER<br />
REAR•R<br />
8 9<br />
2. Press SOUND.<br />
The 10 keys are activated for sound adjustments.<br />
3. Press TEST to check the speaker<br />
output balance.<br />
“TEST TONE L” starts flashing on the<br />
display, and a test tone comes out of the<br />
speakers in the following order:<br />
SOUND<br />
TEST<br />
4<br />
4. Press EFFECT to select an effect<br />
level you want.<br />
• Each time you press the button, the effect<br />
level changes as follows:<br />
EFFECT<br />
7/P<br />
DSP EFFECT 1 DSP EFFECT 2 DSP EFFECT 3<br />
DSP EFFECT 5 DSP EFFECT 4<br />
As the number increases, the selected DAP mode becomes<br />
stronger.<br />
TEST TONE L<br />
(Left front speaker)<br />
Notes:<br />
TEST TONE LS<br />
(Left rear speaker)<br />
TEST TONE C<br />
(Center speaker)<br />
TEST TONE R<br />
(Right front speaker)<br />
TEST TONE RS<br />
(Right rear speaker)<br />
• You can adjust the speaker output levels without outputting the<br />
test tone.<br />
• No test tone comes out of the center speaker when “CENTER<br />
SPK” is set to “NONE” (see page 14).<br />
• No test tone comes out of the rear speakers when “REAR SPK”<br />
is set to “NONE” (see page 14).<br />
• If the TV is turned on and the proper video input is selected on<br />
the TV, the test tone screen will appear on the TV.<br />
29


![TH-V70R[B] revision - JVC](https://img.yumpu.com/23738839/1/184x260/th-v70rb-revision-jvc.jpg?quality=85)