13-E09 V2 - EiS Kent
13-E09 V2 - EiS Kent
13-E09 V2 - EiS Kent

Create successful ePaper yourself
Turn your PDF publications into a flip-book with our unique Google optimized e-Paper software.
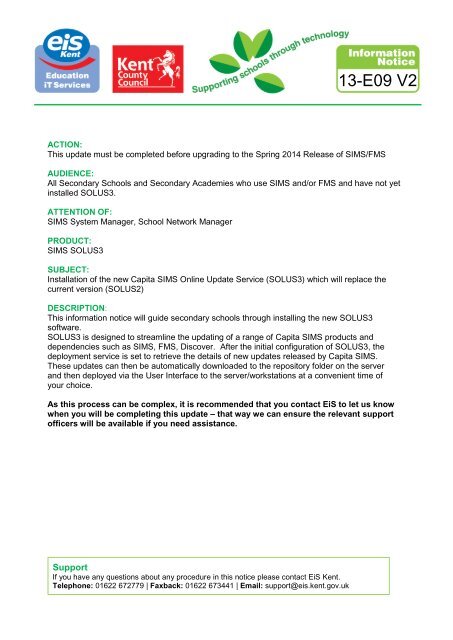
<strong>13</strong>-<strong>E09</strong> <strong>V2</strong><br />
ACTION:<br />
This update must be completed before upgrading to the Spring 2014 Release of SIMS/FMS<br />
AUDIENCE:<br />
All Secondary Schools and Secondary Academies who use SIMS and/or FMS and have not yet<br />
installed SOLUS3.<br />
ATTENTION OF:<br />
SIMS System Manager, School Network Manager<br />
PRODUCT:<br />
SIMS SOLUS3<br />
SUBJECT:<br />
Installation of the new Capita SIMS Online Update Service (SOLUS3) which will replace the<br />
current version (SOLUS2)<br />
DESCRIPTION:<br />
This information notice will guide secondary schools through installing the new SOLUS3<br />
software.<br />
SOLUS3 is designed to streamline the updating of a range of Capita SIMS products and<br />
dependencies such as SIMS, FMS, Discover. After the initial configuration of SOLUS3, the<br />
deployment service is set to retrieve the details of new updates released by Capita SIMS.<br />
These updates can then be automatically downloaded to the repository folder on the server<br />
and then deployed via the User Interface to the server/workstations at a convenient time of<br />
your choice.<br />
As this process can be complex, it is recommended that you contact <strong>EiS</strong> to let us know<br />
when you will be completing this update – that way we can ensure the relevant support<br />
officers will be available if you need assistance.<br />
Support<br />
If you have any questions about any procedure in this notice please contact <strong>EiS</strong> <strong>Kent</strong>.<br />
Telephone: 01622 672779 | Faxback: 01622 673441 | Email: support@eis.kent.gov.uk
<strong>EiS</strong> <strong>Kent</strong> Information Notice <strong>13</strong>-<strong>E09</strong> <strong>V2</strong> June 20<strong>13</strong><br />
Before you begin, it would be useful to find out the following information as you will need<br />
to enter this during the installation:<br />
<br />
<br />
<br />
<br />
<br />
<br />
<br />
<br />
<br />
<br />
<br />
The name & IP Address of the server that hosts your SQL2008/SIMS:<br />
The SQL 2008 Instance Name:<br />
The SA (SQL2008 Administrator) password:<br />
The administrator login details to the server (user id & password):<br />
School DfE Number:<br />
School Address and Post Code:<br />
Email address of the person to receive SOLUS 3 alerts about deployments and downloads:<br />
The time of your scheduled daily backup:<br />
The time the Discover transfer is scheduled to run (if installed):<br />
The details of the proxy server (if you use one):<br />
A list of workstations names for those using SIMS/ FMS/ Discover:<br />
Workstation Name SIMS FMS Discover<br />
© <strong>EiS</strong> <strong>Kent</strong> Page 2
<strong>EiS</strong> <strong>Kent</strong> Information Notice <strong>13</strong>-<strong>E09</strong> <strong>V2</strong> June 20<strong>13</strong><br />
PART I - Installing SOLUS 3 at version 3.5.20<br />
Pre-Installation checklist/information:<br />
<br />
<br />
<br />
<br />
<br />
<br />
Microsoft .NET Framework 2 must be installed on all devices in the Solus3 environment<br />
Microsoft .NET Framework 4 must be installed on all devices in the Solus3 environment<br />
Microsoft SQL Server 2008 (full or express) must be installed on the device that will host the<br />
SOLUS3 Deployment Service database (normally the server).<br />
Windows Task Scheduler must be enabled on all devices in the SOLUS3 environment<br />
To run the SOLUS3 installers you must login to the server as a Domain Administrator<br />
You must have write access to the machine keys folder on the deployment service device<br />
(server), found in the following location:<br />
Windows Server 2003<br />
We would recommend that any school still using Windows Server 2003 waits until they have<br />
moved over to Windows 2008 Server before carrying out this installation.<br />
Windows Server 2008 and 2008 R2<br />
Drive:\ProgramData\Microsoft\Crypto\RSA<br />
More details in Appendix 1 (page 52)<br />
Some Domain Controllers might require that TCP 389 be opened for LDAP.<br />
<br />
Windows Management Instrumentation (WMI) must be enabled on the firewalls of all<br />
devices in the deployment environment.<br />
NOTE: If you will be installing the SOLUS3 agents to devices manually, you do not need to<br />
enable WMI.<br />
<br />
<br />
<br />
<br />
If you would like SOLUS3 to create backups of your Capita SIMS databases before<br />
deploying updates, ensure there is sufficient disk space available to SQL Servers to<br />
accommodate these backups.<br />
Set up a network share to host the Update Repository for SIMS update downloads. The<br />
Deployment Service must have write access to this network share – see point 1 on page 3<br />
below.<br />
Ports TCP 52965 (deployment service), TCP 52966 (S3 agent) and TCP 8739 (agent<br />
notifier user interface) must be open on the firewalls of all devices in the deployment<br />
environment. NB Ports 52965 and 52966 can be changed when installing the Deployment<br />
Service.<br />
TCP port <strong>13</strong>9, UDP port <strong>13</strong>7 and UPD port <strong>13</strong>8 must be open on the firewalls of all<br />
devices in the deployment environment to enable browsing of the network (NetBios)<br />
Please make sure that the policy to open the firewall ports has been applied on the server and all<br />
SIMS/FMS/Workstations before installing SOLUS 3. These firewall exceptions can be added<br />
manually to each workstation if necessary but will be very time consuming if you have many<br />
stations running SIMS/FMS/Discover<br />
More details in Appendix 2 (page 53/54)<br />
© <strong>EiS</strong> <strong>Kent</strong> Page 3
<strong>EiS</strong> <strong>Kent</strong> Information Notice <strong>13</strong>-<strong>E09</strong> <strong>V2</strong> June 20<strong>13</strong><br />
INSTALLING SOLUS3 at Version 3.5.20<br />
1. Apply the policy to open the firewall ports on the server and all SIMS/FMS Workstations<br />
before installing SOLUS 3 (for manual instructions see page 53-54).<br />
NOTE: if you do not know how to write a policy to make these firewall changes, please contact<br />
the EIS Service Desk and ask for a call to be logged with the Technical Admin team.<br />
2. Create a new folder on the server within the SIMS folder called SOLUS3Setups. This Folder<br />
must be SHARED and System user must have Full Control to the share and also on<br />
security tab.<br />
3. Downloaded latest SOLUS 3 software from:<br />
http://dl.capitasolus.co.uk/Solus3Release/SOLUS3-3.5.20.ZIP (unzip password is<br />
$olu$3520). Unzip into a folder on the server i.e. \EIS_SIMS\SOLUS3.5.20<br />
4. Install the SOLUS 3 Deployment Server Database from the SOLUS3.5.20 folder, run<br />
SOLUS3Deploymentserverdatabase.exe<br />
Any items needing to be installed will be ticked – click the Install button to apply them (the<br />
items listed on your server may differ from those shown here)<br />
At the Welcome Page - click next<br />
© <strong>EiS</strong> <strong>Kent</strong> Page 4
<strong>EiS</strong> <strong>Kent</strong> Information Notice <strong>13</strong>-<strong>E09</strong> <strong>V2</strong> June 20<strong>13</strong><br />
At the licence agreement screen, tick to accept the terms and click next<br />
Enter the Server Name and SQL Instance i.e. ADMIN-DC01\SIMS2008<br />
Select the option to Use a Trusted connection<br />
Click on Test Connection<br />
© <strong>EiS</strong> <strong>Kent</strong> Page 5
<strong>EiS</strong> <strong>Kent</strong> Information Notice <strong>13</strong>-<strong>E09</strong> <strong>V2</strong> June 20<strong>13</strong><br />
At the SQL Server Connection was successful message click OK and then click Next - If the<br />
connection is not successful, please contact the <strong>EiS</strong> Service Desk before proceeding any further.<br />
At the Database Setup Screen – Do NOT setup a separate SQL account for SOLUS3 User<br />
Interface, just click on Next<br />
Click Install on the Ready to Install SOLUS3Deployment Server Database<br />
As the files install, a black DOS screen will be appear<br />
© <strong>EiS</strong> <strong>Kent</strong> Page 6
<strong>EiS</strong> <strong>Kent</strong> Information Notice <strong>13</strong>-<strong>E09</strong> <strong>V2</strong> June 20<strong>13</strong><br />
Once completed the following screen will appear, click on Finish<br />
And then click OK at the SOLUS3 Deployment Server database installed successfully message<br />
5. Install SOLUS3 Deployment Service<br />
From the SOLUS3.5.20 folder, run SOLUS3Deploymentservice.exe. At the installer screen<br />
please click Install.<br />
Any items needing to be installed will be ticked – click the Install button to apply them (the<br />
items listed on your server may differ from those shown here).<br />
© <strong>EiS</strong> <strong>Kent</strong> Page 7
<strong>EiS</strong> <strong>Kent</strong> Information Notice <strong>13</strong>-<strong>E09</strong> <strong>V2</strong> June 20<strong>13</strong><br />
At the SOLUS 3 Deployment Service Setup Wizard screen Click on next<br />
Tick to accept the terms and next to accept the terms and conditions<br />
Enter the Server Name and SQL Instance i.e. ADMIN-DC01\SIMS2008<br />
Select the option to Use a Trusted connection and click on Test connection<br />
© <strong>EiS</strong> <strong>Kent</strong> Page 8
<strong>EiS</strong> <strong>Kent</strong> Information Notice <strong>13</strong>-<strong>E09</strong> <strong>V2</strong> June 20<strong>13</strong><br />
When the Connection Successful message appears on screen click OK and then Next to<br />
continue - If the connection is not successful, please contact the <strong>EiS</strong> Service Desk before<br />
proceeding any further.<br />
Leave port 52965 as default – and click on Next<br />
Enter the path to the .net Framework v4.0 support files - this will be located within the<br />
\EIS_SIMS\SOLUS3.5.20 folder created earlier (the path may differ from the screenshot below),<br />
click Next<br />
Install the SOLUS3 service to the default path of c:\program files\solus3\deploymentservice\ and<br />
then click Next to continue<br />
© <strong>EiS</strong> <strong>Kent</strong> Page 9
<strong>EiS</strong> <strong>Kent</strong> Information Notice <strong>13</strong>-<strong>E09</strong> <strong>V2</strong> June 20<strong>13</strong><br />
Click on install to begin the installation<br />
Once the Deployment Service has completed successfully, click on Finish<br />
© <strong>EiS</strong> <strong>Kent</strong> Page 10
<strong>EiS</strong> <strong>Kent</strong> Information Notice <strong>13</strong>-<strong>E09</strong> <strong>V2</strong> June 20<strong>13</strong><br />
At the SOLUS3 Deployment service installed successfully click OK<br />
6. Once installed please check under services that the “Solus 3 Deployment Service” has<br />
started<br />
7. Install SOLUS3 Deployment Server User Interface<br />
From the SOLUS3.5.20 folder, run SOLUS3DeploymentserverUI.exe - any items needing to<br />
be installed will be ticked – click the Install button to apply them (the items listed on your<br />
server may differ from those shown here)<br />
At the welcome screen click on Next<br />
© <strong>EiS</strong> <strong>Kent</strong> Page 11
<strong>EiS</strong> <strong>Kent</strong> Information Notice <strong>13</strong>-<strong>E09</strong> <strong>V2</strong> June 20<strong>13</strong><br />
Tick the box to Accept the licence agreement and click on Next<br />
Enter the Servername and SQL Instance i.e. ADMIN-DC01\SIMS2008<br />
Use a Trusted connection and then click on the Test Connection button<br />
At the Successful connection message click on OK and then Next to continue<br />
© <strong>EiS</strong> <strong>Kent</strong> Page 12
<strong>EiS</strong> <strong>Kent</strong> Information Notice <strong>13</strong>-<strong>E09</strong> <strong>V2</strong> June 20<strong>13</strong><br />
At the Setup Shortcuts Screen, tick both boxes – as below and click on next:<br />
Leave the destination folder for the User Interface as the default i.e. c:\program<br />
files\Solus3\DeploymentServerUI and then click Next<br />
© <strong>EiS</strong> <strong>Kent</strong> Page <strong>13</strong>
<strong>EiS</strong> <strong>Kent</strong> Information Notice <strong>13</strong>-<strong>E09</strong> <strong>V2</strong> June 20<strong>13</strong><br />
Click on Install to install the SOLUS3 User Interface<br />
Click on Finish at the completed screen<br />
And at the SOLUS3 Deployment Server UI installed successfully click OK<br />
© <strong>EiS</strong> <strong>Kent</strong> Page 14
<strong>EiS</strong> <strong>Kent</strong> Information Notice <strong>13</strong>-<strong>E09</strong> <strong>V2</strong> June 20<strong>13</strong><br />
PART 2 - CONFIGURING SOLUS3<br />
Now that SOLUS3 has now been successfully installed, you need to configure the settings:<br />
1. Run the SOLUS3 Deployment Server UI from the server desktop<br />
Complete the registration settings in My Site for your school by entering the following:<br />
Enter the school DfE (no spaces) i.e. 8861234<br />
And the Post code (with a space) i.e. ME15 8AW<br />
Click on Verify and this will populate the address details<br />
NOTE 1: If you get an error message displayed – “unable to reach<br />
http://s3ws.capitasolus.co.uk/packageserverservice.svc”, try this url from a browser and then try<br />
the verify again<br />
© <strong>EiS</strong> <strong>Kent</strong> Page 15
<strong>EiS</strong> <strong>Kent</strong> Information Notice <strong>13</strong>-<strong>E09</strong> <strong>V2</strong> June 20<strong>13</strong><br />
2. Once verified you need to register the site. Click on the Register button which displays<br />
the User credentials dialog - Enter the password (use the SA password) and<br />
confirmation password, SAVE and then Close<br />
NOTE 2: If you get a “primary key” error, click on the register button again and this should<br />
successfully register the site. If this does not work then check the machine keys access as per<br />
NB3 below.<br />
NOTE 3: If the administrator does not have full read/write access to the machine keys directory<br />
on the deployment server, they will be unable to register the site with Capita - See Appendix 1<br />
3. If your school is using a Proxy for internet connection then go to the Proxy Settings tab and<br />
complete, then Save and Close<br />
© <strong>EiS</strong> <strong>Kent</strong> Page 16
<strong>EiS</strong> <strong>Kent</strong> Information Notice <strong>13</strong>-<strong>E09</strong> <strong>V2</strong> June 20<strong>13</strong><br />
Those schools not using a proxy just click Close and you should be at the main SOLUS3<br />
Setup Screen.<br />
For Medway schools using the Medway proxy please enter:<br />
Address: https://filtpol3.medway.org.uk<br />
Port: 8080<br />
Leave the domain, username and password blank.<br />
4. If the SOLUS3 Setup screen is not displayed, run the SOLUS3 UI from the desktop and go<br />
into SYSTEM SETTINGS and select SOLUS3 tab, if the fields are not already populated,<br />
they need to be competed as per the example in Screen shot below but using your own<br />
school server details:<br />
To complete the SOLUS3 tab enter details as follows:<br />
Adding the Deployment database host computer – if this field is not already populated click on<br />
Select computer, Browse network computers on the left hand side of the page, highlight the<br />
SIMS server (i.e. Admin-DC01) and click on Add (this moves the Servername to the bottom half<br />
of the screen) and then click on Save to take you back to the SOLUS3 tab.<br />
© <strong>EiS</strong> <strong>Kent</strong> Page 17
<strong>EiS</strong> <strong>Kent</strong> Information Notice <strong>13</strong>-<strong>E09</strong> <strong>V2</strong> June 20<strong>13</strong><br />
Adding the Deployment database instance name – (if not already populated) manually enter<br />
the instance name i.e. \SIMS2008. NB you will need to add a \ before the instance name, and<br />
then click on the Save Settings button<br />
Adding the Deployment service host computer – (again , if not already populated), click on<br />
select computer, Browse network computers and then highlight the SIMS server and click on Add<br />
(which moves the Servername to the bottom half of the screen) and then click on Save.<br />
Please note you may only have the computer name showing (Admin-DC01) and not the full<br />
computer name plus domain as above.<br />
© <strong>EiS</strong> <strong>Kent</strong> Page 18
<strong>EiS</strong> <strong>Kent</strong> Information Notice <strong>13</strong>-<strong>E09</strong> <strong>V2</strong> June 20<strong>13</strong><br />
Deployment server port – leave as default of 52965<br />
Agent port – leave as default of 52966<br />
Agent heartbeat – tick to poll every 5 mins<br />
Deployment server URL – leave as default i.e. net.tcp://Servername.domain:52965. You<br />
should only need to use this option if you have to manually install SOLUS3 agents on a<br />
workstation.<br />
5. Complete the Updates Tab (still under the system settings area)<br />
In the field Check for new updates make sure it is set to check every 30 minutes<br />
Under the section “Specify the network share where the SOLUS3 updates will be downloaded to”<br />
enter the Update Repository path (the path to the newly created “repository” folder called<br />
SOLUS3Setups - see point 2 on page 4) using the format of the UNC path i.e.<br />
\\Admin-dc01\sims shared$\SIMS\SOLUS3Setups and then click on Validate<br />
Auto download to repository - tick the box to allow auto downloads between preferred times<br />
i.e. 03:00 and 05:00<br />
Maximum concurrent connections – set to 5<br />
Tick the box to Auto download to agents, between your preferred times i.e.12:00 and 14:00<br />
© <strong>EiS</strong> <strong>Kent</strong> Page 19
<strong>EiS</strong> <strong>Kent</strong> Information Notice <strong>13</strong>-<strong>E09</strong> <strong>V2</strong> June 20<strong>13</strong><br />
Once completed click on save, if the System configuration message is displayed click OK<br />
At the agent definitions message click ok<br />
© <strong>EiS</strong> <strong>Kent</strong> Page 20
<strong>EiS</strong> <strong>Kent</strong> Information Notice <strong>13</strong>-<strong>E09</strong> <strong>V2</strong> June 20<strong>13</strong><br />
6. From the Main SOLUS3 UI select System Settings, then the Deployment Tab<br />
In the field for Task time out (minutes) enter 30<br />
And tick the box to Rollback deployment on failure<br />
Click on the Save button (if active) then click the Auto Deployment tab<br />
© <strong>EiS</strong> <strong>Kent</strong> Page 21
<strong>EiS</strong> <strong>Kent</strong> Information Notice <strong>13</strong>-<strong>E09</strong> <strong>V2</strong> June 20<strong>13</strong><br />
7. Auto Deployment Tab (under System Settings)<br />
This tab is used to schedule upgrades to FMS / SIMS / Discover and the Deployment service –<br />
please leave this blank for now and click on the Alerts tab<br />
8. Alerts Tab<br />
In order for your System Manager to receive email notification that updates have been released<br />
or deployment plans has successfully completed, please enter the SMTP information<br />
Enter your SMTP details i.e. if you are using KCN enter SMTP.KCN.ORG.UK and port 25<br />
© <strong>EiS</strong> <strong>Kent</strong> Page 22
<strong>EiS</strong> <strong>Kent</strong> Information Notice <strong>13</strong>-<strong>E09</strong> <strong>V2</strong> June 20<strong>13</strong><br />
If you are a Medway school using the Medway mail server enter<br />
mail.medway.org.uk and port 25<br />
And if you are a Bromley/Bexley school using LGFL2 please enter<br />
mailrelay.lgfl.org.uk and port 25.<br />
If your school is using its own mail server, enter the relevant details here.<br />
If you need to add a user name and password to access the mail server enter them in the<br />
relevant fields.<br />
Add the email address of the “person” who will send the SOLUS3 alert emails to the<br />
school – the sender email address does not have to be a proper email address, it can be a<br />
fictitious one i.e. solus3logs@yourschool.kent.sch.uk. – this way when the alert email appears in<br />
the users inbox it can easily be identified as coming from SOLUS3.<br />
Once the information has been entered, click on the Send Test Email button to make sure the<br />
connection is working.<br />
Now click on Save<br />
If you are taken back to the SOLUS3 main menu, select the System Settings, Alerts tab.<br />
Click on the Alert Settings button on the left hand side<br />
You will now need to setup the two email messages – one to notify of new updates and the<br />
second to email when a deployment plan status changes.<br />
Tick the box next to Update and then enter the email address of the person you want to receive<br />
these messages and the default message you want to send and click on save.<br />
© <strong>EiS</strong> <strong>Kent</strong> Page 23
<strong>EiS</strong> <strong>Kent</strong> Information Notice <strong>13</strong>-<strong>E09</strong> <strong>V2</strong> June 20<strong>13</strong><br />
Next tick the box next to Distribute Deployment and then enter the email address of the<br />
person you want to receive these messages and the default message you want to send and click<br />
on save and close at the end of the screen<br />
© <strong>EiS</strong> <strong>Kent</strong> Page 24
<strong>EiS</strong> <strong>Kent</strong> Information Notice <strong>13</strong>-<strong>E09</strong> <strong>V2</strong> June 20<strong>13</strong><br />
PART 3 - SETTING UP A DEFAULT INSTALLATION PATHS SO THAT SOLUS 3 CAN<br />
BE USED TO AUTO INSTALL SIMS / FMS<br />
Create a new folder within the network SIMS folder named “Default SOLUS 3 ini files”. Into this<br />
folder, copy the full version of the CONNECT.ini (from the \SIMS directory on the server), the<br />
FMSConnect.ini from the FMSSQL folder on the local C:\ drive of the server (i.e c:\program files<br />
(x86)\sims\fmssql) and the SIMS.ini file from C:\windows folder on the server.<br />
Once a copy of the SIMS.ini has been saved into this folder, remove the entries in the [Setup]<br />
area of this copy which points to the location of the SIMSDotNetDirectory and the<br />
FinanceDirectory<br />
[Setup]<br />
SIMSDirectory=S:\SIMS<br />
SIMSSetupsDirectory=S:\SIMS\Setups<br />
SIMSDotNetDirectory=C:\Program Files (x86)\sims\ remove this line<br />
SIMSSQLAppsDirectory=C:\Program Files (x86)\Microsoft SQL<br />
Server\MSSQL10_50.SIMS2008\MSSQL\Binn<br />
Folder=SIMS Applications<br />
FinanceDirectory=C:\Program Files (x86)\SIMS\FMSSQL -remove this line<br />
From the main SOLUS3 menu, go to System Settings, select Workstation Settings from the<br />
left hand side of the screen, and then click on the SIMS.ini tab<br />
You do not need to add the installation path for SIMS or FMS if you are using the default paths –<br />
SOLUS3 is intuitive and will work out via the network BIOS whether the pc is 32 or 64 bit and will<br />
install to the relevant location accordingly (i.e C:\Program Files\SIMS\SIMS .net or C:\Program<br />
Files(x86)\SIMS\SIMS .net)<br />
SIMS.ini Tab<br />
Click on the browse button (…) next to the default SIMS.ini path and browse to the location of<br />
the previous saved SIMS.ini file (D:\Administration\SIMS Shared\SIMS\Default SOLUS 3 ini files),<br />
click on Save then click OK to the target definitions message.<br />
Connect.ini<br />
Click on the Connect.ini tab<br />
© <strong>EiS</strong> <strong>Kent</strong> Page 25
<strong>EiS</strong> <strong>Kent</strong> Information Notice <strong>13</strong>-<strong>E09</strong> <strong>V2</strong> June 20<strong>13</strong><br />
Default connect.ini file path - browse to the location of the previously saved connect.ini file<br />
(S:\SIMS\ Default SOLUS 3 ini files)<br />
Do not tick the box “if all entries in the local connect.ini file should be overwritten tick this box”<br />
Do not tick to Redirect or enter anything in the redirect file location as you have selected to use<br />
a default connect.ini<br />
The Server\Instance name i.e. Admin-dc01\sims2008 and database name i.e. SIMS will be<br />
displayed below<br />
Click on the Connection type drop down and select undefined (if not already selected)<br />
Click on Save<br />
At the message “target definitions have been saved” click OK<br />
Now click on the FMSConnect.ini tab<br />
Default FMSconnect.ini path - browse to the location of the previously saved default<br />
FMSConnect.ini (S:\SIMS\ Default SOLUS 3 ini files)<br />
Do not tick the box “if all entries in the local connect.ini file should be overwritten tick this box”<br />
Do not tick to Redirect or enter anything in the redirect file location as you have selected to use<br />
a default FMSConnect.ini<br />
As you have added a default FMSConnect.ini the Server\Instance name i.e. Admindc01\sims2008<br />
and Database name i.e. CCSFMS, will be displayed below, Click Save<br />
© <strong>EiS</strong> <strong>Kent</strong> Page 26
<strong>EiS</strong> <strong>Kent</strong> Information Notice <strong>13</strong>-<strong>E09</strong> <strong>V2</strong> June 20<strong>13</strong><br />
At the message “target definitions have been saved” click OK<br />
Click Close<br />
© <strong>EiS</strong> <strong>Kent</strong> Page 27
<strong>EiS</strong> <strong>Kent</strong> Information Notice <strong>13</strong>-<strong>E09</strong> <strong>V2</strong> June 20<strong>13</strong><br />
PART 4 - You now need to setup the SIMS/ FMS/ Discover Channels<br />
From the main SOLUS3 User Interface, go into SOLUS3 Agents and select Update<br />
Environment from the menu on the left hand side<br />
Select the SIMS channel from the drop down list on the left hand side of the screen. Here you<br />
will need to go through each option listed and add details of the SIMS SQL Server, SIMS<br />
Database, SIMS Document Management Server, SIMS File server and all SIMS workstations.<br />
© <strong>EiS</strong> <strong>Kent</strong> Page 28
<strong>EiS</strong> <strong>Kent</strong> Information Notice <strong>13</strong>-<strong>E09</strong> <strong>V2</strong> June 20<strong>13</strong><br />
1. Add the SIMS SQL Server:<br />
In the section SIMS SQL Server, click on the Select Computers button – click on Browse for<br />
SQL Servers and the following will be displayed (your screen may display different information) :<br />
Click on the Browse network computers, highlight your SIMS SQL server i.e. Admin-DC01<br />
© <strong>EiS</strong> <strong>Kent</strong> Page 29
<strong>EiS</strong> <strong>Kent</strong> Information Notice <strong>13</strong>-<strong>E09</strong> <strong>V2</strong> June 20<strong>13</strong><br />
Click on the Add button and the servername will drop down to the bottom half of the screen<br />
When you click on Save you will be prompted to enter the SIMS SQL Server Parameters:<br />
At the bottom of the page, enter the instance name and the SQL Binn folder i.e. SIMS2008 (no<br />
\ before it ) and d:\administration\server applications\ms sql server<br />
2008\mssql10_50.sims2008\mssql\binn, and then click on Save (underneath the Instance name)<br />
and the instance name and Binn folder location will appear at the top of the page next to the<br />
computer name and instance.<br />
© <strong>EiS</strong> <strong>Kent</strong> Page 30
<strong>EiS</strong> <strong>Kent</strong> Information Notice <strong>13</strong>-<strong>E09</strong> <strong>V2</strong> June 20<strong>13</strong><br />
Next click on save at the bottom of the screen - at this point you will need to enter the server<br />
domain name and the administrators username and password i.e. admin\administrator<br />
Click Save.<br />
At the message “target definitions have been saved” click ok<br />
2. Add the SIMS Database:<br />
From the Target Definitions screen go to thte SIMS Database section, click on the Select<br />
Computers button, Click on Add, then highlight the SQL Server name i.e. Admin-DC01, click<br />
on the Add button underneath the server name and the computer name moves to the lower half<br />
of the screen – under Selected SIMS SQL Server Definiton<br />
Click on Save<br />
You will now be prompted to insert the SIMS database parameters.<br />
© <strong>EiS</strong> <strong>Kent</strong> Page 31
<strong>EiS</strong> <strong>Kent</strong> Information Notice <strong>13</strong>-<strong>E09</strong> <strong>V2</strong> June 20<strong>13</strong><br />
Manually enter the database name (usually SIMS), the SA userid and the SA password and<br />
click on Save (under the password). Again, the database name and SA username will appear at<br />
the top of the page. If you have more than one SIMS database you can repeat this process to<br />
add your second database.<br />
Click on Save at the bottom of the screen<br />
At the message “target definitions have been saved” click ok<br />
© <strong>EiS</strong> <strong>Kent</strong> Page 32
<strong>EiS</strong> <strong>Kent</strong> Information Notice <strong>13</strong>-<strong>E09</strong> <strong>V2</strong> June 20<strong>13</strong><br />
3. Add SIMS workstations:<br />
From the Target Definitions screen go to the SIMS Workstation section, click on the Select<br />
Computers button, Click on the Add button<br />
then Click on Browse Network Computers (on the left hand side), to show list of workstation not<br />
currently part of the S3 environment for SIMS workstations.<br />
© <strong>EiS</strong> <strong>Kent</strong> Page 33
<strong>EiS</strong> <strong>Kent</strong> Information Notice <strong>13</strong>-<strong>E09</strong> <strong>V2</strong> June 20<strong>13</strong><br />
Highlight the one(s) you want to add as a SIMS workstation/agent (including the server) and<br />
click on ADD. The selected workstations move to the lower half of the screen and then click on<br />
the SAVE button to keep the changes.<br />
NOTE: – if you are wanting to add workstations from a different domain, please change the<br />
domain name on the left hand side of the screen under filters (you may be prompted to enter the<br />
administrator credentials for the curriculum domain i.e. curric\administrator)<br />
Once saved the SIMS workstations will be displayed and you will be prompted to enter the path<br />
for the locally installed SIMS .net program files:<br />
© <strong>EiS</strong> <strong>Kent</strong> Page 34
<strong>EiS</strong> <strong>Kent</strong> Information Notice <strong>13</strong>-<strong>E09</strong> <strong>V2</strong> June 20<strong>13</strong><br />
Do not enter an installation path as new SIMS installs will go to the default path, just click on<br />
Save, enter the Domain name\Administrator user id and password and click ok to the<br />
message and at the message “target definitions have been saved” click ok<br />
4. Add the SIMS Document Server:<br />
From the Target Definitions screen go to the SIMS DMS section, click on the Select Computers<br />
button.<br />
Click on Add, click on Browse Network Computers (left hand side of the screen), highlight the<br />
servername i.e Admin-DC01, click on the Add button in the middle of the screen (the server<br />
name will move to the lower half of the screen)<br />
Click on the save button at the bottom of the screen<br />
Again you do not need to add the path to the SIMS Document Server as it should have been<br />
installed into i.e. c:\program files\sims .net document server.<br />
Click on Save then close.<br />
5. Add the SIMS File Server<br />
From the Target Definitions screen go to the SIMS File Server section, click on the Select<br />
Computers button.<br />
Click on Add, click on Browse network computers, highlight the server i.e. Admin-DC01 and<br />
click on Add in the middle of the screen.<br />
Click Save<br />
Enter the path to the shared SIMS files i.e d:\administration\sims shared\sims, and click on Save<br />
(underneath the installation location) and then click on Save at the bottom of the page.<br />
© <strong>EiS</strong> <strong>Kent</strong> Page 35
<strong>EiS</strong> <strong>Kent</strong> Information Notice <strong>13</strong>-<strong>E09</strong> <strong>V2</strong> June 20<strong>13</strong><br />
Click on ok and at the message “target definitions have been saved” click ok<br />
© <strong>EiS</strong> <strong>Kent</strong> Page 36
<strong>EiS</strong> <strong>Kent</strong> Information Notice <strong>13</strong>-<strong>E09</strong> <strong>V2</strong> June 20<strong>13</strong><br />
If you use FMS you will now need to Setup the FMS Database, FMS SQL server and<br />
Workstations.<br />
Select the FMS Channel from the drop down list on the left hand side of the screen. Here you<br />
will need to go through each option listed and add details of the FMS SQL Server, FMS Database<br />
and all FMS workstations<br />
1. Add the FMS SQL Server<br />
Firstly setup the FMS SQL Server by clicking on the Select Computers button, click on Browse<br />
for SQL servers, then browse for network computers and select the computer that has SQL<br />
installed – highlight the SQL Server, Click on Add then Save.<br />
At the bottom of the screen, enter the Instance Name i.e. SIMS2008 and the location of the<br />
Binn folder i.e. D:\administration\server applications\ms sql server<br />
2008\mssql10_50.sims2008\mssql\Binn.<br />
Click on the Save button under the Instance name and then click the Save at the bottom of the<br />
screen.<br />
At the message “target definitions have been saved” click ok<br />
2. Setup the FMS database<br />
From the Target Definitions screen select the FMS Database section click on the select<br />
computers button, click Add, highlight the server, click on Add and then Save<br />
Now add the FMS database(s) – at the bottom of the screen enter the FMS Database Name i.e.<br />
CCSFMS<br />
Enter the username of SA and enter your SQL 2008 SA password into the password and<br />
confirm password fields and click on Save (under the password), and Save again (at the bottom<br />
of the screen).<br />
Click OK at Target Definition message.<br />
© <strong>EiS</strong> <strong>Kent</strong> Page 37
<strong>EiS</strong> <strong>Kent</strong> Information Notice <strong>13</strong>-<strong>E09</strong> <strong>V2</strong> June 20<strong>13</strong><br />
If you have more than one FMS database you will need to go through the above process<br />
again and add the second database name, add username sa and password and Save.<br />
3. Add the FMS workstations<br />
From the Target Definitions screen select the FMS Workstation section click on the Select<br />
computers button.<br />
Click on the Add button, Browse Network Computers (on the left hand side) to browse to the<br />
workstations – highlight those to use FMS (including the server) and click on Add to move the<br />
name top the lower half of the screen<br />
You may need to Browse AD computers to find any FMS stations not found in Browse Network<br />
Computers, click Administration | Computers | Workstations then Browse Computers<br />
button, select by clicking Add any stations running FMS.<br />
Click on Save (you do not need to enter anything in the Installation path as FMS is installed to<br />
the default location).<br />
Save again.<br />
© <strong>EiS</strong> <strong>Kent</strong> Page 38
<strong>EiS</strong> <strong>Kent</strong> Information Notice <strong>13</strong>-<strong>E09</strong> <strong>V2</strong> June 20<strong>13</strong><br />
At the message “target definitions have been saved” click ok.<br />
If your school does not currentely have Discover installed you can click on Close and exit the<br />
target definitions area.<br />
© <strong>EiS</strong> <strong>Kent</strong> Page 39
<strong>EiS</strong> <strong>Kent</strong> Information Notice <strong>13</strong>-<strong>E09</strong> <strong>V2</strong> June 20<strong>13</strong><br />
If you have Discover installed you will also need to setup the Discover Channel<br />
Please note, if you are not yet using Discover we would recommend that you do not install it at<br />
the time of the SOLUS3 setup – we would suggest waiting until SOLUS3 is up and running and<br />
then contact <strong>EiS</strong> for installation information on Discover.<br />
For those schools who have Discover installed, Select the SIMS- Discover Channel from the<br />
drop down list on the left hand side of the screen.<br />
Here you will need to go through each option listed and add details of the Discover Database,<br />
Discover Windows Services and Discover Clients<br />
1. Add the Discover Database – first click on Select Computer<br />
In Section 1, Computer name – click on the Select computer button then browse network<br />
computers (on the left hand side), highlight the admin server i.e. Admin-DC01. Click on the<br />
Add button in the middle of the screen, the Servername moves to the bottom half of the screen,<br />
click on Save<br />
Now enter the Instance Name i.e. SIMS2008 and the Discover Database name i.e. Discover.<br />
Leave the radio button in Use trusted connection (windows authentication)<br />
If the details for the SIMS database this Discover database relates to are not already<br />
populated, enter the SQL Server name by clicking on Select computer button and browsing to<br />
the admin server i.e. Admin-DC01.<br />
Enter the Instance name i.e. SIMS2008 and the name of the SIMS database that is linked to the<br />
Discover database i.e. SIMS.<br />
© <strong>EiS</strong> <strong>Kent</strong> Page 40
<strong>EiS</strong> <strong>Kent</strong> Information Notice <strong>13</strong>-<strong>E09</strong> <strong>V2</strong> June 20<strong>13</strong><br />
Click on Save<br />
At the message “target definitions have been saved” click OK<br />
2. Setup Discover Windows services definitions<br />
a) In the Discover Windows Services section click on Select Computers and in Panel 1<br />
click Select Computer button and browse to the Admin server by clicking Browse<br />
Network Computers button, highlight Admin server i.e. Admin-dc01 and click Add then<br />
Save.<br />
Enter the installation path of C:\Program Files\SIMS\Discover Services<br />
b) Panel 2 named Enter credentials for the data transfer service account and for Panel 3<br />
named Discover group synch service account make sure the option to Use built in<br />
account and select NT Authority\System Service is selected from the drop down arrow.<br />
c) In Panel 4 enter the time set for the Discover Data transfer & User synch scheduled<br />
task to run<br />
d) Panel 5 If the section Select the Discover database this service relates to if not<br />
populated, browse to the SQL server i.e. Admin-dc01, enter the Instance name i.e.<br />
SIMS2008 and the Database name i.e. Discover, and click on Save.<br />
© <strong>EiS</strong> <strong>Kent</strong> Page 41
<strong>EiS</strong> <strong>Kent</strong> Information Notice <strong>13</strong>-<strong>E09</strong> <strong>V2</strong> June 20<strong>13</strong><br />
At the message “target definitions have been saved” click OK.<br />
3. Setup the Discover Clients<br />
In the Discover Client section click on the Select Computers button, click on the Add button,<br />
Browse network computers, highlight the workstation(s) that run Discover (including the<br />
server) and click on Add, this will move those selected to the bottom half of the screen, now click<br />
on Save.<br />
It may be necessary to Browse AD Computers, go to Administration | Computers |<br />
Workstations then click Browse computers button select any other workstations running<br />
Discover by highlighting and clicking Add and then Save<br />
Panel 2 named - Enter the installation path for the Discover client to use - Leave the<br />
installation path for the Discover client blank and SOLUS 3 will use the default path<br />
Panel 3 named - Select the Discover Databse the client definitions relate to - If not already<br />
populated, browse to the server with SQL 2008 installed, i.e Admin-DC01, enter the Instance<br />
name i.e. SIMS2008 and the Discover Database name i.e. Discover<br />
© <strong>EiS</strong> <strong>Kent</strong> Page 42
<strong>EiS</strong> <strong>Kent</strong> Information Notice <strong>13</strong>-<strong>E09</strong> <strong>V2</strong> June 20<strong>13</strong><br />
Click on Save, you may be prompted to enter the domain administrators credentials i.e<br />
admin\administrator<br />
At the message “target definitions have been saved” click OK<br />
Click on CLOSE<br />
© <strong>EiS</strong> <strong>Kent</strong> Page 43
<strong>EiS</strong> <strong>Kent</strong> Information Notice <strong>13</strong>-<strong>E09</strong> <strong>V2</strong> June 20<strong>13</strong><br />
PART 5 - ENABLE SOLUS3<br />
Once the setup is complete you will need to Enable SOLUS 3, from the main SOLUS3 screen<br />
click on the System Settings button and then click on the button Click here to enable Solus3<br />
Click Yes to activate the service<br />
Click on Save<br />
PART 6 - BACKING UP THE NEW SOLUS3 DATABASE<br />
Once you have installed SOLUS3, you will have to edit your daily backup routine to include trhe<br />
new SOLUS3 database (solus3_deployment_server.mdf and solus3_deployment_server.ldf )<br />
If your school is using Attix 5 please contact <strong>EiS</strong> as we will need to edit the plug-in settings for<br />
you.<br />
PART 7 – “DISABLE SOLUS2”<br />
Now that SOLUS3 has been installed you do not need to use SOLUS2 any more. To stop<br />
confusion, with the setup files and the repository files in the SIMS folder, it is recommnded that<br />
you rename the network SIMS\Setups folder to Setups pre SOLUS3.<br />
Once this has been done you can also rename the “update and run solus” icon on the server to<br />
“Do Not Use update and run solus”.<br />
© <strong>EiS</strong> <strong>Kent</strong> Page 44
<strong>EiS</strong> <strong>Kent</strong> Information Notice <strong>13</strong>-<strong>E09</strong> <strong>V2</strong> June 20<strong>13</strong><br />
PART 8 - THINGS TO CHECK AFTER INSTALLING SOLUS 3<br />
Check workstations are showing correct versions of both SIMS & FMS (& Discover if already<br />
installed).<br />
From the main SOLUS3 menu select SOLUS3 Agents:<br />
Each workstation that was added as a SIMS/FMS or Discover workstation in the setup process<br />
should be listed in this Deployment environment<br />
Check to make sure each workstation listed has the correct agent version listed i.e. 3.5.20 and<br />
the Agent status of “on line”.<br />
© <strong>EiS</strong> <strong>Kent</strong> Page 45
<strong>EiS</strong> <strong>Kent</strong> Information Notice <strong>13</strong>-<strong>E09</strong> <strong>V2</strong> June 20<strong>13</strong><br />
If the Agent version number next to the workstation name is blank or the message panel shows<br />
installation failed, you can try re-installing the agent on the workstation by highlighting it and<br />
clicking on the Reinstall Agent button on the left hand side of the screen.<br />
If the Agent Status is showing as offline, please make sure the workstation is switched on and<br />
then try reinstalling the agent as above.<br />
As a further check, you can also highlight each station and server in turn and check the software<br />
versions installed by clicking View Agent Details (from the panel on the left hand side)<br />
Under the targets tab you will see what version of the SIMS/FMS/Discover client is installed on<br />
the workstation and also the version of the SOLUS 3 agent that has been installed<br />
© <strong>EiS</strong> <strong>Kent</strong> Page 46
<strong>EiS</strong> <strong>Kent</strong> Information Notice <strong>13</strong>-<strong>E09</strong> <strong>V2</strong> June 20<strong>13</strong><br />
PART 9 - CHECKING FOR UPDATES / PATCHES IN SOLUS3<br />
In the original setup we had setup Solus3 to check for updates and auto download them. But, if<br />
you want to force SOLUS3 to check for updates you will need to go to Manage Updates from<br />
the main SOLUS3 menu<br />
All previous updates that have been allocated/downloaded to the school will be listed.<br />
In the first part of the setup, SOLUS3 was set to auto download updates from the server, but if an<br />
update is not showing on this list, you can force SOLUS to check for updates by clicking on the<br />
Check for new updates button. A message will be displayed showing any new updates found:<br />
© <strong>EiS</strong> <strong>Kent</strong> Page 47
<strong>EiS</strong> <strong>Kent</strong> Information Notice <strong>13</strong>-<strong>E09</strong> <strong>V2</strong> June 20<strong>13</strong><br />
In this example, SOLUS3 has found an update to the deployment service, but it could be that<br />
FMS and SIMS upgrades are found. The new update(s) will be displayed in the list:<br />
Download the update file to the repository<br />
Before you can deploy the update, you need to download it – highlight the update and click on the<br />
Download Selected update button. When the file has successfully downloaded, the status will<br />
show as Downloaded.<br />
© <strong>EiS</strong> <strong>Kent</strong> Page 48
<strong>EiS</strong> <strong>Kent</strong> Information Notice <strong>13</strong>-<strong>E09</strong> <strong>V2</strong> June 20<strong>13</strong><br />
Scheduling an update to run overnight<br />
To schedule this update to run automatically overnight; first check the time the nightly Attix5<br />
/scheduled backup will be running so that the update can be applied after this.<br />
From the Main SOLUS3 menu select the System Settings button and then the Auto<br />
Deployment tab:<br />
This example shows how to schedule an update to the SOLUS3 Deployment Service but<br />
the same process can be applied to SIMS/FMS/Discover updates.<br />
© <strong>EiS</strong> <strong>Kent</strong> Page 49
<strong>EiS</strong> <strong>Kent</strong> Information Notice <strong>13</strong>-<strong>E09</strong> <strong>V2</strong> June 20<strong>13</strong><br />
Tick the module you want to update i.e. Deployment Service, enter the time span for the<br />
update to run (need to add at least a two hour slot) then tick the day you want the update to<br />
apply and click on Save.<br />
Once saved click on Close and exit the SOLUS3 console<br />
© <strong>EiS</strong> <strong>Kent</strong> Page 50
<strong>EiS</strong> <strong>Kent</strong> Information Notice <strong>13</strong>-<strong>E09</strong> <strong>V2</strong> June 20<strong>13</strong><br />
How to Check the update has applied successfully<br />
The upgrade will apply overnight at the time specified but you need to check the upgrade has<br />
completed successfully.<br />
From the main SOLUS3 menu select Deployment History - highlight the upgrade and make sure<br />
it is showing as Successful.<br />
If the update was not successful you can re-deploy the update again by highlighting the<br />
element that failed and clicking on Deploy now (please make sure all users are out of<br />
SIMS/FMS).<br />
Where the workstation upgrade has failed on a station(s), you can click on the symbol next to<br />
the workstation and select the stations which did not upgrade and redeploy the workstation files.<br />
© <strong>EiS</strong> <strong>Kent</strong> Page 51
<strong>EiS</strong> <strong>Kent</strong> Information Notice <strong>13</strong>-<strong>E09</strong> <strong>V2</strong> June 20<strong>13</strong><br />
Appendix 1<br />
Ensuring Access to the MachineKeys Directory<br />
If the Administrator does not have full read and write access to the MachineKeys directory on the<br />
Deployment Sever, they will be unable to register the site with Capita SIMS. If the administrator<br />
does not have the correct access privileges, the following error occurs during the site registration<br />
process: Unable to register site error. An error occurred saving the Deployment Service security<br />
keys, please contact your local support unit. Access is denied. To prevent this error during<br />
registration, complete the following procedure:<br />
<br />
<br />
<br />
<br />
<br />
<br />
On the machine that hosts the Deployment Service, navigate to the C:\drive.<br />
From the Tools menu, select Folder Options.<br />
Select the View tab.<br />
In the Advanced Settings list, select the Show hidden files and folder option via Files<br />
and Folders | Hidden files and folders.<br />
Click the Apply button.<br />
Click the OK button.<br />
From the root of the C:\ drive, navigate to the RSA directory. For Windows Server 2008,<br />
Windows Server 2008 RS, Windows 7 and Windows Vista, this is accessed via<br />
ProgramData | Microsoft | Crypto. For Windows Server 2003 and Windows XP, this is<br />
accessed via Documents and Settings | all users | Application Data | Microsoft |<br />
Crypto | RSA | MachineKeys.<br />
<br />
<br />
<br />
<br />
<br />
<br />
<br />
<br />
<br />
In the RSA folder, right-click the MachineKeys folder then select Properties from the popup<br />
menu.<br />
In the MachineKeys Properties dialog, select the Security tab.<br />
Click the Edit button.<br />
In the Group or user name panel, select the Administrators group.<br />
In the Permissions for Administrators panel, select the Full control check box in the<br />
Allow column.<br />
Click the Apply button.<br />
Click the OK button.<br />
Click the OK button again to exit the MachineKey Properties dialog.<br />
Try and register the establishment again with the Capita SIMS servers.<br />
© <strong>EiS</strong> <strong>Kent</strong> Page 52
<strong>EiS</strong> <strong>Kent</strong> Information Notice <strong>13</strong>-<strong>E09</strong> <strong>V2</strong> June 20<strong>13</strong><br />
Appendix 2<br />
Firewall Settings for XP Workstations<br />
Run all of these dos commands to setup the local firewall for SOLUS 3 to work and still allow the<br />
firewall to be turned on. If you set these commands to run as a batch file, you will need to copy<br />
the file to the workstation and run it from there<br />
Please note that this has locked down the changes so that the PC only talks to the SIMS\SOLUS<br />
3 server which is 192.168.1.1 - this would need to be changed to your schools SIMS\SOLUS 3<br />
server IP.<br />
These commands can be setup to run as a batch file but you, you will need to copy the file to the<br />
workstation and run it from there.<br />
netsh firewall set portopening protocol = TCP port = 52965 name = SOLUS-3-DS scope =<br />
CUSTOM addresses = 192.168.1.1<br />
netsh firewall set portopening protocol = TCP port = 52966 name = SOLUS-3-AGENT scope =<br />
CUSTOM addresses = 192.168.1.1<br />
netsh firewall set portopening protocol = TCP port = 8739 name = SOLUS-3--AGENT-UI scope =<br />
CUSTOM addresses = 192.168.1.1<br />
netsh firewall set service type = REMOTEADMIN mode = ENABLE scope = CUSTOM addresses<br />
= 192.168.1.1<br />
netsh firewall set notifications DISABLE<br />
netsh firewall set service type = FILEANDPRINT mode = ENABLE<br />
This is the outcome of the DOS commands:<br />
© <strong>EiS</strong> <strong>Kent</strong> Page 53
<strong>EiS</strong> <strong>Kent</strong> Information Notice <strong>13</strong>-<strong>E09</strong> <strong>V2</strong> June 20<strong>13</strong><br />
Firewall Settings for Windows 7 workstations:<br />
Run all of these dos commands to setup the local firewall for SOLUS 3 to work and still allow the<br />
firewall to be turned on.<br />
Please note that this has locked down the changes so that the PC only talks to the SIMS\SOLUS<br />
3 server which is 192.168.1.1 - this would need to be changed to your schools SIMS\SOLUS 3<br />
server IP.<br />
These commands can be setup to run as a batch file but you, you will need to copy the file to the<br />
workstation and run it from there<br />
netsh firewall set notifications DISABLE<br />
netsh firewall set service type = FILEANDPRINT mode = ENABLE scope = CUSTOM addresses<br />
= 192.168.1.1<br />
netsh firewall set portopening protocol = TCP port = 52965 name = SOLUS-3-DS scope =<br />
CUSTOM addresses = 192.168.1.1<br />
netsh firewall set portopening protocol = TCP port = 52966 name = SOLUS-3-AGENT scope =<br />
CUSTOM addresses = 192.168.1.1<br />
netsh firewall set portopening protocol = TCP port = 8739 name = SOLUS-3--AGENT-UI scope =<br />
CUSTOM addresses = 192.168.1.1<br />
netsh firewall set service type = REMOTEADMIN mode = ENABLE<br />
The outcome of these commands will show as :<br />
© <strong>EiS</strong> <strong>Kent</strong> Page 54