Download C32100FIPTV.pdf - Cello
Download C32100FIPTV.pdf - Cello
Download C32100FIPTV.pdf - Cello

You also want an ePaper? Increase the reach of your titles
YUMPU automatically turns print PDFs into web optimized ePapers that Google loves.
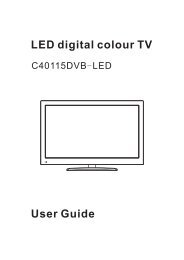
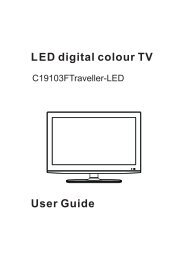
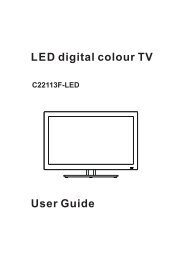
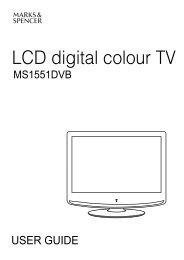
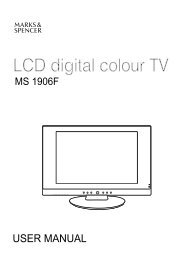
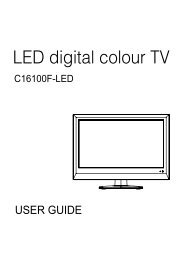
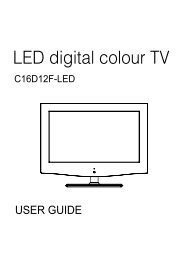
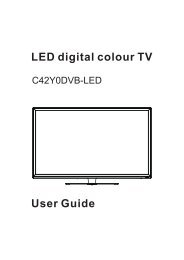
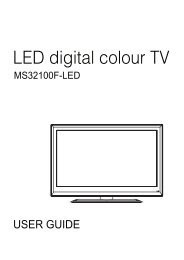
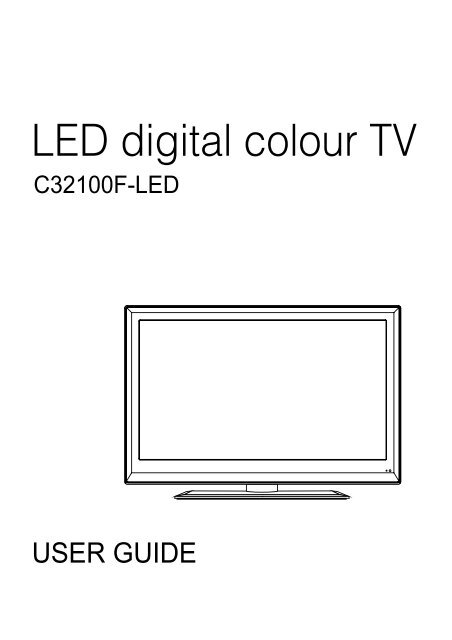
LED digital colour TV<br />
C32100F-LED<br />
USER GUIDE
Introduction<br />
Thank you for purchasing this TV which has been designed and manufactured to<br />
give you many years of trouble free service.<br />
You may already be familiar with using a similar product but please take time to read<br />
these instructions which have been written to ensure you get the very best from your<br />
purchase.<br />
Important Note<br />
This TV is fitted with the latest ECO friendly power saving technology. If whilst viewing<br />
the TV remote control is not used for a period of 4 hours, the Auto Standby feature will<br />
operate and power down the TV.<br />
A warning message will be displayed to inform you that the TV is about to power down.<br />
HDMI<br />
HDMI (High Definition Multimedia Interface) is the next generation of digital interface.<br />
Unlike conventional connections, it transmits uncompressed digital and audio signals<br />
using a single cable. This TV supports high-definition video input via the HDMI<br />
socket on the back of the TV.<br />
Safety is important<br />
To ensure your safety and the safety of others, please read the safety precautions<br />
BEFORE you operate this product.<br />
Contents<br />
You will find the following<br />
TV<br />
User Guide<br />
Quick Start Guide<br />
Remote Control<br />
2 x AA Batteries<br />
NOTE: If any of the items listed are damaged or missing please contact our<br />
helpline on 0871 288 7345<br />
1
Contents<br />
1 Introduction<br />
2 Contents<br />
3-5 Safety Information<br />
6-7<br />
8-11<br />
12<br />
13-17<br />
18<br />
19<br />
19<br />
20-27<br />
28-30<br />
31-33<br />
34<br />
35-42<br />
Unit and Accessories<br />
Remote Control<br />
Aerial connection<br />
Connecting external devices<br />
Common Interface slot<br />
Auto installation setup<br />
Source menu<br />
Menu settings<br />
Multimedia Operation<br />
Recording Operation<br />
EPG menu<br />
DVD Operation<br />
43 SimpleTroubleshooting<br />
44 Technical Specifications<br />
45 Wall Mounting<br />
2
SAFETY INFORMATION<br />
IMPORTANT SAFETY INSTRUCTIONS - READ CAREFULLY BEFORE USE.<br />
Take note of the following safety information which appears on the back of the TV.<br />
CAUTION TO PREVENT ELECTRICAL SHOCK, DO NOT REMOVE ANY<br />
COVER SCREWS, NO USER SERVICEABLE PARTS INSIDE, REFER<br />
SERVICING TO QUALIFIED SERVICE PERSONNEL.<br />
This symbol indicates that there are important operating maintenance instructions in<br />
the literature accompanying this unit.<br />
This symbol indicates that dangerous voltage constituting a risk of electric shock is<br />
present within this unit.<br />
Keep these instructions<br />
• Do not use this TV near water.<br />
• Clean only with a slightly damp cloth.<br />
• Do not block any ventilation openings.<br />
• Install in accordance with the supplied Quick Start Guide and this User Guide.<br />
• Protect the power chord from being walked on or pinched, particularly at plugs, and the<br />
point where it exits from the TV.<br />
• Do not allow the power chord to overhang the edge of a table.<br />
• Unplug this TV during lightening storms or when unused for long periods of time.<br />
WARNING! TO REDUCE THE RISK OF FIRE OR ELECTRICAL SHOCK, DO NOT<br />
EXPOSE THIS TV TO RAIN OR MOISTURE. THE TV MUST NOT BE EXPOSED<br />
TO DRIPPING AND SPLASHING AND NO OBJECTS FILLED WITH LIQUIDS<br />
SHOULD BE PLACED ON THE TV.<br />
NOTE: No naked flames such as candles should be placed on the TV.<br />
3
IMPORTANT SAFETY INFORMATION (Continued)<br />
This unit has been produced according to all current safety regulations. The following safety<br />
tips should safeguard users against careless use and the dangers connected with such use.<br />
Although this appliance has been carefully manufactured and rigorously checked<br />
prior leaving the factory, as with all electrical appliances it is possible for problems to<br />
develop. If you notice smoke, an excessive build up of heat or any other unexpected<br />
phenomena, you should disconnect the plug from the mains power socket<br />
immediately.<br />
Ensure that the unit is sufficiently ventilated! Never place next to or underneath<br />
curtains!<br />
The mains plug or appliance coupler is used as the disconnect device, the disconnect<br />
device shall remain readily operarble.<br />
This set should only be connected to a mains power supply which matches that<br />
stated on the label on the rear of the TV – do not attempt to connect it to any other<br />
type of supply.<br />
The socket – outlet must be installed near the equipment and easily accessible.<br />
To prevent overload, don’t share the same mains supply socket with too many other<br />
items of equipment.<br />
Apparatus with Class 1 construction shall be connected to a mains socket outlet with<br />
a protective earthing connection.<br />
Keep away from rodents. Rodents enjoy biting into electric flexes.<br />
Always hold the plug when pulling out the plug from the mains supply socket. Do not<br />
pull on the flex, the flex can become overloaded and cause a short circuit.<br />
Set up the unit so that no one is able to trip over the flex.<br />
Do not place heavy items on the flex, which may damage it.<br />
Take note that the flex cannot be reached and pulled by young children, avoiding<br />
injury.<br />
Do not set up the unit near to heat sources. The casing and the flex could be<br />
damaged by the impact of heat.<br />
The screen is made of plastic and can break if damage is done to it. Be careful when<br />
collecting sharp edged plastic splinters to avoid injury.<br />
Avoid placing the unit on any surfaces that may be subject to vibrations or shocks.<br />
To protect the unit during a thunderstorm unplug the AC power cable and disconnect<br />
the aerial. Caution: Do not touch the aerial (RF) connector.<br />
When you leave your home for long periods of time, unplug the AC power cable for<br />
safety reasons.<br />
The unit becomes warm when in operation. Do not place any covers or blankets on<br />
the unit in order to prevent overheating. The ventilation holes are not to be blocked.<br />
Do not set up near radiators. Do not place in direct sunshine. When placing on a<br />
shelf leave 5 cm (2”) free space around the whole unit.<br />
Do not allow water or moisture to enter the TV. Do NOT use in wet or moist areas<br />
such as Bathrooms, steamy kitchens or near swimming pools.<br />
Do not use this unit when moisture condensation may occur<br />
Any repairs must be carried out by qualified personnel only.<br />
Do not open this unit. A non – expert attempting to repair the unit could be dangerous<br />
and potentially cause a fire hazard.<br />
4
IMPORTANT SAFETY INFORMATION (continued)<br />
Liquids spilt into the unit can cause serious damage. Switch the set OFF and<br />
disconnect the mains power supply, then consult a qualified service person before<br />
attempting to use the unit again.<br />
Do NOT remove the safety covers. There are no useable or serviceable parts inside.<br />
Youmayinvalidatethewarranty.Qualifiedpersonnelmustonlyservicethis<br />
apperatus.<br />
Do NOT tap or shake the screen, you may damage the internal circuits. Take good<br />
care of the remote control, do not drop.<br />
Never place hot objects or open flame sources on or close to the TV.<br />
High temperatures can melt plastic and lead to fires.<br />
To clean the TV use a soft dry cloth. Do NOT use solvents or petrol based fluids. For<br />
stubborn stains, you may use a damp cloth with dilute detergent.<br />
Headphone Warning<br />
Loud music can damage your hearing irreversibly, therefore do not set the volume to a high<br />
level when listening through headphones, particularly for lengthy listening periods.<br />
Where to install<br />
Locate the television away from direct sunlight and strong lights, soft indirect lighting is<br />
recommended for comfortable viewing. Use curtains or blinds to prevent direct sunlight<br />
falling on the screen. Place the TV on a sturdy platform of which the surface should be flat<br />
and steady. This will prevent it from falling over.<br />
Make sure the television is located in a position where it cannot be pushed or hit by objects,<br />
as pressure will break or damage the screen, and so that small objects cannot be inserted<br />
into the ventilation slots or openings in the cabinet.<br />
LED Screen<br />
The LED display panels are manufactured using an extremely high level of precision<br />
technology, however sometimes some parts of the screen may be missing picture elements<br />
or have luminous spots. This is not a sign of malfunction.<br />
5
Unit and Accessories<br />
VOL- VOL+ CH- CH+ SOURCE MENU<br />
LED Indicator<br />
Remote Control Window<br />
(keep clear)<br />
Insert disc according to<br />
the label next to the<br />
disc slot<br />
The functions of the TV buttons are described below.<br />
Menu : Press to display the OSD menu, press again to exit the menu.<br />
CH+/- : Press to skip through the channels.<br />
Vol +/- : Press to adjust the volume.<br />
INPUT : Press to display the input source menu.<br />
STANDBY:Turn ON/OFF the TV set.<br />
The functions of the DVD buttons are described below.<br />
EJECT<br />
PLAY<br />
6
Unit and Accessories (continued)<br />
TV set<br />
Remote Control<br />
Converter cable<br />
for YPBPR video<br />
Batteries<br />
QUICK START<br />
GUIDE<br />
Gold care<br />
Warranty Card<br />
USER GUIDE<br />
Quick Start Guide<br />
Gold care<br />
Warranty Card<br />
User Guide<br />
7
Remote control<br />
Functions of remote control buttons<br />
Dependant on the model of theTV some keys will have no function<br />
iViewer<br />
Only used on TVs with Internet Player*.<br />
In this mode the remote does not control<br />
the TV.<br />
Press to control the TV again.<br />
If you have set the remote to work a<br />
Satellite receiver, the remote controls only<br />
the Satellite receiver and not the TV when<br />
you press<br />
Press to control the TV again.<br />
Used on TVs with DVD or PVR<br />
Used on TVs with PVR or Internet Player*<br />
HOLD<br />
TEXT<br />
Used on TVs with PVR or Internet Player*<br />
*Dependant on Model<br />
8
Remote control (continued)<br />
Dependant on the Model of the TV some keys will have no function<br />
Menu<br />
TV Settings<br />
Picture<br />
Sound<br />
Extras<br />
Option<br />
Language<br />
DVD setup<br />
Restore Setting<br />
Source Menu<br />
ATV (Analogue)<br />
DTV ( Freeview )<br />
SD1 (red card)*<br />
SD2 (green card)*<br />
AV<br />
Scart 1<br />
Scart 2*<br />
S-Video*<br />
HDMI 1<br />
HDMI 2<br />
HDMI 3<br />
YPbPr<br />
DVD<br />
PC<br />
USB<br />
iViewer<br />
*Dependant on Model<br />
Help<br />
This displays a page that gives telephone<br />
numbers for service.<br />
Press to enter, press again to exit.<br />
Quick Start<br />
Searches all ATV and DTV channels by a<br />
single key (can take up to 10 Mins).<br />
Lock<br />
Back<br />
Exit from any Menu<br />
Guide(DTV)<br />
Press to enter, press again to exit.<br />
Info-Taste<br />
In DTV mode shows Now / Next.<br />
2nd Press<br />
Extended programme Info.<br />
Whilst Recording*<br />
Shows details of the recording and space<br />
available on the card.<br />
DVD Eject<br />
Stop<br />
For DVD , iPlayer*, PVR, SD1*and SD2*.<br />
Fast forward - DVD &SD1*, SD2*, PVR<br />
Reverse - DVD &SD1*, SD2*, PVR<br />
Picture Mode<br />
Displays picture and aspect function<br />
Pause/Play<br />
DVD , iPlayer*, SD1* und SD2*<br />
PVR and Time shift<br />
DVD Disc Menu<br />
Sound - changes the sound<br />
Next - DVD , iPlayer*, PVR<br />
Display the Playback list on SD1*<br />
(red card)<br />
Display the Recorded list<br />
Previous- DVD , iPlayer*, PVR<br />
Display the Playback list on SD2*<br />
(green card)<br />
Soft Keys<br />
The action they perform is shown on the<br />
menu and changes for each menu .<br />
Subtitles<br />
DVD and DTV mode only.<br />
HOLD<br />
TEXT<br />
Teletext / MHEG5<br />
(You can not record this)<br />
A<br />
Displays the red recording list.<br />
(The programmes you have booked to be<br />
recorded).<br />
Displays the timer schedule list.<br />
B*<br />
Displays the green recording list.<br />
(The programmes you have booked to be<br />
recorded).<br />
9
Remote control (continued)<br />
Dependant on the model of TV some keys will have no function<br />
*Dependant on Model<br />
iViewer<br />
HOLD<br />
TEXT<br />
DVD<br />
10
S<br />
Remote control (continued)<br />
Installing Batteries in the Remote Control<br />
1. Remove the battery compartment cover at the rear of the remote<br />
control by pushing the retaining clip forward and pulling up.<br />
2. Install the supplied batteries, ensuring the polarity matches what<br />
is shown in the battery compartment.<br />
3. Replace the battery compartment cover.<br />
Using the Remote Control<br />
To use the remote control point it at the TV and press the required buttons. You must<br />
be within 6 meters and at an angle of less than 30 degrees from the center of the TV.<br />
NOTE: Sunshine or other strong light sources may interfere with the signal from the<br />
remote control. In this situation turn the TV away from the light source.<br />
WARNING! DO NOT LEAVE BATTERIES IN THE REMOTE CONTROL FOR<br />
EXTENDED PERIODS AS THEY CAN LEAK OR CORRODE CAUSING DAMAGE<br />
TO THE REMOTE CONTROL. CHECK THEM PERIODICALLY AND REPLACE<br />
THEM AS REQUIRED.<br />
WARNING! DO NOT MIX BATTERY TYPES. WHEN INSERTING BATTERIES,<br />
REPLACE ALL BATTERIES AT THE SAME TIME. DO NOT MIX OLD AND NEW<br />
BATTERIES.<br />
WARNING! EXHAUSTED BATTERIES MUST BE TREATED WITH CARE AND<br />
DISPOSED OF ACCORDING TO ANY SAFETY OR RECYCLING REGULATIONS<br />
IN FORCE IN YOUR LOCAL AREA, NEVER DISPOSE OF BATTERIES INTO<br />
GENERAL WASTE, OR FIRE.<br />
WARNING! NEVER EXPOSE BATTERIES TO EXCESSIVE HEAT SUCH AS<br />
SUNSHINE, FIRE OR THE LIKE.<br />
11
Video L-in R-in RF<br />
Coax<br />
HDMI2<br />
Headphone out<br />
Aerial connection<br />
WARNING! ENSURE THE TV AND ALL ANCILLARY EQUIPMENT IS<br />
UNPLUGGED FROM THE MAINS BEFORE MAKING ANY CONNECTIONS!<br />
Connecting the TV Antenna<br />
Connect the TV Antenna to the aerial socket with a 75 ohm co-axial plug. For best<br />
results use a high gain TV aerial, preferably roof or loft mounted.<br />
<br />
<br />
To improve picture quality in a poor signal area, purchase<br />
and install a signal amplifier.<br />
If the antenna needs to be split for two TVs, use a 2-Way<br />
Signal Splitter (not supplied).<br />
Connecting external devices<br />
This instruction manual shows the simplest and most effective way of<br />
connecting your TV to ancillary equipment. Alternate methods are listed below.<br />
HDMI Lead<br />
You can connect this TV to a compatible device using a HDMI lead. This method will<br />
give the best picture.<br />
Connect the cable from the HDMI equipment to the TV HDMI socket.<br />
SCART Lead<br />
You can connect this TV to a compatible device using a SCART lead. The<br />
connection uses component video signals, i.e. the red, green and blue (RGB)<br />
content of the video are sent on separate signals.<br />
VGA Cable<br />
You can use your TV as a monitor for your personal computer by using a VGA cable.<br />
Sound from your personal computer may also be played through the TV.<br />
12
Connecting external devices (continued)<br />
HDMI3<br />
Headphone out<br />
Common Interface<br />
Coax<br />
Output to<br />
Audio amplifier<br />
AC POWER IN<br />
Video L-in R-in RF<br />
TV Signal<br />
USB HDMI1 HDMI2<br />
SCART PC-Audio VGA<br />
USB device<br />
Satellite Box<br />
or Blue Ray DVD<br />
13
Connecting external devices (continued)<br />
CONNECTIONS<br />
Name Function Description<br />
AC POWER IN<br />
USB<br />
HDMI1/2/3<br />
SCART<br />
PC-Audio<br />
VGA<br />
MINI YPbPr<br />
Video<br />
RF<br />
COAX<br />
CI<br />
Headphone<br />
Connect to power supply<br />
Connect USB device for multimedia playback and PVR<br />
Connect to the HDMI socket of your DVD or Satellite Box<br />
Connect to the scart input / output of external devices<br />
PC audio input<br />
Connect to the PC VGA output to display PC graphics<br />
Connect to the YPbPr output on external devices<br />
Connect to the video output of external devices<br />
Connect to antenna or cable source<br />
Output to audio amplifier<br />
CI slot (pay as you view card slot)<br />
Connect Headphone<br />
Caution:<br />
Before connecting external devices:<br />
Make sure to disconnect the appliances from the power supply in order to avoid any<br />
potential damage from occurring.<br />
Make sure to establish the required connection.<br />
Make sure that the connectors are properly and correctly attached before connecting<br />
the appliances to the power supply.<br />
14
Connecting external devices (continued)<br />
PC connection<br />
As PCs are sometimes still supplied with a ‘conventional’ CRT monitor, you may need to<br />
adjust the display settings of your PCs graphics card, otherwise the pictures may not appear<br />
correctly. Switch on your PC (still with your original monitor connected) now select<br />
the screen resolution, and select 60Hz refresh rate. Switch off your PC, then connect it to<br />
your TV while both appliances are still switched off.<br />
VGA, HDMI PC Connection<br />
Use a PC-VGA cable (not supplied) to connect the TV to your PC. You can also use an<br />
HDMI cable to connect to your PC (if your PC Graphic card supports HDMI). When the HDMI<br />
cable is used, the PC audio cable is no longer required. If you use the HDMI to DVI cable,<br />
you will need to use the PC audio cable. Connect all cables carefully and do not bend or<br />
break the connector pins.<br />
When using the VGA cable<br />
Switch on the TV<br />
SwitchonthePC<br />
Select PC/VGA as input source<br />
When using the HDMI cable<br />
Select HDMI as input source<br />
VGA cable<br />
HDMI to DVI cable<br />
Audio cable<br />
HDMI to HDMI<br />
( All illustrated cables are not supplied)<br />
15
Connecting external devices (continued)<br />
Connecting Video camera and Video recorder<br />
Video camera<br />
Note:<br />
Connect the AV cable to the TV and to the video camera.<br />
Turn on both video camera and the TV.<br />
Select AV/CVBS source<br />
You can now see the playback picture from the video camera.<br />
To connect the video camera using other cables, refer to the video camera<br />
instruction manual.<br />
Video recorder<br />
Note:<br />
Connect the Scart cable to the TV and video recorder.<br />
Turn on both video recorder and the TV.<br />
Select Scart source<br />
You can now see the playback picture from the video recorder.<br />
To connect the video recorder using other cables, refer to the video recorder<br />
instruction manual.<br />
Video recorder<br />
Scart cable<br />
Video camera<br />
AV cable<br />
All illustrated cables are not supplied<br />
16
Connecting external devices (continued)<br />
Connecting an audio system<br />
You can supply the TV sound to the stereo system (A) with the Scart socket. Use a special<br />
scart cable SCART to RCA. (Please consult your hi-fi instructions for details). If you have a<br />
surround sound amplifier/decoder (B) Use the Scart cable or the special scart cable Scart to<br />
RCA.<br />
(A)<br />
(B)<br />
Scart to RCA cable<br />
Scart cable<br />
All illustrated cables are not supplied)<br />
Connecting a DVD player<br />
Connect a DVD player using either a SCART cable or the HDMI cable.<br />
(only if your external equipment supports HDMI).<br />
HDMI to HDMI<br />
When using the SCART cable<br />
Switch on the TV<br />
Switch on the DVD player<br />
Select SCART as input source<br />
When using the HDMI cable<br />
SCART<br />
Select HDMI as input source<br />
(All illustrated cables are not supplied)<br />
17
USER GUIDE<br />
Common Interface Slot<br />
USING YOUR COMMON INTERFACE SLOT<br />
Common Interface<br />
The Common Interface (CI) slot is designed to accept the Conditional Access<br />
Module (CAM) and Smart Card in order to view the pay TV programmes and<br />
additional services. Contact your Pay Per View TV service provider to get more<br />
information about the modules and subscriptions.<br />
NOTE: Conditional Access Module and Smart Cards are sold separately.<br />
WARNING! SWITCH OFF YOUR TV BEFORE ANY MODULE IS INSERTED INTO THE<br />
COMMON INTERFACE SLOT, THEN ADD THE SMART CARD TO THE CAM.<br />
1. Turn on the TV and ensure ‘DTV’ Source is selected.<br />
2. If the CAM is detected the TV will display the following message on the<br />
screen. "Common Interface Module inserted" wait for a few moments<br />
until the card is activated.<br />
3. Select the relevant digital Pay Per View channel.<br />
4. Detailed information on the Smart Card in use is displayed<br />
5. Press the Ok button to access the card menu. Refer to the Module<br />
Instruction Manual for setting details.<br />
6. When the module is removed, the following message will appear on the<br />
screen. "Common Interface module removed".<br />
18
Auto installation setup<br />
Power On / Off the TV<br />
Press the standby button on the LED TV or the<br />
indicator will light green.<br />
To turn off the LED TV<br />
Press the standby button on the LED TV or the<br />
indicator will light red.<br />
button on the remote control, the standby<br />
button on the remote control, the standby<br />
When you initially turn on the TV you will see the first time installation menu as below:<br />
Ensure that the aerial is plugged into the TV,<br />
Make sure your Remote is in TV mode (by<br />
pressing TV button), switch on the TV by<br />
pressing . You will see the first time<br />
installation menu.<br />
Press the button on the remote control to<br />
start the tuning procedure. This process will<br />
find all available ATV and DTV channels and<br />
store them.<br />
By pressing the Quick Start button the first<br />
time installation can be recalled at any time.<br />
Source Menu<br />
You can select the input source menu by pressing the Source button on the remote control or<br />
the Source button on the TV.<br />
Source<br />
OK<br />
DTV<br />
ATV<br />
SCART<br />
YPBPR<br />
DVD<br />
PC<br />
HDMI1<br />
HDMI2<br />
HDMI3<br />
AV<br />
USB<br />
19
Bas c Use<br />
Menu Settings<br />
1. Turn the TV on.<br />
2. Press the MENU button on the Remote Control.<br />
3. Use the and buttons to navigate through the menu.<br />
4. Press the EXIT button to exit the Menu.<br />
TV SETTINGS MENU<br />
Allows you to search channels and set up a variety of channel options.<br />
(Select DTV source for example)<br />
(Select DTV source for example)<br />
Colour<br />
Colour<br />
Allows you to customize the sound options and effects.<br />
(Select DTV source for example)<br />
EXTRAS MENU:<br />
Allows you to setup a variety of time options.<br />
(Select DTV source for example)<br />
OPTIONS MENU:<br />
Allows you to setup a variety of setup options.<br />
(Select DTV source for example)<br />
LOCK MENU:<br />
Allows you to set up a variety of lock and setup options.<br />
(Select DTV source for example)<br />
DVD Setup<br />
Restore Setting<br />
20
Application<br />
Menu Settings (continued)<br />
1. TV SETTINGS menu<br />
Description<br />
Auto Scan<br />
Press the OK button to enter the menu, and select<br />
the Country and Tuning mode for the TV, then<br />
press OK button to start the auto tuning.<br />
DTV Manual Tuning<br />
Press the OK button to enter the DTV Manual Tuning menu,<br />
select a DTV channel, press the OK button to start searching.<br />
ATV Manual Tuning<br />
Press the OK button to enter the ATV Manual Tuning menu.<br />
Storage To: Select a position for storing the programme.<br />
System: Select a TV system for searching.<br />
Current CH: Select the channel you want to manually tune.<br />
Search: Press / buttons to manually search.<br />
Fine Tune: Press / buttons to fine-tune.<br />
Frequency: Displays the current frequency.<br />
Note: Press the RED button to save your settings<br />
21
Menu Settings (continued)<br />
Programme Edit<br />
Press the OK button to enter the Programme Edit menu as below.<br />
Delete: Select a channel and press the RED button to delete it.<br />
Move: Select an ATV channel, and press the YELLOW button, then you use<br />
buttons to change the position of the programme, press YELLOW again to confirm the<br />
change. Press menu to exit and your new changes will be saved.(ATV mode only)<br />
Skip: Select a channel and press the BLUE button, this will label the channel.As long as the<br />
channel has a skip label it will be skipped when searching through the chan<br />
the CH+/- buttons.<br />
Rename: Select an ATV channel and press the or button to change the name of the<br />
channel by using the buttons.(ATV mode only)<br />
FAV: Select a channel and press GREEN botton to add this channel to favourite lost.<br />
Signal Information<br />
Displays the digital TV-signal information (DTV mode only).<br />
CI Information<br />
Please contact your “pay perview” provider who can supply a viewing card and cam unit with<br />
instructions for their use.<br />
22
Menu Settings (continued)<br />
2. PICTURE menu<br />
Colour<br />
Colour<br />
Description<br />
Picture Mode: Choose from Standard, Dynamic, User and Mild.<br />
Note: Contrast, Brightness, Colour and sharpness are only available and can be<br />
adjusted in the User mode option in the Picture Mode Settings.<br />
Contrast: Controls the difference between the brightest and darkest regions of the picture.<br />
Brightness: Controls the overall brightness of the picture.<br />
Colour: Control the colour.<br />
Sharpness: Increase this setting to see crisp edges in the picture; decrease it for soft edges.<br />
Tint: Controls the tint ( NTSC mode only).<br />
Colour Temperature: Choose from Medium, Cool, User and Warm.<br />
Red: Controls the red colour of the picture.<br />
Green: Controls the green colour of the picture.<br />
Blue: Controls the blue colour of the picture.<br />
Aspect Ratio: Choose from 4:3, 16:9, Zoom1, Zoom2, Just Scan and Panorama.<br />
Noise Reduction: Choose interference noise modes from Off, Low, Middle, High and Default.<br />
23
Application<br />
Menu Settings (continued)<br />
3. SOUND menu<br />
Description<br />
Sound Mode: Allows you to select among: Standard, Music, Movie, Sports and User.<br />
Treble(Can be adjusted when the sound mode is set to User): Controls the relative intensity of<br />
higher pitched sounds.<br />
Bass (Can be adjusted when the sound mode is set to User): Controls the relative intensity of<br />
lower pitched sounds.<br />
Balance: To adjust the balance of the left and right speakers audio output, or turn off the<br />
volume of the left or right speaker.<br />
Auto Volume: This feature automatically adjusts the audio level when the TV is turned on.<br />
This function is activated by selecting “On”.<br />
Surround Sound: Turn on / off the surround sound function by selecting “off” or “surround”.<br />
24
Menu Settings (continued)<br />
4. EXTRAS menu<br />
Description<br />
Sleep Timer: Allows you to setup the sleep timer: 10min, 20min, 30min, 60min, 90min,<br />
120min,180min, 240min and off.<br />
PC Setup (PC mode only) : Press the OK button to enter the submenu to adjust the<br />
Horizontal / Vertical position or Size and Phase of the picture.<br />
Note: The options Schedule List, Recorded List, Timer Record and PVR File System are<br />
described on pages 31 -33.<br />
25
Menu Settings (continued)<br />
5. OPTIONS menu<br />
DVD Setup<br />
Restore Setting<br />
Description<br />
OSD Language: Allows you to select the on screen display menu language.<br />
Audio Language (can only be selected in DTV mode): Select the audio language.<br />
Subtitle Language(can only be selected in DTV mode): Select the subtitle language.<br />
Menu Time Out: Allows you to setup the length of time that the on screen display is<br />
visible: 5s, 10s, 15s, 20s, 25s, 30s, 35s, 40s.<br />
Country: This is defaulted to UK, but can be changed by using the Auto tune function.<br />
DVD Setup: Press the OK button to enter the DVD Setup menu (in DVD mode only).<br />
Restore Setting: Press the OK button to restore the factory default settings.<br />
26
Menu Settings (continued)<br />
6. LOCK menu<br />
Description<br />
Lock System: Turn on/off the Lock System function.<br />
Note: Enter your password to operate this menu.(the default password is 0000)<br />
Set Password: If the Password has been changed you must enter the current<br />
password.<br />
New: Enter the new password.<br />
Confirm: Enter the new password.<br />
Lock Channel: You must enter the password to view channels that have been locked. Use<br />
and buttons to select the channel and press the GREEN button on the remote control to<br />
lock the channel.<br />
Parental Guidance: Control your childs viewing using the Parental Guidance mode.<br />
27
Multimedia Operation<br />
Basic Operation<br />
1). Press the SOURCE button on the remote control to display the input source menu, select the<br />
USB source with the buttons and press the OK button to enter the Multimedia menu below.<br />
DTV<br />
ATV<br />
SCART<br />
YPBPR<br />
DVD<br />
PC<br />
HDMI1<br />
HDMI2<br />
HDMI3<br />
AV<br />
USB<br />
Select<br />
2). Insert the USB device, the name of the device will be displayed on the screen.<br />
MAINS MENU<br />
PHOTO MUSIC MOVIE TEXT<br />
Disk C:F<br />
USB device list<br />
MAINS MENU<br />
PHOTO MUSIC MOVIE TEXT<br />
Select<br />
Navigation options<br />
Information of the USB device<br />
3). Press / button to select the files on the USB device (PHOTO, MUSIC, MOVIE, TEXT) to<br />
view or play.<br />
Return to<br />
main menu<br />
Preview<br />
Up Folder<br />
File Information<br />
Press / / / buttons to select and the OK button to activate the file or open folder. Press<br />
button to play the files in full screen mode. When in full screen mode press the OK button to<br />
show the navigation option menu on the bottom of the screen or press stop button to<br />
return to files.<br />
28
Multimedia Operation (continued)<br />
1. Photo<br />
Photo viewing<br />
Press / buttons to select the option on the menu, and press the OK button to activate.<br />
Repeat: Select the repeat mode from Repeat All, Repeat 1, Repeat None.<br />
Music: Play/Pause the background music of your choice.<br />
Playlist: Display the playlist on the screen and select the photo of your choice.<br />
Info: Display the information of the file.<br />
Rotate: Rotate the photo clockwise/counterclockwise.<br />
Zoom In/Out: Zoom In/Out of your photos.<br />
Move View: Move the photo in Zoom out mode.<br />
2. Music<br />
Listen to music<br />
Press / buttons to select the option on the menu, and press the OK button to activate.<br />
Press / buttons to select the music, and press the OK button to play.<br />
Repeat: Select the repeat mode from Repeat All, Repeat 1, Repeat None.<br />
Search: Program the music to play from the time you set.<br />
Press the OK button to display the time table, and select the position with the buttons,<br />
set the time using the numeral buttons on the remote, select “OK” and press the<br />
OK button to search.<br />
Screen Saver: Press the BLUE button to enter the Screen Saver mode, press again to exit.<br />
29
Multimedia Operation (continued)<br />
3. Movie<br />
Watch a film<br />
Press / buttons to select the option on the menu, and press OK button to activate.<br />
Repeat: Select the repeat mode from Repeat All, Repeat 1, Repeat None.<br />
Set A-B: Select and play the preferable part of the file by setting A and B at the beginning and end.<br />
Press OK button to cancel.<br />
Playlist: Display the playlist on the screen.<br />
Info: Display the information of the movie file.<br />
Slow: Play the movies at slow speed, press button to cancel and resume at normal speed.<br />
Step: Step quickly through the movie by using this option<br />
Search: Program the movie form the time you set.<br />
Zoom In/Out: Zoom In/Out of the movie screen.<br />
Aspect Ratio: Select the aspect ratio of the on screen display.<br />
Move View: View the film in Zoom out mode.<br />
4. Text<br />
View text files<br />
Press / buttons to select the option on the menu, and press the OK button to activate.<br />
Prev/Next page: Turn to previous/next page of the text.<br />
Prev./Next: Turn to previous/next file.<br />
Stop: Stop auto turning pages.<br />
Music: Play/pause the background music of your choice.<br />
Playlist: Display the playlist on the screen.<br />
Info: Display the information of the text file.<br />
30
Recording Operation<br />
PVR settings<br />
Press the MENU button, and select EXTRAS menu.<br />
1). Schedule List<br />
Display the recorder schedule list.<br />
2). Recorded List<br />
INFO: Display the information of the programmes<br />
you have recorded.<br />
RED button: Delete the recording you select.<br />
31
Recording Operation (continued)<br />
3). Timer Record<br />
Set the timer record<br />
The TV will record the programme automatically according<br />
to your settings.<br />
TITLE: Select the channel you want to record.<br />
MODE: Select the record mode.<br />
Start Time: Select the start recording time.<br />
End Time: Select the end recording time.<br />
Press the OK button to save the setting and exit the menu.<br />
there will be a hint on the screen.<br />
4). PVR File System<br />
Setup the PVR File system before you start recording.<br />
Select Disk: Select the device for the Recorded files.<br />
Check PVR File System<br />
USB Disk: Displays the USB state.<br />
Format: Format the USB device<br />
Time Shift Size: Displays the size of the USB device<br />
Speed: Displays the speed of the USB device<br />
32
Recording Operation (continued)<br />
5) Start Recording<br />
Record and Time shift function buttons<br />
Recording: Press to start recording.<br />
PAUSE: Press to enter the timeshift mode, press again to play the recording.<br />
Stop: Press to stop recording or timeshift.<br />
B: Displays the list of programmes scheduled for recording.<br />
A:Displays the list of programmes already recorded on the USB device.<br />
1) Recording menu<br />
When you press<br />
REC button, the screen will display the recording menu as below:<br />
Full mode<br />
Simple mode<br />
Note: a. display and exit full mode by pressing the REC or Exit buttons.<br />
b. Press the STOP button to stop the recording and exit the recording mode.<br />
c. Press the PLAY button to play the programme you are recording from the beginning.<br />
2) Timeshift menu<br />
Press PAUSE button to enter the Timeshift mode, and the picture will be paused, the<br />
recording will begin.<br />
Note: a. Display and exit the navigation menu by pressing the Exit button.<br />
b. Press the STOP button to exit the Timeshift mode.<br />
c. Press PLAY button to play the programme you are recording from the beginning.<br />
33
EPG menu<br />
Display the programme guide by pressing the GUIDE button.<br />
Press the BLUE button to highlight the top of the table in yellow, press the / to select<br />
CHANNEL or TIME.<br />
Programme list by TIME<br />
Programme list by CHANNEL<br />
Press / button to highlight the date, now<br />
press the / buttons to select the date<br />
you want to view (7 day EPG)<br />
Press the / buttons to highlight the channel<br />
option, press / buttons to select the channel<br />
you want to view.<br />
You can select a programme for recording using the / buttons.<br />
Record: Press R button to display the Recorded Mode menu, and set the timer record. When<br />
the programme starts it will be recorded to the USB device.<br />
Remind: Press the GREEN button to display the remind menu, and set the time. When the<br />
programme starts the TV will automatically switch to this programme.<br />
Schedule: Press the YELLOW button to display the schedule list.<br />
To Top: Press the BLUE button to return to and highlight the top of the table.<br />
34
DVD Operation<br />
Press the Power button on the TV or the remote control, and select “DVD” source by the TV/AV(SOURCE).<br />
If there is no disc in the DVD player the screen will show "NO DISC".<br />
Insert Disc according to picture next to disc slot.<br />
Do not touch the playing surface.<br />
Hold the disc around the outside with your fingers and place the disc into the slot The player will<br />
automatically draw the disc into the player.<br />
To "Eject" the disc, press the EJECT button on the TV or the " " button on the remote control.<br />
MENU<br />
Audio<br />
Enter the DVD Setup menu<br />
Press MENU button on the remote control and select OPTIONS menu as below, then select DVD SETUP,<br />
press the OK button to enter the DVD main menu as below.<br />
DVD Setup<br />
Restore Setting<br />
TV Display 16:9<br />
OSD Lang<br />
ENG<br />
Screen Saver Off<br />
Last Memory On<br />
Exit Setup<br />
4:3 PanScan<br />
4:3 Letter Box<br />
Wide<br />
Exit the DVD Setup menu<br />
Select the “Exit Setup” item in the General Setup menu of DVD setup menu, and press OK button to exit<br />
the DVD Setup menu.<br />
4:3 Pan Scan<br />
4:3 Letter Box<br />
Wide<br />
35
TV Display 16:9<br />
OSD Lang<br />
ENG<br />
Screen Saver Off<br />
Last Memory On<br />
Exit Setup<br />
4:3 PanScan<br />
4:3 Letter Box<br />
Wide<br />
TV Display 16:9<br />
OSD Lang<br />
ENG<br />
Screen Saver Off<br />
Last Memory On<br />
Exit Setup<br />
paused for a few minutes<br />
or the picture is<br />
Off (Turn off the screen saver)<br />
TV Display 16:9<br />
OSD Lang<br />
ENG<br />
Screen Saver Off<br />
Last Memory On<br />
Exit Setup<br />
On<br />
Off<br />
This setting enables you to watch the DVD from the last point it was turned off , ( for example<br />
changing the source to watch TV)<br />
ON (Activate the last memory function)<br />
OFF (Deactivate the last memory function)<br />
36
TV Display 16:9<br />
OSD Lang<br />
ENG<br />
Screen Saver Off<br />
Last Memory On<br />
Exit Setup<br />
On<br />
Off<br />
In the Audio Setup page press the ( ) button to select the Speaker Setup option, then press OK on<br />
the remote control to see the Speaker Setup options.<br />
Spdif Setup<br />
37
Volume<br />
You must press STOP twice to enter the Preference settings.<br />
that<br />
38
that<br />
that<br />
39
The user<br />
40
The user<br />
41
Disc Care<br />
About Disc Terms<br />
Title<br />
Generally, pictures or music compressed on a DVD are divided into several sections, "title".<br />
Chapter<br />
The smaller section unit of picture or music in a DVD under the title, usually one title is comprised of one<br />
or more chapters and each of them is numbered for easy searching, but some discs may not have a<br />
recording chapter.<br />
Track<br />
A segment of picture or music on a CD, Each track is numbered for searching.<br />
Care of Disc<br />
Video disc contains high-density compressed data that needs proper handling.<br />
1. Hold the disc with fingers by outer edge and/or the center spindle hole. Do not touch the discs surface.<br />
2. Do not bend or press the disc.<br />
3. Do not expose the disc to direct sunlight or heating sources, Stere discs in cabinet vertically, and in dry<br />
condition.<br />
Prevent exposure to:<br />
Direct sunlight<br />
Heat or exhaust from a heating device<br />
Extreme humidity<br />
Clean the disc surface with a soft, dry cleaning cloth, Wipe the disc surface gently and radically from center<br />
toward the outer edge.<br />
Do not apply thinner, alcohol, chemical solvent, or sprays when cleaning. Such cleaning fluids will<br />
permanently damage the disc surface.<br />
42
USER GUIDE<br />
Simple Troubleshooting<br />
If the TV display or performance fails check the TV in accordance with the following instructions. If the<br />
TV still fails to function correctly contact your dealer for assistance.<br />
SYMPTOM<br />
REMEDY<br />
GENERAL<br />
Dead. No LED Lit No power to the TV. Check all connections to the TV.<br />
Dead Led lit red<br />
Blue screen.<br />
Noisy, snowy,<br />
ghosting picture (TV)<br />
No sound<br />
Set still in standby.<br />
No signal.<br />
Incorrect source<br />
selected.<br />
Poor aerial signal.<br />
Sound "Mute".<br />
Volume set too low.<br />
External leads not<br />
connected "if used".<br />
Press either the Power button or on the Remote<br />
control.<br />
Press Source button to select correct source.<br />
If using an indoor aerial, try moving the<br />
aerial. Check aerial connections.<br />
Turn sound "Mute" OFF.<br />
Check volume settings.<br />
Check all external leads are connected.<br />
Remote control does<br />
not work<br />
DVD<br />
Will not accept disc DVD not selected Select DVD mode with Source button.<br />
Screen shows "NO<br />
DISC"<br />
Picture "Freezes"<br />
or breaks up<br />
Certain disc functions<br />
not working.<br />
Remote are not in the<br />
correct status<br />
Disc placed incorrectly<br />
Disc must have mirror side facing you if single<br />
sided.<br />
Disc damaged or dirty<br />
Inspect disc. If damaged you must discard.<br />
If dirty see "Disc care" page 38.<br />
Disc damaged or dirty.<br />
See "Disc care" page 38.<br />
Disc may not<br />
support required<br />
feature.<br />
Ensure remote is in<br />
TV mode by pressing<br />
TV button.<br />
Read disc information.<br />
If none of the suggestions seem to work, try switching your TV off and then on again. If this<br />
does not work contact our technical helpline 0871 288 7345.<br />
NOTE: The TV must only be repaired by a qualified registered service person. Never<br />
attempt to remove the back cover as the TV has dangerous voltages inside that may cause<br />
fatality or fire.<br />
43
TECHNICAL SPECIFICATIONS<br />
Specifications of the TV that you have just purchased may vary from the information in this<br />
table due to technical innovations.<br />
TV Specifications<br />
TVSystem<br />
PAL/BG/DK/ I/SECAM/BG/DK/L/L’<br />
Audio System<br />
BG / DK / I<br />
Screensize<br />
32”(Diagonal)<br />
Resolution<br />
1920 x 1080Pixels(RGB)<br />
Aerial input 75 (unbalanced)<br />
Audio output power<br />
2 x 6W<br />
Power requirements 100-240V 50/60Hz<br />
Power consumption<br />
65 W<br />
Standby power consumption
Wall Mounting<br />
1. The stand must first be removed. Place the TV face down.<br />
2. Remove the five screws on the back of the TV to release the stand.<br />
3. Remove and store the stand and screws.<br />
4. Use four machine screws to mount the TV on the bracket.<br />
This unit is VESA-Compliant and designed to be wall mounted with a VESA-<br />
Compliant 200mm x 100mm mounting kit. Mount this unit according to the<br />
instructions of the wall bracket (not supplied)<br />
200mm<br />
100mm<br />
4 Mounting holes<br />
Screw size M 6 x 15<br />
45