BMW Mini Aluminium Coolant Expansion Tank. - Forge Motorsport
BMW Mini Aluminium Coolant Expansion Tank. - Forge Motorsport
BMW Mini Aluminium Coolant Expansion Tank. - Forge Motorsport

Create successful ePaper yourself
Turn your PDF publications into a flip-book with our unique Google optimized e-Paper software.
<strong>BMW</strong> <strong>Mini</strong> <strong>Aluminium</strong> <strong>Coolant</strong> <strong>Expansion</strong> <strong>Tank</strong>.<br />
Please allow engine to cool for at least 2 hours before<br />
commencing with any work within the engine bay. Failure to<br />
do so could result in serious skin burns.<br />
Tools and Equipment required:<br />
Flat blade screwdriver.<br />
10mm Socket and ratchet or spanner.<br />
Drain /Drip tray<br />
<strong>BMW</strong> Group anti-freeze and anti corrosive. 1.5litres (part number 81 22 9 407 454)<br />
Step 1.<br />
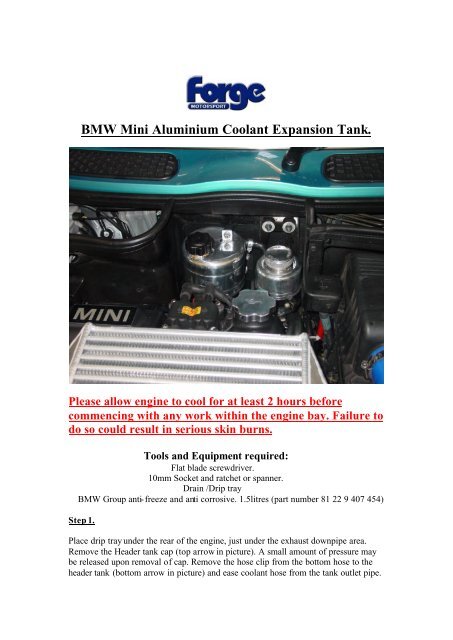
Place drip tray under the rear of the engine, just under the exhaust downpipe area.<br />
Remove the Header tank cap (top arrow in picture). A small amount of pressure may<br />
be released upon removal of cap. Remove the hose clip from the bottom hose to the<br />
header tank (bottom arrow in picture) and ease coolant hose from the tank outlet pipe.
The coolant mixture will drain off at this point. It is only a small amount and due to<br />
the location of the Header tank it is impossible to catch the coolant mixture without<br />
some running on to the exhaust and the rear of the engine. Make sure the drip tray is<br />
positioned under the car to catch the drained off coolant.<br />
Step2.<br />
Remove the smaller overflow hose clip from the top connector of the Header tank<br />
(right arrow in picture below). Then remove the 10mm retaining nut from the top<br />
mounting of the Header tank (left arrow in picture below). The complete Header tank<br />
can then be removed. There are two locating pins at the base of the stock unit, these<br />
may be tight in their sockets so the Header tank may require some manoeuvring to<br />
free these locating pins.
Step3.<br />
Screw in the two plastic fixings to the base of the new <strong>Forge</strong> <strong>Aluminium</strong> Header tank.<br />
Step 4.<br />
Fit the new unit in reverse order.
Step 5.<br />
Make sure all hoses and fixing nut are secure and then top up coolant level. Fill to just<br />
less than half way of the new <strong>Aluminium</strong> tank between the low and max level<br />
indicators. Refit the expansion tank cap and run engine until warm. Allow engine to<br />
cool again before removing cap. Re-check coolant level top up is necessary.<br />
Low level<br />
Fluid should be<br />
above this rim<br />
High level<br />
Fill to below this<br />
plate<br />
Please dispose of the drained coolant mixture in order to comply with<br />
environmental regulations. Your local waste disposal plant will have a hazardous<br />
fluids container for safe disposal.