FMBSPLTR - Big bodied Split-R installation - Forge Motorsport
FMBSPLTR - Big bodied Split-R installation - Forge Motorsport
FMBSPLTR - Big bodied Split-R installation - Forge Motorsport

You also want an ePaper? Increase the reach of your titles
YUMPU automatically turns print PDFs into web optimized ePapers that Google loves.
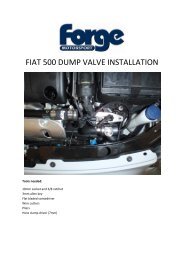
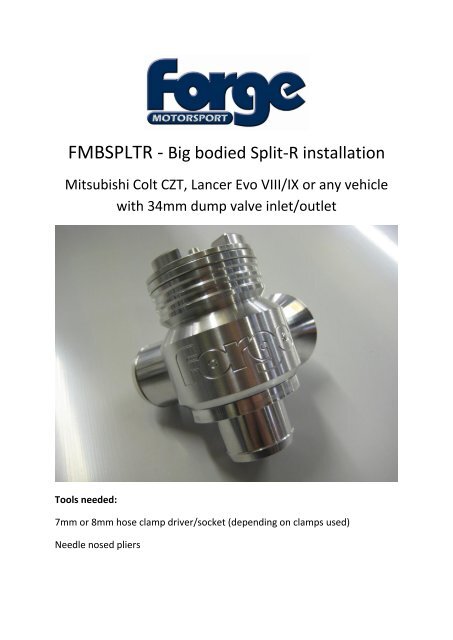
<strong>FMBSPLTR</strong> - <strong>Big</strong> <strong>bodied</strong> <strong>Split</strong>-R <strong>installation</strong><br />
Mitsubishi Colt CZT, Lancer Evo VIII/IX or any vehicle<br />
with 34mm dump valve inlet/outlet<br />
Tools needed:<br />
7mm or 8mm hose clamp driver/socket (depending on clamps used)<br />
Needle nosed pliers
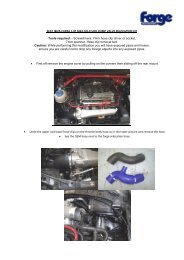
1. Open the bonnet and locate the stock recirculating dump valve. The pictures in this guide<br />
are from a Colt CZT, but other models will be virtually identical.<br />
2. Loosen the two retaining hose clamps with either a 7mm or 8mm hose clamp driver,<br />
screwdriver or socket.
3. Pull the inlet and outlet hoses from the valve, and release the valve from the pipes…..<br />
4. ….then locate where the vaccum line joins the engine, and squeeze the spring clamp with<br />
your needle nose pliers to loosen it, and pull it back down the vacuum line.
5. Remove the valve with the vacuum line attached from the car.<br />
6. Remove the spring clamps from the vacuum line and place them onto the new silicon<br />
vacuum line supplied, about 50mm from the ends. Push the new vacuum line onto the port<br />
on the engine, and secure it with the spring clamp. Leave the other end disconnected at the<br />
moment.
TUNING THE VALVE<br />
7. The <strong>Split</strong>-R valve can be run in three ways – either fully recirculating, recirculating and<br />
atmospheric (as shipped), or fully atmospheric (at users own risk, see next page). All of these<br />
modes can be realised by use of the threaded bung (supplied) as shown below. NOTE the<br />
valve must always be installed with the bottom port receiving boost, fitting the valve with its<br />
side port receiving boost will hinder performance of the valve.<br />
As shipped, 50% recirculating, 50% atmospheric<br />
Re-circ out<br />
Atmospheric out<br />
Boost in<br />
100% recirculating
100% atmospheric<br />
NOTE : the use of the valve fully atmospheric is NOT recommended by <strong>Forge</strong> for modern<br />
cars and will likely produce and engine warning error light and/or overfuelling condition on<br />
gearchanges. The ability is provided for owners of older cars where atmospheric dump<br />
valves do not upset the ECU. If in doubt, contact your supplier or a tuning specialist.<br />
8. Once you have decided on the mode in which you will run the valve, offer the valve to the<br />
car, inserting into the rubber connecting hoses, and tighten the clamps – leave the vacuum<br />
line disconnected.
9. You now need to adjust the tension on the spring – the <strong>Split</strong>-R is fitted with a conical spring<br />
which can be adjusted to suit the boost you are running. Adjustment is made by turning the<br />
castellated top part of the valve either clockwise to INCREASE the tension or anticlockwise to<br />
DECREASE the tension. The adjuster is ratcheted so as it’s turned it will ‘click’.<br />
To start, ensure that the adjuster is fully anticlockwise. For cars running stock levels of boost,<br />
turn the adjuster 16-25 clicks clockwise. For tuned cars, or those running high boost, turn<br />
the adjuster 25-35 clicks.<br />
10. Connect the vacuum line to the top of the valve and put the spring clamp back in place to<br />
hold the line on the dump valve. Start the engine.<br />
- If the spring in the valve rattles at idle, turn the adjuster clockwise until it stops, then<br />
add one further click.<br />
- If valve flutter is felt/heard at full boost throttle lift off, the spring is adjusted too tightly<br />
(valve flutter under part throttle conditions is completely normal)<br />
- If the valve is heard to leak under full boost, then the spring is adjusted too softly<br />
ENGINEERED FOR PERFORMANCE