FIAT 500 DUMP VALVE INSTALLATION - Forge Motorsport
FIAT 500 DUMP VALVE INSTALLATION - Forge Motorsport
FIAT 500 DUMP VALVE INSTALLATION - Forge Motorsport

Create successful ePaper yourself
Turn your PDF publications into a flip-book with our unique Google optimized e-Paper software.
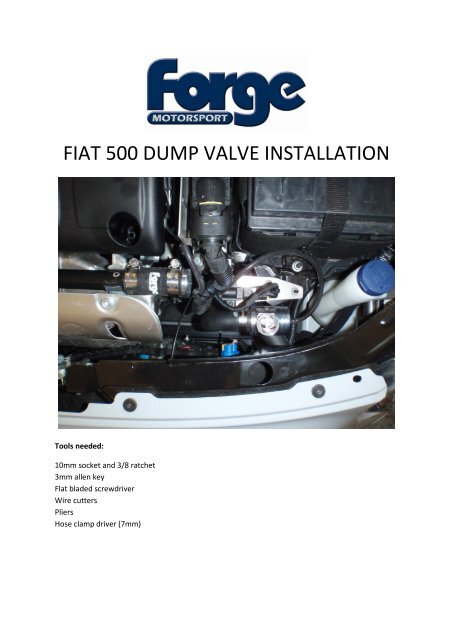
<strong>FIAT</strong> <strong>500</strong> <strong>DUMP</strong> <strong>VALVE</strong> <strong>INSTALLATION</strong><br />
Tools needed:<br />
10mm socket and 3/8 ratchet<br />
3mm allen key<br />
Flat bladed screwdriver<br />
Wire cutters<br />
Pliers<br />
Hose clamp driver (7mm)
1. Open the bonnet, and remove the clip holding the intake to the engine cover, the clip<br />
holding the recirculation pipe and undo the two 10mm bolts. Pull the engine cover upwards<br />
and forwards to release it from the rubber grommets. This will be tough if you haven’t done<br />
it before.<br />
2. Remove the dipstick and using a T20 screwdriver, remove the MAP sensor from the inlet<br />
manifold. You may find it easier to remove the screw holding the fuel pipe in place to give<br />
you a bit more access.
3. Place the <strong>Forge</strong> vacuum take off under the MAP sensor and push it securely in place,<br />
ensuring the o-ring is fitted to the take off. Screw the takeoff and MAP sensor as one unit<br />
back to the inlet manifold with the provided brass screw.<br />
4. Connect the supplied length of silicon vacuum hose to the takeoff just fitted, and route it<br />
around the engine bay, using the clips already on the bulkhead to hold it in place, and route<br />
it between the ECU and the engine block to the front of the car by the stock valve. Use the<br />
supplied cable ties to secure it in the engine bay.
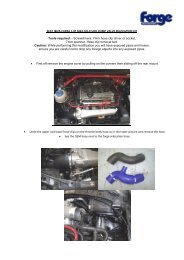
5. Remove the two clips arrowed below that connect the stock valve to the engine. Remove<br />
the electrical connector by pulling out the yellow ‘safety’ catch and then squeezing the<br />
connector to pull it off. Remove the two 10mm nuts holding the valve to the bracket on the<br />
chassis – MAKE SURE you have a hand under the valve to catch the bracket as it falls off !<br />
6. Locate the supplied <strong>Forge</strong> mounting bracket, and mount the solenoid as shown below, using<br />
the two supplied M5 screws. Bolt the <strong>Forge</strong> bracket back to the chassis with the Fiat bracket<br />
you removed in step 5. Cut the silicon vacuum hose from step 4 to a length that allows it to<br />
connect to the end (horizontal) nipple on the solenoid.<br />
Connect vacuum<br />
hose to this nipple
7. You now need to decide if you want a noisy or quiet valve. The side pipe of the valve can be<br />
changed for noisy (trumpet) or quiet (tube). Simply unscrew and screw on which ever you<br />
want.<br />
8. If you want a NOISY valve connect the trumpet to the valve, and the supplied short length of<br />
silicon hose, <strong>Forge</strong> banking plug and jubilee clips to the small pipe on the front of the engine<br />
cover to blank it off(shown with the <strong>Forge</strong> induction kit). For a QUIET valve, just reuse the<br />
stock rubber hose between the engine cover and the dump valve, with the tube on the side<br />
of the valve.
9. Offer the valve up to the bracket already fitted, and pull the lower rubber hose through the<br />
jubilee clip welded to the bracket, and push it over the base pipe of the valve. Tighten the<br />
clip to secure the valve and pipe to the bracket. With left over vacuum hose you have,<br />
connect the vertical nipple on the solenoid to the top of the dump valve.<br />
10. Finally, plug the supplied wiring plug into the solenoid, and into the factory plug you<br />
removed from the stock valve in step 5. Installation is complete (note wiring may vary from<br />
illustration below)<br />
ENGINEERED FOR PERFORMANCE