

Model No. SB-AKX34LM-K - Panasonic
Model No. SB-AKX34LM-K - Panasonic
Model No. SB-AKX34LM-K - Panasonic

You also want an ePaper? Increase the reach of your titles
YUMPU automatically turns print PDFs into web optimized ePapers that Google loves.
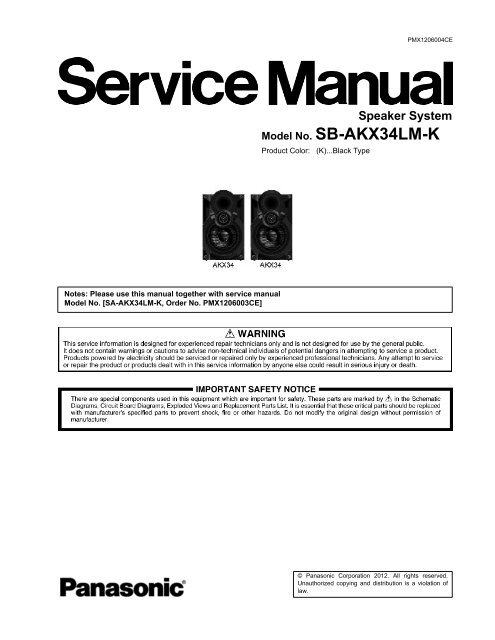
PMX1206004CE<br />
Speaker System<br />
<strong>Model</strong> <strong>No</strong>. <strong>SB</strong>-<strong>AKX34LM</strong>-K<br />
Product Color: (K)...Black Type<br />
<strong>No</strong>tes: Please use this manual together with service manual<br />
<strong>Model</strong> <strong>No</strong>. [SA-<strong>AKX34LM</strong>-K, Order <strong>No</strong>. PMX1206003CE]<br />
© <strong>Panasonic</strong> Corporation 2012. All rights reserved.<br />
Unauthorized copying and distribution is a violation of<br />
law.
TABLE OF CONTENTS<br />
1 Service Navigation<br />
1.1. System Information (<strong>SB</strong>-<strong>AKX34LM</strong>-K)<br />
1.2. Front Speakers (<strong>SB</strong>-<strong>AKX34LM</strong>-K)<br />
2 Specifications<br />
3 Disassembly and Assembly Instructions<br />
3.1. Disassembly of Front Panel Assembly<br />
3.2. Disassembly of Tweeter Speaker (SP1)<br />
3.3. Disassembly of Woofer Speaker (SP2)<br />
3.4. Replacement of Speaker Connector Housing<br />
4 Wiring Connection Diagram<br />
5 Exploded View and Replacement Parts List<br />
5.1. Cabinet Parts Location<br />
5.2. Packaging<br />
5.3. Replacement Parts List<br />
1 Service Navigation<br />
1.1. System Information (<strong>SB</strong>-<strong>AKX34LM</strong>-K)<br />
<strong>SB</strong>-<strong>AKX34LM</strong>-K is use for the following main models:<br />
SC-<strong>AKX34LM</strong>-K<br />
1.2. Front Speakers (<strong>SB</strong>-<strong>AKX34LM</strong>-K)<br />
The illustrations for the speakers will be described in this manual.<br />
Disassembly and Assembly Instructions<br />
Wiring Connection Diagram<br />
Exploded View<br />
Replacement Parts List<br />
2
2 Specifications<br />
Sección de bafles<br />
Tipo<br />
Bocina(s)<br />
Bocina para graves<br />
Bocina para agudos<br />
Impedancia<br />
Sistema de 2 bocinas de 2 vías<br />
(reflejo de sonidos graves)<br />
Tipo cónico de 20 cm<br />
Tipo cónico de 6 cm<br />
4 Ω<br />
P resión acústica de salida<br />
87 dB/W (1 m)<br />
G ama de frecuencias<br />
50 Hz a 21 kHz (–16 dB)<br />
75 Hz a 20 kHz (–10 dB)<br />
Dimensiones (An x Al x Prf)<br />
Peso<br />
250 mm x 429 mm x 226 mm<br />
4 kg<br />
3
3 Disassembly and Assembly Instructions<br />
Caution <strong>No</strong>te:<br />
• This section describes procedures for checking the operation and replacing the main components.<br />
• For reassembly after operation checks or replacement, reverse the respective procedures.<br />
• Special reassembly procedures are described only when required.<br />
• Before carrying out the disassembly process, please ensure all the safety precautions & procedures are followed.<br />
• During the disassembly and/or assembly process, please handle with care as there may be chassis components with sharp<br />
edges.<br />
• During replacement of component parts, please refer to the section of “Replacement Parts List” as described in the service manual.<br />
• Select items from the following indexes when disassembly or replacement are required.<br />
Front Speakers (<strong>SB</strong>-<strong>AKX34LM</strong>-K)<br />
• Disassembly of Front Panel Assembly<br />
• Disassembly of Tweeter Speaker (SP1)<br />
• Disassembly of Woofer Speaker (SP2)<br />
4
3.1. Disassembly of Front Panel<br />
Assembly<br />
Step 1 : Remove 4 screws.<br />
Step 3 : Detach the Front Panel Assembly slightly as arrow<br />
shown.<br />
Caution : Do not exert strong force as it may damage the<br />
wiring within.<br />
Step 2 : Slightly push the Front Panel Assembly as arrow<br />
shown.<br />
Caution : Do not exert strong force as it may damage the<br />
Front Panel Assembly.<br />
Step 4 : Detach the yellow (+) and black (-) speaker wires.<br />
5
Step 5 : Remove the Front Panel Assembly. 3.2. Disassembly of Tweeter<br />
Speaker (SP1)<br />
• Refer to “Disassembly of Front Panel Assembly”<br />
Step 1 : Remove 4 screws.<br />
Step 2 : Remove the Tweeter Speaker (SP1).<br />
6
3.3. Disassembly of Woofer<br />
Speaker (SP2)<br />
• Refer to “Disassembly of Front Panel Assembly”<br />
Step 4 : Remove the Woofer Speaker (SP2).<br />
Step 1 : Remove 4 screws.<br />
Step 2 : Slightly lift up Woofer Speaker (SP2) as shown.<br />
Step 3 : Detach the red (+) and black (-) speaker wires.<br />
7
3.4. Replacement of Speaker Connector Housing<br />
3.4.1. Disassembly<br />
Step 1: Use a paper clip push the Speaker Wire head until it<br />
hide inside the Speaker Connector Housing.<br />
Step 2: Pull out the (+) and (-) speaker wire.<br />
Step 3: Insert the (-) speaker wire into the (-) hole of the<br />
speaker connector housing.<br />
<strong>No</strong>te: Push in the speaker wire until hear the “click” sound.<br />
3.4.2. Assembly<br />
Cautions: Follow the following procedure during assemble.<br />
Step 1: Slightly push up the speaker wire head approximately<br />
45 as shown.<br />
Step 4: Pull both speaker wires gently to ensure they lock-in<br />
firmly.<br />
<strong>No</strong>te: Repeat step1 to 3 if the speaker wires come out.<br />
Step 2: Insert the (+) speaker wire into the (+) hole of the<br />
Speaker Connector Housing.<br />
<strong>No</strong>te: Push in the speaker wire until hear the “click” sound.<br />
8
4 Wiring Connection Diagram<br />
9
5 Exploded View and Replacement Parts List<br />
5.1. Cabinet Parts Location<br />
H<br />
G<br />
F<br />
2<br />
7<br />
7<br />
1<br />
7<br />
E<br />
c<br />
d<br />
7<br />
6<br />
SP1<br />
D<br />
a<br />
b<br />
6<br />
C<br />
6<br />
6<br />
3<br />
B<br />
6<br />
6<br />
6<br />
SP2<br />
4<br />
A<br />
6<br />
4<br />
1 2 3 4 5 6 7 8 9<br />
10<br />
c<br />
d<br />
a<br />
b<br />
2-1<br />
4<br />
4<br />
<strong>SB</strong>-<strong>AKX34LM</strong>-K<br />
CABINET DRAWINGS<br />
10 11 12 13<br />
5
5.2. Packaging<br />
H<br />
G<br />
*P1<br />
F<br />
E<br />
D<br />
P2<br />
P2<br />
<strong>SB</strong>-AKX34 <strong>SB</strong>-AKX34<br />
C<br />
B<br />
*P1<br />
A<br />
*P1<br />
POLYFOAM (TOP) RPNM0242T<br />
POLYFOAM (BOTTOM) RPNM0242B<br />
1 2 3 4 5 6 7 8 9<br />
<strong>SB</strong>-<strong>AKX34LM</strong>-K<br />
FOR SC-AKX34<br />
PACKAGING DRAWINGS<br />
10 11 12 13<br />
11
5.3. Replacement Parts List<br />
5.3.1. Front Speakers (<strong>SB</strong>-<strong>AKX34LM</strong>-K)<br />
Safety Ref. <strong>No</strong>. Part <strong>No</strong>. Part Name &<br />
Description<br />
CABINET AND<br />
CHASSIS<br />
1 RYPM0306 FRONT PANEL ASSY 1<br />
2 RKPM0143 SPEAKER BOX 1<br />
ASS’Y<br />
2-1 KN-MSA-22- SPEAKER CONNEC- 1<br />
20LF(P8) TOR HOUSING<br />
(WHITE)<br />
3 RMQM0131-A EVA PACKING 1<br />
4 RKA0072-KJ LEG CUSHION 4<br />
5 RQLM0435 SPEC LABEL 1<br />
6 XTB4+16AFJK SCREW 8<br />
7 XTB3+10JFJK SCREW 4<br />
Qty Remarks<br />
Safety Ref. <strong>No</strong>. Part <strong>No</strong>. Part Name & Qty Remarks<br />
Description<br />
SP1 EAS6PH124K TWEETER SPEAKER 1<br />
SP2 L0AA20A00022 WOOFER SPEAKER 1<br />
5.3.2. Packing Materials (<strong>SB</strong>-<strong>AKX34LM</strong>-K)<br />
Safety Ref. <strong>No</strong>. Part <strong>No</strong>. Part Name &<br />
Description<br />
Packing Materials<br />
P1 RPNM0242B/T POLYFOAM 1<br />
P2 RPFM0049 MIRAMAT BAG 2<br />
Qty Remarks<br />
12


