Published In Dec. - kyocera
Published In Dec. - kyocera
Published In Dec. - kyocera

Create successful ePaper yourself
Turn your PDF publications into a flip-book with our unique Google optimized e-Paper software.
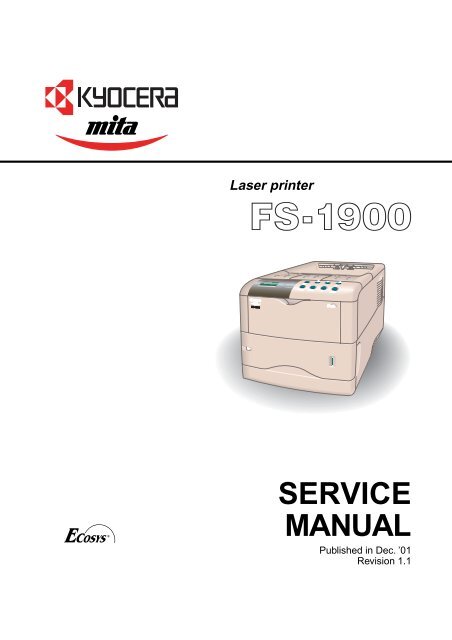
Laser printer<br />
SERVICE<br />
MANUAL<br />
<strong>Published</strong> in <strong>Dec</strong>. ’01<br />
Revision 1.1
Revision history<br />
Version Date<br />
Replaced pages Remarks<br />
1.0<br />
1.1<br />
5-<strong>Dec</strong>-2001<br />
17-<strong>Dec</strong>-2001<br />
-<br />
1-4, 1-5, 2-10, 2-20, 2-23, 3-3, 3-17,<br />
4-23, 4-26, 5-24, B-4, B-5, C-7
Safety precautions<br />
This booklet provides safety warnings and precautions for our service personnel to ensure the safety of<br />
their customers, their machines as well as themselves during maintenance activities. Service personnel<br />
are advised to read this booklet carefully to familiarize themselves with the warnings and precautions<br />
described here before engaging in maintenance activities.
Safety warnings and precautions<br />
Various symbols are used to protect our service personnel and customers from physical danger and<br />
to prevent damage to their property. These symbols are described below:<br />
DANGER: High risk of serious bodily injury or death may result from insufficient attention to or incorrect<br />
compliance with warning messages using this symbol.<br />
WARNING:Serious bodily injury or death may result from insufficient attention to or incorrect compliance<br />
with warning messages using this symbol.<br />
CAUTION:Bodily injury or damage to property may result from insufficient attention to or incorrect<br />
compliance with warning messages using this symbol.<br />
Symbols<br />
The triangle ( ) symbol indicates a warning including danger and caution. The specific point<br />
of attention is shown inside the symbol.<br />
General warning.<br />
Warning of risk of electric shock.<br />
Warning of high temperature.<br />
indicates a prohibited action. The specific prohibition is shown inside the symbol.<br />
General prohibited action.<br />
Disassembly prohibited.<br />
indicates that action is required. The specific action required is shown inside the symbol.<br />
General action required.<br />
Remove the power plug from the wall outlet.<br />
Always ground the printer.
1. <strong>In</strong>stallation Precautions<br />
WARNING<br />
•Do not use a power supply with a voltage other than that specified. Avoid multiple connections to<br />
one outlet: they may cause fire or electric shock. When using an extension cable, always check<br />
that it is adequate for the rated current. ............................................................................................<br />
• Connect the ground wire to a suitable grounding point. Not grounding the printer may cause fire or<br />
electric shock. Connecting the earth wire to an object not approved for the purpose may cause<br />
explosion or electric shock. Never connect the ground cable to any of the following: gas pipes,<br />
lightning rods, ground cables for telephone lines and water pipes or faucets not approved by the<br />
proper authorities. .............................................................................................................................<br />
CAUTION:<br />
•Do not place the printer on an infirm or angled surface: the printer may tip over, causing injury. ....<br />
•Do not install the printer in a humid or dusty place. This may cause fire or electric shock. ..............<br />
• Do not install the printer near a radiator, heater, other heat source or near flammable material.<br />
This may cause fire. ..........................................................................................................................<br />
• Allow sufficient space around the printer to allow the ventilation grills to keep the machine as cool<br />
as possible. <strong>In</strong>sufficient ventilation may cause heat buildup and poor copying performance. ..........<br />
• Always handle the machine by the correct locations when moving it. ..............................................<br />
• Always use anti-toppling and locking devices on printers so equipped. Failure to do this may<br />
cause the printer to move unexpectedly or topple, leading to injury. ................................................<br />
• Avoid inhaling toner or developer excessively. Protect the eyes. If toner or developer is<br />
accidentally ingested, drink a lot of water to dilute it in the stomach and obtain medical attention<br />
immediately. If it gets into the eyes, rinse immediately with copious amounts of water and obtain<br />
medical attention. ..............................................................................................................................<br />
•Advice customers that they must always follow the safety warnings and precautions in the<br />
printer’s instruction handbook. ..........................................................................................................
2. Precautions for Maintenance<br />
WARNING<br />
• Always remove the power plug from the wall outlet before starting machine disassembly. .............<br />
• Always follow the procedures for maintenance described in the service manual and other related<br />
brochures. .........................................................................................................................................<br />
• Under no circumstances attempt to bypass or disable safety features including safety<br />
mechanisms and protective circuits. .................................................................................................<br />
• Always use parts having the correct specifications. ..........................................................................<br />
• Always use the thermostat or thermal fuse specified in the service manual or other related<br />
brochure when replacing them. Using a piece of wire, for example, could lead to fire or other<br />
serious accident. ...............................................................................................................................<br />
•When the service manual or other serious brochure specifies a distance or gap for installation of a<br />
part, always use the correct scale and measure carefully. ...............................................................<br />
• Always check that the printer is correctly connected to an outlet with a ground connection. ...........<br />
• Check that the power cable covering is free of damage. Check that the power plug is dust-free. If<br />
it is dirty, clean it to remove the risk of fire or electric shock. ............................................................<br />
• Never attempt to disassemble the optical unit in machines using lasers. Leaking laser light may<br />
damage eyesight. ..............................................................................................................................<br />
• Handle the charger sections with care. They are charged to high potentials and may cause<br />
electric shock if handled improperly. .................................................................................................<br />
CAUTION<br />
•Wear safe clothing. If wearing loose clothing or accessories such as ties, make sure they are<br />
safely secured so they will not be caught in rotating sections. .........................................................<br />
• Use utmost caution when working on a powered machine. Keep away from chains and belts. .......<br />
• Handle the fixing section with care to avoid burns as it can be extremely hot. .................................<br />
• Check that the fixing unit thermistor, heat and press rollers are clean. Dirt on them can cause<br />
abnormally high temperatures. .........................................................................................................<br />
• Do not remove the ozone filter, if any, from the printer except for routine replacement. ..................
• Do not pull on the AC power cord or connector wires on high-voltage components when removing<br />
them; always hold the plug itself. ......................................................................................................<br />
•Do not route the power cable where it may be stood on or trapped. If necessary, protect it with a<br />
cable cover or other appropriate item. ..............................................................................................<br />
• Treat the ends of the wire carefully when installing a new charger wire to avoid electric leaks. ......<br />
•Remove toner completely from electronic components. ...................................................................<br />
• Run wire harnesses carefully so that wires will not be trapped or damaged. ...................................<br />
• After maintenance, always check that all the parts, screws, connectors and wires that were<br />
removed, have been refitted correctly. Special attention should be paid to any forgotten<br />
connector, trapped wire and missing screws. ..................................................................................<br />
• Check that all the caution labels that should be present on the machine according to the<br />
instruction handbook are clean and not peeling. Replace with new ones if necessary. ...................<br />
• Handle greases and solvents with care by following the instructions below: ....................................<br />
·Use only a small amount of solvent at a time, being careful not to spill. Wipe spills off completely.<br />
· Ventilate the room well while using grease or solvents.<br />
· Allow applied solvents to evaporate completely before refitting the covers or turning the main<br />
switch on.<br />
·Always wash hands afterwards.<br />
•Never dispose of toner or toner bottles in fire. Toner may cause sparks when exposed directly to<br />
fire in a furnace, etc. .........................................................................................................................<br />
• Should smoke be seen coming from the printer, remove the power plug from the wall outlet<br />
immediately. ......................................................................................................................................<br />
3. Miscellaneous<br />
WARNING<br />
• Never attempt to heat the drum or expose it to any organic solvents such as alcohol, other than<br />
the specified refiner; it may generate toxic gas. ................................................................................
Contents<br />
Chapter 1<br />
1-1 Printer specifications .......................................................................................................................................1-3<br />
1-2 Names of parts ................................................................................................................................................1-9<br />
1-3 Safety information..........................................................................................................................................1-10<br />
1-4 Environmental requirements.......................................................................................................................... 1-13<br />
1-5 About the toner container ..............................................................................................................................1-17<br />
Chapter 2<br />
2-1 Unpacking........................................................................................................................................................2-3<br />
2-2 <strong>In</strong>stalling the printer .........................................................................................................................................2-5<br />
2-3 Using the operator panel ...............................................................................................................................2-17<br />
Chapter 3<br />
3-1 Maintenance/Adjustments ...............................................................................................................................3-3<br />
Chapter 4<br />
4-1 Electrophotographic system ............................................................................................................................4-3<br />
4-2 Paper feeding system ....................................................................................................................................4-18<br />
4-3 Electrical control system ................................................................................................................................4-23<br />
Chapter 5<br />
5-1 General instructions.........................................................................................................................................5-3<br />
5-2 Disassembly ....................................................................................................................................................5-4<br />
Chapter 6<br />
6-1 Troubleshooting ...............................................................................................................................................6-4<br />
Appendix A<br />
Timing charts ........................................................................................................................................................ A-4<br />
Wiring diagram...................................................................................................................................................... A-9<br />
Appendix B<br />
Status page........................................................................................................................................................... B-3<br />
Appendix C<br />
Parallel interface ................................................................................................................................................... C-3<br />
USB interface ........................................................................................................................................................ C-6<br />
Serial interface (option) ......................................................................................................................................... C-7<br />
1-1-1
Chapter 1<br />
Product <strong>In</strong>formation
Chapter 1 Contents<br />
1-1 Printer specifications ...................................................................................................................... 1-3<br />
1-1-1 Specifications ............................................................................................................................ 1-3<br />
(1) Engine ....................................................................................................................................... 1-3<br />
(2) Controller ................................................................................................................................... 1-4<br />
(3) Weight and dimensions ............................................................................................................. 1-4<br />
(4) Power requirements ................................................................................................................... 1-5<br />
(5) Environmental requirements ...................................................................................................... 1-5<br />
1-1-2 Available option memory/device ................................................................................................ 1-6<br />
(1) Expansion memory (DIMM) ....................................................................................................... 1-6<br />
(2) Memory card (CompactFlash) ................................................................................................... 1-7<br />
(3) Hard disk (Microdrive) ............................................................................................................... 1-8<br />
1-2 Names of parts ................................................................................................................................. 1-9<br />
1-2-1 Names of parts .......................................................................................................................... 1-9<br />
1-3 Safety information ......................................................................................................................... 1-10<br />
1-3-1 Safety information .................................................................................................................... 1-10<br />
(1) Laser caution label on the scanner unit ................................................................................... 1-10<br />
(2) Ozone concentration ............................................................................................................... 1-11<br />
(3) ISO 7779 ................................................................................................................................. 1-11<br />
(4) CE marking directive ............................................................................................................... 1-11<br />
(5) <strong>Dec</strong>laration of conformity (Australia)........................................................................................ 1-11<br />
1-4 Environmental requirements ........................................................................................................ 1-12<br />
1-4-1 Environmental conditions ........................................................................................................ 1-13<br />
(1) Clearance ................................................................................................................................ 1-13<br />
(2) Places to avoid ........................................................................................................................ 1-14<br />
(3) Note on power ......................................................................................................................... 1-15<br />
(4) Removing the printer ............................................................................................................... 1-15<br />
1-5 About the toner container ............................................................................................................. 1-16<br />
1-5-1 Toner container ........................................................................................................................ 1-17<br />
(1) Toner container handling ......................................................................................................... 1-17<br />
(2) Toner container storage ........................................................................................................... 1-17
1-1 Printer specifications<br />
1-1-1 Specifications<br />
(1) Engine<br />
Item<br />
Print method<br />
Print speed (when printing<br />
multiple pages)<br />
Resolution<br />
Smoothing<br />
First print (A4 or letter, 23 °C),<br />
depends on input data<br />
Warm-up time Power on:<br />
(23 °C ) Sleeping:<br />
Maximum duty cycle (A4)<br />
Machine life expectancy<br />
Development<br />
Laser<br />
Main charger<br />
Transferring<br />
Separation<br />
Drum cleaning<br />
Drum discharging<br />
Fuser<br />
Paper<br />
Capacity of paper feed source<br />
(80 g/m 2 [0.11 mm thickness])<br />
Capacity of output trays<br />
(80 g/m 2 [0.11 mm thickness])<br />
Description<br />
Electrophotography laser scan<br />
18 pages/min. (A4)<br />
19 pages/min. (Letter)<br />
Fast 1200 mode with KIR<br />
600 dpi with KIR<br />
300 dpi with KIR<br />
KIR (Kyocera Image Refinement)<br />
Approximately 19 seconds or less<br />
16 seconds or less<br />
9 seconds or less<br />
65,000 pages/month (Average: 4,000 pages/month)<br />
300,000 pages of printing or 5 years<br />
(expandable to 900,000 pages of printing using MK kits)<br />
Mono component dry developer<br />
Visible laser (Semiconductor laser)<br />
Scorotron plus charging<br />
Negative charger roller<br />
Curvature separation<br />
Blade<br />
Eraser lamp (LED array)<br />
Heat roller and press roller<br />
Plain paper<br />
Cassette: 500 sheets,<br />
MP tray: 100 sheets<br />
Face-up: 250 sheets [Option face-up tray PT-4]<br />
100 sheets [Option face-up tray PT-60]<br />
Face-down: 250 sheets<br />
1-3<br />
FS-1900
(2) Controller<br />
Item<br />
CPU<br />
System ROM<br />
Font ROM<br />
Main (Video) RAM<br />
Expanding RAM Maximum:<br />
Slot:<br />
DIMM size:<br />
Memory card (Optional)<br />
Hard disk (Optional)<br />
Host interface Parallel:<br />
USB:<br />
KUIO-LV [3.3 V]:<br />
Serial:<br />
Page description language<br />
Standard emulation modes<br />
PowerPC405GF/200MHz<br />
4 MB Mask (or Flash) DIMM<br />
2 MB<br />
16 MB<br />
Description<br />
144 MB (<strong>In</strong>cluding the standard 16 MB main RAM)<br />
1 DIMM slot<br />
Accepts any of 16/ 32/ 64/ 128 MB DIMM<br />
CompactFlash<br />
Microdrive (340 MB/ 512 MB/ 1 GB)<br />
High-speed, bidirectional (IEEE1284)<br />
Revision 1.1 standards<br />
Optional network interface card IB-21: 10/100 Base-TX<br />
Optional serial interface board IB-10E : RS-232C, Maximum<br />
speed: 115.2 Kbps<br />
Prescribe<br />
PCL6, Diablo 630, IBM proprinter X24E, Epson LQ850, Line<br />
printer, KPDL<br />
(3) Weight and dimensions<br />
Item<br />
Description<br />
Main unit<br />
(excluding<br />
protrusions)<br />
Width:<br />
Height:<br />
Depth:<br />
Weight:<br />
34.5 cm (13-9/16 inches)<br />
30.0 cm (11-13/16 inches)<br />
39.0 cm (18-1/4 inches)<br />
13 Kg (28-5/8 lb.)<br />
( ): U.S.A<br />
FS-1900<br />
1-4
(4) Power requirements<br />
Item<br />
Voltage/current<br />
Watts Maximum:<br />
Standby (Ready):<br />
Sleeping:<br />
Description<br />
220 - 240 V AC ±10 %, 50/60 Hz ±2 %/3.6 A<br />
(European countries)<br />
120 V AC ±10 %, 60 Hz ±2 %/7.2 A (U.S.A/Canada)<br />
961 W<br />
15 W<br />
12 W<br />
(5) Environmental requirements<br />
Item<br />
Operating temperature and<br />
humidity<br />
Maximum altitude<br />
Noise emission (Excluding<br />
peaks, measured at 1 m from<br />
printer, as per ISO7779)<br />
Description<br />
10 to 32.5 °C (50 to 90.5 °F), 20 to 80 %RH<br />
2,000 m (6,500 feet)<br />
Maximum: 53 dB(A)<br />
Standby: 35 dB(A)<br />
1-5<br />
FS-1900
1-1-2 Available option memory/device<br />
(1) Expansion memory (DIMM)<br />
The following option memory DIMMs are available for use with the printer. For more informations<br />
about DIMM, refer to Section 2-2-3 Expanding the memory (DIMM) on page 2-10.<br />
NOTE<br />
Availability of the following memory DIMMs, manufacturers, and<br />
specifications may change without notice. No responsibility is assumed by<br />
Kyocera Mita with respect to loss or damage caused by the use of these<br />
DIMMs. Only the following DIMMs are certified the for use with the printer.<br />
Manufacturer Capacity Model<br />
Melco <strong>In</strong>c. 16 MB PM-HP-16M-KC<br />
32 MB PM-HP-32M-KC<br />
64 MB PM-HP-64M-KC<br />
128 MB PM-HP-128M-KC<br />
FS-1900<br />
1-6
(2) Memory card (CompactFlash)<br />
The following memory cards are available for use with the printer. Do not insert or remove a<br />
memory card (CompactFlash) while power is on. If the memory card is removed while the printer<br />
is on, damage could result in the printer’s electronics or the memory card. Refer to Section <strong>In</strong>stalling<br />
the option memory card (CompactFlash) on page 2-15.<br />
NOTE<br />
Availability of the following memory cards (CompactFlash), manufacturers,<br />
and specifications may change without notice. No responsibility is assumed by<br />
<strong>kyocera</strong> Mita with respect to loss or damage caused by the use of these<br />
memory card.<br />
Manufacturer Capacity Model<br />
SanDisk 8 MB SDCFBS-8-101<br />
16 MB SDCFBS-16-101<br />
24 MB SDCFBS-24-101<br />
32 MB SDCFBS-32-101<br />
48 MB SDCFBS-48-101<br />
64 MB SDCFBS-64-101<br />
96 MB SDCFBS-96-101<br />
Viking 4 MB CF4M<br />
8 MB CF8M<br />
12 MB CF12M<br />
16 MB CF16M<br />
24 MB CF24M<br />
32 MB CF32M<br />
48 MB CF48M<br />
64 MB CF64M<br />
80 MB CF80M<br />
Kingston 8 MB CF/8<br />
16 MB CF/16<br />
24 MB CF/24<br />
32 MB CF/32<br />
48 MB CF/48<br />
64 MB CF/64<br />
96 MB CF/96<br />
1-7<br />
FS-1900
Manufacturer Capacity Model<br />
DelkinDevices <strong>In</strong>c. 8 MB DDCFFLS2-008<br />
16 MB DDCFFLS2-016<br />
24 MB DDCFFLS2-024<br />
32 MB DDCFFLS2-032<br />
48 MB DDCFFLS2-048<br />
64 MB DDCFFLS2-064<br />
96 MB DDCFFLS2-096<br />
HITACHI 8 MB HB286008C4<br />
16 MB HB286016C4<br />
32 MB HB289032C4<br />
48 MB HB289048C4<br />
64 MB HB288064C5<br />
Transcend 4 MB TS4MFLASHCP<br />
8 MB TS8MFLASHCP<br />
16 MB TS16MFLASHCP<br />
32 MB TS32MFLASHCP<br />
SST 8 MB SST48CF008<br />
16 MB SST48CF016<br />
24 MB SST48CF024<br />
32 MB SST48CF032<br />
48 MB SST48CF048<br />
64 MB SST48CF064<br />
96 MB SST48CF096<br />
LEXAR Media 16 MB -<br />
32 MB -<br />
48 MB -<br />
64 MB -<br />
80 MB -<br />
(3) Hard disk (Microdrive)<br />
The following hard disk is available for the printer:<br />
Manufacturer Capacity Model<br />
IBM 340 MB DMDM-10340<br />
512 MB DSCM-10512<br />
1 GB DSCM-11000<br />
FS-1900<br />
1-8
1-2 Names of parts<br />
1-2-1 Names of parts<br />
1<br />
0 !<br />
2<br />
3<br />
9<br />
7<br />
8<br />
@<br />
6<br />
5<br />
#<br />
4<br />
&<br />
¤<br />
) ⁄<br />
*<br />
‹<br />
(<br />
1 Top cover<br />
2 Toner container<br />
3 Operator panel<br />
4 Paper gauge<br />
5 Paper cassette<br />
6 Paper size window<br />
7 Power switch<br />
8 Paper size dial<br />
9 Waste toner box<br />
0 Left cover<br />
! Charger Cleaning knob<br />
^<br />
@ Paper stopper<br />
# Face-down output tray<br />
$ Memory card slot<br />
% Paper transfer unit<br />
^ Paper transfer unit release lever<br />
& MP tray<br />
* Rear cover<br />
$<br />
%<br />
( AC inlet<br />
) Parallel interface connector<br />
⁄ USB interface connector<br />
¤ Option unit connector<br />
‹ Network interface card (option)<br />
or serial interface board (option)<br />
Figure 1-2-1 Name of parts<br />
1-9<br />
FS-1900
1-3 Safety information<br />
1-3-1 Safety information<br />
(1) Laser caution label on the scanner unit<br />
The laser scanner unit inside the printer has the following label affixed on its top. Observe the laser<br />
radiation warning and figures when handling the laser scanner unit.<br />
WARNING<br />
Use of controls or adjustments or performance of procedures other than those<br />
specified herein may result in hazardous radiation exposure.<br />
This label is affixed atop of the laser scanner unit inside the printer.<br />
European countries<br />
U.S.A/Canada<br />
Figure 1-3-1 Caution labels<br />
FS-1900<br />
1-10
(2) Ozone concentration<br />
The printers generate ozone gas (O 3<br />
) which may concentrate in the place of installation and cause<br />
an unpleasant smell. To minimize concentration of ozone gas to less than 0.1 ppm, we recommend<br />
you not to install the printer in a confined area where ventilation is blocked.<br />
(3) ISO 7779<br />
Maschinenlärminformationsverordnung 3. GSGV, 18.01.1991: Der höchste Schalldruckpegel beträgt<br />
70 dB(A) oder weniger gemäß ISO 7779.<br />
(4) CE marking directive<br />
According to Council Directive 89/336/EEC and 73/23/EEC<br />
Manufacturer's name: Kyocera Corporation, Mie Plant Tamaki Block.<br />
Manufacturer's address: 704-19 Nojino, Tamaki-Cho, Watarai-Gun, Mie-Ken 519-0497, Japan<br />
declares that the product<br />
Product name: Page Printer<br />
Model number: FS-1900 (as tested with the enhancement optional unit: PF-60, DU-60, and SO-60)<br />
Conforms to the following product specifications.<br />
EN 55 022:1998 Class B<br />
EN 61 000-3-2:1995<br />
EN 61 000-3-3:1995<br />
EN 55 024:1998<br />
EN 60 950:1992 (+A1+A2+A3+A4+A11)<br />
EN 60 825-1:1994+A11<br />
The manufacturer and its merchandising companies retain the following technical documentation<br />
in anticipation of the inspection that may be conducted by the authorities concerned.<br />
User's instruction that conforms to the applicable specifications<br />
Technical drawings<br />
Descriptions of the procedures that guarantee the conformity<br />
Other technical information<br />
(5) <strong>Dec</strong>laration of conformity (Australia)<br />
1-11<br />
FS-1900
Manufacturer's name: Kyocera Corporation, Printer Division<br />
Manufacturer's address: 2-14-9 Tamagawadai, Setagaya Ward, Tokyo 158-8610, Japan<br />
declares that the product<br />
Product name: Page printer<br />
Model number: FS-1900 (as tested with the enhancement optional units: PF-60, DU-60, and SO-<br />
60)<br />
Description of device: This page printer model FS-1900 is the 18 ppm; A4 size and utilized plane<br />
paper; laser; dry toner etc. The printer can be equipped with several enhancement optional units as<br />
a paper feeder as PF-60, a duplexer as DU-60, a sorter as SO-60 etc.<br />
Conforms to the following product specifications.<br />
AS/NZS 3548: 1995 (EN 55 022:1994 Class B)<br />
IEC60950 (EN 60 950:1992+A1+A2+A3+A4+A11)<br />
IEC60825-1 (EN 60 825-1:1994+A11)<br />
The manufacturer and its merchandising companies retain the following technical documentation<br />
in anticipation of the inspection that may be conducted by the authorities concerned.<br />
User's instruction that conforms to the applicable specifications<br />
Technical drawings<br />
Descriptions of the procedures that guarantee the conformity<br />
Other technical information<br />
Kyocera Mita Australia Pty., Ltd.<br />
6-10 Talavera Road, North Ryde, NSW, 2113, Australia<br />
Phone: +61 2-9888-9999<br />
Fax: +61 2-9888-9588<br />
FS-1900<br />
1-12
1-4 Environmental requirements<br />
1-4-1 Environmental conditions<br />
The Environmental requirements section on page 1-5 should be observed to ensure the optimum<br />
operation of the printer. The use of the printer in a location which does not satisfy the requirements<br />
may result in troubles and risk shortening its service life.<br />
The printer will work best if it is installed in a location that is:<br />
• Level and well supported (Place the printer on a table or desk.)<br />
• Not exposed to sunlight or other bright light (not next to an uncurtained window). Do not place<br />
the printer on an unstable cart, stand or table.<br />
• Near an AC wall outlet, preferably one that can be used for the printer alone. The outlet should<br />
have a ground slot, or an adapter should be used. If you use an extension cord, the total length of<br />
the power cord plus extension cord should be 17 feet or 5 meters or less.<br />
• Well ventilated, not too hot or cold, and not too damp or dry (See section Environmental<br />
requirements on page 1-5). If you install the printer where the temperature or humidity is outside<br />
the requirements in section Environmental requirements in chapter 1, the best print quality may<br />
not be expected and there will be an increased chance of paper jams.<br />
• Provide a sufficient clearances around the printer to ensure ventilation and ease of access. (See<br />
section Clearance on next page).<br />
1-13<br />
FS-1900
(1) Clearance<br />
Allow the necessary minimum clearance on all sides of the printer as below.<br />
5<br />
1<br />
4<br />
3<br />
2<br />
Figure 1-4-1 Clearances<br />
Ref. Clearance Dimensions [Minimum]<br />
1 Left 30 cm (11-13/16 inches)<br />
2 Front 60 cm (23-5/8 inches)<br />
3 Right 25 cm (9-7/8 inches)<br />
4 Back 20 cm (7-7/8 inches)<br />
5 Head room 30 cm (11-13/16 inches)<br />
FS-1900<br />
1-14
(2) Places to avoid<br />
Avoid installing the printer in locations exposed to:<br />
• Direct drafts of hot or cold air.<br />
• Direct drafts of outside air. (Avoid locations next to outside doors.)<br />
• Sudden temperature or humidity changes.<br />
• Any source of high heat, such as a radiator or stove.<br />
• Excessive dust. Dust and smoke may cause contamination on the laser scanner window, causing<br />
print quality problem.<br />
• Vibration.<br />
• Ammonia fumes or other harmful fumes. (<strong>In</strong> case of fumigating the room or saturate it with<br />
insecticide, remove the printer first.)<br />
• Avoid greenhouse-like rooms. (Because of sunlight and humidity.)<br />
• Avoid enclosed spaces that block ventilation.<br />
• Avoid sites more than 6,500 feet or 2,000 meters above sea level.<br />
(3) Note on power<br />
Use only the power source voltage conforming to the printer’s rated power voltage. Do not use<br />
other power sources.<br />
• Disconnect the printer from the power source before attempting removal or replacement of an<br />
electrical component or a printed-circuit board.<br />
• The printer should not be connected to a power source until the instruction is given to do so<br />
when performing tests described in this manual.<br />
• <strong>In</strong> connecting the printer power, exercise an extreme care in handling the power supply or any<br />
other electric parts which may give an electric shock.<br />
• Before performing maintenance or repair, power from both the power source and the associated<br />
peripheral devices (computer, sorter, etc.) should be disconnected, unless otherwise specified.<br />
• To avoid possible electrical shock, extreme caution must be exercised in handling the power<br />
cord and any other electrical part.<br />
• An easily accessible socket outlet must be provided near the equipment.<br />
WARNING<br />
As the disconnect device is not incorporated in the printer’s AC primary<br />
circuit, an easily accessible socket outlet must be provided near the equipment.<br />
1-15<br />
FS-1900
(4) Removing the printer<br />
Observe the following precautions in removal and transportation of the printer.<br />
• Be sure to repack the printer in its original carton.<br />
• Do not leave the printer, toner container, process unit and other printer modules inside a vehicle<br />
if the outdoor temperature is more than 25 °C. As unexpectedly high temperature may develop<br />
inside when a vehicle is parked for a long period of time, the drum, toner container, process unit<br />
and the supplies should be removed from the vehicle. The vehicle during transportation should<br />
be parked in the shade or with the window open to allow minimum air circulation or the adequate<br />
air conditioning should be made.<br />
• Should the printer be left in a vehicle, it may not be exposed to the temperature change of more<br />
than 7 °C within 30 minutes.<br />
• Before removing the printer to a warm place, wrap it in a blanket, etc., before crating it. Allow<br />
approximately two to three hours after having moved after uncrated. Failure to observe the<br />
above may result in moisture condensation which will affect the performance of the printer.<br />
FS-1900<br />
1-16
1-5 About the toner container<br />
1-5-1 Toner container<br />
The printer should use a Kyocera TK-50 toner kit. To ensure the high print quality and long service<br />
life, the following handling precautions should apply:<br />
CAUTION<br />
As the Ecosys printers are designed to ensure the optimum print quality when<br />
used with Kyocera’s proprietary toner, Kyocera do not recommend to use any<br />
refilled toner containers that may be available commercially. This is because<br />
Kyocera have no means of control over how such refilled toner could affect the<br />
print quality and the reliability of the printer.<br />
(1) Toner container handling<br />
To loosen and mix the toner inside before use, with the label side down, thoroughly shake the toner<br />
container 1 (in the direction of the arrows) ten times or more.<br />
1<br />
Figure 1-5-1 Toner container handling<br />
CAUTION<br />
The toner container is not designed for disassembly or refilling. Do not attempt<br />
to disassemble or refill the toner container.<br />
1-17<br />
FS-1900
(2) Toner container storage<br />
The toner contained in the container is susceptible to temperature and humidity. To ensure the high<br />
print quality, store the toner container in a place that satisfies the following environmental conditions:<br />
Temperature:<br />
Humidity:<br />
−20 to 40 °C (−4 to 104 °F)<br />
15 to 90 % RH<br />
NOTE<br />
CAUTION<br />
If the toner container is removed from the printer’s developer, put it in a<br />
protective bag and keep it in a dark place.<br />
If the printer is shipped for return, etc., do not ship it with the toner container<br />
installed. Remove the toner container from the developer and put in a plastic<br />
bag and seal the plastic bag. Otherwise, toner may leak and contamination may<br />
result in the printer.<br />
FS-1900<br />
1-18
Chapter 2<br />
<strong>In</strong>stallation/Operation
Chapter 2 Contents<br />
2-1 Unpacking ......................................................................................................................................... 2-3<br />
2-1-1 Unpacking and inspection ......................................................................................................... 2-3<br />
2-2 <strong>In</strong>stalling the printer ........................................................................................................................ 2-5<br />
2-2-1 <strong>In</strong>stalling the toner container ..................................................................................................... 2-5<br />
Removing the toner container ......................................................................................................... 2-7<br />
2-2-2 <strong>In</strong>stalling the waste toner box .................................................................................................... 2-8<br />
Removing the waste toner box........................................................................................................ 2-9<br />
2-2-3 Expanding the memory (DIMM)............................................................................................... 2-10<br />
(1) Minimum memory requirements .............................................................................................. 2-10<br />
(2) DIMM specifications ................................................................................................................ 2-10<br />
(3) Notes on handling DIMM ......................................................................................................... 2-11<br />
(4) <strong>In</strong>stalling the DIMM .................................................................................................................. 2-12<br />
(5) Testing the expansion memory ................................................................................................ 2-13<br />
(6) <strong>In</strong>stalling the option hard disk (Microdrive) .............................................................................. 2-14<br />
(7) <strong>In</strong>stalling the option memory card (CompactFlash) ................................................................. 2-15<br />
(8) <strong>In</strong>stalling the option network interface card ............................................................................. 2-16<br />
(9) <strong>In</strong>stalling the option serial interface board ............................................................................... 2-17<br />
2-3 Using the operator panel............................................................................................................... 2-18<br />
2-3-1 Operator panel ......................................................................................................................... 2-18<br />
(1) <strong>In</strong>dicators and keys .................................................................................................................. 2-18<br />
(2) <strong>In</strong>terface indicator .................................................................................................................... 2-20<br />
(3) Paper size indicator ................................................................................................................. 2-20<br />
(4) Paper type <strong>In</strong>dicator ................................................................................................................ 2-21<br />
(5) Message display ...................................................................................................................... 2-22<br />
2-3-2 Menu selection system ............................................................................................................ 2-23<br />
(1) Menu selection and sequence ................................................................................................. 2-23
2-1 Unpacking<br />
2-1-1 Unpacking and inspection<br />
The printer package should contain the items as shown in the figure below. After unpacking, remove<br />
the printer and all the accessories from the package.<br />
For unpacking, place the box containing the printer on a flat, stable surface. Remove the manuals,<br />
toner kit, and other items located on top of the spacer. Then remove the spacer. Carefully remove<br />
the printer. Obtain help from other persons if necessary.<br />
7<br />
56<br />
1<br />
2<br />
4<br />
3<br />
Figure 2-1-1 Unpacking<br />
1 Printer<br />
2 Toner container<br />
3 Waste toner bottle<br />
4 Power cord<br />
5 <strong>In</strong>stallation manual<br />
6 Kyocera digital library CD-ROM<br />
7 Plastic bag<br />
2-3<br />
FS-1900
1<br />
2 3<br />
4<br />
5 6 7<br />
1 Printer<br />
2 Toner container<br />
3 Waste toner box<br />
4 Power cord<br />
5 <strong>In</strong>stallation manual<br />
6 Kyocera digital library CD-ROM<br />
7 Plastic bag<br />
Figure 2-1-2 List of shipped components<br />
FS-1900<br />
2-4
2-2 <strong>In</strong>stalling the printer<br />
<strong>In</strong>stalling the printer requires several steps. Proceed as follows in sequence.<br />
2-2-1 <strong>In</strong>stalling the toner container<br />
1. Open the top cover all the way.<br />
2. Take toner container 1 from the bag. With the label side down and pivoting on the middle of<br />
the container, thoroughly shake the toner container (in the direction of the arrows) ten times or<br />
more to loosen and mix the toner inside.<br />
1<br />
Figure 2-2-1 Shake the toner container<br />
2-5<br />
FS-1900
3. Carefully remove the protective seal 2.<br />
2<br />
Figure 2-2-2 Removing the protective seal<br />
4. <strong>In</strong>stall the toner container 3 into the printer.<br />
3<br />
Figure 2-2-3 <strong>In</strong>stalling the toner container<br />
FS-1900<br />
2-6
Removing the toner container<br />
To remove the toner container, pull the lock lever (green colored) 1 and gently lift the toner<br />
container.<br />
NOTE<br />
Do not remove the toner container unless you need to do so for servicing, etc.<br />
1<br />
Figure- 2-2-4 Removing the toner container<br />
2-7<br />
FS-1900
2-2-2 <strong>In</strong>stalling the waste toner box<br />
The waste toner bottle must be installed in the printer. It must be properly fitted inside the left cover<br />
as explained below.<br />
1. Open the cap 1 of the waste toner box 2.<br />
2. Open the left cover 3 and install the waste toner box 2 so that it is properly seated in the area<br />
under the drum unit.<br />
3. Close the left cover 3.<br />
3<br />
3<br />
1<br />
2<br />
2<br />
Figure 2-2-5 <strong>In</strong>stalling the waste toner box<br />
FS-1900<br />
2-8
Removing the waste toner box<br />
To remove the waste toner box 1, while holding the waste toner box 1, press the lock lever 2<br />
aside, then gently remove the waste toner box 1 sideways.<br />
NOTE<br />
Do not remove the waste toner box unless you need to do so for service, etc.<br />
2<br />
1<br />
Figure 2-2-6 Removing the waste toner box<br />
2-9<br />
FS-1900
2-2-3 Expanding the memory (DIMM)<br />
The FS-1900 comes standard-equipped with 16 MB of main memory. The FS-1900 can be expanded<br />
up to the maximum of 144 MB (16 MB + 128 MB). Expansion should be done using optional<br />
DIMMs (Dual <strong>In</strong>-line Memory Module).<br />
(1) Minimum memory requirements<br />
Resolution<br />
Printing environment 300 dpi 600 dpi 1200 dpi<br />
(Emulation)<br />
(Fast mode)<br />
PCL6, duplex mode = None 8 MB 8 MB 8 MB<br />
PCL6, duplex mode = On 8 MB 8 MB 8 MB<br />
KPDL, duplex mode = None 8 MB 8 MB 8 MB<br />
KPDL, duplex mode = On 8 MB 8 MB 12 MB<br />
PCL6/KPDL resource protection, - 10 MB 10 MB<br />
duplex mode = None<br />
PCL6/KPDL resource protection, - 14 MB 14 MB<br />
duplex mode = ON<br />
(2) DIMM specifications<br />
Item<br />
Memory size in MB<br />
Number of pins<br />
Access speed<br />
Parity<br />
Bus width<br />
Specification<br />
16, 32, 64, 128 MB<br />
100 pins<br />
66 MHz<br />
None<br />
32 bits<br />
FS-1900<br />
2-10
(3) Notes on handling DIMM<br />
Before proceeding to install DIMM, to protect the main board and DIMMs, read the following<br />
notes:<br />
NOTE<br />
• Before touching a DIMM, touch a water pipe or other large metal object to<br />
discharge yourself of static electricity.<br />
• While doing the work, it is recommended that you wear an antistatic wrist<br />
strap.<br />
• Touch the main board and DIMM only by the edges, not in the middle.<br />
Figure 2-2-7 Handling DIMM<br />
2-11<br />
FS-1900
(4) <strong>In</strong>stalling the DIMM<br />
The main board of the printer is equipped with one socket for installing extra DIMM.<br />
CAUTION<br />
WARNING<br />
Be sure that no foreign objects such as metal chips or liquid get inside the<br />
printer during installing DIMM. Operation of the printer during the presence of<br />
a foreign substance may lead to fire or electric shock.<br />
Before proceeding installation, turn the printer’s power switch off. Unplug the<br />
printer’s power cable and disconnect the printer from the computer or the<br />
network.<br />
1. Turn the power switch off.<br />
2. Remove the memory card (CompactFlash) that may be inserted in the memory card slot 1 at<br />
the left side of the printer.<br />
3. Remove the main board 2 by removing the two (plated) screws 3.<br />
4. Pull the main board 2 all the way out of the printer.<br />
2<br />
1<br />
3<br />
3<br />
Figure 2-2-8 Removing the main board<br />
FS-1900<br />
2-12
5. Open the clips 4 on both ends of the DIMM socket 5.<br />
6. <strong>In</strong>sert the DIMM 6 into the DIMM socket 5 so that the notches on the DIMM align with the<br />
corresponding protrusions in the slot.<br />
6<br />
4<br />
5<br />
4<br />
Figure 2-2-9 <strong>In</strong>serting the DIMM (1)<br />
7. Close the clips 4 on the DIMM socket 5 to secure the DIMM 6.<br />
6<br />
4 4<br />
5<br />
Figure 2-2-10 <strong>In</strong>serting the DIMM (2)<br />
(5) Testing the expansion memory<br />
To test the expansion memory, turn printer power on and print a status page. If the installation has<br />
been successful, the Available Memory item of the status page will show the expanded memory<br />
size corresponding to the amount of memory added.<br />
2-13<br />
FS-1900
(6) <strong>In</strong>stalling the option hard disk (Microdrive)<br />
The main board of the printer is equipped with a socket for the hard disk (Microdrive). If the hard<br />
disk is installed in the printer, received data can be rasterized and stored on this hard disk. This<br />
enables high-speed printing of multiple copies using an electronic sort function. Also, by using the<br />
quick copy job function or private/stored job function, desired documents can be printed at any<br />
later time. For details of these functions, refer to the printer’s Users Manual.<br />
CAUTION<br />
WARNING<br />
Take precautions that no foreign objects such as metal chips or liquid get inside<br />
the printer during the installation process. Operation of the printer during the<br />
presence of a foreign objects may lead to fire or electric shock.<br />
Turn the printer’s power switch off. Unplug the printer’s power cable and<br />
disconnect the printer from the computer or the network.<br />
1. Turn the power switch off.<br />
2. Remove the main board 1 from the printer. (See step 2 to 4, on page 2-12.)<br />
3. <strong>In</strong>stall the hard disk 2 to the hard disk slot 3.<br />
3<br />
2<br />
1<br />
Figure 2-2-11 <strong>In</strong>stalling the option hard disk<br />
FS-1900<br />
2-14
(7) <strong>In</strong>stalling the option memory card (CompactFlash)<br />
CAUTION<br />
Do not insert or remove a memory card (CompactFlash) while power is on. If<br />
the memory card is removed while the printer is on, damage could result in the<br />
printer’s electronics or the memory card.<br />
1. Turn the power switch off.<br />
2. <strong>In</strong>sert the memory card 1 in the memory card slot 2 at the right bottom of the printer. <strong>In</strong>sert it<br />
face up, connector end first. Push it in all the way.<br />
2<br />
1<br />
Figure 2-2-12 <strong>In</strong>stalling the option memory card<br />
2-15<br />
FS-1900
(8) <strong>In</strong>stalling the option network interface card<br />
The main board of the printer is equipped with a network interface card slot (KUIO-LV type, 3.3<br />
V).<br />
CAUTION<br />
WARNING<br />
Be sure that no foreign object such as metal chips or liquid get inside the<br />
printer during the installation process. Operation of the printer during the<br />
presence of a foreign object may lead to fire or electric shock.<br />
Turn the printer’s power switch off. Unplug the printer’s power cable and<br />
disconnect the printer from the computer.<br />
1. Turn the power switch off.<br />
2. Remove the two screws 1 then remove the option interface card slot cover 2.<br />
3. <strong>In</strong>sert the network interface card 3 to the option interface card slot 4.<br />
4. Fix the network interface card 3 by two screws 1.<br />
5. Connect the network cable 5 to the network interface card 3.<br />
6. Set the network address from the printer operator panel. (Refer to the printer’s User’s Manual)<br />
2<br />
1<br />
3<br />
5<br />
4<br />
Figure 2-2-13 <strong>In</strong>stalling the option network interface card<br />
3<br />
FS-1900<br />
2-16
(9) <strong>In</strong>stalling the option serial interface board<br />
The main board of the printer is equipped with a serial interface connector (YC05) for serial interface<br />
board IB-10E.<br />
CAUTION<br />
WARNING<br />
Be sure that no foreign object such as metal chips or liquid get inside the<br />
printer during the installation process. Operation of the printer during the<br />
presence of a foreign object may lead to fire or electric shock.<br />
Turn the printer’s power switch off. Unplug the printer’s power cable and<br />
disconnect the printer from the computer.<br />
1. Turn the power switch off.<br />
2. Remove the two screws 1 then remove the main board 2.<br />
3. Remove the two screws 3 then remove the option interface card slot cover 4.<br />
4. <strong>In</strong>sert the serial interface board 5 to the option interface card slot 6.<br />
5. Fix the serial interface board 5 by two screws 3.<br />
6. Connect the connectors of cable 7 between serial interface board connector 8 and main board<br />
connector (YC05 9).<br />
7. Make sure that the serial interface board has been properly installed by printing out the printer’s<br />
status page.<br />
4<br />
3<br />
7<br />
3<br />
1<br />
8<br />
3<br />
9<br />
1<br />
2<br />
6<br />
3<br />
5<br />
Figure 2-2-14 <strong>In</strong>stalling the option serial interface board IB-10E<br />
2-17<br />
FS-1900
2-3 Using the operator panel<br />
This section provides explanation on how to use the printer’s operator panel.<br />
For details on operating the printer, refer to the printer’s User’s Manual.<br />
2-3-1 Operator panel<br />
The printer’s operator panel has the following indicators, keys and message display. Note that<br />
adjustments made using these keys may be overridden by those made from within the application<br />
software.<br />
Message display<br />
1 2 3 4 9 7 0<br />
$#@<br />
5 6 8 !<br />
Figure 2-3-1 Operator panel<br />
(1) <strong>In</strong>dicators and keys<br />
<strong>In</strong>dicator Condition Description<br />
1 READY indicator Flashing An error has occurred that the user can clear.<br />
Lit<br />
The printer is on-line and ready to print.<br />
Off<br />
The printer is off-line. The printers stores but does not<br />
print received data. This is also indicates when printing<br />
is automatically stopped due to the occurrence of an error.<br />
2 DATA indicator Flashing Data transfer between the printer and the computer is<br />
taking place.<br />
Lit<br />
Either data is being processed, or data is being written<br />
onto the option CompactFlash or Microdrive.<br />
3 ATTENTION indicator Flashing The printer needs maintenance attention or the printer is<br />
warming up (Please wait).<br />
Lit<br />
A problem or an error has occurred that the user can<br />
clear, for example, paper jam.<br />
Off<br />
Operations are normal.<br />
FS-1900<br />
2-18
Key<br />
4 GO key<br />
5 CANCEL key<br />
6 MENU key<br />
7 key<br />
8 key<br />
9 < key<br />
0 > key ( key)<br />
! ENTER key<br />
Function<br />
• Switches the printer on-line and off-line.<br />
• Prints and feed out one page.<br />
• Cancels a printing job.<br />
To cancel a print job, proceed as follows:<br />
1. Check the message Processing is displayed in the message<br />
display.<br />
2. Press the CANCEL key.<br />
3. The message Print Cancel? will appear in the message display<br />
and the interface to be canceled will be displayed.<br />
Parallel<br />
USB<br />
Serial (appears only when an [option] serial interface board is installed)<br />
Option (appears only when an [option] network interface card is installed)<br />
Press the CANCEL key again if you wish to stop the cancellation of<br />
printing.<br />
4. Selecting the interface to cancel using the or key. Then press<br />
the ENTER key. Printing from the interface selected will be stopped.<br />
The Cancelling data message appears in the message display<br />
and printing stops after the printer finishes printing the current page.<br />
• Resets numeric values, or cancels a setting procedure.<br />
• Stops the sound alarm that indicates the occurrence of an error.<br />
• Enter menu mode<br />
• When pressed during menu selection, terminates the setting and returns<br />
to the Ready condition.<br />
Lets you access the desired item or enter numeric values. <strong>In</strong> some of the<br />
control procedures, the < and > keys are used to enter or exit the sub items.<br />
Enables access to the desired item or entering of numeric values. <strong>In</strong> some<br />
of the control procedures, the < and > keys are used to enter or exit the sub<br />
items.<br />
Used as the < key in the menu selection.<br />
• Used as the > key in the menu selection.<br />
• Displays on-line help messages on the message display when paper jam<br />
occur. When pressed in the Ready condition, displays on-line help<br />
messages.<br />
Finalizes numeric values and other selections in menu selection.<br />
2-19<br />
FS-1900
(2) <strong>In</strong>terface indicator<br />
The INTERFACE indicator $ shows which of the printer's interfaces is currently active. It uses<br />
the following abbreviations:<br />
Message<br />
Meaning<br />
--- No interface is currently used.<br />
PAR<br />
Standard bidirectional parallel interface<br />
USB<br />
Standard USB interface<br />
SER<br />
[Option] serial interface board (RS-232C)<br />
OPT<br />
[Option] network interface card<br />
The PAR , USB, SER , or OPT indicator flashes when the printer is receiving data and remains<br />
indicated for the duration of the interface time-out time.<br />
(3) Paper size indicator<br />
The SIZE indicator # indicates the size of the current paper cassette. Default is Letter size for the<br />
U.S.A. and A4 for European countries. While the printer is Processing data to print, the SIZE<br />
indicator switches to indicate the paper size selected by the application software.<br />
The following abbreviations are used to indicate paper sizes.<br />
Message Paper size Message Paper size<br />
A4 ISO A4 (21 × 29.7 cm) EX Executive (7-1/4 × 10-1/2 inches) *<br />
A5 ISO A5 (14.8 × 21 cm) B6 JIS B6 (12.8 × 18.2 cm) *<br />
DL ISO DL (11 × 22 cm) * #6 Commercial 6-3/4 (3-5/8 × 6-1/2 inches) *<br />
A6 ISO A6 (10.5 × 14.8 cm) * #9 Commercial 9 (3-7/8 × 8-7/8 inches) *<br />
B5 JIS B5 (18.2 × 25.6 cm) O2 Oficio II (8-1/2 × 13 inches) *<br />
LT Letter (8-1/2 × 11 inches) ST Statement (5-1/2 × 8-1/2 inches) *<br />
LG Legal (8-1/2 × 14 inches) FO Folio (210 × 330 cm) *<br />
MO Monarch (3-7/8 × 7-1/2 inches) * HA Japanese postcard (10 × 14.8 cm) *<br />
BU Business (4-1/8 inches) * OH Return postcard (20 × 14.8 cm) *<br />
DL ISO DL (11 × 22 cm) * Y2 Envelope [Youkei 2] (114 × 162 cm) *<br />
C5 ISO C5 (16.2 × 22.9 cm) * Y4 Envelope [Youkei 4] (105 × 235 cm) *<br />
b5 ISO B5 (17.6 × 25 cm) * CU Custom size (14.8 × 21 cm to 21.6 × 35.6 cm)<br />
* with only the MP tray feeding<br />
FS-1900<br />
2-20
(4) Paper type <strong>In</strong>dicator<br />
The TYPE indicator @ indicates paper types. The following abbreviations are used to indicate<br />
paper types.<br />
Message<br />
Paper type<br />
(none)<br />
Auto<br />
ROUGH<br />
Rough<br />
PLAIN<br />
Plain<br />
LETTERHEA Letterhead<br />
TRNSPRNCY Transparency*<br />
COLOR<br />
Color<br />
PREPRINTE Preprinted<br />
PREPUNCH Prepunched<br />
LABELS<br />
Labels*<br />
ENVELOPE Envelope*<br />
BOND<br />
Bond<br />
CARDSTOCK Cardstock*<br />
RECYCLED Recycled<br />
CUSTOM1(to 8) Custom 1 (to 8)<br />
VELLUM<br />
Vellum*<br />
* with only the MP tray feeding<br />
2-21<br />
FS-1900
(5) Message display<br />
The message display gives information in the form of short messages. The six messages listed<br />
below are displayed during normal warm-up and printing. Other messages appear when the printer<br />
needs the operator's attention as explained in Chapter 6 Troubleshooting.<br />
Message<br />
Self test<br />
Please wait<br />
Ready<br />
Processing<br />
Waiting<br />
Sleeping<br />
Cancelling data<br />
FormFeed Time Out<br />
Meaning<br />
The printer is self-testing after power-up.<br />
The printer is warming up and is not ready. When the printer is<br />
switched on the first time after the toner container is installed,<br />
(Adding toner) also appears.<br />
The printer is ready to print.<br />
The printer is receiving data, generating graphics, reading an memory<br />
card (CompactFlash)/hard disk (Microdrive), or printing.<br />
The printer is waiting for a command that says the job is over before<br />
printing the last page. Pressing the GO key allows you to obtain the<br />
last page immediately.<br />
The printer is in Sleep mode. The printer wakes from Sleep mode<br />
whenever a key on the operator panel is pressed, the cover is opened<br />
or closed, or data is received. The printer then warms up and goes<br />
on-line. (The time that it takes the printer to enter Sleep mode depends<br />
on the Sleep Timer setting.)<br />
Data inside the printer is being canceled.<br />
The printer prints the last page after a waiting period.<br />
FS-1900<br />
2-22
2-3-2 Menu selection system<br />
The MENU key on the operator panel allows you to use the menu selection system to set or change<br />
the printer environment such as the paper source, emulation, etc. Settings can be made when Ready<br />
is indicated on the printer message display. The printer obeys the most recently received printer<br />
settings sent from the application software, or from the printer driver, which take priority over<br />
operator panel settings.<br />
(1) Menu selection and sequence<br />
The following is the hierarchy diagram of the menu selection system of the printer.<br />
Ready<br />
PAR A4 PLAIN<br />
Print<br />
Menu Map<br />
Print<br />
Status Page<br />
These items will not<br />
show unless the printer<br />
is installed with the<br />
applicable option unit.<br />
<strong>In</strong>ter face ><br />
Serial<br />
>Bau rate<br />
9600<br />
e-MPS ><br />
<strong>In</strong>ter face ><br />
Parallel<br />
<strong>In</strong>terface<br />
USB<br />
>Quick Copy<br />
>Private/Stored<br />
>Print VMB Data<br />
>List of VMB<br />
>List of<br />
Code JOB<br />
>e-MPS ><br />
Configuration<br />
>Parallel I/F<br />
Nibble (high)<br />
>Parallel I/F<br />
Auto<br />
>Parallel I/F<br />
Normal<br />
>Parallel I/F<br />
High Speed<br />
>>Quick Copy<br />
>>Temp.Code JOB<br />
Size<br />
>>Perm.Code JOB<br />
Size<br />
>>VMB Size<br />
>Data Bits<br />
8<br />
>Stop Bits<br />
1<br />
>Parity<br />
None<br />
>Protocol<br />
DTR (pos.)&XON<br />
>Barcode Mode<br />
Off<br />
<strong>In</strong>terface ><br />
Option<br />
>NetWare<br />
Off<br />
Continued on next page.<br />
>NetWare ><br />
On<br />
>TCP/IP<br />
Off<br />
>TCP/IP ><br />
On<br />
>>DHCP<br />
Off<br />
>Ether Talk<br />
Off<br />
>OPT. StatusPage<br />
Off<br />
>>NetWare Frame<br />
Auto<br />
>>IP Address<br />
>>Subnet Mask<br />
>>Gateway<br />
2-23<br />
FS-1900
Emulation ><br />
PCL 6<br />
Emulation ><br />
KPDL<br />
>Print KPDL errs<br />
Off<br />
>Print KPDL errs<br />
On Page set ><br />
Emulation ><br />
KPDL (AUTO)<br />
Emulation ><br />
Line printer<br />
Emulation ><br />
IBM Proprinter<br />
Emulation ><br />
DIABLO 630<br />
Emulation ><br />
EPSON LQ-850<br />
Font ><br />
>Alt. Emulation<br />
PCL 6<br />
>Print KPDL errs<br />
Off<br />
>Print KPDL errs<br />
On<br />
Font Select ><br />
<strong>In</strong>ternal<br />
Font Select ><br />
Option<br />
>> I000<br />
>>Courier<br />
Dark<br />
>>Courier<br />
Regular<br />
>>Letter Gothic<br />
Regular<br />
>>Letter Gothic<br />
Dark<br />
>>Size<br />
012.00 point(s)<br />
>>Pitch<br />
10.00 cpi<br />
>Alt. Emulation<br />
PCL6<br />
>List of<br />
<strong>In</strong>ternal Fonts<br />
>List of<br />
Option Fonts<br />
>Copies<br />
Continued on next page.<br />
>Orientation<br />
Portrait<br />
>Orientation<br />
Landscape<br />
>Page Protect<br />
Auto<br />
>Page Protect<br />
On<br />
>LF Action<br />
LF only<br />
>LF Action<br />
CR and LF<br />
>LF Action<br />
Ignore LF<br />
>CR Action<br />
LF only<br />
>CR Action<br />
CR and LF<br />
>CR Action<br />
Ignore CR<br />
>Wide A4<br />
Off<br />
>Wide A4<br />
On<br />
001<br />
FS-1900<br />
2-24
Print Quality ><br />
Memory Card ><br />
>KIR Mode<br />
On<br />
>KIR Mode<br />
Off<br />
>Ecoprint Mode<br />
Off<br />
>Ecoprint Mode<br />
On<br />
>Resolution<br />
Fast 1200 mode<br />
>Read Fonts<br />
>Read Data<br />
>Write Data<br />
>Delete Data<br />
>List of<br />
Partitions<br />
>Resolution<br />
300 dpi<br />
>Resolution<br />
600 dpi<br />
>Print Density<br />
03<br />
Hard Disk ><br />
>Read Data<br />
>Write Data<br />
>Delete Data<br />
>List of<br />
Partitions<br />
RAM Disk Mode<br />
Off<br />
RAM Disk Mode<br />
On<br />
>RAM Disk Size<br />
>Read Data<br />
>Write Data<br />
>Delete Data<br />
>List of<br />
Partitions<br />
2-25<br />
Continued on next page.<br />
FS-1900
Paper Handling ><br />
>MP Tray Mode<br />
First<br />
>MP Tray Size<br />
A4 or Letter<br />
>MP Tray Type<br />
Plain<br />
>EF Size<br />
DL or Business<br />
>EF Type<br />
Plain<br />
>BulkFeeder Size<br />
>BulkFeeder Type<br />
Plain<br />
>Cassette Size ><br />
>Cassette Type<br />
Plain<br />
>Feed Select<br />
Cassette<br />
>Duplex Mode<br />
None<br />
>Stack Select<br />
Face-down tray<br />
>Opt.StackerMode<br />
Sorter<br />
>Override A4/LT<br />
Off<br />
>Override A4/LT<br />
On<br />
>Type Adjust ><br />
Custom 1<br />
>Reset Type<br />
Adjust<br />
>>Unit<br />
mm<br />
>>Unit<br />
inch<br />
>>X Dimension<br />
>>Y Dimension<br />
>>Paper weight<br />
Normal<br />
>>Paper weight<br />
Heavy (Thick)<br />
>>Paper weight<br />
Light (Thin)<br />
>>Duplex Path<br />
Disable<br />
>>Duplex Path<br />
Enable<br />
LIFE Counters ><br />
Others ><br />
>Total Print<br />
0123456<br />
>New Toner<br />
<strong>In</strong>stalled<br />
>MSG Language<br />
English<br />
>Form Feed<br />
Time Out 030sec.<br />
>Sleep Timer ><br />
005 min.<br />
>Print HEX-DUMP<br />
>Printer Reset<br />
>Resource prot.<br />
Off<br />
>Resource prot.<br />
Permanent<br />
>Resource prot.<br />
Perm / Temp<br />
>Buzzer<br />
On<br />
>Buzzer<br />
Off<br />
>Auto Continue<br />
Mode On<br />
>>Auto Continue<br />
Timer 000sec.<br />
>Auto Continue<br />
Mode Off<br />
>Service ><br />
>>Sleep Mode<br />
On<br />
>>Sleep Mode<br />
Off<br />
>>Print<br />
Status Page<br />
>>Developer<br />
>>Drum<br />
FS-1900<br />
2-26
Chapter 3<br />
Maintenance/Adjustments
Chapter 3 Contents<br />
3-1 Maintenance/Adjustments .............................................................................................................. 3-3<br />
3-1-1 Life expectancy of modules ....................................................................................................... 3-3<br />
3-1-2 Toner container .......................................................................................................................... 3-4<br />
(1) When to replace the toner container ......................................................................................... 3-4<br />
(2) Notes on changing the toner container...................................................................................... 3-4<br />
(3) Toner container replacement ..................................................................................................... 3-5<br />
(4) Toner saver mode (EcoPrint) ..................................................................................................... 3-6<br />
(5) Replacing the waste toner box .................................................................................................. 3-7<br />
3-1-3 Cleaning the printer ................................................................................................................... 3-8<br />
(1) Main charger unit ....................................................................................................................... 3-8<br />
(2) Cleaning the main charger wire and grid ................................................................................... 3-9<br />
Main charger wire ........................................................................................................................... 3-9<br />
Grid ............................................................................................................................................... 3-10<br />
(3) Paper transfer unit ................................................................................................................... 3-12<br />
(4) Replacing the developer .......................................................................................................... 3-13<br />
Shipping the developer ................................................................................................................. 3-13<br />
(5) Developer initialization (Toner install mode) ............................................................................ 3-14<br />
(6) Developer refreshing mode ..................................................................................................... 3-15<br />
(7) Drum cleaning mode ............................................................................................................... 3-16<br />
3-1-4 Updating the firmware ............................................................................................................. 3-17<br />
(1) Firmware program data format ................................................................................................ 3-18<br />
(2) Downloading the firmware from the parallel interface ............................................................. 3-19<br />
(3) Downloading the firmware from the memory card ................................................................... 3-21<br />
(4) Downloading errors ................................................................................................................. 3-23
3-1 Maintenance/Adjustments<br />
3-1-1 Life expectancy of modules<br />
The table below shows the nominal life expectancy for modules. Detailed part information for each<br />
module (except toner containers) can be found in the separate Parts Catalog.<br />
Table 3-1-1 Life expectancy of modules<br />
Module Model Nominal life (pages)<br />
Toner container *1 TK-50 10,000<br />
Drum unit DK-63 300,000<br />
Developer DV-62 300,000<br />
Fuser unit FK-60 300,000<br />
Main charger unit MC-60 300,000<br />
Refurbishment kit *2 MK-63 300,000<br />
*1<br />
: User-replaceable<br />
*2<br />
: <strong>In</strong>cludes DK, DV, and FK kits and a feed unit.<br />
3-3<br />
FS-1900
3-1-2 Toner container<br />
Assuming an average toner coverage of 5 % with EcoPrint mode turned off, the toner container<br />
TK-50 will need replacing approximately once every 10,000 pages.<br />
Table 3-1-2 Toner container<br />
Kit<br />
Life in pages<br />
TK-50 10,000<br />
Based on letter or A4 size paper; average print coverage of 5 %<br />
NOTE<br />
A new printer in which a toner kit TK-50 is installed for the first time, the<br />
number of copies that can be printed will be limited to approximately 5,000<br />
pages.<br />
(1) When to replace the toner container<br />
When the printer runs low on toner, Toner low TK-50 display and ATTENTION indicator lit<br />
on the operation panel. Be sure to promptly replace the toner container and clean the inside of the<br />
printer when this message appears.<br />
If the printer stops printing while Replace toner TK-50 is display, replace the toner container<br />
to continue printing.<br />
(2) Notes on changing the toner container<br />
Observe the following cautions when replacing the toner container:<br />
• Do not attempt to disassemble the old toner.<br />
• Do not attempt to reuse the waste toner inside.<br />
• Keep magnetic media such as floppy disks away from the toner container.<br />
• Be sure to clean the parts as instructed in section 3-1-1 Cleaning the printer on page 3-8 at the<br />
same timing of replacing toner container.<br />
• Use of the Kyocera toner kit TK-50 is highly recommended for the optimum operation of the<br />
printer.<br />
FS-1900<br />
3-4
(3) Toner container replacement<br />
To replace the toner container, open the top cover. Pull the lock lever 1 to the right and gently lift<br />
the old container 2.<br />
1<br />
2<br />
Figure 3-1-1 Removing the old toner container<br />
3-5<br />
FS-1900
Put the old toner container in the supplied plastic bag 3 and dispose of it.<br />
3<br />
Figure 3-1-2 Disposal of the old toner container<br />
NOTE<br />
Although the toner container is made from non-harmful, flammable material,<br />
be sure to dispose of it according to laws and regulations.<br />
See also the instructions provided in chapter 2, <strong>In</strong>stalling the toner container on page 2-5 to complete<br />
installation of the new toner container.<br />
(4) Toner saver mode (EcoPrint)<br />
The EcoPrint enables to reduce the amount of toner consumed on the page so as to save printing<br />
costs by drastically extending the toner container life. EcoPrint mode is factory-set to off and<br />
turned on by using the menu system of the printer operator panel. For details, see the printer’s<br />
User’s Manual.<br />
FS-1900<br />
3-6
(5) Replacing the waste toner box<br />
Note that the printer has a sensor to monitor the presence of the waste toner box. The printer does<br />
not operate without a waste toner box installed.<br />
For the reference, the waste toner box can hold up to 100 g of waste toner. The nominal amount of<br />
waste toner derived after 10,000 pages of printing is 20 to 30 g (Letter or A4 size paper; average<br />
print coverage of 5 %). After a prolonged amount of printing low density (coverage) data, the<br />
"check waste toner bottle" message may be displayed earlier than the "replace toner clean printer"<br />
message.<br />
Open the side cover. While holding old the waste toner box 1, press the lock lever 2 in the right<br />
ward direction. Then gently pull out the waste toner box 1. Close the cap 3 of waste toner box 1<br />
after removing from the printer. To avoid toner spilling, place the capped waste toner box 1 in the<br />
plastic bag 4 supplied before forwarding to proper disposal.<br />
Locate the new waste toner box in the toner kit, and install it in the printer according to section 2-<br />
2-2 <strong>In</strong>stalling the waste toner box on page 2-8.<br />
2<br />
4<br />
3<br />
1<br />
Figure 3-1-3 Removing the old waste toner box<br />
3-7<br />
FS-1900
3-1-3 Cleaning the printer<br />
To avoid print quality problems, the following printer parts must be cleaned with every toner container<br />
replacement.<br />
(1) Main charger unit<br />
The main charger unit should be cleaned in its two parts, the main charger wire and grid (See figure<br />
below.) whenever the toner container is changed. Cleaning of the main charger can be done without<br />
needing any tools thanks to its self-cleaning system.<br />
Grid<br />
Cleaning pad<br />
Main charger wire<br />
Cleanig knob<br />
Shield<br />
Figure 3-1-4 Main charger unit<br />
FS-1900<br />
3-8
(2) Cleaning the main charger wire and grid<br />
Main charger wire<br />
1. Open the left cover 1.<br />
2. Pull the cleaning knob (green colored) 2 slowly in and out a few times.<br />
NOTE<br />
Cleaning knob pulls a cleaning pad inside the drum unit along the main charger wire.<br />
1<br />
2<br />
Figure 3-1-5 Cleaning the main charger wire<br />
3-9<br />
FS-1900
Grid<br />
1. Take the grid cleaner 1 from protective bag 2 in the new toner kit and remove the cap 3.<br />
NOTE<br />
The grid cleaner pad is impregnated with water. Perform the following cleaning<br />
procedure before the pad dries.<br />
3<br />
1<br />
2<br />
Figure 3-1-6 Grid cleaner<br />
2. Attach the grid cleaner 1 to the drum unit 3 with the pad uppermost as shown in the diagram.<br />
1<br />
3<br />
Figure 3-1-7 Attaching the grid cleaner<br />
FS-1900<br />
3-10
3. After attaching the grid cleaner, repeat the action of slowly pulling out and then pushing back in<br />
the main charger unit at least 5 times. It is easier to pull out the main charger with its front end<br />
raised slightly as shown in the figure. The grid part underneath the main charger is cleaned by<br />
the wet pad of the grid cleaner.<br />
Figure 3-1-8 Cleaning the grid<br />
4. Remove the grid cleaner from the printer and dispose of it. The grid cleaner is not reusable.<br />
3-11<br />
FS-1900
(3) Paper transfer unit<br />
To avoid print quality problems due to paper dust and debris, clean the paper transfer unit in the<br />
following manner:<br />
Pull the paper transfer unit release lever 1 up and draw the paper transfer unit all the way out until<br />
it stops. Wipe the paper dust on the upper registration roller 2 and the paper ramp 3 using the<br />
wiper cloth 4 included in the toner kit.<br />
CAUTION<br />
Do not touch the transfer roller 5 (black sponge roller) when wiping the paper<br />
ramp 3.<br />
Area 6 below is factory-applied with lubricating oil. When cleaning the paper<br />
transfer unit 7, do not use alcohol to clean this area. If the oil is completely<br />
removed, an incorrect action of the MP tray paper sensor (8, actuator) will result.<br />
8<br />
5<br />
3<br />
6<br />
7<br />
2<br />
4<br />
1<br />
Figure 3-1-9 Cleaning the upper registration roller and the paper ramp<br />
FS-1900<br />
3-12
(4) Replacing the developer<br />
To remove the developer unit from the printer for shipment or replacing to a new one, it should be<br />
handled following the instructions below.<br />
After the replacement, new developer needs to be initialized in manner explained in the section<br />
Developer initialization (Feeding toner into the new developer) on next page.<br />
Shipping the developer<br />
The printer is supplied with a plastic bag that should be retained for future shipment of the developer.<br />
To pack the developer 1 in the packing carton, first flap down the magnet roller protective cover<br />
2. Put the developer 1 into the supplied plastic bag 3. Put the developer 1 on the developer<br />
install position 4 of packing carton.<br />
1<br />
3<br />
2<br />
4<br />
Figure 3-1-10 Shipping the developer<br />
3-13<br />
FS-1900
(5) Developer initialization (Toner install mode)<br />
The new developer unit is shipped from the factory with no toner contained. The developer can be<br />
automatically replete with toner when a toner container is installed onto it and the printer is turned<br />
on. However, because the toner reservoir in the developer has a large capacity, it requires a lengthy<br />
period of time until a substantial amount of toner has been fed to get the printer ready. (A new<br />
developer needs approximately 100 g for triggering the sensor inside.)<br />
A great many seconds of time for this is greatly deducted by using the service menu in the printer’s<br />
mode select routine as accessed by its operation panel. Follow these steps to use this feature, top to<br />
bottom (For details, refer to section 2-3 Using the operator panel on page 2-18).<br />
Perform in sequence Display to show Remarks<br />
1 Press the MENU key.<br />
2 Press the key (repeatedly). Others ><br />
Note:<br />
3 Press the > key.<br />
4 Press the key (repeatedly). >Service ><br />
Paper size<br />
switch<br />
5 Press the > key.<br />
>>Developer<br />
6 Press the ENTER key.<br />
>>Developer?<br />
7 Press the ENTER key.<br />
8 Turn printer power<br />
Self test<br />
off then on.<br />
Please wait<br />
(Adding toner)<br />
9 Developer initialization is<br />
Ready<br />
finished.<br />
Note: If the printer is switched off in the middle of developer<br />
initialization, even after the printer is switch on again, the printer<br />
will automatically resumes developer initialization. To cancel the toner<br />
install mode in this case, first turn power off, press and hold all three<br />
paper size switches (See the figure above.), and turn power on. Let<br />
go off of the switches when the until message changes to Ready.<br />
The printer enters the service<br />
mode and the developer and toner<br />
motor are continually activated.<br />
The printer continually engages in<br />
this mode for a period of<br />
approximately 8 minutes, after which<br />
the printer reverts to the Ready state.<br />
Make a test print by printing a<br />
status page. If the status page is<br />
printed satisfactorily, setup is<br />
complete. If not, investigate<br />
whether all step procedures are<br />
properly followed.<br />
FS-1900<br />
3-14
(6) Developer refreshing mode<br />
This mode is used to eliminate light printing problems. Once activated, the toner in the developer<br />
unit is enforced to be sent onto the drum unit, collected back in the waste toner bottles. At the same<br />
time the new toner is fed in the developer so that the developer unit is refilled with new toner. Once<br />
activated, the printer will keep engaged in this mode and be running for an average of 60 minutes.<br />
NOTE<br />
The amount of the (old) toner replaced and collected in the waste toner bottle<br />
will be approximately 100 g. The waste toner bottle consequently become full<br />
and must be replaced with a new one.<br />
Perform in sequence:<br />
1 Turn printer power on.<br />
2 Make sure the printer is Ready.<br />
(Connect the printer to the computer using the parallel interface.<br />
3 At the DOS prompt, send the following command to the printer:<br />
>ECHO !R!EXTP 7,92;EXIT;>PRN<br />
4 Turn printer power off, then on. The toner refreshing mode will<br />
begin. The old toner will be rejected in the first approximately 20<br />
minutes, followed by another 40 minutes interval in which the new<br />
toner is fed in the developer unit.<br />
Display shows:<br />
Ready<br />
Please Wait<br />
(Adding toner)<br />
Paper size<br />
switch<br />
Note: To cancel the toner install<br />
mode during in this mode first<br />
turn power off, press and hold<br />
all three paper size switches, and<br />
turn power on until message<br />
changes to Ready.<br />
5 Check that the display reverts to Ready.<br />
(If the display shows “Call service 7350”, refer to<br />
section 6-1-2 Diagnostic (Service error messages) on page 6-11.<br />
6 Print a page to check the print density.<br />
(If the print density is too dark (gray background), change the<br />
“Print Density” setting in the menu selection to 1 or 2 steps lighter.<br />
(Default is 3.) Refer to printer’s User’s Manual for details.<br />
Ready<br />
Print density<br />
03<br />
3-15<br />
FS-1900
(7) Drum cleaning mode<br />
This mode enforces the printer to rotate the drum against the cleaning roller inside the drum unit for<br />
a predetermined period of time. The cleaning roller then removes dust and debris that may have<br />
resulted from dew condensation on the drum.<br />
The printer automatically activates the drum cleaning mode based on the environmental conditions<br />
as the temperature/humidity sensor detects. The time required to complete the drum cleaning mode<br />
varies depending on the current setting for the sleep timer and will be deactivated during the developer<br />
initialization.<br />
The drum cleaning mode is also activated manually by following the steps below:<br />
Perform in sequence Display to show Remarks<br />
1 Press the MENU key.<br />
2 Press the key (repeatedly). Others ><br />
3 Press the > key.<br />
4 Press the key. (repeatedly).<br />
>Service ><br />
5 Press the > key.<br />
>>Drum<br />
6 Press the key. (repeatedly).<br />
7 Press the ENTER key.<br />
>>Drum?<br />
8 Press the ENTER key. Drum is cleaned by the cleaning<br />
blade in the drum unit. If paper is<br />
present on the MP tray, the drum<br />
is also cleaned by that the paper<br />
which is fed automatically and<br />
stops at the transfer roller.<br />
FS-1900<br />
3-16
3-1-4 Updating the firmware<br />
Updating the engine and system (controller) firmware is possible by downloading the firmware<br />
through the parallel interface or through the memory card (CompactFlash). These firmware programs<br />
are directly overwritten in the flash ROM on the printer’s engine board or system DIMM [board<br />
KP-893] (Flash ROM type only) on the main board. The operator panel message in different<br />
languages can also be downloaded through the parallel interface or through the memory card<br />
(CompactFlash).<br />
NOTE<br />
System DIMM: Firmware update is possible only with a flash ROM type<br />
system DIMM [board]. Masked type system DIMM [board] can not be<br />
overwritten. Check the type of the system DIMM [board] currently used on the<br />
main board by service status page [see page B-5]).<br />
System DIMM [board]<br />
Main board<br />
Figure 3-1-11 System DIMM [board]<br />
3-17<br />
FS-1900
(1) Firmware program data format<br />
Kyocera supplies the following types of data for updating firmware of the different purposes:<br />
• System firmware<br />
• Engine firmware<br />
• Operator panel message data<br />
The data to be downloaded are supplied in the following format:<br />
System firmware file name example<br />
SB02K8400.bcmp<br />
compression<br />
Boot program is included.<br />
Version code: Version 84.00<br />
ID code for Kyocera<br />
Machine code: FS-1900 (B02)<br />
ID code for system firmware<br />
Engine firmware file name example<br />
EB02KA002.x01<br />
Void<br />
Version code: Version A002<br />
ID code for Kyocera<br />
Machine code: FS-1900 (B02)<br />
ID code for engine firmware<br />
Operator panel message data file name example<br />
dm0201.spa<br />
Language code jpn: Japanese<br />
dan: Dutch<br />
Version code: Version 01<br />
swe: Swedish<br />
ita: Italian<br />
Machine code: FS-1900 (B02)<br />
spa: Spanish<br />
por: Portuguese<br />
ID code for operator panel massage data<br />
rus: Russian<br />
pol: Polish<br />
cze: Czech<br />
FS-1900<br />
3-18
(2) Downloading the firmware from the parallel interface<br />
This section explains how to download firmware data from the parallel interface. The printer system<br />
can automatically recognize whether the data to be overwritten is for the engine firmware, the<br />
controller firmware or operator panel message data.<br />
CAUTION<br />
Downloading the controller firmware takes several minutes. Do not turn power<br />
off during downloading.<br />
NOTE<br />
MS-DOS is required for a downloading from the parallel interface. The<br />
computer must be connected to the printer with a parallel cable.<br />
1 Turn power switch on.<br />
2 At the DOS prompt, send the command to the printer that engages the printer in the supervisor<br />
mode.<br />
3 Copy the firmware data to the printer. (See the flow chart below)<br />
[System firmware ex. SB02KA8400.bcmp, Engine firmware ex. EB02KA002.x01, Operator<br />
panel message data ex. dm0201.spa]<br />
Start<br />
1 Power switch: On<br />
Self test<br />
Message display<br />
Ready<br />
2<br />
PC display<br />
>ECHO !R!UPGR'SYS';EXIT;>PRN<br />
>Supervisor mode<br />
Parallel waiting<br />
3<br />
>COPY/B SB02K8200.bcmp PRN<br />
>COPY/B EB02KA002.x01 PRN<br />
>COPY/B dm0201.spa PRN<br />
S<br />
E<br />
M<br />
To the next page<br />
S : System firmware<br />
E : Engine firmware<br />
M : Operator panel message data<br />
3-19<br />
FS-1900
4 Supervisor mode. The parallel interface is waiting for the firmware data.<br />
5 Receiving the firmware data.<br />
6 The system DIMM or flash ROM is overwritten with the new firmware data.<br />
7 Firmware downloading is finished. (When more than one data are down loaded, the data display<br />
can be changed by pressing any key.)<br />
8 Turn power switch off and on.<br />
9 Check the that printer gets Ready.<br />
From the previous page<br />
S<br />
E<br />
M<br />
: System firmware<br />
: Engine firmware<br />
: Operator panel message data<br />
: Shows only included firmeware<br />
of boot program (".bcmp" extension file).<br />
4<br />
Message display<br />
Supervisor mode<br />
parallel waiting<br />
5<br />
data receiving<br />
>>>>>>>>>>><br />
S<br />
E<br />
6 BootROM<br />
6 engine download 6<br />
erase&write<br />
(3) Downloading the firmware from the memory card<br />
To download data written in a memory card (CompactFlash) to the printer, proceed as explained in<br />
this section.<br />
CAUTION<br />
NOTE<br />
Downloading firmware takes several minutes. Do not turn power off during<br />
downloading. If downloading is interrupted by an accidental power failure,<br />
etc., the system DIMM may have to be replaced.<br />
The firmware program data must be stored to the root directory of the memory<br />
card (CompactFlash).<br />
1 Turn power switch off.<br />
2 <strong>In</strong>sert the memory card in the printer’s memory card slot.<br />
3 Turn power switch on.<br />
4 The printer is automatically engaged in the supervisor mode. The parallel interface receives for<br />
the firmware data.<br />
Start<br />
1 Power switch: Off<br />
2<br />
Memory<br />
card<br />
3 Power switch: On<br />
Self test<br />
Message display<br />
To the next page<br />
3-21<br />
FS-1900
5 Data are transferred to the RAM on the main board.<br />
6 The system DIMM or Flash ROM is overwritten with the new firmware data.<br />
7 Firmware download is finished. (When more than one data are down loaded, the data display<br />
can be changed by pressing any key.<br />
8 Turn power switch off.<br />
9 Remove the memory card.<br />
0 Turn power switch on.<br />
! Check the printer gets Ready.<br />
From the previous page<br />
S : System firmware<br />
E : Engine firmware<br />
M : Operator panel message data<br />
: Shows only included firmeware<br />
of boot program (".bcmp" extension file).<br />
4<br />
Message display<br />
Supervisor mode<br />
5<br />
Supervisor mode<br />
CF-CARD Reading<br />
S E M<br />
6 BootROM<br />
6 engine download 6 message download<br />
erase&write<br />
(4) Downloading errors<br />
The following messages are indicated on the message display when an error occurred during<br />
downloading the firmware data.<br />
Error message Description Corrective action<br />
download header Deficit of the file header<br />
Obtain the correct firmware.<br />
error [##] Deficit of the data header<br />
File checksum error<br />
##: Error code 20 to 26. Data checksum error<br />
File header version error<br />
Data header version error<br />
<strong>In</strong>compatibility of firmware and Confirm whether the firmware<br />
system download<br />
error [##] system DIMM board<br />
is applicable to this printer.<br />
Defective system DIMM board Replace the system DIMM<br />
##: Error code 40 to 59.<br />
board.<br />
receive<br />
error [##]<br />
##: Error code 80 or 81.<br />
Improper connection of parallel cable<br />
between PC and printer<br />
Defective parallel cable<br />
Check the contact between PC<br />
and the printer’s interface<br />
connector.<br />
Replace the parallel cable.<br />
Engine download<br />
error [##]<br />
##: Error code 60 or 69.<br />
Message download<br />
error [##]<br />
##: Error code 70 or 77.<br />
Improper connection of parallel cable<br />
between PC and printer<br />
<strong>In</strong>compatibility of firmware and engine<br />
board<br />
Improper connection of parallel cable<br />
between PC and printer<br />
Defective LCD controller board<br />
Check the contact between PC<br />
and the printer’s interface<br />
connector.<br />
Confirm whether the firmware<br />
conforms to this printer.<br />
Check the contact between PC<br />
and the printer’s interface<br />
connector.<br />
Replace the LCD controller<br />
board<br />
If the corrective action above does not solve the problem, replace engine board (KP-864). See page<br />
5-22.<br />
3-23<br />
FS-1900
Chapter 4<br />
Operation Overview
Chapter 4 Contents<br />
4-1 Electrophotographic system .......................................................................................................... 4-3<br />
4-1-1 Electrophotographic cycle ......................................................................................................... 4-3<br />
(1) Main charging ............................................................................................................................ 4-4<br />
Components of drum and main charger unit .................................................................................. 4-4<br />
Amorphus-silicon drum ................................................................................................................... 4-5<br />
Charging the drum .......................................................................................................................... 4-6<br />
(2) Exposure ................................................................................................................................... 4-7<br />
Laser scanner unit .......................................................................................................................... 4-8<br />
Drum surface potential .................................................................................................................. 4-10<br />
(3) Development............................................................................................................................ 4-11<br />
(4) Transfer .................................................................................................................................... 4-14<br />
(5) Fusing ...................................................................................................................................... 4-15<br />
Fuser unit mechanism................................................................................................................... 4-16<br />
(6) Cleaning .................................................................................................................................. 4-17<br />
4-2 Paper feeding system .................................................................................................................... 4-18<br />
4-2-1 Paper feed control ................................................................................................................... 4-19<br />
(1) Paper feeding mechanism ....................................................................................................... 4-20<br />
Drive and paper transfer unit......................................................................................................... 4-20<br />
MP tray paper feed unit ................................................................................................................. 4-21<br />
Fuser unit and face up/down output .............................................................................................. 4-22<br />
4-3 Electrical control system .............................................................................................................. 4-23<br />
4-3-1 Electrical parts layout .............................................................................................................. 4-23<br />
(1) Circuit boards, sensors and switches ...................................................................................... 4-23<br />
(2) Motors, solenoids, clutches and others ................................................................................... 4-24<br />
(3) Drum unit and developer ......................................................................................................... 4-25<br />
4-3-2 Operation of circuit boards ...................................................................................................... 4-26<br />
(1) Main board............................................................................................................................... 4-26<br />
(2) Engine board ........................................................................................................................... 4-27<br />
Eraser lamp control circuit ............................................................................................................ 4-28<br />
Toner motor control circuit............................................................................................................. 4-29<br />
Heater lamp control circuit ............................................................................................................ 4-30<br />
(3) Sensor board ........................................................................................................................... 4-32<br />
Paper gauge sensing circuit .......................................................................................................... 4-32<br />
<strong>In</strong>terlock circuit .............................................................................................................................. 4-33<br />
Paper size detecting circuit ........................................................................................................... 4-35<br />
(4) Power supply unit .................................................................................................................... 4-37<br />
(5) High voltage unit ...................................................................................................................... 4-38
4-1 Electrophotographic system<br />
Electrophotography is the technology used in laser printing which transfer data representing texts<br />
and graphics objects into a visible image which is developed on the photosensitive drum, finally<br />
fusing them on paper using the light beam generated by a laser diode.<br />
This section provides technical details on the printer’s electrophotography system.<br />
4-1-1 Electrophotographic cycle<br />
The electrophotographic system of the printer performs a cyclic action made of six steps as follows.<br />
Each step is technically explained in the following sections.<br />
Drum unit<br />
Laser scanner unit<br />
1 Main charging<br />
2 Exposure<br />
6 Cleaning<br />
Drum<br />
3 Developing<br />
Developer<br />
4 Transfer<br />
5 Fusing<br />
Paper transfer unit<br />
<br />
Fuser unit<br />
Figure 4-1-1 Electrophotographic cycle<br />
4-3<br />
FS-1900
(1) Main charging<br />
Components of drum and main charger unit<br />
2<br />
1<br />
6<br />
Drum unit<br />
9<br />
7<br />
0<br />
8<br />
$<br />
5<br />
4<br />
3<br />
#<br />
@<br />
!<br />
Main charger unit<br />
1 Eraser lamp [board] (KP-752)<br />
2 Zener board (KP-768)<br />
3 Drum board (KP-748)<br />
4 Waste toner full sensor [board] (KP-766)<br />
5 Waste toner full sensor (receiver)<br />
6 Cleaning blade<br />
7 Cleaning roller<br />
8 Cleaner screw<br />
9 Drum gear Z36H<br />
0 Drum<br />
! Main charger shield<br />
@ Grid<br />
# Main charger wire<br />
$ Charger wire cleaner<br />
Figure 4-1-2 Components of drum and main charger unit<br />
FS-1900<br />
4-4
Amorphus-silicon drum<br />
The printer use the long lasting amorphous silicon drum. The drum surface is a composite of five<br />
substances coated in five layers as shown below.<br />
1 2 3 4 5<br />
Drum<br />
1 Aluminum base<br />
2 Carrier block (1 to 3 µm thick)<br />
3 Photoconductor a-Si<br />
4 Primary protection layer (1 µm thick)<br />
5 Secondary protection layer<br />
Figure 4-1-3 Amorphus silicon drum<br />
The primary and secondary layers are for protecting the amorphous silicon layer underneath. The<br />
amorphus silicon layer is of photoconductive, meaning it can be electronically conductive when<br />
exposed to a (laser) light source to effectively ground electrons charged on its outer surface to the<br />
ground. This layer is approximately 9 µm thick.<br />
The carrier block layer lies between the amorphous silicon layer and the aluminum base cylinder<br />
and prevents the backward electron flow, from the base cylinder to the drum’s outer surface, which<br />
might give adverse effect (possibly “ghost”) on the print quality.<br />
4-5<br />
FS-1900
Charging the drum<br />
The following shows a simplified diagram of the electrophotographic components in relation to the<br />
engine system. Charging the drum A is done by the main charger wire B.<br />
Main charging<br />
output<br />
High voltage unit<br />
M<br />
CN2-9<br />
MCHON*<br />
Engine board<br />
YC204-10<br />
Zener<br />
board<br />
KP-768<br />
B<br />
C<br />
A<br />
Figure 4-1-4 Charging the drum<br />
As the drum A rotates in a “clean (neutral)” state, its photoconductive layer is given a uniform,<br />
positive (+) corona charge dispersed by the main charger wire B. The grid C regulates the main<br />
charging potential so that it is evenly and stably dispersed over the drum A at a constant voltage<br />
level.<br />
Due to being high-voltage scorotron charging, the main charger wire B can get contaminated by<br />
oxidization after a long run. Therefore, it must be cleaned periodically from time to time using the<br />
method explained in chapter 3, page 3-9. Cleaning the main charger wire B prevents print quality<br />
problems such as black streaks.<br />
FS-1900<br />
4-6
(2) Exposure<br />
The charged surface of the drum A is exposed to the laser beam scanning from the laser scanner<br />
unit B.<br />
D D E<br />
C<br />
B<br />
Laser beam<br />
output<br />
A<br />
Figure 4-1-5 Exposure<br />
The polygon motor C (with polygon mirrors) revolves (27,165 rpm) to reflect the laser beam over<br />
the drum A. Lenses D and diversion mirror E are housed in the laser scanner unit B. These<br />
lenses adjust the diameter of the laser beam (670 nm wavelength) so that the laser beam effectively<br />
focalizes on the drum A surface.<br />
4-7<br />
FS-1900
Laser scanner unit<br />
4<br />
5<br />
3<br />
2<br />
9<br />
1<br />
6<br />
0<br />
8<br />
7<br />
Figure 4-1-6 Laser scanner unit<br />
Name<br />
1 Laser diode Emits diffused, visible laser.<br />
Description<br />
2 Collimator lens Aligns the laser beam to the cylindrical lens.<br />
3 Cylindrical lens Compensates the vertical angle at which the laser beam hits on of the<br />
polygon mirror segments.<br />
4 Polygon motor Has six mirror segments around its hexagonal circumference. Each<br />
mirror corresponds to one scanned line width on the drum when the<br />
laser beam scans on it.<br />
FS-1900<br />
4-8
Name<br />
Description<br />
5 Primary f-theta lens See figure 4-1-7 below.<br />
6 Secondary f-theta lens The primary (above) and secondary f-theta lenses equalize<br />
focusing distortion on the area on the drum closer to the edge. The<br />
effective length of line (A, B in the figure below) the laser beam draws<br />
on the drum becomes longer as the laser beam hits closer to the drum<br />
edge. <strong>In</strong> the figure 4-1-7 below, distances represented by A and B<br />
are not the same (A > B) until the f-theta lenses are provided<br />
between the polygon mirror and the drum (A = B).<br />
7 Diversion mirror Diverts the laser beam vertically onto the drum. Note the diffused<br />
laser beam finally pinpoints on the drum.<br />
8 Protective glass Prevent dust, debris, etc., from entering the scanner assembly.<br />
9 Sensor mirror Bends the very first shot of a laser scan towards the pin photo<br />
sensor (See figure 4-1-6).<br />
0 Pin photo sensor When shone by the sensor mirror above, this pin photo sensor<br />
generates a trigger signal.<br />
Polygon mirror<br />
Laser beam<br />
Laser diode<br />
Primary f-theta lens<br />
Secondary f-theta lens<br />
Drum<br />
Figure 4-1-7 F-theta lens<br />
4-9<br />
FS-1900
Drum surface potential<br />
The laser beam is continually switched on and off depending on the print data. It is on for a black<br />
(exposed) dot and off for a white (blank) dot. Since the drum surface is evenly charged, whenever<br />
it is illuminated by the laser beam, the electrical resistance of the photoconductor is reduced and the<br />
potential on the photoconductor is also lowered. Resulted on the drum surface is an electrostatic<br />
image which represents the data to print. Note that the area to be printed black has the low potential,<br />
constituting a “positively exposed” image.<br />
Laser beam<br />
Exposed surface potential<br />
approx. 0 to +20 V<br />
Charged surface potential<br />
approx. +240 V<br />
a-Si layer<br />
Aluminum base<br />
Drum<br />
Figure 4-1-8 Drum surface potential<br />
FS-1900<br />
4-10
(3) Development<br />
Power train<br />
A<br />
A<br />
B<br />
6<br />
7<br />
1<br />
Toner container<br />
B<br />
4<br />
5<br />
Developer<br />
3<br />
2<br />
1 Toner motor<br />
2 Toner sensor<br />
3 Developing roller<br />
4 DLP A screw<br />
5 DLP B screw<br />
6 Blade<br />
7 Magnet<br />
Figure 4-1-9 Developer mechanism<br />
4-11<br />
FS-1900
The latent image constituted on the drum A is developed into a visible image. The developing<br />
roller B contains a 4-pole (S-N-S-N) magnet core C and an aluminum cylinder rotating around<br />
the magnet core C. Toner attracts to the developing roller B since it is powdery ink made of black<br />
resin bound to iron particles. The magnetic blade D to which an auxiliary magnet piece E is<br />
attached is positioned approximately 0.3 to 0.4 mm above the developing roller B. It constitutes a<br />
smooth layer of toner in accordance with the revolution of the roller.<br />
D<br />
A<br />
Magnetism<br />
0.1 mm<br />
F<br />
E<br />
N<br />
S<br />
0.3 to 0.4 mm<br />
S<br />
N<br />
B C<br />
S<br />
N<br />
150 V DC + AC<br />
Developing bias<br />
output<br />
B<br />
High<br />
voltage<br />
unit<br />
CN2-11<br />
HVCLK<br />
Engine board<br />
YC204-8<br />
Figure 4-1-10 Development<br />
The developing roller B is applied with the AC-weighted, positive DC power source. Toner F on<br />
the developing roller B is given a positive charge. The positively charged toner F is then attracted<br />
to the areas of the drum A which was exposed to the laser light. (The gap between the drum A and<br />
the developing roller B is approximately 0.3 mm.) The non-exposed areas of the drum A repel the<br />
positively charged toner as these areas maintain the positive charge. The developing roller B is<br />
also AC-biased to ensure contrast in yielding by compensating the toner’s attraction and repelling<br />
action during development.<br />
FS-1900<br />
4-12
A toner sensor is provided within the developer. As the toner supply from the toner container<br />
dwindles and the toner level lowers in the reservoir, the sensor translates it into an electrical signal<br />
through its diaphragm, urging the toner motor to feed more toner.<br />
Toner container<br />
Toner hopper<br />
Toner motor<br />
Sensable level<br />
Toner<br />
Diaphragm<br />
Toner sensor<br />
Developer<br />
Figure 4-1-11 Toner sensor<br />
4-13<br />
FS-1900
(4) Transfer<br />
The image developed by toner on the drum A is transferred onto the paper because of the electrical<br />
attraction between the toner itself and the transfer roller B. The transfer roller B is negativelybiased<br />
so that the positively-charged toner is attracted onto the paper while it is pinched by the<br />
drum A and the transfer roller B.<br />
A<br />
S<br />
N<br />
S<br />
B<br />
Transfer<br />
bias<br />
output<br />
Paper type<br />
Normal Thick Thin<br />
Transfer bias<br />
output<br />
TR<br />
High<br />
voltage<br />
unit<br />
CN2-13<br />
Engine<br />
board<br />
TRCHON*<br />
YC204-6<br />
Voltage<br />
−2.3 kV<br />
−2.6 kV<br />
−2.1 kV<br />
Figure 4-1-12 Transfer<br />
The nominal transfer bias is set to approximately -2.3 kV (limit). Since the ideal potential of the<br />
transfer bias depends on the thickness of paper, the bias is raised to approximately -2.6 kV for<br />
thicker paper. On the other hand, the bias current is reduced to -2.1 kV for thin paper.<br />
FS-1900<br />
4-14
(5) Fusing<br />
The toner on the paper is molten by heat and pressed into the paper as it passes between the heat<br />
roller A and the press roller B in the fuser unit.<br />
Fusing control temperature<br />
Temperature<br />
Paper type<br />
Thin<br />
A4 Normal<br />
Thick<br />
Thin<br />
B5 Normal<br />
Thick<br />
A5 or Normal<br />
smaller Thick<br />
Ready<br />
175 °C<br />
188 °C<br />
190 °C<br />
188 °C<br />
190 °C<br />
195 °C<br />
188 °C<br />
190 °C<br />
150 °C<br />
Engine<br />
board<br />
YC202-6<br />
YC202-11<br />
THERM<br />
HEATON*<br />
Power<br />
supply<br />
unit<br />
D<br />
AC power<br />
off/on<br />
output<br />
C<br />
A<br />
B<br />
Figure 4-1-13 Fusing<br />
The heat roller A has a heater (infrared) lamp C inside which continuously turns on and off by the<br />
thermistor to maintain the constant temperature on the heat roller A surface. The fusing temperature<br />
is also controlled based on paper types. See the table in the figure above.<br />
The heat roller A is florin coated by to prevent toner from accumulating on the roller after a long<br />
usage. Care must be taken while handling the heat roller A not to scratch the roller surface as<br />
doing so may result in quality problems.<br />
The heat roller A has four scraping claws (Separators) D which are continuously in contact with<br />
its surface. These claws prevent the paper on which toner has been fused from being wound around<br />
the heat roller A causing paper jam.<br />
The press roller B is made of the heat resistant silicon rubber. This roller is used to strongly press<br />
the paper towards the heat roller A by means of coil springs.<br />
The temperature of the heat roller A is constantly monitored by the engine board using the thermistor<br />
and triac. Should the temperature of the heat roller A exceed the predetermined value, the thermal<br />
cutout is activated to effectively disconnect the heater lamp C from power.<br />
4-15<br />
FS-1900
Fuser unit mechanism<br />
1<br />
To face-down<br />
output tray<br />
2 3<br />
5<br />
$<br />
%<br />
To face-up<br />
output tray<br />
or option devices<br />
4<br />
9<br />
8<br />
#<br />
@<br />
!<br />
Paper from<br />
paper transfer unit<br />
(transfer section)<br />
^<br />
0<br />
6<br />
7<br />
1 Face up/down solenoid<br />
2 Thermistor<br />
3 Thermal cutout<br />
4 Exit sensor<br />
5 Fuser board (KP-756)<br />
6 Press roller<br />
7 Heat roller<br />
8 Exit roller<br />
9 Exit pulley(s)<br />
0 Heat gear Z36<br />
! Exit gear Z21<br />
@ Idle gear Z18<br />
# Idle gear Z28<br />
$ Separator(s)<br />
% Change guide<br />
^ Heater lamp<br />
Figure 4-1-14 Fuser unit mechanism<br />
FS-1900<br />
4-16
(6) Cleaning<br />
After the transferring process, the drum needs to be physically cleaned of toner which is residual<br />
after the development process. The cleaning blade A is constantly pressed against the drum B and<br />
scrapes the residual toner on the drum off to the cleaning roller C. The cleaning roller drives the<br />
toner to the cleaner screw D at one end of which the waste toner bottle is connected to collect the<br />
waste toner.<br />
E<br />
B<br />
A<br />
D<br />
C<br />
Figure 4-1-15 Drum cleaning and erasing static charge<br />
After the drum B is physically cleaned, it then must be electrically cleaned to neutral state. This is<br />
necessary to erase any residual positive charges, ready to accept the next uniform charge. The<br />
residual charge is canceled by exposing the drum B to the light emitted from the eraser lamp<br />
[board] E (See figure 4-1-15 above.) in the similar manner as described on page 4-6. This lowers<br />
the electrical conductivity of the drum B surface making the residual charge on the drum B<br />
surface escape to the ground.<br />
4-17<br />
FS-1900
4-2 Paper feeding system<br />
The paper feeding system picks up paper from the paper cassette, MP tray, or if installed, the paper<br />
feeder PF-60, feeds it in the printer and delivers in the output tray. Paper is feed at the precise<br />
timing in synchronization with data processing. The paper feeding system finally delivers the printed<br />
page to either the face-down or face-up output tray as manipulated by the user.<br />
The figure below shows the components in the paper feeding system and the paths through which<br />
the paper travels. The sensors, clutches, solenoids, motor etc., are described in the following pages.<br />
(<br />
)<br />
*<br />
&<br />
1<br />
2<br />
3<br />
^<br />
%<br />
5<br />
6<br />
4<br />
$<br />
7<br />
#<br />
@<br />
!<br />
0<br />
9<br />
8<br />
Paper from option<br />
paper feeder PF-60<br />
or duplexer DU-60<br />
1 Middle feed roller<br />
2 MP tray feed roller<br />
3 Guide pulley(s)<br />
4 MP tray<br />
5 Paper cassette<br />
6 Feed pulley<br />
7 Retard roller<br />
8 Feed roller<br />
9 Pickup roller<br />
0 Upper registration roller<br />
! Lower registration roller<br />
@ Transfer roller<br />
# Drum<br />
$ Press roller<br />
% Heat roller<br />
^ Exit roller<br />
& Exit pulley(s)<br />
* FD roller<br />
( Pinch roller(s)<br />
) Face-down output tray<br />
Figure 4-2-1 Paper feeding components<br />
FS-1900<br />
4-18
4-2-1 Paper feed control<br />
The following diagram shows interconnectivity of the feeding system components including the<br />
sensors and rollers. The engine board issues various signals in synchronization with the<br />
electrophotographic process that is executed by the main board.<br />
6<br />
Laser<br />
scanner<br />
unit<br />
Toner container<br />
Fuser unit<br />
Drum unit<br />
Developer<br />
8 7 2<br />
MP tray<br />
! 5<br />
0 3<br />
4<br />
9<br />
Fuser board<br />
1<br />
Power supply unit<br />
Paper cassette<br />
Sensor<br />
baord<br />
Engine relay board<br />
High voltage<br />
unit<br />
FUDR<br />
FDDR<br />
FDPFUL*<br />
EXITPAP*<br />
YC202-3<br />
YC202-4<br />
YC202-2<br />
YC202-6<br />
YC203-22<br />
YC203-18<br />
YC203-17<br />
YC206-18<br />
YC206-15<br />
YC206-11<br />
YC206-5<br />
YC206-3<br />
YC204-13<br />
PVOLAN2<br />
PVOLAN1<br />
REGPAP<br />
MMOTON*<br />
REGDR*<br />
FDDR*<br />
MIDDR*<br />
MPFSOL*<br />
HANDS*<br />
Engine board<br />
1 Main motor<br />
2 MP tray paper sensor<br />
3 Registration sensor<br />
4 Paper gauge sensor 1, 2<br />
5 Exit sensor<br />
6 Paper full sensor<br />
7 MP tray feed solenoid<br />
8 Middle feed clutch<br />
: Power train<br />
9 Feed clutch<br />
0 Registration clutch<br />
! Face up/down solenoid<br />
Figure 4-2-2 Paper feed control<br />
4-19<br />
FS-1900
(1) Paper feeding mechanism<br />
Drive and paper transfer unit<br />
Drive unit<br />
Power train<br />
B<br />
A<br />
1<br />
8<br />
7<br />
6<br />
2 3<br />
To fuser unit<br />
B<br />
A<br />
Paper transfer unit<br />
4<br />
5<br />
1 Main motor<br />
2 Registration clutch<br />
3 Feed clutch<br />
4 Pickup roller<br />
5 Feed roller<br />
6 Lower registration roller<br />
7 Upper registration roller<br />
8 Transfer roller<br />
Figure 4-2-3 Drive and paper transfer unit<br />
FS-1900<br />
4-20
MP tray paper feed unit<br />
Drive unit<br />
Power train<br />
D<br />
C<br />
9<br />
0<br />
MP tray paper feed unit<br />
!<br />
To paper transfer unit<br />
D<br />
C<br />
@<br />
MP tray<br />
9 Middle feed clutch<br />
0 MP tray feed solenoid<br />
! MP tray feed roller<br />
@ Middle feed roller<br />
Figure 4-2-4 MP tray paper feed unit<br />
4-21<br />
FS-1900
Fuser unit and face up/down output<br />
*<br />
To face-up<br />
output tray or<br />
option device<br />
&<br />
^<br />
%<br />
To face-down<br />
output tray<br />
FD gear bracket<br />
Power train<br />
F<br />
Paper from<br />
paper transfer unit<br />
$<br />
F<br />
Drive unit<br />
#<br />
Fuser unit<br />
# Heat roller<br />
$ Press roller<br />
% Exit roller<br />
^ Exit pulley(s)<br />
& FD roller<br />
* Pinch roller(s)<br />
Figure 4-2-5 Fuser unit and face up/down output<br />
FS-1900<br />
4-22
4-3 Electrical control system<br />
4-3-1 Electrical parts layout<br />
(1) Circuit boards, sensors and switches<br />
fl<br />
fi<br />
7<br />
8<br />
6<br />
¤<br />
5<br />
)<br />
9<br />
⁄<br />
2<br />
!<br />
‡<br />
1<br />
‹<br />
^<br />
%<br />
4 # @<br />
$ &<br />
1 Main board (KP-948)<br />
2 System DIMM [board] (KP-893)<br />
3 Engine board (KP-864)<br />
4 Sensor board (KP-574)<br />
5 LCD controller board (KP-738)<br />
6 Engine relay board (KP-760)<br />
7 APC board (KP-742)<br />
8 Pin photo diode sensor [board] (KP-746)<br />
9 Fuser board (KP-756)<br />
0 Power supply unit<br />
! High voltage unit<br />
@ Registration sensor (PH701)<br />
# Paper gauge sensor 1 (PH702)<br />
3<br />
0<br />
›<br />
*<br />
(<br />
$ Paper gauge sensor 2 (PH703)<br />
% Top cover/paper transfer unit interlock switch (SW702)<br />
^ Left cover interlock switch (SW703)<br />
& Top cover switch (SW701)<br />
* MP tray paper sensor (PC502)<br />
( Option feeder sensor (PC501)<br />
) Paper full sensor<br />
⁄ Exit sensor<br />
¤ Temperature/humidity sensors<br />
‹ Power switch fl Thermal cutout<br />
› Paper size switch ‡ Network interface card or<br />
fi Thermistor<br />
serial interface card (Optional)<br />
Figure 4-3-1 Circuit boards, sensors and switches<br />
4-23<br />
FS-1900
(2) Motors, solenoids, clutches and others<br />
2<br />
3 1<br />
98<br />
5<br />
0<br />
6<br />
7<br />
4<br />
!<br />
1 Main motor<br />
2 Polygon motor<br />
3 Cooling fan motor<br />
4 Controller unit fan motor<br />
5 Face up/down solenoid<br />
6 MP feed solenoid<br />
7 Middle feed clutch<br />
8 Feed clutch<br />
9 Registration clutch<br />
0 Heater lamp<br />
! AC inlet<br />
Figure 4-3-2 Motors, solenoids, clutches and others<br />
FS-1900<br />
4-24
(3) Drum unit and developer<br />
5<br />
4<br />
Drum unit<br />
3<br />
2<br />
1<br />
7<br />
Developer<br />
6<br />
1 Drum board (KP-748)<br />
2 Waste toner full sensor [board] (KP-766)<br />
3 Waste toner full sensor (receiver)<br />
4 Eraser lamp [board] (KP-752)<br />
5 Zener board (KP-768)<br />
6 Toner sensor<br />
7 Toner motor<br />
Figure 4-3-3 Drum unit and developer<br />
4-25<br />
FS-1900
4-3-2 Operation of circuit boards<br />
(1) Main board<br />
Engine I/F<br />
YC07<br />
FPCLK<br />
FPDIR<br />
FPDAT<br />
RESETN<br />
VDEONSPI<br />
PDN<br />
VDATAP, VDATAN<br />
EGSI, SCKN<br />
EGSO, SBSY, SDIR, EGIRN<br />
SCK, SO, SEL(0-2)<br />
SLREADY<br />
OP24V, OP5V<br />
Option I/F<br />
YC08<br />
X'tal (System)<br />
25.0000 MHz<br />
X'tal (Video)<br />
30.2394 MHz<br />
X02<br />
X03<br />
X01<br />
X'tal (USB)<br />
48.0000 MHz<br />
YC04<br />
Parallel I/F<br />
PNSELIN<br />
PNSTROBE, PNAUTOFD,<br />
PNNIT<br />
PNACK, PBUSY, PPERROR<br />
PSELECT, PFAULT<br />
PPDATA7-0<br />
U16<br />
VXIN<br />
VXOUT<br />
CXIN<br />
U2<br />
48MHZIN<br />
PDATA7-0<br />
NSELIN<br />
PDATA7-0<br />
CPU<br />
U01<br />
PowerPC 200 MHz<br />
RISC processor<br />
(Core ASIC)<br />
Q01<br />
Digital Transistor<br />
IICSCL<br />
IICSDA<br />
USBINT<br />
USBDP<br />
USBDN<br />
VBUS<br />
Q02<br />
Digital Transistor<br />
EBA22, EBA10-1<br />
EBOEN1, EBWEN1<br />
CDET11, CDET12, CDRST1<br />
EBCSN2<br />
CDCSN1<br />
EBWEN3<br />
CDCSN2<br />
74LV<br />
EBA21-20 32A<br />
EBA22, EBA10-1<br />
CDET21, CDRST2<br />
CDWAITN<br />
EBA22-2<br />
74HC<br />
08<br />
EBIU Address bus<br />
CDCSN1<br />
CDCSN2<br />
EBCSN0, EBCSN1, EBOEN0, EBWEN0<br />
EBCSN0, EBOEN2<br />
EBA21-1<br />
EBA21-1<br />
EBCSN1, EBOEN2<br />
OPRSTN<br />
OPRDY, DMAACKN, IORN,<br />
IOWN, EBCSN4<br />
DMAREQ, OPACKN, OPIRN<br />
EBA15-1<br />
U03<br />
Font<br />
Mask ROM<br />
YC01<br />
YC02<br />
Option<br />
Memory<br />
card<br />
slot<br />
Option<br />
Hard<br />
disk<br />
dirive<br />
slot<br />
EBIU Data bus<br />
DQMLM, DQMLL<br />
DQMUU, DQMUM<br />
RASN, CASN, WEN, BA1, BA0, SDCLKE<br />
CDD15-8<br />
CDD7-0<br />
YC03<br />
YS01<br />
System<br />
DIMM<br />
Slot 1<br />
(Code ROM)<br />
YC06<br />
U04<br />
API ROM<br />
Socket<br />
Option I/F<br />
KUIO-LV (3.3 V)<br />
EBD31-16<br />
U5<br />
U6<br />
USB I/F<br />
EDB31-16<br />
EDB31-24<br />
EDB23-16<br />
EBD31-0<br />
EBD31-16<br />
EBD31-16<br />
EBD31-0<br />
U11<br />
IIC<br />
EEPROM<br />
Option serial I/F<br />
YC05<br />
DTR, RTS, TXD<br />
CTS, DSR, RXD<br />
RSSEL<br />
[Debugger connector]<br />
YC09<br />
DBTXD<br />
DBRXD, DBCLK<br />
P1284DIR<br />
RISC watch connector<br />
YC10<br />
TDO<br />
TDI, TCK, TMS, HALTN<br />
U13<br />
3.3 V Regulator<br />
+5 V1 +3.3 V1<br />
SDCSN0 SDRAM Address bus SDA12-0<br />
SDD31-16<br />
SDA12-0<br />
U09<br />
SDA12-0<br />
SDRAM<br />
SDCSN0<br />
SDD31-0<br />
SDCLK<br />
U10<br />
SDD15-0<br />
SDA12-0<br />
SDRAM<br />
SDCSN1-2<br />
SDCLK<br />
SDRAM Data bus SDD31-0<br />
YS02<br />
Option<br />
SDRAM<br />
DIMM<br />
Slot<br />
Figure 4-3-4 Main board circuit block diagram<br />
FS-1900<br />
4-26
(2) Engine board<br />
Engine board<br />
Sensor<br />
board<br />
Power<br />
supply<br />
unit<br />
Eraser lamp<br />
control<br />
circuit<br />
Waste toner<br />
full detection<br />
circuit<br />
Paper<br />
gauge<br />
sensing<br />
circuit<br />
+5V1, +24V1, +24V2<br />
Thermisor<br />
blown-out<br />
detection<br />
Abnormal<br />
temperature<br />
detection<br />
circuit<br />
ERASE<br />
ERDEAD*<br />
WTNLED<br />
WTONFUL*<br />
ZCROSS<br />
Heater lamp<br />
control circuit<br />
EECLK<br />
EEDIO<br />
PAPVOL<br />
CASIZE<br />
THERM<br />
THDEAD*<br />
HTEMP*<br />
HEATON<br />
CPU<br />
(U201)<br />
OPRDY*<br />
Address/Data multiplex bus AD0 - AD7<br />
5VSAVE*<br />
Address bus A8 - A19<br />
RD*, WR*, ALE<br />
5 V DC<br />
power<br />
saver<br />
SOOUT, SCLKOUT<br />
SYSCLK<br />
GAINT<br />
RESET*<br />
A8 - A17<br />
Reset<br />
IC<br />
(U203)<br />
Address bus LA0 - LA7<br />
Flash<br />
ROM<br />
(U202)<br />
FRCS*<br />
3-<br />
+24V1 terminal +5V3<br />
regulator<br />
(U208)<br />
POLCLK, POLON,<br />
POLRDY*<br />
PDIN*<br />
SAMPLE1*, POWCONT<br />
LASER*<br />
Engine<br />
gate<br />
array<br />
(U204)<br />
Scanner<br />
unit<br />
Engine<br />
relay<br />
board<br />
Driver<br />
AIRTEMP, AIRWET<br />
WETCK1, WETCK2<br />
FDDR, FUDR<br />
VSEREQ*<br />
SIOUT<br />
Driver<br />
RESET*<br />
HEATON*<br />
FDPFUL*, EXITPAP*<br />
FDON, FUON<br />
MMOTON, MPFSOL, FEDDR, MIDDR, REGDR<br />
Cooling<br />
fan motor<br />
driver circuit<br />
REGPAP, TCOVOP,<br />
SCOVOP*,FCOVOP*,<br />
MMOTRDY*<br />
FANON*<br />
FANSPD<br />
FPRST*<br />
BFANON<br />
OPSCLK,<br />
OPSDO<br />
OPTSDI<br />
OPSEL0-2<br />
OPSEL3-5<br />
Controller<br />
unit<br />
fan motor<br />
driver<br />
circuit<br />
Bus<br />
buffer<br />
(U206)<br />
Bus<br />
buffer<br />
(U207)<br />
Controller<br />
unit fan<br />
motor<br />
Option<br />
unit<br />
High<br />
voltage<br />
unit<br />
Toner motor<br />
control<br />
circuit<br />
TMOTON<br />
TNMOC<br />
DLPTYPE, CONTYPE<br />
TONSCAN<br />
TNEMP*<br />
MCHON, TRCHON, RTRCHON*,<br />
TRVSEL1,TRVSEL2, TRVSEL3,<br />
TRTCHON, HVCLK1, HVCLK2<br />
HUNIT*, HANDS*<br />
OPSDI, OPRDY*<br />
SYSRES*, SDIR,<br />
VDFON1*, PDOUT*,<br />
20PTRIG, SBSY*<br />
EGIR, VDFON1*<br />
SCLKIN, SOIN<br />
FPCLK, FPDIR<br />
FPDATA<br />
+3.3V1<br />
Main<br />
board<br />
Figure 4-3-6 Engine board circuit block diagram<br />
4-27<br />
FS-1900
Eraser lamp control circuit<br />
CPU (U201) turns on its #59 pin to H and turns Q215 and Q214 on. Current flows through Q214<br />
and R249, then the eraser lamp, activating the lamp. Current also routes through R251 and R252 as<br />
bled by R251. Point A below is approximately 14.5 V when the eraser lamp is normal. If the eraser<br />
lamp blows out or the connector is not fitted, current goes through only R251 and R252, subsequently<br />
the potential at point A is as high as approximately 24 V. Difference in the potential at point A<br />
where the eraser lamp is normal or not is automatically detected as an error. When anomaly is<br />
detected with the eraser lamp, the detector circuit turns Q216 on and turns ERDEAD* at #60 pin of<br />
CPU (U201) to L. This in turn causes CPU (U201) to determine that the eraser lamp is faulty,<br />
displaying Call service 5300.<br />
Engine board<br />
Eraser lamp cotrol circuit<br />
+24V<br />
CPU<br />
U201<br />
P37/SOT0CLK<br />
59<br />
ERASE<br />
Q215<br />
2<br />
3<br />
1<br />
GND<br />
Q216<br />
3 Q214<br />
1<br />
2<br />
R249<br />
R252<br />
A<br />
YC203<br />
9<br />
2<br />
ERASEDR<br />
ERASER<br />
Drum board<br />
P40/SCK0<br />
60<br />
ERDEAD*<br />
R250<br />
GND<br />
R251<br />
D2207<br />
GND<br />
Eraser lamp [board]<br />
Figure 4-3-7 Eraser lamp control circuit<br />
FS-1900<br />
4-28
Toner motor control circuit<br />
As TMOTON at #15 of gate array (U204) turns to H, Q218 and Q217 turn on, and +24 V reaches<br />
Q217, R265 and the toner motor, finally driving the toner motor.<br />
If the toner motor is overloaded by some reasons, an overcurrent may flow through the toner motor<br />
beyond the predetermined level, turning Q220 on. Q220, when turned on, causes the current from<br />
the +24 V power supply to flow through Q217, Q220, R267, R268, and to the ground. Consequently,<br />
approximately 3.9 V (H) develops at point A, as limited by the combination of R267, R268, and<br />
DZ206. This voltage is used as TNMOC - toner motor error - which is applied to #17 of CPU<br />
(U201). Thus, CPU determines the toner motor error and lets Call service 7001 be indicated.<br />
Engine board<br />
Toner motor control circuit<br />
+24V2<br />
CPU<br />
U204<br />
TMOTON<br />
15<br />
TMOTON<br />
Q218<br />
2<br />
3<br />
1<br />
3 Q217<br />
2<br />
1<br />
R265<br />
GND<br />
Q220<br />
R267<br />
1<br />
3<br />
2<br />
R266<br />
YC203<br />
16<br />
9<br />
TMOTDR<br />
GND<br />
Toner<br />
motor<br />
TNMOC<br />
17<br />
TNMOC<br />
R268<br />
DZ206<br />
GND<br />
GND<br />
Figure 4-3-8 Toner motor control circuit<br />
4-29<br />
FS-1900
Heater lamp control circuit<br />
The heater lamp control circuit turns the heater lamp on and off which is located coaxially inside<br />
the heat roller. The surface of the roller maintains the constant temperature needed to permanently<br />
fuse the toner on paper.<br />
The heater lamp is directly fed with AC primary power (220 - 240 V or 120 V) which is supplied<br />
from the power supply unit.<br />
Engine board<br />
+5V1<br />
+5V1<br />
R217<br />
+5V1<br />
R219<br />
+<br />
8<br />
6 − 7<br />
5<br />
393<br />
+<br />
4 U205-2<br />
+5V1<br />
QA201B<br />
4<br />
HEATON*<br />
Q204<br />
3<br />
1<br />
2<br />
6<br />
5<br />
3<br />
2<br />
HEATON<br />
4<br />
Engine<br />
gate<br />
array<br />
(U204)<br />
HEATON<br />
1<br />
QA201A<br />
THERM<br />
+5V1<br />
+5V1<br />
CPU<br />
(U201)<br />
R233<br />
1M<br />
U205-1<br />
2 − 1<br />
3 393<br />
+<br />
HTEMP*<br />
THDEAD<br />
63<br />
54<br />
P43/PPG3<br />
P34/RT04<br />
/HRQ<br />
R228<br />
1.3k<br />
THERM<br />
3<br />
P50/AN0<br />
PC<br />
TRC<br />
AC<br />
Power supply unit<br />
Thermisor<br />
Heater lamp<br />
Thermal cutout<br />
+5V1<br />
Fuser board<br />
Figure 4-3-9 heater lamp control circuit<br />
FS-1900<br />
4-30
As change in temperature is detected by the thermistor, CPU U201 adjusts the voltage that is resultant<br />
of change in temperature, given at pin #3 (THERM) to keep the temperature as constant as possible.<br />
This voltage is used to continuously switch the fuser lamp on and off. If pin #4 (HEATON) of the<br />
engine gate array U204 is H level, transistor Q204 (pin #2) turns on, the photo coupler (PC) on the<br />
power supply unit turns on, and the triac (TRC) turns on, consequently the heater lamp is AC<br />
powered and lights. The heater lamp continuously turns on and off to maintain the temperature on<br />
the heater roller at approximately 188 °C (Normal paper, A4), 175 °C (Thin paper, A4), and 190 °C<br />
(Thick paper, A4) for printing and approximately 150 °C at standby (Ready). Refer to section<br />
Fusing on page 4-15.<br />
Abnormal temperature detection circuit<br />
The thermal cutout device which is connected in series with the heater lamp, constitutes the abnormal<br />
temperature detection circuit including of comparators U205-2, R217, R219, etc. Pin #5 of the<br />
comparator U205-2 is continuously given with the voltage by resistors R217 and R219, which<br />
simulate the voltage given if an abnormally high temperature develops. Pin #6 receives the voltage<br />
the thermistor detects. For instance, the heater lamp happens not to switch off, the voltage the<br />
thermistor gives at pin #6 will become unusually high, and as soon as it exceeds the voltage at pin<br />
#5, pin #7 of the comparator U205-2 output changes to L level. This in turn turns transistors QA201B<br />
and QA201A on, and turns QA201A (pin #6) to L level. Since pins #6 of the transistor QA201A and<br />
#2 of transistor Q204 are connected to each other, pin #4 of the engine gate array U204, even<br />
though it is currently at H level, is enforced to be H level, effectively disabling the heater lamp. Pin<br />
#7, the output from comparator U205-2, changes to L. Then, it is output to #63 of CPU (U201)<br />
which in turn determines that an unusual temperature has developed in the fuser, indicating Call<br />
service 6110.<br />
Thermistor blown-out detection<br />
The thermistor is monitored by the combination of comparator U205-1, R233, and R238. Extremely<br />
low potential is applied to pin #3 of U205-1 by means of R233 and R238. Whereas, pin #2 is<br />
applied with the voltage the thermistor detects. <strong>In</strong> normal state, as the heater lamp glows, the voltage<br />
detected by the thermistor is greater than the potential at #3 of U205-1, making the U205-1 output<br />
to L and sent to #54 (THDEAD) of CPU.<br />
When the thermistor has blown, pin #2 of U205-1 becomes zero which is well lower than the<br />
potential at pin #3 of U205-1, the comparator output becomes H, delivering THDEAD at pin #54 of<br />
CPU. CPU uses this signal to determine that the thermistor is faulty and displays Call service<br />
6110.<br />
4-31<br />
FS-1900
(3) Sensor board<br />
Paper gauge sensing circuit<br />
Paper gauge operates in four levels of paper remaining in the cassette. The height of the paper stack<br />
in the paper cassette changes the angle of the actuator. At the end of the actuator is a reflecting<br />
mirror which reflects or interrupts the light emitting from photointerruptor sensors PH702 and<br />
PH703 accordingly.<br />
These two sensors generate four digital signals which will be digital-analog-converted and input to<br />
A/D port of CPU. CPU then issues signals according to the level of the analog signals. The resultant<br />
signals are used to monitor the amount of paper in the cassette through the network management<br />
utilities.<br />
Paper transfer unit<br />
Sensor board<br />
Paper gauge<br />
sensor 1 (PH702)<br />
Paper gauge<br />
sensor 2 (PH703)<br />
Acutuator<br />
(Reflecting mirror)<br />
Actuator<br />
position<br />
Paper<br />
gauge<br />
Sensing input<br />
PH702<br />
PH703<br />
D/A converted<br />
output<br />
PH702<br />
PH703<br />
Empty<br />
H<br />
H<br />
approximately<br />
5 V<br />
1/4 to 1/2<br />
L<br />
H<br />
approximately<br />
2.25 V<br />
1/2 to 3/4<br />
L<br />
L<br />
approximately<br />
1.95 V<br />
3/4 to full<br />
H<br />
L<br />
approximately<br />
3.9 V<br />
Figure 4-3-10 Paper gauge sensor(s)<br />
FS-1900<br />
4-32
<strong>In</strong>terlock circuit<br />
The interlock circuit is constituted by SW702, the top cover/paper transfer unit interlock, and SW703,<br />
the left cover interlock, both mounted on the sensor board. These switches are controlled by the<br />
actuator which is mechanically activated by the projection on the top cover and the paper transfer<br />
unit. SW703 and SW702 are connected in series to the +24 V power. Physically opening the top<br />
cover, left cover, or the paper transfer unit will disconnect the +24 V power, signaling the status to<br />
the engine board. The top cover switch (SW701) serves only the top cover.<br />
Top cover<br />
Projection<br />
Left cover<br />
interlock<br />
switch<br />
(SW703)<br />
Sensor board<br />
Actuator<br />
Projection<br />
Left cover<br />
Top cover/<br />
paper transfer<br />
unit interlock<br />
switch (SW702)<br />
Top cover<br />
switch<br />
(SW701)<br />
Projection<br />
Paper transfer unit<br />
Figure 4-3-11 <strong>In</strong>terlock system<br />
4-33<br />
FS-1900
The interlock circuit outputs the three different detection signals which are combined in matrix to<br />
produce various levels of situations regarding the covers. The subsequent status is displayed on the<br />
message display.<br />
+24V1<br />
Engine board<br />
Top cover<br />
Actuator<br />
N.O.<br />
Top cover/<br />
paper transfer<br />
unit interlock<br />
switch (SW702)<br />
COM<br />
N.C.<br />
Paper transfer unit<br />
+5V2<br />
Engine<br />
gate<br />
array<br />
(U204)<br />
Side cover<br />
COM<br />
GND<br />
Top cover<br />
switch (SW701)<br />
GND<br />
B<br />
Side cover interlock<br />
switch (SW703)<br />
+24V2<br />
C<br />
N.C.<br />
N.O.<br />
GND<br />
A<br />
GND<br />
Operator panel message display<br />
Output level<br />
A B C<br />
Ready<br />
Close top cover<br />
Close top cover Close paper transfer unit<br />
Close top cover Close left cover<br />
Close top cover Close paper transfer unit Close left cover<br />
Close paper transfer unit Close left cover<br />
Close paper transfer unit<br />
Close left cover<br />
H<br />
L<br />
L<br />
L<br />
L<br />
L<br />
L<br />
L<br />
L<br />
H<br />
H<br />
H<br />
H<br />
L<br />
L<br />
L<br />
H<br />
L<br />
L<br />
L<br />
L<br />
L<br />
L<br />
H<br />
NOTE: Message display priority is from left to right.<br />
Figure 4-3-12 <strong>In</strong>terlock circuit<br />
FS-1900<br />
4-34
Paper size detecting circuit<br />
The three paper size switches (SW1, SW2, SW3) are activated according to the positioning of the<br />
paper size dial on the paper cassette. An analog signal is generated by the combination of the paper<br />
size switches, which are put in comparison with the voltage/paper size table referenced by the<br />
paper size detecting circuit. The paper size is detected.<br />
Paper size<br />
switch<br />
Paper size dial<br />
Cassette<br />
Figure 4-3-13 Paper size detecting circuit<br />
4-35<br />
FS-1900
The paper size dial has predetermined patterns of activating the paper size switches using concaves<br />
and convexes according to paper sizes. SW1, SW2, and SW3 produce corresponding signals for<br />
paper sizes. These patterns are translated into analog voltages and sent to the engine board on a<br />
single line. The signals are analog-digital-converted on the engine board.<br />
Sensor board<br />
+24V1<br />
R701<br />
DZ70<br />
GND<br />
R702<br />
R703<br />
R704<br />
Paper size dial<br />
SW1<br />
Engine board<br />
SW2<br />
CPU<br />
(U204)<br />
SW3<br />
Paper size switch<br />
C246<br />
R238<br />
Paper cassette<br />
GND<br />
GND<br />
Paper size switch<br />
Cassette<br />
not<br />
installed<br />
Custom<br />
Letter<br />
Paper size<br />
Legal<br />
A4<br />
A5<br />
B5<br />
See<br />
note<br />
below.<br />
Paper size dial<br />
SW1<br />
Off<br />
Off<br />
Off<br />
Off<br />
On<br />
On<br />
On<br />
On<br />
SW2<br />
SW3<br />
D/A converted<br />
output voltage<br />
Off<br />
Off<br />
0 V<br />
Off<br />
On<br />
1.94 V<br />
On On<br />
On Off<br />
1.58 V 1.19 V<br />
Approximately<br />
Off<br />
Off<br />
0.42 V<br />
Off On<br />
On Off<br />
2.28 V 2.92 V<br />
On<br />
On<br />
3.22 V<br />
Concave<br />
(Function Off)<br />
Convex<br />
(Function On)<br />
Note: Toner install mode cancellaton signal (See page 3-14)<br />
Figure 4-3-14 Paper size detecting circuit<br />
FS-1900<br />
4-36
(4) Power supply unit<br />
The power supply unit produces DC power outputs from the AC input. The high voltage bias<br />
generator circuit is mounted on a separate unit.<br />
A simplified schematic diagram is shown below.<br />
AC<br />
input<br />
Heater<br />
lamp<br />
Power<br />
switch<br />
Current<br />
fuse<br />
Noise<br />
filter<br />
circuit<br />
Zero cross<br />
signal<br />
generation<br />
circuit<br />
Rectifier<br />
circuit<br />
+<br />
Power supply unit<br />
FET<br />
Switching<br />
control<br />
circuit<br />
Transformer<br />
Photocoupler<br />
Photocoupler<br />
Enargysaving<br />
circuit<br />
5 V DC<br />
rectifier/<br />
smoothing<br />
circuit<br />
24 V DC<br />
rectifier/<br />
smoothing<br />
circuit<br />
Over<br />
voltage/<br />
current<br />
detection<br />
circuit<br />
SLEEP*<br />
+24V1<br />
GND<br />
+5V1<br />
GND<br />
ZCROSS<br />
Engine<br />
board<br />
Thermal<br />
cutout<br />
Thermistor<br />
Triac<br />
Photo-<br />
Triac<br />
HEATON*<br />
THERM<br />
FDFUL<br />
EXITPAP*<br />
FDDR<br />
FUDR<br />
+5V1<br />
+24V<br />
Fuser<br />
board<br />
Face up/down<br />
solenoid<br />
Paper full<br />
sensor<br />
Exit sensor<br />
Figure 4-3-15 Power supply unit circuit block diagram<br />
4-37<br />
FS-1900
(5) High voltage unit<br />
High voltage unit contains main charger unit, transfer roller high voltage output circuit which<br />
generates the developer bias. It also contains MP tray paper sensor and option feeder sensor.<br />
Engine board<br />
High voltage board<br />
High voltage output circuit<br />
+24V2<br />
Main charger unit<br />
RTRCHON*<br />
MCHON*<br />
Control<br />
and<br />
driver<br />
circuit<br />
Developer<br />
(Magnet roller)<br />
TRCHON*<br />
TRVSEL3*<br />
TRVSEL2*<br />
TRVSEL1*<br />
Control<br />
and<br />
driver<br />
circuit<br />
Transfer bias<br />
output<br />
positive voltage<br />
circuit<br />
Transfer roller<br />
HVCLK<br />
GND<br />
Driver<br />
circuit<br />
Rectifier<br />
circuit<br />
PGND<br />
+5V2<br />
Sensor circuit<br />
HUNIT*<br />
MP tray<br />
HANDS*<br />
Option<br />
feeder<br />
sensor<br />
MP tray<br />
paper<br />
sensor<br />
Paper<br />
Figure 4-3-16 High voltage unit circuit block diagram<br />
FS-1900<br />
4-38
Chapter 5<br />
D i s a s s e m b l y
Chapter 5 Contents<br />
5-1 General instructions ........................................................................................................................ 5-3<br />
5-1-1 Screw/hardware ......................................................................................................................... 5-3<br />
5-1-2 Before starting disassembly ...................................................................................................... 5-3<br />
5-2 Disassembly ..................................................................................................................................... 5-4<br />
5-2-1 Removing the developer ............................................................................................................ 5-4<br />
(1) Removing the developer ............................................................................................................ 5-4<br />
5-2-2 Removing the paper transfer unit .............................................................................................. 5-6<br />
5-2-3 Removing the main charger unit ................................................................................................ 5-7<br />
5-2-4 Removing the operator panel and outer covers ......................................................................... 5-8<br />
(1) Removing the operator panel .................................................................................................... 5-8<br />
(2) Removing the top cover/face-down output tray ......................................................................... 5-9<br />
(3) Removing the right cover ......................................................................................................... 5-10<br />
(4) Removing the left cover ........................................................................................................... 5-11<br />
5-2-5 Removing the drum unit .......................................................................................................... 5-12<br />
5-2-6 Removing the pickup roller and feed roller .............................................................................. 5-13<br />
5-2-7 Removing the MP paper feed unit ........................................................................................... 5-15<br />
5-2-8 Removing the transfer roller .................................................................................................... 5-17<br />
5-2-9 Removing the controller unit and the principal circuit boards .................................................. 5-18<br />
(1) Removing and opening the controller unit ............................................................................... 5-18<br />
(2) Removing the engine board and power supply unit ................................................................ 5-22<br />
(3) Removing the main board ....................................................................................................... 5-24<br />
(4) Removing the high voltage unit ............................................................................................... 5-25<br />
(5) Removing the sensor board .................................................................................................... 5-26<br />
5-2-10 Removing the drive unit and main motor ............................................................................... 5-27<br />
5-2-11 Removing and splitting the fuser unit .................................................................................... 5-29<br />
(1) Removing the separators ........................................................................................................ 5-32<br />
(2) Removing the heater lamp ...................................................................................................... 5-33<br />
(3) Removing the heat roller ......................................................................................................... 5-34<br />
(4) Removing the thermistor and the thermal cutout .................................................................... 5-35<br />
(5) Removing the press roller........................................................................................................ 5-36<br />
5-2-12 Removing the laser scanner unit ........................................................................................... 5-37
5-1 General instructions<br />
This chapter provides the procedure for removal and replacement of field replacement components.<br />
For other components not explained in this chapter, it is recommended that your refer to the diagrams<br />
in the Parts Catalog as a supplemental reference to this chapter. It features all the part drawings and<br />
help you disassemble or refit the parts in the printer.<br />
When replacing of a component, reverse the procedure for the removal procedure explained in this<br />
chapter.<br />
WARNING<br />
To avoid injury caused by electric shock, make sure that AC power is removed<br />
and the power cord is unplugged from both the power line and the printer.<br />
5-1-1 Screw/hardware<br />
CAUTION<br />
When securing a self-tapping screws, align it with the thread carefully. First turn<br />
it counterclockwise, then slowly clockwise. Do not overtighten. <strong>In</strong> case the selftapped<br />
thread is damaged, the whole part may have to be replaced with a new<br />
part.<br />
5-1-2 Before starting disassembly<br />
Before proceeding, unplug the power cord from the printer and the power supply.<br />
WARNING<br />
Never attempt to operate the printer with components removed.<br />
CAUTION<br />
The printer use electrostatic sensitive parts inside (circuit boards, laser scanner<br />
unit, etc.). Provide an antistatic (discharging) device, such as a wrist strap, that<br />
can effectively discharge your body before touching those components.<br />
5-3<br />
FS-1900
5-2 Disassembly<br />
5-2-1 Removing the developer<br />
(1) Removing the developer<br />
CAUTION<br />
When if installing or removing the developer, do not let the magnet roller touch<br />
any part in the printer.<br />
When handling developer, use both hands. Do not press the bottom of the<br />
developer.<br />
1. Open the top cover.<br />
2. Remove the toner container.<br />
3. Disconnect the developer connector 1.<br />
4. Remove the developer 2 from the printer while sliding the developer lock lever 3 frontwards.<br />
3<br />
1<br />
2<br />
2<br />
Figure 5-2-1 Removing the developer<br />
FS-1900<br />
5-4
5. Gently flip down the magnet roller protective cover 4.<br />
4<br />
5<br />
Figure 5-2-2 Closing the magnet roller protective cover<br />
NOTE<br />
After removing the developer, seal it in the protective bag and place it on a flat<br />
surface. Do not place the developer in a dusty area. If you ship the developer,<br />
pack it in the shipping container specifically supplied with the printer. See section<br />
Shipping the developer on page 3-13. Also do not touch the developing roller 5.<br />
Do not place floppy disks near the developer.<br />
5-5<br />
FS-1900
5-2-2 Removing the paper transfer unit<br />
1. Draw the paper transfer unit 1 while pressing the buttons in the direction of arrow A.<br />
A<br />
1<br />
Figure 5-2-3 Removing the paper transfer unit<br />
FS-1900<br />
5-6
5-2-3 Removing the main charger unit<br />
1. Pull the main charger unit 1 upwards while pushing main charger release lever 2. Then, pull<br />
the main charger unit 1 frontwards.<br />
2<br />
1<br />
Figure 5-2-4 Removing the main charger unit<br />
5-7<br />
FS-1900
5-2-4 Removing the operator panel and outer covers<br />
(1) Removing the operator panel<br />
1. Open the top cover 1 and MP tray 2.<br />
2. Unlatch two hooks 3.<br />
3. Pull the operator panel 4 towards the front.<br />
1<br />
4<br />
3<br />
3<br />
2<br />
Figure 5-2-5 Removing the operator panel<br />
FS-1900<br />
5-8
(2) Removing the top cover/face-down output tray<br />
1. Open the top cover 1.<br />
2. Remove two screws 2.<br />
3. Remove the top cover/face-down output tray 3 while pressing it the direction arrows 4<br />
(backwards).<br />
2<br />
1<br />
2<br />
4<br />
3<br />
4<br />
Figure 5-2-6 Removing the top cover/face-down output tray<br />
5-9<br />
FS-1900
(3) Removing the right cover<br />
1. Remove the operator panel. See page 5-8.<br />
2. Unlatch the four snaps 1 and three hooks 2 on the chassis. Remove the right cover 3.<br />
1<br />
1<br />
1<br />
1<br />
2<br />
2<br />
3<br />
2<br />
Figure 5-2-7 Removing the right cover<br />
FS-1900<br />
5-10
(4) Removing the left cover<br />
1. Unlatch the four snaps 1 and three hooks 2 on the chassis. Remove the left cover 3.<br />
1<br />
1<br />
1<br />
1<br />
2<br />
2<br />
2<br />
3<br />
Figure 5-2-8 Removing the left cover<br />
5-11<br />
FS-1900
5-2-5 Removing the drum unit<br />
1. Remove the paper cassette and the paper transfer unit. See page 5-6.<br />
2. Remove the developer unit. See page 5-4.<br />
3. Remove the waste toner bottle. See page 3-7.<br />
4. Remove the drum unit 1 while pressing the drum lock 2.<br />
1<br />
2<br />
Figure 5-2-9 Removing the drum unit<br />
FS-1900<br />
5-12
5-2-6 Removing the pickup roller and feed roller<br />
1. Remove the paper transfer unit. See page 5-6.<br />
2. Turn the paper transfer unit 1 over.<br />
3. Detach the release holder 2 by sliding it while pressing the projections A.<br />
4. Remove the feed roller assembly 3 while pressing it in the direction of arrow B.<br />
2<br />
A<br />
B<br />
3<br />
A<br />
1<br />
Figure 5-2-10 Removing the feed roller assembly<br />
5-13<br />
FS-1900
5. Remove the feed bracket cover 4 while unlatching three snaps 5.<br />
6. Remove the pickup roller 6 and the feed roller 7.<br />
6<br />
8<br />
5<br />
9<br />
4<br />
5<br />
7<br />
Figure 5-2-11 Remove the pickup roller and feed roller<br />
CAUTION<br />
Pickup gear Z32S 8 is installed of the inside the one way clutch 9. When<br />
refitting pickup gear Z32S 8, face the one way clutch 9 face to the feed bracket<br />
cover 4.<br />
FS-1900<br />
5-14
5-2-7 Removing the MP paper feed unit<br />
1. Remove the paper transfer unit. See page 5-6.<br />
2. Remove the developer. See page 5-4.<br />
3. Remove three connectors 1.<br />
4. Remove the engine relay board 2 while unlatching the latches 3.<br />
1<br />
2<br />
1<br />
3<br />
Figure 5-2-12 Removing the engine relay board<br />
5-15<br />
FS-1900
5. Pull the MP tray paper feed unit 4 out while unlatching two latches 5 off of points A.<br />
5<br />
A<br />
A<br />
4<br />
5<br />
Figure 5-2-13 Removing the MP paper feed unit<br />
FS-1900<br />
5-16
5-2-8 Removing the transfer roller<br />
CAUTION<br />
Do not touch the transfer roller 1 (sponge) surface. Oil and dust (particles of<br />
paper, etc.) on the transfer roller 1 can significantly deteriorate the print quality<br />
(white spots, etc.).<br />
1. Draw the paper transfer unit from the printer.<br />
2. Remove the paper chute 2.<br />
3. Remove the transfer roller 1.<br />
1<br />
2<br />
Figure 5-2-14 Removing the transfer roller<br />
5-17<br />
FS-1900
5-2-9 Removing the controller unit and the principal circuit boards<br />
(1) Removing and opening the controller unit<br />
1. Remove the top cover/face-down output tray. See page 5-9.<br />
2. Remove the right and left covers. See page 5-10 and 5-11.<br />
3. Remove the four connectors 1 from the controller unit 2 left side.<br />
CAUTION<br />
Draw the connector straight to remove. If you draw the connector while it is<br />
slanted, the receptacle may be damaged.<br />
2<br />
1<br />
Receptacle<br />
1<br />
Connector<br />
Figure 5-2-15 Removing the connectors from controller unit left side<br />
FS-1900<br />
5-18
4. Remove the two connectors 3 from the controller unit 2 right side.<br />
Receptacle<br />
2<br />
3<br />
Connector<br />
Figure 5-2-16 Removing the connectors from controller unit right side<br />
5-19<br />
FS-1900
5. Remove three screws 4.<br />
6. Remove frame unit 5 while releasing the projections from the catches on the frame unit 5.<br />
5<br />
4<br />
4<br />
4<br />
Figure 5-2-17 Removing the controller unit form the frame unit<br />
FS-1900<br />
5-20
7. Remove two screws 6.<br />
8. Remove the main board 7.<br />
9. Remove four screws 8.<br />
10. Remove the controller unit lid 9 from the controller unit 2.<br />
8<br />
8<br />
9<br />
8<br />
8<br />
6<br />
2<br />
7<br />
6<br />
Figure 5-2-18 Opening the controller unit<br />
5-21<br />
FS-1900
(2) Removing the engine board and power supply unit<br />
1. Remove and open the controller unit. See pages 5-18.<br />
2. Remove two connectors 1 from the engine board 2.<br />
3. Remove five screws 3.<br />
4. Remove the engine board 2.<br />
3<br />
1<br />
1<br />
3<br />
2<br />
Figure 5-2-19 Removing the engine board<br />
FS-1900<br />
5-22
5. Remove the power switch rod 4.<br />
6. Remove one screw 5, grounding wire terminal 6, and lock washer 7.<br />
7. Remove three screws 8.<br />
8. Remove the power supply unit 9 from the power supply unit cover 0.<br />
6<br />
5<br />
8<br />
7<br />
9<br />
4<br />
0<br />
Figure 5-2-20 Removing the power supply unit<br />
5-23<br />
FS-1900
(3) Removing the main board<br />
CAUTION<br />
Before removing the main board, the memory card must be removed first.<br />
However, do not remove the memory card while power is on. If the memory card<br />
is removed (or inserted) while the printer is on, damage could result in the printer’s<br />
electronics as well as the memory card.<br />
1. Turn the power switch off.<br />
2. Remove the memory card that may be inserted in the memory card slot 1 at the left side of the<br />
printer.<br />
3. Remove two screws 2.<br />
4. Pull the main board 3 all the way out of the printer.<br />
3<br />
1<br />
2<br />
2<br />
Figure 5-2-21 Removing the main board<br />
FS-1900<br />
5-24
(4) Removing the high voltage unit<br />
1. Remove the top cover and left covers. See pages 5-9 and 5-11.<br />
2. Remove the high voltage unit 1 while unlatching two latches 2.<br />
3. Remove two connectors 3, from the high voltage unit. 1.<br />
3<br />
1<br />
2<br />
3<br />
Figure 5-2-22 Removing the high voltage unit<br />
5-25<br />
FS-1900
(5) Removing the sensor board<br />
CAUTION<br />
Draw the connector straight to remove. If you draw the connector while it is<br />
slanted, the receptacle may be damaged.<br />
1. Remove the drum unit. See page 5-12.<br />
2. Remove the high voltage unit. See previous page.<br />
3. Remove two connectors 1.<br />
4. Remove the high voltage unit cover 2.<br />
5. Remove the sensor board 3 while unlatching two latches A.<br />
2<br />
3<br />
A<br />
A<br />
Connector<br />
1<br />
Receptacle<br />
Connector<br />
1<br />
Receptacle<br />
Figure 5-2-23 Removing the sensor board<br />
FS-1900<br />
5-26
5-2-10 Removing the drive unit and main motor<br />
CAUTION<br />
Draw the connector straight to remove. If you draw the connector while it is<br />
slanted, the receptacle may be damaged.<br />
1. Remove the paper cassette and the paper transfer unit. See page 5-6.<br />
2. Remove the top cover/face-down output tray. See page 5-9.<br />
3. Remove the left and right covers. See pages 5-10 and 5-11.<br />
4. Remove two connectors 1.<br />
5. Remove three connectors 2 of the drive unit 3.<br />
6. Remove five screws 4 and the ground wire terminal 5.<br />
7. Remove the drive unit 3 from the frame unit.<br />
2<br />
4<br />
Connector<br />
Receptacle<br />
Connector<br />
3<br />
Receptacle<br />
1<br />
5<br />
4<br />
Figure 5-2-24 Removing drive unit<br />
5-27<br />
FS-1900
8. Remove four screws 6.<br />
9. Remove the main motor 7 from the drive unit 3.<br />
3<br />
6<br />
6 7<br />
Figure 5-2-25 Removing the main motor<br />
FS-1900<br />
5-28
5-2-11 Removing and splitting the fuser unit<br />
WARNING<br />
The fuser unit is hot after the printer was running. Wait until it cools down.<br />
1. Remove three connectors 1.<br />
2. Remove two screws 2.<br />
3. Remove the fuser unit 3 from the frame unit.<br />
2<br />
3<br />
2<br />
1<br />
1<br />
Figure 5-2-26 Removing the fuser unit<br />
5-29<br />
FS-1900
4. Remove the rear cover 4 and the spring 5.<br />
5. Remove the solenoid actuator 6.<br />
6. Remove the change guide 7.<br />
7. Remove one connector 8.<br />
5<br />
4<br />
7<br />
6<br />
8<br />
Figure 5-2-27 Removing the rear cover and change guide<br />
FS-1900<br />
5-30
8. Remove two screws 9.<br />
9. Split the fuser unit 0.<br />
9<br />
0<br />
9<br />
Figure 5-2-28 Splitting the fuser unit<br />
5-31<br />
FS-1900
(1) Removing the separators<br />
WARNING<br />
The separators are extremely hot immediately after the printer was running. Allow<br />
substantial period of time until it cools down.<br />
1. Remove and split the fuser unit. See page 5-29.<br />
2. Remove the upper exit guide 1 while unlatching three latches 2.<br />
3. Remove the exit pulley 3.<br />
4. Hold the separator 4 upright and remove the separator 4 and the separator spring 5.<br />
2<br />
1<br />
3<br />
2<br />
Step 1 Step 2<br />
2<br />
4 4 5<br />
Figure 5-2-29 Removing the separators<br />
FS-1900<br />
5-32
(2) Removing the heater lamp<br />
WARNING<br />
The heater lamp is extremely hot immediately after the printer was running. Allow<br />
substantial period of time until it cools down.<br />
CAUTION<br />
The heater lamps are fragile. Use extreme care when handling not to drop or<br />
break.<br />
Do not directly touch on the heater lamp. Finger prints on the heater lamp’s outer<br />
surface can prevent proper fusing of toner on paper. When holding the heater<br />
lamp, hold the ceramic parts of heater lamp at both ends.<br />
When refitting the heater lamp, direct the wattage making side facing the gear<br />
side.<br />
1. Remove and split the fuser unit. See page 5-29.<br />
2. Remove the lamp support 1.<br />
3. Remove one screw 2 then remove the lamp holder 3.<br />
4. Remove the heater lamp 4 from the heat roller 5.<br />
Gear<br />
Wattage marking<br />
1<br />
2<br />
4<br />
5<br />
3<br />
Figure 5-2-30 Removing the heater lamp<br />
5-33<br />
FS-1900
(3) Removing the heat roller<br />
WARNING<br />
The heat roller is extremely hot immediately after the printer was running. Allow<br />
a substantial period of time until it cools down.<br />
1. Remove and split the fuser unit. See page 5-29.<br />
2. Remove the heater lamp. See the previous page.<br />
3. Remove the separators. See page 5-32.<br />
4. Pull up both heat R bush 1 and heat L bush 2 at the same time.<br />
5. Remove heat gear Z36 3, heat R bush 1, and heat L bush 2 from the heat roller 4.<br />
3<br />
1<br />
4<br />
2<br />
Figure 5-2-31 Removing the heat roller<br />
FS-1900<br />
5-34
(4) Removing the thermistor and the thermal cutout<br />
1. Remove and split the fuser unit. See page 5-29.<br />
2. Remove the heater lamp. See page 5-33.<br />
3. Remove the heat roller. See previous page.<br />
4. Remove one screw 1.<br />
5. Remove the thermistor 2.<br />
6. Remove two screws 3 and then remove cord plate 4.<br />
7. Remove one screw 5 and the heater wire terminal 6.<br />
8. Remove the thermal cutout 7.<br />
3<br />
4<br />
5<br />
6<br />
7<br />
1<br />
2<br />
Figure 5-2-32 Removing the thermistor and thermal cutout<br />
5-35<br />
FS-1900
(5) Removing the press roller<br />
WARNING<br />
The press roller is extremely hot immediately after the printer was running. Allow<br />
substantial period of time until it cools down.<br />
1. Remove and split the fuser unit. See page 5-29.<br />
2. Remove the press roller 1 from the fuser unit 2.<br />
1<br />
2<br />
Figure 5-2-33 Removing the press roller<br />
FS-1900<br />
5-36
5-2-12 Removing the laser scanner unit<br />
1. Remove the top cover/face-down output tray. See pages 5-9.<br />
2. Remove two connectors 1.<br />
3. Remove four screws 2.<br />
4. Remove the laser scanner unit 3 from the frame unit.<br />
2<br />
3<br />
Order of fixing the laser scanner unit<br />
4<br />
1<br />
3<br />
2<br />
1<br />
CAUTION<br />
When refitting the laser scanner unit, fix the four screws in the order indicated<br />
above.<br />
Figure 5-2-34 Removing the laser scanner unit<br />
5-37<br />
FS-1900
Chapter 6<br />
T roubleshooting
Chapter 6 Contents<br />
6-1 Troubleshooting ............................................................................................................................... 6-4<br />
6-1-1 General error handling ............................................................................................................... 6-4<br />
(1) Maintenance messages............................................................................................................. 6-4<br />
(2) Error messages ......................................................................................................................... 6-7<br />
6-1-2 Diagnostic (Service error messages) ...................................................................................... 6-11<br />
(1) 0420 - Option paper feeder PF-60 communication error ......................................................... 6-11<br />
(2) 0440 - Option sorter SO-60 communication error ................................................................... 6-11<br />
(3) 0460 - Option duplexer DU-60 communication error ............................................................... 6-12<br />
(4) 1210 - Option duplexer DU-60 side registration error .............................................................. 6-12<br />
(5) 2000 - Main motor error ........................................................................................................... 6-13<br />
(6) 2600 - Option bulk paper feeder PF-8E motor error ................................................................ 6-14<br />
(7) 2610 - Option paper feeder PF-60 (Top) paper feed motor error............................................. 6-14<br />
(8) 2620 - Option paper feeder PF-60 (Middle) paper feed motor error ........................................ 6-14<br />
(9) 2630 - Option paper feeder PF-60 (Bottom) paper feed motor error ..................................... 6-14<br />
(10) 4000 - Laser scanner unit (Polygon motor) error ................................................................... 6-15<br />
(11) 4200 - Laser scanner unit (Pin photo diode sensor) error ..................................................... 6-16<br />
(12) 5300 - Eraser lamp error ....................................................................................................... 6-17<br />
(13) 6000 - Fuser unit error ........................................................................................................... 6-18<br />
(14) 6020 - Abnormal high temperature error ............................................................................... 6-19<br />
(15) 6400 - Zero cross signal error ............................................................................................... 6-20<br />
(16) 7001 - Toner motor error ........................................................................................................ 6-20<br />
(17) 7350 - Toner refreshing mode error ....................................................................................... 6-21<br />
(18) 8010 - Option bulk paper stacker HS-8E motor error ............................................................ 6-21<br />
(19) F0 - Main board or LCD controller board error ...................................................................... 6-21<br />
(20) F010 - System DIMM [board] error ........................................................................................ 6-21<br />
(21) F020 - Main or expanded memory error ................................................................................ 6-22<br />
(22) F030 - General failure ............................................................................................................ 6-22<br />
(23) F040 - Communication error.................................................................................................. 6-22<br />
(24) F070 - Flash ROM error ........................................................................................................ 6-22<br />
6-1-3 Other problems ........................................................................................................................ 6-23<br />
(1) False “Close paper transfer unit” ............................................................................................. 6-23<br />
(2) False “Close top cover” ............................................................................................................ 6-23<br />
(3) False “Close left cover” ............................................................................................................ 6-24<br />
(4) Defective waste toner box detecting ........................................................................................ 6-24<br />
(5) Defective paper jam detecting ................................................................................................. 6-25<br />
(6) Defective paper gauge sensing ............................................................................................... 6-25<br />
(7) Defective paper size detecting................................................................................................. 6-25<br />
(8) Defective message displaying (LCD) ....................................................................................... 6-26<br />
(9) Defective face up/down solenoid operating ............................................................................. 6-27
6-1-4 Circuit board terminal voltages ................................................................................................ 6-28<br />
(1) Engine board ........................................................................................................................... 6-28<br />
6-1-5 Assignment of circuit board connector pins ............................................................................. 6-34<br />
6-1-6 Print quality problems .............................................................................................................. 6-35<br />
(1) Completely blank printout ........................................................................................................ 6-36<br />
(2) All-black printout ...................................................................................................................... 6-37<br />
(3) Dropouts .................................................................................................................................. 6-38<br />
(4) Black dots ................................................................................................................................ 6-39<br />
(5) Black horizontal streaks ........................................................................................................... 6-39<br />
(6) Black vertical streaks ............................................................................................................... 6-40<br />
(7) Unsharpness ........................................................................................................................... 6-41<br />
(8) Gray background ..................................................................................................................... 6-42<br />
(9) Dirt on the top edge or back of the paper ................................................................................ 6-43<br />
(10) Undulated printing at the left edge (scanning start position) ................................................. 6-44<br />
Repetitive defects gauge............................................................................................................... 6-45<br />
6-1-7 Correcting a paper jam ............................................................................................................ 6-46<br />
(1) Jam in the rear cover ............................................................................................................... 6-46<br />
(2) Jam inside the printer .............................................................................................................. 6-47
6-1 Troubleshooting<br />
6-1-1 General error handling<br />
(1) Maintenance messages<br />
Message<br />
Corrective action<br />
Add paper<br />
The paper has run out. Supply paper according to the paper source<br />
(paper source)<br />
displayed (paper cassette, MP tray, or option paper feeder).<br />
Messages indicating the printer status (Ready , Please wait<br />
Processing *, Waiting, and FormFeed Time Out *) are<br />
displayed alternately.<br />
* These messages will not appear if the number of copies is set to<br />
2 or more.<br />
Check waste<br />
The waste toner box is not installed. Replace the old waste toner<br />
toner box<br />
box with the new one which is included in the TK-50 toner kit.<br />
The message will also be shown if the waste toner box has become<br />
full. The waste toner box should be replaced when the message<br />
display eventually shows Toner low TK-50. See section Toner<br />
container replacement on page 3-5.<br />
Clean printer<br />
Clean the inside of the printer, according to section 3-1-3 Cleaning<br />
Press GO<br />
the printer on page 3-8. This message will be displayed when<br />
replacing the toner container after the message Replace toner<br />
TK-50 has been displayed. After cleaning the inside of the printer,<br />
press the GO key and the printer will be ready for printing. If<br />
Auto Continue is set to On, printing will be automatically resumed<br />
after a preset period of time.<br />
Close Duplexer Open the option duplexer rear cover, then close tightly.<br />
rear cover<br />
Face-down tray The face-down output tray has become full (approximately 250<br />
paper full<br />
pages). Remove all printed pages from the face-down output tray.<br />
When the printer senses that the face-down output tray is empty<br />
again, it will continue printing into the face-down output tray.<br />
: Alarm buzzer sounds when an error occurs. Press the CANCEL key to stop the alarm buzzer.<br />
FS-1900<br />
6-4
Message<br />
Corrective action<br />
Load Cassette #<br />
(paper size)/(paper type)*<br />
*(paper size) and (paper type)<br />
are displayed flashing<br />
alternately.<br />
Load MP tray<br />
(paper size)/(paper type)<br />
*(paper size) and (paper<br />
type) are displayed flashing<br />
alternately.<br />
Missing<br />
duplex drawer<br />
Close sorter<br />
rear cover<br />
Close<br />
stacker cover<br />
Option interface<br />
Error<br />
Paper whose size watches the size embedded in a print job is empty.<br />
Set paper into the paper source as displayed on the operator panel,<br />
and press the GO key to restart printing. The paper source number<br />
(#) is only displayed when there is an optional paper feeder installed.<br />
If you want to print from an alternative paper source press the<br />
key or key to display Use alternative? and you can change<br />
to another paper source. Further, you can change the paper source<br />
by pressing the GO key.<br />
After selecting a paper source and pressing the MENU key, Paper<br />
handling > appears. By pressing the > key, the paper type setting<br />
menu appears. After setting the correct paper type, press the ENTER<br />
key and printing starts.<br />
There is no paper cassette (paper size and paper type) that matches<br />
the size embedded in a print job. Printing is done from the MP tray.<br />
Set paper into the MP tray that matches the paper size and type<br />
shown on the display and press the GO key to restart printing.<br />
If you want to print from an alternative paper source, press the or<br />
key to display Use alternative? and you can change to<br />
another paper source. Further, you can change the paper source by<br />
pressing the GO key.<br />
After selecting a paper source and pressing the MENU key, Paper<br />
Handling > appears. By pressing the > key, the paper type setting<br />
menu appears. After setting the correct paper type, press the ENTER<br />
key and printing starts.<br />
The duplex drawer is either not installed or incorrectly inserted.<br />
<strong>In</strong>sert the duplex drawer securely.<br />
Open the stacker cover, then close tightly.<br />
Open the sorter rear cover, then close tightly.<br />
A failure has occurred with the (option) network interface card.<br />
Check the (option) network interface card installed on the printer.<br />
: Alarm buzzer sounds when an error occurs. Press the CANCEL key to stop the alarm buzzer.<br />
6-5<br />
FS-1900
Message<br />
Sorter tray ##<br />
paper full<br />
Corrective action<br />
The sorter tray indicated by # is now full. Remove the paper from<br />
the tray.<br />
Close paper<br />
transfer unit<br />
Paper jam<br />
###############<br />
Open the paper transfer unit, then close tightly.<br />
Open the top cover or the paper transfer unit and correct the paper<br />
jam (or paper mis-feeding in the cassette). The location of the paper<br />
jam is also indicated in place of the # 's. On-line help messages<br />
which are useful for correcting the paper jam will be displayed by<br />
pressing the key. See section 6-1-7 Correcting a Paper Jam on<br />
page 6-48.<br />
Remove paper<br />
There is still paper in the option sorter's tray indicated by # when the<br />
sorter tray ## power was turned on or the sorter’s mode was switched. Remove<br />
all the paper inside the sorter.<br />
Replace toner Replace the toner container using a new toner kit. The printer does<br />
Clean printer not operate when this message is displayed. See section Toner<br />
container replacement on page 3-5.<br />
Close<br />
Open the left cover, then close tightly.<br />
Left cover<br />
Toner low<br />
Replace the toner container using a new toner kit. See section Toner<br />
TK-50<br />
container replacement on page 3-5.<br />
Close<br />
Open the top cover, then close tightly.<br />
Top cover<br />
Warning<br />
Printing job cannot be done in current resolution because there is<br />
image adapt<br />
not enough memory. Try adding more memory or change resolution.<br />
Warning<br />
The printer memory is running low due to the number of fonts and<br />
Low memory<br />
macros downloaded. Print a status page to see how much user<br />
memory is left, and try deleting unnecessary fonts and macros.<br />
: Alarm buzzer sounds when an error occurs. Press the CANCEL key to stop the alarm buzzer.<br />
FS-1900<br />
6-6
(2) Error messages<br />
Message<br />
Corrective action<br />
Call service The ATTENTION indicator turns on and the READY indicator goes<br />
person F0<br />
off. <strong>In</strong>dicates a problem with the controller and the operator panel.<br />
Call a service person. The printer does not operate when this message<br />
is displayed. (Refer to section 6-1-2 Diagnostic (Service error<br />
message) on page 6-11.)<br />
Call service The ATTENTION indicator turns on. <strong>In</strong>dicates a controller error. Call<br />
####<br />
a service person. The printer does not operate when this message is<br />
displayed. (Refer to section 6-1-2 Diagnostic (Service error message)<br />
on page 6-11.)<br />
Call service The ATTENTION indicator turns on. <strong>In</strong>dicates a mechanical error.<br />
####:0123456 Call a service person. 0123456 indicates the number of printed pages.<br />
(Refer to section 6-1-2 Diagnostic (Service error message) on page<br />
6-11.)<br />
File not found VMB: A VMB tray that was specified for output does not contain any<br />
Press GO<br />
jobs, or the VMB tray is not being used. Confirm the VMB tray.<br />
If Auto Continue is set to On, printing will be automatically<br />
resumed after a preset period of time. Refer to printer’s User’s Manual.<br />
Format error This message appears when the printer is in the ready state and the<br />
Memory Card<br />
memory card (CompactFlash) is not formatted, and therefore cannot<br />
be read or written. Refer to printer’s User’s Manual.<br />
Format error <strong>In</strong>itialization (formatting) of the hard disk is required. <strong>In</strong>itialize the<br />
Hard disk<br />
hard disk (Microdrive). Refer to printer’s User’s Manual.<br />
Hard disk error## Look at the error code given in place of ## and refer to the<br />
Press GO<br />
corresponding description given below.<br />
01: Hard disk (Microdrive) format error. If this error recurs even if<br />
the power has been turned off and then on, reformat the hard disk.<br />
02: The disk system is not installed. Recheck the requirements for<br />
using the system and the devices.<br />
04: There is no available hard disk (Microdrive) space. Delete<br />
unnecessary files, etc., in order to free up space.<br />
05: The specified file does not exist in the hard disk (Microdrive).<br />
06: There is no memory available to the hard disk (Microdrive) system.<br />
<strong>In</strong>crease the available memory.<br />
: Alarm buzzer sounds when an error occurs. Press the CANCEL key to stop the alarm buzzer.<br />
6-7<br />
FS-1900
Message<br />
Corrective action<br />
Hard disk error##<br />
Press GO<br />
10: Formatting is not possible because host data is being spooled on<br />
the hard disk (Microdrive). Wait until the hard disk is ready, and then<br />
format.<br />
85: VMB. Alias error (The alias setting was lost, or the VMB tray<br />
corresponding to the alias does not exist.) Set alias again.<br />
97: Code job. The number of permanent code job reached the limit<br />
value, and no more can be saved. Either delete some unnecessary jobs,<br />
etc., or increase the limit.<br />
99: A print job for the specified ID does not exist in the hard disk<br />
(Microdrive).<br />
I/F occupied This message is displayed when you attempt to use the printer's operator<br />
panel to change the environmental settings on the interface from which<br />
data are presently being received.<br />
ID error<br />
The ID entered for a private job, or a stored job is not correct. Check<br />
the ID that is set using the printer driver.<br />
<strong>In</strong>sert the same<br />
memory card<br />
You have inserted a wrong memory card (CompactFlash) when the<br />
<strong>In</strong>sert again message was displayed. Remove the wrong memory<br />
KPDL Error ##<br />
card from the printer's memory card slot and insert the correct memory<br />
card. The printer again reads it from the beginning of the data.<br />
PostScript error has occurred and current print processing cannot<br />
Press GO<br />
continue. To print out an error report, display > Print KPDL errs<br />
from the menu selection system, and select On. Press the GO key to<br />
resume printing. You can abandon printing by the CANCEL key.<br />
If Auto Continue is set to On, printing will be automatically resumed<br />
after a preset period of time. Refer to printer’s User’s Manual.<br />
Memory card err<br />
<strong>In</strong>sert again<br />
The memory card (CompactFlash) is accidentally removed from the<br />
printer's memory card slot during reading. If you continue reading the<br />
memory card, insert the same memory card into the slot again. The<br />
printer again reads it from the beginning of the data.<br />
Note: We recommend that you follow the reading procedure from the<br />
beginning to ensure correct reading of the memory card.<br />
: Alarm buzzer sounds when an error occurs. Press the CANCEL key to stop the alarm buzzer.<br />
FS-1900<br />
6-8
Message<br />
Corrective action<br />
Memory overflow The total amount of data received by the printer exceeds the printer’s<br />
Press GO<br />
internal memory. Try adding more memory (expansion DIMM). Press<br />
the GO key to resume printing. You can abandon printing by the<br />
CANCEL key. If Auto Continue is set to On, printing will be<br />
automatically resumed after a preset period of time. Refer to printer’s<br />
User’s Manual.<br />
MemoryCard err## This message appears when an error occurred during access to the<br />
Press GO<br />
memory card (CompactFlash) using the PRESCRIBE 2e RWER<br />
command or from the printer's operator panel. Look at the error code<br />
given in place of ## and refer to the corresponding description given<br />
below:<br />
01: The memory card (CompactFlash) does not meet the requirement.<br />
This memory card cannot be used by this printer. <strong>In</strong>sert a memory<br />
card which complies with the requirements. (See section 1-1-2<br />
Available option memory/device on page 1-6.)<br />
02: The memory card is not installed. Check the requirements for<br />
using the memory card.<br />
04: The capacity of the memory card is insufficient. Clean up files.<br />
05: Specified file not found on the memory card.<br />
06: <strong>In</strong>sufficient printer memory to support a memory card. Expand<br />
printer memory.<br />
Paper path error There is no cassette in the feeder, or the cassette is not inserted<br />
properly. When two or more option feeders are installed and the lowest<br />
one is selected, the same message will appear if any of the upper<br />
feeder cassettes and the printer cassette is improperly installed.<br />
The data transferred to the printer was too complex to print on a page.<br />
Print overrun Press the GO key to resume printing. (The page may break in some<br />
Press GO<br />
pages.) You can abandon printing by the CANCEL key.<br />
Note: After this message has been displayed, Page protect mode will<br />
be On. To maintain optimum use of memory during printing, display<br />
>Page protect from the operator panel, and re-select Auto. Refer<br />
to printer’s User’s Manual.<br />
If Auto Continue is set to On, printing will be automatically resumed<br />
after a preset period of time. Refer to printer’s User’s Manual.<br />
: Alarm buzzer sounds when an error occurs. Press the CANCEL key to stop the alarm buzzer.<br />
6-9<br />
FS-1900
Message<br />
Corrective action<br />
RAM disk error ## Look at the error code given in place of ## and refer to the<br />
Press GO<br />
corresponding description below.<br />
01: Abnormal format. Try turning the power off and on again.<br />
02: RAM DISK mode is Off. Turn RAM DISK mode On.<br />
04: No disk space. Clean up files.<br />
05: Specified file not on disk.<br />
06: No insufficient printer memory to support RAM disk. Expand<br />
printer memory.<br />
Virtual mail The storage area for the VMB is full. Purge accumulated VMB data<br />
box fail<br />
by printing or deleting them.<br />
: Alarm buzzer sounds when an error occurs. Press the CANCEL key to stop the alarm buzzer.<br />
FS-1900<br />
6-10
6-1-2 Diagnostic (Service error messages)<br />
The printer does not operate when a message beginning with “Call service ####” or “Call<br />
service person F0##” is displayed. The message is categorized as follows:<br />
(1) 0420 - Option paper feeder PF-60 communication error<br />
Meaning Suggested causes Corrective action<br />
Defective gate array U204 on the engine board Replace engine board<br />
(KP-864).<br />
(KP-864). See page 5-22.<br />
Communication error<br />
between engine board<br />
and option paper<br />
feeder PF-60.<br />
Blown-out fuse (F202) on the engine board.<br />
Improper installation between printer and option<br />
paper feeder.<br />
Defective harness (S02400) between engine<br />
board and option unit interface connector.<br />
Improper connector insertion.<br />
Defective option paper feeder PF-60.<br />
Follow installation<br />
instruction carefully<br />
again.<br />
Replace<br />
(S02400).<br />
Remedy.<br />
harness<br />
Refer to option paper<br />
feeder PF-60’s Service<br />
Manual.<br />
(2) 0440 - Option sorter SO-60 communication error<br />
Meaning Suggested causes Corrective action<br />
Communication error<br />
between engine board<br />
and option sorter<br />
SO-60.<br />
Defective gate array U204 on the engine board<br />
(KP-864).<br />
Blown-out fuse (F202) on the engine board.<br />
Improper installation between printer and option<br />
sorters.<br />
Improper connector insertion.<br />
Defective main board (KP-948).<br />
Defective option sorter SO-60.<br />
Replace engine board<br />
(KP-864). See page 5-<br />
22.<br />
Follow installation<br />
instruction carefully<br />
again.<br />
Replace main board<br />
(KP-948). See page 5-<br />
22.<br />
Refer to option sorter<br />
SO-60’s Service<br />
Manual.<br />
6-11<br />
FS-1900
(3) 0460 - Option duplexer DU-60 communication error<br />
Meaning Suggested causes Corrective action<br />
Defective gate array U204 on the engine board Replace engine board<br />
(KP-864).<br />
(KP-864). See page 5-22.<br />
Communication error<br />
between engine board<br />
and option duplexer<br />
DU-60.<br />
Blown-out fuse (F202) on the engine board.<br />
Improper installation between printer and<br />
option duplexers.<br />
Defective harness (S02400) between engine<br />
board and option unit interface connector.<br />
Improper connector insertion.<br />
Defective option duplexer DU-60.<br />
Follow installation<br />
instruction carefully<br />
again.<br />
Replace harness<br />
(S02400).<br />
Remedy.<br />
Refer to option duplexer<br />
DU-60’s Service<br />
Manual.<br />
(4) 1210 - Option duplexer DU-60 side registration error<br />
Meaning Suggested causes Corrective action<br />
Side registration<br />
home position error<br />
of option duplexer<br />
DU-60.<br />
Defective gate array U204 on the engine board<br />
(KP-864).<br />
Improper installation between printer and<br />
option duplexer, or each option unit.<br />
Defective harness (S02400) between engine<br />
board and option unit interface connector.<br />
Improper connector insertion.<br />
Defective option duplexer DU-60.<br />
Replace engine board<br />
(KP-864). See page 5-22.<br />
Follow installation<br />
instruction carefully<br />
again.<br />
Replace harness<br />
(S02400).<br />
Remedy.<br />
Refer to option duplexer<br />
DU-60’s Service Manual.<br />
FS-1900<br />
6-12
(5) 2000 - Main motor error<br />
Meaning Suggested causes Corrective action<br />
The main motor is<br />
overloaded.<br />
Overcurrent in the main motor circuitry due to<br />
an excessive torque.<br />
Connector insertion error.<br />
Defective gate array U204 on the engine board<br />
(KP-864).<br />
Defective harness between engine board and<br />
engine relay board (KP-760).<br />
Defective harness between engine relay board<br />
(KP-760) and main motor.<br />
Follow the flow chart<br />
below.<br />
Call service<br />
2000:0123456<br />
Turn power switch off.<br />
Remove and check<br />
harness (S02405)<br />
between engine board<br />
(KP-864) and engine<br />
relaly board (KP-760),<br />
or harness (S02401)<br />
between engine board<br />
(KP864) and main<br />
motor.<br />
Print status page.<br />
Does<br />
pin #3 (MMOTON*)<br />
of YC802 on engine board<br />
(KP-864) goes high,<br />
then low?<br />
No<br />
OK?<br />
Yes<br />
Turn power switch on.<br />
+24 V DC<br />
at #1 pin of YC802<br />
on engine board<br />
(KP-864) ?<br />
Yes<br />
No<br />
No<br />
Replace harness (S02405)<br />
between engine board<br />
(KP-864) and engine<br />
relaly board (KP-760).<br />
Replace engine relay board<br />
(KP-760). See page 5-15.<br />
Print status page.<br />
Yes<br />
Does pin<br />
#7 (MMOTRDY*)<br />
of YC802 on engine board<br />
goes low, after pin #3<br />
(MMOTON*) of<br />
YC802 goes<br />
low?<br />
Yes<br />
No<br />
NOTE:<br />
If the problem is not solved by this flow<br />
chart replace the following items:<br />
Harness (S02401) between engine<br />
relay board (KP-760) and engine<br />
board (KP-864)<br />
Drive unit (See page 5-27.)<br />
Engine board (KP-864) and main<br />
motor (replace at the same time)<br />
Replace engine board<br />
(KP-864). See page 5-22.<br />
Replace Main motor.<br />
See page 5-27.<br />
6-13<br />
FS-1900
(6) 2600 - Option bulk paper feeder PF-8E motor error<br />
Meaning Suggested causes Corrective action<br />
Motor error in the<br />
option bulk paper<br />
feeder PF-8E.<br />
Defective harness (S02400) between engine<br />
board and option unit interface connector.<br />
Replace engine board<br />
(KP-864). See page 5-<br />
22.<br />
Defective option bulk paper feeder. Replace harness<br />
(S02400).<br />
(7) 2610 - Option paper feeder PF-60 (Top) paper feed motor error<br />
Meaning Suggested causes Corrective action<br />
Paper feed motor<br />
error in the top option<br />
paper feeder.<br />
Defective gate array U204 on the engine board<br />
(KP-864).<br />
Defective harness (S02400) between engine<br />
board and option unit interface connector.<br />
Defective paper feeder PF-60.<br />
Replace engine board<br />
(KP-864). See page 5-22.<br />
Replace harness<br />
(S02400).<br />
Refer to option paper<br />
feeder PF-60’s Service<br />
Manual.<br />
(8) 2620 - Option paper feeder PF-60 (Middle) paper feed motor error<br />
Meaning Suggested causes Corrective action<br />
Paper feed motor<br />
error in the middle<br />
option paper feeder.<br />
Defective gate array U204 on the engine<br />
board (KP-864).<br />
Defective harness (S02400) between engine<br />
board and option unit interface connector.<br />
Defective option paper feeder PF-60.<br />
Replace engine board<br />
(KP-864). See page 5-22.<br />
Replace harness<br />
(S02400).<br />
Refer to option paper<br />
feeder PF-60’s Service<br />
Manual.<br />
(9) 2630 - Option paper feeder PF-60 (Bottom) paper feed motor error<br />
Meaning Suggested causes Corrective action<br />
Paper feed motor error<br />
in the bottom option<br />
paper feeder.<br />
Defective gate array U204 on the engine board<br />
(KP-864).<br />
Defective harness (S02400) between engine<br />
board and option unit interface connector.<br />
Defective paper feeder PF-60.<br />
Replace engine board<br />
(KP-864). See page 5-22.<br />
Replace harness<br />
(S02400).<br />
Refer to option paper<br />
feeder PF-60’s Service<br />
Manual.<br />
FS-1900<br />
6-14
(10) 4000 - Laser scanner unit (Polygon motor) error<br />
Meaning Suggested causes Corrective action<br />
POLRDY* does not<br />
go low within 20<br />
seconds after<br />
POLON*<br />
goes low (When<br />
starting) or within<br />
16 seconds after<br />
REGPAP signal goes<br />
high (during printing).<br />
Defective gate array U204 on the engine board.<br />
Defective polygon motor.<br />
Improper connector insertion.<br />
Defective harness between laser scanner unit<br />
and engine board.<br />
Follow the flow chart<br />
below.<br />
Call service<br />
4000:01234546<br />
Turn power switch off.<br />
Remove and check<br />
harness between<br />
engine board (KP-864)<br />
and laser scanner unit.<br />
NOTE:<br />
Pins of YC206 connector are<br />
crowded and tiny. When if<br />
measuring signal, contact<br />
measurement probe with pins of<br />
YC206 connector accurately.<br />
Print status page.<br />
Does<br />
pin #31 (POLON*) of<br />
YC206 on engine board<br />
(KP-864) goes high and<br />
then low?<br />
No<br />
OK?<br />
Yes<br />
No<br />
Turn power switch on.<br />
Replace harness between<br />
engine board (KP-864)<br />
and laser scanner unit.<br />
Yes<br />
Print status page.<br />
+24 V DC<br />
at #33 pin of YC206<br />
on engine board<br />
(KP-864) ?<br />
Yes<br />
No<br />
Does pin<br />
#30 (POLRDY*)<br />
of YC206 on engine board<br />
goes low, after pin #31<br />
(POLON*) of YC206<br />
goes low?<br />
No<br />
Print status page.<br />
Yes<br />
Replace engine board<br />
(KP-864). See page 5-22.<br />
Does<br />
pin #1 (POLCLK) of<br />
No<br />
YC206 on engine board<br />
(KP-864) output<br />
square-wave* 1<br />
signal?<br />
* 1 : 2.7165 KHz<br />
Yes<br />
Replace engine board<br />
(KP-864). See page 5-22.<br />
Replace laser scanner<br />
unit. See page 5-37.<br />
NOTE:<br />
When If not solved this flow chart,<br />
try to replace below items.<br />
Harness (S02404) scanner unit<br />
and engine board (KP-864)<br />
Engine board (KP-864) and scanner<br />
unit (replace at the same time)<br />
6-15<br />
FS-1900
(11) 4200 - Laser scanner unit (Pin photo diode sensor) error<br />
Meaning Suggested causes Corrective action<br />
Laser beam detection<br />
failed. The pin photo<br />
diode sensor [board]<br />
(KP-746) does not<br />
deliver a horizontal<br />
synchronous<br />
signal (PD*).<br />
No laser beam due to the laser diode defect<br />
(PD*).<br />
Soiled or defective pin photo diode sensor.<br />
Defective gate array U204 of engine board.<br />
Improper connector insertion.<br />
Defective harness between engine board and<br />
laser scanner unit.<br />
Follow the flow chart<br />
below.<br />
Call service<br />
4200:0123456<br />
Turn power switch off.<br />
* 1 : Pin photo diode sensor<br />
[board KP-746] detecting<br />
horizontal synchronization signal<br />
Remove and check<br />
harness between<br />
engine board (KP-864)<br />
and laser scanner unit.<br />
Frequency: 2.7 kHz,<br />
Low level width: 1.4 µs<br />
Print status page.<br />
OK?<br />
Yes<br />
No<br />
Turn power switch on.<br />
Replace harness between<br />
engine board (KP-864)<br />
and laser scanner unit.<br />
Pin #8 (_PDIN*)<br />
of YC601 on APC board<br />
(KP-742) output pulse<br />
signal* 1 ?<br />
Yes<br />
No<br />
+24 V DC<br />
at #1 pin of YC601<br />
on APC board<br />
(KP-742) ?<br />
No<br />
Replace engine board<br />
(KP-864). See page 5-22.<br />
Yes<br />
Print status page.<br />
Does<br />
pin #4 (LASER*) of<br />
YC601 on APC board<br />
(KP-742) goes high and<br />
then low?<br />
Yes<br />
No<br />
Replace engine board<br />
(KP-864). See page 5-22.<br />
Replace laser scanner<br />
unit. See page 5-37.<br />
NOTE:<br />
If the problem is not solved by<br />
this flow chart replace the<br />
following items:<br />
Harness (S02404) scanner unit<br />
and engine board (KP-864)<br />
Engine board (KP-864) and scanner<br />
unit (replace at the same time)<br />
FS-1900<br />
6-16
(12) 5300 - Eraser lamp error<br />
Meaning Suggested causes Corrective action<br />
The ERADEAD* Blown-out eraser lamp [board KP-762]. Follow the flow chart<br />
signal (delivered from Defective CPU U201 on the engine board. below.<br />
the eraser lamp<br />
Improper connector insertion to the eraser lamp<br />
blown-out detection<br />
[board KP-762].<br />
circuit on the engine<br />
board) goes low<br />
continuously more<br />
than 1 second, while<br />
eraser lamp is on.<br />
Call service<br />
5300:0123456<br />
Turn power switch off.<br />
Measure voltage #1 pin<br />
(ERASEDR*) of sensor<br />
board (KP-754).<br />
Remove and check<br />
harness (S02407)<br />
between engine board<br />
(KP-864) and sensor<br />
board (KP-754).<br />
Approximately<br />
0 V DC?<br />
No<br />
Yes<br />
OK?<br />
Yes<br />
No<br />
Remove and check<br />
harness (S02412)<br />
between drum board<br />
(KP-748) and eraser<br />
lamp [board KP762].<br />
OK?<br />
Yes<br />
No<br />
Check deformation pins<br />
of connector YC702 on<br />
sensor board.<br />
Replace sensor board (KP-754)<br />
and linked harness (S02407).<br />
Replace harness (S02412)<br />
between drum board (KP-748)<br />
and eraser lamp [board KP762].<br />
Approximately<br />
14 to 15.5 V DC?<br />
No<br />
Approximately<br />
24 V DC?<br />
No<br />
Yes<br />
Yes<br />
Replace sensor board<br />
(KP-754). See page 5-26.<br />
Replace engine board<br />
(KP-864. See page 5-22.<br />
Replace drum unit. unit.<br />
See See page 5-12.<br />
Deformed ?<br />
No<br />
Turn power switch on<br />
and print starus page.<br />
Yes<br />
Remedy pins or replace<br />
sensor board (KP-754).<br />
See page 5-26.<br />
NOTE:<br />
If the problem is not solved by<br />
this flow chart replace the<br />
following items:<br />
Engine board (KP864)<br />
Sensor board (KP754)<br />
Drum unit<br />
6-17<br />
FS-1900
(13) 6000 - Fuser unit error<br />
Meaning Suggested causes Corrective action<br />
HTEMP* remains Blown-out thermistor.<br />
Follow the flow chart<br />
high for longer than Blown-out heater lamp.<br />
below.<br />
4 seconds since<br />
Defective CPU U201 or comparator U205 on<br />
the heater lamp is on.<br />
the engine board.<br />
The heater lamp<br />
continues to be turn Improper connector insertion.<br />
on for longer than<br />
60 seconds.<br />
Defective power supply unit.<br />
Defective harness between fuser unit and power<br />
supply unit.<br />
Call service<br />
6000:0123456<br />
Turn power switch off.<br />
Remove and check<br />
harness (S02415)<br />
between fuser board<br />
(KP-756) and power<br />
supply unit, or<br />
thermistor connector<br />
(YC834) on the<br />
fuser board (KP-756).<br />
OK?<br />
Yes<br />
0 V DC<br />
at pin #6 (THERM)<br />
of YC831 on fuser board<br />
(KP-756) ?<br />
No<br />
No<br />
Turn power switch on.<br />
Turn power switch off,<br />
and remove power cable.<br />
Yes<br />
CAUTION:<br />
Fuser unit is fed directly by AC<br />
power from primary circuit on power<br />
supply board.<br />
Be careful with electricshock.<br />
Fuser unit is extremely hot<br />
immediately after the printer was<br />
running. Allow substantial period of<br />
time until it cools down.<br />
Replace harness (S02415)<br />
between fuser board (KP-756)<br />
and power supply unit.<br />
Replace fuser unit. See<br />
page 5-29.<br />
Open (infinite)?<br />
"E4"<br />
shown?<br />
Yes<br />
Replace fuser unit. See<br />
page 5-29.<br />
Replace power supply<br />
unit. See page 5-22.<br />
Turn power switch on.<br />
No<br />
No<br />
Detach connector CN2<br />
A on power supply<br />
board. See figure right.<br />
Measure resistance<br />
between pins 1 and 3<br />
of the detached<br />
connector.<br />
1<br />
3<br />
A<br />
Heater lamp<br />
End.<br />
Yes<br />
Replace engine board<br />
(KP-864). See page 5-22.<br />
FS-1900<br />
6-18
(14) 6020 - Abnormal high temperature error<br />
Meaning Suggested causes Corrective action<br />
CPU U201 detected<br />
that the HTEMP*<br />
signal (Abnormal<br />
temperature of more<br />
than approximately<br />
220 °C) is low for<br />
more than 3 seconds.<br />
Defective CPU U201 or comparator U205 on<br />
the engine board.<br />
Defective engine board (KP-864).<br />
Defective thermistor.<br />
Defective photo coupler on the power supply<br />
unit for the heater lamp.<br />
Follow the flow chart<br />
below.<br />
Call service<br />
6020:0123456<br />
Turn power switch off.<br />
Remove and check<br />
harness (S02415)<br />
between fuser board<br />
(KP-756) and power<br />
supply unit.<br />
CAUTION:<br />
Fuser unit is fed directly by AC<br />
power from primary circuit on power<br />
supply board.<br />
Be careful with electricshock.<br />
OK?<br />
No<br />
Yes<br />
Turn power switch on.<br />
Measure voltage at pin<br />
#6 (THERM) of YC831<br />
on fuser board (KP-756).<br />
Replace harness (S02415)<br />
between fuser board (KP-<br />
756) and power supply unit.<br />
Replace fuser unit. See<br />
page 5-29.<br />
More<br />
than 3 V DC over 3<br />
seconds?<br />
Yes<br />
No<br />
Replace engine board<br />
(KP-864). See page 5-22.<br />
NOTE:<br />
If the problem is not solved by<br />
this flow chart replace, the<br />
following items:<br />
Engine board (KP-864)<br />
Power supply unit<br />
Fuser unit<br />
FS-1900<br />
6-19
(15) 6400 - Zero cross signal error<br />
Meaning Suggested causes Corrective action<br />
The ZCROSS signal Defective power supply unit.<br />
Replace power supply<br />
does not reach the<br />
unit. See page 5-22.<br />
engine board within Defective CPU U201 on the engine board. Replace engine board.<br />
3 seconds after power<br />
See page 5-22.<br />
on.<br />
(16) 7001 - Toner motor error<br />
Meaning Suggested causes Corrective action<br />
Toner motor is<br />
overloaded.<br />
TNMOC is detected<br />
by sampling every<br />
other 100 ms in 2<br />
seconds since the<br />
main and toner<br />
motors are activated<br />
following the Replace<br />
toner Clean printer<br />
message after the<br />
Toner low TK-60 is<br />
detected.<br />
Overcurrent in the toner motor circuitry due to<br />
an excessive torque, caused by hardened toner.<br />
Defective gate array U204 on the engine board.<br />
Improper connector insertion.<br />
Defective harness between developer and high<br />
voltage unit.<br />
Defective harness between high voltage unit<br />
and engine board.<br />
Follow the flow chart<br />
below.<br />
Call service<br />
7001:0123456<br />
Replace with a new<br />
toner kit. See page 3-4.<br />
"E9"<br />
shown?<br />
Yes<br />
No<br />
Replace engine board<br />
(KP-864) and developer.<br />
See page 5-22 and 3-13.<br />
End.<br />
NOTE:<br />
If the problem is not solved by<br />
this flow chart, replace the<br />
following items:<br />
High voltage unit<br />
Harness (S02416) [Between developer and high voltage unit]<br />
Harness (S02416) [Between engine board and high voltage unit]<br />
FS-1900<br />
6-20
(17) 7350 - Toner refreshing mode error<br />
Meaning Suggested causes Corrective action<br />
Toner refreshing<br />
mode error.<br />
Defective high voltage unit.<br />
Replace high voltage unit.<br />
See page 5-25.<br />
Refer to section Toner<br />
refreshing mode on page<br />
3-22.<br />
(18) 8010 - Option bulk paper stacker HS-8E motor error<br />
Meaning Suggested causes Corrective action<br />
Motor error in the<br />
option bulk paper<br />
stacker HS-8E.<br />
Defective harness (S02400) between engine<br />
board and option unit interface connector.<br />
Defective option bulk paper stacker HS-8E.<br />
Replace engine board<br />
(KP-864). See page 5-22.<br />
Replace harness<br />
(S02400).<br />
(19) F0 - Main board or LCD controller board error<br />
Meaning Suggested causes Corrective action<br />
Communication is Defective system DIMM [board KP-893]. Replace system DIMM<br />
failed between the Defective main board (KP-948).<br />
[board KP-893] or main<br />
LCD controller board<br />
board (KP-948).<br />
(KP-738) and the LCD controller board (KP-738).<br />
Replace LCD controller<br />
main board.<br />
board (KP-738).<br />
(20) F010 - System DIMM [board] error<br />
Meaning Suggested causes Corrective action<br />
Checksum failed with<br />
system DIMM [board<br />
KP-893] on the main<br />
board.<br />
Defective system DIMM [board KP-893].<br />
Improper system DIMM [board KP-893]<br />
insertion to system DIMM slot on the main<br />
board (KP-948).<br />
Replace system DIMM<br />
[board KP-893] or main<br />
board (KP-948).<br />
Reinsert the system<br />
DIMM [board KP-893].<br />
6-21<br />
FS-1900
(21) F020 - Main or expanded memory error<br />
Meaning Suggested causes Corrective action<br />
Checksum failed with<br />
main memory (RAM)<br />
on the main board or<br />
expanded memory<br />
(DIMM).<br />
Defective system main memory (RAM) on the<br />
main board (KP-948).<br />
Defective main board (KP-948).<br />
Defective expanding memory (DIMM) on the<br />
main board (KP-948).<br />
Replace main board (KP-<br />
948).<br />
Replace expanding<br />
memory (DIMM).<br />
(22) F030 - General failure<br />
Meaning Suggested causes Corrective action<br />
Miscellaneous failure<br />
with the main board,<br />
other than F0, F010<br />
and F020, above.<br />
Defective main board (KP-948).<br />
Replace main board (KP-<br />
948).<br />
(23) F040 - Communication error<br />
Meaning Suggested causes Corrective action<br />
Communication<br />
between the engine<br />
Defective gate array (U02) on the main board. Replace the main board<br />
(KP-948). See page 5-24.<br />
board and the main Connector failure between the engine board Verify connector<br />
board is failed. (KP-864) and main board (KP-948). connections.<br />
Overrun in the engine system, deactivating the<br />
program flash ROM (U202) on the engine<br />
board (KP-864).<br />
Replace the engine board<br />
(KP-864). See page 5-22.<br />
(24) F070 - Flash ROM error<br />
Meaning Suggested causes Corrective action<br />
CPU U201 of engine<br />
board could not write<br />
data failed to flash<br />
ROM U202. Write<br />
sequence to flash<br />
ROM is not<br />
successful.<br />
Verify error. (Written<br />
data does not match<br />
the original data.)<br />
Defective CPU U201 or gate array U204 or<br />
flash ROM U202 on the engine board (KP-<br />
864).<br />
Replace engine board<br />
(KP-864).<br />
FS-1900<br />
6-22
6-1-3 Other problems<br />
(1) False “Close paper transfer unit”<br />
False<br />
"Close paper<br />
transfer unit"<br />
Measure voltage #12<br />
pin of YC701 on sensor<br />
board (KP-754).<br />
When<br />
paper feed unit<br />
close scurely, does pin<br />
#12 voltage change<br />
0 to 24 V<br />
DC?<br />
No<br />
Connect circuit tester to<br />
pin #20 of YC203 on<br />
engine board (KP-864).<br />
Yes<br />
Replace sensor board<br />
(KP-754). See page 5-26.<br />
When<br />
paper transfer unit<br />
close scurely, does pin<br />
#20 voltage change<br />
0 to 24 V<br />
DC?<br />
Yes<br />
No<br />
Replace sensor board<br />
(KP-754). See page 5-26.<br />
Replace engine board<br />
(KP-864). See page 5-22.<br />
(2) False “Close top cover”<br />
False "Close<br />
top cover"<br />
Measure logic level #11<br />
pin of YC701 on sensor<br />
board (KP-754).<br />
When<br />
Top cover<br />
close scurely, does pin<br />
#11 goes low<br />
to high?<br />
No<br />
Yes<br />
Replace sensor board<br />
(KP-754). See page 5-26.<br />
Replace engine board<br />
(KP-864). See page 5-22.<br />
6-23<br />
FS-1900
(3) False “Close left cover”<br />
False "Close<br />
left cover"<br />
Measure voltage #6, #7<br />
and #8 pins of YC203 on<br />
engine board (KP-864).<br />
When<br />
Side cover<br />
close scurely, Do pins<br />
#5, #6 and #7 voltage<br />
change 0 to 24 V<br />
DC?<br />
Yes<br />
No<br />
Replace sensor board<br />
(KP-754). See page 5-26.<br />
Replace engine board<br />
(KP-864). See page 5-22.<br />
(4) Defective waste toner box detecting<br />
Problem Suggested causes Corrective action<br />
Although new waste<br />
toner box is<br />
installed, Check<br />
waste toner<br />
box is displayed.<br />
Although waste toner<br />
bottle is not installed,<br />
Ready is displayed.<br />
Defective waste toner full sensor [board] (KP-<br />
766) or waste toner sensor (receiver).<br />
Deformed pins of connector (YC702) on the<br />
sensor board (KP-574).<br />
Defective engine board (KP-864).<br />
Replace drum unit. See<br />
page 5-12.<br />
Check and straighten pins<br />
of connector (YC702) on<br />
the sensor board (KP-<br />
574).<br />
Replace engine board<br />
(KP-864).<br />
FS-1900<br />
6-24
(5) Defective paper jam detecting<br />
Problem Suggested causes Corrective action<br />
Paper jam frequently<br />
occurs.<br />
False paper jam<br />
message display.<br />
Surface of the registration sensor (PH701) is<br />
dirty with paper particles.<br />
Actuators of registration sensor (PH701) or<br />
exit sensor does not operate smoothly.<br />
Defective sensor board (KP-574), fuser board<br />
(KP-756) or engine board (KP-864).<br />
A piece of paper torn from a sheet is caught<br />
around actuator of registration sensor or exit<br />
sensor.<br />
Clean with cloth.<br />
Repair or replace.<br />
Replace sensor board<br />
(KP-754), fuser board<br />
(KP-756), or engine board<br />
(KP-864). See page 5-26<br />
and 5-22.<br />
Check visually and<br />
remove it, if any.<br />
(6) Defective paper gauge sensing<br />
Problem Suggested causes Corrective action<br />
False paper gauge<br />
indication.<br />
Surface of the paper gauge sensor 1 (PH702)<br />
and 2 (PH703) on the sensor board (KP-754)<br />
are dirty with paper particles.<br />
A piece of paper torn from a sheet is caught<br />
around paper gauge sensor 1 (PH702) and 2<br />
(PH703) on the paper sensor board (KP-754).<br />
Reflecting mirror has come off the actuator of<br />
paper gauge sensor 1 (PH702) and 2 (PH703).<br />
Defective paper gauge sensor 1 (PH702) and 2<br />
(PH703) on the sensor board (KP-754).<br />
Defective engine board (KP-864).<br />
Clean with cloth.<br />
Check visually and<br />
remove it, if any.<br />
Check visually and<br />
remove it, if any.<br />
Replace sensor board<br />
(KP-574). See page 5-26.<br />
Replace engine board<br />
(KP-864). See page 5-22.<br />
(7) Defective paper size detecting<br />
Problem Suggested causes Corrective action<br />
False paper size<br />
message display.<br />
Defective paper size switch.<br />
Defective sensor board (KP-754).<br />
Defective engine board (KP-864).<br />
Replace paper size switch.<br />
Replace sensor board<br />
(KP-574). See page 5-26.<br />
Replace engine board<br />
(KP-864). See page 5-22.<br />
6-25<br />
FS-1900
(8) Defective message displaying (LCD)<br />
Problem Suggested causes Corrective action<br />
No message appears<br />
on the message<br />
display (LCD),<br />
though the message<br />
background is<br />
faintly illuminated..<br />
(Power is supplied<br />
to the LCD controller<br />
board [KP-738] .)<br />
No message appears<br />
on the message<br />
display (LCD), even<br />
thought the message<br />
background does not<br />
illuminate faintly.<br />
(The power is not<br />
supplied to the LCD<br />
controller board<br />
[KP-738].)<br />
Defective main board (system DIMM board<br />
[KP-893]).<br />
Defective LCD controller board (KP-738).<br />
Defective engine board (KP-864).<br />
Improper connection of harness (S02402)<br />
between LCD controller board (KP-738) and<br />
engine relay board (KP-760).<br />
Improper connection of harness (S02405)<br />
between engine board (KP-864) and engine<br />
relay board (KP-760).<br />
Defective main board (system DIMM [board<br />
KP-893]).<br />
Defective LCD controller board (KP-738).<br />
Defective engine board (KP-864).<br />
Improper connection of harness (S02402)<br />
between LCD controller board (KP-738) and<br />
engine relay board (KP-760).<br />
Improper connection of harness (S02405)<br />
between engine board (KP-864) and engine<br />
relay board (KP-760).<br />
Broken power cord.<br />
The power cord is not plugged in properly.<br />
No electricity at the power outlet.<br />
Defective power supply unit.<br />
Replace main board<br />
(system DIMM [board]).<br />
Replace LCD controller<br />
board (KP-738).<br />
Replace engine board<br />
(KP-864).<br />
Reinsert the connector.<br />
Reinsert the connector.<br />
Replace main board<br />
(system DIMM [board]).<br />
Replace LCD controller<br />
board (KP-738).<br />
Replace engine board<br />
(KP-864).<br />
Reinsert the connector.<br />
Reinsert the connector.<br />
Replace the power cord.<br />
Check the contact<br />
between the printer’s AC<br />
inlet and the outlet.<br />
Measure the AC power<br />
voltage at the outlet.<br />
Replace the power supply<br />
unit. See page 5-22.<br />
NOTE: If the corrective action above does not solve the problem, there might be a short circuit in<br />
the respective circuit. Check the conductivity of the each terminals ( ground, 5 V and 24 V power<br />
line) of the circuit board. If a short circuit is detected, replace the circuit board.<br />
FS-1900<br />
6-26
(9) Defective face up/down solenoid operating<br />
Problem Suggested causes Corrective action<br />
Change guide does<br />
not operate in the<br />
fuser unit.<br />
Improper insertion of the face up/down solenoid<br />
connector into fuser board (KP-756).<br />
Broken face up/down solenoid coil or blownout<br />
fuse (ICP831) on the fuser board (KP-756).<br />
Defective engine board (KP-864) or power<br />
supply unit.<br />
Reinsert the connector.<br />
Remove and then check<br />
for continuity across the<br />
face up/down solenoid<br />
connector terminals; pin<br />
#1 and pin #2, pin #3 and<br />
pin #2. Remove and check<br />
for continuity of fuser<br />
board(KP-756)<br />
connectors terminals;<br />
across the pin #2 of<br />
connector (YC832) and<br />
pin #2 of connector<br />
(YC831). If none, replace<br />
the face up/down solenoid<br />
and fuser board (KP-756)<br />
at the same time. Or<br />
replace fuser unit.<br />
See page 5-29.<br />
Replace engine board<br />
(KP-864) or power supply<br />
unit. See page 5-22.<br />
6-27<br />
FS-1900
6-1-4 Circuit board terminal voltages<br />
(1) Engine board<br />
Connector Pin# Signal I/O Voltage Function<br />
YC201 A1 GND - - Signal ground<br />
B1 GND - - Signal ground<br />
A2 +5V1 I 5 V DC Power supply for main board<br />
B2 +5V1 I 5 V DC Power supply for main board<br />
A3 +5V1 I 5 V DC Power supply for main board<br />
B3 SIOUT O 3.3 V/0 V DC Serial data output signal<br />
A4 SDIR O 3.3 V/0 V DC Serial line direction signal<br />
B4 SCLKN O 3.3 V/0 V DC (Pulse) Serial clock signal<br />
A5 EGIR O 3.3 V/0 V DC Engine interrupt request signal<br />
<strong>In</strong>terrupt/Not <strong>In</strong>terrupt<br />
B5 SBSY* O 0 V/3.3 V DC Serial line busy signal, Busy/Not busy<br />
A6 VDFON1 O 0 V/3.3 V DC Forced video data output signal, On/Off<br />
B6 SOIN I 3.3 V/0 V DC Serial data input signal<br />
A7 VSREQ* O 0 V/3.3 V DC Vertical synchronized request signal Request/Not request<br />
B7 SYSRES* O 0 V/3.3 V DC System reset signal, Reset/Not reset<br />
A8 GND - - Signal ground<br />
B8 PDOUT* O 0 V/3.3 V DC (Pulse) Pin photo diode sensor [board], Laser beam detecting signal<br />
A9 GND - - Signal ground<br />
B9 GND - - Signal ground<br />
A10 GND - - Signal ground<br />
B10 VDO+ I 1.02 to 1.38 V DC LVDS video data signal (positive)<br />
A11 GND - - Signal ground<br />
B11 VDO- I 1.38 to 1.02 V DC LVDS video data signal (negative)<br />
A12 FPDIR O 3.3 V/0 V DC Communication direction signal withLCD controller board<br />
B12 GND - - Signal ground<br />
A13 +3.3V1 O 3.3 V DC Power supply for LCD controller board<br />
B13 FPCLK O 3.3 V/0 V DC (Pulse) Communication data clock signal with LCD controller board<br />
A14 GND - - Signal ground<br />
B14 FPDATA I/O 3.3 V/0 V DC (Pulse) Communication data signal with LCD controller board<br />
FS-1900<br />
6-28
Connector Pin# Signal I/O Voltage Function<br />
YC201 A15 20PSEL5 O 5 V/0 V DC Option unit identifying signal 5<br />
B15 GND - - Signal ground<br />
A16 20PSEL3 O 5 V/0 V DC Option unit identifying signal 3<br />
B16 20PSEL4 O 5 V/0 V DC Option unit identifying signal 4<br />
A17 GND - - Signal ground<br />
B17 20PTRIG* O 0 V/5 V DC Reserved<br />
A18 20PSDO O 5 V/0 V DC (Pulse) Serial communication output signal<br />
B18 20PRDY* I 0 V/5 V DC Option unit ready signal, Ready, Not ready<br />
A19 20PSCLK O 0 V/5 V DC (Pulse) Serial communication clock signal with option unit<br />
B19 20PSDI I 5 V/0 V DC (Pulse) Serial communication input signal<br />
A20 OP24V O 24 V DC Power supply for option unit<br />
B20 OP5V O 5 V DC Power supply for option unit<br />
YC202 1 +24V2 I 24 V DC Power supply<br />
2 FDPFUL* I 0 V/5 V DC Paper full sensor, Paper full/Not full<br />
3 FUDR O 0 V/24 V DC Face up/down solenoid, Change to face down, On/Off<br />
4 FDDR O 0 V/24 V DC Face up/down solenoid, Change to face up, On/Off<br />
5 THERM I Analog Thermistor detecting heat roller temperature signal<br />
6 EXITPAP* I 0 V/5 V DC Exit sensor, Paper Detected/Not detected<br />
7 +5V1 I 5 V DC Power supply<br />
8 GND - - Signal ground<br />
9 +24V2 I 24 V DC Power supply<br />
10 SLEEP* O 0 V/5 V DC Energy saving mode, On/Off<br />
11 ZCROSS I 5 V/0 V DC (pulse) Zero cross signal<br />
12 HEATON* O 0 V/5 V DC Heater lamp, On/Off<br />
6-29<br />
FS-1900
Connector Pin# Signal I/O Voltage Function<br />
YC202 13 +5V1 I 5 V DC Power supply<br />
14 +5V1 I 5 V DC Power supply<br />
15 +5V1 I 5 V DC Power supply<br />
16 +5V1 I 5 V DC Power supply<br />
17 GND - - Signal ground<br />
18 GND - - Signal ground<br />
19 GND - - Power ground<br />
20 GND - - Power ground<br />
21 +24V1 I 24 V DC Power supply<br />
22 +24V1 I 24 V DC Power supply<br />
23 +24V1 I 24 V DC Power supply<br />
24 +24V1 I 24 V DC Power supply<br />
YC203 1 +24V1 O 24 V DC Power supply to sensor board<br />
2 +24V1 O 24 V DC Power supply to sensor board<br />
3 +24V1 O 24 V DC Power supply to sensor board<br />
4 GND - - Not used<br />
5 GND - - Not used<br />
6 +24V2 I 24 V DC Power supply<br />
7 +24V2 I 24 V DC Power supply<br />
8 +24V2 I 24 V DC Power supply<br />
9 ERASEDR O 0 V/14.7 V DC Eraser lamp [board], Turn On/Off<br />
10 WTNLED* O 0 V/4.3 V DC Waste toner full sensor [board]<br />
(light emitting), Turn On/Off<br />
11 TNRFUL* O 0 V/4.1 V DC Waste toner full sensor (light receiving),<br />
Toner full Detected/Not detected<br />
(Signal validates during WTNLED* signal output.)<br />
12 - - - Reserved<br />
13 +5V2 O 5 V/0V DC Power supply to sensor board,<br />
Printer status Ready/Sleep<br />
14 GND - - Signal ground<br />
15 EEDIO I/O 5 V/0 V DC (pulse) EEPROM (Drum board) data signal<br />
16 EECLK O 5 V/0 V DC (pulse) EEPROM (Drum board) clock signal<br />
17 REGPAP* I 0 V/5 V DC Registration sensor,<br />
Paper Detected/Not detected<br />
18 PVOLAN1 I 0 V/5 V DC Paper gauge sensor 1, On/Off<br />
19 TCOVOP I 0 V/5 V DC Top cover switch, On/Off<br />
FS-1900<br />
6-30
Connector Pin# Signal I/O Voltage Function<br />
YC203 20 FCOVOP* I 24 V/0 V DC Top cover/paper transfer unit interlock switch, On/Off<br />
21 CSIZE I Analog Paper size switch detecting signal<br />
22 PVOLAN2 I 0 V/5 V DC Paper gauge sensor 2, On/Off<br />
YC204 1 TRVSEL2* O 0 V/24 V DC Transfer bias output voltage control signal 2<br />
2 TRVSEL1* O 0 V/24 V DC Transfer bias output voltage control signal 1<br />
3 +5V1 O 5 V DC Power supply for high voltage board<br />
4 TRVSEL3* O 0 V/24 V DC Transfer bias output voltage control signal 3<br />
5 TNEMP* I 0 V/5 V DC Toner sensor, Toner empty/Not empty<br />
6 TRCON* O 0 V/24 V DC Transfer bias, Output On/Off<br />
7 TONSCAN O 5 V/0 V DC (Pulse) Toner sensor, Toner detecting clock signal<br />
8 HVCLK O 5 V/0 V DC (Pulse) Developing bias outputclock signal<br />
9 GND - - Power ground<br />
10 MCHON* O 0 V/24 V DC Main charger, Output On/Off<br />
11 HUNIT* I 5 V/0 V DC Option feeder, <strong>In</strong>stalled/Not installed<br />
12 RTRCHON* O 0 V/24 V DC Transfer bias output, Reverse On/Off<br />
13 HANDS* I 0 V/5 V DC MP tray paper sensor,Paper Detected/Not detected<br />
14 DLPTYPE I Analog Developer identifying signal<br />
15 +5V2 O 5 V DC Power supply for high voltage board<br />
16 TMOTDR O 24 V/0 V DC Toner motor, Drive/Stop<br />
17 CONTYPE I 5 V DC Toner container identifying signal<br />
(0 V/5 V DC) (MICR model only)<br />
18 +24V2 O 24 V DC Power supply for high voltage board<br />
YC205 1 OP24V O 24 V DC Power supply for option unit<br />
2 GND - - Signal ground<br />
3 OP5V O 5 V DC Power supply for option unit<br />
4 - - - Reserved<br />
5 OPSCLK - 5 V/0 V DC (Pulse) Serial communication clock signal<br />
6-31<br />
FS-1900
Connector Pin# Signal I/O Voltage Function<br />
YC205 6 OPSEL0 O 0 V/5 V DC Option unit identify signal 0<br />
7 OPSDI I 5 V/0 V DC Serial communication data signal with option unit<br />
8 OPSEL1 O 0 V/5 V DC Option unit identifying signal 1<br />
9 OPSDO O 5 V/0 V DC Serial communication data signal with option unit<br />
10 OPSEL2 O 0 V/5 V DC Option unit identifying signal 2<br />
11 OPRDY* I 0 V/5 V DC Option unit, Ready/Not ready<br />
12 GND - - Signal ground<br />
YC206 1 +24V2 O 24 V DC Power supply for engine relay board<br />
2 +3.3V1 O 3.3 V DC Power supply for LCD controller board<br />
3 MPFSOL* O 0 V/24 V DC MP tray feed solenoid, On/Off<br />
4 FPDATA I/O 3.3 V/0 V DC LCD controller board data signal<br />
5 MIDDR* O 0 V/24 V DC Middle feed clutch, On/Off<br />
6 FPDIR I 3.3 V/0 V DC LCD controller board<br />
7 +24V2 O 24 V DC Power supply for engine relay board<br />
8 FPCLK I 3.3 V/0 V DC (Pulse) Communication data clock signal<br />
9 GND - - Power/Signal ground<br />
10 GND - - Power/Signal ground<br />
11 FEDDR* O 0 V/24 V DC Feed clutch, On/Off<br />
12 FPRST* O 3.3 V/0 V DC LCD controller board reset signal<br />
13 +24V2 O 24 V DC Power supply for engine relay board<br />
14 FANDR O 24 V/15 to 16 V/0 VDC Cooling fan motor, Speed control High/Low/Stop<br />
15 REGDR* O 0 V/24 V DC Registration clutch, On/Off<br />
16 MMOTON* O 0 V/5 V DC Main motor, Drive/Stop<br />
17 GND - - Power/Signal ground<br />
18 MMOTRDY* O 0 V/5 V DC Main motor, Ready/Not ready<br />
19 +5V3 O 5 V DC Power supply for laser scanner unit<br />
20 SAMPLE1* O 0 V/5 V DC (Pulse) Laser power data sample and hold control signal<br />
Data Sampling/Not sampling<br />
21 POWCONT O 0 V/5 V DC Laser power level control signal,High/Low<br />
22 LASER* O 0 V/5 V DC Laser power output signal, Enable/Disable<br />
FS-1900<br />
6-32
Connector Pin# Signal I/O Voltage Function<br />
YC206 23 VDO+ O 1.02 to 1.38 V DC LVDS video data signal (positive)<br />
24 VDO- O 1.38 to 1.02 V DC LVDS video data signal (negative)<br />
25 GND - - Power/Signal ground<br />
26 +5V3 O 5 V DC Power supply for laser scanner unit<br />
step-downed from 24 V DC (+24V2)<br />
27 PDIN* I 0 V/5 V DC Pin photo diode sensor detecting signal<br />
28 GND - - Power/Signal ground<br />
29 POLCLK O 0 V/5 V DC (Pulse) Polygon motor rotation speed control clock signal<br />
30 POLRDY* I 0 V/5 V DC Polygon motor start-up ready signal,<br />
Ready/Not ready<br />
31 POLON* O 0 V/5 V DC Polygon motor drive signal, Drive/Stop<br />
32 GND - - Power/Signal ground<br />
33 +24V2 O 24 V DC Power supply for laser scanner unit<br />
34 GND - - Power/Signal ground<br />
YC209 1 AIRTEMP I Analog Temperature/humidity sensor detecting<br />
external temperature signal<br />
2 +5V1 O 5 V DC Power supply for engine relay board<br />
3 WETCK1 O 0 V/5 V DC (Pulse) Temperature/humidity sensor driveclock signal 1<br />
4 WETCK2 O 0 V/5 V DC (Pulse) Temperature/humidity sensor drive clock signal 2<br />
6-33<br />
FS-1900
6-1-5 Assignment of circuit board connector pins<br />
When measuring voltage or signal of circuit board installed in the printer, refer to the pin assignment<br />
figure below. For further information of each pins and other circuit board, refer to section Appendix<br />
A Wiring diagram on page A-20.<br />
Engine board<br />
1<br />
1<br />
4 2<br />
33<br />
34<br />
YC209<br />
YC206<br />
Engine board<br />
High voltage unit<br />
[Parts side]<br />
[Solder side]<br />
CN1<br />
1 9<br />
1 9<br />
18<br />
2<br />
17<br />
CN2<br />
1<br />
High voltage unit<br />
Engine board<br />
1<br />
2<br />
21<br />
22<br />
1 18<br />
YC203<br />
YC204<br />
Engine board<br />
Fuser board<br />
123<br />
YC833<br />
1 8<br />
YC831<br />
Fuser board<br />
Power supply unit<br />
1<br />
3<br />
1 8<br />
CN2<br />
YC902<br />
Power supply unit<br />
Figure 6-1-1 Assignment of circuit board connector pins<br />
FS-1900<br />
6-34
6-1-6 Print quality problems<br />
Print quality problems range from uneven tone to completely blank output. The troubleshooting<br />
procedure for each type of problem is given below.<br />
(1) Completely<br />
(2) All-black<br />
(3) Dropouts<br />
(4) Black dots<br />
blank printout<br />
printout<br />
See page 6-40.<br />
See page 6-41.<br />
See page 6-38.<br />
See page 6-39.<br />
ABC<br />
123<br />
ABC<br />
123<br />
(5) Black horizontal<br />
(6) Black vertical<br />
(7) Unsharpness<br />
(8) Gray<br />
streaks<br />
streaks<br />
See page 6-43.<br />
background<br />
See page 6-41.<br />
See page 6-42.<br />
See page 6-44.<br />
ABC<br />
123<br />
ABC<br />
123<br />
ABC<br />
123<br />
(9) Dirt on the top<br />
(10) Undulated printing<br />
edge or back of<br />
at the left edge (scanning<br />
the paper<br />
start position)<br />
See page 6-45.<br />
See page 6-46.<br />
ABC<br />
123<br />
This vertical<br />
line should<br />
be straight.<br />
6-35<br />
FS-1900
(1) Completely blank printout<br />
Check the developer.<br />
• Check that the developer is inserted correctly. See page 5-4.<br />
• Check that the toner on the magnet roller surface. See page 5-4.<br />
Check the transfer bias potential.<br />
• Check the transfer bias output on the high voltage unit. This requires removal of the left cover and<br />
the test equipment. Replace the high voltage unit if high voltage potential is not available on the<br />
board. See page 5-25.<br />
Check the laser scanner unit.<br />
• The scanner components within the scanner may be disordered. Replace the laser scanner unit.<br />
See page 5-37.<br />
Replace the main board.<br />
• Defective laser scanner unit control circuit in the main board (KP-948). See page 5-24.<br />
FS-1900<br />
6-36
(2) All-black printout<br />
Check the main charger unit<br />
• Open the printer side cover and check that the drum unit is correctly seated. Check for poor<br />
contact of the main charger terminal between the main charger unit and the drum unit.<br />
Check the drum bias.<br />
• Make sure the bias from the high voltage unit correctly arrives at the drum unit.<br />
Check high voltage potential at the high voltage unit.<br />
• Check the high voltage output on the high voltage unit. Replace the high voltage unit if high<br />
voltage potential is not available on the board.<br />
Replace the main board.<br />
• Defective laser scanner unit control circuit in the main board (KP-948). See page 5-24.<br />
6-37<br />
FS-1900
(3) Dropouts<br />
ABC<br />
123<br />
Note the spacing of the defects. Refer to Repetitive defects gauge. See page 6-47.<br />
• If the defects occur at regular intervals of 39 mm, the problem may be the damaged developing<br />
roller (in the developer). Replace the developer. See page 3-13.<br />
• If the defects occur at regular intervals of 94 mm, the problem may be the damaged drum (in the<br />
drum unit). Replace the drum unit. See page 5-12.<br />
• If the defects occur at regular intervals of 72 mm (heat roller) or 79 mm (press roller), the problem<br />
may be the damaged fuser unit. Replace the press roller or heat roller. See page 5-34 or 5-36.<br />
Check paper property.<br />
• Paper with rugged surface or dump tends to cause dropouts. Replace paper with the one that<br />
satisfies the paper specifications.<br />
Check the transfer roller installation.<br />
• The transfer roller must be supported by the bushes at the both ends. Clean the bush to remove oil<br />
and debris. Replace the transfer roller if necessary. See page 5-17.<br />
Check the transfer bias potential.<br />
• Check the transfer bias output on the high voltage unit. This requires removal of the left cover and<br />
the test equipment. Replace the high voltage unit if high voltage potential is not available on the<br />
board. See page 5-25.<br />
FS-1900<br />
6-38
(4) Black dots<br />
ABC<br />
123<br />
Note the spacing of the defects. Use the Repetitive defects gauge. See page 6-47.<br />
• If the defects occur at regular intervals of 94 mm, the problem may be the damaged drum (in the<br />
drum unit). Replace the drum unit. See page 5-12.<br />
• If the defects occur at random intervals, the toner may be leaking from the developer and drum<br />
unit. Replace the developer and drum unit. See page 5-4 and 5-12.<br />
(5) Black horizontal streaks<br />
ABC<br />
123<br />
Check the drum unit’s ground.<br />
• The drum axle in the drum unit and its counter part, the grounding tab in the printer, must be in a<br />
good contact. If necessary, apply a small amount of electro-conductive grease onto the tab.<br />
The drum may be defective.<br />
• Replace the drum unit. See page 5-12.<br />
6-39<br />
FS-1900
(6) Black vertical streaks<br />
ABC<br />
123<br />
Contaminated main charger wire.<br />
• Clean the main charger wire by pulling the green colored cleaning knob in and out several times.<br />
See page 3-9.<br />
Check the drum surface for a streak of toner laying lengthwise.<br />
• A streak of toner remaining on drum after printing means that the cleaning blade (in the drum unit<br />
) is not working properly. Replace the drum unit. See page 5-12.<br />
Defective magnet roller (in the developer).<br />
• Replace the developer. See page 5-4.<br />
FS-1900<br />
6-40
(7) Unsharpness<br />
Check paper for property.<br />
• Paper with rugged surface or dump tends to cause unsharp printing. Replace paper with the one<br />
that satisfies the paper specifications.<br />
Check the transfer roller installation.<br />
• The transfer roller must be supported by the bushes at the both ends. Clean the bush to remove oil<br />
and debris. Replace the transfer roller if necessary. See page 5-17.<br />
Check the transfer bias potential.<br />
• Check the transfer bias output on the high voltage unit. This requires removal of the left cover and<br />
the test equipment. Replace the high voltage unit if high voltage potential is not available on the<br />
board. See page 5-25.<br />
Check EcoPrint setting.<br />
• The EcoPrint mode can provides faint, unsharp printing because it acts to conserve toner for draft<br />
printing purpose. For normal printing, turn the EcoPrint mode off by using the operator panel. For<br />
details refer to the printer’s User’s Manual.<br />
6-41<br />
FS-1900
(8) Gray background<br />
ABC<br />
123<br />
Check the print density setting.<br />
• The print density may be set too high. Try adjusting the print density using the Remote operation<br />
panel utility. For details refer to the printer’s User’s Manual.<br />
Check the surface potential of the drum (in the drum unit).<br />
• The drum potential should be approximately 230±15 V. This may vary depending on production<br />
lots. Measurement is possible only by using the jig and tool specifically designed for this purpose.<br />
The drum unit will have to be replaced if it bears values far out of the allowable range.<br />
Check the grid.<br />
• Clean the grid by grid cleaner. See page 3-9.<br />
The developing roller (in the developer) may be defective.<br />
• If a developer which is known to work normally is available for check, replace the current developer<br />
in the printer with the normal one. If the symptom disappears, replace the developer with a new<br />
one. See page 5-4.<br />
FS-1900<br />
6-42
(9) Dirt on the top edge or back of the paper<br />
ABC<br />
123<br />
Check toner contamination in various parts.<br />
• Dirty edges and back of the paper can be caused by toner accumulated on such parts as the paper<br />
chute, paper transportation paths, the bottom of the drum and developer, and the fuser unit inlet.<br />
Clean these areas and parts to remove toner.<br />
Check the transfer roller.<br />
• If the transfer roller is contaminated with toner, clean the transfer roller using a vacuum cleaner;<br />
or by continuously printing a low-density page until the symptom has faded away.<br />
6-43<br />
FS-1900
(10) Undulated printing at the left edge (scanning start position)<br />
This vertical<br />
line should<br />
be straight.<br />
Replace the laser scanner unit.<br />
• Defective polygon motor in the laser scanner unit. Replace the laser scanner unit. See page 5-37.<br />
Replace the engine board.<br />
• Defective engine controller circuit in the engine board (KP-864). See page 5-22.<br />
FS-1900<br />
6-44
Repetitive defects gauge<br />
Use the following measurements for checking repetitive occurrences on the printed page. This will<br />
help locating the roller, etc., which has the cause for these defects. See the above section for details.<br />
First occurrence of defect<br />
[39 mm] Developing roller (Developer)<br />
[50 mm] Upper and Lower registration roller<br />
[62 mm] Transfer roller<br />
[72 mm] Heat and press roller (Fuser unit)<br />
[94 mm] Drum (Drum unit)<br />
Figure 6-1-2 Repetitive defects gauge<br />
6-45<br />
FS-1900
6-1-7 Correcting a paper jam<br />
If a paper jam occurs while you are printing, remove the jammed paper as described below. After<br />
you have removed the jammed paper, open and close the top cover or the paper transfer unit.<br />
While the paper jam message is displayed, press the<br />
key. A on-line help message appears.<br />
(1) Jam in the rear cover<br />
1. While pulling the paper transfer unit release lever 1, pull out the paper transfer unit 2.<br />
1<br />
2<br />
Figure 6-1-3 Drawing the paper transfer unit<br />
2. Open the rear cover 3 and remove the jammed paper as shown in the figure.<br />
3<br />
Figure 6-1-4 Jam in the rear cover<br />
FS-1900<br />
6-46
(2) Jam inside the printer<br />
1. While pulling the paper transfer unit release lever, pull out the paper transfer unit (See previous<br />
page).<br />
2. If paper is jammed before the registration roller, remove it as shown figure 6-1-5. If paper<br />
jammed under the registration roller, remove it as shown in figure 6-1-6.<br />
Figure 6-1-5 Jam in the printer (1)<br />
Figure 6-1-6 Jam in the printer (2)<br />
6-47<br />
FS-1900
Appendix A D i a g r a m s
Appendix A Contents<br />
Timing charts.......................................................................................................................................... A-3<br />
Cassette feeding, two A4 size papers, face-down tray output............................................................. A-3<br />
Cassette feeding, two letter size papers, face-down tray output ......................................................... A-4<br />
Cassette feeding, two legal size papers, face-down tray output ......................................................... A-5<br />
Option paper feeder cassette feeding, two A4 size papers, face-down tray output ............................ A-6<br />
MP tray feeding, two A4 size papers, face-down tray output............................................................... A-7<br />
MP tray feeding, two letter size papers, face-down tray output ........................................................... A-8<br />
MP tray feeding, two legal size papers, face-down tray output .......................................................... A-9<br />
Wiring diagram ..................................................................................................................................... A-10
Timing charts<br />
Cassette feeding, two A4 size papers, face-down tray output<br />
0 (s) 1 2 3 4 5 6 7 8 9 10 11 12 13<br />
0 (ms)<br />
85<br />
9021<br />
5996 9075<br />
3156 6236<br />
0 6026 9021<br />
3197 6280 12011<br />
1507 5708 6021 8789<br />
12011<br />
256<br />
171<br />
262<br />
1507<br />
1507<br />
4940<br />
1711 6225<br />
3197 6280<br />
4791 7871<br />
4963 8040<br />
267 1711<br />
3199 4770<br />
4182<br />
5371<br />
6152<br />
6284<br />
6225<br />
6442<br />
6371<br />
6282<br />
7548<br />
7265<br />
8024<br />
8446<br />
9225<br />
9354<br />
9884<br />
10639<br />
12012<br />
12011<br />
0 1 2 3 4 5 6 7 8 9 10 11 12 13<br />
Drum speed: 115 mm/s<br />
Paper feeding speed: 115 mm/s<br />
: Detecting no presence of paper at this time indicates paper jam.<br />
: Detecting presence of paper in this period of time indicates paper jam.<br />
MMOTON<br />
(Main motor)<br />
POLON<br />
(Polygon motor)<br />
LASER*<br />
(Laser diode)<br />
REGDR<br />
(Registration clutch)<br />
REGPAP<br />
(Registration sensor)<br />
EXITPAP<br />
(Exit sensor)<br />
MIDDR<br />
(Millde feed clutch)<br />
FDON/FUON<br />
(Face up/down solenoid)<br />
MCHON<br />
(Main charger)<br />
ERASE<br />
(Eraser lamp)<br />
BIAS<br />
(Developing bias)<br />
TRCHON<br />
(Transfer charger)<br />
RTRCHON<br />
(Transfer charger)<br />
FEDDR<br />
(Feed clutch)<br />
A-3<br />
FS-1900
Cassette feeding, two letter size papers, face-down tray output<br />
MMOTON<br />
(Main motor)<br />
POLON<br />
(Polygon motor)<br />
LASER*<br />
(Laser diode)<br />
REGDR<br />
(Registration clutch)<br />
REGPAP<br />
(Registration sensor)<br />
EXITPAP<br />
(Exit sensor)<br />
MIDDR<br />
(Millde feed clutch)<br />
FDON/FUON<br />
(Face up/down solenoid)<br />
MCHON<br />
(Main charger)<br />
ERASE<br />
(Eraser lamp)<br />
BIAS<br />
(Developing bias)<br />
TRCHON<br />
(Transfer charger)<br />
RTRCHON<br />
(Transfer charger)<br />
FEDDR<br />
(Feed clutch)<br />
0 (s) 1 2 3 4 5 6 7 8 9 10 11 12 13<br />
0 (ms)<br />
11945<br />
84<br />
8956<br />
9013<br />
3240 5931 6329<br />
0 6118 8956<br />
3284 6373 11945<br />
1670 6113<br />
8736<br />
5647<br />
7479 8105<br />
9080 10570<br />
5018 5466<br />
8556<br />
256<br />
170<br />
261<br />
1873<br />
1669<br />
1669<br />
267 1873<br />
3286 4713<br />
4118<br />
6318<br />
3284 6373<br />
4885<br />
5058 7977 8147<br />
6081<br />
6206<br />
6318<br />
6292<br />
6540<br />
6375<br />
7206<br />
9291<br />
9166<br />
9821<br />
11945<br />
11945<br />
0 1 2 3 4 5 6 7 8 9 10 11 12 13<br />
Drum speed: 115 mm/s<br />
Paper feeding speed: 115 mm/s<br />
: Detecting no presence of paper at this time indicates paper jam.<br />
: Detecting presence of paper in this period of time indicates paper jam.<br />
FS-1900<br />
A-4
Cassette feeding, two legal size papers, face-down tray output<br />
0 (s) 1 2 3 4 5 6 7 8 9 10 11 12 13 14<br />
0 (ms)<br />
0<br />
84<br />
3152<br />
3194<br />
1674 6215 6677<br />
9951<br />
6486<br />
6682<br />
6892<br />
6936<br />
10182<br />
10236<br />
10182<br />
13179<br />
13179<br />
4927<br />
8670<br />
11775<br />
5369<br />
8038<br />
9111<br />
1879 3194 6882 6936<br />
8701<br />
4791 4963<br />
256 10519<br />
170<br />
261<br />
1674 6635 7101<br />
10391<br />
1674 6845<br />
6759 11050<br />
266 1879<br />
3195 5267<br />
4689 6882 6938<br />
8430<br />
13179<br />
13179<br />
0 1 2 3 4 5 6 7 8 9 10 11 12 13 14<br />
Drum speed: 115 mm/s<br />
Paper feeding speed: 115 mm/s<br />
: Detecting no presence of paper at this time indicates paper jam.<br />
: Detecting presence of paper in this period of time indicates paper jam.<br />
MMOTON<br />
(Main motor)<br />
POLON<br />
(Polygon motor)<br />
LASER*<br />
(Laser diode)<br />
REGDR<br />
(Registration clutch)<br />
REGPAP<br />
(Registration sensor)<br />
EXITPAP<br />
(Exit sensor)<br />
MIDDR<br />
(Millde feed clutch)<br />
FDON/FUON<br />
(Face up/down solenoid)<br />
MCHON<br />
(Main charger)<br />
A-5<br />
ERASE<br />
(Eraser lamp)<br />
BIAS<br />
(Developing bias)<br />
TRCHON<br />
(Transfer charger)<br />
RTRCHON<br />
(Transfer charger)<br />
FEDDR<br />
(Feed clutch)<br />
FS-1900
Option paper feeder cassette feeding, two A4 size papers, face-down tray output<br />
MMOTON<br />
(Main motor)<br />
POLON<br />
(Polygon motor)<br />
LASER*<br />
(Laser diode)<br />
REGDR<br />
(Registration clutch)<br />
REGPAP<br />
(Registration sensor)<br />
EXITPAP<br />
(Exit sensor)<br />
MIDDR<br />
(Millde feed clutch)<br />
FDON/FUON<br />
(Face up/down solenoid)<br />
MCHON<br />
(Main charger)<br />
ERASE<br />
(Eraser lamp)<br />
BIAS<br />
(Developing bias)<br />
TRCHON<br />
(Transfer charger)<br />
RTRCHON<br />
(Transfer charger)<br />
0 (s) 1 2 3 4 5 6 7 8 9 10 11 12 13<br />
0 (ms)<br />
0<br />
84<br />
257<br />
171<br />
263<br />
8941<br />
5802 8993<br />
2963 6154<br />
3007 5921 6199 8941<br />
11926<br />
2323 5916<br />
5509<br />
4755 5187<br />
2550 6140<br />
3026 6218<br />
4778<br />
4604 7791<br />
8704<br />
7361 7948<br />
10557<br />
8372<br />
2323 6359<br />
5953 9146<br />
2323 6166<br />
6079 9804<br />
7965<br />
9275<br />
11926<br />
11927<br />
11926<br />
Option<br />
paper<br />
feeder<br />
[upper]<br />
269<br />
3895<br />
313 3007 3941<br />
FEDDR 653 4288<br />
(Paper feed clutch)<br />
MOTOR 2463 3282<br />
(Paper feed motor)<br />
6056<br />
6199<br />
6451<br />
0 1 2 3 4 5 6 7 8 9 10 11 12 13<br />
Drum speed: 115 mm/s<br />
Paper feeding speed: (240) 115 mm/s<br />
: Detecting no presence of paper at this time indicates paper jam.<br />
: Detecting presence of paper in this period of time indicates paper jam.<br />
FS-1900<br />
A-6
MP tray feeding, two A4 size papers, face-down tray output<br />
MMOTON<br />
(Main motor)<br />
POLON<br />
(Polygon motor)<br />
LASER*<br />
(Laser diode)<br />
REGDR<br />
(Registration clutch)<br />
REGPAP<br />
(Registration sensor)<br />
EXITPAP<br />
(Exit sensor)<br />
MIDDR<br />
(Millde feed clutch)<br />
FDON/FUON<br />
(Face up/down solenoid)<br />
MCHON<br />
(Main charger)<br />
ERASE<br />
(Eraser lamp)<br />
BIAS<br />
(Developing bias)<br />
TRCHON<br />
(Transfer charger)<br />
RTRCHON<br />
(Transfer charger)<br />
MPFSOL<br />
(MP feed solenoid)<br />
0 (s) 1 2 3 4 5 6 7 8 9 10 11 12 13<br />
0 (ms)<br />
89<br />
3340<br />
9367<br />
6168 6586<br />
9421<br />
0 6372 6628<br />
9367<br />
3383<br />
174<br />
260<br />
265<br />
1332<br />
1536<br />
3383<br />
4988<br />
5127<br />
5886 9126<br />
6367<br />
5566<br />
6572<br />
6628<br />
1332 6320 6791<br />
1332<br />
270 700 5319 5744<br />
7735<br />
8368<br />
8794<br />
8218<br />
5159 8387<br />
6445<br />
6530<br />
9702<br />
9573<br />
10233<br />
10982<br />
12359<br />
12359<br />
12359<br />
12359<br />
0 1 2 3 4 5 6 7 8 9 10 11 12 13<br />
Drum speed: 115 mm/s<br />
Paper feeding speed: 115 mm/s<br />
: Detecting no presence of paper at this time indicates paper jam.<br />
: Detecting presence of paper in this period of time indicates paper jam.<br />
A-7<br />
FS-1900
MP tray feeding, two letter size papers, face-down tray output<br />
MMOTON<br />
(Main motor)<br />
POLON<br />
(Polygon motor)<br />
LASER*<br />
(Laser diode)<br />
REGDR<br />
(Registration clutch)<br />
REGPAP<br />
(Registration sensor)<br />
EXITPAP<br />
(Exit sensor)<br />
MIDDR<br />
(Millde feed clutch)<br />
FDON/FUON<br />
(Face up/down solenoid)<br />
MCHON<br />
(Main charger)<br />
ERASE<br />
(Eraser lamp)<br />
BIAS<br />
(Developing bias)<br />
TRCHON<br />
(Transfer charger)<br />
RTRCHON<br />
(Transfer charger)<br />
MPFSOL<br />
(MP feed solenoid)<br />
0 (s) 1 2 3 4 5 6 7 8 9 10 11 12 13<br />
0 (ms)<br />
84<br />
8959<br />
5844 9012<br />
3161 6314<br />
0 6102 8958<br />
3203 6355 11947<br />
1372<br />
262<br />
171<br />
267<br />
1372<br />
4936<br />
5372<br />
6097<br />
1576 6303<br />
3203 6355<br />
4797<br />
7390<br />
8094<br />
4966 7957 8130<br />
5995 6523<br />
9161<br />
1372 6206<br />
6121 9819<br />
272 4994<br />
695 5419<br />
8715<br />
8537<br />
9287<br />
11947<br />
11947<br />
11947<br />
0 1 2 3 4 5 6 7 8 9 10 11 12 13<br />
Drum speed: 115 mm/s<br />
Paper feeding speed: 115 mm/s<br />
: Detecting no presence of paper at this time indicates paper jam.<br />
: Detecting presence of paper in this period of time indicates paper jam.<br />
FS-1900<br />
A-8
MP tray feeding, two legal size papers, face-down tray output<br />
0 (s) 1 2 3 4 5 6 7 8 9 10 11 12 13 14<br />
0 (ms)<br />
85<br />
10196<br />
6913<br />
10251<br />
3173<br />
6514<br />
0 6704<br />
10196<br />
3218 6955 13192<br />
1389 6229 6699<br />
9969<br />
13192<br />
258<br />
172<br />
263<br />
1593<br />
4951 5392<br />
3218 6900 6955<br />
4812<br />
4983<br />
8054 8688<br />
11798<br />
9125<br />
1389 7116<br />
6668 10402<br />
1389 6879<br />
6793 11063<br />
268 5665<br />
696 6088<br />
8544<br />
8717<br />
10531<br />
13192<br />
13192<br />
0 1 2 3 4 5 6 7 8 9 10 11 12 13 14<br />
Drum speed: 115 mm/s<br />
Paper feeding speed: 115 mm/s<br />
: Detecting no presence of paper at this time indicates paper jam.<br />
: Detecting presence of paper in this period of time indicates paper jam.<br />
MMOTON<br />
(Main motor)<br />
POLON<br />
(Polygon motor)<br />
LASER*<br />
(Laser diode)<br />
REGDR<br />
(Registration clutch)<br />
REGPAP<br />
(Registration sensor)<br />
EXITPAP<br />
(Exit sensor)<br />
MIDDR<br />
(Millde feed clutch)<br />
FDON/FUON<br />
(Face up/down solenoid)<br />
MCHON<br />
(Main charger)<br />
ERASE<br />
(Eraser lamp)<br />
BIAS<br />
(Developing bias)<br />
TRCHON<br />
(Transfer charger)<br />
RTRCHON<br />
(Transfer charger)<br />
MPFSOL<br />
(MP feed solenoid)<br />
A-9<br />
FS-1900
A-10<br />
FS-1900<br />
+<br />
−<br />
1<br />
3<br />
1<br />
2<br />
1<br />
2<br />
1<br />
2<br />
3<br />
FUDR<br />
+24V2<br />
FDDR<br />
S02413<br />
3<br />
2<br />
1<br />
+5V2<br />
FDPFUL<br />
GND<br />
2<br />
1<br />
+5V1<br />
THERM<br />
S02415<br />
8<br />
7<br />
6<br />
5<br />
4<br />
3<br />
2<br />
1<br />
1<br />
2<br />
3<br />
4<br />
5<br />
6<br />
7<br />
8<br />
FDPFUL*<br />
+24V2<br />
FUDR<br />
FDDR<br />
EXITPAP*<br />
THERM<br />
GND<br />
+5V1<br />
10<br />
8<br />
6<br />
4<br />
2<br />
12<br />
9<br />
14<br />
7<br />
16<br />
17<br />
18<br />
1<br />
3<br />
11<br />
5<br />
13<br />
15<br />
10<br />
8<br />
6<br />
4<br />
2<br />
12<br />
9<br />
14<br />
17<br />
16<br />
7<br />
18<br />
1<br />
3<br />
11<br />
5<br />
13<br />
15<br />
+24V2<br />
REGDR*<br />
Optional<br />
unit I/F<br />
connctor<br />
Parallel I/F<br />
USB<br />
I/F<br />
Main board<br />
(KP-948)<br />
(YS02)<br />
(YC07)<br />
(YC201)<br />
A1<br />
B1<br />
A20<br />
B20<br />
A1<br />
B1<br />
A20<br />
B20<br />
1<br />
2<br />
3<br />
4<br />
1<br />
2<br />
1<br />
2<br />
1<br />
2<br />
3<br />
4<br />
S02401<br />
S02423<br />
S02419<br />
S02405<br />
+24V2<br />
GND<br />
MMOTN*<br />
MMOTRDY*<br />
Registration<br />
clutch<br />
(YC803)<br />
(YC802)<br />
(YC03)<br />
+24V2<br />
FDDR*<br />
1<br />
2<br />
1<br />
2<br />
Feed clutch<br />
(YC804)<br />
+24V2<br />
MPFSOL*<br />
MP Feed<br />
solenoid<br />
(YC805)<br />
+24V2<br />
MIDDR*<br />
Middle feed<br />
clutch<br />
(YC806)<br />
FANDR<br />
GND<br />
Cooling<br />
fan<br />
motor<br />
(YC807) (YC808)<br />
(YC801)<br />
(YC809)<br />
LCD controller board<br />
(KP-738)<br />
Engine relay board (KP-760) Temperature<br />
/humidity<br />
sensor<br />
6<br />
5<br />
4<br />
3<br />
2<br />
1<br />
1<br />
2<br />
3<br />
4<br />
5<br />
6<br />
1<br />
2<br />
3<br />
1<br />
2<br />
3<br />
4<br />
5<br />
1<br />
2<br />
3<br />
4<br />
5<br />
1<br />
2<br />
3<br />
4<br />
5<br />
1<br />
7<br />
2<br />
8<br />
3<br />
9<br />
4<br />
10<br />
5<br />
11<br />
6<br />
12<br />
1<br />
2<br />
3<br />
1<br />
2<br />
3<br />
1<br />
2<br />
3<br />
4<br />
5<br />
6<br />
+3.3V1<br />
FPDATA<br />
FPDIR<br />
FPCLK<br />
GND<br />
FPRST*<br />
S02402<br />
S02406<br />
S02403<br />
S02404<br />
S02408<br />
S02407<br />
S02409<br />
S02410<br />
S02400<br />
Pin photo diode<br />
sensor [board]<br />
(KP-746)<br />
1<br />
2<br />
3<br />
4<br />
5<br />
6<br />
7<br />
8<br />
9<br />
1<br />
2<br />
3<br />
4<br />
5<br />
6<br />
7<br />
8<br />
9<br />
1<br />
2<br />
1<br />
2<br />
1<br />
2<br />
1<br />
2<br />
1<br />
2<br />
1<br />
2<br />
(YC04)<br />
(YC01)<br />
(YC08)<br />
(YC02)<br />
(YC06)<br />
+5V3<br />
PD*<br />
GND<br />
POLCLK<br />
POLRDY*<br />
POLON*<br />
GND<br />
+24V2<br />
POLCLK<br />
POLRDY*<br />
POLON*<br />
GND<br />
+24V2<br />
Polygon motor<br />
APC board<br />
(KP-742)<br />
(YC602)<br />
(YC601)<br />
Optional unit<br />
I/F connector<br />
OP24V<br />
GND<br />
OP5V<br />
(PFSEL)<br />
OPSCLK<br />
OPSEL0<br />
OPSDI<br />
OPSEL1<br />
OPSD0<br />
OPSEL2<br />
OPRDY*<br />
18<br />
17<br />
16<br />
15<br />
14<br />
13<br />
12<br />
11<br />
10<br />
9<br />
8<br />
7<br />
6<br />
5<br />
4<br />
3<br />
2<br />
1<br />
Engine board<br />
(KP-864)<br />
Fuser board<br />
(KP-756)<br />
Top cover/paper transfer<br />
unit interlock switch<br />
Left<br />
cover<br />
interlock<br />
switch<br />
1<br />
2<br />
3<br />
4<br />
5<br />
6<br />
7<br />
8<br />
9<br />
10<br />
1<br />
2<br />
3<br />
4<br />
1<br />
2<br />
3<br />
4<br />
5<br />
6<br />
7<br />
8<br />
9<br />
10<br />
29<br />
30<br />
31<br />
32<br />
33<br />
34<br />
29<br />
30<br />
31<br />
32<br />
33<br />
34<br />
(YC205)<br />
GND<br />
FPCLK<br />
PFDIR<br />
FPDATA<br />
+3.3V1<br />
FPRST*<br />
GND<br />
FANDR<br />
+24V2<br />
MMOTON*<br />
GND<br />
MMOTRDY*<br />
+24V2<br />
MPFSOL*<br />
FEDDR*<br />
MIDDR*<br />
+24V2<br />
REGDR*<br />
+5V3<br />
SAMPLE*<br />
POWCONT<br />
LASER*<br />
VDD+<br />
VOO-<br />
GND<br />
PDIN*<br />
GND<br />
19<br />
20<br />
21<br />
22<br />
23<br />
24<br />
25<br />
26<br />
27<br />
28<br />
19<br />
20<br />
21<br />
22<br />
23<br />
24<br />
25<br />
26<br />
27<br />
28<br />
AIRTEMP<br />
+5V1<br />
WETCK1<br />
WETCK2<br />
(YC203)<br />
(YC209)<br />
(YC206)<br />
(YC704)<br />
(YC701)<br />
(YC703)<br />
(YC702)<br />
(YC204)<br />
4<br />
3<br />
2<br />
1<br />
4<br />
3<br />
2<br />
1<br />
1<br />
2<br />
3<br />
4<br />
5<br />
1<br />
2<br />
1<br />
2<br />
(YC207)<br />
(YC831)<br />
(YC834) (YC833) (YC832)<br />
+24V2<br />
(YC208)<br />
+24V2<br />
CONTYPE<br />
TMOTDR<br />
+5V2<br />
DLPTYPE<br />
HANDS*<br />
RTRCHON*<br />
HUNIT*<br />
MCHON*<br />
GND<br />
HVCLK<br />
TONSCAN<br />
TRCHON*<br />
TNEMP*<br />
TRVSEL3*<br />
+5V1<br />
TRVSEL1*<br />
TRVSEL2*<br />
+24V1<br />
+24V1<br />
+24V1<br />
+24V2<br />
+24V2<br />
+24V2<br />
ERASEDR<br />
WTNLED*<br />
TNRFUL*<br />
+5V2<br />
GND<br />
EEDIO<br />
EECLK<br />
REGPAP<br />
PVOLAN1<br />
TCPVP<br />
FCPVP*<br />
CASIZE<br />
PVOLAN2<br />
Sensor board<br />
(KP-754)<br />
4<br />
3<br />
2<br />
1<br />
N.C. (GND)<br />
ERASEDR<br />
N.C. (GND)<br />
WTNLED*<br />
EECLK<br />
TNRFUL*<br />
EEDIO<br />
N.C. (+5V2)<br />
GND<br />
+5V2<br />
Drum board<br />
(KP-748)<br />
(YC741)<br />
(YC743) (YC742)<br />
(YC771)<br />
(YC761)<br />
1<br />
2<br />
2<br />
1<br />
1<br />
2<br />
2<br />
1<br />
2<br />
1<br />
Waste<br />
toner full<br />
sensor<br />
[board]<br />
(KP-766)<br />
Eraser<br />
lamp<br />
[board]<br />
(KP-752)<br />
S02411<br />
S02412<br />
+5V2<br />
WTNLED*<br />
ERASEDR<br />
GND<br />
CAS0<br />
COM<br />
CAS1<br />
CAS2<br />
24/23<br />
22/21<br />
20/19<br />
18/17<br />
16/15<br />
14/13<br />
12/11<br />
10/9<br />
8/7<br />
6/5<br />
4/3<br />
2/1<br />
24/23<br />
22/21<br />
20/19<br />
18/17<br />
16/15<br />
14/13<br />
12/11<br />
10/9<br />
8/7<br />
6/5<br />
4/3<br />
2/1<br />
+24V1/+24V1<br />
+24V1/+24V1<br />
GND/GND<br />
GND/GND<br />
+5V1/+5V1<br />
+5V1/+5V1<br />
ZCROSS/HEATON*<br />
+24V2/SLEEP*<br />
+5V2/GND<br />
THERM/EXITPAP*<br />
FDDR/FUDR<br />
+24V2/FDPFUL*<br />
(YC202)<br />
(YC901)<br />
Power supply unit<br />
8<br />
7<br />
6<br />
5<br />
4<br />
3<br />
2<br />
1<br />
1<br />
2<br />
3<br />
4<br />
5<br />
6<br />
7<br />
8<br />
2<br />
1<br />
3<br />
2<br />
1<br />
1<br />
2<br />
3<br />
Waste<br />
toner full<br />
sensor<br />
(receiver)<br />
C<br />
E<br />
Face<br />
up/down<br />
solenoid<br />
1<br />
2<br />
3<br />
1<br />
2<br />
3<br />
Paper full<br />
sensor<br />
Exit<br />
sensor<br />
MP tray<br />
paper<br />
sensor<br />
Option<br />
feeder<br />
sensor<br />
Thermistor<br />
Thermal cutout<br />
Heater lamp<br />
Controller<br />
unit fan<br />
motor<br />
BFANDR(+5V)<br />
GND<br />
+5V1<br />
DBTX<br />
DBRX<br />
DBCLK<br />
GND<br />
Hight voltage unit<br />
1<br />
2<br />
3<br />
4<br />
5<br />
6<br />
7<br />
8<br />
9<br />
1<br />
2<br />
3<br />
4<br />
5<br />
6<br />
7<br />
8<br />
9<br />
9<br />
8<br />
7<br />
6<br />
5<br />
4<br />
3<br />
2<br />
1<br />
9<br />
8<br />
7<br />
6<br />
5<br />
4<br />
3<br />
2<br />
1<br />
TPMSCAN<br />
(GND)<br />
TMOTDR<br />
GND<br />
COM<br />
CNTYPE<br />
Toner<br />
sensor<br />
Power<br />
switch<br />
(YC902)<br />
(CN2)<br />
(CN1)<br />
AC inlet<br />
AC<br />
input<br />
+24V2<br />
OP24V<br />
1<br />
12<br />
Paper<br />
size switch<br />
Toner<br />
motor<br />
MP feed roller<br />
OP24V<br />
OP24V<br />
1<br />
3<br />
Option DIMM<br />
System DIMM [board]<br />
(KP-893)<br />
S02116<br />
S024**<br />
TONSCAN<br />
GND<br />
TMOTDR<br />
GND<br />
1<br />
2<br />
1<br />
2<br />
MICR<br />
switch<br />
+24V2<br />
Grid<br />
Magnet roller<br />
Transfer roller<br />
1<br />
2<br />
3<br />
4<br />
1<br />
2<br />
3<br />
4<br />
10<br />
8<br />
6<br />
4<br />
2<br />
12<br />
9<br />
14<br />
7<br />
16<br />
17<br />
18<br />
1<br />
3<br />
11<br />
5<br />
13<br />
15<br />
10<br />
8<br />
6<br />
4<br />
2<br />
12<br />
9<br />
14<br />
7<br />
16<br />
17<br />
18<br />
1<br />
3<br />
11<br />
5<br />
13<br />
15<br />
1<br />
2<br />
3<br />
4<br />
1<br />
2<br />
3<br />
4<br />
1<br />
2<br />
3<br />
4<br />
5<br />
6<br />
7<br />
8<br />
9<br />
10<br />
11<br />
12<br />
13<br />
14<br />
15<br />
16<br />
17<br />
18<br />
19<br />
20<br />
21<br />
22<br />
1<br />
2<br />
3<br />
4<br />
5<br />
6<br />
7<br />
8<br />
9<br />
10<br />
11<br />
12<br />
13<br />
14<br />
15<br />
16<br />
17<br />
18<br />
19<br />
20<br />
21<br />
22<br />
1<br />
2<br />
3<br />
4<br />
5<br />
6<br />
7<br />
8<br />
9<br />
10<br />
11<br />
12<br />
13<br />
14<br />
1<br />
2<br />
3<br />
4<br />
5<br />
6<br />
7<br />
8<br />
9<br />
10<br />
11<br />
12<br />
13<br />
14<br />
15<br />
16<br />
17<br />
18<br />
1<br />
2<br />
3<br />
4<br />
5<br />
6<br />
7<br />
8<br />
9<br />
10<br />
11<br />
12<br />
13<br />
14<br />
15<br />
16<br />
17<br />
18<br />
Zener board<br />
(KP-768)<br />
1<br />
2<br />
1<br />
2<br />
+24V2<br />
+5V1<br />
OP24V<br />
OP5V<br />
1<br />
2<br />
3<br />
4<br />
5<br />
6<br />
7<br />
8<br />
9<br />
10<br />
11<br />
12<br />
1<br />
2<br />
3<br />
4<br />
5<br />
6<br />
7<br />
8<br />
9<br />
10<br />
11<br />
12<br />
1<br />
2<br />
3<br />
4<br />
5<br />
6<br />
7<br />
Top cover<br />
switch<br />
Paper gauge<br />
sensor 1<br />
Registration<br />
sensor<br />
Paper gauge<br />
sensor 2<br />
To PF-60, DU-60 or HS-60<br />
Compact<br />
Flash<br />
MicroDrive<br />
KUIO-LV<br />
Network<br />
interface<br />
card<br />
(Option)<br />
Main motor<br />
S02420 : 120 V AC model<br />
S02421 : 220 - 240 V AC model<br />
Optional<br />
memory<br />
card slot<br />
Optional<br />
hard disk<br />
drive slot<br />
(Centronics)<br />
(YC651)<br />
S02424<br />
Serial I/F<br />
card<br />
(Option)<br />
(RS232C)<br />
(YC05)<br />
1<br />
9<br />
Wiring diagram
Appendix B S t a t u s P a g e
Appendix B Contents<br />
Status page ............................................................................................................................................. B-3<br />
Printing the service status page .......................................................................................................... B-3<br />
Service information on the status page............................................................................................... B-4<br />
Details of service information .............................................................................................................. B-4
Status page<br />
The printer can print two different types of the status page—the user (normal) status page and the<br />
service status page. This section exclusively describes information obtainable with the service status<br />
page. For information on the user (normal) status page, refer to the printer’s User’s Manual.<br />
<strong>In</strong>formation on the service page include various settings for the printer, service statistics, etc. To<br />
print a service status page, proceed as follows:<br />
Printing the service status page<br />
To print a service status page, using the MENU key. Or, have a PC running MS-DOS and proceed<br />
as follows:<br />
1. Connect the printer to the PC via the parallel interface.<br />
2. Ensure that the printer is ready to print.<br />
3. At the DOS prompt, type:<br />
echo !R! STAT 1; EXIT; >lpt1:<br />
The service status page is printed. (If you omit ‘1,’ a user status page is printed.)<br />
B-3<br />
FS-1900
Service information on the status page<br />
An example of the service status page is shown below. (Note the details born by the status page my<br />
differ from a firmware version to another.) Most of the service information are located under Service<br />
information.<br />
Most of these service information on the status page are alphanumerically-coded. Each item is<br />
explained on the next page.<br />
Details of service information<br />
Controller firmware version*<br />
Released date of the firmware<br />
Firmware version: 84.00-01 Released: 28/Sep/2001<br />
Service information<br />
[0A00/0003][C1][32.00 ][17/05] Total page 9690<br />
/t/P00/S00/F00/N00/D10:DM0301.DAN/<br />
/0020/0020/1061/0811/ 0/ 0/ 0/ 0/ 0/ 0/ 0<br />
/AAAAAA/AAAAAA/AAAAAA/AAAAAA/<br />
AAAAAA/AAAAAA/<br />
AAAAAA/<br />
/003D/0005/0005/0005/0005/0005/0005/0005/0000/<br />
RS2/FF/[0003-0003]/AI.E/1/20/31/50<br />
/8088808880808000/8088808880808000/8088808880808000/8088808880808000/<br />
/20A11080/1020B200/20001080/81000000/00000000/10101010/10101010/<br />
SPD1:0203040508090A0B0C0D0F101112131415161718191A1B1C1D1E1F202122235E<br />
DN:SPL9200007 SN:SPL9200010<br />
Service information<br />
FS-1900<br />
B-4
Service information<br />
[0A00/0003][C1][32.00 ][17/05] Total page 9690<br />
1 2 3 4<br />
5<br />
/t/P00/S00/F00/N00/D10:DM0301.DAN/<br />
6 7 8 9 0 !<br />
/0020/0020/1061/0811/ 0/ 0/ 0/ 0/ 0/ 0/ 0<br />
@<br />
#<br />
/AAAAAA/AAAAAA/AAAAAA/AAAAAA/<br />
$<br />
AAAAAA/AAAAAA/<br />
%<br />
AAAAAA/<br />
^<br />
/003D/0005/0005/0005/0005/0005/0005/0005/0000/<br />
&<br />
*<br />
RS2/FF/[0003-0003]/AI.E/1/20/31/50<br />
( ) ⁄ ¤ ‹›fi fl<br />
/8088808880808000/8088808880808000/8088808880808000/8088808880808000/<br />
‡<br />
/20A11080/1020B200/20001080/81000000/00000000/10101010/10101010/<br />
°<br />
SPD1:0203040508090A0B0C0D0F101112131415161718191A1B1C1D1E1F202122235E<br />
·<br />
DN:SPL9200007 SN:SPL9200010<br />
‚ Œ<br />
Example Meaning Description<br />
1 [0A00/0003] Mask ROM/Flash ROM version<br />
on the engine board<br />
-<br />
2 [C1]<br />
Mask ROM version on the LCD<br />
controller board (Operator panel)<br />
-<br />
3 [32.00 ] Boot ROM version and DIMM [32.00 ] or [32.00*]<br />
type<br />
The last digit means DIMM type,<br />
the blank is flash type, and the<br />
asterisk (*) is mask type.<br />
4 [17/05]<br />
5 Total page 9690<br />
6 t/<br />
<strong>In</strong>ternal use<br />
Total count page<br />
<strong>In</strong>ternal use<br />
-<br />
-<br />
-<br />
B-5<br />
FS-1900
Example Meaning Description<br />
7 P00/<br />
Parallel interface mode bit 7= 0: No error with<br />
bidirectional communication,<br />
1: Error with bidirectional<br />
communication<br />
bit 6= 0: No ECP communication,<br />
1: ECP communication had<br />
occurred, at least once.<br />
bit 0 to 5= History of printer<br />
parallel port directional<br />
communication.<br />
05= Nibble (High-speed), 07=<br />
ECP<br />
8 /S00<br />
Serial interface error<br />
00= Normal, bit 0= Framing error<br />
bit 1= Overrun, bit 2= Parity error<br />
9 /F00<br />
Operator panel lock (Shown only 01= Partially locked<br />
during locking)<br />
02= Fully locked<br />
0 /N00<br />
! /D10:DM0301.DAN<br />
@ /0020/0020<br />
/1061/0811<br />
# / 0/ 0/ 0<br />
/ 0/ 0/ 0<br />
/ 0<br />
$ /AAAAAA/AAAAAA<br />
/AAAAAA/AAAAAA<br />
/AAAAAA/<br />
% /AAAAAA/AAAAAA/<br />
^ /AAAAAA/<br />
NVRAM error (Shown only if<br />
error has occurred)<br />
NVRAM down loading status<br />
Printing area<br />
Left margin offset for paper source<br />
Life counter for the paper source<br />
Life counter for the paper exit<br />
device<br />
Life counter for the drum<br />
01= ID error, 02= Version error,<br />
03= Checksum error,<br />
04= NVRAM crash error<br />
00= Normal (Nothing<br />
downloaded), bit0= Font data,<br />
bit1= host data, bit2= Macro data,<br />
bit3= Program data, bit4=<br />
Operator panel message<br />
download (shown file name),<br />
bit5= OEM data, bit6= Reserved,<br />
bit7= Error occurred<br />
/Top margin/Left margin/Page<br />
length/Page width/<br />
/MP tray/Printer’s cassette/Top<br />
paper feeder/Middle feeder/<br />
Bottom feeder/ Envelope feeder/<br />
Duplexer<br />
/Top paper feeder/Middle feeder<br />
/Bottom feeder/Duplexer<br />
/Bulk paper feeder/<br />
/Bulk paper stacker/Sorter<br />
-<br />
FS-1900<br />
B-6
Example Meaning Description<br />
& /003D/0005/0005<br />
/0005/0005/0005<br />
/0005/0005<br />
* /0000/<br />
( /RS2<br />
) /FF<br />
⁄ /[0003-0003]<br />
¤ /AI.E<br />
‹ /1<br />
› /20<br />
fi /31<br />
fl /50<br />
‡ /8088808880808000/...<br />
/20A11080/1020B200<br />
/20001080/81000000<br />
/00000000/10101010<br />
/10101010<br />
· SPD2:02030405...<br />
‚ DN:SPL92000007<br />
ΠSN:SPL92000010<br />
Version for each unit<br />
(Hexadecimal)<br />
EEPROM error for each unit<br />
Serial interface mode<br />
Drum sensitivity<br />
Option unit equipment<br />
Average print coverage (total)<br />
Operator panel message<br />
language<br />
Toner capacity<br />
The present temperature<br />
The present humidity<br />
Engine parameter information<br />
Media type settings<br />
SPD (slot1)<br />
Serial number for the drum<br />
Serial number for the printer<br />
Drum unit/Top paper feeder/<br />
Middle feeder/Bottom feeder/<br />
Duplexer/Bulk paper feeder/Bulk<br />
paper stacker/Sorter<br />
bit0= Top paper feeder,<br />
bit1= Middle feeder,<br />
bit2= Bottom feeder,<br />
bit3= Duplexer, bit4= Sorter,<br />
bit5= Bulk paper feeder,<br />
bit6= Bulk paper stacker,<br />
bit7= Drum unit<br />
RS2= RS-232C, RS4= RS422A<br />
Hexadecimal (FRPO I4)<br />
The first 2 byte:<br />
bit0= MP tray, bit1 to 6= Paper<br />
feeder (5 and 6 are not supported.),<br />
bit7= Duplexer, bit8= Bulk paper<br />
feeder, bit9= Envelope feeder,<br />
bit10 to 15= Reserved.<br />
The second 2 byte:<br />
bit0 =Face-up output tray, bit1=<br />
Face-down output tray, bit2= Bulk<br />
paper stacker. bit3= Sorter, bit4 to<br />
15= Reserved.<br />
Two digits for integer part; one<br />
digit for decimal; unit is in percent<br />
PMSG command settings shown<br />
by decimal.<br />
Number of pages shown by<br />
decimal ( × 1000 pages)<br />
0 to 100 °C, When if “-” shows,<br />
the temperature/humidity sensor<br />
is abnormal.<br />
55 to 90 %, step by 5%<br />
Hexadecimal, 32 bytes (64 digits)<br />
Detailed media type settings 1 to<br />
28. (14 to 20 are reserved<br />
and fixed to setting “0x00”. )<br />
-<br />
-<br />
-<br />
B-7<br />
FS-1900
Appendix C I n t e r f a c e
Appendix C Contents<br />
Parallel interface .................................................................................................................................... C-3<br />
Selecting the parallel interface mode .................................................................................................. C-3<br />
Parallel interface pin assignment ........................................................................................................ C-4<br />
Parallel interface signals ..................................................................................................................... C-5<br />
USB interface.......................................................................................................................................... C-6<br />
USB interface pin assignment ............................................................................................................. C-6<br />
Serial interface (option) ......................................................................................................................... C-7<br />
RS-232C interface voltage levels ........................................................................................................ C-7<br />
Connector configurations .................................................................................................................... C-7<br />
Protocol ........................................................................................................................................... C-8<br />
RS-232C - For computers with a DB-9 connector .......................................................................... C-8<br />
RS-232C - For computers with a DB-25 connector ........................................................................ C-8
Parallel interface<br />
The printer uses a bidirectional parallel interface for high-speed data transmission for the host<br />
computer. This interface includes the buffers which are compatible with the IEEE 1284 standards.<br />
The parallel interface provides support for the ECP and nibble modes in this standards. The parallel<br />
interface mode can be changed by commanding Prescribe commands on a PC.<br />
Selecting the parallel interface mode<br />
To change the parallel interface mode, a PC running MS-DOS is needed. Connect the printer to the<br />
PC via the parallel interface. Then, at the DOS prompt, type a FRPO O0 (the letter O and the<br />
number zero) command as follows depending on the desired parallel mode:<br />
To set the parallel interface mode...<br />
Normal<br />
High-speed<br />
Nibble<br />
Automatic*<br />
Type at the DOS prompt...<br />
echo !R! FPRO O0, 0; EXIT;>lpt1:<br />
echo !R! FPRO O0, 1; EXIT;>lpt1:<br />
echo !R! FPRO O0, 5; EXIT;>lpt1:<br />
echo !R! FPRO O0, 70; EXIT;>lpt1:<br />
*: Factory-set default.<br />
C-3<br />
FS-1900
Parallel interface pin assignment<br />
The pins of the parallel interface connector carry the signals listed below. The function for each<br />
signal is detailed on the following page.<br />
18<br />
1<br />
36<br />
19<br />
No. Terminal Signal No. Terminal Signal<br />
1 nStrobe (STBIN1/2*) 19 Ground GND<br />
2 Data1 (PAD0) 20 Ground GND<br />
3 Data2 (PAD1) 21 Ground GND<br />
4 Data3 (PAD2) 22 Ground GND<br />
5 Data4 (PAD3) 23 Ground GND<br />
6 Data5 (PAD4) 24 Ground GND<br />
7 Data6 (PAD5) 25 Ground GND<br />
8 Data7 (PAD6) 26 Ground GND<br />
9 Data8 (PAD7) 27 Ground GND<br />
10 nAck (ACKOUT) 28 Ground GND<br />
11 Busy (BUSYOUT) 29 Ground GND<br />
12 PError (PERROR) 30 Ground GND<br />
13 Select (SELECT) 31 n<strong>In</strong>it (INIT*)<br />
14 nAutoFd (AUTOFD*) 32 nFault (FAULT*)<br />
15 Not defined NC 33 Not defined Pull-up (1 kΩ)<br />
16 Logic ground GND 34 Not defined NC<br />
17 Chassis ground GND 35 Not defined Pull-up (1 kΩ)<br />
18 Peri-logic H (VCC) 36 nSelect <strong>In</strong> (SELECTI*)<br />
Maximum rated current for pin 18 is 500 mA (fused).<br />
Pin 18 can not use pin 12 (+5V) of serial connector RS-232C at the same time.<br />
FS-1900<br />
C-4
Parallel interface signals<br />
The following table provides details for the signals used on the printer’s parallel interface. Note<br />
descriptions in [ ] are for high-speed mode of the parallel interface.<br />
Signal<br />
Strobe* [nStrobe] (Pin 1)<br />
Data 0 [1] to Data 7 [8]<br />
(Pins 2 to 9)<br />
Acknowledge* [nAck]<br />
(Pin 10)<br />
Busy [Busy] (Pin 11)<br />
Paper Empty [PError]<br />
(Pin 12)<br />
On-Line [Select] (Pin 13)<br />
Auto-Feed [nAutoFd]<br />
(Pin 14)<br />
+5 V DC (pin 18)<br />
Prime [n<strong>In</strong>it] (Pin 31)<br />
Error* [nFault] (Pin 32)<br />
Auxiliary output 1 (Pin 33)<br />
Power Ready (Pin 35)<br />
Select <strong>In</strong> [NSelect<strong>In</strong>]<br />
(Pin 36)<br />
Meaning<br />
A negative-going Strobe* pulse causes the printer to read and latch<br />
the data on the Data 0 [1] to Data 7 [8] signal lines.<br />
These eight signals form the data byte sent from the host computer to<br />
the printer. Data 7 [8] is the most significant bit and Data 0 [1] is the<br />
least significant bit.<br />
This signal is returned to the host computer. This negative-going pulse<br />
acknowledges the previous character received by the printer.<br />
Acknowledge* pulses are sent only when Busy is low.<br />
This signal is returned to the host computer. This signal is high when<br />
the printer is busy and low when it is able to accept more data. Every<br />
high-to-low transition is followed by an Acknowledge* pulse.<br />
This signal is returned to the host computer. This signal goes high<br />
when the printer runs out of paper.<br />
This signal is returned to the host computer. This signal is high when<br />
the printer is on-line and low when the printer is off-line. It goes low<br />
when the upper unit is raised, or when the GO key is pressed to set the<br />
printer off-line.<br />
Note: The Paper Empty and On-Line signals are not used unless enabled<br />
by the FRPO command (O2 parameter).<br />
This signal is used in the Epson version of the Centronics interface to<br />
receive a carriage return. <strong>In</strong> high-speed mode, it is used as an interrupt.<br />
This line is connected to the printer’s +5 V DC line (+5 V ±0.5 V, 500<br />
mA maximum, fused).<br />
This signal is used in the standard Centronics interface to enable the<br />
computer to reset the printer. It is ignored by the printer.<br />
When the high-speed parallel line control is on (FRPO O2 = 2), this<br />
line returns error status to the host computer.<br />
This signal line is not used.<br />
This signal is high when the printer’s power is on.<br />
This signal is used in some versions of the Centronics interface to<br />
enable the computer to force the printer on-line. <strong>In</strong> high-speed mode,<br />
it is used as an interrupt.<br />
C-5<br />
FS-1900
USB interface<br />
This printer supports the USB (Universal Serial Bus) Revision 1.1 standards. USB interface<br />
specifications and interface signals are as follows:<br />
Item<br />
Basic specification<br />
Connectors<br />
Cable<br />
Transfer mode<br />
Power control<br />
Specifications<br />
Complies with the USB Revision 1.1 standards.<br />
Printer: B-type receptacle (female) with upstream port<br />
Cable: B-type plug (male)<br />
Use shielded cable that complies with the USB Revision 1.1 standards and<br />
not longer than 5 meters (16 feet).<br />
Full speed (max. 12 Mbps)<br />
Self-power device<br />
USB interface pin assignment<br />
2 1<br />
3 4<br />
Shell<br />
Pin No. Signal Description<br />
1 Vbus Power supply (+5 V)<br />
2 D- Data transmission<br />
3 D+ Data transmission<br />
4 GND Signal ground Shell Shield<br />
Shell: Shield<br />
FS-1900<br />
C-6
Serial interface (option)<br />
This printer is supported protocol of RS-232C serial interface, and printer is equipped a connector<br />
(YC5 A) on the main board for a serial interface. The printer is able to connect the computer<br />
through its RS-232C serial interface when optional serial interface board IB-10E B is installed.<br />
The serial interface board IB-10E has a 25-pin D-sub connector C. serial interface specifications<br />
and interface signals are as follows:<br />
A<br />
C<br />
B<br />
RS-232C interface voltage levels<br />
The voltage levels of the RS-232C signals conform to EIA RS-232C specifications. FALSE is from<br />
3 volts to 15 volts. TRUE is from -3 volts to -15 volts. Voltages between -3 volts and 3 volts are<br />
undefined.<br />
Connector configurations<br />
Signal<br />
FG (Pin 1)<br />
TxD (Pin 2)<br />
RxD (Pin 3)<br />
RTS (Pin 4)<br />
CTS (Pin 5)<br />
DSR (Pin 6)<br />
SG (Pin 7)<br />
DTR (Pin 20)<br />
Meaning<br />
This pin is connected directly to the printer frame.<br />
This output carries asynchronous data sent by the printer to the computer.<br />
It is used mainly in handshaking protocols.<br />
This input carries serial asynchronous data sent by the computer to the<br />
printer.<br />
This output is always held high (above 3 V).<br />
Unused.<br />
Unused.<br />
All signals can transmit between the printer and the host computer to send<br />
each signals with a signal ground.<br />
This output is used as a buffer nearly-full handshake line. It is held high<br />
(above 3 V) when the buffer can accept more data.<br />
C-7<br />
FS-1900
Protocol<br />
The serial interface supports the full baud rate of: 1200, 2400, 4800, 9600, and 19200, 38400,<br />
57600 and 115.2 k (bps). For adjusting serial interface parameters including baud rate, parity, etc.,<br />
refer to printer’s User’s Manual.<br />
RS-232C - For computers with a DB-9 connector<br />
Computer<br />
serial port (DB-9)<br />
Serial interface<br />
board IB-10E<br />
connector (DB-25)<br />
RXD<br />
TXD<br />
DTR<br />
GND<br />
DSR<br />
RTS<br />
CTS<br />
2<br />
3<br />
4<br />
5<br />
6<br />
7<br />
8<br />
2<br />
3<br />
4<br />
5<br />
6<br />
7<br />
)<br />
TXD<br />
RXD<br />
RTS<br />
CTS<br />
DSR<br />
SG<br />
DTR<br />
RS-232C - For computers with a DB-25 connector<br />
Computer<br />
serial port (DB-25)<br />
Serial interface<br />
board IB-10E<br />
connector (DB-25)<br />
GND<br />
TXD<br />
RXD<br />
RTS<br />
CTS<br />
DSR<br />
GND<br />
DTR<br />
1<br />
2<br />
3<br />
4<br />
5<br />
6<br />
7<br />
)<br />
1<br />
2<br />
3<br />
4<br />
5<br />
6<br />
7<br />
)<br />
FG<br />
TXD<br />
RXD<br />
RTS<br />
CTS<br />
DSR<br />
SG<br />
DTR<br />
FS-1900<br />
C-8
KYOCERA MITA EUROPE B.V.<br />
Hoeksteen 40, 2132 MS Hoofddorp,<br />
The Netherlands<br />
Phone: (020) 6540000<br />
Home page: http://www.<strong>kyocera</strong>mita-europe.com<br />
Email: info@<strong>kyocera</strong>mita-europe.com<br />
KYOCERA MITA NEDERLAND B.V.<br />
Hoeksteen 40, 2132 MS Hoofddorp,<br />
The Netherlands<br />
Phone: (020) 5877200<br />
KYOCERA MITA (UK) LIMITED<br />
8 Beacontree Plaza<br />
Gillette Way,<br />
Reading RG2 0BS UK<br />
Phone: (0118) 931 1500<br />
KYOCERA MITA ITALIA S.P.A.<br />
Via Verdi 89/91 20063 Cernusco sul Naviglio<br />
(Milano) Italy<br />
Phone: 02-92179 1<br />
S.A. KYOCERA MITA BELGIUM N.V.<br />
Hermesstraat 8A, 1930 Zaventem, Belgium<br />
Phone: (02) 7209270<br />
KYOCERA MITA FRANCE S.A.<br />
Parc les Algorithmes<br />
SAINT AUBIN<br />
91194 GIF-SUR-YVETTE<br />
France<br />
Phone: (01) 69852600<br />
KYOCERA MITA ESPAÑA S.A.<br />
Edificio Mita, Avda. De Manacor Nº2,<br />
Urb. Parque Rozas, Apartado de Correos 76,<br />
28230 Las Rozas, Madrid, Spain<br />
Phone: (91) 631-8392<br />
KYOCERA MITA FINLAND OY<br />
Kirvesmiehenkatu 4, 00810 Helsinki,<br />
Finland<br />
Phone: (09) 478-05200<br />
KYOCERA MITA (SCHWEIZ) AG<br />
Hölzliwisen, <strong>In</strong>dustriestrasse 28,<br />
8604 Volketswil, Switzerland<br />
Phone: (01) 908 4949<br />
KYOCERA MITA DEUTSCHLAND GMBH<br />
Mollsfeld 12 40670 Meerbusch,<br />
Germany<br />
Phone: 02159-918120<br />
KYOCERA MITA GMBH AUSTRIA<br />
Eduard-Kittenberger-Gasse 95,<br />
1230, Wien, Austria<br />
Phone: (01) 86338-0<br />
KYOCERA MITA SVENSKA AB<br />
Siktgatan 2,<br />
162 50 Vällingby, Sweden<br />
Phone: (08) 4719999<br />
KYOCERA MITA DANMARK A/S<br />
<strong>In</strong>dustrivej 11, DK-4632 Bjæverskov,<br />
Denmark<br />
Phone: 56871100<br />
KYOCERA MITA PORTUGAL LDA.<br />
CASCAISTOCK-Armazem nº8,<br />
Rua das Fisgas, Alcoitão,<br />
2765 Estoril, Portugal<br />
Phone: (21) 4602221<br />
KYOCERA MITA SOUTH AFRICA<br />
(PTY) LTD.<br />
UNIT 3, "Kyalami Crescent,"<br />
Kyalami Business Park,<br />
1685 Midrand, South Africa<br />
Phone: (11) 466-3290<br />
KYOCERA MITA<br />
AMERICA, INC.<br />
Headquarters:<br />
225 Sand Road, P.O. Box 40008,<br />
Fairfield, New Jersey 07004-0008,<br />
U.S.A.<br />
Phone: (973) 808-8444<br />
KYOCERA MITA AUSTRALIA PTY.<br />
LTD.<br />
Level 3, 6-10 Talavera Road, North Ryde,<br />
N.S.W. 2113 Australia<br />
Phone: (02) 9888-9999<br />
KYOCERA MITA NEW ZEALAND LTD.<br />
1-3 Parkhead Place,<br />
Albany, Auckland,<br />
New Zealand<br />
Phone: (09) 415-4517<br />
KYOCERA MITA (THAILAND) CORP.,<br />
LTD.<br />
9/209 Ratchada-Prachachem Road,<br />
Bang Sue, Bangkok 10800, Thailand<br />
Phone: (02) 586-0320<br />
KYOCERA MITA SINGAPORE<br />
PTE LTD.<br />
121 Genting Lane, 3rd Level,<br />
Singapore 349572<br />
Phone: (65) 7418733<br />
KYOCERA MITA HONG KONG<br />
LIMITED<br />
11/F., Mita Centre,<br />
552-566, Castle Peak Road,<br />
Tsuen Wan, New Territories,<br />
Hong Kong<br />
Phone: (852) 24297422<br />
KYOCERA MITA<br />
CORPORATION<br />
2-28, 1-chome, Tamatsukuri, Chuo-ku<br />
Osaka 540-8585, Japan<br />
Phone: (06) 6764-3555
KYOCERA MITA AMERICA, INC.<br />
Headquarters:<br />
225 Sand Road, P.O. Box 40008<br />
Fairfield, New Jersey 07004-0008<br />
TEL : (973) 808-8444<br />
FAX : (973) 882-6000<br />
New York Show Room:<br />
149 West 51st street,<br />
New York, NY 10019<br />
TEL : (212) 554-2679<br />
FAX : (212) 554-2625<br />
Northeastern Region:<br />
225 Sand Road, P.O. Box 40008<br />
Fairfield, New Jersey 07004-0008<br />
TEL : (973) 808-8444<br />
FAX : (973) 882-4401<br />
Midwestern Region:<br />
201 Hansen Court Suite 119<br />
Wood Dale, Illinois 60179<br />
TEL : (630) 238-9982<br />
FAX : (630) 238-9487<br />
Western Region:<br />
14101 Alton Parkway,<br />
Irvine, California 92618-7006<br />
TEL : (949) 457-9000<br />
FAX : (949) 457-9119<br />
Southeastern Region:<br />
1500 Oakbrook Drive,<br />
Norcross, Georgia 30093<br />
TEL : (770) 729-9786<br />
FAX : (770) 729-9873<br />
Southwestern Region:<br />
2825 West Story Road,<br />
Irving, Texas 75038-5299<br />
TEL : (972) 550-8987<br />
FAX : (972) 570-4704<br />
Dallas Parts Distribution Center<br />
& National Training Center:<br />
2825 West Story Road,<br />
Irving, Texas 75038-5299<br />
TEL : (972) 659-0055<br />
FAX : (972) 570-5816<br />
KYOCERA MITA CANADA, LTD.<br />
6120 Kestrel Road, Mississauga,<br />
Ontario L5T 1S8, Canada<br />
TEL : (905) 670-4425<br />
FAX : (905) 670-8116<br />
KYOCERA MITA MEXICO, S.A. DE C.V.<br />
Av. 16 de Septiembre #407<br />
Col. Santa <strong>In</strong>és,<br />
02130 Azcapotzalco<br />
México, D.F. Mexico<br />
TEL : (5) 383-2741<br />
FAX : (5) 383-7804<br />
©2001 KYOCERA MITA CORPORATION<br />
is a trademark of Kyocera Corporation<br />
is a registered trademark of KYOCERA MITA CORPORATION