Converting from OfficeMate to the AcuityLogic Scheduler
Converting from OfficeMate to the AcuityLogic Scheduler
Converting from OfficeMate to the AcuityLogic Scheduler

You also want an ePaper? Increase the reach of your titles
YUMPU automatically turns print PDFs into web optimized ePapers that Google loves.
<strong>Converting</strong> <strong>from</strong> <strong>OfficeMate</strong> <strong>to</strong> <strong>the</strong><br />
<strong>AcuityLogic</strong> <strong>Scheduler</strong><br />
In this document:<br />
• Pre-Conversion Checklist, 1<br />
• <strong>AcuityLogic</strong> Admin: Converted <strong>Scheduler</strong> Settings, 2<br />
• <strong>AcuityLogic</strong> POS and <strong>AcuityLogic</strong> BackOffice: Converted Appointments, 6<br />
This document explains how your appointments, resource schedules, and o<strong>the</strong>r<br />
<strong>OfficeMate</strong> <strong>Scheduler</strong> settings are converted <strong>from</strong> <strong>OfficeMate</strong> <strong>to</strong> <strong>AcuityLogic</strong><br />
Q4.2012.0. Read this document before you convert <strong>to</strong> <strong>AcuityLogic</strong> Q4.2012.0 so<br />
that you are prepared <strong>to</strong> use <strong>the</strong> <strong>AcuityLogic</strong> <strong>Scheduler</strong>.<br />
All of your appointments and most of your <strong>Scheduler</strong> settings convert <strong>from</strong><br />
<strong>OfficeMate</strong> <strong>to</strong> <strong>AcuityLogic</strong>. Due <strong>to</strong> some differences between <strong>OfficeMate</strong> and<br />
<strong>AcuityLogic</strong>, you will need <strong>to</strong> perform some setup tasks before and after your<br />
conversion. All tasks that require your attention are called out in checklists.<br />
NOTE<br />
This document was last updated on December 13, 2012 and is<br />
applicable <strong>to</strong> Q4.2012.0. This document is subject <strong>to</strong> change at any<br />
time without notice.<br />
Pre-Conversion<br />
Checklist<br />
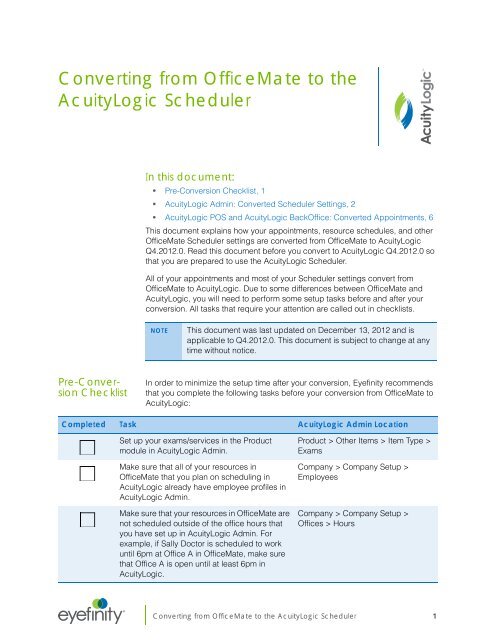
In order <strong>to</strong> minimize <strong>the</strong> setup time after your conversion, Eyefinity recommends<br />
that you complete <strong>the</strong> following tasks before your conversion <strong>from</strong> <strong>OfficeMate</strong> <strong>to</strong><br />
<strong>AcuityLogic</strong>:<br />
Completed Task <strong>AcuityLogic</strong> Admin Location<br />
Set up your exams/services in <strong>the</strong> Product<br />
module in <strong>AcuityLogic</strong> Admin.<br />
Make sure that all of your resources in<br />
<strong>OfficeMate</strong> that you plan on scheduling in<br />
<strong>AcuityLogic</strong> already have employee profiles in<br />
<strong>AcuityLogic</strong> Admin.<br />
Make sure that your resources in <strong>OfficeMate</strong> are<br />
not scheduled outside of <strong>the</strong> office hours that<br />
you have set up in <strong>AcuityLogic</strong> Admin. For<br />
example, if Sally Doc<strong>to</strong>r is scheduled <strong>to</strong> work<br />
until 6pm at Office A in <strong>OfficeMate</strong>, make sure<br />
that Office A is open until at least 6pm in<br />
<strong>AcuityLogic</strong>.<br />
Product > O<strong>the</strong>r Items > Item Type ><br />
Exams<br />
Company > Company Setup ><br />
Employees<br />
Company > Company Setup ><br />
Offices > Hours<br />
®<br />
<strong>Converting</strong> <strong>from</strong> <strong>OfficeMate</strong> <strong>to</strong> <strong>the</strong> <strong>AcuityLogic</strong> <strong>Scheduler</strong> 1
<strong>Converting</strong> <strong>from</strong> <strong>OfficeMate</strong> <strong>to</strong> <strong>the</strong> <strong>AcuityLogic</strong> <strong>Scheduler</strong><br />
<strong>AcuityLogic</strong> Admin: Converted <strong>Scheduler</strong> Settings<br />
<strong>AcuityLogic</strong><br />
Admin:<br />
Converted<br />
<strong>Scheduler</strong><br />
Settings<br />
For detailed<br />
instructions on<br />
setting up <strong>the</strong><br />
<strong>Scheduler</strong> in<br />
<strong>AcuityLogic</strong> Admin<br />
On-Premises, see <strong>the</strong><br />
Setting Up Your<br />
Company in<br />
<strong>AcuityLogic</strong> Admin<br />
On-Premises<br />
document at<br />
www.officemate.ne<br />
t/pdfs/<strong>AcuityLogic</strong>/<br />
Company<br />
Setup.pdf.<br />
In <strong>AcuityLogic</strong>, setting up <strong>the</strong> <strong>Scheduler</strong> is performed in <strong>AcuityLogic</strong> Admin, so<br />
you can find all of your <strong>Scheduler</strong> settings and preferences in <strong>AcuityLogic</strong> Admin<br />
after your conversion.<br />
Resource schedules and service templates can be set up in both <strong>AcuityLogic</strong><br />
Admin and <strong>AcuityLogic</strong> POS.<br />
This section explains how <strong>Scheduler</strong> setup areas are converted <strong>from</strong> <strong>OfficeMate</strong><br />
<strong>to</strong> <strong>AcuityLogic</strong> Admin, and tells you what tasks you should perform after your<br />
conversion.<br />
Topics include:<br />
• Services and <strong>Scheduler</strong> Services, 2<br />
• Resource Setup and Schedules, 3<br />
• Service Templates, 3<br />
• Preferences, 3<br />
• Service Reminders, 4<br />
• Insurance Reminders, 4<br />
• Appointment Icons, 4<br />
• Post-Conversion Checklist: <strong>AcuityLogic</strong> Admin, 4<br />
Services and <strong>Scheduler</strong> Services<br />
Services/exams are not converted <strong>from</strong> <strong>OfficeMate</strong> <strong>to</strong> <strong>AcuityLogic</strong>. Eyefinity<br />
recommends that you set up services in <strong>AcuityLogic</strong> Admin before your<br />
conversion.<br />
Since services do not convert <strong>from</strong> <strong>OfficeMate</strong> <strong>to</strong> <strong>AcuityLogic</strong>, your <strong>Scheduler</strong><br />
service settings (<strong>the</strong> services that are available in <strong>the</strong> <strong>Scheduler</strong> and <strong>the</strong> colors<br />
associate with <strong>the</strong>se services) do not convert <strong>to</strong> <strong>AcuityLogic</strong> ei<strong>the</strong>r.<br />
After your conversion, mark whe<strong>the</strong>r or not services can be scheduled in <strong>the</strong><br />
<strong>Scheduler</strong>, and assign colors <strong>to</strong> those services.<br />
2 <strong>Converting</strong> <strong>from</strong> <strong>OfficeMate</strong> <strong>to</strong> <strong>the</strong> <strong>AcuityLogic</strong> <strong>Scheduler</strong>
<strong>Converting</strong> <strong>from</strong> <strong>OfficeMate</strong> <strong>to</strong> <strong>the</strong> <strong>AcuityLogic</strong> <strong>Scheduler</strong><br />
<strong>AcuityLogic</strong> Admin: Converted <strong>Scheduler</strong> Settings<br />
Resource Setup and Schedules<br />
Most of your resources in <strong>OfficeMate</strong> convert <strong>to</strong> <strong>AcuityLogic</strong>. This list describes<br />
how your resources are converted:<br />
• Each resource’s <strong>Scheduler</strong> settings (Allow Overbooks, Max Overbooks,<br />
Exam Minutes) <strong>from</strong> <strong>OfficeMate</strong> will be added <strong>to</strong> his or her employee profile<br />
in <strong>AcuityLogic</strong> Admin.<br />
• If a resource has any appointments assigned <strong>to</strong> him or her in <strong>OfficeMate</strong>, <strong>the</strong><br />
resource will have <strong>the</strong> Allow <strong>to</strong> be scheduled/Allow Schedule check boxes<br />
selected in <strong>AcuityLogic</strong> Admin.<br />
• Each resource that is set up as an O<strong>the</strong>r Resource in <strong>OfficeMate</strong> will have<br />
<strong>the</strong> Non-person resource check box selected in his or her employee profile<br />
in <strong>AcuityLogic</strong> Admin.<br />
• All resources that have schedules and appointments in <strong>OfficeMate</strong> will have<br />
<strong>the</strong> same schedules in <strong>AcuityLogic</strong> Admin.<br />
• If a resource in <strong>OfficeMate</strong> has a schedule at an office, but does not have<br />
any appointments assigned <strong>to</strong> him or her at that office, <strong>the</strong> resource will not<br />
be assigned <strong>to</strong> that office in <strong>AcuityLogic</strong>, and <strong>the</strong>refore will not have a<br />
schedule for that location.<br />
• In <strong>AcuityLogic</strong>, each resource can be assigned <strong>to</strong> multiple locations, but you<br />
cannot schedule a resource for <strong>the</strong> same time slot at multiple locations. Any<br />
resource that is scheduled at different locations during <strong>the</strong> same time slots<br />
in <strong>OfficeMate</strong> will have his or her schedule after <strong>the</strong> conversion. However, if<br />
you delete one of his or her scheduled time slots at one location, you will not<br />
be able <strong>to</strong> re-create that available time slot while he or she is still scheduled<br />
at ano<strong>the</strong>r location.<br />
Service Templates<br />
Service templates for providers and staff resources convert <strong>from</strong> <strong>OfficeMate</strong> <strong>to</strong><br />
<strong>AcuityLogic</strong>. However, since services do not convert <strong>from</strong> <strong>OfficeMate</strong> <strong>to</strong><br />
<strong>AcuityLogic</strong>, none of your service templates will have service groups. Until you<br />
assign services <strong>to</strong> <strong>the</strong> templates, all converted templates are read-only in <strong>the</strong><br />
<strong>Scheduler</strong>.<br />
Service templates for resources that are marked as O<strong>the</strong>r Resources in<br />
<strong>OfficeMate</strong> do not convert <strong>to</strong> <strong>AcuityLogic</strong>.<br />
Preferences<br />
Most of your <strong>OfficeMate</strong> <strong>Scheduler</strong> preferences convert <strong>to</strong> <strong>AcuityLogic</strong>. However,<br />
due <strong>to</strong> differences between <strong>the</strong> two systems, not all <strong>OfficeMate</strong> preferences exist<br />
in <strong>AcuityLogic</strong>.<br />
<strong>Converting</strong> <strong>from</strong> <strong>OfficeMate</strong> <strong>to</strong> <strong>the</strong> <strong>AcuityLogic</strong> <strong>Scheduler</strong> 3
<strong>Converting</strong> <strong>from</strong> <strong>OfficeMate</strong> <strong>to</strong> <strong>the</strong> <strong>AcuityLogic</strong> <strong>Scheduler</strong><br />
<strong>AcuityLogic</strong> Admin: Converted <strong>Scheduler</strong> Settings<br />
This list explains how your <strong>OfficeMate</strong> preferences are converted:<br />
• Phone Number: This preference does not exist in <strong>AcuityLogic</strong>; each patient<br />
is required <strong>to</strong> have a phone number in <strong>AcuityLogic</strong>.<br />
• Insurance: This preference converts.<br />
• Patient for Appointment: This preference converts.<br />
• Appointment Type: This preference does not exist in <strong>OfficeMate</strong>; defaults<br />
<strong>to</strong> “Warn if missing.”<br />
• <strong>Scheduler</strong> Colors: This preference does not convert; colors are set <strong>to</strong> <strong>the</strong><br />
default <strong>AcuityLogic</strong> system colors.<br />
• Overrides: This preference converts.<br />
• Default <strong>Scheduler</strong> View: This preference does not convert, since<br />
<strong>AcuityLogic</strong> has different view options; defaults <strong>to</strong> “Calendar View.”<br />
• Past Date Appointments: This preference does not exist in <strong>OfficeMate</strong>;<br />
defaults <strong>to</strong> “Warn if missing.”<br />
Service Reminders<br />
Service reminders that are assigned <strong>to</strong> All Resources are not converted. All o<strong>the</strong>r<br />
service reminders are converted, but since services are not converted, services<br />
are not assigned <strong>to</strong> any of <strong>the</strong> service reminders.<br />
Insurance Reminders<br />
Insurance reminders do not convert <strong>from</strong> <strong>OfficeMate</strong> <strong>to</strong> <strong>AcuityLogic</strong>.<br />
Appointment Icons<br />
<strong>AcuityLogic</strong> does not use appointment icons, so your appointment icons in<br />
<strong>OfficeMate</strong> do not convert <strong>to</strong> <strong>AcuityLogic</strong>.<br />
Post-Conversion Checklist: <strong>AcuityLogic</strong> Admin<br />
The table below lists <strong>the</strong> tasks that you should perform after you convert <strong>to</strong><br />
<strong>AcuityLogic</strong> Q4.2012.0. Depending on your settings and resource schedules in<br />
<strong>OfficeMate</strong>, some tasks may not apply <strong>to</strong> you. For example, if you do not use<br />
service templates in <strong>OfficeMate</strong>, you do not have <strong>to</strong> perform any tasks related <strong>to</strong><br />
setting up service templates in <strong>AcuityLogic</strong>.<br />
Completed Task <strong>AcuityLogic</strong> Admin Location<br />
For each location, mark which services are<br />
available <strong>to</strong> be scheduled, and assign colors <strong>to</strong><br />
those services.<br />
Review <strong>the</strong> employee profiles of your resources<br />
in <strong>AcuityLogic</strong> Admin.<br />
Company > Company Setup ><br />
Offices > Setup<br />
Company > Company Setup ><br />
Employees > Last Name hyperlink<br />
4 <strong>Converting</strong> <strong>from</strong> <strong>OfficeMate</strong> <strong>to</strong> <strong>the</strong> <strong>AcuityLogic</strong> <strong>Scheduler</strong>
<strong>Converting</strong> <strong>from</strong> <strong>OfficeMate</strong> <strong>to</strong> <strong>the</strong> <strong>AcuityLogic</strong> <strong>Scheduler</strong><br />
<strong>AcuityLogic</strong> Admin: Converted <strong>Scheduler</strong> Settings<br />
Completed Task <strong>AcuityLogic</strong> Admin Location<br />
Review <strong>the</strong> resource schedules in <strong>AcuityLogic</strong><br />
Admin.<br />
If you have a resource who has a schedule for<br />
an office in <strong>OfficeMate</strong> but does not have any<br />
appointments at that location, assign that<br />
resource <strong>to</strong> <strong>the</strong> office and set up his or her<br />
schedule, since this resource’s schedule does<br />
not convert <strong>from</strong> <strong>OfficeMate</strong> <strong>to</strong> <strong>AcuityLogic</strong>.<br />
Review <strong>the</strong> service templates for your resources<br />
in <strong>AcuityLogic</strong> Admin.<br />
Set up <strong>the</strong> service groups for each service<br />
template in <strong>AcuityLogic</strong> Admin.<br />
Set up service templates in <strong>AcuityLogic</strong> Admin<br />
for each resource that is marked as an O<strong>the</strong>r<br />
Resource and has service templates in<br />
<strong>OfficeMate</strong>, as <strong>the</strong>ir service templates are not<br />
converted.<br />
For each location, review <strong>Scheduler</strong><br />
preferences.<br />
For each location, review your service<br />
reminders.<br />
For each location, assign a service <strong>to</strong> each<br />
service reminder.<br />
If you have service reminders that are assigned<br />
<strong>to</strong> All Resource in <strong>OfficeMate</strong>, set up those<br />
service reminders in <strong>AcuityLogic</strong>, since <strong>the</strong>y are<br />
not converted<br />
Set up insurance reminders in <strong>AcuityLogic</strong><br />
Admin.<br />
Company > Company Setup ><br />
Employees > Hours > Resource<br />
Hours Setup tab.<br />
• To assign employees <strong>to</strong> offices:<br />
Company > Company Setup ><br />
Offices > Employees<br />
• To set up schedules: Company ><br />
Company Setup > Employees ><br />
Hours > Resource Hours Setup tab<br />
Company > Company Setup ><br />
Employees > Hours > Service<br />
Template Setup tab<br />
Company > Company Setup ><br />
Employees > Hours > Service<br />
Template Setup tab<br />
Company > Company Setup ><br />
Employees > Hours > Service<br />
Template Setup tab<br />
Company > Company Setup ><br />
Offices > Preferences hyperlink<br />
Company > Company Setup ><br />
Offices > Reminders > Service<br />
Reminders tab<br />
Company > Company Setup ><br />
Offices > Reminders > Service<br />
Reminders tab<br />
Company > Company Setup ><br />
Offices > Reminders > Service<br />
Reminders tab<br />
Company > Company Setup ><br />
Offices > Reminders > Insurance<br />
Reminders tab<br />
<strong>Converting</strong> <strong>from</strong> <strong>OfficeMate</strong> <strong>to</strong> <strong>the</strong> <strong>AcuityLogic</strong> <strong>Scheduler</strong> 5
<strong>Converting</strong> <strong>from</strong> <strong>OfficeMate</strong> <strong>to</strong> <strong>the</strong> <strong>AcuityLogic</strong> <strong>Scheduler</strong><br />
<strong>AcuityLogic</strong> POS and <strong>AcuityLogic</strong> BackOffice: Converted Appointments<br />
<strong>AcuityLogic</strong><br />
POS and<br />
<strong>AcuityLogic</strong><br />
BackOffice:<br />
Converted<br />
Appointments<br />
For more information<br />
on using <strong>the</strong><br />
<strong>Scheduler</strong>, see <strong>the</strong><br />
Scheduling<br />
Appointments in<br />
<strong>AcuityLogic</strong> POS<br />
document at<br />
www.officemate.ne<br />
t/pdfs/<strong>AcuityLogic</strong>/<br />
Appointments.pdf,<br />
or <strong>the</strong> Scheduling<br />
Appointments in<br />
<strong>AcuityLogic</strong><br />
BackOffice<br />
document at<br />
www.officemate.ne<br />
t/pdfs/<strong>AcuityLogic</strong>/<br />
Appointments_Back<br />
Office.pdf.<br />
This section explains how appointments and appointment details are converted<br />
in<strong>to</strong> <strong>AcuityLogic</strong> POS and <strong>AcuityLogic</strong> BackOffice, and tells you what tasks you<br />
should perform after your conversion.<br />
Resource schedules and service templates can be set up in both <strong>AcuityLogic</strong><br />
Admin and <strong>AcuityLogic</strong> POS; for more information on how schedules and service<br />
templates are converted, go <strong>to</strong> “<strong>AcuityLogic</strong> Admin: Converted <strong>Scheduler</strong><br />
Settings” on page 2.<br />
Topics include:<br />
• Appointments and Appointment Details, 6<br />
• Post-Conversion Checklist: <strong>AcuityLogic</strong> POS and <strong>AcuityLogic</strong> BackOffice, 7<br />
Appointments and Appointment Details<br />
All of your appointments, recurring appointments, non-patient appointments,<br />
recurring non-patient appointments, exceptions, and recurring exceptions<br />
convert <strong>from</strong> <strong>OfficeMate</strong> <strong>to</strong> <strong>AcuityLogic</strong>. You will be able <strong>to</strong> view and modify <strong>the</strong>se<br />
appointments and exceptions in <strong>the</strong> <strong>Scheduler</strong>.<br />
This list explains how your <strong>OfficeMate</strong> appointments are converted:<br />
• <strong>AcuityLogic</strong> does not use appointment icons, so any appointment icons you<br />
used in <strong>OfficeMate</strong> will not display in <strong>AcuityLogic</strong>.<br />
• When viewing an appointment in <strong>the</strong> Calendar View and <strong>the</strong> Book View, <strong>the</strong><br />
name of <strong>the</strong> service displays with <strong>the</strong> appointment. However, for converted<br />
appointments, <strong>the</strong> service name is read-only information, since services are<br />
not converted <strong>from</strong> <strong>OfficeMate</strong> <strong>to</strong> <strong>AcuityLogic</strong>. After your conversion, and<br />
after your administra<strong>to</strong>r adds services <strong>to</strong> <strong>AcuityLogic</strong>, you can select a new<br />
service for each appointment.<br />
• By default, all appointments display as white until services are assigned <strong>to</strong><br />
<strong>the</strong>m in <strong>the</strong> <strong>AcuityLogic</strong> <strong>Scheduler</strong>. Non-patient appointments will always<br />
display as white.<br />
• If an insurance carrier was assigned <strong>to</strong> a patient’s appointment in<br />
<strong>AcuityLogic</strong>, <strong>the</strong> name of <strong>the</strong> insurance carrier is included in an appointment<br />
note. Since insurance and eligibility information does not convert <strong>from</strong><br />
<strong>OfficeMate</strong> <strong>to</strong> <strong>AcuityLogic</strong>, this is <strong>the</strong> only place that you will see a patient’s<br />
insurance. After your conversion, and after your administra<strong>to</strong>r sets up<br />
insurance information in <strong>AcuityLogic</strong>, you can record insurance and<br />
eligibility information for each appointment.<br />
• Until your administra<strong>to</strong>r assigns services <strong>to</strong> converted service templates, all<br />
converted templates are read-only in <strong>the</strong> <strong>Scheduler</strong>. The Lock icon will not<br />
display on converted appointments, regardless of whe<strong>the</strong>r <strong>the</strong> service<br />
template was restricted or unrestricted. The Lock icon and any service<br />
template restrictions will only apply when scheduling new appointments.<br />
• All exceptions <strong>from</strong> <strong>OfficeMate</strong> display in <strong>AcuityLogic</strong> <strong>Scheduler</strong>, but <strong>the</strong><br />
employee who created each exception does not display. In <strong>the</strong> Book View of<br />
<strong>the</strong> <strong>AcuityLogic</strong> <strong>Scheduler</strong>, you will see “Exception by: Not available.”<br />
6 <strong>Converting</strong> <strong>from</strong> <strong>OfficeMate</strong> <strong>to</strong> <strong>the</strong> <strong>AcuityLogic</strong> <strong>Scheduler</strong>
<strong>Converting</strong> <strong>from</strong> <strong>OfficeMate</strong> <strong>to</strong> <strong>the</strong> <strong>AcuityLogic</strong> <strong>Scheduler</strong><br />
<strong>AcuityLogic</strong> POS and <strong>AcuityLogic</strong> BackOffice: Converted Appointments<br />
Post-Conversion Checklist: <strong>AcuityLogic</strong> POS and <strong>AcuityLogic</strong><br />
BackOffice<br />
The table below lists <strong>the</strong> tasks that you should perform after your convert <strong>to</strong><br />
<strong>AcuityLogic</strong> Q4.2012.0. However, all tasks are optional, and depend on how<br />
detailed you want your converted appointments <strong>to</strong> be. For example, if leaving <strong>the</strong><br />
patient’s insurance carrier name in <strong>the</strong> Notes section is sufficient for your<br />
practice’s needs, you do not need <strong>to</strong> record additional insurance and eligibility<br />
information for <strong>the</strong> converted appointments.<br />
Completed Task <strong>AcuityLogic</strong> POS Location<br />
Add a service <strong>to</strong> each converted appointment, if<br />
needed.<br />
Add insurance and eligibility information <strong>to</strong> each<br />
converted appointment, if needed.<br />
Calendar View > Double-click<br />
appointment > Select <strong>from</strong> Service<br />
Type drop-down menu<br />
Calendar View > Double-click<br />
appointment > Click Insurance and<br />
Eligibility icons <strong>to</strong> add<br />
insurance/eligibility information<br />
<strong>Converting</strong> <strong>from</strong> <strong>OfficeMate</strong> <strong>to</strong> <strong>the</strong> <strong>AcuityLogic</strong> <strong>Scheduler</strong> 7