Setting Up and Using the DVI Lab Interface
Setting Up and Using the DVI Lab Interface
Setting Up and Using the DVI Lab Interface

Create successful ePaper yourself
Turn your PDF publications into a flip-book with our unique Google optimized e-Paper software.
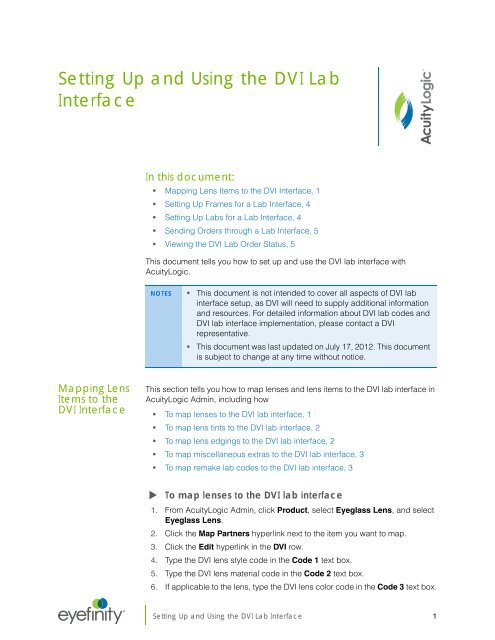
<strong>Setting</strong> <strong>Up</strong> <strong>and</strong> <strong>Using</strong> <strong>the</strong> <strong>DVI</strong> <strong>Lab</strong><br />
<strong>Interface</strong><br />
In this document:<br />
• Mapping Lens Items to <strong>the</strong> <strong>DVI</strong> <strong>Interface</strong>, 1<br />
• <strong>Setting</strong> <strong>Up</strong> Frames for a <strong>Lab</strong> <strong>Interface</strong>, 4<br />
• <strong>Setting</strong> <strong>Up</strong> <strong>Lab</strong>s for a <strong>Lab</strong> <strong>Interface</strong>, 4<br />
• Sending Orders through a <strong>Lab</strong> <strong>Interface</strong>, 5<br />
• Viewing <strong>the</strong> <strong>DVI</strong> <strong>Lab</strong> Order Status, 5<br />
This document tells you how to set up <strong>and</strong> use <strong>the</strong> <strong>DVI</strong> lab interface with<br />
AcuityLogic.<br />
NOTES • This document is not intended to cover all aspects of <strong>DVI</strong> lab<br />
interface setup, as <strong>DVI</strong> will need to supply additional information<br />
<strong>and</strong> resources. For detailed information about <strong>DVI</strong> lab codes <strong>and</strong><br />
<strong>DVI</strong> lab interface implementation, please contact a <strong>DVI</strong><br />
representative.<br />
• This document was last updated on July 17, 2012. This document<br />
is subject to change at any time without notice.<br />
Mapping Lens<br />
Items to <strong>the</strong><br />
<strong>DVI</strong> <strong>Interface</strong><br />
This section tells you how to map lenses <strong>and</strong> lens items to <strong>the</strong> <strong>DVI</strong> lab interface in<br />
AcuityLogic Admin, including how<br />
• To map lenses to <strong>the</strong> <strong>DVI</strong> lab interface, 1<br />
• To map lens tints to <strong>the</strong> <strong>DVI</strong> lab interface, 2<br />
• To map lens edgings to <strong>the</strong> <strong>DVI</strong> lab interface, 2<br />
• To map miscellaneous extras to <strong>the</strong> <strong>DVI</strong> lab interface, 3<br />
• To map remake lab codes to <strong>the</strong> <strong>DVI</strong> lab interface, 3<br />
<br />
To map lenses to <strong>the</strong> <strong>DVI</strong> lab interface<br />
1. From AcuityLogic Admin, click Product, select Eyeglass Lens, <strong>and</strong> select<br />
Eyeglass Lens.<br />
2. Click <strong>the</strong> Map Partners hyperlink next to <strong>the</strong> item you want to map.<br />
3. Click <strong>the</strong> Edit hyperlink in <strong>the</strong> <strong>DVI</strong> row.<br />
4. Type <strong>the</strong> <strong>DVI</strong> lens style code in <strong>the</strong> Code 1 text box.<br />
5. Type <strong>the</strong> <strong>DVI</strong> lens material code in <strong>the</strong> Code 2 text box.<br />
6. If applicable to <strong>the</strong> lens, type <strong>the</strong> <strong>DVI</strong> lens color code in <strong>the</strong> Code 3 text box.<br />
®<br />
<strong>Setting</strong> <strong>Up</strong> <strong>and</strong> <strong>Using</strong> <strong>the</strong> <strong>DVI</strong> <strong>Lab</strong> <strong>Interface</strong> 1
<strong>Setting</strong> <strong>Up</strong> <strong>and</strong> <strong>Using</strong> <strong>the</strong> <strong>DVI</strong> <strong>Lab</strong> <strong>Interface</strong><br />
Mapping Lens Items to <strong>the</strong> <strong>DVI</strong> <strong>Interface</strong><br />
7. If applicable to <strong>the</strong> lens, type <strong>the</strong> <strong>DVI</strong> lens coating code in <strong>the</strong> Code 4 text<br />
box.<br />
8. Click <strong>Up</strong>date.<br />
<br />
To map lens tints to <strong>the</strong> <strong>DVI</strong> lab interface<br />
1. From AcuityLogic Admin, click Product, select Eyeglass Lens, <strong>and</strong> select<br />
Tint.<br />
2. Click <strong>the</strong> Map Partners hyperlink next to <strong>the</strong> item you want to map.<br />
3. Click <strong>the</strong> Edit hyperlink in <strong>the</strong> <strong>DVI</strong> row.<br />
4. Type <strong>the</strong> <strong>DVI</strong> tint code in <strong>the</strong> Code 1 text box.<br />
5. Type <strong>the</strong> <strong>DVI</strong> tint color or instruction code in <strong>the</strong> Code 2 text box.<br />
<br />
To map lens edgings to <strong>the</strong> <strong>DVI</strong> lab interface<br />
1. From AcuityLogic Admin, click Product, select Eyeglass Lens, <strong>and</strong> select<br />
Edging.<br />
2. Click <strong>the</strong> Map Partners hyperlink next to <strong>the</strong> item you want to map.<br />
3. Click <strong>the</strong> Edit hyperlink in <strong>the</strong> <strong>DVI</strong> row.<br />
4. Type <strong>the</strong> <strong>DVI</strong> edging code in <strong>the</strong> Code 1 text box.<br />
2 <strong>Setting</strong> <strong>Up</strong> <strong>and</strong> <strong>Using</strong> <strong>the</strong> <strong>DVI</strong> <strong>Lab</strong> <strong>Interface</strong>
<strong>Setting</strong> <strong>Up</strong> <strong>and</strong> <strong>Using</strong> <strong>the</strong> <strong>DVI</strong> <strong>Lab</strong> <strong>Interface</strong><br />
Mapping Lens Items to <strong>the</strong> <strong>DVI</strong> <strong>Interface</strong><br />
5. Click <strong>Up</strong>date.<br />
<br />
To map miscellaneous extras to <strong>the</strong> <strong>DVI</strong> lab interface<br />
1. From AcuityLogic Admin, click Product, <strong>and</strong> select O<strong>the</strong>r Items.<br />
2. Select Misc. Extras from <strong>the</strong> Item Type drop-down menu.<br />
3. To filter <strong>the</strong> displayed items, select an item name from <strong>the</strong> Item Name<br />
drop-down menu.<br />
4. Click <strong>the</strong> Map Partners hyperlink next to <strong>the</strong> item you want to map.<br />
5. Click <strong>the</strong> Edit hyperlink in <strong>the</strong> <strong>DVI</strong> row.<br />
6. Type <strong>the</strong> <strong>DVI</strong> miscellaneous extra code in <strong>the</strong> Code 1 text box.<br />
7. Click <strong>Up</strong>date.<br />
<br />
To map remake lab codes to <strong>the</strong> <strong>DVI</strong> lab interface<br />
1. From AcuityLogic Admin, click Company, <strong>and</strong> select Types/Reference.<br />
2. Click Remake.<br />
3. Click <strong>the</strong> Edit hyperlink next to <strong>the</strong> remake type to which you want to add a<br />
lab code.<br />
4. Type <strong>the</strong> <strong>DVI</strong> remake lab code in <strong>the</strong> <strong>Lab</strong> Code 1 text box.<br />
<strong>Setting</strong> <strong>Up</strong> <strong>and</strong> <strong>Using</strong> <strong>the</strong> <strong>DVI</strong> <strong>Lab</strong> <strong>Interface</strong> 3
<strong>Setting</strong> <strong>Up</strong> <strong>and</strong> <strong>Using</strong> <strong>the</strong> <strong>DVI</strong> <strong>Lab</strong> <strong>Interface</strong><br />
<strong>Setting</strong> <strong>Up</strong> Frames for a <strong>Lab</strong> <strong>Interface</strong><br />
5. Click <strong>Up</strong>date.<br />
<strong>Setting</strong> <strong>Up</strong><br />
Frames for a<br />
<strong>Lab</strong> <strong>Interface</strong><br />
You do not need to perform any mapping in order to send frame information<br />
through a lab interface. Set up frame information as you would o<strong>the</strong>rwise. Record<br />
information for all frame details (for example, UPC code, edge type, frame shape)<br />
that you want to send to a lab. You must record <strong>the</strong> frame UPC code for all frames<br />
that <strong>the</strong> lab is expected to provide.<br />
<strong>Setting</strong> <strong>Up</strong><br />
<strong>Lab</strong>s for a <strong>Lab</strong><br />
<strong>Interface</strong><br />
1. From AcuityLogic Admin, click Master Data Admin, <strong>and</strong> select <strong>Lab</strong> Search.<br />
2. Click <strong>the</strong> hyperlink of <strong>the</strong> <strong>Lab</strong> Number for an existing lab or create a new<br />
lab.<br />
3. Type <strong>and</strong> select <strong>the</strong> appropriate information for <strong>the</strong> lab.<br />
4. Select <strong>the</strong> Is System <strong>Lab</strong> check box. You must select this check box in<br />
order for lab orders to be sent through <strong>the</strong> lab interface to <strong>the</strong> lab.<br />
5. Click Save.<br />
4 <strong>Setting</strong> <strong>Up</strong> <strong>and</strong> <strong>Using</strong> <strong>the</strong> <strong>DVI</strong> <strong>Lab</strong> <strong>Interface</strong>
<strong>Setting</strong> <strong>Up</strong> <strong>and</strong> <strong>Using</strong> <strong>the</strong> <strong>DVI</strong> <strong>Lab</strong> <strong>Interface</strong><br />
Sending Orders through a <strong>Lab</strong> <strong>Interface</strong><br />
Sending<br />
Orders<br />
through a <strong>Lab</strong><br />
<strong>Interface</strong><br />
You can transmit lab orders through a lab interface by following <strong>the</strong> usual ordering<br />
procedure in AcuityLogic POS. To ensure that <strong>the</strong> order is sent through <strong>the</strong> lab<br />
interface, select <strong>the</strong> designated lab for <strong>the</strong> lab interface from <strong>the</strong> <strong>Lab</strong> drop-down<br />
menu.<br />
Viewing <strong>the</strong><br />
<strong>DVI</strong> <strong>Lab</strong> Order<br />
Status<br />
When a lab order is complete, <strong>the</strong> <strong>DVI</strong> lab interface updates <strong>the</strong> lab order status<br />
to Shipped. <strong>DVI</strong> does not offer any additional lab order statuses at this time.<br />
To view a lab order status, follow <strong>the</strong> instructions below:<br />
1. From AcuityLogic POS, open a patient’s profile.<br />
2. Click <strong>the</strong> Orders tab.<br />
All of <strong>the</strong> patient’s orders display.<br />
3. Click <strong>the</strong> S icon in <strong>the</strong> row of an eyeglass order.<br />
The eyeglass lab order status displays.<br />
<strong>Setting</strong> <strong>Up</strong> <strong>and</strong> <strong>Using</strong> <strong>the</strong> <strong>DVI</strong> <strong>Lab</strong> <strong>Interface</strong> 5