Instruction Manual (PDF) - Palsonic
Instruction Manual (PDF) - Palsonic
Instruction Manual (PDF) - Palsonic

You also want an ePaper? Increase the reach of your titles
YUMPU automatically turns print PDFs into web optimized ePapers that Google loves.
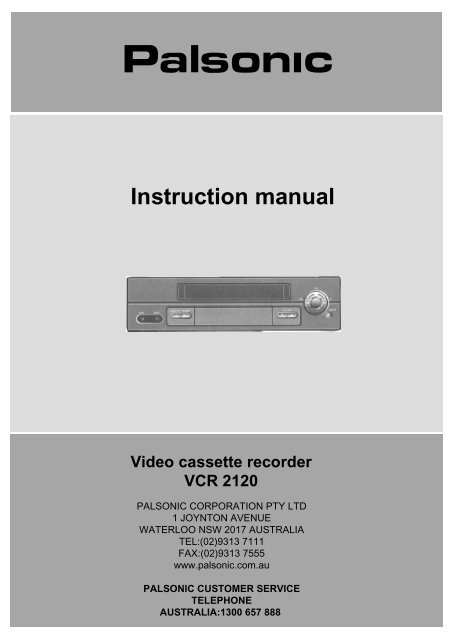
<strong>Instruction</strong> manual<br />
Video cassette recorder<br />
VCR 2120<br />
PALSONIC CORPORATION PTY LTD<br />
1 JOYNTON AVENUE<br />
WATERLOO NSW 2017 AUSTRALIA<br />
TEL:(02)9313 7111<br />
FAX:(02)9313 7555<br />
www.palsonic.com.au<br />
PALSONIC CUSTOMER SERVICE<br />
TELEPHONE<br />
AUSTRALIA:1300 657 888
W O R T H<br />
k n o w i n g<br />
Please keep the video machines guarantee card and receipt safe for warranty<br />
purposes.<br />
Precautions<br />
Read carefully through this manual to familiarize yourself with this<br />
high-quality video recorder.<br />
Make sure the rating of your household electricity supply matches<br />
that shown on the back of the video recorder.<br />
Refer to this chapter and the "Initial installation" chapter to help<br />
you install and adjust your video recorder.<br />
Do not ...<br />
... expose the video recorder to high levels of humidity and heat, to<br />
avoid the risk of fire and electric shock.<br />
... open the video recorder. Have a qualified technician carry out<br />
repairs.<br />
... connect the video recorder to the power supply if you have just<br />
moved it from a cold to warm environment. This can result in<br />
condensation inside the recorder and cause serious damage to the<br />
machine and cassettes. Wait around two hours to allow it to reach<br />
room temperature.<br />
Make sure ...<br />
... the recorder is placed on a steady, flat surface.<br />
... you place the recorder where there is good ventilation all around.<br />
... you clean the recorder only with a soft, lint-free cloth; do not use<br />
aggressive or alcohol-based cleaning agents.<br />
... you disconnect the power supply if the recorder appears to be<br />
working incorrectly, is making an unusual sound, has a strange<br />
smell, has smoke emitting from it or liquids have got inside it. Have<br />
a qualified technician check the recorder.<br />
... you disconnect the power supply and aerial if you will not be using<br />
the recorder for a long period or during a thunderstorm.<br />
For your own safety!<br />
There are no components in this video recorder you can<br />
service or repair yourself<br />
Do not open the case of the video recorder. Only allow<br />
qualified personnel to repair or service your set.<br />
This video recorder is designed for continuous<br />
operation. Switching it off does not disconnect it from<br />
the mains (stand-by). To disconnect it from the mains,<br />
you have to unplug it.<br />
Recording any copyright protected material may infringe<br />
a copyright.
Before doing anything with the machine, please<br />
read the chapter “Initial installation".<br />
W O R T H<br />
k n o w i n g<br />
Contnets<br />
Controls<br />
The remote control unit .............................................................................<br />
The machine, On screen display ..............................................................<br />
Initial installation<br />
Connecting up the video recorder, Fitting the remote control‘s batteries .<br />
Setting up the video recorder ....................................................................<br />
Playing cassettes<br />
Playing back .............................................................................................<br />
Still, Variable picture search, Variable slow motion,<br />
Accessing new recordings (index scan), CM Skip ....................................<br />
Recording cassettes<br />
Simple recording .......................................................................................<br />
One touch recording (OTR) ......................................................................<br />
More functions<br />
Normal timer recording .............................................................................<br />
Timer Review - changing and erasing, Setting time and date ..................<br />
Clock/Counter display, Remaining time and Cassette length,<br />
Accessing counter zero position, Resetting the counter to zero ...............<br />
Menu languages, Child lock, Cassettes, and ...........................................<br />
Tuning in new stations<br />
Tuning ....................................................................................................... 14<br />
Station names ........................................................................................... 15<br />
Sorting programme locations, Clearing programme locations .................. 16<br />
Connections and copying<br />
To the TV via antenna cable (if you are not using a RCA cable) ..............<br />
Copying, Assembling ... ............................................................................<br />
Appendix<br />
Brief instruction for experienced users ................................................. 19/20<br />
Before you ask a specialist ....................................................................... 21<br />
Index, Technical data ............................................................................... 22<br />
2<br />
3<br />
4<br />
5<br />
6<br />
7<br />
8<br />
9<br />
10<br />
11<br />
12<br />
13<br />
17<br />
18<br />
On the following pages, the pictures show the buttons you press on the remote control to<br />
perform the function, and what you should see in the On Screen Display or machine<br />
display (if present)<br />
1
CONTROLS<br />
The remote control is the principle means of control, but the main playback and<br />
record functions are also available on the front of the machine.<br />
Press any button to turn on the power.<br />
The remote control unit<br />
power on/off<br />
This button is not available for this set<br />
number buttons to select programmes (stations) or to type<br />
in numbers<br />
This button is not available for this set<br />
a button for selecting input sources for recording:<br />
TV stations - input sockets<br />
clock/counter on-screen display<br />
This button is not available for this set<br />
This button is not available for this set<br />
CM skip button to cue the tape for 30 seconds<br />
pause (record), still (playback)<br />
playback start<br />
playback stop<br />
rewindind/fast forwarding a cassette from stop, or<br />
picture search backwards/forwards from playback mode<br />
the record or OTR button<br />
(One Touch Recording means each time you press the<br />
button recording is extended by 30 minutes)<br />
to eject the cassette<br />
a button that doubles the maximum recording time for<br />
very long recordings<br />
the variable slow motion button<br />
The buttons to use<br />
are marked on the<br />
following pages.<br />
the menu controls, programme (station) selection<br />
(PR +/-)<br />
to search the beginnings of records (index)<br />
This button is not available for this set<br />
This button is not available for this set<br />
2
Press any button to turn on the power.<br />
CONTROLS<br />
The machine<br />
standby/on<br />
playback stop and ejecting the cassette<br />
front input sockets for connecting a camcorder<br />
programme (station) selection<br />
recording or OTR<br />
(One Touch Recording means each time you press the button recording is<br />
extended by 30 minutes)<br />
rewinding / fast forwarding a cassette from Stop, or picture search<br />
backwards / forwards from playback mode.<br />
playback start<br />
On screen display<br />
The video's menu system<br />
gives you easy-tounderstand<br />
access to the<br />
less used functions such<br />
as tuning to stations, clock<br />
setting and more.<br />
"Tape Control" Menu<br />
appears only when a tape<br />
is in the VCR.<br />
2x<br />
The menus show you<br />
which button to press<br />
for the next step.<br />
In addition, some other<br />
functions appear on<br />
screen temporarily.<br />
* Though the "16:9 Set" is displayed on the screen, this function is not available for this set.<br />
3
I n i t i a l<br />
INSTALLATION ,<br />
Place your video<br />
horizontally on a flat, steady base so that air can circulate around it for ventilation<br />
away from humidity and heat, magnetic fields, such as those from loudspeakers<br />
etc and with no heavy objects placed on top<br />
Connecting up the video recorder<br />
AC 204 V<br />
50 Hz<br />
Unplug the aerial cable from your TV and plug it into the<br />
ANT.IN" " socket of the video.<br />
Plug the short coaxial cable provided into the "ANT.OUT"<br />
socket of the video and the aerial socket of the TV.<br />
Plug a RCA cable into the "RCA" socket of the video and<br />
the AV socket on the TV if available.<br />
This connection will provide best picture and sound quality.<br />
Ask your dealer for an appropriate cable if you do not have one.<br />
Without a RCA cable, you need to follow the steps described under<br />
"If you are not using a RCA cable" (right page and page 17).<br />
Make sure the rating of the household mains supply matches the<br />
rating shown on the back of the video.<br />
Now plug in the mains lead. The display of the video<br />
should now light.<br />
Fitting the remote control's batteries<br />
The buttons to use<br />
are marked on the<br />
following pages.<br />
1.5 V (AAA)<br />
Fit the batteries as shown by<br />
the pictures in the bay.<br />
Protect your environment by returning used batteries to your dealer. Since<br />
batteries contain toxic substances they require special disposal methods.<br />
Make sure the batteries are always of the same type and age, and remove them<br />
from the remote control if you are not using it for a long period.<br />
4
Switch the TV on<br />
You can also start "Auto Search" in the menu<br />
"PR PRESET" "Auto Search"<br />
To tune in new stations (manual tuning) and to<br />
enter station names see page 14- 16<br />
I n i t i a l<br />
INSTALLATION<br />
Setting up the video recorder<br />
You should see this picture the first<br />
time you switch on the TV and video<br />
Choose your language<br />
OK for "Auto Search"!<br />
"AUTO SEARCH" tunes in all the stations you can receive in<br />
your country and...<br />
sorts them in an order common for your country<br />
Then type in the current time and date<br />
Should you wish the stations to have the same numbers as<br />
those used on the TV, follow the instructions in "Sorting<br />
programme locations" on page 16<br />
Else<br />
exit the basic installation function and enjoy your<br />
video recorder.<br />
If you don't see this picture, because you don't use a RCA cable, search this picture<br />
now (CH 26) with the station tuning functions of your TV set (see its user manual)<br />
In case of interference problems on CH 26, type in an other<br />
transmission channel between 21 and 69 using the number buttons<br />
5
P L A Y I N G<br />
c a s s e t t e s<br />
Your TV and your video recorder are switched on.<br />
To see the picture from your video, press the station button on the TV<br />
reserved for video input or the AV (Audio/Video) button<br />
Playing back<br />
Load the cassette by pushing<br />
it smoothly and squarely into<br />
the cassette bay, with its<br />
windows pointing up.<br />
Start playback.<br />
Stop playback<br />
Eject the cassette<br />
Fast forward or rewind the<br />
cassette from stop<br />
When you load a protected cassette (e.g. pre-recorded film,<br />
see page 13) playback starts automatically.<br />
PLAY switches back to normal playback.<br />
During still, slow or search, you don't hear the sound.<br />
If the still picture is jittering, you can steady it by using the PR+/-<br />
buttons.<br />
You can reduce horizontal interference stripes resulting from<br />
inaccurate tracking (when playing tapes of poor quality or recorded<br />
on other machines) by using the PR+/- buttons during playback.<br />
After approx 5 minutes instill, the cassette plays back<br />
automatically.<br />
NTSC PLAYBACK on PAL TV, If you playback the tapes, which have<br />
been recorded on NTSC colour system, on this VCR, you can watch<br />
the pictures on a PAL TV.<br />
Clock / Counter / Remaining time - page 12.<br />
Auto Head Cleaning<br />
This VCR has Auto Head Cleaner The video head will be cleaned<br />
automatically whenever loading or unloading the tape.<br />
6
P L A Y I N G<br />
c a s s e t t e s<br />
Still<br />
Still picture from playback.<br />
Each press of the button advances the picture<br />
one frame.<br />
"PLAY" blinks during still<br />
PLAY switches back to normal playback<br />
Variable picture search<br />
Starting from playback you can control search<br />
speed in 2 steps either forwards ( ) or<br />
backwards ( ). Press repeatedly.<br />
PLAY switches back to normal playback.<br />
Variable slow motion<br />
Accessing new recordings (index scan)<br />
CM Skip<br />
Starting from playback you can control slow<br />
motion speed in 6 steps (1/5, 1/10, 1/5, 1/30,<br />
1/25, 1/20, 1/15, ...) Press repeatedly.<br />
PLAY switches back to normal playback.<br />
Access the beginning of recordings in the middle of the tape using the Index +/- function.<br />
The video recorder automatically sets an electronic marker (index) at the beginning of each<br />
recording. It is these markers which the Index +/- function detects.<br />
Select INDEX + or INDEX - to search forwards or<br />
backwards.<br />
The video will now wind to the beginning of the first<br />
recording, play it for about 6 seconds then wind on to the<br />
next one<br />
When you see the recording you want, press<br />
PLAY.<br />
If you press [CM Skip] button on the remote control, tape advances for 30<br />
seconds segment.<br />
7
RECORDING<br />
c a s s e t t e s<br />
The TV stations on the video have been tuned in (page 5).<br />
The video is switched on.<br />
You can either watch the picture from the video on the TV by pressing the station<br />
button reserved for video input or the AV button, watch another TV station or<br />
switch off the TV altogether.<br />
Simple recording<br />
Load a cassette with its<br />
safety tab in place (see page 13)<br />
Choose the station whose<br />
programme you want to<br />
record.<br />
If the programme you wish to<br />
record is very long, double the<br />
possible recording time with<br />
"LP" (Long Play).<br />
Up to eight hours with an E-240<br />
cassette.<br />
Start your recording.<br />
If you wish to interrupt<br />
recording briefly - then<br />
continue.<br />
"REC" blinks during this period.<br />
The video stops automatically, if<br />
pause exceeds five minutes.<br />
Stop your recording.<br />
8
For timer recordings, clock, date, and stations<br />
must be set correctly<br />
Load a cassette with its safety tab in place<br />
(see page 13) and with sufficient free space for<br />
the recording<br />
RECORDING<br />
c a s s e t t e s<br />
One touch recording - OTR<br />
Choose the station you want and press the<br />
button once for every 30 minutes of<br />
programme you wish to record.<br />
Up to ten hours are possible<br />
If you want to record from a source connected to your video see page 18<br />
To cancel OTR press the button (stop) more than 5 seconds.<br />
Clock / Counter / Remaining time - page 12.<br />
9
M O R E<br />
f u n c t i o n s<br />
For timer recordings, clock, date, and stations must be set correctly.<br />
Load a cassette with its safety tab in place<br />
(see page 13) and with sufficient free space for the recording.<br />
Normal timer recording<br />
Call the video's "MAIN MENU",<br />
choose "Timer Program".<br />
Decide if you want to record<br />
"Once", "Weekly" or "Daily" ...<br />
... and confirm.<br />
Type in one after the other.<br />
The programme location<br />
number,<br />
the time the broadcast starts,<br />
the time the broadcast ends,<br />
the day of the broadcast, if it<br />
is not today.<br />
Select LP if you wish to make<br />
a very long recording.<br />
If you wish to make changes:<br />
Move to the position you want to<br />
change using the buttons.<br />
Change the setting using the PR+/- or<br />
number buttons.<br />
If all setting are ok, press or till<br />
you see "OK : confirm" in the bottom<br />
line.<br />
Confirm.<br />
Switch your video off.<br />
Wait a few seconds after typing a one-digit-number<br />
If you have made a mistake, move to the position you want to change<br />
using the buttons and change the setting<br />
If programme timings overlap, the machine will give a warning<br />
message If you don't adjust the times, the machine will record the first<br />
programme completely then continue with the second one<br />
If there is no sufficient free space for the recording on the cassette the<br />
video switches automatically to "LP" for double recording capacity<br />
The recorder will eject cassettes which have the safety tab removed<br />
(page 13).<br />
10
M O R E<br />
f u n c t i o n s<br />
Timer Review - changing and erasing<br />
Call the video's "MAIN MENU",<br />
choose "Timer Program<br />
Select the programming to change or erase.<br />
Setting time and date<br />
If you want to erase this programming press<br />
button 0, confirm with OK.<br />
If you wish to make changes:<br />
Move to the position you want to change using<br />
the buttons.<br />
Change the settings using the PR +/- or number<br />
buttons.<br />
If all setting are ok, press or till you see<br />
"OK: confirm" in the bottom line.<br />
Confirm changes with OK. Exit the menus.<br />
Call the video's "MAIN MENU",<br />
choose "VCR Setup", then "Clock Set"<br />
Move to the position you want to change and<br />
type in the new values.<br />
Wait a few seconds after typing a one-digit number<br />
Store with OK button and exit with MENU button.<br />
11
M O R E<br />
f u n c t i o n s<br />
The counter counts in real time from the point you load the cassette This does not<br />
have to be its beginning! The counter does not count unrecorded parts of the tape<br />
If you rewind beyond the zero position, the counter counts in negative values<br />
(e.g.- 0:01:15)<br />
Clock / counter display<br />
1x: Time and datetcurrent<br />
status Time and date<br />
2x: Counter + current status<br />
counter<br />
3x: disappear<br />
If didn't wind tape (PLAY, FF, REW,...)<br />
it doesn't appear the tape remain<br />
time.<br />
Remaining time and cassette length<br />
Call the video's "MAIN MENU", choose "Tape Control".<br />
When you want the video to show the time remaining from the current video<br />
tape position (to find out if there is sufficient space for a recording, for<br />
example).<br />
To ensure the remaining time shown is accurate, select the length of cassette<br />
currently loaded by selecting this function until you reach the correct length.<br />
Remaining time display is only possible when the cassette is loaded<br />
Accessing counter zero position<br />
The video will wind to the<br />
position 0:00:00 and stop.<br />
Resetting the counter to zero<br />
Reset the counter<br />
12
M O R E<br />
f u n c t i o n s<br />
Menu languages<br />
Call the video's "MAIN MENU", choose<br />
"VCR Setup", then "Language Set"<br />
Select your language<br />
Confirm.<br />
Child Lock<br />
Press the button for about 5 seconds.<br />
Your video can't be operated now, only timer recordings will<br />
be performed.Keep you remote control in a safe place.<br />
To release child lock, press the button again for 5 seconds.<br />
Cassettes<br />
Use only good quality tape cassettes with the VHS logo.<br />
Keep cassettes away from excessive moisture or dust, magnetic and<br />
electrical fields (loudspeakers and computer monitors, for example).<br />
Always wind the tape to the beginning when you have finished. Store<br />
with the full spool at the bottom and with the cassette in its cover.<br />
You can protect your precious recordings from being wiped by breaking out<br />
the safety tab on the side of the cassette (some cassettes have a slide).<br />
Should you wish to re-use the tape after removing the tab, cover the hole<br />
with adhesive tape.<br />
and...<br />
Dimmer<br />
Your video recorder dims its display when switched to stand-by mode.<br />
Auto power off<br />
Your video recorder switches to stand-by when no tape is played and no<br />
station is received for more than 5 minutes.<br />
13
T u n i n g i n<br />
NEW STATIONS<br />
The TV and video recorder are switched on.<br />
To see the picture from your video, press the station button on the TV reserved for<br />
video input or the AV (Audio / Video) button.<br />
"AV" should not be selected with the AV button on the video.<br />
Tuning<br />
Call the video's "MAIN MENU",<br />
choose "PR Preset".<br />
Select "<strong>Manual</strong> Set"<br />
Choose any unused location<br />
number "----" or "P-xx" ...<br />
It's simplest to use the same location<br />
number on both the TV and video.<br />
...and confirm.<br />
Tune in the station you want.<br />
Press button to see the<br />
picture.<br />
If it isn't the station you want, or the<br />
picture is disturbed, carry on tuning.<br />
Once you see the station you<br />
want, store it.<br />
Tune in further stations (from<br />
step 3 onwards) or exit tuning<br />
mode.<br />
14
T u n i n g i n<br />
NEW STATI0NS<br />
Station names<br />
If your video is showing no station name or is showing a station name incorrectly, you can<br />
correct this. Select " : name correct" on the "MANUAL SET" menu.<br />
Call this menu (just see the left page),<br />
if it isn't displayed.<br />
SeIect "name correct"<br />
Either select the name from the stored list ..<br />
... or you select " :name create" and enter<br />
a 4-digit name.<br />
Change the letters with the PR +/- buttons,<br />
move to the next letter with the buttons.<br />
Store and exit.<br />
The video's automatic tuning system usually produces the best results In poor reception areas,<br />
fine tuning may improve reception Choose the station and tune using the buttons<br />
Store, typing in the location number again<br />
Should you wish to tune in all the channels available in your region, please refer to page 5<br />
Should you wish to sort or clear stations, please refer to page 16<br />
15
T u n i n g i n<br />
NEW STATIONS<br />
Sorting programme locations<br />
If the location numbers used for programmes stored in your TV and<br />
video are different, you can change them on the video.<br />
To do this, move the stations to the right numbers, until they are<br />
arranged the way you want.<br />
Call the video's "MAIN MENU",<br />
choose "PR Preset" then "PR<br />
Align".<br />
Select the proqramme to swap.<br />
Confirm.<br />
Move the station to the desired<br />
location number<br />
Confirm<br />
Clearing programme locations<br />
Call the video's "MAIN MENU",<br />
choose "PR Preset" then "PR<br />
Erase".<br />
Select the station (location<br />
number) you want to clear.<br />
Review the picture.<br />
Clear.<br />
16
If you are using a RCA cable, select the AV<br />
input on the TV to see the picture from the<br />
video<br />
If you are not using a RCA cable, select the<br />
button number on the TV reserved for video<br />
input to see the picture from the video<br />
CONNECTIONS<br />
a n d c o p y i n g<br />
To the TV via antenna cable (if you are not using a RCA cable)<br />
If you are not using a RCA cable, your video can transmit pictures and sound to the TV via the<br />
coax aerial cable. Just tune the TV to the video's output channel (factory set to UHF CH26)<br />
Tune the TV carefully to ensure the best pictures and sound.<br />
Once you have carried out the steps in<br />
"Connecting up the video recorder" (page 4),<br />
switch on your TV.<br />
Press the OK button of the video's remote control<br />
longer than 5 seconds to call the video's test<br />
picture.<br />
Tune the TV to the test picture using the channel<br />
pre-set functions of your TV as described in its<br />
manual.<br />
When you have found the test picture, store it<br />
under the button number on your TV for video<br />
input.<br />
Press the OK button of the video's remote control<br />
again longer than 5 seconds to release the test<br />
picture.<br />
If the quality of the test picture transmitted to the TV is poor due to interference caused by<br />
a station transmitting on channel 26. you can tune the video to a different transmitting<br />
channel Find a free channel between 21 and 69 on your TV<br />
Call the video's "MAIN MENU" choose<br />
"VCR Setup" then "RF Output Set".<br />
Type in the free channel.<br />
Store and exit<br />
If the quality of the test picture transmitted to the TV is poor, fine-tuning on the TV may<br />
help (refer to the TV manual)<br />
17
CONNECTIONS<br />
a n d c o p y i n g<br />
Switch off all components when connecting or disconnecting cables<br />
Copying<br />
TV<br />
(other VCR)<br />
Other VCR<br />
Decoder for Pay-TV<br />
Camcorder<br />
Video Player<br />
To copy to your video from<br />
another video machine,<br />
connect the two machines with<br />
a cable between their RCA<br />
sockets and select as<br />
programme "AV" using the AV<br />
button.<br />
Set the other video machine to<br />
playback and your machine to<br />
record.<br />
To copy to another video<br />
machine from your video,<br />
connect the two machines by<br />
means of their RCA sockets.<br />
On the other video, select its<br />
AV input and set the machine<br />
to record.<br />
Switch your video to play back<br />
at the position vou want<br />
copying to start.<br />
Assembling<br />
Should you wish to assemble your own film, from camcorder footage for<br />
example, use the assembly technique for smooth edit points:<br />
Move the tape to the<br />
position at which the new<br />
scene is to be added using<br />
the play functions (pages<br />
6/7).<br />
Wind back slightly before<br />
the edit point and put the<br />
machine into pause using the<br />
|| button (do not press<br />
STOP!).<br />
Now go directly into record.<br />
For the best results, the source cassette from which you are recording<br />
should already be playing back when you start recording.<br />
18
BRIEF INSTRUCTION<br />
f o r e x p e r i e n c e d u s e r s<br />
Playing back<br />
Your TV and your video recorder are switched on<br />
To see the picture from your video, press the station<br />
button on the TV reserved for video input or the AV<br />
(Audio/Video) button.<br />
Start playback<br />
Stop playback<br />
Fast forward or rewind the<br />
cassette from stop<br />
Still picture from playback.<br />
Each press of the button<br />
advances the picture one<br />
frame.<br />
PLAY switches back to normal<br />
playback.<br />
Starting from playback you can<br />
control search speed in<br />
2 steps either forwards ( )<br />
or backwards ( ) Press<br />
repeatedly.<br />
PLAY switches back to normal<br />
playback.<br />
Starting from playback you<br />
can control slow motion speed<br />
in 6 steps (1/15, 1/10, 1/5,<br />
1/30, 1/25, 1/20, 1/15, ....)<br />
Press repeatedly.<br />
PLAY switches back to normal<br />
playback.<br />
Select INDEX + or INDEX - to<br />
search forwards or backwards.<br />
The video will now wind to the<br />
beginning of the first recording, play<br />
it for about 6 seconds then wind on<br />
to the next one.<br />
When you see the recording you<br />
want, press play.<br />
Simple recording<br />
The TV stations on the video have been tuned in<br />
(Page 5)<br />
The video is switched on.<br />
You can either watch the picture from the video on<br />
the TV by pressing the station button reserved for<br />
video input or the AV button, watch another TV<br />
station or switch off the TV altogether.<br />
Load a cassette with its safety<br />
tab in place (see page 13).<br />
Choose the station whose<br />
programme you want to<br />
record.<br />
If the programme you wish to<br />
record is very long, double the<br />
possible recording time with<br />
"LP" (Long Play).<br />
Up to eight hours with an E-240<br />
cassette.<br />
Start your recording.<br />
If you wish to interrupt<br />
recording briefly - then<br />
continue.<br />
Stop your recording<br />
One touch recording - OTR<br />
Choose the station you want<br />
and press the button once for<br />
every 30 minutes of<br />
programme you wish to<br />
record.<br />
Up to ten hours are possible.<br />
19
BRIEF INSTRUCTION<br />
f o r e x p e r i e n c e d u s e r s<br />
Normal timer<br />
For timer recordings, clock, date, and stations must be set correctly.<br />
Load a cassette with safety tab in place (page 13) and with sufficient free space for the recording.<br />
Call the video's "MAIN MENU", Confirm,<br />
choose "Timer Program".<br />
Decide if you want to record<br />
"Once", "Weekly" or "Daily" ...<br />
... and confirm.<br />
Type in one after the other:<br />
the programme location<br />
number,<br />
the time the broadcast starts,<br />
the time the broadcast ends,<br />
the day of the broadcast,<br />
if it is not today.<br />
select LP if you wish to make a<br />
very long recording.<br />
If you wish to make changes:<br />
Move to the position you want to change<br />
using the button.<br />
Change the setting using the +/- or number<br />
button.<br />
If all setting are ok, press or till you<br />
see "OK:confirm" in the last line.<br />
Switch your video off<br />
20
A P P E N D I X<br />
Before you ask a specialist<br />
Mains supply<br />
thevideo's display does not light<br />
the video doesn't work<br />
Recording<br />
doesn't start<br />
the cassette starts playback<br />
or is ejected<br />
Playback<br />
no picture<br />
-<br />
-<br />
-<br />
-<br />
-<br />
-<br />
The mains lead is not connected to the wall socket.<br />
condensation may have formed when moving the video<br />
recorder from a cold to a warm room. Wait until the video<br />
(and cassette!) reach room temperature.<br />
Is a cassette loaded?<br />
the safety tab may be missing. Cover the hole with<br />
adhesive tape (page 13).<br />
Is the TV tuned to the video (page 5)?<br />
Is there a recording on the video tape?<br />
poor picture quality<br />
-<br />
-<br />
-<br />
-<br />
Use PR. -/+ buttons to adjust tracking if horizontal stripes appear.<br />
Is the cassette of poor quality or worn out? Test with another cassette.<br />
If you are not using a RCA cable, have you tuned the location<br />
for video input on the TV properly? pages 5/17.<br />
Try a different cassette. The video head drum may need cleaning<br />
- ask your dealer.<br />
poor still picture<br />
Remote control doesn't work<br />
General<br />
a cassette won't load<br />
the cassette won't rewind, fast forward,<br />
play or record mode<br />
timer is recording incorrectly<br />
a loud noise when left in Stop mode<br />
"ERR" shows in the display<br />
-<br />
-<br />
-<br />
-<br />
-<br />
-<br />
-<br />
-<br />
Press || (pause) several times. Adjust with the PR +/- buttons until<br />
you get the best picture.<br />
are the batteries run down?<br />
is the distance between remote control and video more than<br />
1 meters?<br />
is there an object blocking the direct line between remote control<br />
and video?<br />
is there a cassette already loaded? If so, the video's display will<br />
indicate it.<br />
the cassette is already fully wound back or to the end.<br />
is the clock set correctly (page 11)?<br />
if no play or record function is used for about five minutes when left<br />
in Stop mode, the video switches its motor off to conserve the<br />
mechanism.<br />
Your video has detected abnormal conditions. Release this mode<br />
with any button ,your video then safely switches to stand-by.<br />
21
A P P E N D I X<br />
Index<br />
Aerial ....................................................<br />
Assembling recordings .........................<br />
Cassette length .................................... 12<br />
Channel ....................................... 5/14-17<br />
Child lock .............................................<br />
CM Skip ...............................................<br />
13<br />
7<br />
Condensation ........................ Precautions<br />
Counter ................................................ 12<br />
Fine Tuning ..........................................<br />
4<br />
18<br />
15<br />
Location number ......................... 4/14-17<br />
LP (Long Play) .................................. 8-10<br />
Protected cassette ................................... 13<br />
RCA ......................................................... 17<br />
Remaining time ........................................ 12<br />
RF out ................................................... 5/17<br />
SP (Standard Play)................................ 8-10<br />
Stand-by .................................... Precautions<br />
Station .............................................. 5/14-17<br />
Still frame adjustment ............................... 6<br />
Test picture ..............................................<br />
Tracking ....................................................<br />
17<br />
6<br />
Mains ................................................ 4/22<br />
Menu ................................................... 3<br />
OTR .................................................... 9<br />
Technical data<br />
Dimensions<br />
W x H x D<br />
Weight<br />
360 x 90 x 288 mm<br />
3.85 kg<br />
Video<br />
System<br />
Speeds<br />
VHS<br />
SP / LP<br />
Power supply<br />
VoItage<br />
Power consumption<br />
System<br />
Video<br />
Channel range<br />
Channel locations<br />
RF Out<br />
AC 240 V- 50 Hz<br />
15 Watt<br />
PAL B/G<br />
VHF 2 - 12,<br />
UHF 21 - 69,<br />
CATV S1 -S41, x, y, z<br />
(Hyperband)<br />
99 + AUX<br />
UHF CH 21 - 69 (26)<br />
General<br />
Temperature range<br />
Humidity range<br />
Timer<br />
0<br />
5 - 35 C<br />
< 80 %<br />
8 events,<br />
1 month<br />
Subject to technical alterations without notice.<br />
22
VCR 2120<br />
Unplug the aerial cable from your TV and plug it into the socket "ANT.IN"<br />
of the video.<br />
Plug the short coaxial cable provided into the "ANT.OUT" socket of the<br />
video and the aerial socket of the TV.<br />
Plug a RCA cable into the "RCA socket of the video and the AV socket<br />
on the TV if available.<br />
Now plug in the main lead. The display of the video should now light.<br />
Fit the batteries as shown by the pictures in the bay.<br />
Press any button to turn on the power.<br />
You should see this<br />
picture the first time you<br />
switch on the TV and<br />
video<br />
Choose your language.<br />
OK for "Auto Search!".<br />
"AUTO SEARCH" tunes in<br />
all the stations you can<br />
receive in your country<br />
and ...<br />
...sorts them in an order<br />
common for your country.<br />
Then type in the current<br />
time and date.<br />
Eixit the basic installation<br />
function and enjoy your<br />
Video cassette recorder.<br />
<strong>Instruction</strong> <strong>Manual</strong> Pages 4-5