
You also want an ePaper? Increase the reach of your titles
YUMPU automatically turns print PDFs into web optimized ePapers that Google loves.
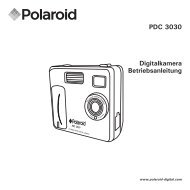
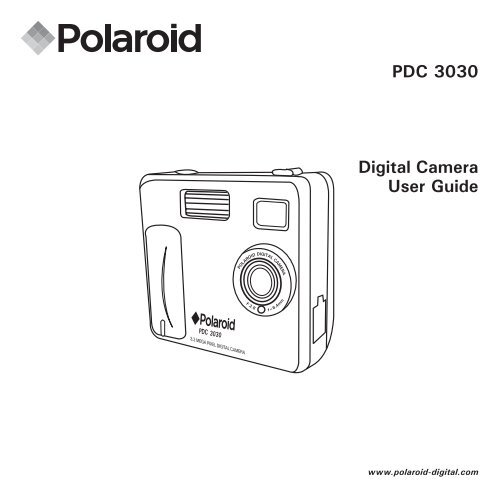
<strong>PDC</strong> <strong>3030</strong><br />
Digital Camera<br />
User Guide<br />
F 2.8<br />
f=8.4mm<br />
www.polaroid-digital.com
Product Overview<br />
1. Flash<br />
2. Lens<br />
3. Self-timer LED<br />
4. USB port<br />
5. Viewfinder<br />
1<br />
5<br />
2<br />
3<br />
F 2.8<br />
f=8.4 m m<br />
4<br />
1. Status LED<br />
2. Viewfinder<br />
3. LCD screen<br />
4. Menu/OK button<br />
5. Up / Zoom out button<br />
6. Down / Zoom in button<br />
7. SMC slot<br />
8. Power button<br />
9. Capture/Playback selector<br />
1<br />
2<br />
3<br />
4<br />
9<br />
8<br />
7<br />
5<br />
6<br />
2 Polaroid <strong>PDC</strong> <strong>3030</strong> Digital Camera User Guide<br />
www.polaroid-digital.com
1. Flash/Previous button<br />
2. Quality/Next button<br />
3. Shutter button<br />
1<br />
2<br />
3<br />
1. Battery compartment<br />
2. Hand strap holder<br />
3. Tripod mount<br />
1<br />
2<br />
3<br />
1. SMC slot<br />
2. Microphone<br />
2<br />
1<br />
Polaroid <strong>PDC</strong> <strong>3030</strong> Digital Camera User Guide<br />
www.polaroid-digital.com<br />
3
Table of Contents<br />
1 Getting Started ........................................................................... 6<br />
• What can I do with my Camera?............................................... 6<br />
• What can I do with my Digital Pictures? .................................... 6<br />
• What can I do with my Audio Clips and Video Clips?................... 7<br />
• Camera Package Contents ....................................................... 7<br />
• Attaching the Hand Strap ........................................................ 8<br />
• Installing the Batteries ............................................................. 8<br />
• Turning the Camera On and Off................................................ 9<br />
• Checking the Battery Level ...................................................... 9<br />
• Automatic Power Off Saves Battery ........................................ 10<br />
2 Camera Setting ......................................................................... 11<br />
• Checking Camera Status........................................................ 11<br />
• Setting the Display Language ................................................. 12<br />
• Setting Date and Time........................................................... 13<br />
3 Taking Pictures ......................................................................... 14<br />
• Taking a Picture.................................................................... 14<br />
• Setting the Picture Quality ..................................................... 14<br />
• Setting the Picture Size ......................................................... 15<br />
• Setting the Flash Mode.......................................................... 16<br />
• Zoom in and out ................................................................... 16<br />
• Setting Self-timer.................................................................. 17<br />
• Setting the Date Stamp ......................................................... 18<br />
• Setting the Exposure Compensation ....................................... 19<br />
• Setting the White Balance...................................................... 20<br />
• Setting Sharpness................................................................. 21<br />
• Setting Frequency................................................................. 22<br />
• Reviewing the Pictures .......................................................... 22<br />
• Zooming the Displayed Picture ............................................... 22<br />
• Rotate the Displayed Picture ................................................. 23<br />
• Protecting/Unprotecting the Pictures from Deletion ................... 24<br />
• Deleting One Picture or All Pictures......................................... 25<br />
4 Polaroid <strong>PDC</strong> <strong>3030</strong> Digital Camera User Guide<br />
www.polaroid-digital.com
4 Recording Audio and Video Clips ................................................. 26<br />
• Recording Audio Clips .......................................................... 26<br />
• Recording Video Clips ........................................................... 27<br />
• Playback Video Clips on LCD Screen ....................................... 27<br />
• Protecting/Unprotecting Audio Clip(s) and Video Clip(s) ............. 28<br />
• Deleting One Audio Clip or Video Clip...................................... 30<br />
• Using the SMC (SmartMedia Card) ........................................ 32<br />
• Formatting Memory............................................................... 34<br />
5 Installing the Software into a Computer ....................................... 35<br />
• Installing the Software .......................................................... 35<br />
• Software included with Your Camera ...................................... 37<br />
• Computer System Requirements ............................................. 38<br />
6 Transferring Pictures, Audio and Video Clips To Your Computer ...... 39<br />
• Before Transferring Pictures ................................................... 39<br />
• Connecting to Your Computer ................................................ 39<br />
• Transferring and Viewing the Pictures, Audio Clips and Video Clips on PC. 40<br />
• Transferring and Viewing the Pictures, Audio Clips and Video Clips on MAC 40<br />
7 Using the Camera as a Web Cam ................................................ 41<br />
• Setting up NetMeeting......................................................... 41<br />
• Start NetMeeting ................................................................ 41<br />
8 Troubleshooting Problems........................................................... 42<br />
9 Getting Help ............................................................................. 44<br />
• Polaroid-digital Online Services ............................................... 44<br />
• ArcSoft Software Help .......................................................... 44<br />
10 Appendix................................................................................ 45<br />
• Technical Specifications ........................................................ 45<br />
• Capacity of SMC card ........................................................... 46<br />
• Using Your Batteries ............................................................. 47<br />
• Tips, Your Safety & Maintenance............................................ 47<br />
• Uninstalling the Camera Driver (PC only).................................. 47<br />
• Regulatory Information .......................................................... 48<br />
Polaroid <strong>PDC</strong> <strong>3030</strong> Digital Camera User Guide<br />
www.polaroid-digital.com<br />
5
1 Getting Started<br />
• What can I do with my Camera?<br />
Capture<br />
Set Up<br />
Enjoy point & shoot operation. Store<br />
pictures, audio clips and video clips to the<br />
internal memory or a SMC.<br />
Select various camera and video recording<br />
settings.<br />
Communicate<br />
Use the camera as a web camera.<br />
• What can I do with my Digital Pictures?<br />
View<br />
Save<br />
View pictures on the LCD screen or on<br />
a computer using the Arcsoft® software<br />
supplied.<br />
Save pictures to the computer memory by<br />
Mass Storage interface.<br />
Communicate<br />
Send the pictures over the Internet to<br />
family and friends.<br />
6 Polaroid <strong>PDC</strong> <strong>3030</strong> Digital Camera User Guide<br />
www.polaroid-digital.com
Quick Start Guide<br />
Guide de Démarrage rapide<br />
Schnellanleitung<br />
Guida Rapida<br />
Guía Rápida de Inicio<br />
Guia de Início Rápido<br />
F 2.8<br />
f=8.4 m m<br />
<strong>PDC</strong> <strong>3030</strong><br />
<strong>ML</strong> 0403<br />
Part no.: OM837657 R1<br />
Printed in China<br />
Digital Imaging Products<br />
201 Burlington Road<br />
Bedford, MA 01730-1434<br />
• What can I do with my Audio Clips and Video Clips?<br />
Playback<br />
Save<br />
Playback audio clips and video clips on<br />
a computer using the Windows® Media<br />
Player or other Media software supplied.<br />
Save audio clips and video clips to the<br />
computer memory by Mass Storage<br />
interface.<br />
Communicate<br />
Send the audio clips and video clips over<br />
the Internet to family and friends.<br />
• Camera Package Contents<br />
F 2.8<br />
f=8.4 m m<br />
<strong>PDC</strong> <strong>3030</strong><br />
Registration Card<br />
The CD-ROM includes<br />
Polaroid <strong>PDC</strong> <strong>3030</strong> Camera (PC)<br />
PhotoImpression 4.0 (PC & Mac)<br />
MicroSoft NetMeeting (PC)<br />
Adobe Acrobat Reader (PC & Mac)<br />
User’s manual in PDF format.<br />
Quick Guide<br />
Hand Strap<br />
USB Cable<br />
Pouch<br />
4 x AAA Alkaline<br />
Batteries<br />
Polaroid <strong>PDC</strong> <strong>3030</strong> Digital Camera User Guide<br />
www.polaroid-digital.com<br />
7
• Attaching the Hand Strap<br />
• Installing the Batteries<br />
4 x AAA Alkaline batteries are supplied with the product. For more<br />
guidelines on battery usage, please see Using your batteries.<br />
1. To open the battery door, slide the button in the direction as shown to<br />
release.<br />
2. Insert the batteries as shown, ensuring you follow the +/- signs<br />
correctly.<br />
3. Close the battery door.<br />
8 Polaroid <strong>PDC</strong> <strong>3030</strong> Digital Camera User Guide<br />
www.polaroid-digital.com
• Turning the Camera On and Off<br />
To turn on the camera, fully press and hold the<br />
Power button until the Status LED turns green.<br />
When LCD screen comes on, the Status LED will<br />
be off. Press and hold the Power button again,<br />
“Good Bye” will show on the LCD screen and the<br />
camera will be off.<br />
Status LED<br />
Power button<br />
• Checking the Battery Level<br />
Check the battery power level before taking pictures.<br />
1. Turn on the camera.<br />
2. Check the power status level that appears on the<br />
camera LCD screen.<br />
Batteries have adequate power.<br />
Batteries need to be replaced.<br />
Polaroid <strong>PDC</strong> <strong>3030</strong> Digital Camera User Guide<br />
www.polaroid-digital.com<br />
9
• Automatic Power Off Saves Battery<br />
Your camera is designed to switch off automatically after 60 seconds<br />
(default setting) of inactivity. You can change the Auto Power Off setting<br />
by the following steps:<br />
Turn on the camera, set the Mode selector to Capture mode (the Status<br />
LED blinks once).<br />
Press<br />
Press<br />
Or set the Mode selector to Playback mode.<br />
Press<br />
Press<br />
Press<br />
Press<br />
10 Polaroid <strong>PDC</strong> <strong>3030</strong> Digital Camera User Guide<br />
www.polaroid-digital.com
2 Camera Setting<br />
• Checking Camera Status<br />
Turn on the camera, view the camera LCD screen to check which camera<br />
settings are active. If feature icon is not displayed, that particular feature<br />
is not activated.<br />
Picture Quality<br />
Camera Status<br />
Other Features<br />
Fine Quality<br />
Normal Quality<br />
Image size<br />
2048 X 1536<br />
1600 X 1200<br />
1280 X 960<br />
ONF<br />
OFFF<br />
SMC Card inserted<br />
Pictures can be taken<br />
Still Picture<br />
Locked file<br />
Unlocked file<br />
Full<br />
Low<br />
Self-Timer On<br />
Auto Flash Mode<br />
Flash Mode On<br />
Flash Mode Off<br />
Video Mode<br />
800 X 600<br />
Audio Mode<br />
NOTE:<br />
Some settings will remain even after the camera is turned off, e.g. Image<br />
Quality/Image Size/Flash Mode/Auto off/Date and time/Date stamp/<br />
Frequency/Display Language settings.<br />
Polaroid <strong>PDC</strong> <strong>3030</strong> Digital Camera User Guide<br />
www.polaroid-digital.com<br />
11
• Setting the Display Language<br />
Under this setting, you can select the language you prefer for the LCD<br />
screen.<br />
Turn on the camera, set the Mode selector to Capture mode (the Status<br />
LED blinks once).<br />
Press<br />
Press<br />
Press
• Setting Date and Time<br />
Turn on the camera, set the Mode selector to Capture mode (the Status<br />
LED blinks once). Use Previous or Next button to select a field, such as<br />
year, month, day, hour, minute, second. Use the Up or Down buttons to<br />
adjust the value in the field. Press the OK button after all fields are set.<br />
Press<br />
Press<br />
Press<br />
Press<br />
Press<br />
Press Previous<br />
or Next button<br />
to shift to the<br />
item
3 Taking Pictures<br />
• Taking a Picture<br />
1. Turn on the camera.<br />
2. Set the Mode selector to Capture mode (the Status LED blinks once).<br />
3. Frame your subject using the LCD<br />
Shutter button<br />
screen or viewfinder.<br />
4. Press the Shutter button to take a<br />
picture. Hold the camera steady.<br />
Status LED will be on and a beep will<br />
sound when the picture has been<br />
taken.<br />
• Setting the Picture Quality<br />
A digital picture’s quality depends on both its resolution and the JPEG file<br />
compression that the camera applies when you take the picture. Resolution<br />
refers to the number of pixel in a digital picture. Higher resolution and less<br />
compression makes better quality which occupies more memory space.<br />
Smaller size pictures and normal quality are easier to email while larger<br />
size and fine quality are better for printing.<br />
1. Turn on the camera.<br />
2. Set the Mode selector to Capture mode (the Status LED blinks once).<br />
3. Press the Quality button will alter the picture quality setting.<br />
Fine - high resolution and fine quality are good for printing<br />
photo.<br />
Normal - low resolution and normal quality are efficient for email or<br />
posting to web.<br />
14 Polaroid <strong>PDC</strong> <strong>3030</strong> Digital Camera User Guide<br />
www.polaroid-digital.com
• Setting the Picture Size<br />
Turn on the camera, set the Mode selector to Capture mode (the Status<br />
LED blinks once).<br />
Press<br />
Press<br />
Press<br />
Here are the approximate number of pictures you can expect the camera<br />
to hold at each setting based on 8MB internal memory. You can expand<br />
the memory with SMC, please refer to Capacity of SMC Card.<br />
H: 2048 X 1536 Fine: Approx. 5 pictures<br />
H: 2048 X 1536 Normal: Approx. 11 pictures<br />
M: 1600 X 1200 Fine: Approx. 9 pictures<br />
M: 1600 X 1200 Normal: Approx. 20 pictures<br />
L: 1280 X 960 Fine: Approx. 14 pictures<br />
L: 1280 X 960 Normal: Approx. 30 pictures<br />
E: 800 X 600 Fine: Approx. 36 pictures<br />
E: 800 X 600 Normal: Approx. 86 pictures<br />
NOTE:<br />
Scene complexity affects a picture’s file size. For example, a picture of<br />
trees in autumn has a larger file size than a picture of blue sky at the same<br />
resolution and quality setting. Therefore, the number of pictures you can<br />
store on a memory card may vary. The number of pictures on the LCD screen<br />
is for reference only.<br />
Polaroid <strong>PDC</strong> <strong>3030</strong> Digital Camera User Guide<br />
www.polaroid-digital.com<br />
15
• Setting the Flash Mode<br />
The Flash Range is approximately 3.2 feet to 6.5 feet (1 to 2 metres).<br />
1. Turn on the camera.<br />
2. Set the Mode selector to Capture mode (the Status LED blinks once).<br />
3. Press Flash button to cycle through the flash mode until the one you<br />
want is shown on the LCD screen.<br />
Flash mode on, the flash fires for every picture. Use this setting<br />
indoors in low light.<br />
Flash mode off, the flash does not fire. Use this setting for outdoor<br />
pictures or where flash is prohibited or may be distracting. Also use<br />
when shooting toward a reflective surface, such as a window or<br />
mirror. If you do not have enough light when using this setting, your<br />
pictures will be too dark.<br />
Auto Flash mode, the flash fires automatically as needed. Use this<br />
setting to take most pictures.<br />
Please note that when flash mode is selected, the Status LED turns green<br />
and blinks until the flash finishes charging, then the Status LED will be on<br />
until pressing Shutter button to take a picture.<br />
• Zoom in and out<br />
Your camera is designed to have 3X digital Zoom. This feature lets you<br />
“zoom” in on the central area of a photo and photograph only the enlarged<br />
portion of the picture. Digital zoom applies to only one photo at a time. To<br />
Zoom in and out the picture, press Down/Up button.<br />
NOTE:<br />
This feature is available in Capture and Playback mode.<br />
16 Polaroid <strong>PDC</strong> <strong>3030</strong> Digital Camera User Guide<br />
www.polaroid-digital.com
• Setting Self-timer<br />
Your camera is designed with a self-timer function which will allow you to<br />
take picture with the 10 seconds build in timer.<br />
1 Turn on the camera.<br />
2 Set the Mode selector to Capture mode (the Status LED blinks once).<br />
Press<br />
Press<br />
The icon appears on LCD screen. Press Shutter<br />
button to perform self-timer. A timer appears in the<br />
centre of LCD screen and the camera beeps indicating<br />
self-timer is activating.<br />
NOTE:<br />
Self-timer feature is only applied to next picture. When<br />
self-timer is activated, status LED turns green, while the<br />
self-timer LED turns red and blinks slowly for 8 seconds,<br />
then blinks quickly for 2 seconds before the picture is<br />
taken. Please place the camera on a flat surface or use<br />
a tripod.<br />
Press<br />
Polaroid <strong>PDC</strong> <strong>3030</strong> Digital Camera User Guide<br />
www.polaroid-digital.com<br />
17
• Setting the Date Stamp<br />
Turn on the camera, set the Mode selector to Capture mode (the Status<br />
LED blinks once).<br />
Press<br />
Press<br />
Press<br />
18 Polaroid <strong>PDC</strong> <strong>3030</strong> Digital Camera User Guide<br />
www.polaroid-digital.com
• Setting the Exposure Compensation<br />
Turn on the camera, set the Mode selector to Capture mode (the Status<br />
LED blinks once).<br />
Press<br />
Press<br />
Press<br />
Press<br />
You can adjust the exposure compensation value (EV) within the range of<br />
-1.5EV to +1.5EV in order to compensate for current lighting conditions.<br />
This setting can be used to obtain better result when shooting with<br />
backlighting, indirect indoor lighting, a dark background, etc.<br />
NOTE:<br />
• A higher EV value is best used for light-coloured subjects and backlit<br />
subjects. A lower EV value is best for dark-coloured subjects and for<br />
shooting outdoors on a clear day.<br />
• When shooting under very dark or very bright conditions, you may not<br />
be able to obtain satisfactory results even after performing exposure<br />
compensation.<br />
• Exposure compensation returns to its standard default setting (AUTO) after<br />
you turn off and turn on the camera again.<br />
Polaroid <strong>PDC</strong> <strong>3030</strong> Digital Camera User Guide<br />
www.polaroid-digital.com<br />
19
• Setting the White Balance<br />
Selecting the right type of white balance can help to make the colours of a<br />
subject appear more natural under the type of lighting that is available.<br />
Turn on the camera, set the Mode selector to Capture mode (the Status<br />
LED blinks once).<br />
Press<br />
Press<br />
Press<br />
Press<br />
NOTE:<br />
White balance returns to its default setting (AUTO) after you turn off the<br />
camera and turn it on again.<br />
20 Polaroid <strong>PDC</strong> <strong>3030</strong> Digital Camera User Guide<br />
www.polaroid-digital.com
• Setting Sharpness<br />
Use the Sharpness setting to highlight or blend the edges of the subject<br />
in pictures.<br />
Turn on the camera, set the Mode selector to Capture mode (the Status<br />
LED blinks once).<br />
Press<br />
Press<br />
Press<br />
Press<br />
Normal Use when no special effect is needed. Ideal for everyday<br />
pictures.<br />
Sharp Increases contrast on the edges of the picture. Ideal when you<br />
want to improve the clarity of an picture, or if you later may<br />
want to crop or cut out specific areas in the picture.<br />
Soft Softens the edges of the picture, creating a “soft focus” effect.<br />
Polaroid <strong>PDC</strong> <strong>3030</strong> Digital Camera User Guide<br />
www.polaroid-digital.com<br />
21
• Setting Frequency<br />
In order to take a better indoor picture, the camera needs to be set to suit<br />
the lighting frequency, for US, set the frequency to 60Hz, for Europe, set<br />
the frequency to 50Hz.<br />
Turn on the camera, set the Mode selector to Capture mode (the Status<br />
LED blinks once).<br />
Press<br />
Press<br />
Press<br />
• Reviewing the Pictures<br />
1. Turn on the camera.<br />
2. Set the Mode selector to Playback mode (the Status LED blinks<br />
once).<br />
3. Press Previous and Next button to view the pictures taken.<br />
• Zooming the Displayed Picture<br />
1. Turn on the camera.<br />
2. Set the Mode selector to Playback mode (the Status LED blinks<br />
once).<br />
3. Press Down button to zoom in.<br />
4. Press Up button to zoom out.<br />
22 Polaroid <strong>PDC</strong> <strong>3030</strong> Digital Camera User Guide<br />
www.polaroid-digital.com
• Rotate the Displayed Picture<br />
This function enables you to view the picture taken at a better angle.<br />
Turn on the camera, set the Mode selector to Playback mode (the Status<br />
LED blinks once).<br />
Press<br />
Press<br />
Press<br />
NOTE:<br />
This function only keeps the picture rotated while the camera is on. The<br />
picture will return to its original angle after the camera is turned off.<br />
Polaroid <strong>PDC</strong> <strong>3030</strong> Digital Camera User Guide<br />
www.polaroid-digital.com<br />
23
• Protecting/Unprotecting the Pictures from Deletion<br />
Following the steps below to protect a picture:<br />
Turn on the camera, set the Mode selector to Playback mode (the Status<br />
LED blinks once).<br />
Press<br />
Press<br />
Press<br />
Press<br />
NOTE:<br />
When a picture is protected, the<br />
ON F icon will appear. To unprotect the<br />
protected picture, please repeat the above steps and select “UNLOCK”. The<br />
icon will appear.<br />
OFF<br />
F<br />
24 Polaroid <strong>PDC</strong> <strong>3030</strong> Digital Camera User Guide<br />
www.polaroid-digital.com
• Deleting One Picture or All Pictures<br />
Following the steps below to delete one picture:<br />
Turn on the camera, set the Mode selector to Playback mode (the Status<br />
LED blinks once).<br />
Press<br />
Press<br />
NOTE:<br />
• The protected file(s) can not be deleted.<br />
• To delete all the pictures, please repeat the above<br />
steps and select “ALL”. All unprotected files<br />
(pictures, audio and video clips) in the current<br />
memory will be deleted.<br />
Press<br />
Polaroid <strong>PDC</strong> <strong>3030</strong> Digital Camera User Guide<br />
www.polaroid-digital.com<br />
25
4 Recording Audio and Video Clips<br />
• Recording Audio Clips<br />
1. Turn on the camera, set the Mode selector to Capture mode (the Status<br />
LED blinks once).<br />
2. Set the camera to Audio mode by the following steps.<br />
Press<br />
Press<br />
Press<br />
3. Press Shutter button to start, if you want to stop,<br />
press the Shutter button again. Please note that<br />
recording time displays on LCD screen.<br />
26 Polaroid <strong>PDC</strong> <strong>3030</strong> Digital Camera User Guide<br />
www.polaroid-digital.com
• Recording Video Clips<br />
1. Turn on the camera, set the Mode selector to Capture mode (the Status<br />
LED blinks once).<br />
2. Set the camera to Video mode by the following steps.<br />
Press<br />
Press<br />
3. Frame your subject using the LCD screen.<br />
4. Press Shutter button to start, if you want to stop,<br />
press the Shutter button again.<br />
Press<br />
NOTE:<br />
The recording time displays on the LCD screen will<br />
increase and the status LED turns green while recording<br />
video clip.<br />
• Playback Video Clips on LCD Screen<br />
IMPORTANT!<br />
Audio clips can only be played in PC/MAC when connected to the computer.<br />
Please refer to Transferring Pictures, Audio and Video Clips to Your<br />
Computer for further detail.<br />
1. Turn on the camera.<br />
2. Set the Mode selector to Playback mode (the Status LED blinks<br />
once).<br />
3. Press Previous and Next button to select the video clip you want to<br />
playback.<br />
4. The LCD screen shows “PLAY AVI? YES NO”, use Up or Down button<br />
to select “YES” and press OK button to play the video clip. Press OK<br />
button again to stop playback.<br />
NOTE:<br />
There is no sound during video playback as it has no built-in speaker.<br />
Polaroid <strong>PDC</strong> <strong>3030</strong> Digital Camera User Guide<br />
www.polaroid-digital.com<br />
27
• Protecting/Unprotecting Audio Clip(s) and Video Clip(s)<br />
Following the steps below to protect an Audio Clip:<br />
1. Turn on the camera.<br />
2. Set the Mode selector to Playback mode (the Status LED blinks<br />
once).<br />
3. Use Previous or Next button to select the audio clip you want to<br />
protect.<br />
Press<br />
Press<br />
Press<br />
Press<br />
NOTE:<br />
When an Audio clip is protected, the<br />
ON F icon will appear. To unprotect the<br />
protected Audio clip, please repeat the above steps and select “UNLOCK”.<br />
The icon will appear.<br />
OFF F<br />
28 Polaroid <strong>PDC</strong> <strong>3030</strong> Digital Camera User Guide<br />
www.polaroid-digital.com
Following the steps below to protect a Video Clip:<br />
1. Turn on the camera.<br />
2. Set the Mode selector to Playback mode (the Status LED blinks<br />
once).<br />
3. Use Previous or Next button to select the video clip you want to<br />
protect.<br />
Press<br />
Press<br />
Press<br />
Press<br />
Press<br />
NOTE:<br />
When a Video clip is protected, the<br />
ON F icon will appear. To unprotect the<br />
protected Video clip, please repeat the above steps and select “UNLOCK”.<br />
The icon will appear.<br />
OFFF<br />
Polaroid <strong>PDC</strong> <strong>3030</strong> Digital Camera User Guide<br />
www.polaroid-digital.com<br />
29
• Deleting One Audio Clip or Video Clip<br />
Deleting One Audio Clip<br />
1. Turn on the camera.<br />
2. Set the Mode selector to Playback mode (the Status LED blinks<br />
once).<br />
3. Use Previous or Next button to select the video clip you want to<br />
delete.<br />
Press<br />
Press<br />
Press<br />
NOTE:<br />
• The protected file(s) can not be deleted.<br />
• Please note that selecting “ALL” will delete all unprotected files (pictures,<br />
audio and video clips) in the current memory.<br />
30 Polaroid <strong>PDC</strong> <strong>3030</strong> Digital Camera User Guide<br />
www.polaroid-digital.com
Deleting One Video Clip<br />
1. Turn on the camera.<br />
2. Set the Mode selector to Playback mode (the Status LED blinks<br />
once).<br />
3. Use Previous or Next button to select the audio clip you want to<br />
delete.<br />
Press<br />
Press<br />
Press<br />
Press<br />
NOTE:<br />
• The protected file(s) can not be deleted.<br />
• Please note that selecting “ALL” will delete all unprotected files (pictures,<br />
audio and video clips) in the current memory.<br />
Polaroid <strong>PDC</strong> <strong>3030</strong> Digital Camera User Guide<br />
www.polaroid-digital.com<br />
31
• Using the SMC (SmartMedia Card)<br />
Your camera comes with 8MB of built-in Nand flash memory for storing<br />
pictures, audio clips and video clips as you record them. You can expand<br />
the memory using a commercially available SMC (up to 128MB). The<br />
camera senses whether a memory card is inserted, and automatically<br />
saves pictures, audio clips or video clips accordingly. Note that you<br />
cannot save pictures, audio clips or video clips to the built-in Nand flash<br />
memory while a memory card is installed in the camera.<br />
IMPORTANT!<br />
• Files contained in the SMC card recorded by other cameras may conflict<br />
with the <strong>PDC</strong> <strong>3030</strong> camera, and valuable data in your existing SMC card<br />
may be distorted or lost when the card is inserted in the <strong>PDC</strong> <strong>3030</strong> camera.<br />
We strongly recommend the user to use a NEW or formatted SMC card for<br />
the SMC camera. We will not guarantee any valuable data or files (other<br />
than <strong>PDC</strong> <strong>3030</strong> camera’s) in your SMC card.<br />
• Make sure you turn off the camera before inserting or removing a memory<br />
card.<br />
• Be sure to orient the card correctly when inserting it. Never try to force a<br />
memory card into the slot when you feel resistance.<br />
Memory card precautions:<br />
1. Use only a SMC memory card with this camera. Proper operation is not<br />
guaranteed when any other type of card is used.<br />
2. Electrostatic charge, electrical noise, and other phenomena can cause<br />
data corruption or even loss. Always make sure that you always back<br />
up important data on other media (MO disc, computer hard drive, etc.).<br />
3. If a memory card starts to behave abnormally, you can restore normal<br />
operation by formatting it. However, we recommend that you always<br />
take along with you more than one memory card whenever using the<br />
camera far away from your home or office.<br />
4. We recommend that you format a memory card when using it for the<br />
first time, or whenever the card you are using seems to be the cause of<br />
abnormal pictures. Remember to format a memory card if it was used<br />
in another digital camera or other devices.<br />
32 Polaroid <strong>PDC</strong> <strong>3030</strong> Digital Camera User Guide<br />
www.polaroid-digital.com
Inserting a SMC (not included)<br />
Turn off the camera and open the SMC slot cover as illustrated. Insert<br />
the SMC ensuring the card is inserted the correct position as illustrated.<br />
On the inner side of the SMC slot cover, there is a diagram showing the<br />
proper insertion orientation.<br />
Notched corner<br />
of SMC card<br />
NOTE:<br />
The camera will turn off automatically if you insert the SMC card while the<br />
camera is turned on.<br />
Removing the SMC (not included)<br />
To remove the SMC, turn off your camera , open the SMC slot cover,<br />
gently push the SMC inwards and then release it for the SMC to eject.<br />
Take the SMC out and close the card slot cover.<br />
Polaroid <strong>PDC</strong> <strong>3030</strong> Digital Camera User Guide<br />
www.polaroid-digital.com<br />
33
• Formatting Memory<br />
Turn on the camera, set the Mode selector to Playback mode<br />
Press<br />
Press<br />
IMPORTANT!<br />
• Formatting the internal memory and a SMC erases all<br />
the pictures, audio and video clips, including protected<br />
ones.<br />
• You can format a memory card on the camera or on<br />
a computer. However formatting a memory card on a<br />
computer takes much longer.<br />
• Note that data deleted by a format operation can not be<br />
recovered. Make sure you do not have any useful data<br />
currently stored on a memory card before you format it.<br />
Press<br />
34 Polaroid <strong>PDC</strong> <strong>3030</strong> Digital Camera User Guide<br />
www.polaroid-digital.com
5 Installing the Software into a Computer<br />
• Installing the Software<br />
For Windows® Users:<br />
PC<br />
IMPORTANT! (For Windows® 98SE)<br />
On Windows® 98SE Mass Storage function needs to install the <strong>PDC</strong> <strong>3030</strong><br />
Driver.<br />
IMPORTANT! (For Windows® ME, 2000, XP)<br />
Directly plug-in the camera to transfer and play the pictures, video clips or<br />
audio clips, no need to install the driver, but if you want to use NetMeeting<br />
function, please install the driver first.<br />
IMPORTANT! – If the computer requests you to install the Windows®<br />
operating system during the software installation, place the Windows® CD<br />
into the computer CD-ROM drive. The computer will install the necessary files<br />
from the CD automatically. When the Windows® software appears to have<br />
finished the operation, close the Windows® screen. Remove the Windows® CD<br />
and store safely.<br />
NOTE:<br />
Microsoft® NetMeeting is already bundled with Windows® 2000 and XP OS.<br />
Users using Windows® 2000 or XP do not need to install this software from<br />
the CD-ROM.<br />
Polaroid <strong>PDC</strong> <strong>3030</strong> Digital Camera User Guide<br />
www.polaroid-digital.com<br />
35
1. Before you begin, close all other software<br />
applications open on your computer.<br />
2. Insert the CD supplied into the computer CD-<br />
ROM Drive.<br />
3. The CD User Interface Screen will<br />
automatically launch.<br />
4. With the mouse, click on each software<br />
interface button in turn and follow the on<br />
screen instructions.<br />
Open & Close<br />
NOTE:<br />
If the setup screen doesn’t appear after loading<br />
the CD, then you can manually start it by doubleclicking<br />
the “My Computer” Icon on your desktop,<br />
then double-clicking the icon for the CD-ROM drive.<br />
When the CD-ROM window opens, double-click the<br />
“INSTALL-E.EXE” icon.<br />
For Macintosh® Users:<br />
MAC<br />
1. Before you begin, close all other software applications opened on your<br />
computer.<br />
2. Insert the CD supplied into the computer CD-ROM Drive.<br />
3. Double click the CD-ROM icon “Polaroid”.<br />
4. Install the software included.<br />
36 Polaroid <strong>PDC</strong> <strong>3030</strong> Digital Camera User Guide<br />
www.polaroid-digital.com
• Software included with Your Camera<br />
<strong>PDC</strong> <strong>3030</strong> Driver Plug & Play removable disk<br />
Easy to use, just plug the camera to a computer and use it as a removable<br />
disk. Use the Arcsoft® software suite to edit and print the Pictures.<br />
ArcSoft PhotoImpression 4.0 Picture Editing Software<br />
ArcSoft PhotoImpression is an easy to use digital video and imageediting<br />
program. This program enables users to upload still image and<br />
movie clips store in your camera. You could also edit and retouch your<br />
photos, then add special effects or place them in cards, calendars, frames<br />
and fantasy templates. ArcSoft PhotoImpression also includes a wide<br />
variety of printing options.<br />
Microsoft® NetMeeting Web Cam software<br />
NetMeeting provides the most complete conferencing solution for the<br />
Internet and corporate intranet. Powerful features let you communicate<br />
with both audio and video, collaborate on virtually any Windows-based<br />
application, exchange graphics on an electronic whiteboard, transfer files,<br />
use the text-based chat program, and much more. Using your PC and the<br />
Internet, you can now hold face-to-face conversations with friends and<br />
family around the world.<br />
Adobe® Acrobat® Reader .PDF File Reading Software<br />
Adobe® Acrobat® Reader lets you view and print Adobe Portable Document<br />
format (PDF) files on all major computer platforms, as well as fill in and<br />
submit Adobe PDF forms online.<br />
Polaroid <strong>PDC</strong> <strong>3030</strong> Digital Camera User Guide<br />
www.polaroid-digital.com<br />
37
• Computer System Requirements<br />
For acceptable picture transfer and editing performance, we recommend<br />
the following minimum requirements;<br />
For Windows® Users<br />
• Compatible with Microsoft® Windows® 98SE, Me, 2000 or XP<br />
• Pentium® II 333MHz or equivalent processor<br />
• 64MB RAM (128MB recommended)<br />
• USB Port<br />
• 200MB free disk space<br />
• Colour monitor with high colour (16-bit) graphic capability or higher<br />
• CD-ROM drive<br />
• Standard mouse and keyboard<br />
• Stereo speakers<br />
For Macintosh® Users<br />
• PowerPC® Processor<br />
• Mas OS Version 9.2~X<br />
• USB Port<br />
• 64MB RAM (128MB recommended)<br />
• 150MB Free disk space<br />
• Colour monitor with high colour (16-bit) graphic capability or higher<br />
• CD-ROM drive<br />
• Standard mouse and keyboard<br />
• Stereo speakers<br />
PC<br />
MAC<br />
38 Polaroid <strong>PDC</strong> <strong>3030</strong> Digital Camera User Guide<br />
www.polaroid-digital.com
6 Transferring Pictures, Audio and Video Clips To Your Computer<br />
• Before Transferring Pictures<br />
IMPORTANT! -<br />
Before you transfer your pictures make sure you have installed the software<br />
from the CD.<br />
For Windows® and Macintosh® Users: PC MAC<br />
• Connecting to Your Computer<br />
Connecting with the USB Cable.<br />
1. Turn on the camera.<br />
2. Plug the labelled end of the USB cable into the socket marked<br />
on your computer.<br />
3. Plug the other end of the USB cable into the port on your camera.<br />
Polaroid <strong>PDC</strong> <strong>3030</strong> Digital Camera User Guide<br />
www.polaroid-digital.com<br />
39
For Windows® Users:<br />
• Transferring and Viewing the Pictures, Audio Clips and Video<br />
Clips on PC<br />
1. Turn on the camera<br />
2. Set the camera to Playback mode.<br />
3. Connect the camera to a computer via the USB cable.<br />
4. Open the Windows® Explorer and then you can see a “Removable Disk”<br />
drive.<br />
5. Double click “Removable Disk” -> double click “DCIM”-> double click<br />
“100MEDIA”.<br />
6. All the pictures, video clips and audio clips are in the “100MEDIA”<br />
folder. Highlight the pictures, video clips or audio clips and drag them<br />
to a folder of your choice. You can also create sub-folders to group<br />
them or use the Arcsoft software to edit and manage the pictures or<br />
video / audio clips.<br />
For Macintosh® Users:<br />
PC<br />
MAC<br />
• Transferring and Viewing the Pictures, Audio Clips and Video<br />
Clips on Mac<br />
NOTE:<br />
For MAC user, directly plug-in the camera, no need to install the driver.<br />
1. Turn on the camera<br />
2. Set the camera to Playback mode.<br />
3. Connect the camera with MAC via USB cable, the systems will<br />
automatically recognize the MASS STORAGE drive named “untitled”.<br />
NOTE:<br />
This Drive name will be varied from different version of MAC OS system.<br />
4. Double click the folder “untitled” to enter sub-folder “DCIM”.<br />
5. Double click the folder “DCIM” to enter sub-folder “100MEDIA”.<br />
6. You can copy the pictures, audio clips and video clips from this folder<br />
“100MEDIA” and paste to the hard disk.<br />
40 Polaroid <strong>PDC</strong> <strong>3030</strong> Digital Camera User Guide<br />
www.polaroid-digital.com
F 2.8<br />
f=8.4mm<br />
7 Using the Camera as a Web Cam<br />
• Setting up NetMeeting<br />
NOTE:<br />
Set the camera to Capture mode before starting NetMeeting.<br />
1. Connect your <strong>PDC</strong> <strong>3030</strong> to the USB cable on one end.<br />
2. Connect the USB cable to a USB port on your PC on the other end.<br />
3. Put your <strong>PDC</strong> <strong>3030</strong> on top of your PC monitor or another flat surface.<br />
4. Connect your Microphone and your Speaker to your audio card’s Mic in<br />
jack and Speaker out jack respectively.<br />
• Start NetMeeting<br />
NOTE:<br />
For Windows® XP / 2000 users who use NetMeeting for the first time, Go to<br />
Start -> Run ->type in “conf” ->click “OK” and then follow the on-screen set<br />
up instruction to set up NetMeeting.<br />
1. Double click the “NetMeeting” icon on the desktop or select the<br />
“NetMeeting” icon from the Windows® Start Menu.<br />
2. If you need further help on how to use Microsoft® NetMeeting, select<br />
the “Help” under the menu bar and choose the topic you need. You<br />
can also refer to the Polaroid “EASY TO USE GUIDE TO MICROSOFT®<br />
NETMEETING” or visit the website: http://www.microsoft.com/<br />
windows/netmeeting.<br />
Polaroid <strong>PDC</strong> <strong>3030</strong> Digital Camera User Guide<br />
www.polaroid-digital.com<br />
41
8 Troubleshooting Problems<br />
The troubleshooting guide is designed to help you. If problems continue,<br />
please contact your local customer support hot-line. See your registration<br />
card for help line contact details.<br />
Symptom Problem Solution<br />
I receive an error message<br />
when I am installing “<strong>PDC</strong><br />
<strong>3030</strong> Camera Driver”.<br />
I cannot upload images to<br />
the PC.<br />
I cannot run the <strong>PDC</strong> <strong>3030</strong><br />
Camera Driver.<br />
I cannot upload the images<br />
from the internal memory<br />
of the <strong>PDC</strong> <strong>3030</strong> camera<br />
to PC.<br />
I cannot switch on my<br />
<strong>PDC</strong> <strong>3030</strong> Camera after<br />
inserting a SMC card.<br />
I press the shutter button<br />
but no response.<br />
“<strong>PDC</strong> <strong>3030</strong> Camera Driver”<br />
does not load.<br />
Connection failure or<br />
the camera is not set to<br />
Capture Mode.<br />
The camera is set to the<br />
Capture mode.<br />
Conflict with another<br />
camera driver capture<br />
device.<br />
The SMC card is inserted<br />
inside the SMC card slot.<br />
The SMC card is not inserted<br />
all the way in or card slot<br />
door is not closed properly.<br />
The <strong>PDC</strong> <strong>3030</strong> camera is<br />
processing data.<br />
Or<br />
The internal memory or<br />
SMC card memory is full.<br />
Shut down all other applications<br />
and attempt to reinstall the<br />
driver.<br />
Check the USB controller in<br />
your BIOS if they are activated.<br />
If these do not work, contact<br />
your national customer support<br />
representative.<br />
Check all cable connections are<br />
secured or set the camera to<br />
Playback Mode.<br />
Set the camera to Playback<br />
mode.<br />
If you have any other camera<br />
installed on your computer,<br />
remove the camera and its<br />
driver completely from your<br />
system to avoid conflict with<br />
<strong>PDC</strong> <strong>3030</strong>.<br />
The memory card has a higher<br />
priority than the internal<br />
memory for image storage,<br />
image transfer or deletion.<br />
Make sure the SMC card is<br />
inserted all the way in and close<br />
the slot door properly.<br />
Wait for this process to<br />
complete.<br />
Or<br />
Delete some images in the<br />
internal memory of the camera<br />
or SMC.<br />
42 Polaroid <strong>PDC</strong> <strong>3030</strong> Digital Camera User Guide<br />
www.polaroid-digital.com
Symptom Problem Solution<br />
The <strong>PDC</strong> <strong>3030</strong> Camera is<br />
processing the image and<br />
recharging the flash unit.<br />
The Flash icon and the<br />
image counter on the LCD<br />
is flashing after I took my<br />
last image using the Flash<br />
Mode.<br />
I get a blurred image when<br />
uploading my images to my<br />
computer.<br />
There may be a momentary<br />
delay between pressing<br />
the shutter button and the<br />
actual exposure.<br />
The battery indicator icon This means there is<br />
on the 1.4” LCD screen will insufficient power.<br />
go “blank”.<br />
My image quality is grainy.<br />
My CD installation wizard<br />
does not work.<br />
The LCD on my <strong>PDC</strong> <strong>3030</strong><br />
Camera has frozen when<br />
you insert a SMC card into<br />
your <strong>PDC</strong> <strong>3030</strong> camera.<br />
You may have selected the<br />
wrong camera frequency<br />
setting.<br />
The auto installation file is<br />
switched to off.<br />
Or<br />
The CD ROM is<br />
disconnected.<br />
No response from any of<br />
the function buttons.<br />
No web camera function. The camera is set to<br />
Playback mode<br />
Or<br />
Have not installed the <strong>PDC</strong><br />
<strong>3030</strong> Driver.<br />
Wait for the flash icon on the<br />
status LCD to stop flashing and<br />
then take another image.<br />
Hold your <strong>PDC</strong> <strong>3030</strong> camera<br />
steadily until you hear a “beep”<br />
which indicates the exposure is<br />
completed.<br />
You need to change the new<br />
batteries.<br />
Using the different frequency<br />
setting.<br />
Pal for 50 Hz<br />
NTSC for 60 Hz<br />
Go to the computer desktop,<br />
Right click on “My Computer”.<br />
Click “Properties”. Select<br />
“Device Manager”. Double<br />
click on “CD-ROM”, double<br />
click on "CD-R" (Normally the<br />
manufacturer’s name). Click on<br />
" Setting “. Ensure "Auto insert<br />
notification " is ticked and the<br />
" disconnect " is ticked. If<br />
you change the settings the<br />
computer will ask you to restart<br />
your PC. Click " Yes " (Only for<br />
Windows® 98SE & ME user)<br />
Ensure you only use a new or<br />
formatted SMC card for use<br />
with your <strong>PDC</strong> <strong>3030</strong> camera.<br />
Set the camera to Capture<br />
mode<br />
Or<br />
Install the <strong>PDC</strong> <strong>3030</strong> Driver.<br />
Please also refer to the help files & User Guide that accompany the enclosed applications. For<br />
further information and support, please visit our website: http://www.polaroid-digital.com.<br />
Polaroid <strong>PDC</strong> <strong>3030</strong> Digital Camera User Guide<br />
43<br />
www.polaroid-digital.com
9 Getting Help<br />
• Polaroid-digital Online Services<br />
Website: http://www.polaroid-digital.com<br />
• ArcSoft Software Help<br />
For North America<br />
For South & Central America<br />
ArcSoft HQ Support Centre Tel: 1-510-979+5520<br />
(Fremont California, CA) Fax: 1-510-440-1270<br />
Tel: 1-800-762-8657<br />
E-mail:latlnsupport@arcsoft.com<br />
(toll free number)<br />
Fax: 1-510-440-1270<br />
E-mail: support@arcsoft.com<br />
For China<br />
For Japan<br />
ArcSoft China Support Centre (Beijing) ArcSoft Japan Support Centre (Tokyo)<br />
Tel: 8610-6849-1368 Tel: +81-03-3834-5256<br />
Fax: 8610-6849-1367 Fax: +81-03-5816-4730<br />
E-mail: china@arcsoft.com<br />
Web: http://www.mds2000.co.jp/<br />
arcsoft<br />
E-mail: japan@arcsoft.com and<br />
support@mds2000.com<br />
For Oceania<br />
For Europe/Middle East/<br />
ArcSoft Australian Support Centre<br />
Africa & Rest of the World<br />
(Baulkham Hills, New South Wales) ArcSoft Europe Support Centre<br />
Tel: 61 (2) 9899-5888<br />
(Ireland)<br />
Fax: 61 (2) 9899-5728 Tel: +353-(0) 61-702087<br />
E-mail: support@supportgroup.com.au Fax: +353-(0) 61-702001<br />
E-mail: europe@arcsoft.com<br />
Visit http:// www.arcsoft.com for technical support and frequently asked<br />
questions (FAQ’s).<br />
44 Polaroid <strong>PDC</strong> <strong>3030</strong> Digital Camera User Guide<br />
www.polaroid-digital.com
10 Appendix<br />
• Technical Specifications<br />
• Internal Memory: 8MB NAND FLASH<br />
• External Memory: support SMC memory card up to 128MB (not included)<br />
• Still Picture Resolution (based on 8 MB internal memory):<br />
• Fine quality -<br />
2048 x1536 pixel -Approx. 5 pictures<br />
1600 x 1200 pixel -Approx. 9 pictures<br />
1280 x 960 pixel -Approx. 14 pictures<br />
800 x 600 pixel -Approx. 36 pictures<br />
• Normal quality - 2048 x1536 pixel -Approx. 11 pictures<br />
1600 x 1200 pixel -Approx. 20 pictures<br />
1280 x 960pixel -Approx. 30 pictures<br />
800 x 600 pixel -Approx. 86 pictures<br />
• Video Clip:<br />
• Unlimited when connected to the computer via video capture software<br />
• Limited when using the 8MB internal memory:<br />
Approximately 1.5 minutes in CIF mode 10fps @ 320 X 240 pixel<br />
• Using SMC card:<br />
16 M - Approx. 3 minutes<br />
32 M - Approx. 8 minutes<br />
64 M - Approx. 16 minutes<br />
128 M - Approx. 32 minutes<br />
• Audio Clip:<br />
8KHZ, 4bit, Approximately 30 minutes based on 8MB internal memory<br />
• File Format:<br />
• Still Picture - Compression in JPEG format after download to PC via<br />
USB (depend on application used)<br />
• Video Clip - AVI format<br />
• Audio Clip - WAV format<br />
• External Connector: USB, SMC slot<br />
• Auto Power Off: After 30, 60, or 90 seconds inactivity<br />
• Power Supply: USB Port, 4 X AAA batteries<br />
• Operating System:<br />
• For Windows® Users: Microsoft® Windows® 98SE, Me, 2000 or XP<br />
• For Macintosh® Users: Mac OS 9.2~X<br />
Polaroid <strong>PDC</strong> <strong>3030</strong> Digital Camera User Guide<br />
www.polaroid-digital.com<br />
45
• Capacity of SMC Card<br />
16M<br />
32M<br />
64M<br />
128M<br />
SMC Card<br />
Fine quality pictures Normal quality<br />
can be taken pictures can be taken<br />
High<br />
(2048x1536)<br />
9 23<br />
Middle<br />
(1600x1200)<br />
18 41<br />
Low<br />
(1280x960)<br />
28 60<br />
Economic<br />
(800x600)<br />
72 172<br />
High<br />
(2048x1536)<br />
Middle<br />
(1600x1200)<br />
Low<br />
(1280x960)<br />
Economic<br />
(800x600)<br />
19<br />
37<br />
57<br />
145<br />
48<br />
84<br />
122<br />
346<br />
High<br />
(2048x1536)<br />
Middle<br />
(1600x1200)<br />
Low<br />
(1280x960)<br />
39<br />
75<br />
115<br />
98<br />
170<br />
246<br />
Economic<br />
(800x600)<br />
High<br />
(2048x1536)<br />
Middle<br />
(1600x1200)<br />
Low<br />
(1280x960)<br />
291<br />
79<br />
151<br />
231<br />
694<br />
198<br />
342<br />
494<br />
Economic<br />
(800x600) 583 1390<br />
NOTE:<br />
Scene complexity affects a picture’s file size. For example, a picture of trees in<br />
autumn has a larger file size than a picture of blue sky at the same resolution and<br />
quality setting. Therefore, the number of pictures you can store on a card may vary.<br />
46 Polaroid <strong>PDC</strong> <strong>3030</strong> Digital Camera User Guide<br />
www.polaroid-digital.com
• Using Your Batteries<br />
WARNINGS!<br />
• Batteries should be replaced by an adult.<br />
• Do not mix different types of batteries or new and used batteries.<br />
• Use recommended or equivalent type of batteries only.<br />
• Insert the batteries with the correct polarity.<br />
• Remove exhausted batteries from the camera immediately.<br />
• Do not short the supply terminals.<br />
• Do not dispose the batteries in fire.<br />
• Remove batteries from the camera when not in use.<br />
These instructions should be retained for future reference.<br />
• Tips, Your Safety & Maintenance<br />
Your Camera should only be operated within the following environmental conditions;<br />
• 41 - 104º Fahrenheit; 5 - 40º Celsius<br />
• 20% - 85% relative humidity, non condensing<br />
Battery life or image quality may be affected outside these conditions<br />
Camera Cautions<br />
• NEVER immerse any part of the Camera or its accessories into any fluid or liquid.<br />
• ALWAYS disconnect the Camera from your PC or TV before cleaning it.<br />
• ALWAYS remove dust or stains with a soft cloth dampened with water<br />
or neutral detergent.<br />
• NEVER place hot items on the surface of the Camera.<br />
• NEVER attempt to open or disassemble Camera as this will affect any<br />
warranty claim.<br />
• Uninstalling the Camera Driver (PC only)<br />
1. Unplug the camera from the computer.<br />
2. Go to Start -> Setting -> Control Panel.<br />
3. Double click Add / Remove Programs.<br />
4. In Add / Remove Programs, select “Polaroid Digital Cam” and click the<br />
Remove button.<br />
5. Restart the computer.<br />
Polaroid <strong>PDC</strong> <strong>3030</strong> Digital Camera User Guide<br />
www.polaroid-digital.com<br />
47
• Regulatory Information<br />
FCC Notice<br />
This device complies with Part 15 of FCC Rules. Operation is subject<br />
to the following two conditions: (1) This device may not cause harmful<br />
interference, and (2) This device must accept any interference received,<br />
including interference that may cause undesired operation.<br />
Warning: Changes or modifications to this unit not expressly approved<br />
by the party responsible for compliance could void the user’s authority to<br />
operate the equipment.<br />
NOTE: This equipment has been tested and found to comply with the<br />
limits for Class B digital device, pursuant to Part 15 of the FCC Rules.<br />
These limits are designed to provide reasonable protection against harmful<br />
interference in a residential installation. This equipment generates, uses<br />
and can radiate radio frequency energy and, if not installed and used in<br />
accordance with the instructions, may cause harmful interference to radio<br />
communications.<br />
However, there is no guarantee that interference will not occur in a<br />
particular installation. If this equipment does cause harmful interference<br />
to radio or television reception, which can be determined by turning<br />
the equipment off and on, the user is encouraged to try to correct the<br />
interference by one or more of the following measures:<br />
• Reorient or relocate the receiving antenna.<br />
• Increase the separation between the equipment and receiver.<br />
• Connect the equipment into an outlet on a circuit different from that to<br />
which the receiver is needed.<br />
• Consult the dealer or an experienced radio/TV technician for help.<br />
Shielded cable must be used with this unit to ensure compliance with the<br />
Class B FCC limits.<br />
Under the environment with electrostatic discharge, the product may<br />
malfunction and require user to reset the product.<br />
48 Polaroid <strong>PDC</strong> <strong>3030</strong> Digital Camera User Guide<br />
www.polaroid-digital.com
<strong>UK</strong> 1103<br />
Part No.: OM3244<strong>UK</strong>001<br />
Polaroid <strong>PDC</strong> <strong>3030</strong> Digital Camera User Guide<br />
www.polaroid-digital.com<br />
49