Scroll Saw DSH/E Manual - Proxxon Tools
Scroll Saw DSH/E Manual - Proxxon Tools
Scroll Saw DSH/E Manual - Proxxon Tools
You also want an ePaper? Increase the reach of your titles
YUMPU automatically turns print PDFs into web optimized ePapers that Google loves.
<strong>Proxxon</strong><strong>Tools</strong>.com<br />
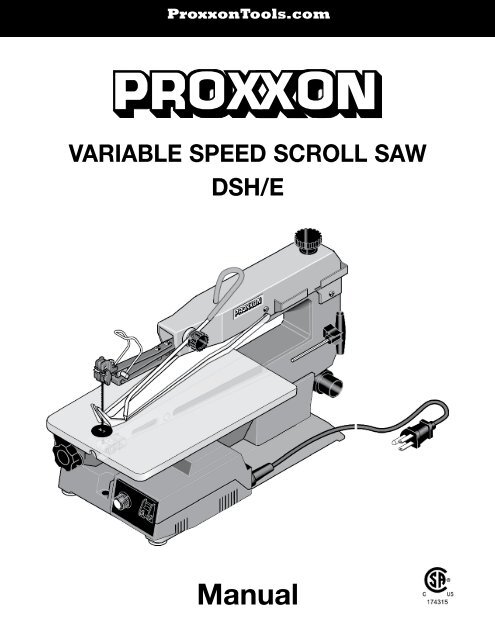
VARIABLE SPEED SCROLL SAW<br />
<strong>DSH</strong>/E<br />
<strong>Manual</strong>
- 2 -<br />
Fold out the picture pages<br />
when reading the user instructions!
äg e<br />
0<br />
<br />
D ekupiers<br />
<br />
<br />
<br />
<br />
<br />
<br />
<br />
<br />
<br />
<br />
<br />
<br />
<br />
<br />
<br />
<br />
<br />
Fig. 1a<br />
15<br />
<br />
<br />
4<br />
3<br />
1<br />
5<br />
20 7<br />
14<br />
6<br />
18<br />
11<br />
16<br />
17<br />
9<br />
8<br />
19<br />
Fig. 1b<br />
13<br />
- 3 -
11<br />
10<br />
4<br />
5<br />
3<br />
<br />
D ekupiers äg e<br />
<br />
<br />
<br />
<br />
<br />
<br />
<br />
2<br />
6<br />
7<br />
<br />
<br />
<br />
45<br />
30<br />
15<br />
0<br />
8<br />
1<br />
15<br />
0<br />
9<br />
Fig. 2<br />
Fig. 2a<br />
<br />
<br />
<br />
<br />
<br />
2<br />
1<br />
Fig. 3<br />
Fig. 4<br />
5<br />
4<br />
6<br />
1<br />
9<br />
7<br />
8<br />
1<br />
2<br />
3<br />
2<br />
3<br />
Fig. 5a<br />
Fig. 5b<br />
5<br />
4<br />
- 4 -
äg e<br />
<br />
Dekupiersäge <strong>DSH</strong>^ CE D-54518 Niersbach<br />
D ekupiers<br />
Spannung 220-230V 50Hz Hub 1 Stufe 990/min<br />
Input 205/145 Watt Hub 2 Stufe 1500/min<br />
Ampere 0,907<br />
Conforme aux règlements du ministère du travail à la date de fabrication<br />
KB 30 Artikel-Nr. 28 092<br />
Hubhöhe 19 mm<br />
Zum Auswechsel der Sägeblätter<br />
Zum Auswechsel der Sägeblätter<br />
Zum Auswechsel der Sägeblätter<br />
Zum Auswechsel der Sägeblätter<br />
15<br />
0<br />
Zum Auswechsel der Sägeblätter<br />
Fig. 6<br />
Fig. 7<br />
<br />
<br />
<br />
Fig. 8<br />
- 5 -
Contents<br />
1 Mechanical <strong>Scroll</strong> <strong>Saw</strong> <strong>DSH</strong>/E with electronic speed control ................................................................................................6<br />
2 General Safety Instructions: ....................................................................................................................................................7<br />
3 Additional Safety Instructions ..................................................................................................................................................8<br />
4 Grounding Instructions ..........................................................................................................................................................10<br />
5 Legend (fig. 1) ........................................................................................................................................................................10<br />
6 Description of machine (also see fig. 1a and 1b) ..................................................................................................................10<br />
7 Technical data ........................................................................................................................................................................11<br />
8 Set-up and commissioning of the saw: ................................................................................................................................11<br />
8.1 Unpacking (fig. 1a and 1b): ....................................................................................................................................................11<br />
8.2 Attaching Blade Guard ..........................................................................................................................................................11<br />
8.3 Setting up the saw: ................................................................................................................................................................11<br />
8.4 Adjust and set angle display (fig. 2): ......................................................................................................................................12<br />
8.5 Assembling the air nozzle (fig. 3): ..........................................................................................................................................12<br />
8.6 Connecting the vacuum cleaner (fig. 4): ................................................................................................................................12<br />
8.7 <strong>Saw</strong> blades ............................................................................................................................................................................12<br />
8.7.1 Clamping in the saw blade (fig. 5a and 5b): ..........................................................................................................................12<br />
8.7.2 <strong>Saw</strong> blades with cross pin (fig. 5a). ......................................................................................................................................12<br />
8.7.3 <strong>Saw</strong> blades with flat ends (hand or leaf saw blades, see fig. 5b): ........................................................................................12<br />
8.7.4 Finely setting the correct saw tensioning (fig. 6): ..................................................................................................................12<br />
8.7.5 Removing saw blade (fig. 5a and 5b):....................................................................................................................................13<br />
9 Working with the saw: ............................................................................................................................................................13<br />
9.1 General information for working with mechanical scroll saw: ..............................................................................................13<br />
9.1.1 Selecting the saw blade: ........................................................................................................................................................13<br />
10 Selecting the speed: ..............................................................................................................................................................14<br />
10.1.1 Possible causes of faults: ......................................................................................................................................................14<br />
10.2 <strong>Saw</strong>ing (fig. 7) ........................................................................................................................................................................14<br />
10.2.1 Inside cuts (fig. 8) ..................................................................................................................................................................14<br />
10.2.2 Grain cuts: ..............................................................................................................................................................................14<br />
11 Care and maintenance ..........................................................................................................................................................15<br />
12 Accessories ............................................................................................................................................................................15<br />
1 Mechanical <strong>Scroll</strong> <strong>Saw</strong> <strong>DSH</strong>/E with electronic<br />
speed control<br />
Dear customer!<br />
Using these instructions<br />
• makes it easier to get familiar with the device<br />
• prevents malfunctions caused by improper handling, and<br />
• lengthens the service life of your device.<br />
NOTE:<br />
Keep this instruction manual in an easily accessible place.<br />
Only operate this machine if you are qualified to do so and<br />
follow the guidelines in this instruction manual.<br />
PROXXON does not accept responsibility for the safe<br />
functioning of the machine<br />
if it is handled in a manner which constitutes improper use,<br />
if it is used for other purposes which are not specified in the<br />
instruction manual,<br />
if the safety regulations are not observed.<br />
Warranty claims are invalid if<br />
1. the machine is incorrectly operated,<br />
2. the machine has not been sufficiently maintained.<br />
In the interests of your safety, please always observe the<br />
safety regulations. Only use genuine PROXXON spare parts.<br />
We reserve the right to make further alterations for the<br />
purpose of technical progress. We wish you every success<br />
with your machine.<br />
- 6 -
Read and understand the entire owners<br />
manual before attempting assembly or<br />
operation!<br />
2 General safety instructions<br />
Read and become familiar with this entire instructions manual.<br />
Learn the tool`s applications, limitations and possible hazards.<br />
SAVE THESE INSTRUCTIONS<br />
1. KEEP GUARDS IN PLACE and in working order.<br />
2. REMOVE ADJUSTING KEYS AND WRENCHES. Form<br />
habit of checking to see that keys and adjusting<br />
wrenches are removed from tool before turning it on.<br />
3. KEEP WORK AREA CLEAN. Cluttered areas and benches<br />
invite accidents.<br />
4. DON'T USE IN DANGEROUS ENVIRONMENT. Don't use<br />
power tools in damp or wet locations, or expose them to<br />
rain. Keep work area well lighted.<br />
5. KEEP CHILDREN AWAY. All visitors should be kept safe<br />
distance from work area.<br />
6. MAKE WORKSHOP KID PROOF with padlocks, master<br />
switches, or by removing starter keys.<br />
7. DON'T FORCE TOOL. It will do the job better and safer<br />
at the rate for which it was designed.<br />
8. USE RIGHT TOOL. Don't force tool or attachment to do a<br />
job for which it was not designed.<br />
9. USE PROPER EXTENSION CORD. Make sure your<br />
extension cord is in good condition. When using an<br />
extension cord, be sure to use one heavy enough to carry<br />
the current your product will draw. An undersized cord<br />
will cause a drop in line voltage resulting in loss of power<br />
and overheating. Table 1 shows the correct size to use<br />
depending on cord length and nameplate ampere rating.<br />
If in doubt, use the next heavier gage. The smaller the<br />
gage number, the heavier the cord. Exception<br />
No. 1: The reference to the table and the table itself may<br />
be omitted if a statement indicating the appropriate gage<br />
and length is incorporated into the instruction.Exception<br />
No. 2: The information regarding extension cords need<br />
not be provided for a permanently connected tool.<br />
10. WEAR PROPER APPAREL. Do not wear loose clothing,<br />
gloves, neckties, rings, bracelets, or other jewelry which<br />
may get caught in moving parts. Non-slip footwear is<br />
recommended. Wear protective hair covering to contain<br />
long hair. Exception: The reference to gloves may be<br />
omitted from the instructions for a grinder.<br />
11. ALWAYS USE SAFETY GLASSES. Also use face or dust<br />
mask if cutting operation is dusty. Everyday eyeglasses<br />
only have impact resistant lenses, they are NOT safety<br />
glasses.<br />
12. SECURE WORK. Use clamps or a vise to hold work<br />
when practical. It's safer than using your hand and it<br />
frees both hands to operate tool.<br />
13. DON'T OVERREACH. Keep proper footing and balance at<br />
all times.<br />
14. MAINTAIN TOOLS WITH CARE. Keep tools sharp and<br />
clean for best and safest performance. Follow instructions<br />
for lubricating and changing accessories.<br />
15. DISCONNECT TOOLS before servicing; when changing<br />
accessories, such as blades, bits, cutters, and the like.<br />
16. REDUCE THE RISK OF UNINTENTIONAL STARTING.<br />
Make sure switch is in off position before plugging in.<br />
17. USE RECOMMENDED ACCESSORIES. Consult the<br />
owner's manual for recommended accessories. The use of<br />
improper accessories may cause risk of injury to persons.<br />
18. NEVER STAND ON TOOL. Serious injury could occur if the<br />
tool is tipped or if the cutting tool is unintentionally<br />
contacted.<br />
19. CHECK DAMAGED PARTS. Before further use of the tool,<br />
a guard or other part that is damaged should be carefully<br />
checked to determine that it will operate properly and<br />
perform its intended function - check for alignment of<br />
moving parts, binding of moving parts, breakage of parts,<br />
mounting, and any other conditions that may affect its<br />
operation. A guard or other part that is damaged should<br />
be properly repaired or replaced.<br />
20. DIRECTION OF FEED. Feed work into a blade or cutter<br />
against the direction of rotation of the blade or cutter only.<br />
21. NEVER LEAVE TOOL RUNNING UNATTENDED. TURN<br />
POWER OFF. Don't leave tool until it comes to a complete<br />
stop.<br />
Table 1:<br />
Minimum gage for cord:<br />
Total length of<br />
cord in feet 25 ft 50 ft 100 ft 150 ft<br />
AWG: 18 16 16 14<br />
- 7 -
IMPORTANT<br />
Additional Safety Instructions For <strong>Scroll</strong> <strong>Saw</strong>s<br />
Your safety is very important! Please follow the warnings<br />
below :<br />
3. Additional Safety Instructions For <strong>Scroll</strong> <strong>Saw</strong>s<br />
Safety is a combination of common sense, staying alert and<br />
knowing how your scroll saw works. Read this manual to<br />
understand this saw and become familiar with its contents,<br />
including all the safety warnings. Do not allow familiarity<br />
(gained from frequent use of your <strong>Scroll</strong> <strong>Saw</strong>) to become<br />
commonplace. Always remember that a careless fraction of a<br />
second is sufficient to inflict severe injury.<br />
Developing these habits in your shop and safety will become<br />
second nature to you.<br />
ALWAYS WEAR EYE PROTECTION<br />
Projectiles thrown away from the machine could cause serious<br />
permanent eye damage. Always wear safety goggles, not<br />
glasses, complying with ANSI Z87.1 (or in Canada CSA Z94-3-<br />
M88). Everyday eyeglasses have only impact resistant lenses.<br />
They are not safety glasses! Safety goggles are available at<br />
many local retail stores. Glasses or goggles not in compliance<br />
with ANSI or CSA could seriously hurt you when they break.<br />
DO NOT REMOVE JAMMED CUTOFF PIECES UNTIL<br />
BLADE HAS STOPPED1<br />
Before freeing any jammed material or loose pieces from the<br />
saw table, turn the machine off, wait for all moving parts to<br />
stop and unplug the saw!<br />
MAINTAIN PROPER ADJUSTMENT OF BLADE TENSION<br />
AND BLADE GUARDS<br />
Quick Release Tension Lever should be in the correct position<br />
before operating. Make sure the blade tension is properly<br />
adjusted: For finely setting the correct saw blade tension you<br />
can use the knob on the upper back part of the housing,<br />
observe the instruction manual!<br />
HOLD WORK PIECE FIRMLY AGAINST TABLE<br />
Plan the way you will hold the work piece from start to finish;<br />
and follow the instructions:<br />
Reduce the Risk of awkward operations and hand positions<br />
where a sudden slip could cause fingers or hand to move into<br />
the blade. Keep your face and body to one side of the blade, out<br />
of line with a possible thrown piece if the blade should break.<br />
Always use extra caution with large, very small or awkward<br />
work pieces! Do not use this <strong>Scroll</strong> <strong>Saw</strong> to finish pieces too<br />
small to hold by hand, and, if necessary, use extra supports<br />
(saw horses, V-blocks, tables, etc.) for any work pieces large<br />
enough to tip when not held down to the table top.<br />
• Support round material such as tubing or dowel rods. They<br />
have a tendency to roll during a cut, causing the blade to<br />
“bite”. To avoid this, always use “V” blocks.<br />
• When cutting irregularly shaped work pieces, plan your work<br />
so it will not pinch the blade. A piece of molding, for example,<br />
must lay flat or be held by a fixture or jig that will not let it<br />
twist, rock or slip while being cut.<br />
• Cut only one work piece at a time.<br />
• Clear everything except the work piece and related support<br />
devices off the table before turning the saw on.<br />
Never turn your <strong>Scroll</strong> <strong>Saw</strong> on before clearing the table of all<br />
objects (tools, scraps of wood, etc.) except for the work piece<br />
and related feed or support devices for the operation planned.<br />
Do not use another person as a substitute for a table<br />
extension, or as additional support for a work piece or to help<br />
feed, support or pull the work piece.<br />
INSTALL BLADE TEETH POINTING DOWN TOWARDS<br />
TABLE<br />
The <strong>Scroll</strong> <strong>Saw</strong> should cut on the down stroke. Always make<br />
sure blade teeth are oriented downward toward table.<br />
KEEP FINGERS IN A SAFE DISTANCE FROM THE BLADE<br />
Do not cut pieces so small that your fingers go under the<br />
blade guard. Never reach in blade cutting path with your<br />
hands or fingers.<br />
Use jigs or fixtures to hold the work and keep your hands<br />
away from the blade.<br />
When making a very small cut out, always secure the work<br />
piece to a scrap piece of plywood with double faced tape. This<br />
way, the work is supported and your fingers are away from the<br />
blade.<br />
BLADE GUARD/HOLD DOWN MUST CONTACT<br />
WORKPIECE<br />
Never use your <strong>Scroll</strong> <strong>Saw</strong> with the blade guard removed,<br />
damaged or mounted incorrect (see instruction manual). A<br />
blade guard that is damaged should be properly replaced.<br />
NEVER LEAVE SCROLL SAW WITH MOTOR OPERATING<br />
Never leave the <strong>Scroll</strong> <strong>Saw</strong> running unattended. Turn the saw<br />
OFF, make sure the saw has come to a complete stop, and<br />
then remove plug from power supply before leaving the work<br />
area.<br />
ADJUST BLADE TENSIN BY HAND. NO TOOLS<br />
For finely setting the correct saw blade tension you can use<br />
the knob on the upper back part of the housing, observe the<br />
instruction manual! Do not use any tools!<br />
RAISE GUARD/HOLD DOWN WHEN TILTING TABLE<br />
SECURE TOOL PROPERLY TO PREVENT UNEXPECTED<br />
MOVEMENT<br />
Bolt the saw on a firm level surface where there is plenty of<br />
room for handling and properly supporting the work piece, like<br />
a stable, level table, workbench or the floor. The saw may<br />
move when cutting large work pieces if not secured (See also<br />
“Setting up the saw” in the manual). Support large work pieces<br />
- 8 -
to reduce blade breakage and pinching. Support the saw so<br />
the table is level and the saw does not rock.<br />
DISCONNECT MACHINE FROM POWER SOURCE BEFORE<br />
MAKING REPAIRS AND ADJUSTMENTS<br />
Unplug your scroll saw before changing blades, adjustments,<br />
or performing any maintenance.<br />
DO NOT EXPOSE TO RAIN OR USE IN DAMP LOCATIONS<br />
DO NOT OPERATE MACHINE WHILE UNDER THE<br />
INFLUENCE OF DRUGS; ALCOHOL OR<br />
MEDICAMENTATION<br />
Never operate a machine when tired, or under the influence of<br />
drugs or alcohol or medicamentation. . Full mental alertness is<br />
required at all times when running a machine.<br />
NEVER ALLOW UNSUPERVISED CHILDREN OR<br />
UNTRAINED PERSONNEL TO OPERATE THE MACHINE.<br />
Make sure any instructions you give in regards to machine<br />
operation are approved, correct, safe, and clearly understood.<br />
Unsupervised visitors or children inside your shop could<br />
receive serious personal injury. Ensure child and visitor safety<br />
by keeping all entrances to the shop, the ON/OFF knob on the<br />
saw locked and the plug removed from the power supply outlet<br />
at all times the saw is unsupervised.<br />
KNOW YOUR POWER TOOL<br />
Read and understand the owner’s manual and all the labels<br />
affixed to the tool. Learn its application and limitations as well<br />
as the specific potential hazards peculiar to this tool.<br />
DO NOT FEED THE MATERIAL TOO FAST WHILE CUTTING<br />
Only feed the material fast enough so that the blade will cut.<br />
BEFORE EACH USE INSPECT YOUR SAW AND CHECK<br />
DAMAGED PARTS AND WATCH THE SAW WHILE IT RUNS<br />
Before use of the tool, any part that is damaged should be<br />
carefully checked to ensure that it will operate properly and<br />
perform its intended function. If the saw makes an unfamiliar<br />
noise or vibrates excessively, stop immediately; turn the saw<br />
off. Unplug the saw! Check for alignment of moving parts,<br />
mounting, and any other conditions that may affect its<br />
operation. If any part is missing, broken or bent in any way, or<br />
any electrical parts don’t work properly, turn the saw off and<br />
unplug the saw. Do not restart until finding and fixing the<br />
problem correctly. All repairs, electrical or mechanical, should<br />
be attempted only by trained repairmen.<br />
DO NOT ALTER OR MISUSE TOOL<br />
These <strong>Scroll</strong> <strong>Saw</strong>s are precision built. Any alteration or<br />
modification not specified is misuse and may result in<br />
dangerous conditions.<br />
AVOID POSITIONS where a slip could cause your hand to go<br />
into the blade. Wear non slip footwear.<br />
DO NOT START THE SAW WITH THE BLADE IN CONTACT<br />
WITH THE WORKPIECE.<br />
BEFORE STARTING YOUR WORK ALWAYS INSPECT<br />
YOUR WORKPIECE:<br />
Make sure there are no nails or foreign objects in the part of<br />
the work piece to be cut.<br />
REDUCE THE RISK OF FIRE!<br />
Remove all traces of wood dust from on and around the saw.<br />
Remove all metal shavings from on or around the saw before<br />
sawing wood again.<br />
WARNING:<br />
Some dust created by power sanding, sawing, grinding,<br />
drilling, and other construction activities contains chemicals<br />
known to the State of California to cause cancer, birth defects<br />
or other reproductive harm. Some examples of these<br />
chemicals are:<br />
• lead from lead-based paints,<br />
• crystalline silica from bricks and cement and other masonry<br />
products, and<br />
• arsenic and chromium from chemically-treated lumber.<br />
Your risk from these exposures varies, depending on how<br />
often you do this type of work. To reduce your exposure to<br />
these chemicals: work in a well ventilated area, and work with<br />
approved safety equipment, such as those dust masks that<br />
are specially designed to filter out microscopic particles.<br />
Use a vacuum cleaner for wood dust collection as described<br />
in our manual whenever possible.<br />
USE BLADES AND ACCESSORIES RECOMMENDED FOR<br />
YOUR MACHINE<br />
Choose the right size and style blade for the material and the<br />
type of cutting you plan to perform. Use only recommended<br />
accessories and follow the instructions that come with the<br />
accessories. The use of improper accessories may cause risk<br />
of injury. Remove plug from power supply outlet before<br />
installing or removing any saw blades or other accessories.<br />
- 9 -
4 Grounding instructions<br />
All grounded, cord-connected tools:<br />
In the event of a malfunction or breakdown, grounding<br />
provides a path of least resistance for electric current to<br />
reduce the risk of electric shock. This tool is equipped with an<br />
electric cord having an equipment-grounding conductor and a<br />
grounding plug. The plug must be plugged into a matching<br />
outlet that is properly installed and grounded in accordance<br />
with all local codes and ordinances. Do not modify the plug<br />
provided - if it will not fit the outlet, have the proper outlet<br />
installed by a qualified electrician. Improper connection of the<br />
equipment-grounding conductor can result in a risk of electric<br />
shock. The conductor with insulation having an outer surface<br />
that is green with or without yellow stripes is the equipmentgrounding<br />
conductor. If repair or replacement of the electric<br />
cord or plug is necessary, do not connect the equipmentgrounding<br />
conductor to a live terminal. Check with a qualified<br />
electrician or service personnel if the grounding instructions<br />
are not completely understood, or if in doubt as to whether<br />
the tool is properly grounded. Use only 3-wire extension cords<br />
that have 3-prong grounding plugs and 3-pole receptacles<br />
that accept the tool's plug.<br />
Repair or replace damaged or worn cord immediately.<br />
Grounded, cord-connected tools intended for use on a supply<br />
circuit having a nominal rating less than 150 volts:<br />
This tool is intended for use on a circuit that has an outlet that<br />
looks like the one illustrated in Sketch A in Figure 9. The tool<br />
has a grounding plug that looks like the plug illustrated in<br />
Sketch A in Figure 9 temporary adapter, which looks like the<br />
GROUNDING<br />
PIN<br />
Fig. 9<br />
<br />
ADAPTER<br />
<br />
GROUNDING<br />
MEANS<br />
METAL SCREW<br />
COVER OF GROUNDED<br />
OUTLET BOX<br />
GROUNDING<br />
PIN<br />
<br />
<br />
adapter illustrated in Sketches B and C, may be used to<br />
connect this plug to a 2-pole receptacle as shown in Sketch B<br />
if a properly grounded outlet is not available. The temporary<br />
adapter should be used only until a properly grounded outlet<br />
can be installed by a qualified electrician. The green-colored<br />
rigid ear, lug, and the like, extending from the adapter must be<br />
connected to a permanent ground such as a properly<br />
grounded outlet box.<br />
5 Legend (fig. 1)<br />
1. Quick tensioning clamp for saw blade tensioning<br />
2. Fine adjustment for saw blade tensioning<br />
3. Storage compartment for saw blades<br />
4. <strong>Saw</strong> frame<br />
5. <strong>Saw</strong> blade mount, top<br />
6. <strong>Saw</strong> blade mount, bottom<br />
7. Air nozzle<br />
8. ON OFF switch<br />
9. Stroke rate regulating button<br />
10. Tilting Locking Knob<br />
11. Connecting piece for vacuum cleaner<br />
12. Cast steel base<br />
13. Direct current motor<br />
14. <strong>Saw</strong> table<br />
15. <strong>Saw</strong> blade<br />
16. Mains cable<br />
17. Drill holes for fastening screws<br />
18. Allen key with T-Handle<br />
19. <strong>Saw</strong> blades<br />
20. Blade guard<br />
6 Description of machine<br />
(also see fig. 1a and 1b)<br />
The PROXXON mechanical scroll saw is a very solid and<br />
robustly designed device. The heavy base made of cast<br />
material, item 12, forms a solid basis for the expensive<br />
mechanism of the machine which can work vibration-free,<br />
precisely positioned and driven by an electronically controlled<br />
direct current motor 13.<br />
The areas of application are multifaceted. Your <strong>DSH</strong>/E is<br />
particularly suitable for mould construction, precision<br />
engineering model building and toy manufacture. For this<br />
reason, it is precisely the right tool for designers, architects<br />
(model building) and carpenters.<br />
The large-area, saw table 14 1/8" x 10 5/8" for mitre cuts can<br />
be titled up to 45°, is manufactured from aluminium die<br />
casting for the highest precision and stability, and is then<br />
ground for optimal glide properties.<br />
The high quality saw blade mounts (5 and 6) and the innovative<br />
quick clamping 1 also guarantee a lot of pleasure while working<br />
and a convincing working result.<br />
Changing the saw blades 15 is very simple with the quick<br />
tensioning clamp. <strong>Saw</strong> blades with flat ends (without pin) are<br />
introduced into the clamp adapter when the quick tensioning<br />
device is released, clamped by tightening the screw and then<br />
tightened with the tensioning device.<br />
Changing saw blades with pins is even easier. These are<br />
simply attached when the quick clamp is released and then<br />
clamped using the quick clamp device.<br />
The saw blade tensioning can then be set by the large rotary<br />
button 2 at the top end of the arm.<br />
- 10 -
The replacement saw blades are stored in the “saw blade<br />
garage" 3, on the side of the panelling of the top arm.<br />
The <strong>DSH</strong>/E saws soft wood up to a thickness of 2", plastic up<br />
to 1 1/4" and non-ferrous metals up to 0.4".<br />
The saw can also be used without problem for separating<br />
Plexiglas, GRP, foam, rubber, leather and cork.<br />
And so that the dust does not obscure the view of the cutting<br />
line when working, there are automatically driven bellows with<br />
adjustable air nozzle 7. An additional vacuum cleaner can also<br />
be connected. The connecting piece 11 is positioned at 90° to<br />
save space.<br />
This guarantees clean work.<br />
Scope of supply:<br />
1 pc. <strong>Scroll</strong> <strong>Saw</strong> <strong>DSH</strong>/E<br />
1 pc. connector for Vacuum cleaner<br />
1 pc. Bag with air nozzle incl. accessories<br />
5 pc. <strong>Saw</strong> blades 18 teeth<br />
5 pc. <strong>Saw</strong> blades 25 teeth<br />
1 pc. Allen key with T-handle<br />
1 pc. Operating manual<br />
7 Technical data<br />
No. of strokes:<br />
400-1.600 strokes per min.<br />
Stroke height: 3/4"<br />
Max. cutting<br />
height (90°): 2"<br />
Max. cutting<br />
height (45°): 1"<br />
Table tilt: 0-45°<br />
Cutting blade length: 5" Pin-Type or Plain End (without<br />
cross pin)<br />
Net weight:<br />
34.6 lb<br />
Dimensions:<br />
LxWxH 20 7/8" x 10 5/8" x 11 13/16"<br />
Table: 14 1/8" x 10 5/8"<br />
Depth of Throat: 15 3/4"<br />
Motor:<br />
Voltage:<br />
Amps:<br />
110-120 V, 60 Hz<br />
1.6 A<br />
8 Set-up and commissioning of the saw:<br />
CAUTION:<br />
Disconnect power to the machine during the entire assembly<br />
process. Failure to do this may result in serious personal<br />
injury.<br />
8.1 Unpacking (fig. 1a and 1b):<br />
Disconnect power to the machine during the entire assembly<br />
process. Failure to do this may result in serious personal<br />
injury.<br />
1. Unpack the device and remove it from the box. Ensure that<br />
the device is not lifted by the plastic panelling around the<br />
top arm 4 (as shown on the sheet attached to the<br />
packaging).<br />
2. For transport reasons, the saw table is tilted up at an angle<br />
of about 45°. Turn the toggle 10 to tilt the table back into<br />
the horizontal position (the precise setting is described<br />
below). Then thighten the toggle 10 again.<br />
8.2 Attaching Blade Guard<br />
Your <strong>DSH</strong>/E <strong>Scroll</strong> <strong>Saw</strong> is provided with the attached blade<br />
guard. But for some of the actions and adjustments described<br />
in this manual it could be necessary to detach the blade<br />
guard.<br />
Attaching and detaching the blade guard:<br />
1. Bend up the saw blade guard on the upper side and hang it<br />
out like shown in illustration 2a.<br />
2. For attaching the saw blade guard just act the opposite<br />
way around: Bend up the saw blade guard on the upper<br />
side and hang it in. There are holes in the upper cover<br />
designed for that.<br />
8.3 Setting up the saw:<br />
NOTE:<br />
Safe and precise work is only possible with careful fixing!<br />
Bolt your <strong>Scroll</strong> Sas securely to a stand or workbench. If there<br />
is any tendency for the <strong>Scroll</strong> <strong>Saw</strong> to tip over or move during<br />
certain operations (for example cutting long, heavy boards),<br />
fix the <strong>Scroll</strong> <strong>Saw</strong> stand or the workbench to the floor.<br />
1. Secure saw with two screws (not included in scope of<br />
delivery) on a solid workbench. Use the drill holes intended<br />
for this purpose (17, fig. 1) which are located at the front<br />
and back of the saw base.<br />
The saw is equipped with rubber feet for noise insulation. If<br />
required, you can also place an additional plastic or cork<br />
underlay between the machine and the standing surface (not<br />
included in scope of delivery!).<br />
For your own safety, do not operate your <strong>Scroll</strong> <strong>Saw</strong> until it is<br />
completely assembled and installed according to the following<br />
instructions!<br />
- 11 -
8.4 Adjust and set angle display (fig. 2):<br />
1. Slightly loosen toggle 1 (fig. 2) and fold saw table 2 up to<br />
stop screw 3.<br />
2. Clamp saw blade 4! See the corresponding section 8.7.1 of<br />
these instructions. Caution! Mains plug must not be<br />
connected.<br />
3. Using an angle 5 on the saw table 2, check the right-hand<br />
angle to the saw blade. The stop screw is preset. If this still<br />
has to be adjusted, you can adjust the setting yourself<br />
using an Allen key 7, as shown in fig. 2, once the counter<br />
nut has been loosened. After correct setting, tighten the<br />
counter nut. Make sure that the stop screw does not go<br />
out of position in this process.<br />
4. Check the “zero” setting of the bevel indicator 8, if<br />
necessary, correct after the fastening screw has been<br />
loosened. For precise working, carry out sawing sample.<br />
5. <strong>Saw</strong> a sample from a piece of wood and check the angle<br />
again, if necessary adjust the saw table 2, indicator 8 or<br />
stop screw 3 as shown in fig. 2.<br />
8.5 Assembling the air nozzle (fig. 3):<br />
1. Take parts for securing the air nozzles from the attached bag.<br />
2. Screw the knurled screw 1 (fig. 3) with clamping pieces 2<br />
into the saw frame.<br />
3. Introduce the air nozzle pipe 3 (fig. 3) into the hole on the<br />
opened clamp pieces, adjust the pipe and slightly tighten<br />
the toggle 1.<br />
4. Place the air hose 4 (fig. 3) on pipe 3 and nipple 5.<br />
cutting performance and precision can only be achieved with<br />
perfect saw blades.<br />
Use PROXXON original saw blades and carefully select<br />
suitable saw blades for the intended purpose and material to<br />
be cut. With <strong>Proxxon</strong>, there are also various fine toothings, flat<br />
and round blades, and some with and without cross pin. You<br />
will find suggestions in these instructions.<br />
8.7.2 <strong>Saw</strong> blades with cross pin (fig. 5a).<br />
<strong>Saw</strong> blades with cross pin are particularly suitable for working<br />
with many closed inside cuts. The saw blade can be quickly<br />
and comfortably removed from the upper mount, looped<br />
through the work piece and repositioned. You will find more<br />
precise information in the section "Inside cuts".<br />
CAUTION!<br />
<strong>Saw</strong> blades with cross pins may only be hung in position. Do<br />
not clamp the saw blades with the cross pin additionally by<br />
means of the cheese-head screws. Risk of fracture!<br />
1. Position the level for the quick tensioning clamp 4 to the<br />
front!<br />
2. Place saw blade 1 with the teeth pointing downwards<br />
through the table opening 2 and fit in the bottom mount 3.<br />
3. Press lightly on the top arm 5 and fit blade in the upper<br />
mount 6, see fig. 5a).<br />
4. Release arm and position the lever of quick tensioning<br />
clamp 4 to the rear.<br />
5. If required, finely set the saw blade clamp as described<br />
under 8.7.4.<br />
8.6 Connecting the vacuum cleaner (fig. 4):<br />
1. Place the vacuum hose 1 of the vacuum cleaner in the<br />
connecting piece 2.<br />
2. Switch on the vacuum cleaner before sawing so that the<br />
sawdust is vacuumed and the suction device does not get<br />
blocked. For practical reasons, the PROXXON suction<br />
control device is recommended.<br />
8.7 <strong>Saw</strong> blades<br />
CAUTION!<br />
Always remove the mains plug before performing the activities<br />
described here.<br />
8.7.1 Clamping in the saw blade (fig. 5a and 5b):<br />
Standard blades with cross pins or plain ended blades<br />
without cross pin can be clamped into the saw blade mount.<br />
Replace damaged or worn saw blades immediately. They<br />
represent a safety risk and worsen the work result. The best<br />
8.7.3 <strong>Saw</strong> blades with flat ends (hand or leaf saw blades,<br />
see fig. 5b):<br />
1. Position the lever for the quick tensioning clamp 4 to the<br />
front!<br />
2. Place saw blade 1 with the teeth pointing downwards<br />
through the table opening 2 and fit in the bottom mount 3.<br />
Then clamp the blade in the mount by tightening the<br />
cheese-head screw 4 with the supplied Allen key with<br />
T-handle 5.<br />
3. Press lightly on the upper arm 6, introduce the saw blade<br />
into the upper mount 7 and fix by tightening the wingnut 8.<br />
4. Position the lever for the quick tensioning clamp 9 to the<br />
rear!<br />
5. If required, finely set the saw blade clamp as described<br />
under 8.7.4.<br />
8.7.4 Finely setting the correct saw tensioning (fig. 6):<br />
Correct saw tensioning is an essential factor for a clean work<br />
result. This must, therefore, be carefully set. If over or<br />
- 12 -
undertensioned, the saw blade can lightly crack. Turn knurled<br />
button 1 to set the tensioning. If the button is moved to the<br />
right (clockwise), the saw blade is more tightly tensioned. If it<br />
is turned to the left (anticlockwise) the blade is loosened.<br />
A correctly tensioned blade sounds a slight tone if "plucked"<br />
like a string.<br />
8.7.5 Removing saw blade (fig. 5a and 5b):<br />
8.7.5.1 <strong>Saw</strong> blades with cross pin (fig. 5a).<br />
1. Position the quick tensioning lever 4 to the front<br />
2. Press top arm 5 slightly down so that the saw blade 1 can<br />
be released from the top mount 6. Take out saw blade.<br />
3. Take out saw blade from bottom mount 3 and remove<br />
through table opening 2.<br />
8.7.5.2 <strong>Saw</strong> blades with plain ends (fig. 5b):<br />
1. Position the quick tensioning lever 4 to the front.<br />
1. Open wingnut 8, the saw blade 1 releases from the top<br />
mount 7.<br />
2. Open cheese-head screw 7 with the T-handle Allen key 5,<br />
release saw blade from the lower mount 3 and remove<br />
through the table opening.<br />
9 Working with the saw:<br />
9.1 General information for working with mechanical scroll<br />
saw:<br />
The mechanical scroll saw is predominantly a machine for<br />
sawing curves and precise sections. A typical application is<br />
shown in fig. 7. The work piece must be carefully guided by<br />
the operator. Note: Mechanical scroll saws are normally<br />
operated without length stop, as the saw blade loses its line íf<br />
forced in, particularly in the grain of wood.<br />
Please note that the saw blade only saws in reverse motion in<br />
the direction in which the teeth point.<br />
For good results, please note the following points:<br />
– When sawing, press the work piece onto the work plate (fig.<br />
7), guide by feeling and with little power; more pressure on<br />
the work plate, less pressure against the saw blade.<br />
– Make sure that the work piece is lying properly on the saw<br />
table (nor burrs or sawdust)<br />
– Adapt the feed to the requirements by saw blade, speed<br />
and work piece material.<br />
– Guide the work piece slowly into the saw blade, particularly<br />
if the blade is very thin and the teeth very fine or if the work<br />
piece is very thick. Note: The teeth only cut in reverse<br />
motion.<br />
– Only use perfect saw blades.<br />
– Do not let the device operate unsupervised.<br />
– Carefully mark out/block the check line.<br />
– Make sure there is good lighting.<br />
– Always work with connected vacuum cleaner and carefully<br />
set the air nozzle (7, fig. 1).<br />
– You will achieve the best results if the wood thickness is<br />
under 1”.<br />
– With wood thicknesses of greater than 1”, the work piece<br />
must be very carefully guided to stop the saw blade from<br />
jamming, bending, twisting or breaking.<br />
– For precise cutting, note that the saw blade will always try<br />
to follow the direction of the fibre (applies particularly to<br />
thin saw blades).<br />
9.1.1 Selecting the saw blade:<br />
As already mentioned, the correct selection of material has a<br />
very great influence on the quality of the result. The table<br />
below should serve as a small guide. Extensive experience<br />
with many materials and types of saw blade is, of course,<br />
always helpful with selection. You can experiment here.<br />
Tip: The saw blades are mostly only particularly worn at<br />
places where the teeth are particularly highly utilised when<br />
sawing and, therefore, become blunt very quickly. To “use<br />
up” the non-worn teeth and thus increase the edge life of the<br />
sawing blades, you can artificially “raise” the bearing surface<br />
for the work piece somewhat.<br />
To do this, simply secure a smooth, table-sized underlay with<br />
the required thickness to the saw table, using, for example,<br />
double-sided sticky tape. The non-worn parts of the saw<br />
blade are now sawing the work piece.<br />
This is particularly sensible if you often saw very hard and<br />
wear-intensive materials with thin blades.<br />
The numerical data for characterising the “fineness” of the<br />
toothing is related to the number of teeth per inch of saw<br />
blade length:<br />
Teeth/inches<br />
approx. 10-14<br />
approx. 17-18<br />
approx. 25-28<br />
approx. 41<br />
Material:<br />
Soft and hard wood<br />
(from approx. 3/16"-2"),<br />
plastics, soft materials,<br />
thicker work pieces<br />
Fine sawing work, wood<br />
(up to 3/16"), plastics, soft<br />
materials, thinner work pieces<br />
Plastic, GRP, non-ferrous<br />
metal, Plexiglas, iron with<br />
restriction Pertinax<br />
Iron, Pertinax<br />
- 13 -
Round sawing blades (with flat ends) can ideally be used for<br />
plastic, hard and soft wood. They cut on all sides, so it is not<br />
necessary to turn the work piece when sawing.<br />
10 Selecting the speed:<br />
This representation can, of course, only give instructions on<br />
the general direction to take. As in the previous section, you<br />
have to "experiment” a little to find the optimal result. The<br />
appropriate speed also, of course, depends on the blade<br />
used, the material of the work piece, the feed etc.<br />
Level<br />
Material<br />
400 strokes Steel, brass, non-ferrous<br />
metals, GRP, plastics<br />
1600 strokes Aluminium, wood, polystyrene,<br />
rubber, leather, cork<br />
10.1.1 Possible causes of faults:<br />
The following causes may break the saw blade:<br />
– If blade is tensioned too tightly or not tightly enough<br />
– Mechanical overloading of the blade by feeding too quickly.<br />
– Bending or twisting of the blade when turning the work<br />
piece too quickly when cutting curves.<br />
– When the wear limit of the saw blade has been reached.<br />
– If the screws are tightened on saw blades with cross pin.<br />
10.2 <strong>Saw</strong>ing (fig. 7)<br />
Hold the work piece on the saw table as shown in fig. 7.<br />
Adapt the feed according to the material, the saw blade and<br />
the work piece thickness. Hard materials, fine saw blades and<br />
thick work pieces do not “tolerate” as much feed as soft<br />
materials, rough saw blades and thin materials.<br />
You can also experiment with various speeds.<br />
NOTE:<br />
Safe and precise work is only possible with careful fixing!<br />
The mechanical scroll saw is predominantly a machine for<br />
sawing curves. For good results, please note the following<br />
points:<br />
1. When sawing, press the work piece onto the work plate,<br />
guide by feeling and with little power, more pressure on the<br />
work plate, less pressure against the saw blade. Caution!<br />
The saw does not cut the work piece itself. You must guide<br />
the work piece into the saw blade.<br />
2. Guide the work piece slowly into the saw blade, particularly<br />
if the blade is very thin and the teeth very fine or if the work<br />
piece is very thick. You will achieve the best results if the<br />
wood thickness is less than 25 mm.<br />
3. Please observe the instructions under 8.1.<br />
10.2.1 Inside cuts (fig. 8)<br />
CAUTION!<br />
Always remove the mains plug before releasing the saw<br />
blade.<br />
If you must also make inside cuts when working with your<br />
mechanical scroll saw, proceed as follows:<br />
1. Drill a hole in the inside part 1 to be cut out of your work<br />
piece.<br />
2. Take the saw blade from the top saw blade guide 2.<br />
Proceed as shown in 8.7.5.1 and in 8.7.5.2, depending on<br />
the type of saw blade used.<br />
3. Push the saw blade through the drill hole. Reattach saw<br />
blade at the top. Tension the saw blade properly again.<br />
4. Cut out the opening and remove the work piece once the<br />
saw blade has been removed again.<br />
Tip: If you drill the hole in such a way that it does not touch<br />
the later inside contour, you can allow the saw line to run<br />
tangentially into the contour. This produces a nice even<br />
sawing edge.<br />
10.2.2 Grain cuts:<br />
For grain cuts, the table is simply tilted by the required<br />
amount. This works as follows:<br />
1. Slightly loosen toggle screw 1 (fig. 2) and align saw table 2<br />
to the required value, using scale 9 on indicator 8.<br />
2. Tighten toggle screw 1.<br />
3. Press the work piece particularly firmly against the table for<br />
a grain cut.<br />
Please note:<br />
– Only use perfect saw blades.<br />
– Always remove the mains plug for maintenance and upkeep<br />
work.<br />
– Do not let the device operate unsupervised.<br />
- 14 -
11 Care and maintenance<br />
After use<br />
CAUTION!<br />
Pull the mains plug before making any adjustments,<br />
performing maintenance work, or carrying out repairs!<br />
Failure to do this may result in serious personal injury.<br />
NOTE:<br />
The scroll saw is basically maintenance free. However, to<br />
ensure a long service life you should clean the device after<br />
each use with a soft cloth, swab, or brush. A vacuum cleaner<br />
is also advisable for this. Ensure all ventilation slots are free<br />
from obstruction.<br />
External cleaning of the housing can be carried out using a<br />
soft, possibly moist cloth. While doing so, a mild detergent or<br />
other suitable cleansing agent can be used.<br />
WARNING:<br />
To avoid fire or toxic reaction, never use gasoline, naphtha,<br />
acetone, lacquer thinner, or similar highly volatile solvents to<br />
clean the scroll saw.<br />
These products have low flash points and could explode if<br />
used to clean the saw.<br />
NEVER smoke while using solvents: Smoking near solvents<br />
could ignite an explosion or fire and cause serious injury.<br />
ALWAYS WORK in a well ventilated area to prevent the<br />
accumulation of dangerous fumes, continuesly supply the<br />
work area with a constant source of fresh air:<br />
Lack of ventilation while using solvents could cause serious<br />
personal health risks, fire, or environmental hazards.<br />
Do not allow brake fluids, gasoline, or penetrating oils to<br />
come in contact with the plastic parts. They contain<br />
chemicals that can damage or destroy plastics!<br />
When servicing use only PROXXON replacement parts. Use of<br />
any other parts may create a hazard or cause product<br />
damage.<br />
Any attempt to repair or replace electrical parts on this tool<br />
may create a hazard unless repair is done by a qualified<br />
service technician.<br />
12 Accessories<br />
Replace damaged or worn saw blades immediately. They<br />
represent a safety risk and worsen the work result.<br />
Please use PROXXON accessories. NOTE: The use of<br />
improper accessories may cause hazards.<br />
Use 5 inch Plain or Pin-end blades. Actually PROXXON<br />
provides:<br />
"Super-Cut" scroll saw blades:<br />
Special industrial quality steel for prolonged cutting capacity.<br />
NO 28 106<br />
Set of 6 blades<br />
NO 28 107<br />
Set of 6 blades<br />
NO 28 108<br />
Set of 6 blades<br />
Very fine-toothed blades<br />
(40 TPI)<br />
Ideal for hard woods, circuit boards, nonferrous<br />
metals, Plexiglas and plastic.<br />
Set of fine-toothed blades<br />
(28TPI)<br />
For thinner materials, or finer cuts on hard<br />
and soft woods as well as plastics (Plexiglas<br />
and acrylics, too).<br />
Coarse toothed (16 TPI). For<br />
hardwoods, plastics (Plexiglas and acrylics,<br />
too) as well as thicker materials.<br />
Standard blades with pin ends:<br />
NO 28 740<br />
Set of 6 blades<br />
NO 28 742<br />
Set of 6 blades<br />
NO 28 744<br />
Set of 6 blades<br />
Spiral blades for <strong>DSH</strong>/E:<br />
NO 28 746<br />
Set of 6 blades<br />
Coarse (10 TPI). For hard and<br />
soft woods and thick material.<br />
Fine (18 TPI). For soft and hard<br />
woods and thinner materials.<br />
Very fine toothed (25 TPI). For v<br />
plastics, fiberglass, non-ferrous metals,<br />
acrylics and wood.<br />
Plain end blades, cutting in all directions,<br />
eliminating the need to turn the work piece<br />
(advantageous, especially with bigger work<br />
pieces). A 1/16" hole is required. Ideal for<br />
plastic, hard and soft woods.<br />
Repair service is available at your PROXXON service center<br />
(You find the address at address at the back of this manual).<br />
- 15 -


