User manual - RADWAG
User manual - RADWAG
User manual - RADWAG

Create successful ePaper yourself
Turn your PDF publications into a flip-book with our unique Google optimized e-Paper software.
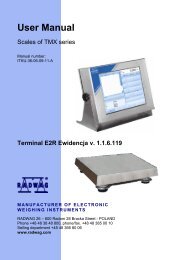
<strong>User</strong> Manual<br />
Single load cell platform scales<br />
Manual number:<br />
ITKU-18-02-01-12-A<br />
• Scales of WPT series<br />
• Table scales of WPT/F series<br />
• Waterproof scales of WPT/H series<br />
• Waterproof scales of WPT/HR series<br />
MANUFACTURER OF ELECTRONIC<br />
WEIGHING INSTRUMENTS<br />
<strong>RADWAG</strong> Wagi Elektroniczne<br />
26 – 600 Radom Bracka 28 Street - POLAND<br />
Phone +48 48 38 48 800, phone/fax. +48 48 385 00 10<br />
Selling department +48 48 366 80 06<br />
www.radwag.com
JANUARY 2012<br />
- 2 -
TABLE OF CONTENTS<br />
1. INTENDED USE .......................................................................................................................................5<br />
2. PRECAUTIONS ........................................................................................................................................6<br />
2.1. Maintenance.....................................................................................................................................6<br />
2.2. Accumu<br />
lator / battery pack ...............................................................................................................6<br />
2.2.1. Pow er supply of weighing indicators in plastic casings .........................................................7<br />
2.2.2. Replacement of worn batteries..............................................................................................7<br />
2.3. Operation in a strong electrostatic field ............................................................................................8<br />
3. WARRANTY CONDITIONS ......................................................................................................................9<br />
4. MAIN DIMENSIONS .................................................................................................................................9<br />
4.1. T able scales WPT/F series...............................................................................................................9<br />
4.2. W aterproof scales of WPT/H series................................................................................................10<br />
4.3. W aterproof scales of WPT/HR series .............................................................................................12<br />
4.4. Scales of WPT series .....................................................................................................................12<br />
5. UNPACKING AND ASSEMBLY .............................................................................................................16<br />
5.1. Table scales of WPT/F series.........................................................................................................16<br />
5.2. Scales of WPT series .....................................................................................................................17<br />
5.3. Waterproof scales of WPT/H, WPT/HR series................................................................................18<br />
6. GETTING STARTED ..............................................................................................................................19<br />
7. KEYPAD .................................................................................................................................................20<br />
8. KEYS’ FUNCTIONS ...............................................................................................................................20<br />
9. INSCRIPTIONS ON THE DISPLAY........................................................................................................21<br />
10. USER MENU ........................................................................................................................................22<br />
10.1. Submenus ....................................................................................................................................22<br />
10.2. Browsing user menu.....................................................................................................................23<br />
10.2.1. Keypad..............................................................................................................................23<br />
10.2.2. Return to the weighing mode ............................................................................................23<br />
11. WEIGHING ...........................................................................................................................................24<br />
11.1. Tarring ..........................................................................................................................................25<br />
11.2. Inscribing tare v alue .....................................................................................................................25<br />
11.3. Zeroing .........................................................................................................................................26<br />
11.4. W eighings in two ranges ..............................................................................................................26<br />
11.5. Selection of basic weight unit .......................................................................................................27<br />
11.6. Temporarily selected unit .............................................................................................................28<br />
12. MAIN PARAMETERS...........................................................................................................................29<br />
12.1. Setting a filtering lev el ..................................................................................................................29<br />
12.2. Median filter ..................................................................................................................................30<br />
12.3. Autozero function .........................................................................................................................31<br />
12.4. Tare function ................................................................................................................................32<br />
13. RS 232 PARAMETERS ........................................................................................................................33<br />
13.1. Printout ty pe .................................................................................................................................33<br />
13.2. Minimal mas s threshold................................................................................................................34<br />
13.3. Baud rate ......................................................................................................................................35<br />
13.4. Serial transmission parameters ....................................................................................................36<br />
14. OTHER PARAMETERS........................................................................................................................37<br />
14.1. Backlight function .........................................................................................................................37<br />
14.1.1. Backlight for supplying from mains ...................................................................................37<br />
14.1.2. Backlight for supplying from batteries ...............................................................................38<br />
14.2. “Beep” signal – after pressing a key .............................................................................................39<br />
14.3. Autom atic switch-off .....................................................................................................................39<br />
14.4. Battery v oltage level check...........................................................................................................40<br />
14.4.1. Checking the batteries ......................................................................................................40<br />
14.4.2. Battery discharge pictogram .............................................................................................41<br />
14.4.3. Accumulator charging option.............................................................................................41<br />
14.4.4. Formatting rechargeable battery packs.............................................................................42<br />
- 3 -
15. WORK MODES ....................................................................................................................................43<br />
15.1. Setting accessibility of operation modes.......................................................................................43<br />
15.2. Selecting quantity of operation modes..........................................................................................44<br />
15.3. Counting pieces of the same mass ..............................................................................................45<br />
15.4. +/- control referring to the inscribed standard mass .....................................................................47<br />
15.5. Control of % deviation referring to the inscribed standard mass...................................................49<br />
15.5.1. Standard mass determined by its weighing.......................................................................49<br />
15.5.2. Mass of standard inscribed to scale memory ....................................................................50<br />
15.6. Autom atic tare ..............................................................................................................................51<br />
15.7. Measurement max force on the pan – latch..................................................................................52<br />
15.8. Totalizing......................................................................................................................................52<br />
15.8.1. Enabling the w ork mode....................................................................................................53<br />
15.8.2. Totalizing procedure .........................................................................................................53<br />
15.8.3. Memory of the last value of sum of weighed goods ..........................................................54<br />
15.8.4. Return to weighing ............................................................................................................55<br />
15.9. Weighing animals .........................................................................................................................56<br />
15.10. Tare memory...............................................................................................................................57<br />
15.10.1. Entering the tare value to the scale memory...................................................................57<br />
15.10.2. Selecting a tare value from the memory..........................................................................59<br />
16. USER CALIBRATION...........................................................................................................................60<br />
16.1. Calibration ....................................................................................................................................60<br />
16.2. Start mass adjustment..................................................................................................................62<br />
17. COOPERATION WITH PRINTER.........................................................................................................63<br />
18. COOPERATION WITH COMPUTER ....................................................................................................64<br />
19. COMMUNICATION PROTOCOL..........................................................................................................65<br />
19.1. General information ......................................................................................................................65<br />
19.2. A set of commands for RS interfaces ...........................................................................................66<br />
19.3. Respond message format ............................................................................................................66<br />
19.4. Command’s description................................................................................................................67<br />
19.4.1. Zeroing ..............................................................................................................................67<br />
19.4.2. Tarring ..............................................................................................................................67<br />
19.4.3. Get tare v alue ...................................................................................................................67<br />
19.4.4. Send the stable result in basic unit ...................................................................................68<br />
19.4.5. Send the result immediately in basic unit ..........................................................................68<br />
19.4.6. Send the stable result in current unit .................................................................................69<br />
19.4.7. Send the result immediately in current unit .......................................................................70<br />
19.4.8. Sw itch on continuous transmission in basic unit ...............................................................70<br />
19.4.9. Switch off continuous transmission in basic unit ...............................................................70<br />
19.4.10. Switch on continuous transmission in current unit ..........................................................71<br />
19.4.11. Switch off continuous transmission in current unit ..........................................................71<br />
19.4.12. Send all implemented commands ...................................................................................71<br />
19.5. Manual printouts / aut omatic printouts..........................................................................................72<br />
19.6. Continuous transmission ..............................................................................................................73<br />
19.7. Configuring printouts ....................................................................................................................73<br />
20. ERROR COMMANDS...........................................................................................................................74<br />
21. TECHNICAL PARAMETERS................................................................................................................75<br />
21.1. Scales of W PT series ...................................................................................................................75<br />
21.2. Table scales of W PT/F series.......................................................................................................77<br />
21.3. W aterproof scales of WPT/H series .............................................................................................78<br />
21.4. Waterproof scales of WPT/HR series...........................................................................................81<br />
22. TROUBLE SHOOTING.........................................................................................................................83<br />
23. ADDITIONAL EQUIPMENT..................................................................................................................83<br />
- 4 -
1. INTENDED USE<br />
Scales are designed for fast and precise measurements of weighed loads<br />
masses and direct commercial settlements. Tarring in full weighing range<br />
enables to determine net mass of weighed loads.<br />
Functions:<br />
• backlight of display<br />
• level of filtration<br />
• autozero function<br />
• setting baud rate of transmission<br />
• continuous data transmission for RS 232<br />
• automatic operation for RS 232<br />
• designed printouts<br />
• designation minimum mass for function operating<br />
• counting pieces<br />
• +/- mass control<br />
• percentage deviation from standard mass<br />
• latch of maximum scale indication<br />
• automatic tare<br />
• memory of tare<br />
• Memory of 9 tare values<br />
• inscribing tare value<br />
• automatic scale switch-off<br />
• user calibration<br />
• Totalizing<br />
• Weighing animals<br />
<strong>User</strong> functions may have attribute of accessibility. For this reason it is<br />
possible to adjust scale to individual needs to provide access to only<br />
these functions which are currently needed. Attribute determination<br />
accessible / inaccessible is possible in user menu and described in<br />
further part of <strong>manual</strong>.<br />
- 5 -
2. PRECAUTIONS<br />
2.1. Maintenance<br />
A. Please, read carefully this user <strong>manual</strong> before and use the device<br />
according to its intended use.<br />
B. Devices that are to be withdrawn from usage should be sent back to<br />
the producer or in case of own utilization do it according to the law.<br />
2.2. Accumulator / battery pack<br />
The device connected to mains inteligently monitors the battery state and<br />
charges it if possible. After sudden lack of power supply from the mains<br />
the device automatically switches to accumulator without breaking<br />
operation.<br />
• Scales aquipped with indicator PUE C/31 (plastic casing) are devices<br />
designed to be supplied from NiMH batteries (nickel-metal-hydrogen)<br />
with rated voltage of 1.2V, size R6 and capacities from 1800 to<br />
2800mAh charged while connected to mains without stopping<br />
operation.<br />
• Scales equipped with PUE C/31H and PUE C/31H/Z weighing<br />
indicators (stainless steal housing) are devices designed to be<br />
supplied from SLA accumulators (Sealed lead acid type) 6V o<br />
and capacity 3 to 4Ah charged while connected to mains without<br />
stopping operation.<br />
In case of an elongated storage period in low<br />
temperatures, it is not allowed the full discharge<br />
of the accompanied batteries.<br />
The equipment including accumulators does not belong<br />
to your regular household waste. The European legislation<br />
requires that electric and electronic equipment be collected<br />
and disposed separately from other communal waste with<br />
the aim of being recycled.<br />
- 6 -
Notice:<br />
Some symbols on accumulators identify harmful elements/compounds:<br />
Pb = lead,<br />
Cd = cadmium,<br />
Hg = mercury.<br />
2.2.1. Power supply of weighing indicators in plastic casings<br />
Indicators in plastic casing are intended to be supplied from a power<br />
adapter or from NiMH rechargeable battery pack (standard equipment).<br />
New rechargeable batteries should be formatted according to the<br />
description in the chapter 14.4.4. of this <strong>manual</strong>.<br />
Alternatively, you can use to power the device R6 size standard nonrechargible<br />
batteries. If you want to use normal batteries instead of<br />
rechargeable ones, proceed as follows:<br />
• Before installing non-rechargeable batteries turn on the device<br />
and set to , to switch off charging.<br />
• Then install the batteries.<br />
Installing batteries without changing to <br />
may cause damage of batteries and the indicator.<br />
2.2.2. Replacement of worn batteries<br />
<strong>User</strong>s have the ability to replace worn out batteries to new ones in<br />
weighing indicators PUE C/31 (plastic casing).<br />
Procedure:<br />
• Open the lid of the chamber for<br />
batteries placed in the bottom of<br />
the indicator casing:<br />
- 7 -
• Remove discharged and then insert new batteries into the chamber,<br />
according to given polarity (+/-):<br />
• Close the lid of the chamber for batteries:<br />
In PUE C/31H and PUE C/31H/Z weighing indicators<br />
(stainless steel housing) the worn out accumulator can<br />
be exchanged to a new one by the authorized service<br />
of the manufacturer.<br />
2.3. Operation in a strong electrostatic field<br />
If the device is about to operate in a strong electrostatic field<br />
(e.g. printing houses etc.) it should be connected to the earthing.<br />
Connect it to the clamp terminal signed .<br />
- 8 -
3. WARRANTY CONDITIONS<br />
A. <strong>RADWAG</strong> is obliged to repair or change those elements that<br />
appears to be faulty because of production and construction reason,<br />
B. Defining defects of unclear origin and outlining methods<br />
of elimination can be settled only in participation of a<br />
user and the manufacturer representatives,<br />
C. <strong>RADWAG</strong> does not take any responsibility connected with<br />
destructions or losses derives from non-authorized or inappropriate<br />
(not adequate to <strong>manual</strong>s) production or service procedures,<br />
D. Warranty does not cover:<br />
• Mechanical failures caused by inappropriate maintenance of<br />
the device or failures of thermal or chemical origin or caused<br />
by atmospheric discharge, overvoltage in mains or other<br />
random event,<br />
• Inappropriate cleaning.<br />
E. Loss of warranty appears after:<br />
• Access by an unauthorized service,<br />
• Intrusion into mechanical or electronic construction<br />
of unauthorized people,<br />
• Removing or destroying protection stickers.<br />
F. Warranty conditions outline the warranty period for rechargeable<br />
batteries attached to the device for 12 months.<br />
G. The detailed warranty conditions one can find in warranty certificate.<br />
H. Contact with the central authorized service:<br />
+48 48 384 88 00 ext. 106 or 107.<br />
4. MAIN DIMENSIONS<br />
4.1. Table scales WPT/F series<br />
WPT/F…/C series – main dimensions<br />
- 9 -
WPT/F…/C/K series – main dimensions<br />
WPT/F…/C/R series – main dimensions<br />
4.2. Waterproof scales of WPT/H series<br />
WPT…H1 series (pillar 24cm) –main dimensions<br />
- 10 -
WPT…H1series (pillar 7cm) –main dimensions<br />
WPT…H2 - WPT…H6 series – main dimensionS<br />
- 11 -
4.3. Waterproof scales of WPT/HR series<br />
WPT…HR2 - WPT…HR6 series – main dimensions<br />
4.4. Scales of WPT series<br />
WPT…C1/K series – main dimensions<br />
- 12 -
WPT…C1/R series - main dimensions<br />
WPT…C1 series – main dimensions<br />
- 13 -
WPT…C2/K series – main dimensions<br />
WPT…C2/R series – main dimensions<br />
- 14 -
WPT…C2 series – main dimensions<br />
WPT…C3/K series – main dimensions<br />
- 15 -
WPT…C3 series – main dimensions<br />
5. UNPACKING AND ASSEMBLY<br />
5.1. Table scales of WPT/F series<br />
Unpack and put the scale on a flat even stable surface far away from<br />
sources of heat.<br />
• maximally screw out the transport protection according to the<br />
drawing below:<br />
• Install the pillar, be careful about the cable linking the indicator with<br />
the load cell:<br />
- 16 -
5.2. Scales of WPT series<br />
Unpack and put the scale on a flat even stable surface far away from<br />
sources of heat and then:<br />
- Remove transport protection:<br />
For versions with an indicator on the pillar:<br />
- 17 -
5.3. Waterproof scales of WPT/H, WPT/HR series<br />
Unpack and put the scale on a flat even stable surface far away from<br />
sources of heat and then:<br />
• Unscrew the pillar and the transport handler from the platform:<br />
- 18 -
• Turn the pillar and mount it to<br />
the platform. The surplus cable<br />
place inside the pillar.<br />
• Pick up the pan and remove<br />
the transport protection.<br />
6. GETTING STARTED<br />
• After unpacking and mounting the scale level it out.<br />
Use levelling legs and the level condition<br />
indicator installed in the basis of the scale.<br />
• Turn the device on using the key – keep pressing the key<br />
for about 0.5 sec,<br />
• Wait for the test completion,<br />
• Then you will see zero indication and pictograms:<br />
- zero indication<br />
- stable result<br />
kg - weight unit<br />
• If the indication is not zero press zero key.<br />
- 19 -
7. KEYPAD<br />
8. KEYS’ FUNCTIONS<br />
Switching on/off<br />
Function key (operation mode selection)<br />
Sending a weighing result to RS232<br />
Zeroing<br />
Tarring<br />
Notice:<br />
After pressing + keys’ functions changes. The way of operation<br />
in this mode is described in details further in this <strong>manual</strong>.<br />
- 20 -
9. INSCRIPTIONS ON THE DISPLAY<br />
No Text string Description<br />
1. FIL Filter level<br />
2. bAud Transmission baud rate<br />
3. PCS Piece counting<br />
4. HiLo +/- control according to a standard mass<br />
5. rEPL Automatic printout<br />
6. StAb The condition of printing data<br />
7. Auto Autozero correction<br />
8. t1 Power save – time to switch off while no operation<br />
9. toP Latch of the max measurement<br />
10. Add Totalizing<br />
11. AnLS Weighing animals<br />
12. tArE Memory of 9 tare values<br />
13. Indication in autozero zone (indication = exact zero)<br />
14. Stable result (ready to read)<br />
15. PCS Operation mode – counting pieces<br />
16. kg (g) Operation mode – weighing<br />
17. Rechargeable battery pack or battery discharged (BAT-LO)<br />
18. Net Tare function has been used<br />
19. Min<br />
20. OK<br />
21. Max<br />
+/- control with reference to the standard mass: setting<br />
the lower threshold or mass below the first threshold<br />
+/- control with reference to the standard mass:<br />
load mass between the thresholds<br />
+/- control with reference to the standard mass: setting<br />
the upper threshold or mass over the second threshold<br />
- 21 -
10. USER MENU<br />
10.1. Submenus<br />
<strong>User</strong>’s menu is divided into 6 basic submenus. Each group has its<br />
own characteristic name preceded by the letter P and a number.<br />
P1 rEAd<br />
P 1.1 Fil | 2<br />
P 1.2 Auto | YES<br />
P 1.3 tArA | no<br />
P 1.4 Fnnd | no<br />
P2 Prnt<br />
P2.1 Pr_n | StAb<br />
P2.2 S_Lo |<br />
P2.3 bAud | 9600<br />
P2.4 S_rS | 8d1SnP<br />
P3 Unit<br />
P3.1 StUn | kg<br />
P4 Func<br />
P4.1 FFun | ALL<br />
P4.2 Funi | no<br />
P4.3 PcS | no<br />
P4.4 HiLo | no<br />
P4.5 PrcA | no<br />
P4.6 Prcb | no<br />
P4.7 AtAr | no<br />
P4.8 toP | no<br />
P4.9 Add | no<br />
P4.A AnLS | no<br />
P4.b tArE | no<br />
P5 othr<br />
P5.1 bL | Auto<br />
P5.2 bLbt | 70<br />
P5.3 bEEP | YES<br />
P5.4 t1 | Auto<br />
P5.5 CHr6 | YES<br />
P6 CAL<br />
P6.1 St_u | * FUNCTION *<br />
P6.2 uCAL | * FUNCTION *<br />
- 22 -
10.2. Browsing user menu<br />
Use scale’s keys to move inside the menu.<br />
10.2.1. Keypad<br />
+<br />
+<br />
+<br />
+<br />
Entering main menu<br />
Inscribing tare value<br />
Increasing a digit value by „1”<br />
moving down in the menu<br />
Battery / accumulator state monitoring<br />
Toggling between gross / net values<br />
Selecting the parameter or changing the value of a<br />
selected parameter<br />
Entering the selected submenu or activating a parameter<br />
for changes<br />
Confirmation (enter)<br />
Leaving without changes or reaching a higher level of the<br />
menu<br />
10.2.2. Return to the weighing mode<br />
The changes that have been introduced should be saved<br />
in order to keep them in the memory for good.<br />
While leaving parameters press<br />
key until the text<br />
appears on the display. Then press:<br />
– to save changes or – to leave without changes.<br />
- 23 -
11. WEIGHING<br />
Put a load you want to weigh on the weighing pan. When the<br />
pictogram appears it means that the result is stable and ready to read.<br />
In order to assure long-term operation and appropriate measurements of<br />
weighted loads following precautions should be taken into consideration:<br />
• Loads should be placed on the pan delicately and carefully<br />
in order to avoid mechanical shocks:<br />
• Loads should be placed centrally on the pan (errors caused<br />
by eccentric weighing are outlined by standard PN-EN 45501<br />
ch. 3.5 and 3.6.2):<br />
• Do not load the pan with concentrated force:<br />
• Avoid side loads, particularly side shocks should be avoided:<br />
- 24 -
11.1. Tarring<br />
In order to determine the net mass put the packaging on the pan.<br />
After stabilising press - (Net pictogram will be displayed in the left<br />
upper corner and zero will be indicated).<br />
After placing a load on the weight pan net mass will be shown.<br />
Tarring is possible within the whole range of the scale. After unloading<br />
the pan the display shows the tarred value with minus sign.<br />
Notice:<br />
Tarring cannot be performer when a negative or zero value is being<br />
displayed. In such case appears on the display and short<br />
audible signal will be emitted.<br />
11.2. Inscribing tare value<br />
You can also inscribe a tare value. While in weighings mode press:<br />
• Press simultaneously and ,<br />
• You will see :<br />
- 25 -
• Using and set the tare value,<br />
• Press ,<br />
• Program returns to weighings mode. The inscribed tare value<br />
can be seen on the display with „–” sign,<br />
• Tare can be inscribed anytime in weighings mode.<br />
Notice:<br />
1. You cannot inscribe a new tare value when the tare value in memory<br />
is greater than zero. In the case of trying this the message<br />
will be displayed and short audible signal will be emitted.<br />
2. <strong>User</strong>s can also enter up to 9 tare values to the scale memory<br />
(see 15.10 of his <strong>manual</strong>).<br />
11.3. Zeroing<br />
To ZERO the scale press: .<br />
The scale will display zero and following pictograms: and .<br />
Zeroing is only possible within the scope of ±2% of full scale. While<br />
zeroing outside the scope of ±2% you will see . Zeroing is<br />
possible only in stable state.<br />
Notice:<br />
Zeroing is possible only within the ±2% interval of the maximal range.<br />
If zeroing is performed beyond this range the message and<br />
short audible signal will be emitted.<br />
11.4. Weighings in two ranges<br />
Switching between the I range and the II range happens automatically<br />
(exceeding Max of the I range). Weighings in the second range is<br />
signalled by a pictogram in the top left corner of the display.<br />
Then weighings is done with the accuracy of the II range to the moment<br />
of returning to zero (autozero range ) where the scale switches back<br />
to the I range.<br />
- 26 -
11.5. Selection of basic weight unit<br />
This function is used to set weight unit the scale will start with.<br />
Procedure:<br />
• Enter the submenu and then:<br />
• press<br />
, until the expected unit appears on the display:<br />
Options:<br />
A. When the basic unit is [kg], users can toggle between:<br />
[kg, lb, N], for verified scales [lb] is not accessible,<br />
B. If the basic unit is [g], users can toggle between:<br />
[g, ct, lb], for verified scales [lb] is not accessible,<br />
- 27 -
• After you select the unit press<br />
, the scale returns to:<br />
• Return to weighing according to chapter - 10.2.2.<br />
Notice:<br />
After turning on the scale always sets the basic unit.<br />
11.6. Temporarily selected unit<br />
This function is used to set weight unit the scale will use temporarily<br />
until the next power off or next selection.<br />
Procedure:<br />
• Press<br />
and then:<br />
• After you select the unit you want come back to weighing procedure.<br />
- 28 -
Options:<br />
A. When [kg] is a basic unit, users can select following units:<br />
[kg, lb, N], [lb] is not accessible for verified scales.<br />
B. When [g] is a basic unit, users can select following units:<br />
[g, ct, lb], [lb] is not accessible for verified scales.<br />
12. MAIN PARAMETERS<br />
<strong>User</strong>s can adjust the scale to external ambient conditions (filtering level)<br />
or particular needs (autozero operation, tare memory). This parameters<br />
are placed in submenu.<br />
12.1. Setting a filtering level<br />
Procedure:<br />
• Enter the submenu and then:<br />
1 - 4 - level of filtering<br />
• By pressing<br />
select the filtering level you need.<br />
- 29 -
Notice:<br />
Filtering level influences the time of stabilization. The higher the filtering<br />
level is the longer stabilization time is needed.<br />
Return to weighing:<br />
See - 10.2.2.<br />
12.2. Median filter<br />
This filter eliminates short changes (impulses) of measure signal<br />
(e.g. shocks).<br />
Procedure:<br />
• Enter the submenu and then:<br />
Return to weighing:<br />
See - 10.2.2.<br />
Fnnd no - filter disabled<br />
Fnnd YES - filter enabled<br />
- 30 -
12.3. Autozero function<br />
The autozero function has been implemented in order to assure precise<br />
indications. This function controls and corrects „0” indication. While the<br />
function is active it compares the results continuously with constant<br />
frequency. If two sequentional results differ less than the declared<br />
value of autozero range, so the scale will be automatically zeroed<br />
and the pictograms and will be displayed.<br />
When AUTOZERO is disabled zero is not corrected automatically.<br />
However, in particular cases, this function can disrupt the measurement<br />
process e.g. slow pouring of liquid or powder on the weighing pan. In<br />
this case, it is advisable to disable the autozero function.<br />
Procedure:<br />
• Enter the submenu and then:<br />
Fnnd no - filter disabled<br />
Fnnd YES - filter enabled<br />
Return to weighing:<br />
See - 10.2.2.<br />
- 31 -
12.4. Tare function<br />
This parameters enables users to configure a tare function.<br />
Procedure:<br />
• Enter the submenu and then:<br />
tArA AtAr - automatic tare function on and is stored in balance<br />
memory after unplugging it from mains (Description<br />
of function operating point 15.6 automatic tare)<br />
tArA no - automatic tare function off (user can turn on<br />
operating of automatic tare F6 AtAr – till unplugging<br />
the balance from mains)<br />
tArA tArF - tare memory function – stores last value of tare in<br />
balance memory. It is automatically displayed after<br />
starting the balance. Value of tare is displayed with<br />
minus sign, and there is Net symbol indicated on the<br />
display. (user can turn on operating of automatic tare<br />
F6 AtAr – till unplugging the balance from mains)<br />
Return to weighing:<br />
See - 10.2.2.<br />
- 32 -
13. RS 232 PARAMETERS<br />
External devices connected to RS 232C have to be supplied from the<br />
same mains and common electric shock protection. It prevents from<br />
appearing a potential difference between zero leads of the two devices.<br />
This notice does not apply to the devices that do not use zero leads.<br />
Transmission parameters:<br />
• Baud rate - 2400 – 38400 bit / s<br />
• Data bits - 7,8<br />
• Stop bits - 1,2<br />
• Parity control - no, even, odd.<br />
There are four ways of sending data via RS232 interface:<br />
• Manually – after pressing ,<br />
• Automatically – after stabilizing the indication over LO threshold<br />
• Continuously – after it is activated in parameter or by a command<br />
sent via RS232<br />
• On external request - see - „List of scale - computer commands”.<br />
The indication can be sent as:<br />
• stable – the indication is sent after the scale stabilizes.<br />
• any – the indication is sent immediately after pressing the<br />
this state is assign with in the printout.<br />
key,<br />
13.1. Printout type<br />
This parameter is to select the type of printout.<br />
Procedure:<br />
• Enter the submenu and then:<br />
- 33 -
Pr_n noStAb - immediate printout<br />
(not accessible in verified scales)<br />
Pr_n StAb - sending stable results<br />
Pr_n rEPL - automatic operation<br />
Pr_n CntA - continuous transmission in basic unit<br />
Pr_n Cntb - continuous transmission in present unit<br />
Return to weighing:<br />
see 10.2.2.<br />
13.2. Minimal mass threshold<br />
This function is necessary while working with automatic tare or<br />
automatic operation or weighing animals.<br />
Automatic tarring will not be applied until the indication (gross)<br />
is lower than the value inscribed in S_Lo parameter.<br />
In automatic operation measurements (net) are sent via RS232<br />
when the indication is equal or greater than the value inscribed<br />
in S_Lo parameter.<br />
Weighings animals is performer when the indication is equal or<br />
greater than the value inscribed in S_Lo parameter.<br />
Procedure:<br />
• Enter the submenu and then:<br />
- 34 -
Return to weighing:<br />
see 10.2.2.<br />
13.3. Baud rate<br />
Procedure:<br />
• Enter the submenu and then:<br />
- 35 -
Return to weighing:<br />
see 10.2.2.<br />
13.4. Serial transmission parameters<br />
Procedure:<br />
• Enter the submenu and then:<br />
7d2SnP - 7 data bits; 2 stop bits, no parity control<br />
7d1SEP - 7 data bits; 1 stop bit, EVEN parity control<br />
7d1SoP - 7 data bits; 1 stop bit, ODD parity control<br />
8d1SnP - 8 data bits; 1 stop bit, no parity control<br />
8d2SnP - 8 data bits; 2 stop bits, no parity control<br />
8d1SEP - 8 data bits; 1 stop bit, EVEN parity control<br />
8d1SoP - 8 data bits; 1 stop bit, ODD parity control<br />
Return to weighing:<br />
See 10.2.2.<br />
- 36 -
14. OTHER PARAMETERS<br />
The user can set parameters which influence the scale operation.<br />
They are gathered in the submenu e.g. backlight and beep<br />
signal. Enter this submenu according to chapter 11.2.<br />
14.1. Backlight function<br />
Program recognises the way the scale is supplied (mains, battery)<br />
and automatically selects the way of operating on the backlight:<br />
bl – for mains,<br />
blbt – for batteries or rechargeable battery pack.<br />
14.1.1. Backlight for supplying from mains<br />
Procedure:<br />
• Enter the submenu and then:<br />
bL no - backlight switched off<br />
bL YES - backlight switched on<br />
bL Auto - backlight switched off automatically if indication<br />
becomes stable for about 10s<br />
- 37 -
Return to weighing:<br />
See 10.2.2.<br />
Notice:<br />
When bl=Auto, and the indication has not changed for 10s, the<br />
backlight is automatically switched off. The backlight is switched<br />
on again automatically after the result changes.<br />
14.1.2. Backlight for supplying from batteries<br />
The user can change the intensity of backlight from 0% to 100%.<br />
The lower the intensity is the longer the scale operates without recharging<br />
or exchanging batteries. When the intensity is set this function works as<br />
AUTO (described above).<br />
Procedure:<br />
• Enter the submenu and then:<br />
Return to weighing:<br />
See 10.2.2.<br />
Notice:<br />
The more intense the backlight is the shorter the scale operates<br />
on batteries.<br />
- 38 -
14.2. “Beep” signal – after pressing a key<br />
Procedure:<br />
• Enter the submenu and then:<br />
Return to weighing:<br />
See 10.2.2.<br />
bEEP no - switched off<br />
bEEP YES - switched on<br />
14.3. Automatic switch-off<br />
This function is essential to save the battery power. The scale is switched<br />
off automatically when (function t1 = YES) no weighing appears in 5<br />
minutes. (no changes on the display). In case when this function disrupts<br />
the operation (e.g. long time weighing procedures) or while working with<br />
connection to mains, switch off this function.<br />
Operation according to the power supply:<br />
Setting<br />
Operation<br />
Mains<br />
Batteries/accumulator<br />
t1 = 0 disabled disabled<br />
t1 = YES enabled enabled<br />
t1 = Auto * disabled enabled<br />
- 39 -
* automatic enabling/disabling according to the source of power.<br />
Procedure:<br />
• Enter the submenu and then:<br />
Returnto weighing:<br />
See 10.2.2.<br />
14.4. Battery voltage level check<br />
While supplying from batteries too low level of voltage is measured<br />
by software the pictogram is displayed. It means that charging<br />
or exchanging batteries is required.<br />
14.4.1. Checking the batteries<br />
This function is to check the level of battery supply. It works only if:<br />
• Weighing mode is set,<br />
• Battery supply is set in parameters.<br />
- 40 -
Procedure:<br />
After displaying the level of batteries (in per cents) the program returns<br />
to weighing.<br />
14.4.2. Battery discharge pictogram<br />
The symbol (bat low) switches on when the voltage level drops to 18%<br />
of the accepted level of voltage. It means that charging or exchanging<br />
batteries is required.<br />
Low level of batteries:<br />
• Pictogram on the display,<br />
• After one time the device will automatically switch off<br />
to protect the batteries from distructable discharging,<br />
• Charging is signalled by (blinking period about<br />
2 seconds) on the display.<br />
14.4.3. Accumulator charging option<br />
This function allows to switch on charging algorithm for a NiMH battery<br />
pack (for indicators in plastic casings) or a gel cell SLA accumulator<br />
(for indicators in metal housings):<br />
a) Parameter set to :<br />
• Pictogram does not appear, charging disabled,<br />
• During software initializing, after turning on .<br />
b) Parameter set to :<br />
• Pictogram blinks slowly (period about 2 seconds),<br />
charging is enabled,<br />
- 41 -
• Message appears on the display (for indicators in<br />
plastic casings) or (for indicators in metal housings).<br />
• In case of damaging accumulators or lack of it the pictogram<br />
blinks quickly (period about 0.5 sec).<br />
Notice:<br />
Indicators in plastic casings are equipped with the set of rechargeable<br />
batteries NiMH R6 (AA) and power adapter.<br />
Procedure:<br />
• Enter the submenu and then:<br />
CHr6 YES<br />
CHr6 no<br />
- enabled<br />
- disabled<br />
Return to weighing:<br />
See 10.2.2.<br />
14.4.4. Formatting rechargeable battery packs<br />
Every plastic indicator is equipped with a brand new NiMH R6 (AA)<br />
battery pack and a power adapter. They need formatting after first<br />
powering up. It is crucial for batteries lifetime to undertake this<br />
process. Formatting consist in charging and total discharging<br />
(without meantime charging).<br />
- 42 -
Procedure:<br />
1. Supply the indicator from mains.<br />
2. Charge batteries for 12 hours (time of charging 2200mAh batteries).<br />
3. After 12 hours unplug from mains.<br />
4. Use the device up to the moment of self powering down.<br />
5. Repeat the process of charging starting from point 1.<br />
Notice:<br />
They reach their optima capacity after three cycles of full charging<br />
and discharging.<br />
15. WORK MODES<br />
15.1. Setting accessibility of operation modes<br />
In this parameter group users can disable/enable accessibility<br />
of functions after pressing<br />
key.<br />
Procedure:<br />
• Enter the submenu and then:<br />
- 43 -
no<br />
YES<br />
– mode is disabled<br />
– mode is enabled<br />
Return to weighing:<br />
See 10.2.2.<br />
15.2. Selecting quantity of operation modes<br />
This function enables user to set if ,after pressing key, all operating<br />
modes will be accessible (ALL) or only one from the list chosen and<br />
used by operator.<br />
Procedure:<br />
• Enter the submenu and then:<br />
After choosing setting press key. The program will return<br />
to displaying name of submenu .<br />
Return to weighing:<br />
See 10.2.2.<br />
- 44 -
15.3. Counting pieces of the same mass<br />
Standard solution is equipped with option of counting small pieces of the<br />
same mass. It is possible to execute a tare function in this operating mode<br />
in order to tare a container value.<br />
Notice:<br />
1. Counting pieces does not work together with other scale functions,<br />
2. The counting pieces function is not saved as a default start function<br />
so it is not remembered after restarting.<br />
Procedure:<br />
• Enter to function:<br />
• You will see a blinking value of sample quantity.<br />
• Press key to start setting quantity of sample, you have a few<br />
options to chose from:<br />
- 45 -
• If option is choosen in the scale program displays estimated<br />
unit mass of the last piece (about 3 seconds) and then goes to<br />
Counting pieces automatically setting the previously displayed<br />
value as valid for the procedure.<br />
• If the option is selected you will see:<br />
• Using and enter the required sample quantity,<br />
where: - selection of digit position, - setting the digit,<br />
• Confirm the value by pressing ,<br />
• You will see on the display and then:<br />
• If weighing is performed in a container put the container on the pan<br />
first and then tare it. Then put the declared quantity of pieces on the<br />
pan and confirm it when stable (signalled by ):<br />
• The program will automatically calculate the mass of a single piece<br />
and go on to the Piece Counting mode (pcs). You will see the<br />
following display:<br />
- 46 -
Notice:<br />
1. If a user presses the key when load is not present on the pan,<br />
the message -Lo- will be indicated for a few seconds and the scale<br />
will automatically return to weighing.<br />
2. In order to comply with the rules of appropriate counting pieces put<br />
as many pieces as possible during unit mass adjustment. Single<br />
piece mass should not be less than 5 divisions.<br />
3. If a single piece mass is lower than a reading interval d the display<br />
will show the message (see ch. 20. Error messages) and<br />
short audible signal will be emitted than the scale returns to weighing.<br />
Return to weighing:<br />
• Press the<br />
key twice.<br />
15.4. +/- control referring to the inscribed standard mass<br />
Procedure:<br />
• Enter to function:<br />
• The program enters the window of setting the lower threshold<br />
of weighing (Min):<br />
- 47 -
• The inscribed value confirm by pressing , the program will<br />
automatically go to the higher threshold of weighing (Max):<br />
• The inscribed value confirm by pressing<br />
automatically go to the main window.<br />
, the program will<br />
• During setting threshold values following cases take place:<br />
Notice:<br />
If a user erroneously enters a value of the lower threshold higher<br />
than the upper one, the scale will indicate an error message and<br />
will return to weighing.<br />
- 48 -
Return to weighing:<br />
• Press the<br />
key twice.<br />
15.5. Control of % deviation referring to the inscribed standard mass<br />
Scale software enables control of deviation (in %) of weighed loads<br />
mass referring to the inscribed standard mass. Mass of standard can<br />
be determined by its weighing (PrcA function) or entered to the scale<br />
memory by an user (PrcB function).<br />
15.5.1. Standard mass determined by its weighing<br />
Procedure:<br />
• Enter to function:<br />
• You will see on the display and then:<br />
• place an load on the pan which mass will be accepted as standard<br />
• press to confirm this operating mode<br />
• after few seconds the indication 100,00% will be displayed<br />
• From this moment display will not indicate mass of weighed load<br />
but deviation of load mass placed on the pan referring to the mass<br />
of standard (in %).<br />
- 49 -
Return to weighing:<br />
• Press the<br />
key twice.<br />
15.5.2. Mass of standard inscribed to scale memory<br />
Procedure:<br />
• Enter to function:<br />
• The program goes to the weight display window:<br />
• Using and set standard mass,<br />
where: - digit selection, - digit setting.<br />
• Confirm the entered value by pressing ,<br />
• You will see the indication equal to 0,000%,<br />
• From this moment display will not indicate the mass of weighed<br />
load but deviation of the load mass placed on the pan referring<br />
mass of standard (in %).<br />
- 50 -
Return to weighing:<br />
• Press the<br />
key twice.<br />
15.6. Automatic tare<br />
This function is useful for fast net mass determination of weighed load<br />
in case when tare value of is different for each load. In case when the<br />
function is active the cycle of scales operating looks as follows:<br />
• press zeroing key when the pan is empty,<br />
• place the container for pieces,<br />
• when indication is stable automatic tarring of the container mass will<br />
be performed (Net marker will appear in the upper part of the display),<br />
• place a sample into the package,<br />
• display will indicate net mass of sample,<br />
• remove the sample together with the container,<br />
• display will indicate tare mass with minus sign,<br />
• place a container for the next sample. When indication is stable<br />
automatic tarring will take place (Net marker will appear in the<br />
upper part of the display),<br />
• place next sample into the package.<br />
Procedure:<br />
Return to weighing:<br />
• Press the<br />
key twice.<br />
- 51 -
15.7. Measurement max force on the pan – latch<br />
Procedure:<br />
• Enter to function:<br />
• Confirmation of choice of function is indication of the Max<br />
pictogram:<br />
• Apply a force to the weighing pan.<br />
• The display of scale will latch the maximum value of the force<br />
• Remove loads from the pan<br />
• Before the next measurement press the<br />
key.<br />
Return to weighing:<br />
• Press the<br />
key twice.<br />
15.8. Totalizing<br />
Scale software is equipped in a totalizing function of single weighings.<br />
The totalizing procedure can be documented on the printer connected<br />
to the indicator.<br />
- 52 -
15.8.1. Enabling the work mode<br />
Procedure:<br />
• Enter to function:<br />
• A letter „P” in the left side of the display is a confirmation that<br />
function have been selected:<br />
15.8.2. Totalizing procedure<br />
• Enter function according to ch. 16.8.1,<br />
• Put the first load on the pan. If the weighing procedure is performed<br />
in a container put the container on the pan first and tare it. Then put<br />
the first load on the pan and confirm it by pressing when stable<br />
(signalled by ),<br />
• You will see a sum of weighings on the display, the „▲” pictogram<br />
in the upper right corner will be displayed and the weighing result<br />
will be printed on the printer connected to the indicator.<br />
- 53 -
• Take off the load from the pan, indication returns to ZERO<br />
and the letter „P” in the left part of the display appears,<br />
• Put the next load on the pan,<br />
• After stabilizing press , the sum of first and second weighing<br />
will appear on the display, the „▲” pictogram in the upper right corner<br />
will be displayed and the second weighing result will be printed on the<br />
printer connected to the indicator:<br />
• Press to complete the procedure (with the loaded or unloaded<br />
pan), a sum of all weighings will be printed:<br />
(1) 1.912 kg<br />
(2) 1.912 kg<br />
------------------------<br />
TOTAL: 3.824 kg<br />
• In case of pressing one more time with loaded pan, you will<br />
see the message. Unload the pan, the scale will return<br />
to ZERO and the letter „P” in the left part of the display will appear.<br />
The scale is ready for the next procedure.<br />
• In case of pressing one more time with loaded pan, you will<br />
see the letter „P” in the left part of the display will appear. The<br />
scale is ready for the next procedure.<br />
15.8.3. Memory of the last value of sum of weighed goods<br />
After interrupting (e.g. switching off) the totalizing procedure, it is<br />
possible to restart the procedure without loosing data. In order to<br />
do it just enter the totalizing procedure:<br />
• Enter function again according to the ch. 16.8.1 of the <strong>manual</strong>,<br />
• You will see the last memorized sum of weighings on He display.<br />
- 54 -
- In order to continue the procedure press , the indication<br />
returns to ZERO and the letter „P” appears in the left part<br />
of the display. The scale is ready for weighing;<br />
- In order to terminate the previous totalizing procedure press<br />
key, , or . You will see the letter „P” in the left part of<br />
the display. The scale is ready for weighing.<br />
15.8.4. Return to weighing<br />
• Press<br />
key, you will see:<br />
• Before leaving the function it is possible to print out<br />
subsequent weighings and the sum of weighings on the<br />
connected printer (press to print, press to cancel),<br />
• The following message will appear on the display:<br />
• Press<br />
• Press<br />
key to return to weighing,<br />
to return to totalizing.<br />
Notice:<br />
In case of overflow of the range of the display in totalizing you will see<br />
message in the display. In that case unload the pan and<br />
press to complete the procedure with a printout of sum of all<br />
weighings or put a lower mass on the pan which does not cause<br />
the overflow error.<br />
- 55 -
15.9. Weighing animals<br />
Procedure:<br />
• Enter to function:<br />
• The message appears on the display for 1s, and then the<br />
program goes to the window of setting the duration time (in seconds)<br />
of the animal weighing process:<br />
• Confirm the selected value by pressing ,<br />
• You will see the following window:<br />
- 56 -
• Load an animal to the platform,<br />
• After exceeding the -LO- value (see 13.2), program starts the<br />
weighings process. The appearance of subsequent hyphens<br />
< - - - - - - - > showing the progress,<br />
• After completing the process of weighings the result is latched<br />
on the display and additionally the OK pictogram is shown in<br />
the upper part of the display:<br />
• You can start the procedure of weighing animals again by<br />
pressing ,<br />
• After removing the animal from the platform program returns<br />
to the window:<br />
Return to weighing:<br />
• Press .<br />
15.10. Tare memory<br />
<strong>User</strong>s are allowed to Enter Up to 9 tare values to the memory.<br />
15.10.1. Entering the tare value to the scale memory<br />
Procedure:<br />
• Enter to function:<br />
- 57 -
• The program goes to displaying the first value from the selection<br />
of tare values (press<br />
to chose different values):<br />
• After selecting the right position press<br />
field:<br />
and you will see an editing<br />
• Enter the selected tare value to the scale memory ,<br />
• The program returns to the following window:<br />
- 58 -
Return to weighing:<br />
• Press .<br />
15.10.2. Selecting a tare value from the memory<br />
• Enter function according to the ch. 16.10.1 of the <strong>manual</strong>,<br />
• The program goes to displaying the first value from the selection<br />
of tare values (press<br />
to chose different values):<br />
• To use an entered tare value press , you will see the tare value<br />
on the display preceded by the „-„ sign and the Net pictogram:<br />
Caution:<br />
A tare value from the memory is not remembered after powering off<br />
and on the scale.<br />
- 59 -
16. USER CALIBRATION<br />
Only for non-verified scales<br />
Confirmation of high accuracy of weighing requires periodical correcting<br />
of calibration factors in the scale memory – this is adjustment of the<br />
scale. Calibration should be performed when we start weighing or<br />
dynamic change of temperature occurs. Before starting calibration<br />
remove loads from the pan.<br />
16.1. Calibration<br />
Procedure:<br />
• Enter the submenu and then:<br />
• Following inscriptions will appear<br />
• A new start mass is adjusted during this period of time.<br />
After that a mass of calibration weight is shown (e.g. 3 000kg).<br />
- 60 -
• Put a weight of the displayed mass value on the pan and press .<br />
The calibration process will start which is signalled by the message:<br />
• After completion of the process of calibration the following screen<br />
will appear<br />
• Take off the weight , then the following sequence of screens<br />
will appear<br />
• Calibration process can be terminated anytime by pressing<br />
which is signalled by the following message on the display:<br />
• Return to weighing with saving changes that have been made.<br />
Caution:<br />
If the calibration process (span adjustment) lasts longer than 15 the<br />
message will be displayed and short audible signal will be<br />
emitted. Press to perform calibration again with more stable<br />
ambient conditions!<br />
- 61 -
16.2. Start mass adjustment<br />
If the scale does not require the full calibration process sit is possible<br />
to adjust only a new start mass.<br />
Procedure:<br />
• Enter the submenu and then:<br />
• The display will show the following information<br />
• After the completion of the start mass adjustment the following<br />
screen will appear:<br />
• The process of start mass adjustment can be terminated by<br />
pressing<br />
, which is signalled on the display:<br />
- 62 -
• Return to weighing performing the procedure of saving parameters.<br />
Caution:<br />
If the start mass adjustment lasts longer than 15 the message<br />
will be displayed and short audible signal will be emitted. Press<br />
to perform calibration again with more stable ambient conditions!<br />
17. COOPERATION WITH PRINTER<br />
Each time the key is pressed a current mass value together with<br />
mass units is sent to RS 232 interface.<br />
Depending on setting of STAB parameter it can be printed out with<br />
temporary or stable value. Depending on setting of REPL parameter,<br />
printout will be automatic or <strong>manual</strong>.<br />
One of thermal printer in KAFKA series can cooperate with each<br />
platform scales:<br />
a) KAFKA<br />
Only result of weighing with mass unit can be printed.<br />
b) KAFKA 1/Z<br />
This printer is equipped with an internal real time clock.<br />
Both date and time can be printed.<br />
c) KAFKA SQ S<br />
This printer is equipped with an internal real time clock and<br />
possibility of running statistics from measurements. Statistic<br />
contents: quantity of samples, sum of masses of all samples,<br />
average value, standard deviation, variation factor, min value,<br />
max value, difference max - min.<br />
- 63 -
Cable diagrams:<br />
Scale – Kafka printer cable diagram for plastic casing<br />
Scale – Kafka printer cable diagram for steel housing<br />
18. COOPERATION WITH COMPUTER<br />
Sending weighing results to the computer can be done:<br />
- <strong>manual</strong>ly - after pressing key,<br />
- in continuous way - after function activating or sending an<br />
appropriate command,<br />
- automatically - After stabilizing the indication<br />
- on the request from<br />
the computer - After sending a control command<br />
These scales can cooperate with „EDYTOR WAG” program. The indicator<br />
window comprises the most important information from the scale display.<br />
The program allows to configure easily, e.g. design printouts, edit<br />
parameters. A precise description is issued in the „Help” file that<br />
accompanies the program.<br />
- 64 -
Cable diagrams:<br />
Scale – computer cable diagram for plastic casing<br />
Scale – computer cable diagram for metal housing<br />
19. COMMUNICATION PROTOCOL<br />
19.1. General information<br />
A. A character protocol scale-terminal has been designed for<br />
communication between <strong>RADWAG</strong> scales and external<br />
devices via RS-232 interface.<br />
B. It consists of commands sent from an external device to<br />
the scale and a responses from a scale.<br />
C. Responses are sent every time after receiving a command<br />
(reaction for any command).<br />
D. Using commands allows users to receive some information<br />
about the state of scale and/or influence the operation e.g.:<br />
• Requesting weighing results,<br />
• Display control.<br />
- 65 -
19.2. A set of commands for RS interfaces<br />
Commands<br />
Z<br />
T<br />
TO<br />
S<br />
SI<br />
SU<br />
SUI<br />
C1<br />
C0<br />
CU1<br />
CU0<br />
PC<br />
Description of commands<br />
Zeroing<br />
Tarring<br />
Get tare<br />
Send the stable result in basic unit<br />
Send the result immediately in basic unit<br />
Send the stable result in current unit<br />
Send the result immediately in current unit<br />
Switch on continuous transmission in basic unit<br />
Switch off continuous transmission in basic unit<br />
Switch on continuous transmission in current unit<br />
Switch off continuous transmission in current unit<br />
Send all implemented commands<br />
Notice:<br />
1. Each command have to be terminated in CR LF;<br />
2. The best Policy for communication is not sending another<br />
command until the former answer has been received.<br />
19.3. Respond message format<br />
After sending a request message you can receive:<br />
XX_A CR LF<br />
XX_D CR LF<br />
XX_I CR LF<br />
XX _ ^ CR LF<br />
XX _ v CR LF<br />
XX _ OK CR LF<br />
ES_CR LF<br />
XX _ E CR LF<br />
command accepted and in progress<br />
command completed (appears only after XX_A)<br />
command comprehended but cannot be executed<br />
command comprehended but time overflow error appeared<br />
command comprehended but the indication below the<br />
Command done<br />
Command not comprehended<br />
error while executing command – time limit for stable result<br />
exceeded (limit time is a descriptive parameter of the scale)<br />
- 66 -
XX<br />
_<br />
- command name<br />
- substitutes spaces<br />
19.4. Command’s description<br />
19.4.1. Zeroing<br />
Syntax Z CR LF<br />
Possible answers:<br />
Z_A CR LF<br />
Z_D CR LF<br />
Z_A CR LF<br />
Z_^ CR LF<br />
Z_A CR LF<br />
Z_E CR LF<br />
Z_I CR LF<br />
- command accepted and in progress<br />
- command completed<br />
- command accepted and in progress<br />
- command comprehended but zero range overflow appeared<br />
- command accepted and in progress<br />
- time limit for stable result exceeded<br />
- command comprehended but cannot be executed<br />
19.4.2. Tarring<br />
Syntax: T CR LF<br />
Possible answers:<br />
T_A CR LF<br />
T_D CR LF<br />
T_A CR LF<br />
T_v CR LF<br />
T_A CR LF<br />
T_E CR LF<br />
T_I CR LF<br />
- command accepted and in progress<br />
- command completed<br />
- command accepted and in progress<br />
- command comprehended but tare range overflow appeared<br />
- command accepted and in progress<br />
- time limit for stable result exceeded<br />
- command comprehended but cannot be executed<br />
19.4.3. Get tare value<br />
Syntax: TO CR LF<br />
Possible answers:<br />
- 67 -
TO_TARA CR LF - command executed<br />
Frame format:<br />
1 2 3 4 5-6 7-15 16 17 18 19 20 21<br />
T O space stability space tare space unit CR LF<br />
Tare<br />
Unit<br />
- 9 characters with decimal point justified to the right<br />
- 3 characters justified to the left<br />
19.4.4. Send the stable result in basic unit<br />
Syntax: S CR LF<br />
Possible answers:<br />
S_A CR LF<br />
S_E CR LF<br />
S_I CR LF<br />
S_A CR LF<br />
MASS FRAME<br />
- command accepted and in progress<br />
- time limit for stable result exceeded<br />
- command comprehended but cannot be executed<br />
- command accepted and in progress<br />
- mass value in basic unit is returned<br />
Frame format:<br />
1 2-3 4 5 6 7-15 16 17 18 19 20 21<br />
S space stability space sign mass space unit CR LF<br />
Example:<br />
S CR LF – computer command<br />
S _ A CR LF - command accepted and in progress<br />
S _ _ _ _ - _ _ _ _ _ _ 8 . 5 _ g _ _ CR LF – command done, mass value<br />
in basic unit is returned.<br />
19.4.5. Send the result immediately in basic unit<br />
Syntax: SI CR LF<br />
Possible answers:<br />
- 68 -
SI_I CR LF<br />
MASS FRAME<br />
- command comprehended but cannot be executed<br />
at the moment<br />
- mass value in basic unit is returned<br />
Frame format:<br />
1 2 3 4 5 6 7-15 16 17 18 19 20 21<br />
S I space stability space sign mass space unit CR LF<br />
Example:<br />
S I CR LF – computer command<br />
S I _ ? _ _ _ _ _ _ _ 1 8 . 5 _ k g _ CR LF - command done, mass value<br />
in basic unit is returned immediately.<br />
19.4.6. Send the stable result in current unit<br />
Syntax: SU CR LF<br />
Possible answers:<br />
SU_A CR LF<br />
SU_E CR LF<br />
SU_I CR LF<br />
SU_A CR LF<br />
MASS FRAME<br />
- command accepted and in progress<br />
- timeout while waiting for stable results<br />
- command comprehended but cannot be executed<br />
- command accepted and in progress<br />
- mass value in current unit is returned<br />
Frame format:<br />
1 2 3 4 5 6 7-15 16 17 18 19 20 21<br />
S U space stability space sign mass space unit CR LF<br />
Example:<br />
S U CR LF – computer command<br />
S U _ A CR LF - command accepted and in progress<br />
S U _ _ _ - _ _ 1 7 2 . 1 3 5 _ N _ _ CR LF - command done, mass value<br />
in current unit is returned.<br />
- 69 -
19.4.7. Send the result immediately in current unit<br />
Syntax: SUI CR LF<br />
Possible answers:<br />
SUI_I CR LF<br />
MASS FRAME<br />
- command comprehended but cannot be executed<br />
- mass value in current unit is returned immediately<br />
Frame format:<br />
1 2 3 4 5 6 7-15 16 17 18 19 20 21<br />
S U I stability space sign mass space unit CR LF<br />
Example:<br />
S U I CR LF – computer command<br />
S U I ? _ - _ _ _ 5 8 . 2 3 7 _ k g _ CR LF - command executed<br />
and mass returned<br />
19.4.8. Switch on continuous transmission in basic unit<br />
Syntax: C1 CR LF<br />
Possible answers:<br />
C1_I CR LF<br />
C1_A CR LF<br />
MASS FRAME<br />
- command comprehended but cannot be executed<br />
- command comprehended and in progress<br />
- mass value in basic unit is returned<br />
Frame format:<br />
1 2 3 4 5 6 7-15 16 17 18 19 20 21<br />
S I space stability space sign mass space unit CR LF<br />
19.4.9. Switch off continuous transmission in basic unit<br />
Syntax: C0 CR LF<br />
- 70 -
Possible answers:<br />
C0_I CR LF<br />
C0_A CR LF<br />
- command comprehended but cannot be executed<br />
- command comprehended and executed<br />
19.4.10. Switch on continuous transmission in current unit<br />
Syntax: CU1 CR LF<br />
Possible answers:<br />
CU1_I CR LF<br />
CU1_A CR LF<br />
MASS FRAME<br />
- command comprehended but cannot be executed<br />
- command comprehended and in progress<br />
- mass value in current unit is returned<br />
Frame format:<br />
1 2 3 4 5 6 7-15 16 17 18 19 20 21<br />
S U I stability space sign mass space unit CR LF<br />
19.4.11. Switch off continuous transmission in current unit<br />
Syntax: CU0 CR LF<br />
Possible answers:<br />
CU0_I CR LF<br />
CU0_A CR LF<br />
- command comprehended but cannot be executed<br />
- command comprehended and executed<br />
19.4.12. Send all implemented commands<br />
Syntax: PC CR LF<br />
Possible answers:<br />
PC_- >_Z,T,TO,S,SI,SU,SUI,C1,C0,CU1,CU0,PC – command executed,<br />
the indicator have sent all the implemented commands.<br />
- 71 -
19.5. Manual printouts / automatic printouts<br />
<strong>User</strong>s can general <strong>manual</strong> or automatic printouts from the scale.<br />
• Manual printouts can be performed after loading the pan<br />
and stabilizing indication by pressing .<br />
• Automatic printouts can be performed only after loading the pan<br />
and stabilizing indication.<br />
Notice:<br />
If a scale is verified printouts of immediate values are blocked.<br />
Format frame:<br />
1 2 3 4 -12 13 14 15 16 17 18<br />
stability space sign mass space unit CR LF<br />
Stability character<br />
sign<br />
mass<br />
unit<br />
command<br />
[space] if stable<br />
[?] if not stable<br />
[^] if an indication over the range<br />
[v] if fan indication below the range<br />
[space] for positive values or<br />
[-] for negative values<br />
9 characters justified to the right<br />
3 characters justified to the left<br />
3 characters justified to the left<br />
Example 1:<br />
_ _ _ _ _ _ 1 8 3 2 . 0 _ g _ _ CR LF – the printout generated from<br />
the scale after pressing ENTER/PRINT.<br />
Example 2:<br />
? _ - _ _ _ _ 2 . 2 3 7 _ l b _ CR LF - the printout generated from<br />
the scale after pressing ENTER/PRINT.<br />
Example 3:<br />
^ _ _ _ _ _ _ 0 . 0 0 0 _ k g _ CR LF - the printout generated from<br />
the scale after pressing ENTER/PRINT.<br />
- 72 -
19.6. Continuous transmission<br />
The indicator can work in a continuous transmission mode. It can<br />
be switched on or off in parameters or using RS232 commands.<br />
The frame format sent by the indicator in case of setting<br />
to CntA:<br />
1 2 3 4 5 6 7-15 16 17 18 19 20 21<br />
S I space stability space sign mass space Unit CR LF<br />
Stability character<br />
sign<br />
mass<br />
unit<br />
command<br />
[space] if stable<br />
[?] if not stable<br />
[^] if an indication over the range<br />
[v] if fan indication below the range<br />
[space] for positive values or<br />
[-] for negative values<br />
9 characters justified to the right<br />
3 characters justified to the left<br />
3 characters justified to the left<br />
The frame format sent by the indicator in case of setting <br />
to Cntb:<br />
1 2 3 4 5 6 7-15 16 17 18 19 20 21<br />
S U I stability space sign mass space unit CR LF<br />
19.7. Configuring printouts<br />
General information<br />
If some information included are redundant or not sufficient and there<br />
is a necessity of changes one can design their own protocol format in<br />
EDYTOR WAG computer program. This piece of software is accessible<br />
in: http://www.radwag.com<br />
- 73 -
20. ERROR COMMANDS<br />
Err2<br />
Err3<br />
Err4<br />
Err5<br />
Err8<br />
NULL<br />
FULL2<br />
LH<br />
5-FULL<br />
- Value beyond the zero range<br />
- Value beyond the tare range<br />
- Calibration mass or start mass beyond the acceptable<br />
range (±1% for weight, ±10 for start mass)<br />
- Mass of a single piece lower than the scale division<br />
- Exceeded the time for tarring, zeroing, start mass<br />
adjustment or span adjustment<br />
- Zero value from the AD converter<br />
- Measurement range overflow<br />
- Start mass error, the mass on the weighing platform is<br />
beyond the acceptable range (-5% to +15% of start mass)<br />
- Display range overflow in totalizing<br />
Notice:<br />
1. Errors: Err2, Err3, Err4, Err5, Err8, null, that appear on the display<br />
are also signalled by a short beep sound (about 1 sec.);<br />
2. Error FULL2 that appears on the display is also signalled by<br />
a continuous sound until the cause of error disappears.<br />
- 74 -
21. TECHNICAL PARAMETERS<br />
21.1. Scales of WPT series<br />
Scale type:<br />
WPT<br />
6 C1<br />
WPT<br />
6 C1/K<br />
WPT<br />
6 C1/R<br />
WPT<br />
15 C1<br />
WPT<br />
15 C1/K<br />
WPT<br />
15 C1/R<br />
WPT<br />
30 C1<br />
WPT<br />
30 C1/K<br />
WPT<br />
30 C1/R<br />
WPT 30<br />
C2<br />
WPT 30<br />
C2/K<br />
WPT 30<br />
C2/R<br />
Max capacity 6kg 15kg 30kg 30kg<br />
Min capacity 40g 100g 200g 200g<br />
Readability 2g 5g 10g 10g<br />
Verification division 2g 5g 10g 10g<br />
Tare range -6kg -15kg -30kg -30kg<br />
Platform size 290 × 360mm 400 x 500mm<br />
OIML class<br />
III<br />
Operation temperature<br />
-10°C to +40°C<br />
Interfaces RS 232<br />
Power supply<br />
230 V 50Hz/11V AC, and 6×AA NiMH<br />
Supplied from batteries<br />
Average operation when supplied from batteries 35h<br />
Ingress protection rating<br />
IP 43 - plastic<br />
Display<br />
LCD with backlight<br />
Net / Gross weight 6,5 / 7,8kg 15,5 / 17,8kg<br />
Package dimensions 550 x 420 x 220mm 720 x 580 x 220mm<br />
Scale type:<br />
WPT<br />
60 C2<br />
WPT 60<br />
C2/K<br />
WPT 60<br />
C2/R<br />
WPT<br />
150 C2<br />
WPT 150<br />
C2/K<br />
WPT 150<br />
C2/R<br />
WPT<br />
300 C2<br />
WPT 300<br />
C2/K<br />
WPT 300<br />
C2/R<br />
WPT<br />
150 C3<br />
WPT 150<br />
C3/K<br />
WPT<br />
300 C3<br />
WPT 300<br />
C3/K<br />
Max capacity 60kg 150kg 300kg 150kg 300kg<br />
Min capacity 400g 1000g 2000g 1000g 2000g<br />
Readability 20g 50g 100g 50g 100g<br />
Verification division 20g 50g 100g 50g 100g<br />
Tare range -60kg -150kg -300kg -150kg -300kg<br />
Platform size 400 × 500mm 500 × 700mm<br />
OIML class<br />
III<br />
Operation temperature<br />
-10°C to +40°C<br />
Interfaces RS 232<br />
Power supply<br />
230 V 50Hz/11V AC, and 6×AA NiMH<br />
Supplied from batteries<br />
Average operation when supplied from batteries 35h<br />
Ingress protection rating<br />
IP 43 - plastic<br />
Display<br />
LCD with backlight<br />
Net / Gross weight 15,5 / 17,8kg 20,5 / 26,8kg<br />
Package dimensions 720 x 580 x 220mm 820 x 640 x 260mm<br />
- 75 -
Notice:<br />
/K designation describes a scale with an indicator with the cable,<br />
/R signifies a scale with an indicator integrated with the scale platform.<br />
WPT 3/6 C1 WPT 6/15 C1 WPT 15/30 C1<br />
Scale type:<br />
WPT 3/6 C1/K WPT 6/15 C1/K WPT 15/30 C1/K<br />
WPT 3/6 C1/R WPT 6/15 C1/R WPT 15/30 C1/R<br />
Max capacity 3/6kg 6/15kg 15/30kg<br />
Min capacity 20/40g 40/100g 100/200g<br />
Readability 1/2g 2/5g 5/10g<br />
Verification division 1/2g 2/5g 5/10g<br />
Tare range -6kg -15kg -30kg<br />
Platform size<br />
290 × 360mm<br />
OIML class<br />
III<br />
Operation temperature<br />
-10°C to +40°C<br />
Interfaces RS 232<br />
Power supply<br />
230 V 50Hz/11V AC, and 6×AA NiMH<br />
Supplied from batteries<br />
Average operation when supplied from batteries 35h<br />
Ingress protection rating<br />
IP 43 - plastic<br />
Display<br />
LCD with backlight<br />
Net / Gross weight<br />
6,5 / 7,8kg<br />
Package dimensions<br />
550 x 420 x 220mm<br />
Scale type:<br />
WPT 15/30<br />
C2<br />
WPT 15/30<br />
C2/K<br />
WPT 15/30<br />
C2/R<br />
WPT 30/60<br />
C2<br />
WPT 30/60<br />
C2/K<br />
WPT 30/60<br />
C2/R<br />
WPT 60/150<br />
C2<br />
WPT 60/150<br />
C2/K<br />
WPT 60/150<br />
C2/R<br />
WPT 150/300<br />
C2<br />
WPT 150/300<br />
C2/K<br />
Max capacity 15/30kg 30/60kg 60/150kg 150/300kg<br />
Min capacity 100/200g 200/400g 400/1000g 1000/2000g<br />
Readability 5/10g 10/20g 20/50g 50/100g<br />
Verification division 5/10g 10/20g 20/50g 50/100g<br />
Tare range -30kg -60kg -150kg -300kg<br />
Platform size<br />
400 × 500mm<br />
OIML class<br />
III<br />
Operation temperature<br />
-10°C to +40°C<br />
Interfaces RS 232<br />
Power supply<br />
230 V 50Hz/11V AC, and 6×AA NiMH<br />
Supplied from batteries<br />
Average operation when supplied from batteries 35h<br />
Ingress protection rating<br />
IP 43 - plastic<br />
Display<br />
LCD with backlight<br />
Net / Gross weight<br />
15,5 / 17,8kg<br />
Package dimensions<br />
720 x 580 x 220mm<br />
- 76 -
21.2. Table scales of WPT/F series<br />
WPT/F 3C WPT/F 6C WPT/F 15C WPT/F 30C<br />
Scale type:<br />
WPT/F 3C/K WPT/F 6C/K WPT/F 15C/K WPT/F 30C/K<br />
WPT/F 3C/R WPT/F 6C/R WPT/F 15C/R WPT/F 30C/R<br />
Max capacity 3kg 6kg 15kg 30kg<br />
Min capacity 20g 40g 100g 200g<br />
Readability 1g 2g 5g 10g<br />
Verification division 1g 2g 5g 10g<br />
Range of tare -3kg -6kg -15kg -30kg<br />
Platform size<br />
300 x 300mm<br />
OIML class<br />
III<br />
Operation temperature<br />
-10°C to +40°C<br />
Interfaces RS 232<br />
Ingress protection rating<br />
IP 43 - plastic<br />
Power supply<br />
230 V 50Hz/11V AC, and 6×AA NiMH<br />
Supplied from batteries<br />
Average operation when supplied from batteries 35h<br />
Display<br />
LCD with backlight<br />
Net / Gross weight<br />
5,5 / 6,5kg<br />
Package dimensions<br />
410 x 380 x 210mm<br />
WPT/F 3/6C WPT/F 6/15C WPT/F 15/30C/K<br />
Scale type:<br />
WPT/F 3/6C/K WPT/F 6/15C/K WPT/F 15/30C<br />
WPT/F 3/6C/R WPT/F 6/15C/R WPT/F 15/30R<br />
Max capacity 3/6kg 6/15kg 15/30kg<br />
Min capacity 20/40g 40/100g 100/200g<br />
Readability 1/2g 2/5g 5/10g<br />
Verification division 1/2g 2/5g 5/10g<br />
Range of tare -6kg -15kg -30kg<br />
Platform size<br />
300 x 300mm<br />
OIML class<br />
III<br />
Operation temperature<br />
-10°C to +40°C<br />
Interfaces RS 232<br />
Power supply<br />
230 V 50Hz/11V AC, and 6×AA NiMH<br />
Supplied from batteries<br />
Average operation when supplied from batteries 35h<br />
Ingress protection rating<br />
IP 43 - plastic<br />
Display<br />
LCD with backlight<br />
Net / Gross weight<br />
5,5 / 6,5kg<br />
Package dimensions<br />
410 x 380 x 210mm<br />
Notice:<br />
/K designation describes a scale with an indicator with the cable,<br />
/R signifies a scale with an indicator integrated with the scale platform.<br />
- 77 -
21.3. Waterproof scales of WPT/H series<br />
Scale type:<br />
WPT<br />
3H1<br />
WPT<br />
3H1/K<br />
WPT<br />
6H2<br />
WPT<br />
6H2/K<br />
WPT<br />
15H2<br />
WPT<br />
15H2/K<br />
WPT<br />
15H3<br />
WPT<br />
15H3/K<br />
WPT<br />
30H3<br />
WPT<br />
30H3/K<br />
Max capacity 3kg 6kg 15kg 15kg 30kg<br />
Min capacity 20g 40g 100g 100g 200g<br />
Readability 1g 2g 5g 5g 10g<br />
Verification division 1g 2g 5g 5g 10g<br />
Tare range -3kg -6kg -15kg -15kg -30kg<br />
Platform size 200×150mm 250 × 300mm 410 × 410mm<br />
OIML class<br />
Work temperature<br />
III<br />
-10°C to +40°C<br />
Interfaces RS 232<br />
Ingress protection rating<br />
Power supply<br />
Supplied from batteries<br />
Display<br />
IP 67 - platform, IP 66/67 - indicator<br />
230V AC, 50Hz / 11V AC and internal gell cell SLA 6V accumulator<br />
Average operation when supplied from batteries 45h<br />
LCD with backlight<br />
Net / Gross weight 7 / 8,3kg 9 / 10,3kg 15,5 / 17,3kg<br />
Package dimensions 520x260x290mm 580x320x360mm 670x510x330mm<br />
Scale type:<br />
WPT<br />
60H3<br />
WPT<br />
60H3/K<br />
WPT<br />
150H3<br />
WPT<br />
150H3/K<br />
WPT<br />
60H4<br />
WPT<br />
60H4/K<br />
WPT<br />
150H4<br />
WPT<br />
150H4/K<br />
Max capacity 60kg 150kg 60kg 150kg<br />
Min capacity 400g 1000g 400g 1000g<br />
Readability 20g 50g 20g 50g<br />
Verification division 20g 50g 20g 50g<br />
Tare range -60kg -150kg -60kg -150kg<br />
Platform size 410 × 410mm 500 × 500mm<br />
OIML class<br />
III<br />
Work temperature<br />
-10°C to +40°C<br />
Interfaces RS 232<br />
Ingress protection rating<br />
IP 67 - platform, IP 66/67 – indicator<br />
Power supply<br />
230V AC, 50Hz / 11V AC and internal gell cell SLA 6V accumulator<br />
Supplied from batteries<br />
Average operation when supplied from batteries 45h<br />
Display<br />
LCD with backlight<br />
Net / Gross weight 15,5 / 17,3kg 23,5 / 25,8kg<br />
Package dimensions 670x510x330mm 520x260x290mm<br />
- 78 -
Scale type:<br />
WPT<br />
60H5<br />
WPT<br />
60H5/K<br />
WPT<br />
150H5<br />
WPT<br />
150H5/K<br />
WPT<br />
300H5<br />
WPT<br />
300H5/K<br />
WPT<br />
150H6<br />
WPT<br />
150H6/K<br />
WPT<br />
300H6<br />
WPT<br />
300H6/K<br />
Max capacity 60kg 150kg 300kg 150kg 300kg<br />
Min capacity 400g 1000g 2000g 1000g 2000g<br />
Readability 20g 50g 100g 50g 100g<br />
Verification division 20g 50g 100g 50g 100g<br />
Tare range -60kg -150kg -300kg -150kg -300kg<br />
Platform size 600 × 600mm 800 × 800mm<br />
OIML class<br />
Work temperature<br />
III<br />
-10°C to +40°C<br />
Interfaces RS 232<br />
Ingress protection rating<br />
Power supply<br />
Supplied from batteries<br />
Display<br />
IP 67 - platform, IP 66/67 - indicator<br />
230V AC, 50Hz / 11V AC and internal gell cell SLA 6V accumulator<br />
Average operation when supplied from batteries 45h<br />
LCD with backlight<br />
Net / Gross weight 29,5 / 31,8kg 42,5 / 45,8kg<br />
Package dimensions 840x700x400mm 1160x820x340mm<br />
Scale type:<br />
WPT<br />
1,5/3H1<br />
WPT<br />
1,5/3H1/K<br />
WPT<br />
3/6H2<br />
WPT<br />
3/6H2/K<br />
WPT<br />
6/15H2<br />
WPT<br />
6/15H2/K<br />
WPT<br />
6/15H3<br />
WPT<br />
6/15H3/K<br />
WPT<br />
15/30H3<br />
WPT<br />
15/30H3/K<br />
Max capacity 1,5/3kg 3/6kg 6/15kg 6/15kg 15/30kg<br />
Min capacity 10/20g 20/40g 40/100g 40/100g 100/200g<br />
Readability 0,5/1g 1/2g 2/5g 2/5g 5/10g<br />
Verification division 0,5/1g 1/2g 2/5g 2/5g 5/10g<br />
Tare range -3kg -6kg -15kg -15kg -30kg<br />
Platform size 200×150mm 250 × 300mm 410 × 410mm<br />
OIML class<br />
III<br />
Work temperature<br />
-10°C to +40°C<br />
Interfaces RS 232<br />
Ingress protection rating<br />
IP 67 - platform, IP 66/67 - indicator<br />
Power supply<br />
230V AC, 50Hz / 11V AC and internal gell cell SLA 6V accumulator<br />
Supplied from batteries<br />
Average operation when supplied from batteries 45h<br />
Display<br />
LCD with backlight<br />
Net / Gross weight 7 / 8,3kg 9 / 10,3kg 15,5 / 17,3kg<br />
Package dimensions 520x260x290 580x320x360mm 670x510x330mm<br />
- 79 -
Scale type:<br />
WPT<br />
30/60H3<br />
WPT<br />
30/60H3/K<br />
WPT<br />
60/150H3<br />
WPT<br />
60/150H3/K<br />
WPT<br />
30/60H4<br />
WPT<br />
30/60H4/K<br />
WPT<br />
60/150H4<br />
WPT<br />
60/150H4/K<br />
Max capacity 30/60kg 60/150kg 30/60kg 60/150kg<br />
Min capacity 200/400g 400/1000g 200/400g 400/1000g<br />
Readability 10/20g 20/50g 10/20g 20/50g<br />
Verification division 10/20g 20/50g 10/20g 20/50g<br />
Tare range -60kg -150kg -60kg -150kg<br />
Platform size 410 × 410mm 500 × 500mm<br />
OIML class<br />
Work temperature<br />
III<br />
-10°C to +40°C<br />
Interfaces RS 232<br />
Ingress protection rating<br />
Power supply<br />
Supplied from batteries<br />
Display<br />
IP 67 - platform, IP 66/67 - indicator<br />
230V AC, 50Hz / 11V AC and internal gell cell SLA 6V accumulator<br />
Average operation when supplied from batteries 45h<br />
LCD with backlight<br />
Net / Gross weight 15,5 / 17,3kg 23,5 / 25,8kg<br />
Package dimensions 670x510x330mm 840x600x400mm<br />
Scale type:<br />
WPT<br />
30/60H5<br />
WPT<br />
30/60H5/K<br />
WPT<br />
60/150H5<br />
WPT<br />
60/150H5/K<br />
WPT<br />
150/300H5<br />
WPT<br />
150/300H5/K<br />
WPT<br />
150/300H6<br />
WPT<br />
150/300H6/K<br />
Max capacity 30/60kg 60/150kg 150300kg 150300kg<br />
Min capacity 200/400g 400/1000g 1000/2000g 1000/2000g<br />
Readability 10/20g 20/50g 100g 100g<br />
Verification division 10/20g 20/50g 100g 100g<br />
Tare range -60kg -150kg -300kg -300kg<br />
Platform size 600 × 600mm 800 × 800mm<br />
OIML class<br />
III<br />
Work temperature<br />
-10°C to +40°C<br />
Interfaces RS 232<br />
Ingress protection rating<br />
IP 67 - platform, IP 66/67 - indicator<br />
Power supply<br />
230V AC, 50Hz / 11V AC and internal gell cell SLA 6V accumulator<br />
Supplied from batteries<br />
Average operation when supplied from batteries 45h<br />
Display<br />
LCD with backlight<br />
Net / Gross weight 29,5 / 31,8kg 42,5 / 45,8kg<br />
Package dimensions 840x700x400mm 1160x820x340mm<br />
- 80 -
21.4. Waterproof scales of WPT/HR series<br />
Scale type:<br />
WPT<br />
3HR2<br />
WPT<br />
3HR2/K<br />
WPT<br />
6HR2<br />
WPT<br />
6HR2/K<br />
WPT<br />
15HR2<br />
WPT<br />
15HR2/K<br />
WPT<br />
15HR3<br />
WPT<br />
15HR3/K<br />
WPT<br />
30HR3<br />
WPT<br />
30HR3/K<br />
Max capacity 3kg 6kg 15kg 15kg 30kg<br />
Min capacity 20g 40g 100g 100g 200g<br />
Readability 1g 2g 5g 5g 10g<br />
Verification division 1g 2g 5g 5g 10g<br />
Tare range -3kg -6kg -15kg -15kg -30kg<br />
Platform size 250 × 300mm 410 × 410mm<br />
OIML class<br />
Work temperature<br />
Storage temperature<br />
III<br />
-10°C to +40°C<br />
-25° to +70°C<br />
Interfaces RS 232<br />
Ingress protection rating<br />
Power supply<br />
Supplied from batteries<br />
Display<br />
IP 68 - construction, IP 68 – tensometer, IP 66/67 - indicator<br />
220÷240VAC 50Hz (optional 110÷120VAC 60Hz) and SLA 6V/3,4Ah<br />
Average operation when supplied from batteries 45h<br />
LCD with backlight<br />
Net / Gross weight 9/10,3kg 15,5/17,3kg<br />
Package dimensions 580x320x360mm 670x510x330mm<br />
Scale type:<br />
WPT<br />
60HR3<br />
WPT<br />
60HR3/K<br />
WPT<br />
150HR3<br />
WPT<br />
150HR3/K<br />
WPT<br />
60HR4<br />
WPT<br />
60HR4/K<br />
WPT<br />
150HR4<br />
WPT<br />
150HR4/K<br />
WPT<br />
60HR5<br />
WPT<br />
60HR5/K<br />
WPT<br />
150HR5<br />
WPT<br />
150HR5/K<br />
Max capacity 60kg 150kg 60kg 150kg 60kg 150kg<br />
Min capacity 400g 1000g 400g 1000g 400g 1000g<br />
Readability 20g 50g 20g 50g 20g 50g<br />
Verification division 20g 50g 20g 50g 20g 50g<br />
Tare range -60kg -150kg -60kg -150kg -60kg -150kg<br />
Platform size 410 × 410mm 500 × 500mm 600 x 600mm<br />
OIML class<br />
III<br />
Work temperature<br />
-10°C to +40°C<br />
Storage temperature<br />
-25° to +70°C<br />
Interfaces RS 232<br />
Ingress protection<br />
rating<br />
IP 68 - construction, IP 68 – tensometer, IP 66/67 - indicator<br />
Power supply<br />
220÷240VAC 50Hz (optional 110÷120VAC 60Hz) and SLA 6V/3,4Ah<br />
Supplied from batteries<br />
Average operation when supplied from batteries 45h<br />
Display<br />
LCD with backlight<br />
Net / Gross weight 15,5/17,3kg 15,5/17,3kg 23,5 / 25,8kg<br />
Package dimensions 670x510x330mm 670x510x330mm 840x600x400mm<br />
- 81 -
Scale type:<br />
WPT<br />
3/6HR2<br />
WPT<br />
3/6HR2/K<br />
WPT<br />
6/15HR2<br />
WPT<br />
6/15HR2/K<br />
WPT<br />
15/30HR3<br />
WPT<br />
15/30HR3/K<br />
WPT<br />
30/60HR3<br />
WPT<br />
30/60HR3/K<br />
WPT<br />
60/150HR3<br />
WPT<br />
60/150HR3/K<br />
Max capacity 3/6kg 6/15kg 15/30kg 30/60kg 60/150kg<br />
Min capacity 20/40g 40/100g 100/200g 200/400g 400/1000g<br />
Readability 1/2g 2/5g 5/10g 10/20g 20/50g<br />
Verification division 1/2g 2/5g 5/10g 10/20g 20/50g<br />
Tare range -6kg -15kg -30kg -60kg -150kg<br />
Platform size 250 × 300mm 410 × 410mm<br />
OIML class<br />
Work temperature<br />
Storage temperature<br />
III<br />
-10°C to +40°C<br />
-25° to +70°C<br />
Interfaces RS 232<br />
Ingress protection rating<br />
Power supply<br />
Supplied from batteries<br />
Display<br />
IP 68 - construction, IP 68 – tensometer, IP 66/67 - indicator<br />
220÷240VAC 50Hz (optional 110÷120VAC 60Hz) and SLA 6V/3,4Ah<br />
Average operation when supplied from batteries 45h<br />
LCD with backlight<br />
Net / Gross weight 9/10,3kg 15,5/17,3kg<br />
Package dimensions 580x320x360mm 670x510x330mm<br />
Scale type:<br />
WPT<br />
30/60HR4<br />
WPT<br />
30/60HR4/K<br />
WPT<br />
60/150HR4<br />
WPT<br />
60/150HR4/K<br />
WPT<br />
30/60HR5<br />
WPT<br />
30/60HR5/K<br />
WPT<br />
60/150HR5<br />
WPT<br />
60/150HR5/K<br />
Max capacity 30/60kg 60/150kg 30/60kg 60/150kg<br />
Min capacity 200/400g 400/1000g 200/400g 400/1000g<br />
Readability 10/20g 20/50g 10/20g 20/50g<br />
Verification division 10/20g 20/50g 10/20g 20/50g<br />
Tare range -60kg -150kg -60kg -150kg<br />
Platform size 500 x 500mm 600 x 600mm<br />
OIML class<br />
III<br />
Work temperature<br />
-10°C to +40°C<br />
Storage temperature<br />
-25° to +70°C<br />
Interfaces RS 232<br />
Ingress protection rating<br />
IP 68 - construction, IP 68 – tensometer, IP 66/67 - indicator<br />
Power supply<br />
220÷240VAC 50Hz (optional 110÷120VAC 60Hz) and SLA 6V/3,4Ah<br />
Supplied from batteries<br />
Average operation when supplied from batteries 45h<br />
Display<br />
LCD with backlight<br />
Net / Gross weight 23,5 / 25,8kg 29,5 / 31,8kg<br />
Package dimensions 840x600x400mm 840x700x400mm<br />
- 82 -
22. TROUBLE SHOOTING<br />
Problem Cause Solution<br />
Turning on does not<br />
work<br />
The scale turns off<br />
automatically<br />
Discharged batteries.<br />
No batteries (not installed or<br />
improperly installed)<br />
„t1” set to „YES” (Power<br />
save)<br />
Connect to mains or<br />
change batteries<br />
Check the correctness of<br />
installation (polarization)<br />
In „othr” submenu change<br />
„5.4 t1” to „no”<br />
After turning on „LH”<br />
message on the display<br />
Loaded weight pan during<br />
powering up<br />
Unload the pan. Then the<br />
scale will indicator zero.<br />
23. ADDITIONAL EQUIPMENT<br />
Accessories:<br />
• KAFKA printer cable for PUE C/31 indicators - P0136,<br />
• KAFKA printer cable for PUE C/31H, PUE C/31H/Z - P0253,<br />
• Computer cable for PUE C/31 - P0108,<br />
• Computer cable for PUE C/31H, PUE C/31H/Z - P0259,<br />
• EPSON printer cable for PUE C/31 - P0151,<br />
• EPSON printer cable for PUE C/31H, PUE C/31H/Z - P0261,<br />
• Power cord for car lighter 12V DC for PUE C/31 - K0047,<br />
• Power cord for car lighter 12V DC for PUE C/31H/Z - K0042,<br />
• Thermal printer - KAFKA,<br />
• Dot matrix printer - EPSON,<br />
• Additional display in plastic casing for PUE C/31- WD- 4/1<br />
(accessible with balance as complete set only),<br />
• Additional display in stainless metal housing for PUE C/31H, PUE<br />
C/31H/Z - WD- 4/3 (accessible with balance as complete set only),<br />
• Large size display (2”) for PUE C/31H, PUE C/31H/Z - WWG-2,<br />
• Current loop in plastic casing for PUE C/31 - AP2-1,<br />
• Current loop in metal housing PUE C/31H, PUE C/31H/Z - AP2-3<br />
(accessible with balance as complete set only),<br />
- 83 -
• RS232 / RS485 converter for PUE C/31 – KR-01,<br />
• RS232 / Ethernet converter for PUE C/31 - KR-04,<br />
• Stainless steel anti-vibration table - SAP/N,<br />
• A case for save carring/transporting a scale of WPT/C1/K series – W2,<br />
• Anti-dust case for Epson printer,<br />
• A rack for PUE C/31, PUE C/31H or PUE C/31H/Z indicator,<br />
• Handle for measuring indicator in plastic version,<br />
• A table for a scale (3 versions, for WPT/H3, WPT/H4 and WPT/H5),<br />
• A frame for weighings loads under a scale of WPT/F series,<br />
• Roller table.<br />
Computer programs:<br />
• “EDYTOR WAG” computer program,<br />
• "RAD-KEY" computer program,<br />
• "PW-WIN" computer program.<br />
- 84 -
MANUFACTURER<br />
OF ELECTRONIC WEIGHING<br />
INSTRUMENTS<br />
<strong>RADWAG</strong> WAGI ELEKTRONICZNE<br />
26 – 600 Radom, Bracka 28 Street<br />
POLAND<br />
Tel. +48 48 38 48 800, tel./fax. + 48 48 385 00 10<br />
Selling departament + 48 48 366 80 06<br />
www.radwag.com<br />
- 85 -