wpx balances for controling of packaged goods - RADWAG
wpx balances for controling of packaged goods - RADWAG
wpx balances for controling of packaged goods - RADWAG

You also want an ePaper? Increase the reach of your titles
YUMPU automatically turns print PDFs into web optimized ePapers that Google loves.
Instruction number<br />
LMI-01-03/01/07/A<br />
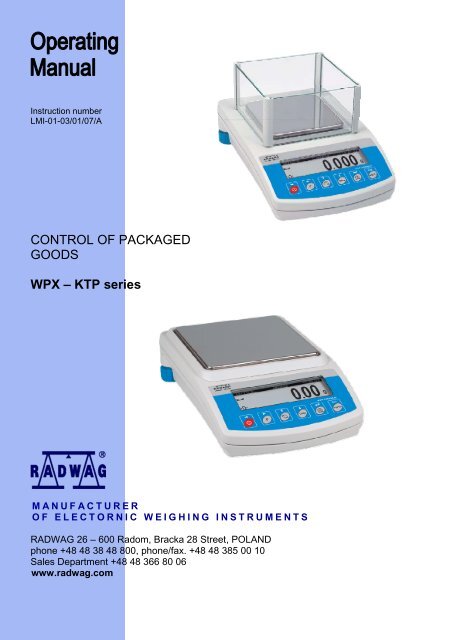
CONTROL OF PACKAGED<br />
GOODS<br />
WPX – KTP series<br />
MANUFACTURER<br />
OF ELECTORNIC WEIGHING INSTRUMENTS<br />
<strong>RADWAG</strong> 26 – 600 Radom, Bracka 28 Street, POLAND<br />
phone +48 48 38 48 800, phone/fax. +48 48 385 00 10<br />
Sales Department +48 48 366 80 06<br />
www.radwag.com
May 2007<br />
2
Contents<br />
1. UNWRAPING THE BALANCE ....................................................................................4<br />
2. START THE BALANCE UP.........................................................................................5<br />
3. APPROPRATION.........................................................................................................6<br />
4. DESCRIPTION OF THE BALANCE - display.............................................................7<br />
5. USER MENU................................................................................................................8<br />
6. WEIGHING.................................................................................................................16<br />
6.1. Log-in function.....................................................................................................17<br />
7. BALANCE CALIBRATION ........................................................................................20<br />
8. SETTING PRINTOUTS FOR GLP PROCEDURES ...................................................25<br />
9. SETTING TIME AND DATE.......................................................................................26<br />
10. SETTING THE PARAMETERS................................................................................29<br />
11. FUNCTIONS IN USING RS 232 PORT....................................................................31<br />
12. PRINTOUTS.............................................................................................................32<br />
13. ACCESS TO MASS UNITS......................................................................................32<br />
14. OTHER PARAMETERS...........................................................................................33<br />
15. USE OF SCALE OPERATING MODES...................................................................35<br />
15.1. CONTROL OF PACKAGED GOODS ...............................................................35<br />
15.2. Statistics............................................................................................................49<br />
16. KINDS OF PRINTOUTS...........................................................................................51<br />
17. COOPERATION WITH PRINTER OR COMPUTER ................................................59<br />
18. WEIGHING LOADS UNDER THE BALANCE .........................................................60<br />
19. CONNECTING ADDITIONAL KEYS........................................................................60<br />
20. LIST OF COMMUNICATIONS COMPUTER - BALANCE .......................................61<br />
21. TECHNICAL PARAMETERS...................................................................................64<br />
22. COMMANDS ABOUT ERRORS ..............................................................................65<br />
23. WPX - EC TYPE APPROVAL ..................................................................................66<br />
3
1. UNWRAPING THE BALANCE<br />
1.1. The balance WPX<br />
Take the balance out <strong>of</strong> the box and put in on the stable table. Take all<br />
components out <strong>of</strong> the box. Install the components on the balance.<br />
The components installation <strong>for</strong> the balance WPX with d=0,01g<br />
The components installation <strong>for</strong> the balance WPX with d=0,001g<br />
The balance is supplied through power pack 230 V AC / 11 V AC. Power pack<br />
socket is at the rear <strong>of</strong> the balance.<br />
4
2. START THE BALANCE UP<br />
2.1. Conditions <strong>of</strong> proper usage<br />
−<br />
−<br />
−<br />
−<br />
−<br />
−<br />
−<br />
Set the balance on stable table, far from vibrations<br />
The balance should be replaced far from draughts and air breeze.<br />
The balance should be in stable temperature and humidity room<br />
The balance should be replaced far from sources <strong>of</strong><br />
Temperature in the room +15°C ÷ +30°C (WPX)<br />
If the static electricity has influence on the balance indications it base<br />
should be earthed. Earthing screw is in the rear part <strong>of</strong> the balance base.<br />
The balance should be replaced in leveled position<br />
2.2. Set level up<br />
The balance should be leveled. The correct leveling is shown on the level<br />
indication installed at rear <strong>of</strong> the balance.<br />
2.3 Warming up<br />
Be<strong>for</strong>e measurements user should wait untill the balance reaches<br />
temperature stabilization. It is warming up time.<br />
For <strong>balances</strong> WPX it is about 15 min.<br />
This periods refers to the <strong>balances</strong> which ware in surrounding temperature (work)<br />
be<strong>for</strong>e start weighing.<br />
If the WPX <strong>balances</strong> are kept in lower temperature be<strong>for</strong>e weighing the<br />
warming-up time is about 2 hours.<br />
During warm-up stabilization the indications can change.<br />
5
3. APPROPRATION<br />
The <strong>balances</strong> are used to do precise measurements in laboratories. It is possible<br />
to do the zero function in all measure range.<br />
The balance weights in following units:<br />
Measure units<br />
Apart from weighing in various measure units the balance also:<br />
−<br />
−<br />
−<br />
SQC<br />
SQC-net<br />
creates statistics<br />
Measure units and particular functions can be inaccessible <strong>for</strong> user. It is<br />
possible to adapt the balance to individual needs and access functions and units<br />
which are necessary at this moment.<br />
It is possible to define accessible or noo-accessible in user menu and it is<br />
described in further part <strong>of</strong> the manual.<br />
6
4. DESCRIPTION OF THE BALANCE - display<br />
Display balance<br />
1. load mass and quantity <strong>of</strong> pieces<br />
2. measure unit<br />
3. the result is stable<br />
4. line <strong>of</strong> max range <strong>of</strong> the balance<br />
5. work mode<br />
6. date<br />
7. time<br />
8. precise ZERO<br />
4.2. Keyboard<br />
Each key is dual-function key. Particular function can be done through. User also<br />
can move in the balance menu.<br />
Switches the display <strong>of</strong>f.<br />
Function key.<br />
Selects the work mode<br />
Changes measure units<br />
Sends in<strong>for</strong>mation to external instrument (PRINT) or confirms<br />
parameter value or function (ENTER).<br />
Sets indication to zero<br />
7
4.3 Connections<br />
1. power adapter socket<br />
2. PS keyboard connector<br />
3. RS 232 port<br />
4. additional display socket<br />
Sockets <strong>of</strong> the WPX balance<br />
5. USER MENU<br />
There are 9 groups in user menu. Each group is named by P letter. Name and<br />
contents <strong>of</strong> each group is presented below.<br />
P1 Calibration<br />
01 internal calibr | * * * * * * * * | Function<br />
02 external calibr | * * * * * * * * | Function<br />
03 user calibr | * * * * * * * * | Function<br />
04 Test calibr | * * * * * * * * | Function<br />
05 weight correction | * * * * * *0.0 |<br />
06 automatic calibr | * * * * * *0.3 | both<br />
07 Aut. Calibr time | * * * * * *0.3 | 3 hours<br />
08 Report printout | * * * * * *0.1 | on<br />
P2 GLP<br />
01 User | Nowak Jan |<br />
02 Project | AR – 65/04 |<br />
03 time printout | * * * * * *0.0 | <strong>of</strong>f<br />
04 date printout | * * * * * *0.0 | <strong>of</strong>f<br />
05 User printout | * * * * * *0.0 | <strong>of</strong>f<br />
06 Project printout | * * * * * *0.0 | <strong>of</strong>f<br />
07 Printout Id | * * * * * *0.0 | <strong>of</strong>f<br />
08 Calibration printout | * * * * * *0.0 | <strong>of</strong>f<br />
P3 Date/Time<br />
01 Form date | * * * * * * * 0 | D/M/R<br />
02 Form time | * * * * * * * 0 | 24 hours<br />
03 Time | * * * * * * * * | Function<br />
04 Date | * * * * * * * * | Function<br />
05 Display time | * * * * * * * 1 | on<br />
06 Display date | * * * * * * * 1 | on<br />
8
P4 Readout<br />
01 Filter | * * * * * * * 3 | middle<br />
02 Med. ilter | * * * * * * * 1 | enabled<br />
03 Disp refresh | * * * * * * * 1 | 0.08 s<br />
04 Autozero | * * * * * * * 1 | on<br />
05 Last digit | * * * * * * * 1 | always<br />
06 Negative | * * * * * * * 0 | disabled<br />
P5 RS - 232<br />
01 Transm. speed | * * * * * * * 1 | 4800<br />
02 Parity | * * * * * * * 0 | none<br />
03 Data bits | * * * * * * * 2 | 8 bits<br />
04 Stop bits | * * * * * * * 1 | 1 bit<br />
05 Transm data | * * * * * * * 0 | none<br />
06 Aut. printout | * * * * * * * 0 | none<br />
07 Interval | * * * * * * * 1 | * 0.1 s<br />
08 Min. mass | * * * * * * * 4 | 10 d<br />
09 Print stab | * * * * * * * 1 | enabled<br />
10 Print to | * * * * * * * 0 | printer<br />
P6 Printout<br />
01 Numer Print | * * * * * * * 0 | standard<br />
02 Print 1 start | * * * * * * * 1 |<br />
03 Print 1 stop | * * * * * * * 1 |<br />
04 Print 2 start | * * * * * * * 1 |<br />
05 Print 2 stop | * * * * * * * 1 |<br />
... . . . . . . . . . . | * * * * * * * 0 |<br />
10 Pr. Edit | * * * * * * * * | function<br />
11 String 1 | * * * * * * * 1 |<br />
... . . . . . . . . . . | * * * * * * * 1 |<br />
89 String 80 | * * * * * * * 0 |<br />
P7 units<br />
01 Grams | * * * * * * * 1 | enabled<br />
02 Miligrams | * * * * * * * 1 | enabled<br />
03 Carats | * * * * * * * 1 | enabled<br />
04 Pounds | * * * * * * * 0 | disabled<br />
05 Ounces | * * * * * * * 0 | disabled<br />
06 Ounces troy | * * * * * * * 0 | disabled<br />
07 Dwt | * * * * * * * 0 | disabled<br />
08 Taele Hk. | * * * * * * * 0 | disabled<br />
09 Taele S. | * * * * * * * 0 | disabled<br />
10 Taele T. | * * * * * * * 0 | disabled<br />
11 Momms | * * * * * * * 0 | disabled<br />
12 Gran | * * * * * * * 0 | disabled<br />
13 Newtons | * * * * * * * 0 | disabled<br />
14 Tical’ e | * * * * * * * 0 | disabled<br />
15 user unit | * * * * * * * 0 | disabled<br />
16 factor unit | * * * * * * * 1 |<br />
9
P8 SQC<br />
01 Res. in rep | * * * * * * * 1 | enabled<br />
02 Header No. | * * * * * * * 0 | none<br />
03 Code page | * * * * * * * 0 | Win<br />
04 Printer | * * * * * * * 0 | standard<br />
05 Cut paper | * * * * * * * 1 | enabled<br />
06 Art. printout | * * * * * * * * | function<br />
P9 Globals<br />
01 Adress | * * * * * * * 1 |<br />
02 Ustawieno ID | * * * * * * * * | function<br />
03 Print Aut. ID | * * * * * * * 0 | <strong>of</strong>f<br />
04 Signal | * * * * * * * 1 | enabled<br />
05 Language | * * * * * * * * | function<br />
06 Backlight | * * * * * * * 1 | on<br />
07 Contrast | * * * * * * * * | function<br />
08 Screen server | * * * * * * * 0 | enabled<br />
09 Temperature | * * * * * * * * | function<br />
10 Balance numbe | 114493 * * |<br />
11 S<strong>of</strong>tware rev. | MKA 0.12 |<br />
12 Par. printout | * * * * * * * * | function<br />
13 Par. Receive | * * * * * * * * | function<br />
14 Passwd prot. | * * * * * * * * | function<br />
15 Start mode | * * * * * * * 0 | Weighing<br />
Parameters in user menu are:<br />
• functional – <strong>for</strong> particular activity eg. the balance calibration<br />
• selectable – selects one <strong>of</strong> few values from the balance memory<br />
• noted – changes sets in the balance memory eg. Date, time, user<br />
number, texts<br />
10
Menu – graphic version<br />
Press the F key to display main menu <strong>of</strong> the balance (display I). Select the<br />
submenu whose contents is displayed after pressing the F key (display II).<br />
Menu<br />
1 – main menu number<br />
2 – indication <strong>of</strong> the function selection<br />
3 – function name<br />
4 – currently used function<br />
5 – submenu number<br />
6 – submenu name<br />
7 – attribute <strong>of</strong> the menu<br />
8 – value <strong>of</strong> the attribute<br />
11
5.1. Move in user menu<br />
User moves in the menu by<br />
- the balance keyboard<br />
- PS keyboard,<br />
- Communicates from computer to the balance<br />
5.1.1. The balance keyboard<br />
enter main menu<br />
move down in the menu<br />
move up in the menu<br />
selects submenu which is activated. Submenu contents is<br />
presented on the display<br />
move one level up to main menu<br />
Resignation parameter changing<br />
5.1.2. Return to weighing function<br />
Introduced changes are recorded after return to weighing mode and<br />
confirm changes. Press the ESC key many times. If following<br />
question appears on the display press: ENTER – confirm or ESC –<br />
cancel<br />
Return to weighing<br />
12
5.1.3. PS computer keyboard<br />
Each key on the balance keyboard has its equvivalent on the PS keyboard:<br />
- <strong>for</strong> functions<br />
Description<br />
keyboard<br />
Switch on/<strong>of</strong>f the balance display<br />
Move to the balance menu<br />
Selects work mode<br />
Selects measure unit<br />
PRINT<br />
TARE<br />
- <strong>for</strong> direction keys<br />
Move up<br />
Move to level up<br />
Sets selected parameter<br />
Move down<br />
13
- <strong>for</strong> ENTER / PRINT keys and ESC<br />
Confirm changes<br />
Cancel and leave function without changes<br />
5.1.4. By means <strong>of</strong> virtual keyboard through RS 232<br />
Most <strong>of</strong> the functions are done by the balance desk or PS keyboard. They are<br />
aslo done by sending orders computer – balance.<br />
This commands enables to move in the balance manu and control the balance<br />
work. The list <strong>of</strong> the commands is at the end <strong>of</strong> the manual.<br />
5.2 User menu<br />
The menu is presented in p. 5. Press the F key in weighing level. Main menu is<br />
presented on the display. Select the submenu which is modificated.<br />
Main menu – submenu selection<br />
If the menu is modificated press the F key. Selected menu appears on the<br />
display. Select what will be changed in this submenu (activate). Select through<br />
keys presented on the Draw above. Press the F key.<br />
14
Reaction <strong>of</strong> the balance:<br />
- Activity <strong>of</strong> the balance (eg. the balance calibration) is done <strong>for</strong> submenu<br />
described as Function<br />
- Attribute activation <strong>for</strong> submenu which is indicated (digit flashing means<br />
the value can be changed and some signs can be written)<br />
Tthe balance submenu<br />
15
6. WEIGHING<br />
Following conditions must be fulfilled to get reliable results:<br />
- Stable temperature<br />
- Stable ground<br />
- Proper parameters <strong>for</strong> external conditions<br />
Be<strong>for</strong>e measurements or <strong>for</strong> essential changes <strong>of</strong> the external conditions (if<br />
the temperature changes more than 1°C/h) calibrate the balance in<br />
accordance with p. 7.1.<br />
Be<strong>for</strong>e measurements load the pan and check if the balance show „precise<br />
zero” – displayed in down left corner <strong>of</strong> the display (only if the<br />
parameter P4 06 Autozero has the value 1: yes) and check if the<br />
measurement is stable – is displayed in right up corner <strong>of</strong> the display.<br />
If the balance does not show zero press the key<br />
If the conditions are unfavourable (no stable result) lines appear on the<br />
display. After settled time the balance returns to weighing mode without set<br />
up to zero. In this case wait untill the conditions stabilize and press Esc<br />
again<br />
By the Units key select measure unit. Put the load on the pan and after<br />
stabilization read out the result. If measure unit user wants to use is not<br />
displayed during pressing the Units key check if it has access attribute.<br />
The indication can be set to zero many times. Sum <strong>of</strong> loads noted in the<br />
balance memory cannot be higher than max capacity.<br />
Betwenn following measurements do not unpluged the balance.<br />
The balance should be switched <strong>of</strong>f by the ON/OFF key. After pressing the<br />
key again the balance is ready to work without warm stabilization.<br />
16
6.1. Log-in function<br />
The operator has own access code to internal menu. The password system is<br />
defined by administrator. Password can contain max 6 digits.<br />
The balance program enables to declare:<br />
• One administrator who is authorised to use all sets and programme<br />
functions, change the passwords – own and user<br />
• One user who is authorised to sets and the balance functions<br />
determined by administrator<br />
Setting password and access authorization<br />
• After set the password and access parameters (parameter P9 13<br />
Password protection) write the password <strong>for</strong> administrator<br />
• If the admistrator password is different from “0” the program wants<br />
administrator password during enter <strong>for</strong> the parameter<br />
P9 13 Password protection.<br />
• Every enter this parameter the s<strong>of</strong>tware demands administrator<br />
password, after writting correct password it is possible to set the<br />
parameter P9 13 Password protection<br />
• Dependly on setting the password is shown as digits or stars (start value<br />
each digit = 0)<br />
According to p. 5.1.1 <strong>of</strong> the manual enter the menu P9 Other<br />
Password – activation the function<br />
17
Menu password protection<br />
- Administrator<br />
line to write administrator who has access to all set up<br />
- User<br />
line to write user password. User who has access to setting with NO attribute<br />
(are not protected by password)<br />
- Start up<br />
If it is settled on YES during start the balance up user must write access<br />
password (administrator or user)<br />
- Functions<br />
If it is settled on NO (not protected by password) user can use implemented<br />
functions in the balance.<br />
- Set up<br />
If it is set up on NO (not protected by password) user can change setting in<br />
the balance<br />
- Only Kal+GLP<br />
If it is set up on YES user can per<strong>for</strong>m the calibration and calibration report<br />
- Stars<br />
If it is settled on YES during start the balance up password is hidden under<br />
starts<br />
Administrator password<br />
Write the password <strong>for</strong> administrator (max 6 digits) and user. Each<br />
admistrator has access to all functions in the balance. User has access to<br />
balance possibilities in accordance with above description. Please, remember<br />
the password. If you set YES <strong>for</strong> „Start up” function the password must be<br />
writen after switch the balance on.<br />
If the password is not correct using the balance is not possible.<br />
To write the password in use keys described on the drawing 2. or PS/2<br />
keyboard (it can be connected to the balance port).<br />
Set up the attributes <strong>for</strong> other options dependly on authorizations <strong>for</strong> user.<br />
18
The keys – introducing the values in the menu<br />
19
7. BALANCE CALIBRATION<br />
To ensure high precision <strong>of</strong> weighing corrective factor in relation to standard mass<br />
must be noted in the balance memory periodicaly – it is the balance calibration.<br />
Calibration should be per<strong>for</strong>med when:<br />
- The weighing is started,<br />
- Long breaks are between following measure series<br />
- Temperature inside the balance changes more than: 1°C <strong>for</strong> WPX<br />
<strong>balances</strong><br />
Kind <strong>of</strong> calibration:<br />
- Internal automatic calibration<br />
* started if temperature changes<br />
* started if the time changes<br />
- Manual internal calibration<br />
* started by the balance keyboard<br />
- Calibration made with external weight<br />
* with declared mass which cannot be modificated<br />
* with any mass which should be given be<strong>for</strong>e the calibration<br />
process<br />
In verified <strong>balances</strong> only automatic internal calibration and manual internal<br />
calibration is accessible.<br />
Per<strong>for</strong>m the calibration when there is no load on the pan!<br />
7.1. Automatic balance calibration<br />
It is per<strong>for</strong>med when:<br />
- Period <strong>of</strong> time passes from last calibration<br />
- temperature changes <strong>for</strong> settled value by manufacturer<br />
* <strong>for</strong> <strong>balances</strong> WPX is 1°C.<br />
Following in<strong>for</strong>mation appears on the display:<br />
automatic calibration – display<br />
Time delay in starting the calibration up enables user to yese load <strong>of</strong>f the pan<br />
untill the measurements are per<strong>for</strong>med. If the T/O key is pressed the calibration<br />
process is stopped.<br />
Set up automatic calibartion<br />
20
Set up automatic balance calibration<br />
1 – main menu number<br />
2 – function selection factor<br />
3 – function name<br />
4 – name <strong>of</strong> actual activity<br />
5 – selects factor to autocalibration (time / temp.)<br />
6 – declaring autocalibration time<br />
7 – value <strong>of</strong> factors <strong>for</strong> autocalibration<br />
8 – value <strong>of</strong> time <strong>for</strong> autocalibration<br />
if the values <strong>for</strong> factor and autocalibration time also descriptions <strong>for</strong> tchem<br />
changes.<br />
01 Internal calibration<br />
Start internal calibration process, the process is automaticaly without operator<br />
interference, if there is load on the pan the display shows order to remove the<br />
load<br />
02 External calibration<br />
calibration per<strong>for</strong>med by external mass, its value is recorded in factory menu,<br />
function inadmissible in verified <strong>balances</strong><br />
03 User calibration<br />
calibration per<strong>for</strong>med with any mass which must be introduced be<strong>for</strong>e the<br />
calibration, function inadmissible in verified <strong>balances</strong><br />
04 Calibration test<br />
comparison internal calibration mass with its value recorded in the balance<br />
memory<br />
05 Weight code<br />
correct value <strong>of</strong> internal calibration mass, function inadmissible in verified<br />
21
alances<br />
06 Automatic calibration<br />
determine factor which decides about start automatic internal calibration<br />
0 non – non <strong>of</strong> the factors causes start <strong>of</strong> the calibration<br />
1 time – calibration in relation to time determined in p. 07<br />
2 temperature – calibration in relation to changes <strong>of</strong> surroundign<br />
temperature<br />
3 both – calibration in relation to changes <strong>of</strong> time and temperature<br />
07 Automatic calibration time<br />
Determination <strong>of</strong> time automatic calibration starts up<br />
Return to weighing<br />
The changes are recorded when the balance returns to weighing<br />
mode with the recording the changes. Press the ESC many times.<br />
Following question appears on the display.<br />
Select one <strong>of</strong> the options : ENTER – record / ESC – cancell<br />
(see Return to weighing p. 5.1.2. Return to weighing)<br />
7.2. Calibration test<br />
Internal calibration mass is compared to its value in the balance memory. This<br />
preocess is automatic. Its result is shown on the display.<br />
The calibration test<br />
Kal. – value <strong>of</strong> internal calibration mass<br />
Akt. – result <strong>of</strong> weighing internal calibration mass<br />
Odch – difference between two values<br />
Return to weighing<br />
Changes are recorded only after return to weighing mode and<br />
confirmation the changes. Press the ESC key many times. Following<br />
question appears on the display. Select one <strong>of</strong> the options: ENTER<br />
– confirmation / ESC – cancel.<br />
(see Return to weighing. p.. 5.1.2. Return to weighing)<br />
7.3. Manual calibration<br />
7.3.1. Internal calibration<br />
22
1. Enter submenu P1 – Calibration.<br />
2. Select the function 01 Internal calibration.<br />
3. Press the F key.<br />
4. The balance per<strong>for</strong>ms the calibration automatically. During this calibration<br />
do not load the pan.<br />
5. After this process the balance records results <strong>of</strong> the calibartion in the<br />
memory and returns to weighing mode.<br />
- Pressing the ESC key stops the calibration process<br />
- If during the calibration load is on the pan display show order about<br />
error. The calibration process is stopped.<br />
After take load <strong>of</strong>f the calibration process is finished.<br />
- If the function DRH is active user cannot stop the internal calibration<br />
process.<br />
7.3.2. External calibration<br />
The external calibration should be per<strong>for</strong>med with external mass class:<br />
- F 2 – <strong>for</strong> <strong>balances</strong> WPX<br />
List <strong>of</strong> weights <strong>for</strong> separate <strong>balances</strong> is included in technical specification in the<br />
final part <strong>of</strong> the manual.<br />
1. Move to submenu P1 – Calibration.<br />
2. Select the function 02 external calibration<br />
3. Press the F key.<br />
4. Order to yese the load <strong>of</strong>f the pan appears on the display (no load on the<br />
pan). After yesing load <strong>of</strong>f the pan press the ENTER key.<br />
5. The balance determines mass <strong>of</strong> empty pan<br />
6. Put load and press the ENTER<br />
7. After the calibration the balance returns to submenu P1 - Calibration<br />
8. Return to weighing – as in the point 5.1.2.<br />
If the function DRH is active user cannot per<strong>for</strong>m the external calibration<br />
process. Function DRH is active in verified <strong>balances</strong>.<br />
23
7.3.3. Calibration per<strong>for</strong>med by user<br />
Calibration per<strong>for</strong>med by user with aby external weight class:<br />
• F 2 – <strong>for</strong> <strong>balances</strong> WPX;<br />
- Enter menu group P1 Calibration. Select the parameter<br />
03 user calibration<br />
- Press the F key. The balance displays order to note calibration mass. The<br />
first digit flashes and it can be changed.<br />
User calibration – declaring value <strong>of</strong> weight<br />
- Record new external mass by functional keys (in accordance with p. 5.1.1 <strong>of</strong><br />
the manual)<br />
- Confirm the mass. The balance starts calibration and shows orders on the<br />
display.<br />
- The balance determines mass <strong>of</strong> empty pan and shows order to put this<br />
mass<br />
- After put the weight on the pan confirm by the Enter.<br />
- After this procedure balance returns to menu to group P1 Calibration.<br />
- In accordance with previous point start weighing mode.<br />
It is recomended to select external calibration mass as its mass would be<br />
about ¾ <strong>of</strong> max balance capacity.<br />
If the DRH function is active user cannot per<strong>for</strong>m the external calibration<br />
process.<br />
7.4. Calibration report printout<br />
After calibration user can reveice the calibration report. The report can be printed<br />
on connected printer and sent to computer or recorded in file.<br />
P1 08 Report printout :<br />
P1 08 Report printout:<br />
1:yes – report is printed<br />
0:no – report is not printed<br />
If the parameter has the value 1 the report is genrated and sent automaticaly.<br />
24
Submenu calibration<br />
A content <strong>of</strong> report depends on setting in submenu GLP. All options with YES<br />
attribute are printed.<br />
Submenu GLP - setting<br />
Apart from in<strong>for</strong>mation settled in menu group the report contains: calibration mass<br />
remembered by balance after last calibration (description Old:), calibration mass<br />
determined during actual calibration (description: Calibration) and deviation <strong>of</strong> the<br />
calibration (description Deviation:) – difference between these two masses.<br />
Example <strong>of</strong> balance calibration report<br />
8. SETTING PRINTOUTS FOR GLP PROCEDURES<br />
25
P2 GLP is group <strong>of</strong> the parameters which declares factors on the calibration<br />
printout. For fields:<br />
- user (max 8 alphanumerical signs)<br />
- design (max 8 alphanumerical signs)<br />
introduce names by the balance keyboard or the PS/2 keyboard. For the rest<br />
select:<br />
- 1 no (do not print during report)<br />
- 0 yes (print during report)<br />
Main view <strong>of</strong> the GLP submenu is presented. If you use the PS/2 keyboard see<br />
what dipendences are between the balance keyboard and PS/2 keyboard<br />
(p. 5.1.2)<br />
9. SETTING TIME AND DATE<br />
The balance has real time clock whose parameters can be modificated. Enter the<br />
menu group P3 Date/Time as it is show below:<br />
Submenu Date / Time<br />
26
01 Date <strong>for</strong>m<br />
There are two possibilities:<br />
- 1 <strong>for</strong>mat date Month/Day/Year<br />
- 0 <strong>for</strong>mat date Day/Month/Year<br />
After selection proper value confirm by the ENTER key.<br />
02 Time <strong>for</strong>m<br />
There are two possibilities:<br />
- 1 time <strong>for</strong>m 12 h<br />
- 0 time <strong>for</strong>m 24 h<br />
After selection press the ENTER to confirm.<br />
12 h <strong>for</strong>m is distinguished by the letters PM or AM on the printouts.<br />
03 Time<br />
Enter setting the parameter 03 Time by the F key in accordance with below<br />
scheme.<br />
Submenu / Time – setting time<br />
Replace the marker next to the value which will be changed (Hour, Minute,<br />
Second). Confirm with the F key. Change the numerical values with Mode and<br />
Units keys.<br />
27
Submenu Date / Time – setting time – steering keys<br />
Confirm settled value (last change digit stops flashing)<br />
Repeat above activities <strong>for</strong> following values. After setting new values <strong>for</strong> time<br />
press the ENTER key. The balance returns to submenu P3 Date/Time and<br />
displayed time changes.<br />
After setting time return to weighing mode in accordance to p. 5.1.1 <strong>of</strong> the<br />
manual.<br />
04 Date<br />
Set the parameter 04 Date with the F key. In accordance with previous<br />
description (03 Time) set actual date. After setting date return to weighing mode<br />
as it is presented in p. 5.1.2 <strong>of</strong> the manual.<br />
Submenu Date / Time – setting date<br />
28
05 Display time<br />
<strong>for</strong> the value 1 – YES on top graph time is displayed, <strong>for</strong> the value 0 – NO, time is<br />
not displayed.<br />
05 Display date<br />
For the value 1 – YES date is displayed on top graph, <strong>for</strong> the value 0 – NO, date<br />
is not displayed.<br />
Return to weighing<br />
(see - 5.1.2. – Return to weighing)<br />
10. SETTING THE PARAMETERS<br />
User can adjust the balance to existing conditions (filter) and own needs<br />
(autozero, displaying last digit) by means <strong>of</strong> parameters in group .<br />
Submenu Readout – internal setting<br />
10.1 Setting filter<br />
Dependly on conditions set the filter. If the conditions are conductive set the filter<br />
as very fast (value <strong>of</strong> the parameter 01 Filter 1) and if the conditions are bad<br />
(vibrations, draught) set the filter as slowly or very slowly (value <strong>of</strong> the parameter<br />
01 Filtr at 4 or 5). Efficience <strong>of</strong> filter is different <strong>for</strong> range <strong>of</strong> weighing. The filter<br />
works slowler during getting to weighed mass. It works faster when mass is the<br />
settled filer range (parameter filter range accessed only from service menu – user<br />
does not have acess).<br />
29
10.2. Mediane filter setting<br />
Mediane filter eliminates singular big disturbances. The speed <strong>of</strong> filter can be<br />
determined after set digital value. For zero option filter function is switched <strong>of</strong>f –<br />
only filter described in p. 10.1 works.<br />
10.3 Set the display refreshing time<br />
This parameter determines period <strong>of</strong> time which the display refreshes in.<br />
In<strong>for</strong>mation on the display is compared to in<strong>for</strong>mation which is sent by the<br />
balance processor about load on the pan.<br />
For higher values <strong>of</strong> the refreshing parameter indirect not stable mass indications<br />
are not presented on the display during puttin on and yesing <strong>of</strong>f the load. For low<br />
values all changes in mass during weighing are visible – it enables to dosage<br />
liquids and solids. The refreshing time is settled in seconds.<br />
10.4 Set autozero working<br />
To ensure precise indications programmable function „AUTOZERO” is in the<br />
balance. This function controls automaticaly and corrects zero indication <strong>of</strong> the<br />
balance.<br />
If the function is active following results in declared periods <strong>of</strong> time are compared<br />
eg. each 1s. If these results differs at less value than declared range AUTOZERA<br />
eg. 1 interval the balance sets to zero automaticaly and and appears<br />
on the display.<br />
If the AUTOZERO function is active each measurement starts at precise zero<br />
every time. In special cases this function disturbes in the measurements eg. when<br />
the load is put on the pan very slowly (pouring substance). In this case correcting<br />
system <strong>of</strong> zero indication can correct also indication <strong>of</strong> real load mass.<br />
AUTOZERA is switched on anr <strong>of</strong>f in the parameter P4 03 in accordance with p.<br />
5.1.1 <strong>of</strong> the manual.<br />
15.5. Displaying last digit<br />
10.5. Last digit<br />
To ensure kom<strong>for</strong>t <strong>of</strong> work with the balance user determines (dependly on needs)<br />
if last digit should be displayed and when. One <strong>of</strong> the following values can be<br />
selected:<br />
- 0 never<br />
- 1 always<br />
- 2 when stab<br />
10.6. Negative<br />
Function sets way <strong>of</strong> laying-out descriptions on the display .Function should be<br />
set depending on used display .<br />
30
11. FUNCTIONS IN USING RS 232 PORT<br />
User can set the parameters necessary <strong>for</strong> correct comunication balance with<br />
computer or printer.<br />
Submenu RS 232 - setting<br />
Parameter No and<br />
name<br />
01 Speed <strong>of</strong><br />
transmission<br />
02 Parity<br />
03 Date bits<br />
04 Stop bits<br />
Parameter value<br />
0 : 2400;<br />
1 : 4800;<br />
2 : 9600;<br />
3 : 19200<br />
0 : no;<br />
1 : see;<br />
2 : dont see<br />
1 : 7 bits;<br />
2 : 8 bits<br />
1 : 1 bit;<br />
2 : 2 bits<br />
Parameter No<br />
and name<br />
06 Automatic<br />
printout<br />
07 Interval<br />
08 Print stable<br />
Parameter value<br />
0 : no;<br />
1 : constance;<br />
2 : with breakes;<br />
3 : <strong>for</strong> stable.<br />
Interval it is defined how <strong>of</strong>ten<br />
balance sends indications<br />
through RS 232 port. It is<br />
counted on base on <strong>for</strong>m <strong>for</strong><br />
the parameter x 0.1 s = time<br />
yestu-interval). Value from 1<br />
to 9999 can be written.<br />
0 : no;<br />
1 : yes<br />
05 Transmission<br />
control<br />
0 : no;<br />
1 : RTS/CTS;<br />
2 : XON/XOFF<br />
09 printout to<br />
0 : printer;<br />
1 : computer<br />
After setting correct values return to weighing mode as it is described in p. 5.1.2<br />
<strong>of</strong> the manual.<br />
For value 1 : computer parameter 09 Printout to, <strong>for</strong> printouts the last digit <strong>of</strong><br />
indication is omited.<br />
31
12. PRINTOUTS<br />
This function is used to make not standard printouts and select type <strong>of</strong> printout.<br />
Precise description <strong>for</strong> printouts is described in p.16.<br />
13. ACCESS TO MASS UNITS<br />
In this group <strong>of</strong> parameters user declares mass units which are accessible <strong>for</strong><br />
operator directly under the key Units.<br />
All units which value <strong>of</strong> the parameters is set up at 1: yes are accessible from the<br />
level <strong>of</strong> switching between units.<br />
For units described as 09 Taele Hk., 10 Taele S., 11 Taele T . there are following<br />
dependences:<br />
• If all <strong>of</strong> them have attribute 1: yes the balance show only first <strong>of</strong> them 09<br />
Taele Hk<br />
If the measurement is done in units 11 Taele T set the attribute 0 : no <strong>for</strong> two previous<br />
Enter group <strong>of</strong> the parameters P7 Units according to p. 5.2.7.<br />
Measure units - setting<br />
After set proper values <strong>of</strong> the parameters return to weighing mode in accordance<br />
to p 5.1.2 <strong>of</strong> the manual.<br />
32
14. OTHER PARAMETERS<br />
User can set parameters have influence on work with balance in group <strong>of</strong> the<br />
paraemeters P9 Others eg. beep signals etc. Enter submenu group P9 Others the<br />
same as in pakt. 14.<br />
01 Adress<br />
address <strong>of</strong> scale set <strong>for</strong> cooperation with computer s<strong>of</strong>tware KTP NET 2003<br />
02 ID Setting<br />
it includes 6 digits 6 codes which can be used during printouts <strong>for</strong> product<br />
specification, operator, batch etc.<br />
03 Aut. Printout ID<br />
<strong>for</strong> the option YES all digit codes are printed, <strong>for</strong> option NO the codes are not<br />
printed.<br />
04 Signal<br />
beep signal <strong>for</strong> pressing keys<br />
05 Language<br />
selection <strong>of</strong> languages<br />
06 Backlight<br />
switch on/<strong>of</strong>f the backlight<br />
07 Contrast<br />
changes contrast – after entering this function a window appears, by means<br />
<strong>of</strong> keys on the balance contrast on the display can be changed<br />
08 Screen server<br />
if the screen server is switched on displayed values disappear after settled<br />
time and if displayed value <strong>of</strong> the measurement does not change.<br />
09 Temperature<br />
it is in<strong>for</strong>mation about temperature which is registered by temperature sensor<br />
in the balance. Return to the menu – press the ESC key<br />
10 The balance number<br />
it is only in<strong>for</strong>mation about factory number <strong>of</strong> the balance<br />
11 The number <strong>of</strong> the program<br />
it is in<strong>for</strong>mation about program number <strong>of</strong> the balance<br />
33
12 Printout <strong>of</strong> the parameters<br />
if the function is active the balance parameters in user menu are printed.<br />
User gives numbers <strong>of</strong> the parameters which should be printed.<br />
Submenu Others - printing setting<br />
After confirmation parameters are printed through RS 232 port, actualy sent<br />
settled user parameters in the balance<br />
13 The parameter reception<br />
If the functions are activated all parameters <strong>of</strong> the balance are received<br />
through RS 232. After reception the balance in<strong>for</strong>ms user how many<br />
parameters are accepted, how many are changed, how many were declared<br />
incorrectly and how many were not accepted by the s<strong>of</strong>tware.<br />
Printing and reception <strong>of</strong> the parameters is very easy and fast procedure <strong>of</strong><br />
introducing new setting. After printing actual parameters to file in the<br />
computer user changes the parameters very fastly and without any problems.<br />
User sends new corrected setting to the balance s<strong>of</strong>tware. After these<br />
changes the balance accepts new set up. User must know all parameters<br />
and computer operation very well.<br />
14 Password protection<br />
this submenu contains options about accee password <strong>for</strong> administrator and<br />
user (see 6.1.)<br />
15 Start mode<br />
setting operation mode (function) with which scale should started after plug in<br />
to power supply<br />
34
15. USE OF SCALE OPERATING MODES<br />
15.1. CONTROL OF PACKAGED GOODS<br />
S<strong>of</strong>tware <strong>of</strong> scale enables control <strong>of</strong> <strong>packaged</strong> <strong>goods</strong> directly on the scale (<br />
single stand control) or connecting to computer and cooperation with computer<br />
s<strong>of</strong>tware KTP NET 2003 (multi stand control). Choice <strong>of</strong> type <strong>of</strong> scale use to<br />
single stand control or multi stand control is possible from factory menu and it is<br />
not possible to be changed by user.<br />
S<strong>of</strong>tware enables execution <strong>of</strong> <strong>goods</strong> control according to requirements <strong>of</strong><br />
General Manager’s Notice only, on few or dozen <strong>of</strong> production lines.<br />
Basing on collected data it is possible to per<strong>for</strong>m quality evaluation produced<br />
<strong>packaged</strong> <strong>goods</strong>:<br />
• complying to company’s quality system - built-in statistics elements<br />
Control started from scale is automatically finished after control <strong>of</strong> required<br />
quantity <strong>of</strong> packages (sample), which is set by scale s<strong>of</strong>tware depending on<br />
number <strong>of</strong> <strong>goods</strong> batches. When control is finished it is possible to generate final<br />
report containing all in<strong>for</strong>mation necessary to report <strong>of</strong> control <strong>of</strong> <strong>packaged</strong> <strong>goods</strong><br />
and print-out on connected printer.<br />
Scale s<strong>of</strong>tware enables:<br />
- control <strong>of</strong> <strong>packaged</strong> <strong>goods</strong> <strong>of</strong> constant tare<br />
- control <strong>of</strong> <strong>packaged</strong> <strong>goods</strong> <strong>of</strong> changeable tare<br />
15.1.1. Control <strong>of</strong> Packaged Goods – single stand<br />
S<strong>of</strong>tware enables introducing 999 <strong>goods</strong> to data base. For each good user<br />
has ability to set all data necessary <strong>for</strong> correct (according to regulation)<br />
per<strong>for</strong>ming <strong>of</strong> control process.<br />
During control s<strong>of</strong>tware currently displays in<strong>for</strong>mation about process, when<br />
control is finished generates summary.<br />
Results <strong>of</strong> control can be printed repeatedly on connected printer or<br />
memorize in scale memory <strong>for</strong> future printouts and analyzes.<br />
For correct management <strong>of</strong> memory capacity it is possible to enter 50<br />
operators <strong>of</strong> different authorizations <strong>for</strong> interference in scale settings.<br />
Be<strong>for</strong>e per<strong>for</strong>ming the control operator must introduce to data base<br />
in<strong>for</strong>mation about <strong>goods</strong> subjected to control and about users <strong>of</strong> scale, which will<br />
per<strong>for</strong>m future controls and their level <strong>of</strong> authorization.<br />
15.1.1.1. Adding the operators<br />
35
Attention: in scale s<strong>of</strong>tware there must be at least one operator <strong>of</strong> 5 level<br />
<strong>of</strong> authorization – administrator. It is operator recorded under position<br />
01 on operators list (it is not possible to change level <strong>of</strong> his<br />
authorization). It is protection from accidental depriving by even one<br />
user the possibility <strong>of</strong> data editing .<br />
To add new operator:<br />
Only “administrator” has authorization to introduce changes operators list and<br />
operators which received such authorization from administrator.<br />
In line <strong>of</strong> operators no name is displayed (none operator logged). To per<strong>for</strong>m<br />
changes in operators list is authorized operator <strong>of</strong> suitable authorization level.<br />
By first turn on list is filled by factory settings.<br />
Select operator 01 <strong>of</strong> administrator authorization (5 in last column <strong>of</strong><br />
list). Password <strong>for</strong> this operator is factory set to value 1111.<br />
After selecting operator and pressing ENTER key, s<strong>of</strong>tware will move to next<br />
window, in which operator must enter password known only <strong>for</strong> him. After<br />
correct entering the password and confirmation by ENTER key s<strong>of</strong>tware will<br />
go back to option <strong>of</strong> menu KTP with simultaneous introduction <strong>of</strong> name <strong>of</strong><br />
chosen operator.<br />
If entered password is incorrect, s<strong>of</strong>tware will display message about<br />
incorrect password and will go back to window <strong>of</strong> operator choice.<br />
After logging in scale s<strong>of</strong>tware as administrator it is possible to introduce<br />
36
changes in operators data.<br />
Introducing administator password<br />
During introducing the password use scale keys described on drawing 2 or<br />
keyboard PS/2 (they can be connected to scale port) .<br />
Scales keys – introducing value in menu field<br />
To add operator:<br />
• introduce name <strong>of</strong> operator – Max 25 marks<br />
• introduce password <strong>of</strong> operator – Max 6 digits<br />
• set level <strong>of</strong> authorization – 1 digit determining level<br />
0 – no possibility to start control<br />
1 – possible to start control<br />
2 – possible to stop control be<strong>for</strong>e set end<br />
3 – possible to edit <strong>goods</strong><br />
4 – possible to edit operators<br />
5 – has „administrator” authorization<br />
ATTENTION:<br />
It is not possible to change authorization <strong>of</strong> operator 01.<br />
37
15.1.1.2. Adding <strong>goods</strong><br />
Editing <strong>of</strong> <strong>goods</strong> is possibly only by operator <strong>of</strong> authorization level at least 3.<br />
To edit good:<br />
• Log as operator <strong>of</strong> authorization allowing edition (point mentioned above).<br />
• Will enter window <strong>of</strong> <strong>goods</strong> choice where all variables concerning <strong>goods</strong><br />
and control are placed<br />
• Select position on the list in which we want to add new good or introduce<br />
changes in existing data. All positions have exemplary data. Entering<br />
correct data will delete data introduced by manufacturer.<br />
• Enter name <strong>of</strong> good – max 35 marks (enter in edition <strong>of</strong> name after<br />
pressing F key)<br />
• Enter nominal mass <strong>of</strong> good – field Nominal<br />
• Select measuring unit – field MU<br />
Enter remaining data <strong>for</strong> good.<br />
• Mass <strong>of</strong> packing – Tare: - in grams.<br />
• Density <strong>of</strong> assortment if mass is set in [ml] – range entered values must<br />
include between 0,5 g/cm 3 and 2,5 g/cm 3 s<strong>of</strong>tware doesn’t accept other<br />
values. If selected mass is in [g], field <strong>of</strong> entering density is unavailable.<br />
• Type <strong>of</strong> control – it is possible to select control NON-DESTROYABLE or<br />
DESTROYABLE.<br />
38
• For type <strong>of</strong> control set control mode<br />
Control NON-DESTRYABLE – mode AVERAGE TARE or EMPTY-<br />
FULL. By selected mode AVERAGE TARE field Tare is active, and by<br />
mode EMPTY-FULL value <strong>of</strong> Tare is not displayed, and field <strong>of</strong><br />
introducing Series, where dimension <strong>of</strong> measuring series <strong>for</strong> control<br />
should be entered is activated DESTROYABLE control – mode EMPTY-<br />
FULL or FULL-EMPTY<br />
For both modes value <strong>of</strong> Tare is not displayed, and field <strong>of</strong> introducing<br />
Series, where dimension <strong>of</strong> measuring series <strong>for</strong> control should be<br />
entered is activated<br />
After introducing all data concerning assortment enter changes to memory <strong>of</strong><br />
scale pressing ENTER key.<br />
Marker <strong>of</strong> field will not be displayed. If user press Esc, changes introduced in<br />
assortment data won’t be memorize and displayed data will return to initial<br />
settings.<br />
After entering data <strong>for</strong> assortment user can choose next good to be edited or<br />
return to option <strong>of</strong> KTP mode with procedure <strong>of</strong> introduced changes record.<br />
15.1.1.3. Per<strong>for</strong>ming NON-DESTROYABLE control in mode with average tare<br />
Be<strong>for</strong>e control set general KTP parameters in submenu P8 KTP<br />
parameter 01 Results in report:<br />
• 1: yes – when control is finished complete report <strong>of</strong> control will be<br />
generated including all measurements <strong>of</strong> <strong>goods</strong> per<strong>for</strong>med during<br />
process<br />
• 0: no – when control is finished shorten report <strong>of</strong> control will be<br />
generated not including results <strong>of</strong> measurements<br />
39
parameter 02 No. <strong>of</strong> headings:<br />
• 0: none – report will not include any heading (e.g. name <strong>of</strong> company<br />
using the scale)<br />
• 1: printout 1 – as heading <strong>of</strong> report printout 1 will be printed<br />
designed by user in submenu group P6 Printouts (see point 12 <strong>of</strong><br />
manual).<br />
• 2: printout 2 – as heading <strong>of</strong> report printout 2 will be printed<br />
designed by user in submenu group P6 Printouts (see point 12 <strong>of</strong><br />
manual).<br />
• 3: printout 3 – as heading <strong>of</strong> report printout 3 will be printed<br />
designed by user in submenu group P6 Printouts (see point 12 <strong>of</strong><br />
manual).<br />
• 4: printout 4 – as heading <strong>of</strong> report printout 4 will be printed<br />
designed by user in submenu group P6 Printouts (see point 12 <strong>of</strong><br />
manual).<br />
parameter 03 Code page :<br />
• 0: Win – code page <strong>of</strong> Windows – printout to computer<br />
• 1: CP ISO – code page CP – cooperation with EPSON printer<br />
• 2: Mazovia – code page Mazovia – cooperation with KAFKA printer<br />
parameter 04 Printer:<br />
• 0: Standard – cooperation with KAFKA printer or printout to computer<br />
• 1: Epson – cooperation with EPSON printer<br />
parameter 05 Cut paper:<br />
• 0: no – cooperation with KAFKA printer or printout to computer<br />
• 1: yes – cooperation with EPSON printer<br />
parameter 06 Printout <strong>goods</strong>:<br />
Start-up <strong>of</strong> parameter pressing F key will cause opening window to<br />
introduce contain <strong>of</strong> printout, (which <strong>goods</strong> are to be printed) giving<br />
positions <strong>of</strong> list from which should be startedand on which should be<br />
finished.. Pressing ENTER will cause printout <strong>of</strong> assortment list on<br />
connected printer.<br />
Exemplary printout see below.<br />
Baze materials <strong>of</strong> balance no:<br />
----------------------------------------<br />
Material : 1<br />
Art. 001<br />
Nominal : 200.0 g<br />
Tare : 10.0 g<br />
Density :<br />
Control kind : NONDESTRUICTIVE<br />
Control mode : AVERANGE TARE<br />
Series :<br />
Becery : OFF<br />
TO START CONTROL THERE SHOULD BE:<br />
40
‣ Logged operator <strong>of</strong> authorization to per<strong>for</strong>m control – parameter 01<br />
Operator.<br />
ATTENTION: to start control there should be selected operator<br />
<strong>of</strong> authorization level at least 1<br />
‣ Selected appropriate good (<strong>goods</strong> should be correctly introduced to<br />
memory <strong>of</strong> scale) - parameter 02 Good.<br />
‣ Introduced volume <strong>of</strong> batch and <strong>for</strong> this value, s<strong>of</strong>tware will accept in<br />
accordance with regulation - size <strong>of</strong> sample to test parameter 03<br />
Batch/Sample.<br />
‣ Enter if <strong>for</strong> NON-DESTROYABLE with AVERAGE TARE be<strong>for</strong>e<br />
start-up <strong>of</strong> control there should be per<strong>for</strong>med process <strong>of</strong> setting<br />
average tare by weighing packages - parameter 04 Control <strong>of</strong> tare<br />
‣ Set indicator by parameter 05 Start and press ENTER key.<br />
After starting control <strong>of</strong> introduced data s<strong>of</strong>tware will move to displaying main<br />
window <strong>of</strong> per<strong>for</strong>ming <strong>of</strong> control <strong>of</strong> <strong>packaged</strong> <strong>goods</strong>.<br />
If function <strong>of</strong> tare control is on be<strong>for</strong>e starting process <strong>of</strong> control <strong>of</strong> good ,<br />
setting <strong>of</strong> average tare <strong>of</strong> package should be per<strong>for</strong>med from at least 10<br />
pieces <strong>of</strong> packages.<br />
To make possibility <strong>of</strong> control <strong>of</strong> good in AVERAGE TARE mode, standard<br />
deviation ”S” <strong>of</strong> package mass, set from at least 10 weighing can’t be bigger<br />
than 0.25, maximum permissible minus error T1, <strong>for</strong> nominal mass <strong>of</strong><br />
package.<br />
During control <strong>of</strong> tare s<strong>of</strong>tware currently displays:<br />
• Quantity <strong>of</strong> weighed packages Positions 1 from 10<br />
• Average mass <strong>of</strong> package X=<br />
• Standard deviation S=<br />
If user enters last measurement <strong>of</strong> package mass s<strong>of</strong>tware will display<br />
summation.<br />
41
Pressing Esc key will cause moving to control without recording new set<br />
average mass <strong>of</strong> package in data <strong>of</strong> <strong>goods</strong>.<br />
Pressing ENTER key will cause moving to control simultaneously recording<br />
new set average mass <strong>of</strong> package in data <strong>of</strong> <strong>goods</strong>.<br />
During per<strong>for</strong>ming <strong>of</strong> control s<strong>of</strong>tware currently analyzes results <strong>of</strong><br />
measurements and displays them in appropriate fields <strong>of</strong> display in<strong>for</strong>ming user<br />
about results <strong>of</strong> control.<br />
During control there are displayed::<br />
• Name and nominal value <strong>of</strong> assortment<br />
• Number <strong>of</strong> sample P=1<br />
• Quantity <strong>of</strong> per<strong>for</strong>med measurements and quantity <strong>of</strong> all<br />
measurements <strong>for</strong> given batch N=0 /50<br />
• Average value <strong>of</strong> per<strong>for</strong>med measurements X=<br />
• Value <strong>of</strong> disqualifying average DX=<br />
• Quantity <strong>of</strong> minus errors T in sample and quantity <strong>of</strong> errors T<br />
disqualifying control T:0/5<br />
• Quantity <strong>of</strong> minus errors 2T in sample and quantity <strong>of</strong> errors 2T<br />
disqualifying control 2T:0/1<br />
• Description <strong>of</strong> control result POSITIVE or NEGATIVE.<br />
When control is finished summation <strong>of</strong> process is generated.<br />
Pressing ENTER key will case printing report on printer connected to scale.<br />
However pressing Esc key will cause return to menu function KTP without<br />
report printing.<br />
Exemplary view <strong>of</strong> report:<br />
REPORT FROM CONTROL No. 06/12/05/10:24<br />
42
----------------------------------------<br />
Scale manufacturer: ZMP <strong>RADWAG</strong> Radom<br />
Type <strong>of</strong> scale: WPX 4500<br />
Max 4500.0 g<br />
d=0.01 g<br />
e=0.1 g<br />
Serial No.: 147159<br />
Start <strong>of</strong> control:<br />
Date : 06/12/2005<br />
Time : 10:20:35<br />
End <strong>of</strong> control:<br />
Date : 06/12/2005<br />
Time : 10:24:56<br />
Operator:<br />
operator 01<br />
Material:<br />
art. 001<br />
Batch No.:<br />
Nominal : 100.00 g<br />
Tare : 0.00 g<br />
Error T: 4.5 g<br />
Error 2T: 9.0 g<br />
Control : nondestructive<br />
Batch : 100 pcs<br />
Sample : 30 pcs<br />
No. <strong>of</strong> trials : 1<br />
No. <strong>of</strong> error T : 0<br />
No. <strong>of</strong> error 2T : 0<br />
Minimum : 99.99 g<br />
Maximum : 100.07 g<br />
Measurement avarage : 99.99 g<br />
Disqualifying average : 99.99 g<br />
Avarage standard deviation: 0.01<br />
** RESULT OF CONTROL **<br />
ERROR IN AVARAGE : NO<br />
ERROR IN QUANTITY T: NO<br />
ERROR IN QUANTITY 2T: N0<br />
BATCH OF MATERIAL ACCEPTED<br />
Results:<br />
01. 100.07 g<br />
02. 99.99 g<br />
03. 100.01 g<br />
04. 100.00 g<br />
05. 99.99 g<br />
06. 99.99 g<br />
07. 99.99 g<br />
08. 99.99 g<br />
09. 99.99 g<br />
10. 99.99 g<br />
11. 99.99 g<br />
12. 99.99 g<br />
13. 99.99 g<br />
14. 99.99 g<br />
15. 99.99 g<br />
16. 99.99 g<br />
17. 99.99 g<br />
18. 99.99 g<br />
19. 99.99 g<br />
20. 99.99 g<br />
21. 99.99 g<br />
22. 99.99 g<br />
23. 99.99 g<br />
24. 99.99 g<br />
25. 99.99 g<br />
26. 99.99 g<br />
27. 99.99 g<br />
28. 99.99 g<br />
29. 99.99 g<br />
30. 99.99 g<br />
Signature:..............................<br />
----------------------------------------<br />
ATTENTION:<br />
If user sets in options <strong>of</strong> submenu P8 KTP parameter 01 Results in rep. On<br />
value 0:no, printed report will not include results <strong>of</strong> measurement per<strong>for</strong>med in<br />
43
control.<br />
If during control <strong>for</strong> any reasons s<strong>of</strong>tware recognizes that result <strong>of</strong> control is<br />
negative, message about incorrect control will be displayed with exposure why<br />
control was rejected.<br />
When control is finished in summation <strong>of</strong> control s<strong>of</strong>tware displays factors<br />
disqualifying control and its result as NEGATIVE.<br />
If during control such quantity <strong>of</strong> minus errors T appears <strong>for</strong> which with<br />
accordance with regulation second sample from batch should be controlled then<br />
when measurement <strong>of</strong> sample 1 is finished, s<strong>of</strong>tware will give message about<br />
necessity <strong>of</strong> taking second sample from batch and controlling it.<br />
After taking second sample <strong>for</strong> control press ENTER key, descriptions in control<br />
window and permissible quantity <strong>of</strong> errors.<br />
Not be<strong>for</strong>e finish <strong>of</strong> second sample testing s<strong>of</strong>tware will generate summation from<br />
control and printing <strong>of</strong> report will be possible.<br />
15.1.1.4. Per<strong>for</strong>ming <strong>of</strong> NON-DESTROYABLE control in EMPTY-FULL mode<br />
For EMPTY-FULL option user in data <strong>for</strong> good sets measuring batch (see<br />
example below)<br />
44
After choosing good from control with options set as above, s<strong>of</strong>tware after starting<br />
control displays messages simplifying correct per<strong>for</strong>ming <strong>of</strong> process.<br />
S<strong>of</strong>tware with accordance to set batch gives message to first weigh empty<br />
packages and then after it’s filling with keeping order <strong>of</strong> weighing. S<strong>of</strong>tware<br />
per<strong>for</strong>ms particular calculations and results are actualized after confirming each<br />
next measurement. After finishing the control s<strong>of</strong>tware as be<strong>for</strong>e generates<br />
summation and enables printing the report.<br />
15.1.1.5. Per<strong>for</strong>ming DESTROYABLE control in mode EMPTY-FULL,<br />
FULL- EMPTY<br />
For DESTROYABLE control irrespective <strong>of</strong> volume <strong>of</strong> product series from<br />
100 pieces, volume <strong>of</strong> sample accepted by s<strong>of</strong>tware is 20 pieces. Remaining<br />
conditions evaluating results <strong>of</strong> control are accepted in accordance with<br />
regulation.<br />
After choosing from the list good with set options to destroyable control with<br />
determined measuring batch and starting the control s<strong>of</strong>tware will be displaying<br />
messages simplifying per<strong>for</strong>ming the control. Dependably on set mode order <strong>of</strong><br />
<strong>goods</strong> weighing is given, EMPTY-FULL, FULL-EMPTY. Keep to the order <strong>of</strong><br />
<strong>goods</strong> weighing, it is necessary <strong>for</strong> correct per<strong>for</strong>ming <strong>of</strong> calculation <strong>of</strong> <strong>goods</strong><br />
mass placed in actual package.<br />
After finishing the control as be<strong>for</strong>e summation <strong>of</strong> testing process is displayed<br />
with possibility <strong>of</strong> printing report from control.<br />
45
15.1.2. Control <strong>of</strong> Packaged Goods – multi stand<br />
cooperating with computer s<strong>of</strong>tware KTP Net 2003<br />
ATTENTION:<br />
1. Scale has possibility to cooperate with computer s<strong>of</strong>tware KTP Net<br />
2003 by <strong>RADWAG</strong> only after unblocking this function in factory<br />
menu<br />
2. Unblocking can be per<strong>for</strong>med by authorized <strong>RADWAG</strong> worker which<br />
is connected with destroying scale verification protective stickers<br />
and repeated legalization<br />
3. Scale <strong>for</strong> correct cooperation with computer must be connected to it<br />
through converter <strong>of</strong> <strong>RADWAG</strong>.<br />
4. Connection <strong>of</strong> scales in net and start-up cooperation with computer<br />
s<strong>of</strong>tware KTP NET can be per<strong>for</strong>med only by authorized <strong>RADWAG</strong><br />
worker!<br />
Be<strong>for</strong>e starting work one should:<br />
• Connect scales in net using converter.<br />
• Set address <strong>of</strong> scale in net parameter 01 Address from group P9<br />
Other<br />
• Set speed <strong>of</strong> transmission <strong>for</strong> value 9600 bit/s (parameter 01 groups<br />
P5 RS232)<br />
• Select mode M2 KTP-net<br />
Press ENTER, scale will move to mode KTP, (size <strong>of</strong> displayed digit will be<br />
reduced, and on the left side <strong>of</strong> display pictogram which means activity <strong>of</strong> function<br />
KTP-net will appear)<br />
46
If computer s<strong>of</strong>tware KTP NET is started pictogram will start to „move” which<br />
means correct communication <strong>of</strong> scale with s<strong>of</strong>tware KTP NET 2003.<br />
• Start computer s<strong>of</strong>tware KTP NET and set appropriate parameters in<br />
s<strong>of</strong>tware<br />
• Set appropriate codes in scale<br />
If entered codes are correct and <strong>for</strong> these codes (good, operator) exist in<br />
s<strong>of</strong>tware defined names <strong>of</strong> good and operator, on the display in upper<br />
part appropriate name <strong>of</strong> good and scale operator will appear and<br />
in<strong>for</strong>mation that setting code 5 on value 1 will cause start <strong>of</strong> control<br />
47
• From the moment <strong>of</strong> entering code <strong>of</strong> good and operator all<br />
measurements after pressing ENTER/PRINT key will be memorized<br />
in data base <strong>of</strong> computer s<strong>of</strong>tware<br />
Appearing pictogram in<strong>for</strong>ms user about sending result <strong>of</strong><br />
measurement to computer s<strong>of</strong>tware, if pictogram disappears from<br />
display, this means that result was memorized in data base <strong>of</strong><br />
computer s<strong>of</strong>tware.<br />
• To start per<strong>for</strong>ming control set code KOD 5 on value 1 and confirm by<br />
ENTER/PRINT key<br />
• Started control can be stopped by pressing and confirm<br />
operation by ENTER/PRINT key<br />
In each moment <strong>of</strong> operation user can change value <strong>of</strong> random code.<br />
48
15.2. Statistics<br />
Activation<br />
Statistics – fucntion activation<br />
Results <strong>of</strong> previous statistics should removed after function activation. It is<br />
realized through option M8 01 Cancel.<br />
All statistic date are actualized after write following measurement to the balance<br />
memory. Following measurment is writen to series after load is put on the pan,<br />
stabilization <strong>of</strong> the result (measure unit is displayed) and after pressing ENTER.<br />
User decides what statistic date are presented on the graphic display during<br />
measurements by setting their activity in the submenu <strong>of</strong> work mode (values<br />
which are set <strong>for</strong> YES are active). Independly on setting (YES/ NO), during final<br />
result (the key UNITS) the printout contains full statistics.<br />
N : 5 (quantity <strong>of</strong> weights)<br />
SUM : 161.121 g (all components total mass)<br />
X : 32.224 g (average mass <strong>of</strong> weighed components)<br />
MIN : 20.486 g (min mass)<br />
MAX : 35.578 g (max mass)<br />
D : 15.092 g (difference between Max- Min)<br />
SDV : 6.581 g (standard deviation)<br />
RDV : 20.4 % (variation factor)<br />
49
Statistics – display <strong>for</strong> series <strong>of</strong> measurement<br />
1. mass on the pan<br />
2. measurement number in measurement series<br />
3. sum <strong>of</strong> all weighed components in measurement series<br />
4. average mass <strong>of</strong> weighed components in the series<br />
5. mass <strong>of</strong> the lightest component in measurement series<br />
6. mas s<strong>of</strong> the heaviest component in measurement series<br />
7. difference between the lightest and the heaviest component in<br />
measurement series<br />
8. value <strong>of</strong> counted standard deviation<br />
9. value <strong>of</strong> variation factor<br />
10. measure unit [g]<br />
11. work mode<br />
50
16. KINDS OF PRINTOUTS<br />
16.1. Standard printout<br />
The are 2 types <strong>of</strong> printouts. First <strong>of</strong> them is standard printout. It includes result <strong>of</strong><br />
weighing and all variables which have attibute YES in GLP submenu. In User and<br />
Project fields names should be written.<br />
Declaration <strong>of</strong> variables to printout – submenu GLP<br />
Example <strong>of</strong> standard printout<br />
Example <strong>of</strong> standard printout (all option settled on YES – printed)<br />
Example <strong>of</strong> standard printout<br />
Question mark be<strong>for</strong>e load mass means that the result is not stable.<br />
16.2. Non-standard printout<br />
51
Procedure <strong>of</strong> creating non-standard printouts:<br />
− user can create own 4 printouts,<br />
− give the number <strong>of</strong> the text which starts the printout eg. Printout 1 Start –<br />
1 and text number which finishes the printout eg. Printout 1 Stop – 40. In<br />
this case texts from 1 to 40 are printed.<br />
− And then write text in the lines 1 ÷ 40.<br />
It is recomended to use PC keyboard what is simplier and faster way.<br />
− Non-standard printouts can overlap each other:<br />
Printout 1 Start – 1<br />
Printout 1 Stop – 40<br />
Printout 2 Start – 20<br />
Printout 2 Stop – 40<br />
− Non-standard printout can be created by Edition <strong>of</strong> the printout.<br />
During manual writting give all special signs as CRLF, tabulator etc. If function Printout<br />
Edition is used all these values can be selected in <strong>for</strong>m <strong>of</strong> ready elements. They are<br />
transmitted from one side Line <strong>of</strong> selection to the other window Printout<br />
Draw 55. Menu pritnouts – the function activation<br />
Non-standard printout can include:<br />
− Variable dependly on work mode and other user necessities (mass, date,<br />
Project No)<br />
− Stable texts in user menu<br />
− Non-standard printout can include not more than 640 signs recorded as<br />
80 texts 8 signs each (from the parameter Text 1 to Text 80). User can<br />
design 4 non-standard printouts<br />
16.2.1 Texts<br />
Variables in all modes and with the same values<br />
52
%% Printout <strong>of</strong> „%” singular sign<br />
%N Actual net mass in basic unit<br />
%d Actual date<br />
%t Actual time<br />
%i The balance number<br />
%R The program number<br />
%P The Project number<br />
%U The user number<br />
%F Actual function name – work mode<br />
%C Date and time <strong>of</strong> last calibration<br />
%K Kind <strong>of</strong> last calibration<br />
%I Deviation <strong>of</strong> last calibration<br />
%1 Code 1<br />
%2 Code 2<br />
%3 Code 3<br />
%4 Code 4<br />
%5 Code 5<br />
%6 Code 6<br />
53
Statistic variables in all modes apart from basic weighing<br />
%n The measurement number<br />
%x Average value<br />
%S Sum<br />
%m Min value<br />
%M Max value<br />
%D Difference between max and min value<br />
%s Standard deviation<br />
%r Variation factor<br />
Special signs used to create special printouts<br />
\\ Singular sign „\”<br />
\c CRLF<br />
\r CR<br />
\n LF<br />
\t Tabulator<br />
\s skip to next „string”<br />
\0 End <strong>of</strong> the printout<br />
Each text (Text 1 ÷ 89 Text 80) can include max 8 signs (letters, digits, special<br />
signs, spaces). To write long sentence create it using 8 sings texts. User can use<br />
special signs to include variables dependly on own necessities.<br />
Example 1:<br />
Max mass cannot be higher than 11.250 g!<br />
If user write this sentence uses 640 signs grouped in adjacent lines <strong>of</strong> the text.<br />
Set up following texts and write 8 signs in each <strong>of</strong> them untill the sentence<br />
finishes.<br />
Parameter number<br />
Text<br />
1 2 3 4 5 6 7 8<br />
19 Text 10 M a s a m a k<br />
20 Text 11 s y m a l n a<br />
21 Text 12 n i e m o ż e<br />
22 Text 13 p r z e k r a c<br />
23 Text 14 z a ć 1 1 . 2<br />
24 Text 15 5 5 0 g !<br />
54
Example 2:<br />
Zakład Mechaniki Precyzyjnej „<strong>RADWAG</strong>”<br />
Date:<br />
Time:<br />
Load mass:<br />
*****Signature:.........<br />
******<br />
Set following texts and write 8 signs in each <strong>of</strong> them untill it is finished.<br />
Parameter number<br />
Text<br />
1 2 3 4 5 6 7 8<br />
25 Text 16 Z a k ł a d M<br />
26 Text 17 e c h a n i k i<br />
27 Text 18 P r e c y z y<br />
28 Text 19 j n e j „ R A<br />
29 Text 20 D W A G „ \ c D<br />
30 Text 21 a t a : % d \ c<br />
31 Text 22 G o d z i n a :<br />
32 Text 23 % t \ r \ n M a<br />
33 Text 24 s a ł a d u n<br />
34 Text 25 k u : % N \ c \<br />
35 Text 26 c * * * * * P o<br />
36 Text 27 d p i s : . . .<br />
37 Text 28 . . . . . . . \<br />
38 Text 29 c * * * % F * *<br />
39 Text 30 *<br />
55
−<br />
On the balance desk<br />
Move up through digits, letters and sings o 1<br />
Move down through digits, letters and sings o 1<br />
Determine sign to change and move right (if the key is pressed<br />
flashing sign is moved in right direction. If no sign is written this<br />
keys makes space in the text)<br />
Determine sign to change and move lef (after this key is pressed<br />
flashing sign is cancelled)<br />
Confirm the text<br />
−<br />
On PS/2 keyboard<br />
Press F2 to enter main menu. Press F3 to set parameters indications next<br />
to group P6 Printouts and press F2 to enter menu group and then select<br />
parameter. Press F2 to activate the procedure <strong>of</strong> writing the text. By<br />
means <strong>of</strong> keyboard write the text (max 8 signs) and confirm by Enter.<br />
Repeat this procedure <strong>for</strong> the rest <strong>of</strong> the texts.<br />
Description <strong>of</strong> the computer keyboard is in the p. 5.1.3<br />
56
16.2.2. Composing texts by Edition function<br />
The function activation<br />
Not standard printouts – printout edition<br />
Not standard printouts – printout edition – select<br />
After activation <strong>of</strong> the function select printout number (1-4) and beginning <strong>of</strong><br />
writting the texts in (range from text 1 to text 80). Then select the option Edition to<br />
edite (create) printout or cancell all (remove all printouts).<br />
Edition <strong>of</strong> printouts – selection <strong>of</strong> the elements<br />
To select following fields use keys Units and Mode. To print field press the F key.<br />
57
After the edition press ENTER/PRINT. Display shows question if printout should<br />
be done – press ENTER/PRINT again.<br />
16.2.3 select non-standard printouts<br />
if STANDARD printout is selected – there will be only result and variables<br />
declared in the GLP (see p. 17.1 Standard printout. Declaration <strong>of</strong> the variables to printout –<br />
submenu GLP).<br />
If non-standard printout is printed select kind <strong>of</strong> the printout (1-4) and give the<br />
beginning and end <strong>of</strong> the printout.<br />
58
17. COOPERATION WITH PRINTER OR COMPUTER<br />
To send the in<strong>for</strong>mation on the display with the unit <strong>of</strong> measure to the computer or<br />
printer, press the < PRINT > key. 9600 bit/s is the default setting <strong>for</strong> the speed <strong>of</strong><br />
transmission. If the peripheral unit has a different speed <strong>of</strong> transmission, you may<br />
change the speed <strong>of</strong> transmission in the balance menu. (see p. 15 <strong>of</strong> the manual)<br />
17.1. Connections<br />
Connections balance - computer<br />
The balance connection DB 9/F – The computer connection DB 9/F (with control<br />
<strong>of</strong> sending date)<br />
Balance Computer<br />
2 (RxD) 3 (TxD)<br />
3 (TxD) 2 (RxD)<br />
4 (DTR) 6 DSR<br />
5 (GND) 5 (GND)<br />
6 (DSR) 6 (DTR)<br />
7 (RTS) 8 (CTS)<br />
8 (CTS) 7 (RTS)<br />
59
18. WEIGHING LOADS UNDER THE BALANCE<br />
In standard version <strong>of</strong> WPX it is possible to weight loads under the balance. To<br />
use this function:<br />
Weighign under analytical balance<br />
Remove the cover in the base <strong>of</strong> the balance. There is a hook visible which can<br />
be used to suspend a sample.<br />
Note:<br />
1. The suspension eye is directly connected to the weighing mechanism.<br />
Take great care not to move or rotate the eye, as this will damage the<br />
weighing mechanism.<br />
2. Accessories such as an under the balance rack and a suspension hook<br />
are available.<br />
3. The mass <strong>of</strong> all suspended accesories should be set to zero by pressing<br />
TARE be<strong>for</strong>e commencing any weighing.<br />
19. CONNECTING ADDITIONAL KEYS<br />
It is possible to connect external tare and print buttons by special luster through<br />
port RS232.<br />
Printer or computer can be connected to the cluster.<br />
Connected elements are not standard accesories <strong>of</strong> the balance.<br />
60
20. LIST OF COMMUNICATIONS COMPUTER - BALANCE<br />
Function<br />
Command<br />
Function<br />
Command<br />
Function<br />
Command<br />
Function<br />
Command<br />
Function<br />
Command<br />
Function<br />
Command<br />
Function<br />
Command<br />
Function<br />
Command<br />
Function<br />
Command<br />
Function<br />
Command<br />
Function<br />
Command<br />
Function<br />
Command<br />
Function<br />
Command<br />
Function<br />
RESET INTERFACE<br />
R CR LF (zero actual orders, restore factory setting)<br />
SEND ALL COMMANDS FROM THE BALANCE<br />
PC CR LF (all recorded in<strong>for</strong>mation in commands in the balance programme<br />
are sent from the balance)<br />
SEND THE RESULT IN BASIC UNIT<br />
S CR LF (result is sent from the balance in basic interval after stability)<br />
SEND RESULT IN BASIC UNIT IMMEDIATELY<br />
SI CR LF<br />
SEND THE RESULT IN ACTUAL INTERVAL<br />
SU CR LF (result in actaul unit is sent from the balance after stability)<br />
SEND RESULT IN ACTUAL INTERVAL IMMEDIATELY<br />
SUI CR LF<br />
ZERO THE BALANCE<br />
Z CR LF (set the balance to zero after it reaches stability)<br />
ZERO IMMEDIATELY<br />
ZI CR LF<br />
TARE WHEN STABLE<br />
T CR LF<br />
TARE THE BALANCE IMMEDIATELY<br />
TI CR LF<br />
SWITCH CONSTANCE TRANSMISSION OFF IN BASIC INTERVAL<br />
C0 CR LF<br />
SWITCH CONSTANCE TRANSMISSION IN BASIC INTERVAL<br />
C1 CR LF<br />
SWITCH CONSTANCE TRANSMISSION OFF IN ACTUAL INTERVAL<br />
CU0 CR LF<br />
SWITCH CONSTANCE TRANSMISSION ON IN ACTUAL INTERVAL<br />
Comand CU1 CR LF<br />
61
Function<br />
Command<br />
Function<br />
Command<br />
Function<br />
Command<br />
Function<br />
Command<br />
Function<br />
Command<br />
Function<br />
Command<br />
Function<br />
Command<br />
Function<br />
Command<br />
Function<br />
Command<br />
Function<br />
Command<br />
Function<br />
Command<br />
Function<br />
Command<br />
Function<br />
Command<br />
Function<br />
Command<br />
NUMBER OF THE BALANCE<br />
NB CR LF<br />
RANGE OF WEIGHIGN<br />
FS CR LF<br />
PROGRAM VERSION<br />
RV CR LF<br />
WRITE OR CHANGE DATE IN THE BALANCE<br />
PD CR LF (the balance sends settled date or the date is changed)<br />
WRITE NEW OR CHANGE TIME IN THE BALANCE<br />
PD CR LF (the balance sends settled time or this time is changed)<br />
WRITE ACTUAL WORK MODE<br />
PM CR LF<br />
SEND SETUP<br />
PS CR LF (all balance setup is sent – printout <strong>of</strong> the parameters)<br />
SOUND SIGNAL – „BEEP“<br />
B CR LF (sound beep is switched on)<br />
SEND LAST ERROR CODE<br />
ER CR LF (last order <strong>of</strong> the error is sent)<br />
DISPLAY STRING<br />
DS CR LF (signs are show on the display)<br />
CANCELL STRING<br />
CS CR LF (cancells string and restores previous state <strong>of</strong> the display)<br />
DISPLAY HEADLINE<br />
DH CR LF (sinus are displayed in top headline <strong>of</strong> the display)<br />
CANCELL HEADLINE<br />
CH CR LF (cancells in<strong>for</strong>mation in the top healine)<br />
CANCELL HEADLINE<br />
DF CR LF (displays signs in the bottom headline)<br />
62
Function<br />
Command<br />
CANCELL HEADLINE<br />
CF CR LF (cancells in<strong>for</strong>mation in bottom headline)<br />
Function<br />
Command<br />
Function<br />
Command<br />
Function<br />
Command<br />
Function<br />
Command<br />
Function<br />
Command<br />
Function<br />
Command<br />
Function<br />
Command<br />
Function<br />
Command<br />
Function<br />
Command<br />
PERFORM INTERNAL CALIBRATION<br />
CL CR LF<br />
BLOCK THE KEYBOARD<br />
KL CR LF<br />
UNBLOCK THE KEYBOARD<br />
KU CR LF<br />
SWITCH „ECHO“ OFF FOR THE KEYBOARD<br />
E0 CR LF (keys codes are switched <strong>of</strong>f)<br />
SWITCH „ECHO“ ON FOR THE KEYBOARD<br />
E1 CR LF<br />
SWITCH THE BALANCE OFF<br />
O0 CR LF (the same as ON/OFF)<br />
SWITCH THE BALANCE ON<br />
O1 CR LF (the same as ON/OFF)<br />
SWITCH AUTOZERO OFF<br />
A0 CR LF<br />
SWITCH AUTOZERO ON<br />
A1 CR LF<br />
If command which is not listed or with error and with CRLF at the end the<br />
command is returned in E S CR LF <strong>for</strong>m. Spaces in the <strong>for</strong>ms should be omited ,<br />
63
21. TECHNICAL PARAMETERS<br />
21.1. WPX <strong>balances</strong><br />
Type<br />
WPX<br />
650<br />
WPX<br />
1500<br />
WPX<br />
4500<br />
Max capacity 650g 1500g 4500g<br />
Min capacity 0,02 g 0,5 g 0,5 g<br />
Accuracy 0,001 g 0,01 g 0,01 g<br />
Verification scale interval 0,01 g 0,1 g 0,1 g<br />
Tare range -650g -1500g -4500g<br />
Linearity ±0,002 g ±0,02 g ±0,02 g<br />
Repeatabiliy 0,002 g 0,02 g 0,02 g<br />
Temperature<br />
Power supply<br />
OIML class<br />
+ 15 o C - + 30 o C<br />
230 V , 50 Hz / 11V AC 380mA<br />
II<br />
Pan 128 x 128 mm 165 x 165 mm<br />
64
22. COMMANDS ABOUT ERRORS<br />
Order<br />
Error<br />
Error description<br />
number<br />
"control sum error" 1.1 Errors duting date transmission<br />
"A/D Error" 1.2 Converter error<br />
"Exceed range" 2.1 Exceed max measure range <strong>of</strong> the balance<br />
" Exceed range " 2.2 Exceed max measure range <strong>of</strong> the balance<br />
"A/D Null" 2.3 No divisions from converter<br />
"A/D Full" 2.4 Exceed max value converter intervals<br />
"Tara/Zero above the<br />
Exceed admissible tare or zero value<br />
2.5<br />
range"<br />
"Tara above the range " 2.6<br />
Exceed admissible tare value <strong>for</strong> the<br />
<strong>balances</strong><br />
"Zero above the range" 2.7 Exceed zero range <strong>for</strong> the <strong>balances</strong><br />
"Result > 4% Max" 2.8<br />
To high start mass (start the balance up with<br />
load on the pan)<br />
"Result > 1% Max" 2.9<br />
Difference between determined calibration<br />
mass and calibration mass recorded in the<br />
balance memory higher than (difference<br />
>1%)<br />
"Piece < 1 Div" 2.10<br />
Singular mass value in counting pieces<br />
function less than actual scale interval<br />
Piece < 10 Div" 2.11<br />
Mass on the pan during determining mas s<strong>of</strong><br />
singular piece in the function <strong>of</strong> counting<br />
pieces less than 10 actual scale intervals<br />
"Ref < 1000 Div" 2.12<br />
Value <strong>of</strong> reference mass in the function<br />
deviations is less than 1000 actual scaleń<br />
intervals<br />
"above the range" 3.1 The parameter value above the range<br />
"Faulty value" 3.2 Inadmissible value <strong>of</strong> the paraemter<br />
"Blocked - DRH" 3.3<br />
The parameter cannot be changed<br />
(Function DRH active in the factory menu)<br />
"Writting error " 4.1<br />
" Party error" 4.2<br />
" Frame error" 4.3 Errors during date transmission to sprinter or<br />
computer<br />
"stopped transmission CTS" 4.4<br />
" stopped transmission<br />
XOFF"<br />
4.5<br />
"incorrect date" 5.1 Faulty date<br />
"Exceed time" 6.1<br />
Exceed admissible time during <strong>for</strong> an<br />
operation (eg. zero)<br />
65
23. WPX - EC TYPE APPROVAL<br />
66
MANUFACTURER<br />
OF ELECTRONIC WEIGHING INSTRUMENTS<br />
<strong>RADWAG</strong> 26 – 600 Radom<br />
Bracka 28 Street<br />
POLAND<br />
Central tel. +48 48 38 48 800, tel./fax. + 48 48 385 00 10<br />
Sales Department + 48 48 366 80 06<br />
www.radwag.com<br />
68