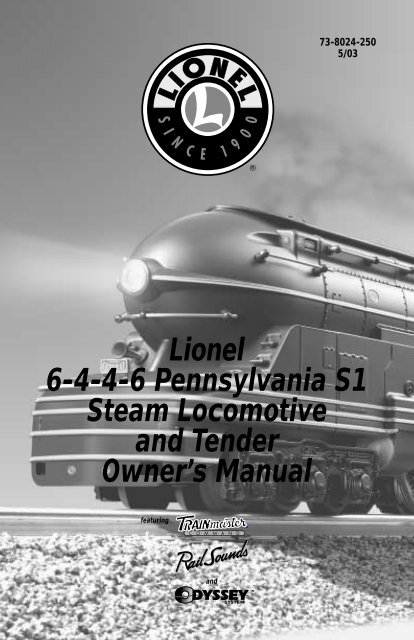
Lionel 6-4-4-6 Pennsylvania S1 Steam Locomotive and Tender ...
Lionel 6-4-4-6 Pennsylvania S1 Steam Locomotive and Tender ...
Lionel 6-4-4-6 Pennsylvania S1 Steam Locomotive and Tender ...

You also want an ePaper? Increase the reach of your titles
YUMPU automatically turns print PDFs into web optimized ePapers that Google loves.
73-8024-250<br />
5/03<br />
<strong>Lionel</strong><br />
6-4-4-6 <strong>Pennsylvania</strong> <strong>S1</strong><br />
<strong>Steam</strong> <strong>Locomotive</strong><br />
<strong>and</strong> <strong>Tender</strong><br />
Owner’s Manual<br />
featuring<br />
®<br />
<strong>and</strong><br />
SYSTEM
Congratulations!<br />
You own one of the finest <strong>and</strong> most<br />
sophisticated model trains ever built—<br />
the <strong>Lionel</strong> TrainMaster Comm<strong>and</strong> <strong>and</strong><br />
Odyssey System-equipped 6-4-4-6<br />
<strong>Pennsylvania</strong> <strong>S1</strong> steam locomotive. From its<br />
many h<strong>and</strong>-applied scale details, to the<br />
advanced technology found inside, your<br />
locomotive is ready for duty on your model<br />
railroad layout. Experience the superiority<br />
of today’s <strong>Lionel</strong>.<br />
Features of the 6-4-4-6 <strong>Pennsylvania</strong> <strong>S1</strong> steam locomotive<br />
• High-torque Pittman ® motor<br />
• Comm<strong>and</strong> reverse unit for use with the <strong>Lionel</strong><br />
TrainMaster Comm<strong>and</strong> Control system<br />
• Fan-driven puffing smoke generator that<br />
produces clean, safe, white smoke in sync with<br />
the drivers<br />
• Die-cast ElectroCoupler (rear of tender)<br />
• Wireless Tether connection between locomotive<br />
<strong>and</strong> tender<br />
• Enhanced conventional mode operation<br />
• Odyssey System for speed control with ON/OFF<br />
switch<br />
• Lighted cab interior<br />
• RailSounds digital sound system<br />
• Brilliant headlight, illuminated classification<br />
lights, <strong>and</strong> lighted number boards on the<br />
locomotive<br />
• CrewTalk communication <strong>and</strong> TowerCom<br />
announcements (in Comm<strong>and</strong>)<br />
• Tire-Traction<br />
• Flickering firebox<br />
• Directional lighting<br />
• Back-up light <strong>and</strong> marker llights on the tender<br />
The following <strong>Lionel</strong> marks may be used throughout this instruction manual <strong>and</strong> are protected under<br />
law. All rights reserved.<br />
<strong>Lionel</strong> ® , TrainMaster ® , Odyssey ® , RailSounds ® , CrewTalk , TowerCom , DynaChuff ,<br />
StationSounds , Pullmor ® , ElectroCoupler , Magne-Traction ® , CAB-1 Remote Controller ® ,<br />
PowerMaster ® , <strong>Lionel</strong> ZW ® , ZW ® , PowerHouse ® , TMCC ® , <strong>Lionel</strong>ville , Lockon ®<br />
2
Table of contents<br />
Transformer operations<br />
Running your locomotive with a <strong>Lionel</strong> transformer 4<br />
Locking your locomotive into a single operational state 5<br />
Using your tender-mounted ElectroCoupler in the non-Comm<strong>and</strong> environment 6<br />
Installing a <strong>Lionel</strong> Sound Activation Button 7<br />
RailSounds operations<br />
Your locomotive’s RailSounds sound system—the basics 8<br />
The RailSounds sound system in the Comm<strong>and</strong> environment 8-9<br />
Experiencing the range of your locomotive’s RailSounds sound system 10<br />
Notes on the RailSounds sound system 10<br />
Odyssey System operations<br />
The Odyssey System 11<br />
Odyssey System conventional (transformer) operation 11<br />
Odyssey System Comm<strong>and</strong> operation 12<br />
TrainMaster Comm<strong>and</strong> operations<br />
The Comm<strong>and</strong> Control environment 13<br />
Running your locomotive in the TrainMaster Comm<strong>and</strong> environment 14<br />
CAB-1 comm<strong>and</strong>s for your locomotive 14<br />
CAB-1 numeric keypad comm<strong>and</strong>s for your locomotive 15<br />
Tuning your locomotive’s performance 16<br />
Assigning your locomotive a new ID# 17<br />
Reprogramming the Comm<strong>and</strong> reverse unit to restore features 18<br />
Maintaining <strong>and</strong> servicing your locomotive<br />
Maintaining your locomotive’s h<strong>and</strong>rail antenna 19<br />
Adding fluid to your locomotive’s smoke generator 19<br />
Lubricating your locomotive 20<br />
Servicing your locomotive’s lamps 21<br />
Replacing your tender’s lamp 22<br />
Tire-Traction 23<br />
Installing the O gauge front coupler 23<br />
Changing the train sign 23<br />
Limited Warranty/<strong>Lionel</strong> Service 24<br />
3
Transformer operations<br />
Running your locomotive with a <strong>Lionel</strong> transformer<br />
1<br />
Place your locomotive on <strong>Lionel</strong> or <strong>Lionel</strong>-compatible<br />
O-72 or larger track.<br />
Caution! This locomotive requires extra trackside<br />
clearance. Check that the locomotive<br />
clears switch motors, structures, <strong>and</strong><br />
scenery around your track, especially at<br />
curves. Also, be sure that your bridges<br />
<strong>and</strong> trestles can withst<strong>and</strong> the extra<br />
weight of this locomotive.<br />
Figure 1. Drawbar connection<br />
With track power OFF, connect the drawbar between locomotive <strong>and</strong> tender as<br />
illustrated in Figure 1. That’s all you have to do with the <strong>Lionel</strong> Wireless Tether, an<br />
infrared communication system that eliminates the plugs <strong>and</strong> wires of the past.<br />
2<br />
Caution!<br />
Note!<br />
3<br />
Power up your locomotive with your transformer.<br />
Your locomotive is designed to operate on 8-18 volts alternating<br />
current. Virtually all <strong>Lionel</strong> <strong>and</strong> <strong>Lionel</strong>-compatible alternating-current<br />
transformers are suitable.<br />
Do not power your locomotive with direct current (DC). Damage to<br />
sensitive electronic components may occur.<br />
When you first power up your track, the locomotive will wait<br />
between three <strong>and</strong> eight seconds as it “listens” for digital language from the<br />
TrainMaster Comm<strong>and</strong> Base (available separately). When the locomotive has<br />
determined that it’s on a conventional (non-Comm<strong>and</strong>) railroad, the locomotive’s<br />
headlight will illuminate <strong>and</strong> the RailSounds sound system will start. At this point,<br />
the locomotive is in neutral. (This occurs when placing the locomotive on your<br />
railroad for the first time. Thereafter, it will start in forward following every fivesecond<br />
power interruption.)<br />
To experience all of your locomotive’s features, we recommend using the<br />
TrainMaster Comm<strong>and</strong> Control system, available at your authorized <strong>Lionel</strong> dealer.<br />
Move ‘em out!<br />
Get your locomotive moving. Press the DIRECTION button on your <strong>Lionel</strong><br />
transformer. This sequences the Comm<strong>and</strong> reverse unit to the next operating state.<br />
Adjust track voltage until your locomotive moves at your desired speed. To<br />
increase speed, increase track voltage. To decrease speed, reduce voltage. To stop the<br />
locomotive, turn-off track power.<br />
See page 5 for information on locking your locomotive in a single<br />
operational state.<br />
4
Transformer operations<br />
Locking your locomotive into a single operational state<br />
To select a single operational state for<br />
your <strong>Lionel</strong> locomotive (for example,<br />
forward only), you can deactivate the<br />
Comm<strong>and</strong> reverse unit’s sequencing<br />
function with the Comm<strong>and</strong> reverse unit<br />
(PROG/RUN) switch.<br />
Get your locomotive moving in the<br />
desired direction, then slow it down<br />
without stopping. Set the Comm<strong>and</strong> reverse<br />
unit switch to PROG. Refer to Figure 2 for<br />
the location of the switch. The locomotive is<br />
now “locked” into your chosen direction.<br />
When you no longer want single-direction<br />
operation, just slide the Comm<strong>and</strong> reverse<br />
unit switch back to RUN.<br />
Note! Your locomotive’s reverse unit will<br />
“reset” to forward after any power<br />
interruption lasting five seconds<br />
or longer, regardless of the<br />
original locked-out direction.<br />
FRONT<br />
Comm<strong>and</strong> reverse<br />
unit switch<br />
Odyssey System<br />
switch<br />
OFF ON PROG RUN<br />
OFF ON<br />
Smoke unit<br />
switch<br />
Body screws<br />
(see page 19 for details)<br />
Underside of the locomotive<br />
REAR<br />
Figure 2. Switch locations<br />
5
Transformer operations<br />
Using your tender-mounted ElectroCoupler in the<br />
non-Comm<strong>and</strong> environment<br />
To uncouple rolling stock from your<br />
locomotive tender’s ElectroCoupler in<br />
the non-Comm<strong>and</strong> environment, you must<br />
Magnetic coupler on the rolling stock coupled<br />
to your locomotive<br />
Figure 3. Trigger disc operation<br />
Remote-Control<br />
Track section<br />
rely on a piece of rolling stock equipped<br />
with <strong>Lionel</strong> magnetic couplers coupled<br />
directly to your locomotive tender’s<br />
ElectroCoupler. The magnetic coupler on<br />
the rolling stock will then react to the<br />
magnetic field generated by a <strong>Lionel</strong><br />
Remote-Control Track section (available<br />
separately, 6-65530 for O gauge, 6-65149 or<br />
6-12746 for O-27 gauge). Place your rolling<br />
stock’s coupler “trigger disc” over the<br />
central coil of a Remote-Control Track<br />
section <strong>and</strong> press UNCOUPLE on the<br />
controller. The magnetic field pulls the disc<br />
downward, <strong>and</strong> the coupler opens.<br />
Note!<br />
Your locomotive tender’s<br />
ElectroCoupler will NOT open<br />
manually or by using a<br />
Remote-Control Track section.<br />
6
Transformer operations<br />
Installing a <strong>Lionel</strong> Sound Activation Button<br />
To activate the bell <strong>and</strong> whistle sounds<br />
when operating your locomotive with<br />
conventional transformers, you may need to<br />
install <strong>Lionel</strong> no. 610-5906-001 Sound<br />
Activation Buttons (available separately) if<br />
your transformer is not equipped to activate<br />
For AC transformers lacking a bell button<br />
these features. Connect the button(s) as<br />
shown below.<br />
Note! All track power must feed through<br />
the Sound Activation Buttons. Do<br />
not bypass the buttons.<br />
Black wire<br />
1 2<br />
Red wire<br />
Existing wire<br />
Common/Ground/U<br />
POWER<br />
SUPPLY<br />
Power/A<br />
<strong>Lionel</strong> no. 610-5906-001<br />
Sound Activation Button for<br />
activating the bell<br />
For AC transformers lacking bell <strong>and</strong> horn/whistle buttons<br />
Red wire<br />
Existing wire<br />
Common/Ground/U<br />
Black wire<br />
Wire<br />
nut<br />
Red wire<br />
POWER<br />
SUPPLY<br />
Power/A<br />
<strong>Lionel</strong> no. 610-5906-001<br />
Sound Activation Button<br />
for activating the<br />
whistle<br />
<strong>Lionel</strong> no. 610-5906-001<br />
Sound Activation Button for<br />
activating the bell<br />
Note!<br />
The no. 610-5906-001 button works with any <strong>Lionel</strong> AC transformer except<br />
no. 6-4690 Type MW. Transformers made by other manufacturers may not be<br />
compatible with the RailSounds sound system.<br />
7
RailSounds operations<br />
Your locomotive’s RailSounds sound system—the basics<br />
The <strong>Lionel</strong> RailSounds sound system is the<br />
most realistic model railroad sound system<br />
in the world. Your locomotive features digital<br />
samples from real-life steam locomotives for<br />
the ultimate in realism.<br />
Begin by installing a nine-volt alkaline<br />
battery in the tender as illustrated in Figure 4<br />
on page 9. This ensures interruption-free<br />
operation of the RailSounds sound system.<br />
The battery harness is located inside the<br />
tender. To access the battery harness, you must<br />
first remove the body screws from the bottom<br />
of the tender <strong>and</strong> then lift the tender body off<br />
the frame. Refer to the Figure 4 on page 9 for<br />
the location of the body screws. Snap the<br />
battery harness onto the battery terminals,<br />
then slide the battery into the holder. Replace<br />
the tender body, securing it with the body<br />
Note!<br />
Note!<br />
Note!<br />
Note!<br />
8<br />
screws.<br />
When you first apply track power, the<br />
locomotive’s RailSounds sound system will<br />
produce the sounds of the locomotive at rest.<br />
As the locomotive moves, chuffing begins,<br />
increasing with the locomotive’s speed.<br />
To silence the steam chuffing sound<br />
(whistle/bell are unaffected), slide the<br />
RailSounds switch, located on the top of the<br />
tender beneath the right-h<strong>and</strong> hatch (see<br />
Figure 4 on page 9 for the location), to the<br />
SIGNALSOUNDS position before powering up<br />
the locomotive. The whistle is activated by<br />
using the lever or button on your transformer<br />
or CAB-1 Remote Controller. The volume<br />
control knob is also located on the top of the<br />
tender beneath the hatch (see Figure 4 on<br />
page 9).<br />
Please remove the protective cover from the battery clip before installing the battery.<br />
Although the RailSounds sound system is powered by track voltage, the battery is<br />
required for uninterrupted operation <strong>and</strong> shutdown sequences. Use only alkaline<br />
batteries.<br />
Discontinue locomotive power for ten seconds before changing the RailSounds<br />
switch position.<br />
If the RailSounds sound system “drops out” during track power interruptions<br />
(during direction changes, switches, crossings, etc.), replace the battery.<br />
The RailSounds sound system in the Comm<strong>and</strong> environment<br />
Your locomotive’s RailSounds sound<br />
system gives you even more in the<br />
TrainMaster Comm<strong>and</strong> environment.<br />
• DynaChuff. Real steam locomotive<br />
chuffing depends on the locomotive’s<br />
load. DynaChuff simulates both labored<br />
<strong>and</strong> relaxed chuffing sounds. Highball<br />
down the mainline <strong>and</strong> hear the labored<br />
chuffing of a locomotive battling<br />
inertia. Reduce your throttle setting, <strong>and</strong><br />
chuffing relaxes to a more sedate sound,<br />
as though the load placed on the<br />
locomotive has decreased. Experience<br />
DynaChuff on steep grades, at yard<br />
crawls, <strong>and</strong> at speed. Another<br />
RailSounds exclusive.<br />
• Bonus sounds like squealing brakes<br />
with the CAB-1 BRAKE comm<strong>and</strong>.<br />
• Incidental sounds you control with<br />
CAB-1 numeric keypad comm<strong>and</strong>s, like<br />
steam blow-off <strong>and</strong> steam release effects.
RailSounds operations<br />
RailSounds in the Comm<strong>and</strong> environment (continued)<br />
REAR<br />
Body Screws<br />
FRONT<br />
Bottom of tender<br />
FRONT<br />
Top of<br />
tender<br />
RailSounds switch<br />
Volume<br />
control<br />
knob<br />
REAR<br />
REAR<br />
Speaker<br />
Battery harness<br />
Battery holder<br />
FRONT<br />
Inside of the tender<br />
Figure 4. Servicing the tender<br />
9
RailSounds operations<br />
Experiencing the range of your locomotive’s RailSounds sound<br />
system<br />
With the RailSounds sound system, you<br />
experience the sounds of real<br />
railroading like never before. Simply put,<br />
it’s the most sophisticated, authentic model<br />
railroad sound system in the world.<br />
• Variable chuff rate. The speed of<br />
your locomotive determines the steam<br />
chuff rate.<br />
• MultiWhistle. Different whistles<br />
for different speeds—a RailSounds<br />
exclusive.<br />
• Authentic bell. Press BELL on your<br />
CAB-1 Remote Controller or transformer<br />
to begin the effect, again to discontinue.<br />
Even the final “hit” is muted like the<br />
real thing.<br />
• Reverse unit reset sound. Power<br />
down your track, wait for three to five<br />
Notes on the RailSounds sound system<br />
seconds, <strong>and</strong> listen for the air-release<br />
sound—that’s the locomotive telling<br />
you its Comm<strong>and</strong> reverse unit has just<br />
reset to forward operation.<br />
• Shutdown sequence. No other model<br />
railroad sound system shuts down like<br />
the RailSounds sound system. Turn off<br />
track power, <strong>and</strong> after the air-release<br />
reset sound, you have two seconds to<br />
restart your locomotive. If you’re done<br />
with operations, RailSounds will<br />
commence with an authentic shutdown<br />
sequence about two seconds after the airrelease<br />
reset occurs.<br />
A nine-volt alkaline battery must<br />
Note!<br />
be installed for the shutdown<br />
sequence.<br />
• Use the volume control knob, located<br />
under the right-h<strong>and</strong> hatch on top of the<br />
tender, to adjust sound output. Refer to<br />
Figure 4 on page 9. Use a flat-blade<br />
screwdriver to adjust the volume level.<br />
Note! Do not force the volume control<br />
knob past the point where it will<br />
easily turn, or damage to the<br />
volume control will result.<br />
• Listen for incidental locomotive sounds<br />
during the operation of the RailSounds<br />
sound system. They’re automatic <strong>and</strong>, of<br />
course, authentic.<br />
• The nine-volt alkaline battery you<br />
installed ensures continuous sounds,<br />
even during short track-power<br />
interruptions. The battery must be<br />
installed for the shutdown sequence.<br />
• Longer track-power interruptions<br />
(including locomotive derailments)<br />
cause the RailSounds sound system to<br />
shut down after about seven seconds.<br />
• For even more authentic RailSounds<br />
effects, operate your locomotive in the<br />
TrainMaster Comm<strong>and</strong> environment. See<br />
pages 13-16 for details.<br />
10
Odyssey System operations<br />
The Odyssey System<br />
The Odyssey System is a “cruise control”<br />
for your locomotive. Once the speed is<br />
set (see below), your locomotive will<br />
maintain a constant speed, no matter what<br />
loads the locomotive pulls or what grades<br />
you have on your layout. This digitallycontrolled<br />
system also allows for extremely<br />
slow movement that will amaze any “scale”<br />
enthusiast.<br />
Odyssey System conventional (transformer) operation<br />
The Odyssey System is automatically operational when you operate your locomotive in<br />
conventional (non-Comm<strong>and</strong> Control) mode, as long as the Odyssey switch is in the ON<br />
position (see Figure 2 on page 5). This means that your locomotive will maintain a constant<br />
speed, compensating for grades, loads, <strong>and</strong> turns. Simply use your transformer’s throttle to<br />
adjust the speed of your locomotive. If you would like to deactivate the speed control feature,<br />
slide the Odyssey switch to the OFF position while the locomotive is not in motion.<br />
Caution!<br />
In conventional operation, the lights in both the engine <strong>and</strong> tender are<br />
connected directly to track power. Do not exceed 14-16 volts for extended<br />
periods. Doing so will reduce the life of your lamps.<br />
Note!<br />
Because of the way that speed control operates in conventional mode, you will<br />
notice a slight delay between adjusting your transformer throttle <strong>and</strong> the change in<br />
the speed of your locomotive. If you desire instantaneous response to throttle<br />
changes, turn off the Odyssey System.<br />
11
Odyssey System operations<br />
Odyssey System Comm<strong>and</strong> operation<br />
Use your CAB-1 Remote Controller to<br />
turn the Odyssey System speed control<br />
on or off. The position of the Odyssey<br />
switch (see Figure 2 on page 5) is<br />
the Odyssey System default setting<br />
when you power up the locomotive.<br />
You may override the default with the<br />
following comm<strong>and</strong>s. The override settings<br />
will be cleared <strong>and</strong> the default settings will<br />
be restored when the locomotive is powered<br />
down.<br />
Turns off Odyssey System speed control.<br />
Note!<br />
When you press 7, you will activate a TowerCom announcement. This has no<br />
impact on the Odyssey System function.<br />
Turns on Odyssey System speed control.<br />
Note!<br />
When you press 9, you will activate the <strong>Steam</strong> blow-off sound <strong>and</strong> turn on the<br />
smoke unit (if it was off). This has no impact on the Odyssey System.<br />
Do not wait longer than two or three seconds between pushing the buttons in each sequence.<br />
If the comm<strong>and</strong> is not accepted, repeat the sequence.<br />
Note!<br />
The locomotive must not be in motion while enabling or disabling the Odyssey<br />
System speed control.<br />
12
TrainMaster Comm<strong>and</strong> operations<br />
The Comm<strong>and</strong> Control environment<br />
TrainMaster Comm<strong>and</strong> Control is the<br />
advanced model railroad control system<br />
from <strong>Lionel</strong>. TrainMaster Comm<strong>and</strong> Control<br />
gives you the power to operate multiple<br />
Comm<strong>and</strong>-equipped locomotives on the<br />
same track, at the same time.<br />
1<br />
Place your locomotive on <strong>Lionel</strong> or<br />
<strong>Lionel</strong>-compatible O-72 or larger track.<br />
To operate in Comm<strong>and</strong> mode, you<br />
need a Comm<strong>and</strong> Base (6-12911)<br />
<strong>and</strong> a CAB-1 Remote Controller<br />
(6-12868). Find them both at your<br />
authorized <strong>Lionel</strong> retailer.<br />
Caution! This locomotive requires extra trackside clearance. Check that the<br />
locomotive clears switch motors, structures, <strong>and</strong> scenery around your<br />
track, especially at curves. Also, be sure that your bridges <strong>and</strong> trestles<br />
can withst<strong>and</strong> the extra weight of this locomotive.<br />
• Make sure track power is OFF before placing on the track.<br />
• Make sure your <strong>Lionel</strong> Comm<strong>and</strong> Base is plugged-in <strong>and</strong> its<br />
communications wire is connected to the COMMON post on your <strong>Lionel</strong><br />
transformer or the U terminal on any of your installed PowerMasters.<br />
• Once positioned on the track, increase track voltage to FULL (no more<br />
than 19 volts). On PowerMasters, slide the CMD/CONV switch to CMD.<br />
2<br />
Note!<br />
3<br />
Address your locomotive using your CAB-1 Remote<br />
Controller.<br />
• Press ENG <strong>and</strong> 1 on the numeric keypad of your CAB-1 Remote Controller.<br />
This comm<strong>and</strong> is sent by your CAB-1 Remote Controller to the Comm<strong>and</strong> Base,<br />
which then translates your comm<strong>and</strong> into digital code. That code is sent around<br />
your railroad’s outside rails in the form of a digital “halo.” All Comm<strong>and</strong>equipped<br />
<strong>Lionel</strong> engines listen to this digital communication, but they do not<br />
respond until they hear their individual ID number—in this case, “1.”<br />
• The digital language of TrainMaster Comm<strong>and</strong>—<strong>and</strong> not track<br />
power—controls the actions of Comm<strong>and</strong>-equipped <strong>Lionel</strong><br />
engines. Track power is simply like gasoline in the tank of your car—it gives<br />
you the power to go places, but it doesn’t tell you where to go or how fast to get<br />
there.<br />
All Comm<strong>and</strong> locomotives come factory-programmed with an ID# of<br />
“1.” To change the ID# of your locomotive, see page 17.<br />
Move ‘em out!<br />
• Throttle up or press any comm<strong>and</strong> button on the CAB-1 Remote<br />
Controller. Your locomotive will respond to your every comm<strong>and</strong>.<br />
13
TrainMaster Comm<strong>and</strong> operations<br />
Running your locomotive in the TrainMaster Comm<strong>and</strong> environment<br />
Example<br />
Address <strong>Locomotive</strong> #1<br />
Set PowerMaster to CMD or traditional<br />
power supplies to full throttle (no more<br />
than 19 volts)<br />
Press ENG<br />
Press 1 (the ID#)<br />
Throttle up/press any comm<strong>and</strong> button<br />
CAB-1 comm<strong>and</strong>s for your locomotive<br />
Your Comm<strong>and</strong>-equipped<br />
locomotive comes factoryprogrammed<br />
with an ID# of “1.” To<br />
get your locomotive in action, set<br />
PowerMasters to CMD or set all power<br />
supplies on full (no more than<br />
19 volts). Press ENG <strong>and</strong> 1 on your<br />
CAB-1 Remote Controller. Turn the<br />
throttle or press any comm<strong>and</strong> button,<br />
<strong>and</strong> your locomotive is ready for<br />
Comm<strong>and</strong> operations.<br />
<strong>Locomotive</strong> RailSounds effects in bold italic.<br />
<strong>Tender</strong> rear coupler<br />
releases. Coupler<br />
release sounds.<br />
Press AUX2 to turn<br />
your locomotive’s<br />
headlight on <strong>and</strong> off.<br />
Turn the THROTTLE<br />
to the right to<br />
accelerate, left to<br />
decelerate. Speeddependent<br />
variable steam<br />
chuffing. DynaChuff<br />
dynamic chuffing effect.<br />
Press HALT to shut down<br />
all PowerMaster<br />
electrical output on your<br />
railroad. Stops all Comm<strong>and</strong>equipped<br />
locomotives in operation.<br />
Note!<br />
Coupler release<br />
sounds.<br />
Press AUX1 to activate<br />
the numeric keypad.<br />
Use HALT only in<br />
emergency situations.<br />
Beneath this panel<br />
SET L M H<br />
14<br />
Press WSTL/HRN to<br />
activate the<br />
locomotive’s whistle,<br />
release to discontinue. Multi-<br />
Whistle steam whistle<br />
sound.<br />
Press BELL once to<br />
activate the bell,<br />
again to discontinue.<br />
Traditional bell sound.<br />
Press DIR—the locomotive<br />
decelerates to a<br />
complete stop; turn the throttle<br />
up, <strong>and</strong> the locomotive moves in<br />
the opposite direction. There is<br />
no neutral. <strong>Steam</strong> airrelease<br />
sound.<br />
Press <strong>and</strong> hold<br />
BOOST for extra<br />
power. Release BOOST<br />
<strong>and</strong> return to the locomotive’s<br />
previous speed. Labored chuff.<br />
Press <strong>and</strong> hold BRAKE<br />
to slow down or stop.<br />
Release BRAKE <strong>and</strong> return to the<br />
previous speed. Squealing<br />
brake sounds.
TrainMaster Comm<strong>and</strong> operations<br />
CAB-1 numeric keypad comm<strong>and</strong>s for your locomotive<br />
When you press AUX1 on your CAB-1 Remote Controller, you<br />
turn the numeric keypad into ten comm<strong>and</strong> buttons. The<br />
keypad “stays open” <strong>and</strong> gives you access to extra comm<strong>and</strong> features<br />
until you press any top-row button (SW, ACC, RTE, TR, or ENG).<br />
The CAB-1 keypad overlay included with your locomotive is designed<br />
to help you learn the auxiliary features specific to this classic<br />
locomotive.<br />
<strong>Locomotive</strong> RailSounds effects in bold italic.<br />
➠<br />
VOLUME<br />
➠<br />
STEAM<br />
TOWER<br />
COM<br />
CREW<br />
TALK<br />
SHUT<br />
DOWN<br />
SMOKE<br />
OFF ON<br />
ENGINE<br />
RESET<br />
START-UP<br />
BLOW<br />
OFF<br />
STEAM<br />
RELEASE<br />
0Stops <strong>and</strong> resets the locomotive to<br />
FORWARD. Headlight flickers.<br />
1Raises the volume of RailSounds.<br />
Sound volume increases.<br />
2CrewTalk is the sound of<br />
unintelligible walkie-talkie<br />
communication.<br />
3Starts-up the RailSounds sound system.<br />
Start-up sequence commences.<br />
<strong>Steam</strong> blow-off sound.<br />
4Lowers the volume of the RailSounds<br />
sound system. Sound volume<br />
decreases.<br />
5Activates the RailSounds steam<br />
shutdown sequence. Just like the real<br />
thing, your locomotive must be idle for<br />
shutdown to occur. <strong>Steam</strong> shutdown<br />
commences. Remember, the whistle <strong>and</strong><br />
bell will not sound until you restart<br />
RailSounds. CrewTalk sounds*.<br />
6Air horn sound.<br />
7TowerCom is an audible two-part<br />
announcement that includes that<br />
engine’s road number <strong>and</strong>/or name.<br />
Pressing 7 the first time triggers a “Hold for<br />
clearance” announcement. Press 7 again,<br />
<strong>and</strong> a “Cleared for departure” message<br />
plays. There is a four second delay in this<br />
function.<br />
8Turns off the smoke generator.<br />
<strong>Steam</strong> release sound*.<br />
9Turns on the smoke generator. <strong>Steam</strong><br />
blow-off sound*.<br />
* Hearing the <strong>Steam</strong> release sound, <strong>Steam</strong><br />
blow-off sound, or the CrewTalk sounds lets<br />
you know that the locomotive has received<br />
these comm<strong>and</strong>s.<br />
Note!<br />
AUX1, 8 <strong>and</strong> 9 only work if the<br />
smoke unit switch is in the ON<br />
position.<br />
15
TrainMaster Comm<strong>and</strong> operations<br />
Tuning your locomotive’s performance<br />
MOMENTUM<br />
TrainMaster Comm<strong>and</strong>’s momentum<br />
feature simulates the labored performance<br />
of a locomotive pulling a heavy load. Press<br />
L, M, or H (located under the CAB-1 Remote<br />
Controller’s removable panel) for light,<br />
medium, or heavy momentum. The<br />
locomotive’s Comm<strong>and</strong> reverse unit<br />
remembers this setting until you change it.<br />
For quick locomotive response, choose L.<br />
BRAKING AND BOOSTING<br />
There’s more to starting <strong>and</strong> stopping<br />
than just turning the CAB-1 throttle. Use the<br />
BOOST <strong>and</strong> BRAKE comm<strong>and</strong> buttons—<br />
they give you incremental control of speed<br />
<strong>and</strong> are the superior way to h<strong>and</strong>le grades,<br />
gradual stops-<strong>and</strong>-starts, <strong>and</strong> more. Plus,<br />
using BRAKE in the Comm<strong>and</strong><br />
environment gives you a bonus RailSounds<br />
effect—the ultra-realistic sound of<br />
squealing brakes.<br />
SOUND QUALITY<br />
To set your maximum volume level, use<br />
the volume control knob located on the top<br />
of the tender beneath the right-h<strong>and</strong> hatch<br />
(see Figure 4 on page 9). Turn the knob left<br />
or right to adjust the volume to your liking.<br />
For quick remote-control of volume below<br />
the master setting—like muting—use the<br />
CAB-1 numeric keypad’s volume control.<br />
Press AUX1, 4 on the keypad to lower<br />
overall RailSounds output.<br />
HIGH VOLTAGE SETTING<br />
Press SET, <strong>and</strong> the headlight will flash.<br />
Get your locomotive moving to the<br />
maximum speed you want it to run, then<br />
press BOOST. Use this to keep your<br />
locomotive from derailing at excessive<br />
speeds. Turn off the high voltage setting by<br />
pressing SET, then BOOST, holding each<br />
for one second.<br />
STALL<br />
Make your locomotive feel more<br />
responsive by setting a “stall” voltage. Get<br />
your locomotive moving, then press SET;<br />
the locomotive will stop. Turn the throttle<br />
clockwise to get the locomotive moving,<br />
then decrease speed until the locomotive<br />
just stops. Press SET again; the Comm<strong>and</strong><br />
reverse unit remembers the stall setting<br />
until you change it. To clear the stall<br />
setting, press SET twice, holding it for one<br />
second each time.<br />
Note!<br />
These settings will be lost when you assign a new engine ID number.<br />
16
TrainMaster Comm<strong>and</strong> operations<br />
Assigning your locomotive a new ID#<br />
Example<br />
Assign a new ID# to your<br />
Comm<strong>and</strong>-equipped<br />
locomotive<br />
Set the Comm<strong>and</strong> reverse unit switch to<br />
PROG<br />
Comm<strong>and</strong> Base plugged in<br />
Place the locomotive on track<br />
PowerMasters set to CMD or traditional<br />
power supplies ON FULL (no more than<br />
19 volts)<br />
Turn track power on (PowerMasters):<br />
Press BOOST<br />
Program the locomotive with a new ID#:<br />
Press ENG<br />
Press a number you choose<br />
(the ID#)<br />
Press SET<br />
Set the Comm<strong>and</strong> reverse unit switch to<br />
RUN<br />
Your locomotive remembers its ID#<br />
forever; change it any time with these<br />
steps<br />
As your fleet of Comm<strong>and</strong>-equipped<br />
<strong>Lionel</strong> locomotives grows, you’ll want<br />
to give your locomotive a more<br />
individualized number. Choose from any<br />
between 1 <strong>and</strong> 99. To make things easy, use<br />
a portion of your locomotive’s cab number.<br />
Set the locomotive’s Comm<strong>and</strong> reverse<br />
unit switch to PROG (see Figure 2 on<br />
page 5). Plug in the Comm<strong>and</strong> Base <strong>and</strong><br />
place the locomotive on track, then power<br />
up. Using your CAB-1 Remote Controller,<br />
press ENG, the locomotive ID# that you<br />
select, <strong>and</strong> then press the SET button<br />
located under your CAB-1 Remote<br />
Controller’s removable panel. Hear the<br />
whistle blow (or see the headlight flash if<br />
the RailSounds sound system is off); that’s<br />
the Comm<strong>and</strong> reverse unit confirming the<br />
new ID#. Set the Comm<strong>and</strong> reverse unit<br />
switch to RUN. Your locomotive is ready for<br />
operations with its all-new ID#.<br />
We recommend that you choose an easy to<br />
remember ID# for your engine. Some possibilities<br />
are part of the engine road number,<br />
your age, or any two digit number that is not<br />
used by another engine. Write the number on a<br />
small piece of tape <strong>and</strong> put this on the bottom<br />
of the tender frame to aid in remembering.<br />
17
TrainMaster Comm<strong>and</strong> operations<br />
Reprogramming the Comm<strong>and</strong> reverse unit to restore features<br />
Due to the inevitable derailments <strong>and</strong><br />
static, it is possible that your Comm<strong>and</strong><br />
reverse unit could someday lose its setup<br />
program. The symptom of this condition<br />
would be unresponsiveness in Comm<strong>and</strong><br />
mode. This can be easily remedied by<br />
“reprogramming” your Comm<strong>and</strong> reverse<br />
unit using the following steps.<br />
STEP 1: Move the switch on your<br />
locomotive from RUN to PROG.<br />
STEP 2: Plug in your Comm<strong>and</strong> Base.<br />
STEP 5: Press ENG, the ID#, AUX1, then<br />
press 74 for this particular locomotive.<br />
STEP 6: Turn off power to your track <strong>and</strong><br />
wait ten seconds.<br />
STEP 7: Remove the locomotive from your<br />
track, <strong>and</strong> move the switch from PROG to<br />
RUN.<br />
STEP 8: Place the locomotive back on<br />
track, then turn power on to the track.<br />
STEP 3: Place the locomotive on track,<br />
then turn on power to your track.<br />
STEP 9: Press ENG <strong>and</strong> the ID#, then<br />
operate as normal.<br />
STEP 4: Press ENG then input the<br />
locomotive’s ID#. Press SET.<br />
18
Maintaining <strong>and</strong> servicing your locomotive<br />
Maintaining your locomotive’s h<strong>and</strong>rail antenna<br />
Your locomotive h<strong>and</strong>rails are more than<br />
just model grab irons—they’re the<br />
Comm<strong>and</strong> reverse unit’s antenna for<br />
receiving Comm<strong>and</strong> Base digital<br />
communications. Please h<strong>and</strong>le the<br />
locomotive carefully to avoid h<strong>and</strong>rail<br />
damage. To ensure optimum reception, both<br />
h<strong>and</strong>rails are insulated from the die-cast<br />
metal shell. If your locomotive experiences<br />
difficulty receiving Comm<strong>and</strong> Base<br />
communications, check the h<strong>and</strong>rail ends in<br />
the cab for the presence of insulating<br />
material. Ensure that each insulator is<br />
present <strong>and</strong> in position. Finally, prevent the<br />
h<strong>and</strong>rails from touching any part of the diecast<br />
metal locomotive cab.<br />
Adding fluid to your locomotive’s smoke generator<br />
Your locomotive is equipped with a<br />
smoke generator that produces safe,<br />
clean, white smoke during operation.<br />
The smoke generator requires the periodic<br />
addition of <strong>Lionel</strong> smoke fluid in order to<br />
function. A small tube of smoke fluid was<br />
included with this locomotive. Pierce the<br />
fluid tube’s end with a pin, then add eight to<br />
Note!<br />
ten drops of fluid directly into the smoke<br />
stack. Smoke production will commence<br />
momentarily, faster if you run your<br />
locomotive at speed. When smoke<br />
production decreases, add more fluid (eight<br />
to ten drops).<br />
When you place your locomotive on the<br />
track for the first time, the smoke unit will<br />
be on. Thereafter, the smoke unit will return<br />
to its last operating state each time you<br />
power it up. For example, if you turn off the<br />
smoke unit before you power down the<br />
locomotive, the smoke unit will be off the<br />
next time you power it up. If the smoke unit<br />
was on before you powered down the<br />
locomotive, the smoke unit will be on the<br />
Note!<br />
19<br />
next time you power it up. When operating<br />
your locomotive in the TrainMaster<br />
Comm<strong>and</strong> Control environment, press<br />
AUX1, 8 on your CAB-1 to turn off the<br />
smoke unit; press AUX1, 9 to turn on the<br />
smoke unit.<br />
To control the operation of the<br />
smoke unit with your CAB-1<br />
Remote Controller, be sure that<br />
the smoke unit switch is in the<br />
ON position. Refer to Figure 2 on<br />
page 5 for the location of the<br />
switch. Comm<strong>and</strong>s from the<br />
CAB-1 Remote Controller will not<br />
override the switch setting.<br />
Always keep a small amount of smoke<br />
fluid in the locomotive smoke generator; the<br />
generator’s element can become damaged if<br />
operated without fluid. Smoke production is<br />
greater at higher voltages <strong>and</strong> when the<br />
locomotive is pulling a heavy load or long<br />
consist.<br />
Always keep smoke fluid in your locomotive’s smoke generator. If not, turn it off<br />
when smoke is not desired using the smoke unit switch shown in Figure 2 on page 5<br />
or the AUX1, 8 comm<strong>and</strong> if you are running in Comm<strong>and</strong> mode.
Maintaining <strong>and</strong> servicing your locomotive<br />
Lubricating your locomotive<br />
Help your <strong>Lionel</strong> locomotive lead a long<br />
<strong>and</strong> productive life on your railroad by<br />
maintaining it properly.<br />
We recommend that you purchase a<br />
<strong>Lionel</strong> Lubrication <strong>and</strong> Maintenance Kit<br />
(6-62927), available from your <strong>Lionel</strong><br />
dealer. Two basic rules to keep in mind:<br />
never over-lubricate (a small amount will<br />
do), <strong>and</strong> avoid getting grease or oil on the<br />
locomotive wheels, contact rollers, or your<br />
track.<br />
You’ll know your locomotive requires<br />
lubrication when visual inspection reveals<br />
dryness on the parts indicated in Figure 5.<br />
Remove accumulated dirt <strong>and</strong> dust before<br />
lubricating, <strong>and</strong> always lubricate any<br />
locomotive emerging from prolonged<br />
storage. Also, lightly lubricate the<br />
locomotive side rods, drive rods, linkage,<br />
front <strong>and</strong> rear truck pivot points, <strong>and</strong> tender<br />
wheel bearings after each 25 hours of<br />
operation.<br />
FRONT<br />
Body screws<br />
Lubricate with<br />
<strong>Lionel</strong> oil sparingly<br />
Remove screws <strong>and</strong><br />
lubricate with <strong>Lionel</strong><br />
grease sparingly<br />
Lubricate with<br />
<strong>Lionel</strong> oil sparingly<br />
Lubricate with<br />
<strong>Lionel</strong> oil sparingly<br />
Body screws<br />
Figure 5. Lubrication points <strong>and</strong> body screw locations<br />
20<br />
REAR
Maintaining <strong>and</strong> servicing your locomotive<br />
Servicing your locomotive’s lamps<br />
Note!<br />
Before changing the lamps in your locomotive, be sure to check that the AUX2<br />
comm<strong>and</strong> was not used to turn off the front headlight.<br />
Your locomotive is illuminated by several<br />
lamps. One lamp illuminates the<br />
headlight, another lamp illuminates the<br />
interior of the cab, <strong>and</strong> a lamp assembly<br />
illuminates the number boards. During the<br />
course of normal operations, these lamps<br />
may require replacement.<br />
Removing the screws as shown in Figure 5<br />
on page 20 will allow access to the inside of<br />
the cab <strong>and</strong> the expired lamps. Due to the<br />
complexity of the required disassembly, we<br />
recommend that you take your locomotive<br />
to your authorized <strong>Lionel</strong> Service Center for<br />
any lamp replacement.<br />
Lamp Numbers:<br />
Headlight (1) 620-8029-300<br />
Cab light (1) 610-8082-019<br />
Number board lamp assembly 620-8064-300<br />
Note! The flickering firebox lights are<br />
LEDs (light emitting diodes) <strong>and</strong><br />
are not user serviceable. They can<br />
be replaced by your authorized<br />
<strong>Lionel</strong> Service Center, if it is ever<br />
required.<br />
21
Maintaining <strong>and</strong> servicing your locomotive<br />
Replacing your tender’s lamp<br />
Your tender is illuminated by three<br />
lamps. One illuminates the center backup<br />
light <strong>and</strong> a lamp assembly (two lights)<br />
illuminates the corner marker lights. During<br />
the course of normal operations, you may<br />
find that these lamps require replacement.<br />
To access the expired lamps, remove the<br />
six body screws from the underside of the<br />
tender <strong>and</strong> lift away the tender body. Refer to<br />
Figure 6. Be careful with the wires that<br />
attach the body to the frame. Unhook the<br />
leads from the wire retainer <strong>and</strong> unplug the<br />
lamp connector from the rest of the wire<br />
harness. Carefully pull the expired lamp out<br />
of the hole in the tender body.<br />
Lamp numbers:<br />
Back-up light 620-8029-300<br />
Marker light assembly 630-8024-300<br />
(two lamps)<br />
These lamps are available from your<br />
authorized <strong>Lionel</strong> Service Center or from<br />
<strong>Lionel</strong> Service. See <strong>Lionel</strong> Service section on<br />
page 24 for more for more information.<br />
Reassemble the tender in reverse order. Be<br />
sure that all wires are inside the body before<br />
you tighten the screws.<br />
REAR<br />
Body Screws<br />
FRONT<br />
Bottom of tender<br />
Lamps<br />
Back-up light<br />
<strong>Lionel</strong> part no. 620-8029-300<br />
Wire retainer<br />
Connectors<br />
Figure 6. <strong>Tender</strong> lamp replacement<br />
22
Maintaining <strong>and</strong> servicing your locomotive<br />
Tire-Traction<br />
Your locomotive is equipped with traction<br />
tires. This means that two of the drive<br />
wheels are fitted with rubber traction tires to<br />
enhance tractive effort so your locomotive<br />
can pull many cars at once.<br />
<strong>Lionel</strong> has provided extra traction tires<br />
(<strong>Lionel</strong> part no. 600-0242-206) to replace<br />
the installed traction tires if they ever wear<br />
Installing the O gauge front coupler<br />
An O gauge coupler (non-operating) is<br />
included with your locomotive for those<br />
who may wish to “double-head” their trains<br />
with a second 6-4-4-6 or another locomotive.<br />
Turn the locomotive over onto a soft<br />
surface. Using a small Phillips screwdriver,<br />
remove the two screws holding the front<br />
coupler cover <strong>and</strong> slide out the cover.<br />
Remove the screw holding the scale coupler<br />
<strong>and</strong> slide the coupler out of the pilot.<br />
Position the O gauge coupler <strong>and</strong> secure it<br />
with the previously removed screw. Refer to<br />
Figure 7. We recommend that you store the<br />
coupler cover, coupler cover screws, <strong>and</strong><br />
out. The traction tires are replaced by<br />
unscrewing the drive rod screws. A 3/16” nut<br />
driver is included with this locomotive for<br />
this purpose. Slip off the old traction tire<br />
<strong>and</strong> remove it from under the drive rod.<br />
Place the new traction tire on the wheel <strong>and</strong><br />
retighten the drive rod screw.<br />
scale coupler in a safe place for possible<br />
reassembly at a later date.<br />
Note!<br />
The coupler cover can not be<br />
reinstalled with the O gauge<br />
coupler attached.<br />
Coupler cover<br />
Figure 7. Coupler installation<br />
Changing the train sign<br />
Your locomotive displays the name of the<br />
train above the front pilot. A second sign<br />
is packaged with the locomotive. To switch<br />
the signs, carefully lift up the installed sign<br />
using a small flat blade screwdriver. We<br />
recommend that you use a piece of electrical<br />
or masking tape to protect the finish from<br />
any possible damage when changing the<br />
sign. Once the original sign is removed,<br />
simply press the new sign into place <strong>and</strong><br />
remove the tape.<br />
Figure 8. Changing the train sign<br />
23
Limited Warranty/<strong>Lionel</strong> Service<br />
This <strong>Lionel</strong> product, including all<br />
mechanical <strong>and</strong> electrical components,<br />
moving parts, motors <strong>and</strong> structural<br />
components, except for light bulbs, is warranted<br />
to the original consumer-purchaser, for one year<br />
against original defects in materials or<br />
workmanship when purchased through an<br />
authorized <strong>Lionel</strong> merchant.<br />
This warranty does NOT cover normal wear<br />
<strong>and</strong> tear, light bulbs, defects appearing in the<br />
course of commercial use, or damage resulting<br />
from abuse or misuse of the product by the<br />
purchaser. Transfer of this product by the original<br />
consumer-purchaser to another person voids this<br />
warranty. Modification of this product voids this<br />
warranty.<br />
Any warranted product which is defective in<br />
original materials or workmanship <strong>and</strong> is<br />
delivered by the original consumer-purchaser to<br />
<strong>Lionel</strong> L.L.C. or an authorized <strong>Lionel</strong> L.L.C. Service<br />
Center, together with proof of original purchase<br />
will, at the option of <strong>Lionel</strong> L.L.C., be repaired or<br />
replaced, without charge for parts or labor. In the<br />
event the defective product cannot be repaired, <strong>and</strong><br />
a replacement is not available, a refund of the<br />
original purchase price will be granted. Any<br />
products on which warranty service is sought must<br />
be sent freight or postage prepaid, as<br />
transportation <strong>and</strong> shipping charges are not<br />
covered by the warranty.<br />
In no event shall <strong>Lionel</strong> L.L.C. be<br />
liable for incidental or<br />
consequential damages.<br />
Some states do not allow the exclusion or<br />
limitation of incidental or consequential damages,<br />
so the above exclusion may not apply to you.<br />
This limited warranty gives you specific legal<br />
rights, <strong>and</strong> you may have other rights which vary<br />
from state to state.<br />
Instructions for Obtaining Service<br />
If service for this <strong>Lionel</strong> L.L.C. product is<br />
required, bring the item, along with your dated<br />
sales receipt <strong>and</strong> completed warranty information<br />
to the nearest Authorized <strong>Lionel</strong> Service Center.<br />
Your nearest <strong>Lionel</strong> Service Center can be found<br />
by calling 1-800-4-<strong>Lionel</strong>, or by accessing our<br />
Website at www.lionel.com.<br />
If you prefer to send your product back to<br />
<strong>Lionel</strong> L.L.C. for repair in Michigan, you must<br />
first call 586-949-4100 or FAX 586-949-5429, or<br />
write to Customer Service, P.O. Box 748, New<br />
Baltimore, MI 48047-0748, stating what the item<br />
is, when it was purchased <strong>and</strong> what seems to be<br />
the problem. You will be sent a return<br />
authorization letter <strong>and</strong> label to ensure your<br />
merch<strong>and</strong>ise will be properly h<strong>and</strong>led upon<br />
receipt.<br />
Once you have received your return<br />
authorization <strong>and</strong> label, make sure that the item<br />
is packed to prevent damage during shipping <strong>and</strong><br />
h<strong>and</strong>ling. We suggest that you use the product’s<br />
original packaging. This shipment must be<br />
prepaid <strong>and</strong> we recommend that it be insured.<br />
Please make sure you have followed all of the<br />
above instructions carefully before returning any<br />
merch<strong>and</strong>ise for service. You may choose to have<br />
your product repaired by one of our Authorized<br />
<strong>Lionel</strong> Service Centers after its warranty has<br />
expired. A reasonable service fee will be charged.<br />
Warranty Information<br />
Please complete the information below <strong>and</strong><br />
keep it, along with your dated sales receipt. You<br />
must present this <strong>and</strong> your dated sales receipt<br />
when requesting warranty service.<br />
Name<br />
____________________________<br />
Address ____________________________<br />
Place of Purchase<br />
Date of Purchase<br />
____________________<br />
____________________<br />
Product Number ______________________<br />
Product Description____________________<br />
________________________________<br />
©2003 LIONEL L.L.C., CHESTERFIELD, MI 48051-2493<br />
UNITED STATES OF AMERICA<br />
PRINTED IN U.S.A.