Download Pulse Manual - Apeks
Download Pulse Manual - Apeks
Download Pulse Manual - Apeks

Create successful ePaper yourself
Turn your PDF publications into a flip-book with our unique Google optimized e-Paper software.
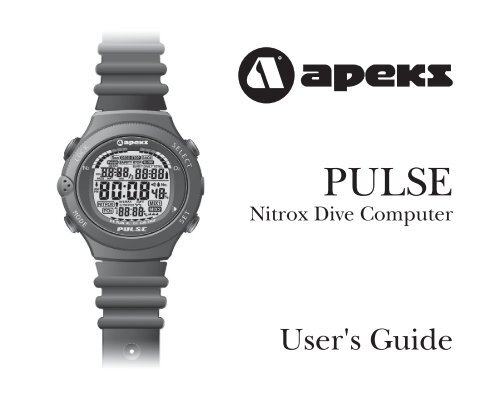
PULSE<br />
Nitrox Dive Computer<br />
User's Guide
2<br />
Contents<br />
FOR YOUR SAFETY.................................................5<br />
INTRODUCTION....................................................8<br />
SECTION 1 - Using the <strong>Pulse</strong> on the Surface............9<br />
The Push Buttons ......................................................................... 10<br />
Mode Indicators............................................................................ 11<br />
Time Display Mode (pre-dive)..................................................... 12<br />
Backlight ................................................................................16<br />
Low Battery Indicator ...............................................................16<br />
Time Display Mode (post-dive) ................................................... 17<br />
Wait-to-fly Guidelines ................................................................... 19<br />
Setting the Time, Date & 12/24 Hour Format........................... 20<br />
Plan Mode/Plan Simulator.......................................................... 26<br />
Plan Simulator ........................................................................28<br />
Setting Alarms............................................................................... 30<br />
Turning Alarms on and off .......................................................30
<strong>Pulse</strong> Owner's <strong>Manual</strong><br />
Alarm Clock Setting..................................................................31<br />
Setting Dual Time......................................................................... 32<br />
Logbook Mode ............................................................................. 34<br />
Logbook Page 1........................................................................35<br />
Logbook Page 2........................................................................38<br />
Logbook Page 3........................................................................40<br />
Profile Mode ................................................................................. 42<br />
Transfer Data Mode...................................................................... 44<br />
Change Units of Measure ............................................................ 46<br />
SECTION 2- Diving With The <strong>Pulse</strong>........................ 47<br />
Pre-Dive Checklist......................................................................... 48<br />
Automatic Activation.................................................................... 49<br />
Testing the water contact ...........................................................49<br />
No-decompression Dive Mode..................................................... 50<br />
Primary Display.......................................................................50<br />
Alternate Display 1...................................................................52<br />
3
4<br />
Alternate Display 2...................................................................54<br />
Safety Stop...............................................................................55<br />
Decompression Dive Mode .......................................................... 56<br />
Summary of Warnings and Alarms .............................................. 58<br />
FO2 Warning ..........................................................................58<br />
Fast Ascent Warning ................................................................58<br />
PO2 Warning..........................................................................59<br />
Decompression Stop Violation Warning........................................59<br />
Oxygen Bar Graph Warning......................................................60<br />
Out-of-Range Warning .............................................................60<br />
Gage Mode.................................................................................... 62<br />
Primary display .......................................................................62<br />
CARE & MAINTENANCE....................................... 64<br />
Care before the dive ...................................................................64<br />
Care during the dive .................................................................65<br />
Care after the dive ....................................................................65<br />
Changing the Battery................................................................66
<strong>Pulse</strong> Owner's <strong>Manual</strong><br />
FOR YOUR SAFETY<br />
All warnings and cautions are identified with the triangle symbol.<br />
Whenever you see a warning or a caution, read it carefully, as it may<br />
protect you from serious injury or damage to the product. Read the<br />
manual in its entirety before attempting to use the <strong>Pulse</strong> computer.<br />
WARNING: Decompression sickness (aka, “the bends”)<br />
is an inherent risk of SCUBA diving. Even if you properly<br />
follow all the instructions in this manual, and dive within<br />
the recreational limits of SCUBA diving, you still run the<br />
risk of getting decompression sickness, or some other<br />
inherent risk of SCUBA diving. Unless you are fully aware<br />
of these risks and are willing to personally accept and assume<br />
responsibility for those risks, do not use the <strong>Pulse</strong><br />
dive computer<br />
The <strong>Pulse</strong>, or any other dive computer, does not actually monitor<br />
changes that occur in your body as you dive. Rather, it is performing<br />
calculations using algorithms developed by leading decompression<br />
5
experts and backed by years of research and thousands of dives. However,<br />
these algorithms cannot account for factors like dehydration, fatigue,<br />
obesity, or poor physical conditioning. Therefore, always leave<br />
a comfortable safety margin in respect to no-decompression time and<br />
ascent speed. The computer is designed to ASSIST you in making a<br />
dive, not to CONTROL your dive.<br />
6
<strong>Pulse</strong> Owner's <strong>Manual</strong><br />
WARNING: Using the <strong>Pulse</strong> will not prevent decompression<br />
sickness, but using it sensibly reduces this risk. You<br />
must accept that there is no device or procedure that<br />
will totally prevent the possibility of a decompression<br />
accident.<br />
7
INTRODUCTION<br />
Congratulations on the purchase of your new <strong>Pulse</strong> dive computer. As<br />
with all diving equipment, it is important to understand the features<br />
and functions of the <strong>Pulse</strong>. Before using the computer, read this<br />
manual in its entirety. Contained within this manual are illustrations<br />
to aid you in understanding the computer.<br />
Section 1 instructs you on how to navigate through the <strong>Pulse</strong>’s surface<br />
modes. Section 2 describes all the underwater displays and functions<br />
while diving with the <strong>Pulse</strong>. Lastly, Section 3 covers care & maintenance.<br />
This manual will clearly and concisely instruct you on the use of the<br />
<strong>Pulse</strong>. However, if you have any questions on the material contained<br />
in this manual, please contact your nearest authorized dealer.<br />
8
<strong>Pulse</strong> Owner's <strong>Manual</strong><br />
SECTION 1<br />
Using the <strong>Pulse</strong> on the Surface<br />
9
The Push Buttons<br />
The <strong>Pulse</strong> has four buttons that allow you to access modes, change<br />
settings and switch displays. Next to each button is a label (MODE,<br />
LOCK, SELECT and SET, see Figure 1). These labels are primarily<br />
related to the various set modes, such as Time Set Mode and Dive Set<br />
Mode. However, the buttons have different functions in other modes,<br />
such as Plan Mode or Dive Mode. It is important to thoroughly read<br />
and understand the manual so you know the functions of the buttons<br />
in all situations.<br />
Figure 1.<br />
The push buttons<br />
10
<strong>Pulse</strong> Owner's <strong>Manual</strong><br />
Mode Indicators<br />
At the bottom of the LCD are six mode indicators: D.S (dive settings),<br />
PLAN (plan mode), AL (alarm settings), D.T (dual time setting)<br />
LOG (logbook), and PROF (profile). Details on accessing and<br />
entering these modes are explained later in the manual.<br />
Figure 3.<br />
Mode<br />
Indicators<br />
Dive<br />
Set<br />
Mode<br />
Plan<br />
Mode<br />
Alarm<br />
Set<br />
Mode<br />
Dual<br />
Time<br />
Set<br />
Mode<br />
Logbook<br />
Memory<br />
Profile<br />
Memory<br />
11
Time Display Mode (pre-dive)<br />
a<br />
b<br />
c<br />
e<br />
f<br />
g<br />
h<br />
d<br />
Figure 3.<br />
Time Display Mode<br />
12
<strong>Pulse</strong> Owner's <strong>Manual</strong><br />
The <strong>Pulse</strong>’s default mode is the Time Display Mode (figure 3). The<br />
computer always returns to the time display after making a dive or exiting<br />
from one of the other modes, such as Plan Mode or Log Mode.<br />
If there is no button activity for several minutes while in another<br />
mode, the computer will automatically exit back to the time display.<br />
a. Day: Day of the week:<br />
b. Date: Displayed in month-day format.<br />
c. Time of day: Displayed in 12-hour or 24-hour format. The<br />
24-hour format does not use AM and PM. For example, 15:45<br />
is the same as 3:45 PM. Selecting the 12- or 24-hour format is<br />
explained on page 21.<br />
d. Dual Time: Dual time shows the time in a different time zone.<br />
If Dual time is set the same as the current time, it will not be<br />
displayed.<br />
e. Alarm clock icon: If the alarm clock is turned on, the icon will<br />
appear.<br />
continued...<br />
13
f. Hourly alarm icon: If the <strong>Pulse</strong> is set to sound an alarm every<br />
hour, the bell icon will be displayed<br />
g. Nitrox indicator: If FO 2 for mix 1 has been set to 22% or higher,<br />
the Nitrox indicator will be displayed. See page 23 for more info<br />
on nitrox settings.<br />
14<br />
CAUTION: If the Nitrox indicator is flashing, it means that<br />
the <strong>Pulse</strong> has defaulted to 99% FO 2. You must reset the<br />
FO 2 to match the contents in your cylinder.<br />
h. Altitude sector: The <strong>Pulse</strong> automatically adjusts for altitudes<br />
up to 19,680 ft. (6000 m). The following table lists the altitude<br />
sectors and their corresponding altitude range.<br />
WARNING: When diving at altitude, make sure the altitude<br />
sector matches the actual elevation of the dive site, otherwise,<br />
the <strong>Pulse</strong> may display inaccurate information.<br />
Note: When arriving at a new altitude sector, segments on the<br />
nitrogen loading bar graph may appear, even if you have not made<br />
a dive.
<strong>Pulse</strong> Owner's <strong>Manual</strong><br />
Sector<br />
Altitude Range<br />
Sea Level to 2624 ft (800 m)<br />
2624 ft (800 m) to 5248 ft (1600 m)<br />
5248 ft (1600 m) to 7872 ft (2400 m)<br />
7872 ft (2400 m) to 19680 ft (6000 m)<br />
Error. Icons flash above 19680 ft (6000 m)<br />
15
Backlight<br />
To activate the backlight, press SET. The backlight will stay on for 3<br />
seconds.<br />
Low Battery Indicator<br />
When the battery power is too low for the computer to function<br />
properly, the <strong>Pulse</strong> displays a battery icon (see figure 4). When the<br />
battery icon is blinking, you can place<br />
the computer into Transfer Mode to<br />
download your dive profiles to a PC, but<br />
it will not enter dive mode. When the<br />
battery icon stops blinking, you cannot<br />
dive with the computer and will not be<br />
able to transfer to a personal computer.<br />
Figure 4.<br />
Low Battery Warning<br />
16
<strong>Pulse</strong> Owner's <strong>Manual</strong><br />
Time Display Mode (post-dive)<br />
After making a dive, the Time Display Mode shows additional information<br />
(figure 5):<br />
a. Nitrogen Bar Graph. The<br />
Nitrogen bar graph is a series of<br />
nine segments that graphically<br />
represent your body’s residual<br />
nitrogen. During the surface interval,<br />
the Nitrogen Bar Graph<br />
starts to recede, indicating that<br />
you are off-gassing nitrogen.<br />
b. Oxygen Bar Graph. The<br />
Oxygen Bar Graph is a series of<br />
eight segments that graphically<br />
represent your CNS clock. It<br />
tracks your exposure to higher<br />
partial pressures of oxygen<br />
when diving with enriched air nitrox.<br />
a<br />
Figure 5.<br />
Time Display - Post Dive<br />
b<br />
17
To view desaturation time and surface interval time, press SELECT<br />
(see figure 6).<br />
a. Desaturation Time: Desaturation<br />
time is the amount<br />
of time it takes to release all<br />
the residual nitrogen left<br />
in your body from previous<br />
dives. Any dive made while<br />
there is still desaturation<br />
time remaining is considered<br />
a repetitive dive.<br />
b. Surface Interval Time:<br />
Surface interval time is<br />
the amount of time since<br />
surfacing from a dive. It is<br />
displayed until desaturation<br />
time reaches zero.<br />
a<br />
Figure 6.<br />
Press SELECT to view<br />
Desaturation Time and<br />
Surface interval Time<br />
b<br />
18
<strong>Pulse</strong> Owner's <strong>Manual</strong><br />
Wait-to-fly Guidelines<br />
The Undersea and Hyperbaric Medical Society (UHMS) suggests<br />
that divers using standard air tanks and exhibiting no symptoms of<br />
decompression sickness wait 24 hours after the last dive to fly in an<br />
aircraft with a cabin pressure of 8000 feet (2438 m) or less. The two<br />
exceptions to this recommendation are:<br />
1. Less than two hours of dive time in the last 48 hours, then wait<br />
12 hours before flying.<br />
2. Following a decompression stop dive, wait at least 24 hours or, if<br />
possible, 48 hours.<br />
Both UHMS and Divers Alert Network (DAN) agree that there can<br />
never be a flying after diving rule that is guaranteed to prevent<br />
decompression sickness. Rather, there can be a guideline that represents<br />
the best estimate for a conservative surface interval for the<br />
vast majority of divers. There will always be an occasional diver whose<br />
physiological makeup or special diving circumstances will result in<br />
decompression sickness.<br />
19
Setting the Time, Date & 12/24 Hour Format<br />
ENTER/EXIT<br />
NEXT FIELD<br />
Figure 7.<br />
Tine, date, 12/24<br />
hour setting<br />
CHANGE SETTING<br />
20
<strong>Pulse</strong> Owner's <strong>Manual</strong><br />
1. To set the time and date, press LOCK. Dual Time starts to flash.<br />
2. Press SET to swap the Dual Time with the Time of Day; Press<br />
SELECT to accept the setting and move to the next field.<br />
3. The time and date are set in the following order: Seconds, minutes,<br />
hours, year, month, and day. To change the setting press<br />
SET. To accept the setting and move to the next field, press<br />
SELECT.<br />
4. After the time and date are set, the hours:minutes will start to<br />
flash. Press SET to toggle between the 12-hour and 24-hour<br />
display.<br />
5. To exit the Time Set mode, press LOCK.<br />
21
Dive Settings Mode<br />
Dive Settings Mode allows you set all the parameters related to the<br />
operation of the computer during a dive.<br />
f<br />
g<br />
ENTER/EXIT<br />
NEXT FIELD<br />
a<br />
d<br />
b<br />
e<br />
Figure 8.<br />
Dive Settings<br />
c<br />
CHANGE SETTING<br />
22
<strong>Pulse</strong> Owner's <strong>Manual</strong><br />
1. To view the Dive Settings, press MODE once so the mode<br />
indicator is above D.S. The computer will display the following<br />
information (figure 8):<br />
a. Operational Mode: If set to DIVE, the <strong>Pulse</strong> will function<br />
as a complete dive computer and calculate no-decompression,<br />
decompression and oxygen related information. If set<br />
to GAGE, the <strong>Pulse</strong> will become a basic depth gauge and<br />
timer. For more information on these modes, review Section<br />
2, Diving with the <strong>Pulse</strong>.<br />
b. Nitrox Mix 1: The FO 2 setting for Mix 1 may be set for Air<br />
(21%) to 50%.<br />
c. Nitrox Mix 2: The FO 2 setting for Mix 2 may be set for Air<br />
(21%) to 99%.<br />
d. Maximum Operating Depth (MOD): MOD is calculated<br />
automatically and is based on a PO 2 of 1.4 for Mix 1 and<br />
1.6 for Mix 2.<br />
23
e. Safety Factor (SF): The safety factor may be set to 0 or 1.<br />
When set to 0, the computer will perform calculations<br />
based on the current altitude setting. If set to 1, the calculations<br />
are made as though the computer was at one altitude<br />
sector higher. This adds in an extra level of conservatism.<br />
f. Water type: Actual depth can differ based on the salinity of<br />
the water. If you are diving in a fresh water lake or river, set<br />
the <strong>Pulse</strong> to Fresh; if diving in seawater, set it to Sea.<br />
g. Profile recording interval: The pulse can record depth<br />
measurements every 15 or 30 seconds. If set to 15, memory<br />
capacity is cut in half.<br />
2. To make changes to the settings, press LOCK.<br />
3. Press SET to change the setting; press SELECT to accept the setting<br />
and move to the next field. To exit the mode, Press LOCK.<br />
IMPORTANT NOTE:<br />
- If either mix is set to 22% or higher, the <strong>Pulse</strong> will default the FO 2<br />
for<br />
24
<strong>Pulse</strong> Owner's <strong>Manual</strong><br />
that mix to 99% at midnight; if either mix is set to Air, it will stay set<br />
to Air indefinitely.<br />
- If mix 1 defaults to a 99% FO 2<br />
, it will be denoted by the flashing<br />
Nitrox label . This 99% default is built in to protect you from making<br />
subsequent nitrox dives with the wrong FO 2<br />
setting. If you make a dive<br />
with the FO 2<br />
set to 99%, an audible alarm will sound upon entering<br />
the water. Return to the surface and reset the FO 2<br />
to the proper percentage.<br />
If you continue the dive, you will reach the PO 2<br />
limit at about<br />
20 feet (6 m). Again, return to the surface and reset the FO 2<br />
to the<br />
proper percentage.<br />
- If Mix 1 defaults to 99%, the no-decompression and decompression<br />
calculations will be calculated as though you were diving with normal<br />
air (79% nitrogen). Therefore, the <strong>Pulse</strong> calculates a worst-case scenario<br />
(99% Oxygen, 79% Nitrogen). At worst, the computer will be more<br />
conservative on subsequent dives.<br />
- If only Mix 2 defaults to 99% (Mix 1 set to Air), you will only get an<br />
audible warning when entering the water. Upon hearing the warning,<br />
return to the surface and reset the Mix.<br />
25
Plan Mode/Plan Simulator<br />
Plan Mode allows you to review the no-decompression time limits at<br />
various depths for the next dive.<br />
e<br />
b<br />
PLAN SIMULATOR*<br />
*Only available<br />
between repetitive<br />
dives<br />
NEXT DEPTH<br />
a<br />
Figure 9.<br />
Plan Mode<br />
d<br />
c<br />
PREVIOUS DEPTH<br />
26
<strong>Pulse</strong> Owner's <strong>Manual</strong><br />
1. To enter Plan Mode, press the MODE button twice so the mode<br />
indicator is above PLAN. Once in Plan Mode, the computer will<br />
display the following information (figure 9):<br />
a. Plan Depth. The computer will display the plan depths in<br />
3m/10 ft., increments starting at 9m/30 ft.<br />
b. No-decompression limit (NDL). This is the maximum<br />
amount of time you can stay at the given depth before requiring<br />
mandatory decompression stops. If you set Mix 1 to<br />
22% or higher and you exceed your Maximum operating<br />
Depth (MOD), three dashes (- - -) will be displayed.<br />
c. Nitrox Mix 1. You need to make sure the FO 2<br />
accurately<br />
matches the actual breathing gas in your cylinder. (See<br />
“Dive Settings Mode” on page 22).<br />
d. Safety Factor (SF)<br />
e. Water type<br />
27
2. To scroll through the time/depth combinations, press SELECT<br />
to go deeper or press SET to go shallower. Note that there is a<br />
short delay between the appearance of the next depth and the<br />
display of the NDL time.<br />
3. To exit Plan Mode, Press MODE. To switch to Plan Simulator,<br />
press LOCK. (Note: Plan Simulator is only available between<br />
repetitive dives with a minimum 10 minute surface interval).<br />
Plan Simulator<br />
The Plan Simulator is only available between dives, not before the<br />
first dive. Plan Simulator allows you to enter addition surface interval<br />
time to your current interval time and lets you see no-decompression<br />
times out in the future. In addition, the Plan Simulator will display<br />
the PO 2 for each depth.<br />
1. While in Plan Mode, press LOCK. Surface time (a) and PO 2 (b)<br />
will appear (figure 10).<br />
2. Press SELECT to add surface interval time in 30 minute increments.<br />
28
<strong>Pulse</strong> Owner's <strong>Manual</strong><br />
3. Press SET to change depths. For each depth the <strong>Pulse</strong> will display<br />
the no decompression lime and PO 2.<br />
4. To exit back to Plan Mode, press LOCK.<br />
PLAN MODE<br />
ADD SURF TIME<br />
a<br />
b<br />
Figure 10.<br />
Plan Simulator<br />
NEXT DEPTH<br />
29
Setting Alarms<br />
The <strong>Pulse</strong> has an alarm clock and an hourly alarm . The alarm<br />
clock goes off at a time that you set; the hourly alarm goes off at the<br />
top of every hour.<br />
Turning Alarms on and off<br />
1. Press the MODE button three times so the mode indicator<br />
is above AL. The alarm setting is displayed along with<br />
the two alarm icons (if active).<br />
2. If the alarm setting is OK<br />
and all you want to do<br />
is turn the alarms on or<br />
off, press SELECT. Continue<br />
to press SELECT<br />
until one or both the<br />
icon displays are visible.<br />
ALARMS ON/OFF<br />
Figure 11.<br />
Alarms on/off<br />
30
<strong>Pulse</strong> Owner's <strong>Manual</strong><br />
Alarm Clock Setting<br />
3. To change the alarm setting, press LOCK. The hours start to<br />
flash. Press SET to change. Press SELECT to accept the setting<br />
and move to minutes.<br />
ENTER/EXIT<br />
4. To exit,<br />
press LOCK<br />
NEXT FIELD<br />
Figure 12.<br />
Setting alarm clock<br />
CHANGE SETTING<br />
31
Setting Dual Time<br />
ENTER/EXIT - 30 MINS.<br />
+ 30 MINS.<br />
32<br />
Figure 13.<br />
Setting Dual Time
<strong>Pulse</strong> Owner's <strong>Manual</strong><br />
Dual Time shows the time in a different time zone, a handy feature<br />
when travelling. If Dual Time matches current time, it will not be<br />
displayed.<br />
1. Press the MODE button four times so the mode indicator is over<br />
D.T.<br />
2. Press LOCK. Dual time starts to flash.<br />
3. Press SET to lower the time in 30 minute increments; press SE-<br />
LECT to increase the time. Dual Time can be set 24 hours ahead<br />
or behind, and the date will change accordingly.<br />
4. Press LOCK to exit the setting mode.<br />
33
Logbook Mode<br />
The <strong>Pulse</strong> logs any dive that is at least 1.5m/5 ft., and has a dive time<br />
of at least three minutes. The <strong>Pulse</strong>'s memory capacity is 30-hours or<br />
60 logged dives if the sampling rate is set to 30 seconds. If the sampling<br />
rate is set to 15 seconds, the logbook capacity is cut in half to 15<br />
hours or 30 logged dives.<br />
When the memory is full, the newest dives will overwrite the oldest<br />
dives. The memory stays intact indefinitely, even after a battery<br />
change. It is strongly recommended, however, that you download all<br />
your dives and/or enter them into your logbook before changing the<br />
battery.<br />
The <strong>Pulse</strong> logs more information than can be displayed on a single<br />
screen; therefore, the logbook displays three "pages" of information<br />
for each dive.<br />
34
<strong>Pulse</strong> Owner's <strong>Manual</strong><br />
1. Press the MODE button five times so the mode indicator is over<br />
LOG. Page 1 of the most recent dive is displayed.<br />
2. Press SET to go to page 2<br />
3. Press SET again to page 3 or press SELECT to go back to page 1<br />
4. If on page 3, press SET to go to the first page of the next dive.<br />
If on page 1, press SELECT to go to page 3 of the previous dive.<br />
Press and hold SET or SELECT to quick move forward or backward<br />
through the logbook.<br />
5. To view the profile of the dive, press MODE (Profile Mode is<br />
explained in the next section).<br />
Logbook Page 1 (see figure 14)<br />
a. Log Number: This is the sequential number of the dive relative<br />
to all the other dives in memory. The higher the number, the<br />
newer the dive, i.e., dive 1 is the oldest dive in memory.<br />
b. Page Number: The page is displayed as 1/3. (1 of 3), 2/3 (2 of<br />
3), and 3/3 (3 of 3).<br />
35
Figure 14.<br />
Logbook Page 1<br />
h<br />
i<br />
b<br />
j<br />
PREVIOUS PAGE<br />
a<br />
c<br />
e<br />
d<br />
36<br />
VIEW PROFILE<br />
g<br />
f<br />
l<br />
k<br />
NEXT PAGE
<strong>Pulse</strong> Owner's <strong>Manual</strong><br />
c. Date: The date the dive started.<br />
d. Dive number: The number of the dive made that day.<br />
e. Start time: The time of day that the dive started.<br />
f. End time: The time of day that the dive ended.<br />
g. NITROX indicator: If the FO 2<br />
was set to 22% or higher, the computer<br />
records that it was a nitrox dive.<br />
h. Residual nitrogen: The residual nitrogen at the end of the dive.<br />
This is not displayed if it was a Gage Mode dive.<br />
i. Water type: The water type setting when the dive was made.<br />
j. Oxygen level: The oxygen level at the end of the dive.<br />
k. Mix indicator: Denotes if one or both mixes were used during<br />
the dive.<br />
l. Altitude Sector: The altitude sector when the dive started.<br />
37
Recorded violations (not shown)<br />
a. Decompression: If a decompression dive was made, the DE-<br />
COSTOP label will be displayed; if the decompression stop was<br />
violated, the DECOSTOP label will flash.<br />
b, Fast ascent: If the ascent rate was violated, the SLOW label will<br />
flash.<br />
c. PO 2 violation: If you exceed the maximum operating depth for<br />
either mix, the PO 2 label will flash.<br />
d. Out of range: If a dive was made that exceeded the depth limit<br />
or at an altitude over 6000m/19,685 ft., the entire display will<br />
flash.<br />
Logbook Page 2 (see figure 15)<br />
a. Dive time: This is the total time spent below 1.5m/5 ft.<br />
b. Average depth: The average depth of the dive.<br />
c. Water temperature: The lowest temperature recorded during<br />
the dive.<br />
38
<strong>Pulse</strong> Owner's <strong>Manual</strong><br />
Figure 15.<br />
Logbook Page 2<br />
PREVIOUS PAGE<br />
b<br />
a<br />
VIEW PROFILE<br />
NEXT PAGE<br />
c<br />
39
Logbook Page 3 (see figure 16)<br />
a. Maximum depth: The deepest depth reached during the dive<br />
b. Safety factor setting: The safety factor setting when dive was<br />
made<br />
c. Mix 1: The FO2 setting for Mix 1 when dive was made.<br />
d. Mix 2: The FO2 setting for Mix 2 when dive was made.<br />
40
<strong>Pulse</strong> Owner's <strong>Manual</strong><br />
Figure 16.<br />
Logbook Page 2<br />
PREVIOUS PAGE<br />
a<br />
c<br />
VIEW PROFILE<br />
b<br />
d<br />
NEXT PAGE<br />
41
Profile Mode<br />
In addition to the basic logbook data, the <strong>Pulse</strong> also records the dive<br />
depth every 15 or 30 seconds (see Dive Mode Settings on page 22). The<br />
Profile Mode plays back the profile so you can manually plot the dive<br />
profile. This profile information is also downloadable to a PC.<br />
1a. To view the most recent dive profile, press the MODE button six<br />
times so the mode indicator is over PROF.<br />
42<br />
- or -<br />
1b. To view the profile of a particular dive, go into Log Mode, scroll<br />
to the dive you want to profile, then press MODE.<br />
2. The <strong>Pulse</strong> will automatically start scrolling through the profile.<br />
To pause the profile, press and hold SET.<br />
3. To go to a previous dive, press SELECT<br />
4. To exit Profile Mode, press MODE.<br />
In Profile Mode, the <strong>Pulse</strong> displays the following information:
<strong>Pulse</strong> Owner's <strong>Manual</strong><br />
PC TRANSFER<br />
BACK 1 DIVE<br />
a<br />
b<br />
c<br />
EXIT MODE<br />
Figure 17.<br />
Profile Mode<br />
d<br />
PAUSE<br />
43
a. Profile number: This is the sequential number of the dive in<br />
memory.<br />
b. Dive time: This is the minute display during the dive. If the<br />
profile recording was set to 30 seconds, you will see two depth<br />
readings for each minute; if set to 15 seconds, you will see four<br />
depth readings per minute.<br />
c. Depth: The depth where the sampling occurred.<br />
d. Mix: The mix setting used at that point during the dive<br />
Transfer Data Mode<br />
You can download the logbook and profile data to a personal computer<br />
using the optional PC interface kit.<br />
1. Go into Profile Mode as explained in the previous section.<br />
2. Press LOCK to start the Transfer Data Mode<br />
3. At this point, you can attach the computer to the interface and<br />
upload your data to the PC.<br />
44
<strong>Pulse</strong> Owner's <strong>Manual</strong><br />
4. To exit this mode and return to Profile Mode, press LOCK.<br />
WARNING: The <strong>Pulse</strong> cannot enter Dive Mode while in<br />
Transfer Data Mode. You must exit Transfer Data Mode<br />
before attempting to dive. Otherwise, the computer will<br />
not perform any nitrogen or oxygen calculations, which<br />
may lead to serious injury or death.<br />
Figure 18.<br />
Transfer Data Mode<br />
45
Change Units of Measure<br />
The <strong>Pulse</strong> allows you to change the units of measure from Imperial<br />
(feet, °F) to Metric (meters, °C), or vice versa.<br />
1. Press MODE twice so the mode indicator is over PLAN.<br />
2. Press and hold LOCK for 5 to 6 seconds. An audible alarm will<br />
sound and the depth display will switch to the new metric or<br />
imperial setting.<br />
46
<strong>Pulse</strong> Owner's <strong>Manual</strong><br />
Section 2<br />
DIVING WITH THE PULSE<br />
WARNING: Never use the <strong>Pulse</strong> unless it has been with<br />
you since the first dive. Using a “clean” computer (no<br />
residual nitrogen) after you have already made a dive(s)<br />
may result in the computer allowing you more no-decompression<br />
time than you really have. In addition, never<br />
share or swap computers. Any of these practices may<br />
result in decompression sickness.<br />
47
Pre-Dive Checklist<br />
Before making a dive, it is important that you make sure you go<br />
through the following checklist:<br />
1. Make sure the time and date is set correctly. Remember, the<br />
<strong>Pulse</strong> records the time and date of each dive into memory.<br />
2. Check the Altitude sector and make sure it matches the altitude<br />
of the dive site.<br />
3. Go into Dive Settings Mode (page 22) and make sure all the parameters<br />
are set correctly, including the water type, safety factor,<br />
profile recording interval, and FO 2<br />
settings for mix 1 & mix 2.<br />
4. Go to Plan Mode (see page 26) and review your no-decompression<br />
time limits.<br />
5. GO DIVING.<br />
48
<strong>Pulse</strong> Owner's <strong>Manual</strong><br />
Automatic Activation<br />
On the right side of the <strong>Pulse</strong>, between the<br />
SELECT and SET buttons, is a water contact (see<br />
figure 19). When the water contact is submerged<br />
in water, the computer automatically enters Dive<br />
Mode.<br />
Testing the water contact<br />
You can test this feature by wetting your finger and<br />
touching the water contact. The computer should<br />
enter Dive Mode and display a 0 depth reading.<br />
If the computer doesn't go into dive mode, it is<br />
possible that the contact needs to be cleaned. You<br />
can clean the contact with warm, soapy water and a<br />
soft-bristle brush.<br />
Figure 19.<br />
Water Contact<br />
49
No-decompression Dive Mode<br />
The <strong>Pulse</strong> has a primary dive display and two alternate displays that<br />
you can access with a press of a button (see figure 20).<br />
1. To switch displays, press MODE or SELECT.<br />
2. To activate the backlight, press SET.<br />
3. To switch mixes, press and hold LOCK for two seconds.<br />
Primary Display<br />
a. Current Depth: How deep you are at any moment during the<br />
dive<br />
b. No-decompression limit (NDL): The amount of time you can<br />
stay at the current depth before requiring mandatory decompression<br />
stops.<br />
c. Dive Time: How long you have been below 5 feet (1.5 meters).<br />
d. PO 2: The calculated PO2 based on depth and FO2.<br />
50
<strong>Pulse</strong> Owner's <strong>Manual</strong><br />
*Depress for two seconds<br />
SWITCH MIX*<br />
b<br />
h<br />
ALT DISPLAY 1<br />
g<br />
c<br />
a<br />
e<br />
ALT DISPLAY 2<br />
f<br />
d<br />
Figure 20.<br />
Dive Mode -<br />
Primary Display<br />
BACKLIGHT<br />
51
e. MIX indicator: Which mix is currently being used.<br />
f. Nitrox symbol: Only displayed if FO 2<br />
is set to 22% or higher.<br />
Does not appear if set to Air.<br />
g. Nitrogen Bar Graph: Graphically shows your body absorbing<br />
and eliminating Nitrogen. The bar graph has nine rectangular<br />
segments. When the last segment appears, you have gone<br />
beyond the no-decompression limit and now require mandatory<br />
decompression stops.<br />
h. Oxygen Bar Graph: Graphically shows your exposure to an<br />
elevated partial pressure of Oxygen (PO 2<br />
). The bar graph has<br />
eight circular segments. When the eighth segment appears, you<br />
have reached 100% of the CNS clock.<br />
Alternate Display 1<br />
Pressing the SELECT button shows the first alternate display (figure<br />
21):<br />
a. Maximum depth: The deepest depth reached during the dive.<br />
52
<strong>Pulse</strong> Owner's <strong>Manual</strong><br />
b. Temperature: The actual water temperature at that time. Since<br />
the temperature sensor is inside the computer, it may take a few<br />
minutes before you get an accurate reading.<br />
a<br />
b<br />
Figure 21.<br />
Dive Mode -<br />
Alternate Display 1<br />
53
Alternate Display 2<br />
Pressing the MODE button shows the second alternate display (figure<br />
22)<br />
a. Time of day<br />
b. FO 2: The FO 2 setting of the mix currently in use.<br />
a<br />
Figure 21.<br />
Dive Mode -<br />
Alternate Display 1<br />
b<br />
54
<strong>Pulse</strong> Owner's <strong>Manual</strong><br />
Safety Stop<br />
Whenever you make a dive deeper than 10m/33ft., the ascend above<br />
6m/20 ft., the <strong>Pulse</strong> will display a three minute safety stop countdown<br />
(figure 22).<br />
a. Safety stop time: Safety<br />
stop time is shown in min:<br />
sec. It starts at 3:00 and<br />
counts down to 0:00. If you<br />
descend below 6m/20ft., the<br />
countdown is paused until<br />
you ascend to 6m/20ft. If you<br />
descend below 10m/33ft.,<br />
the safety stop will reset to 3:<br />
00 when you return to 6m/20<br />
ft.<br />
b. Safety stop indicator: Alerts<br />
you to perform the safety<br />
stop.<br />
a<br />
b<br />
Figure 22.<br />
Dive Mode - Alternate Display 1<br />
55
Decompression Dive Mode<br />
If you exceed the no-decompression time limit, you will be required<br />
to make mandatory decompression stops. The computer will<br />
automatically switch from No-Decompression Dive Mode to Decompression<br />
Dive Mode. In Decompression Dive Mode, the <strong>Pulse</strong> displays<br />
the following information (figure 23):<br />
a. Decompression indicator: This denotes that the computer is in<br />
Decompression Dive Mode<br />
b. Stop depth: This is the shallowest depth to which you can ascend.<br />
DO NOT ascend above this depth until the computer displays<br />
the next shallower decompression stop, or the computer<br />
returns to No-Decompression Dive Mode.<br />
c. Stop time: This is the amount of time you need to spend at the<br />
decompression stop.<br />
d. Total ascent time: This is the total amount of time required at<br />
all the decompression stops, plus the time it takes to ascend to<br />
all the stops.<br />
56
<strong>Pulse</strong> Owner's <strong>Manual</strong><br />
a<br />
c<br />
b<br />
d<br />
Figure 23.<br />
Decompression Dive<br />
Mode<br />
57
Summary of Warnings and Alarms<br />
FO 2<br />
Warning<br />
If you enter the water when the computer has defaulted to a 99%<br />
FO 2<br />
, the computer will sound an audible alarm. Immediately surface<br />
and set the FO 2<br />
to the proper Oxygen percentage.<br />
Fast Ascent Warning<br />
The <strong>Pulse</strong> uses a variable ascent rate. The fastest allowable rate of<br />
ascent is dependent upon the depth. The table below shows the three<br />
depth ranges and the fastest ascent allowed in each range:<br />
Depth Range<br />
Fastest Allowable Ascent Rate<br />
0-20 ft (0-5.9 m) 26 ft (8m) per minute<br />
21 to 59 ft (6 to 17.9 m) 39 ft (12m) per minute<br />
60 ft (18m) or deeper 52 ft (16m) per minute.<br />
58
<strong>Pulse</strong> Owner's <strong>Manual</strong><br />
If you exceed the fastest allowable ascent rate, the <strong>Pulse</strong> flashes the<br />
SLOW symbol, sounds an audible alarm, and flashes the current<br />
depth. The warning will remain in effect until you slow your ascent or<br />
go shallower than 5 feet (1.5m).<br />
PO 2<br />
Warning<br />
When Mix 1 reaches 1.4, the computer will sound a 3-second alarm<br />
twice and flash the PO2 indicator, PO2, and depth. If Mix 1 or Mix 2<br />
reaches 1.6, the OLI graph will also flash. The alarm will continue to<br />
flash until you ascend to a safer, shallower depth.<br />
NOTE: If the PO 2<br />
warning activates at 20 feet, you forgot to reset<br />
the FO 2<br />
and the computer is using the 99% default.<br />
Decompression Stop Violation Warning<br />
If you ascend shallower than the required decompression stop, the<br />
<strong>Pulse</strong> will alert you by flashing the DECO label, current depth, deco<br />
stop depth, and deco stop time. This warning will remain in effect<br />
59
until you descend to, or slightly deeper than, the decompression stop<br />
depth.<br />
If you ignore the decompression stop and surface, the computer will<br />
lock out for 48 hours, five minutes after surfacing.<br />
Oxygen Bar Graph Warning<br />
When the next to last segment appears, the <strong>Pulse</strong> sounds an audible<br />
alarm for 3 seconds and flashes the bar graph for 10 seconds. When<br />
the last segment appears, the audible alarm will sound for three<br />
seconds, but the entire bar graph will flash until you ascend to a shallower<br />
depth and the bar graph reduces to seven segments.<br />
Out-of-Range Warning<br />
The out-of-range warning only occurs when you take the <strong>Pulse</strong> to<br />
extreme depths and/or time limits. To activate the out-of-range warning,<br />
you must exceed one of the following limits:<br />
60
<strong>Pulse</strong> Owner's <strong>Manual</strong><br />
1. Maximum depth limit of 100m/328 ft.<br />
2. Dive time limit of 599 minutes.<br />
3. Deepest decompression stop of 27m/90 ft.<br />
4. Decompression stop time of 99 minutes<br />
5. Total ascent time of 999 minutes<br />
In the extremely unlikely event that you exceed one of the limits<br />
listed above, the computer will sound an alarm for ten seconds, replace<br />
the center display with dashes, and flash the entire display. The<br />
computer cannot be used for 48 hours after an out-of-range warning.<br />
61
Gage Mode<br />
If the <strong>Pulse</strong> is set to Gage Mode (see Dive Settings on page 22), the<br />
computer as a basic depth gauge and dive timer. It does not calculate<br />
no-decompression, decompression, or oxygen information. If you<br />
make a dive while in Gage Mode, you must wait 48 hours until you<br />
can use Dive Mode.<br />
Gauge Mode, like Dive Mode, has a primary display and two alternate<br />
displays. To switch displays, press MODE or SELECT. To activate the<br />
backlight, press SET.<br />
Primary display<br />
a. GAGE Mode indicator: Alerts you that the <strong>Pulse</strong> is in Gage<br />
Mode.<br />
b. Current Depth: How deep you are at any moment during the<br />
dive<br />
c. Dive Time: The amount of time below 1.5m/5 ft.<br />
62
<strong>Pulse</strong> Owner's <strong>Manual</strong><br />
a<br />
ALT DISPLAY 1<br />
b<br />
c<br />
ALT DISPLAY 2<br />
Figure 24.<br />
Gage Mode<br />
BACKLIGHT<br />
63
CARE & MAINTENANCE<br />
The <strong>Pulse</strong> is a tough and durable instrument, but it still needs to be<br />
protected from excessive shock, extreme heat, chemical attack, and<br />
tampering.<br />
CAUTION: Do not store the <strong>Pulse</strong> near chemicals, such<br />
as gasoline. Do not use silicone sprays or any other type<br />
of propellants near the <strong>Pulse</strong>. Do not clean the computer<br />
with alcohol or any other solvents. Exposing the <strong>Pulse</strong> to<br />
chemicals and solvents may damage the lens and case.<br />
Care before the dive<br />
The <strong>Pulse</strong> can withstand the normal bumps associated with SCUBA<br />
diving, however, it cannot withstand the impact of heavy objects, such<br />
as a weight belt or SCUBA cylinder. Do not leave it exposed where<br />
someone could accidentally step on it or drop something on it.<br />
64
<strong>Pulse</strong> Owner's <strong>Manual</strong><br />
Care during the dive<br />
Because the <strong>Pulse</strong> is worn on the wrist, you must be careful when<br />
reaching into rocky holes and crevices to avoid scratching the<br />
computer. You may want to consider purchasing a third-party watch<br />
protector.<br />
Care after the dive<br />
Soak the <strong>Pulse</strong> in a warm, fresh water bath to dissolve salt crystals.<br />
Rinse thoroughly with fresh water and towel dry before final storage.<br />
Store the computer in a cool, dry and protected place. Do not store<br />
the computer in a wet or humid environment. Doing so may cause<br />
the unit to go into dive mode and prematurely drain the battery.<br />
65
Changing the Battery<br />
IMPORTANT NOTE: The <strong>Pulse</strong> will not lose its logbook memory<br />
when the battery is replaced; however, it is recommended that<br />
you record all your logbook information and upload the data to<br />
your PC (if you have the optional PC interface kit) before changing<br />
the battery.<br />
Whenever you see the low battery symbol, you should change the<br />
battery right away. The battery should be changed by an authorized<br />
dealer who has the proper equipment to perform the battery change<br />
an pressure test the computer.<br />
66
<strong>Pulse</strong> Owner's <strong>Manual</strong><br />
67
PULSE User's Guide, Copyright 2003<br />
<strong>Apeks</strong> Marine Equipment, Ltd.<br />
Neptune Way, Blackburn, Lancashire, England<br />
Tel. +44 (0) 1254 69220 Fax: +44 (0) 1254 692211<br />
E-mail: info@apeks.co.uk Website: www.apeks.co.uk