Accucraft Cab Forward (AC-12) Upgrade: Cross head and guide ...
Accucraft Cab Forward (AC-12) Upgrade: Cross head and guide ...
Accucraft Cab Forward (AC-12) Upgrade: Cross head and guide ...

Create successful ePaper yourself
Turn your PDF publications into a flip-book with our unique Google optimized e-Paper software.
<strong>Accucraft</strong> <strong>Cab</strong> <strong>Forward</strong> (<strong>AC</strong>-<strong>12</strong>) <strong>Upgrade</strong>: <strong>Cross</strong> <strong>head</strong> <strong>and</strong> <strong>guide</strong><br />
Thanks to the work of Gordon Watson, Ryan Bednarik <strong>and</strong> Jeff Redeker; this DYI sheet<br />
can help owners of the <strong>Accucraft</strong> <strong>AC</strong>-<strong>12</strong> upgrade their fine steam locomotives in areas<br />
that can improve performance <strong>and</strong>/or prevent premature failures.<br />
There are several mechanical <strong>and</strong> structural areas on the <strong>Accucraft</strong> <strong>Cab</strong> <strong>Forward</strong> that<br />
could be improved. These improvements would be necessary for the betterment of<br />
running characteristics, overall functioning <strong>and</strong> preventative of premature wear <strong>and</strong><br />
tear. Based on this premise we offer a series of key areas that will enhance your <strong>AC</strong>-<strong>12</strong><br />
for the long term: cross <strong>head</strong> <strong>and</strong> <strong>guide</strong>, rear engine flex joint, combination levers <strong>and</strong><br />
suspension.<br />
The main reason for upgrading the cross <strong>head</strong> is to correct the excess play in the<br />
cross<strong>head</strong>-main rod connection <strong>and</strong> the lateral play that ensues.<br />
Part One: Disassembly (rear engine)<br />
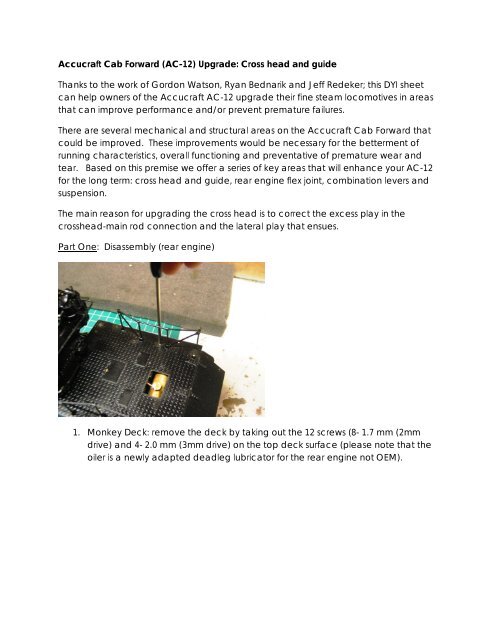
1. Monkey Deck: remove the deck by taking out the <strong>12</strong> screws (8- 1.7 mm (2mm<br />
drive) <strong>and</strong> 4- 2.0 mm (3mm drive) on the top deck surface (please note that the<br />
oiler is a newly adapted deadleg lubricator for the rear engine not OEM).
2. Monkey Deck off: access to the rear engine exhaust line (blue flex line with<br />
protective metal sleeve) to disconnect. Note: this photo shows new<br />
replacement parts (not OEM). The upgraded parts shown are the deadleg<br />
lubricator <strong>and</strong> the mechanical flex joint.<br />
3. Access underside: tape the steam turret hatches shut <strong>and</strong> then turn the engine<br />
over. Then disconnect the flexible lines (Water delivery, Gas delivery <strong>and</strong> Water<br />
return) at the pivot point in the middle of the engine (Between the front <strong>and</strong> rear<br />
engine) <strong>and</strong> label for easy re-connection.
4. Pivot point: there are 10 screws on the pivot (3mm drive, 2mm thread), remove<br />
the outer Six, then the large inner pivot screw (silver), <strong>and</strong> finally remove the four<br />
inner screws. Remove the plate; slide the inner pivot point backwards to reveal<br />
the U-joint for the reverser.<br />
5. Reversing coupling: there are two set screws (1.5 mm allen size). Either one can<br />
be loosen allowing the rod to be disconnected from the collar. DO NOT remove<br />
the set screw(s).
6. Rear engine: there are 4 screws (1.7 mm) that hold the engine in place. Two<br />
screws on each side.<br />
7. Dummy piping: Disconnect the dummy piping at the flex line(rubber) prior to<br />
removal of engine.<br />
8. Rear engine: Off the main frame <strong>and</strong> detached from the support saddle.