Front Suspension
Front Suspension
Front Suspension

You also want an ePaper? Increase the reach of your titles
YUMPU automatically turns print PDFs into web optimized ePapers that Google loves.
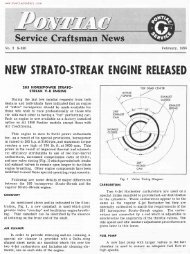
3-10 1955 PONTIAC SHOP MANUAL<br />
be removed. Lower car until it touches top of car<br />
stand. Remove wheel.<br />
2. Remove shock absorber (page 3-7).<br />
3. Disconnect lower end of stabilizer link at lower<br />
control arm.<br />
4. Remove lower pivot pin nut and pin from bushing.<br />
S. Raise the car slowly with chain hoist and remove<br />
coil spring.<br />
6. When installing spring, have car elevated on<br />
chain hoist and place bottom of spring in seat on<br />
lower control arm. Top of spring may be identified<br />
since it is flat and bottom is not. End of coil at bottom<br />
of spring must index with hole provided in spring<br />
seat in lower control arm.<br />
7. Lower chain hoist gradually, checking to see<br />
that spring is correctly seated top and bottom.<br />
8. Install lower pivot pin and nut (see page 3-9)<br />
and connect stabilizer link.<br />
9. Install shock absorber (page 3-7).<br />
10. Lubricate pivot pin, install front wheel, lower<br />
car and check wheel alignment. NOTE: Wheel alignment<br />
must be checked since replacement of front<br />
springs will usually affect jounce space and, therefore,<br />
wheel alignment.<br />
FLOOR JACK METHOD<br />
l. Raise front end of car with jack until wheels are<br />
about 10" above floor and place car stand under<br />
frame side member on each side of car forward of<br />
front door hinge pillar so car will be firmly supported.<br />
2. Place car stand under lower control arm of<br />
spring which is not to be replaced. The two stands<br />
under the frame are almost at car center of balance<br />
so car will asume a horizontal position on the two<br />
stands when jack is removed unless the extra stand is<br />
placed under control arm to keep car front end elevated.<br />
3. Place floor jack under lower control arm spring<br />
seat from which spring is to be removed and raise<br />
jack until it touches spring seat.<br />
4. Remove wheel on side of car where spring is to<br />
be removed.<br />
5. Remove shock absorber (page 3-7).<br />
6. Disconnect lower end of stabilizer link at lower<br />
control arm.<br />
7. Remove lower pivot pin nut and pin from bushing.<br />
8. Slowly lower jack until coil spring is fully extended<br />
and remove spring.<br />
9. To install spring have jack pad under spring<br />
seat and place spring in seat on lower control arm<br />
with end of coil at bottom of spring indexing with<br />
hole in spring seat. Top of spring may be easily identified<br />
since it is flat and bottom of spring is not.<br />
10. Raise jack gradually, checking to see that<br />
spring is correctly seated top and bottom.<br />
11. Install lower pivot pin and nut (page 3-9) and<br />
connect stabilizer bar to lower control arm.<br />
12. Install shock absorber (page 3-7).<br />
13. Lubricate pivot pin, install front wheel, lower<br />
car and check wheel alignment. NOTE: Wheel alignment<br />
must be checked since replacement of front<br />
springs will usually affect jounce space and, therefore,<br />
wheel alignment.<br />
LOWER CONTROL ARM AND SHAFT<br />
REMOVE AND REPLACE<br />
NOTE: See Note under heading "Lower Pivot<br />
Pin and Bushing-Remove and Replace".<br />
l. Follow procedure for removing front spring as<br />
outlined on page 3-9.<br />
2. Remove four nuts and lockwashers holding lower<br />
control arm shaft to frame cross member and remove<br />
control arm and shaft assembly.<br />
3. Remove shaft from control arm by removing<br />
front and rear threaded bushings from shaft and control<br />
arm.<br />
4. When installing a new lower control arm, it is<br />
necessary to cut a thread for the bushing in extruded<br />
portion of arm. The shaft bushing has threads on inside<br />
and outside so that as the bushing threads onto<br />
the pivot shaft, the outside thread on bushing cuts its<br />
own thread in lower control arm. To install pivot<br />
shaft in new arm proceed as follows:<br />
a. Place tool J-1052 in position and expand until<br />
distance between inner faces of arms is 11%" (Fig.<br />
3-17 and 3-18).<br />
b. Place pivot shaft with rubber seals in position<br />
in control arm.<br />
c. After lubricating pivot shaft threads with chassis<br />
lubricant, start bushing on pivot shaft and into<br />
arm at same time. Tighten until bushing flange is<br />
firmly seated against metal of control arm (385-4SS<br />
lb. ft. torque).<br />
www.PontiacSafari.com