Installation, Operation & Maintenance Manual - Corken
Installation, Operation & Maintenance Manual - Corken
Installation, Operation & Maintenance Manual - Corken

Create successful ePaper yourself
Turn your PDF publications into a flip-book with our unique Google optimized e-Paper software.
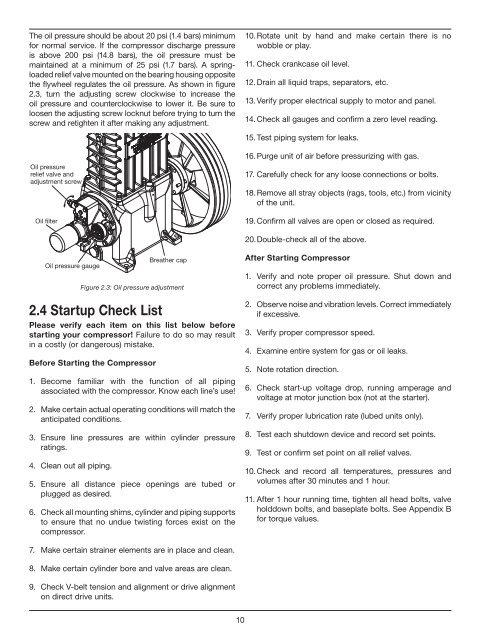
The oil pressure should be about 20 psi (1.4 bars) minimum<br />
for normal service. If the compressor discharge pressure<br />
is above 200 psi (14.8 bars), the oil pressure must be<br />
maintained at a minimum of 25 psi (1.7 bars). A springloaded<br />
relief valve mounted on the bearing housing opposite<br />
the flywheel regulates the oil pressure. As shown in figure<br />
2.3, turn the adjusting screw clockwise to increase the<br />
oil pressure and counterclockwise to lower it. Be sure to<br />
loosen the adjusting screw locknut before trying to turn the<br />
screw and retighten it after making any adjustment.<br />
Oil pressure<br />
relief valve and<br />
adjustment screw<br />
Oil filter<br />
10. Rotate unit by hand and make certain there is no<br />
wobble or play.<br />
11. Check crankcase oil level.<br />
12. Drain all liquid traps, separators, etc.<br />
13. Verify proper electrical supply to motor and panel.<br />
14. Check all gauges and confirm a zero level reading.<br />
15. Test piping system for leaks.<br />
16. Purge unit of air before pressurizing with gas.<br />
17. Carefully check for any loose connections or bolts.<br />
18. Remove all stray objects (rags, tools, etc.) from vicinity<br />
of the unit.<br />
19. Confirm all valves are open or closed as required.<br />
20. Double-check all of the above.<br />
Oil pressure gauge<br />
Breather cap<br />
Figure 2.3: Oil pressure adjustment<br />
2.4 Startup Check List<br />
Please verify each item on this list below before<br />
starting your compressor! Failure to do so may result<br />
in a costly (or dangerous) mistake.<br />
Before Starting the Compressor<br />
1. Become familiar with the function of all piping<br />
associated with the compressor. Know each line’s use!<br />
2. Make certain actual operating conditions will match the<br />
anticipated conditions.<br />
3. Ensure line pressures are within cylinder pressure<br />
ratings.<br />
4. Clean out all piping.<br />
5. Ensure all distance piece openings are tubed or<br />
plugged as desired.<br />
6. Check all mounting shims, cylinder and piping supports<br />
to ensure that no undue twisting forces exist on the<br />
compressor.<br />
After Starting Compressor<br />
1. Verify and note proper oil pressure. Shut down and<br />
correct any problems immediately.<br />
2. Observe noise and vibration levels. Correct immediately<br />
if excessive.<br />
3. Verify proper compressor speed.<br />
4. Examine entire system for gas or oil leaks.<br />
5. Note rotation direction.<br />
6. Check start-up voltage drop, running amperage and<br />
voltage at motor junction box (not at the starter).<br />
7. Verify proper lubrication rate (lubed units only).<br />
8. Test each shutdown device and record set points.<br />
9. Test or confirm set point on all relief valves.<br />
10. Check and record all temperatures, pressures and<br />
volumes after 30 minutes and 1 hour.<br />
11. After 1 hour running time, tighten all head bolts, valve<br />
holddown bolts, and baseplate bolts. See Appendix B<br />
for torque values.<br />
7. Make certain strainer elements are in place and clean.<br />
8. Make certain cylinder bore and valve areas are clean.<br />
9. Check V-belt tension and alignment or drive alignment<br />
on direct drive units.<br />
10