
Create successful ePaper yourself
Turn your PDF publications into a flip-book with our unique Google optimized e-Paper software.
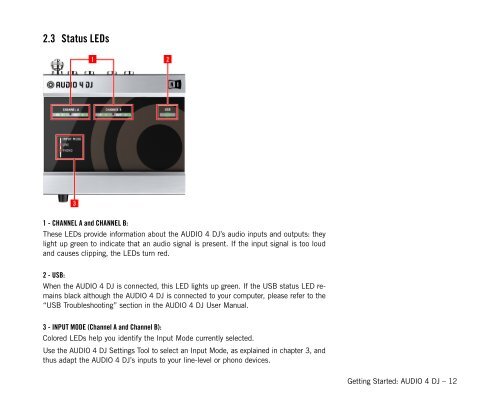
2.3 Status LEDs<br />
1 - CHANNEL A and CHANNEL B:<br />
These LEDs provide information about the <strong>AUDIO</strong> 4 <strong>DJ</strong>’s audio inputs and outputs: they<br />
light up green to indicate that an audio signal is present. If the input signal is too loud<br />
and causes clipping, the LEDs turn red.<br />
2 - USB:<br />
When the <strong>AUDIO</strong> 4 <strong>DJ</strong> is connected, this LED lights up green. If the USB status LED remains<br />
black although the <strong>AUDIO</strong> 4 <strong>DJ</strong> is connected to your computer, please refer to the<br />
“USB Troubleshooting” section in the <strong>AUDIO</strong> 4 <strong>DJ</strong> User Manual.<br />
3 - INPUT MODE (Channel A and Channel B):<br />
Colored LEDs help you identify the Input Mode currently selected.<br />
Use the <strong>AUDIO</strong> 4 <strong>DJ</strong> Settings Tool to select an Input Mode, as explained in chapter 3, and<br />
thus adapt the <strong>AUDIO</strong> 4 <strong>DJ</strong>’s inputs to your line-level or phono devices.<br />
<strong>Getting</strong> <strong>Started</strong>: <strong>AUDIO</strong> 4 <strong>DJ</strong> <strong>–</strong> 12