

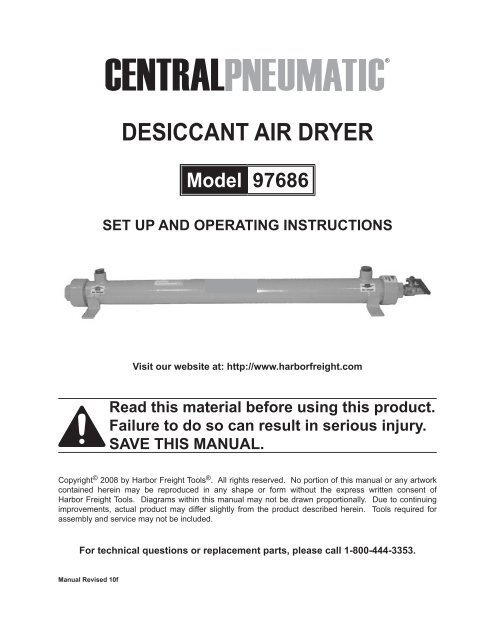
DESICCANT AIR DRYER - Harbor Freight Tools
DESICCANT AIR DRYER - Harbor Freight Tools
DESICCANT AIR DRYER - Harbor Freight Tools

You also want an ePaper? Increase the reach of your titles
YUMPU automatically turns print PDFs into web optimized ePapers that Google loves.
<strong>DESICCANT</strong> <strong>AIR</strong> <strong>DRYER</strong><br />
Model 97686<br />
Set up and Operating Instructions<br />
Visit our website at: http://www.harborfreight.com<br />
Read this material before using this product.<br />
Failure to do so can result in serious injury.<br />
Save this manual.<br />
Copyright © 2008 by <strong>Harbor</strong> <strong>Freight</strong> <strong>Tools</strong> ® . All rights reserved. No portion of this manual or any artwork<br />
contained herein may be reproduced in any shape or form without the express written consent of<br />
<strong>Harbor</strong> <strong>Freight</strong> <strong>Tools</strong>. Diagrams within this manual may not be drawn proportionally. Due to continuing<br />
improvements, actual product may differ slightly from the product described herein. <strong>Tools</strong> required for<br />
assembly and service may not be included.<br />
For technical questions or replacement parts, please call 1-800-444-3353.<br />
Manual Revised 10f
Save This Manual<br />
Keep this manual for the safety warnings<br />
and precautions, assembly, operating,<br />
inspection, maintenance and cleaning<br />
procedures. Write the product’s serial number<br />
in the back of the manual near the assembly<br />
diagram (or month and year of purchase if<br />
product has no number). Keep this manual<br />
and the receipt in a safe and dry place for<br />
future reference.<br />
Important SAFETY<br />
Information<br />
In this manual, on the labeling, and<br />
all other information provided with<br />
this product:<br />
This is the safety alert<br />
symbol. It is used to alert<br />
you to potential personal<br />
injury hazards. Obey all<br />
safety messages that follow<br />
this symbol to avoid possible<br />
injury or death.<br />
1.<br />
CAUTION, without the<br />
safety alert symbol, is<br />
used to address practices not<br />
related to personal injury.<br />
Caution<br />
General Safety Rules<br />
WARNING! Read all instructions<br />
Failure to follow all instructions<br />
listed below may result in serious<br />
injury. The term “tool” in all of the<br />
warnings listed below refers to your Air<br />
Dryer.<br />
SAVE THESE INSTRUCTIONS<br />
Work area safety<br />
a. Keep work area clean and well lit.<br />
Cluttered or dark areas invite accidents.<br />
b. Do not operate tools in explosive<br />
atmospheres, such as in the presence<br />
of flammable liquids, gases or dust.<br />
Pneumatic tools create sparks which<br />
may ignite the dust or fumes.<br />
c. Keep children and bystanders away<br />
while operating this tool. Distractions<br />
can cause you to lose control.<br />
DANGER indicates a<br />
hazardous situation<br />
which, if not avoided, will result<br />
in death or serious injury.<br />
Danger<br />
WARNING indicates a<br />
hazardous situation<br />
which, if not avoided, could<br />
result in death or serious injury.<br />
WARNING<br />
CAUTION, used with<br />
the safety alert<br />
symbol, indicates a hazardous<br />
situation which, if not avoided,<br />
could result in minor or moderate<br />
injury.<br />
Caution<br />
NOTICE is used to<br />
address practices not<br />
related to personal injury.<br />
Notice<br />
Personal safety<br />
Page 2 For technical questions, please call 1-800-444-3353. SKU 97686<br />
3.<br />
a. Stay alert, watch what you are doing<br />
and use common sense when operating<br />
this tool. Do not use this tool while you<br />
are tired or under the influence of drugs,<br />
alcohol or medication. A moment of<br />
inattention while operating this tool may<br />
result in serious personal injury.<br />
b. Use safety equipment. Always wear<br />
ANSI-approved safety impact goggles<br />
and a dust mask or respirator. Safety<br />
equipment such as non-skid safety<br />
shoes, hard hat, or hearing protection<br />
used for appropriate conditions will<br />
reduce personal injuries.<br />
c. Avoid accidental starting. Ensure the<br />
Ball Valve (6) is in the off-position before<br />
connecting to an air supply. Connecting
4.<br />
this tool with the Air Valve on invites<br />
accidents.<br />
d. Do not overreach. Keep proper footing<br />
and balance at all times. This enables<br />
better control of the tool in unexpected<br />
situations.<br />
e. Dress properly. Do not wear loose<br />
clothing or jewelry. Keep your hair,<br />
clothing and gloves away from moving<br />
parts. Loose clothes, jewelry or long<br />
hair can be caught in moving parts.<br />
Tool use and care<br />
a. Do not force the tool. Use the correct<br />
tool for your application. The correct<br />
tool will do the job better and safer at<br />
the rate for which it was designed.<br />
b. Do not use the tool if the Ball Valve (6)<br />
does not turn it on and off. Any tool that<br />
cannot be controlled with its Ball Valve<br />
is dangerous and must be repaired.<br />
c. Disconnect the air hose from the tool<br />
and release any remaining air pressure<br />
before making any adjustments,<br />
changing accessories, or storing the<br />
tool. Such preventive safety measures<br />
reduce the risk of starting the tool<br />
accidentally.<br />
d. Do not allow people unfamiliar with the<br />
tool or these instructions to operate this<br />
tool. <strong>Tools</strong> are dangerous in the hands<br />
of untrained users.<br />
e. Maintain this tool. Check for<br />
misalignment or binding of moving<br />
parts, breakage of parts and any other<br />
condition that may affect the tool’s<br />
operation. If damaged, have the tool<br />
repaired before use. Many accidents<br />
are caused by poorly maintained tools.<br />
f. Use the tool and its accessories in<br />
accordance with these instructions and<br />
in the manner intended for this particular<br />
type of tool, taking into account the<br />
working conditions and the work to<br />
5.<br />
1.<br />
2.<br />
3.<br />
4.<br />
5.<br />
6.<br />
7.<br />
8.<br />
be performed. Use of this tool for<br />
operations different from those intended<br />
could result in a hazardous situation.<br />
Service<br />
a. Have the tool serviced by a qualified<br />
repair person using only identical<br />
replacement parts. This will ensure the<br />
safety of the tool is maintained.<br />
Specific Safety Rules<br />
Maintain labels and nameplates<br />
on the Desiccant Air Dryer. These<br />
carry important safety information. If<br />
unreadable or missing, contact <strong>Harbor</strong><br />
<strong>Freight</strong> <strong>Tools</strong> for a replacement.<br />
Compressed air only. Use clean, dry,<br />
regulated, compressed air at a maximum<br />
of 175 PSI. Do not exceed 175 PSI.<br />
Mount the Air Dryer on a solid, level wall<br />
surface capable of supporting the weight<br />
of the Dryer and all other additional tools<br />
and accessories.<br />
Do not use for breathing air.<br />
Mount at least 25 feet away from an<br />
air compressor to prevent air being<br />
discharged with very high temperature.<br />
Before replacing pellets, make sure<br />
to turn off the air supply source and<br />
bleed the Air Dryer of any remaining<br />
compressed air.<br />
Do not leave the Air Dryer unattended<br />
with its compressed air supply on. Turn<br />
off the compressed air supply and<br />
bleed the Air Dryer of any remaining<br />
compressed air before leaving.<br />
To prevent contamination of your air<br />
lines and air tools an air filter MUST be<br />
mounted on the outlet between the Air<br />
Dryer and air lines and tools. Additional<br />
air filters, such as on the inlet line, may<br />
SKU 97686<br />
For technical questions, please call 1-800-444-3353.<br />
Page 3
9.<br />
10.<br />
increase the usable life of the desiccant,<br />
but are not required.<br />
This product is not a toy. Keep it out of<br />
reach of children.<br />
The warnings, precautions, and<br />
instructions discussed in this instruction<br />
manual cannot cover all possible<br />
conditions and situations that may occur.<br />
It must be understood by the operator<br />
that common sense and caution are<br />
factors which cannot be built into this<br />
product, but must be supplied by the<br />
operator.<br />
Save these<br />
instructions.<br />
Specifications<br />
Maximum Air Pressure<br />
Flow Capacity<br />
Maximum Input Air<br />
Temperature<br />
Air Connection<br />
Size<br />
175 PSI<br />
17 CFM<br />
100° Fahrenheit<br />
1/2”-14 NPT<br />
Mounting Holes 1/4” Diameter (Qty. 4)<br />
Replacement Silica<br />
Desiccant<br />
Weight<br />
Order Sku 97924 (2.2 lb.)<br />
17.6 lb.<br />
Unpacking<br />
Installation Instructions<br />
1.<br />
Read the entire Important<br />
Safety Information section at<br />
the beginning of this manual<br />
including all text under<br />
subheadings therein before set up<br />
or use of this product.<br />
To prevent<br />
serious injury<br />
from accidental<br />
operation:<br />
Turn off the compressed air<br />
supply source, and release any<br />
compressed air from the tool<br />
before performing any set up and<br />
operating procedures.<br />
WARNING<br />
Prior to use, the Desiccant Air Dryer<br />
must be firmly mounted to a solid, level<br />
wall surface capable of supporting<br />
the weight of the Dryer and all other<br />
additional tools and accessories.<br />
2. IMPORTANT: Mount the Air Dryer<br />
vertically with the Ball Valve (6)<br />
downwards and as far as possible (at<br />
least 25 feet) from the air supply to allow<br />
cooling of the air. The temperature of the<br />
air should not exceed 100° Fahrenheit at<br />
the inlet of the Air Dryer. (See Figure A.)<br />
When unpacking, check to make sure<br />
that the item is intact and undamaged. If<br />
any parts are missing or broken, please call<br />
<strong>Harbor</strong> <strong>Freight</strong> <strong>Tools</strong> at the number shown on<br />
the cover of this manual as soon as possible.<br />
Note: For additional information regarding the<br />
parts listed in the following pages, refer<br />
to the Assembly Diagram near the end of<br />
this manual.<br />
Page 4 For technical questions, please call 1-800-444-3353. SKU 97686<br />
REV 10d
MOUNTING<br />
BRACKET<br />
MOUNTING<br />
BRACKET<br />
FIGURE A<br />
UPPER<br />
CYLINDER<br />
CAP<br />
(1)<br />
<strong>AIR</strong> OUTLET<br />
<strong>AIR</strong> INLET<br />
BALL VALVE (6)<br />
3. The Air Dryer features four 1/4” diameter<br />
mounting holes in its mounting brackets.<br />
To mount the Air Dryer, use four 1/4”<br />
diameter screws (not included).<br />
(See Figure A.)<br />
4.<br />
5.<br />
6.<br />
FIGURE B<br />
A moisture filter may be installed on the<br />
inlet line between the air compressor and<br />
the dryer to extend the usable life of the<br />
desiccant, but it is not required.<br />
Remove the protective plastic Plug (7)<br />
from the unit’s Air Outlet. Wrap about 3”<br />
of pipe thread sealer tape (not included)<br />
around the male threads of the air output<br />
hose and firmly screw it into the Air<br />
Outlet.<br />
IMPORTANT: This air hose MUST have<br />
an in-line air filter to prevent particles<br />
from damaging any air tools.<br />
(See Figure B.)<br />
Remove the protective plastic Plug (7)<br />
from the unit’s Air Inlet. Wrap about 3”<br />
of pipe thread sealer tape (not included)<br />
around the male threads of the air<br />
compressor’s air hose. Then firmly<br />
screw the air hose into the Air Inlet.<br />
(See Figure B.)<br />
Particle<br />
Filter<br />
UPPER<br />
CYLINDER CAP (1)<br />
TO<br />
PNEUMATIC<br />
TOOL<br />
<strong>AIR</strong> OUTLET<br />
Regulator with<br />
Pressure Gauge<br />
Moisture<br />
Filter<br />
<strong>AIR</strong> INLET<br />
REV 10d<br />
SKU 97686<br />
<strong>AIR</strong><br />
COMPRESSOR<br />
(NOT INCLUDED)<br />
<strong>AIR</strong> COMPRESSOR AND<br />
<strong>AIR</strong> <strong>DRYER</strong><br />
MUST BE A MINIMUM<br />
25 FEET DISTANCE APART<br />
BALL<br />
VALVE (6)<br />
For technical questions, please call 1-800-444-3353.<br />
Page 5
6.<br />
Check to make sure the air compressor<br />
is OFF and the Ball Valve (6) of the Air<br />
Dryer is in its CLOSED position.<br />
2.<br />
Turn on the air compressor, and set its<br />
regulator at no more than 175 PSI. Do<br />
not exceed 175 PSI.<br />
7.<br />
8.<br />
9.<br />
10.<br />
11.<br />
12.<br />
13.<br />
Unscrew and remove the Upper Cylinder<br />
Cap (1). Then unscrew and remove<br />
the Lower Cylinder Cap (5) with its Ball<br />
Valve (6) still attached. The two Pellets<br />
Retaining Plugs (3) will then drop from<br />
the bottom of the Air Dryer unit. Use<br />
care not to allow the Pellets Retaining<br />
Plugs to drop to the floor and become<br />
damaged.<br />
Wrap about ten inches of pipe thread<br />
sealer tape (not included) around<br />
the input end threads of the Cylinder<br />
(4). Make sure that Air Seal (2) is<br />
undamaged and is located inside the<br />
cap. Then firmly screw the Input End<br />
Cap (5) back onto the bottom of the<br />
Cylinder.<br />
Insert one Pellets Retaining Plug (3) into<br />
the top of the Cylinder (4), and allow it to<br />
drop to the bottom of the Cylinder.<br />
From the top of the Cylinder (4), pour<br />
in the desiccant silica pellets. Fill the<br />
Cylinder to its top with the pellets.<br />
Insert the remaining Pellets Retaining<br />
Plug (3) into the top of the Cylinder (4).<br />
Wrap about ten inches of pipe thread<br />
sealer tape (not included) around the<br />
output end of the Cylinder. Then firmly<br />
screw the Upper Cylinder Cap (1) back<br />
onto the Cylinder (4).<br />
The Desiccant Air Dryer is now ready<br />
for use.<br />
3.<br />
When finished using the pneumatic tool,<br />
turn off the air compressor. Squeeze<br />
the trigger on the tool to release any<br />
remaining air pressure from the Air<br />
Dryer and the tool. Then disconnect the<br />
pneumatic tool from its air hose.<br />
IMPORTANT:<br />
4. Make sure to drain all<br />
water from the Air Dryer daily. Hold<br />
a bucket under the ball valve and turn<br />
the Ball Valve (6) to its OPEN position.<br />
Once all water is expelled from the<br />
unit, close the Ball Valve. (See Assy.<br />
Diagram.)<br />
Operating Instructions<br />
1.<br />
Check to make sure the Ball Valve (6) of<br />
the Air Dryer is in its CLOSED position.<br />
(See Assy. Diagram.)<br />
Page 6 For technical questions, please call 1-800-444-3353. SKU 97686
Maintenance And Servicing<br />
Procedures not specifically explained in this manual must be performed only by<br />
a qualified technician.<br />
To prevent serious injury from accidental operation:<br />
Turn off the compressed air supply source and turn the Ball Valve (6) to its<br />
OPEN position before performing any inspection, maintenance, or cleaning<br />
procedures.<br />
1. BEFORE EACH USE, inspect the general condition of the Air Dryer. Check for loose air<br />
hose connections and any other condition that may affect the proper operation of the unit.<br />
Do not use the Air Dryer if the unit is damaged in any way.<br />
2. DAILY, drain the Air Dryer of water. To do so, turn the Ball Valve (6) to its OPEN position.<br />
Once all water is drained, close the Ball Valve.<br />
3. EVERY SIX MONTHS OR DEPENDING ON EXTENT OF USE, replace the desiccant<br />
silica pellets.<br />
4. TO CLEAN, use a damp cloth and mild detergent. Do not use solvents.<br />
TROUBLESHOOTING<br />
Problem<br />
Water is being forwarded to the<br />
pneumatic tool.<br />
The PSI to the pneumatic tool slowly<br />
drops when in use.<br />
1.<br />
2.<br />
1.<br />
2.<br />
Possible Solution<br />
Open the Ball Valve to drain excess water from the<br />
Air Dryer. Then close the Ball Valve.<br />
Replace the desiccant silica pellets.<br />
Open the Ball Valve to drain excess water from the<br />
Air Dryer. Then close the Ball Valve.<br />
Replace the desiccant silica pellets.<br />
PLEASE READ THE FOLLOWING CAREFULLY<br />
The manufacturer and/or distributor has provided the parts list and assembly diagram<br />
in this manual as a reference tool only. Neither the manufacturer or distributor makes<br />
any representation or warranty of any kind to the buyer that he or she is qualified to<br />
make any repairs to the product, or that he or she is qualified to replace any parts<br />
of the product. In fact, the manufacturer and/or distributor expressly states that<br />
all repairs and parts replacements should be undertaken by certified and licensed<br />
technicians, and not by the buyer. The buyer assumes all risk and liability arising out<br />
of his or her repairs to the original product or replacement parts thereto, or arising<br />
out of his or her installation of replacement parts thereto.<br />
Record Product’s Serial Number Here:<br />
Note: If product has no serial number, record month and year of purchase instead.<br />
Note: Some parts are listed and shown for illustration purposes only, and are not available<br />
individually as replacement parts.<br />
SKU 97686<br />
For technical questions, please call 1-800-444-3353.<br />
Page 7
PARTS LIST & ASSEMBLY DIAGRAM<br />
Air Inlet End<br />
Part # Description Qty. Part # Description Qty.<br />
1 Upper Cylinder Cap 1 5 Desiccants (2.2lb) 1<br />
2 Air Seal 2 6 Lower Cylinder Cap 1<br />
3 Dryer Pellets Retaining Plug 2 7 Ball Valve Assembly 1<br />
4 Cylinder 1 8 Plug 3<br />
Air Outlet End<br />
Page 8 For technical questions, please call 1-800-444-3353. SKU 97686
LIMITED 90 DAY WARRANTY<br />
<strong>Harbor</strong> <strong>Freight</strong> <strong>Tools</strong> Co. makes every effort to assure that its products meet high quality and<br />
durability standards, and warrants to the original purchaser that this product is free from defects<br />
in materials and workmanship for the period of 90 days from the date of purchase. This warranty<br />
does not apply to damage due directly or indirectly, to misuse, abuse, negligence or accidents,<br />
repairs or alterations outside our facilities, criminal activity, improper installation, normal wear<br />
and tear, or to lack of maintenance. We shall in no event be liable for death, injuries to persons<br />
or property, or for incidental, contingent, special or consequential damages arising from the use<br />
of our product. Some states do not allow the exclusion or limitation of incidental or consequential<br />
damages, so the above limitation of exclusion may not apply to you. This warranty is<br />
expressly in lieu of all other warranties, express or implied, including<br />
the warranties of merchantability and fitness.<br />
To take advantage of this warranty, the product or part must be returned to us with<br />
transportation charges prepaid. Proof of purchase date and an explanation of the complaint must<br />
accompany the merchandise. If our inspection verifies the defect, we will either repair or replace<br />
the product at our election or we may elect to refund the purchase price if we cannot readily and<br />
quickly provide you with a replacement. We will return repaired products at our expense, but if<br />
we determine there is no defect, or that the defect resulted from causes not within the scope of<br />
our warranty, then you must bear the cost of returning the product.<br />
This warranty gives you specific legal rights and you may also have other rights which vary<br />
from state to state.<br />
3491 Mission Oaks Blvd. • PO Box 6009 • Camarillo, CA 93011 • (800) 444-3353<br />
SKU 97686<br />
For technical questions, please call 1-800-444-3353.<br />
Page 9


