dsl+ 1100 LAN.book - the world of dLAN® ... devolo AG
dsl+ 1100 LAN.book - the world of dLAN® ... devolo AG
dsl+ 1100 LAN.book - the world of dLAN® ... devolo AG

Create successful ePaper yourself
Turn your PDF publications into a flip-book with our unique Google optimized e-Paper software.
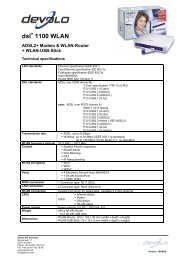
dsl + <strong>1100</strong> <strong>LAN</strong>
© 2006 <strong>devolo</strong> <strong>AG</strong>, Aachen (Germany)<br />
While <strong>the</strong> information in this manual has been compiled with great care, it may not be deemed an assurance <strong>of</strong> product characteristics.<br />
<strong>devolo</strong> shall be liable only to <strong>the</strong> degree specified in <strong>the</strong> terms <strong>of</strong> sale and delivery.<br />
The reproduction and distribution <strong>of</strong> <strong>the</strong> documentation and s<strong>of</strong>tware supplied with this product and <strong>the</strong> use <strong>of</strong> its contents is<br />
subject to written authorization from <strong>devolo</strong>. We reserve <strong>the</strong> right to make any alterations that arise as <strong>the</strong> result <strong>of</strong> technical<br />
development.<br />
You can find all declarations and certifications <strong>of</strong> compliance for <strong>the</strong> products, as long as <strong>the</strong>y were available at <strong>the</strong> time <strong>of</strong><br />
publication, in <strong>the</strong> appendix <strong>of</strong> this documentation.<br />
Trademarks<br />
Windows ® and Micros<strong>of</strong>t ® are registered trademarks <strong>of</strong> Micros<strong>of</strong>t, Corp.<br />
Mac ® is a registered trademark <strong>of</strong> Apple Computer, Inc.<br />
Linux ® is a registered trademark <strong>of</strong> Linus Torvalds.<br />
The firmware package from <strong>devolo</strong> contains files which are covered by different licenses, in particular under <strong>devolo</strong> proprietary<br />
license and under open source license (GNU General Public License, GNU Lesser General Public License or FreeBSD License).<br />
The source code which is available for Open Source distribution can be requested in writing from gpl@<strong>devolo</strong>.de.<br />
<strong>devolo</strong> and <strong>the</strong> <strong>devolo</strong> logo are registered trademarks <strong>of</strong> <strong>devolo</strong> <strong>AG</strong>. All o<strong>the</strong>r names mentioned may be trademarks or registered<br />
trademarks <strong>of</strong> <strong>the</strong>ir respective owners.<br />
Subject to change without notice. No liability for technical errors or omissions.<br />
<strong>devolo</strong> <strong>AG</strong><br />
Sonnenweg 11<br />
52070 Aachen<br />
Germany<br />
www.<strong>devolo</strong>.com<br />
Aachen, August 2006
Preface<br />
Thank you for placing your trust in this <strong>devolo</strong> product.<br />
The dsl + <strong>1100</strong> <strong>LAN</strong> is a DSL modem that complies with <strong>the</strong> latest ADSL2+ standard,<br />
<strong>of</strong>fering demanding users a quick entry into modern, high-speed surfing.<br />
This new modem generation opens <strong>the</strong> door to complex, data-intensive Internet<br />
applications such as voice over IP (VoIP), IP-TV, video on demand and online<br />
games. The setup wizard <strong>of</strong> <strong>the</strong> dsl + <strong>1100</strong> <strong>LAN</strong> will guide you through <strong>the</strong> few<br />
short, self-explanatory steps necessary for high-speed Internet access.<br />
In conjunction with a router or multiple d<strong>LAN</strong> adapters, <strong>the</strong> dsl + <strong>1100</strong> <strong>LAN</strong> will<br />
let you set up a home network tailored to your requirements.<br />
The dsl + <strong>1100</strong> <strong>LAN</strong>, with its support for <strong>the</strong> latest ADSL2+ standard, is fully<br />
equipped to handle current DSL line speeds <strong>of</strong> 1 to 6 Mbps as well as future<br />
speeds <strong>of</strong> up to 24 Mbps.<br />
About this manual<br />
Exacting manufacturing standards and stringent quality control are <strong>the</strong> basis for<br />
high product standards and consistent quality to ensure your fullest satisfaction<br />
with this dsl + <strong>1100</strong> <strong>LAN</strong>.<br />
This documentation was compiled by several members <strong>of</strong> our staff from a variety<br />
<strong>of</strong> departments in order to ensure you <strong>the</strong> best possible support when using your<br />
product.<br />
For fur<strong>the</strong>r information, please visit 'www.<strong>devolo</strong>.com'<br />
Our online services (www.<strong>devolo</strong>.com) are available to you around <strong>the</strong> clock<br />
should you have any queries or require any fur<strong>the</strong>r support.<br />
|<br />
| <strong>devolo</strong> <strong>dsl+</strong> <strong>1100</strong> <strong>LAN</strong> |
|<br />
| <strong>devolo</strong> <strong>dsl+</strong> <strong>1100</strong> <strong>LAN</strong> |<br />
Package contents<br />
Please ensure that <strong>the</strong> delivery is complete before beginning with <strong>the</strong> installation<br />
<strong>of</strong> your router:<br />
� dsl + <strong>1100</strong> <strong>LAN</strong><br />
� AC adapter<br />
� DSL cable (gray, 5m) to connect <strong>the</strong> dsl + <strong>1100</strong> <strong>LAN</strong> to <strong>the</strong> DSL line<br />
� Network cable (yellow, 3m) to connect <strong>the</strong> dsl + <strong>1100</strong> <strong>LAN</strong> to a computer,<br />
d<strong>LAN</strong> adapter or <strong>LAN</strong> router<br />
� Printed information leaflet<br />
� <strong>dsl+</strong> <strong>1100</strong> <strong>LAN</strong> CD with<br />
� setup wizard<br />
� product manual<br />
� network manual 'Home-Networking und Internet<br />
� s<strong>of</strong>tware<br />
<strong>devolo</strong> <strong>AG</strong> reserves <strong>the</strong> right to change <strong>the</strong> package contents without prior<br />
notice.<br />
Description <strong>of</strong> <strong>the</strong> symbols<br />
Here we briefly describe <strong>the</strong> meaning <strong>of</strong> <strong>the</strong> symbols used in this manual.<br />
Very important notice which, if ignored, may lead to damage.<br />
Important notice which should be heeded.<br />
Additional information which is useful to know, but not vital.
Contents<br />
1 Introduction ..................................................................................... . . . . . . . . . . . . . 6<br />
1.1 What is ADSL? .............................................................................. . . . . . . . . . . . . . . 6<br />
1.2 What does <strong>the</strong> dsl + <strong>1100</strong> <strong>LAN</strong> have to <strong>of</strong>fer? ................................. . . . . . . . . . . . . . . 7<br />
1.3 Firewall and virus scanner ............................................................. . . . . . . . . . . . . . . 8<br />
1.4 Protect your child in <strong>the</strong> Internet with OrangeBox Web Home ........ . . . . . . . . . . . . . . 8<br />
2 Connection and installation ............................................................. . . . . . . . . . . . . 9<br />
2.1 Displays and connections............................................................... . . . . . . . . . . . . . . 9<br />
2.2 Connecting <strong>the</strong> dsl + <strong>1100</strong> <strong>LAN</strong> ...................................................... . . . . . . . . . . . . . 10<br />
2.2.1 Connecting a single computer ........................................ . . . . . . . . . . . . . 11<br />
2.2.2 Connecting to a network using d<strong>LAN</strong> adapters ................ . . . . . . . . . . . . . 12<br />
2.2.3 Connecting to a network using a <strong>LAN</strong> router ................... . . . . . . . . . . . . . 13<br />
2.3 Installing Internet access s<strong>of</strong>tware and setting up Internet access .. . . . . . . . . . . . . . 14<br />
3 <strong>devolo</strong> s<strong>of</strong>tware ............................................................................... . . . . . . . . . . . . 20<br />
3.1 Overview <strong>of</strong> <strong>the</strong> <strong>devolo</strong> s<strong>of</strong>tware .................................................... . . . . . . . . . . . . . 20<br />
3.1.1 Informer ......................................................................... . . . . . . . . . . . . . 20<br />
3.1.2 EasyShare ...................................................................... . . . . . . . . . . . . . 20<br />
3.1.3 EasyClean ...................................................................... . . . . . . . . . . . . . 20<br />
3.2 Installing <strong>the</strong> <strong>devolo</strong> s<strong>of</strong>tware ....................................................... . . . . . . . . . . . . . 20<br />
3.3 Overview in <strong>the</strong> network with <strong>the</strong> Informer .................................... . . . . . . . . . . . . . 21<br />
3.4 Communication in <strong>the</strong> network using EasyShare ............................ . . . . . . . . . . . . . 22<br />
3.4.1 Configuration.................................................................. . . . . . . . . . . . . . 22<br />
3.5 Maintain your privacy with EasyClean ............................................ . . . . . . . . . . . . . 24<br />
4 Appendix .......................................................................................... . . . . . . . . . . . . 26<br />
4.1 Performance data and specifications ............................................. . . . . . . . . . . . . . 26<br />
4.2 Care and maintenance <strong>of</strong> <strong>the</strong> device .............................................. . . . . . . . . . . . . . 27<br />
4.3 CE conformity ............................................................................... . . . . . . . . . . . . . 27<br />
4.4 Declaration <strong>of</strong> conformity .............................................................. . . . . . . . . . . . . . 28<br />
4.5 Warranty conditions ...................................................................... . . . . . . . . . . . . . 29<br />
| <strong>devolo</strong> <strong>dsl+</strong> <strong>1100</strong> <strong>LAN</strong> |<br />
|
6<br />
Introduction |<br />
1 Introduction<br />
1.1 What is ADSL?<br />
| <strong>devolo</strong> <strong>dsl+</strong> <strong>1100</strong> <strong>LAN</strong> |<br />
The sheer speed <strong>of</strong> development <strong>of</strong> computer technology over <strong>the</strong> last few years<br />
has resulted in a huge increase in <strong>the</strong> volume <strong>of</strong> electronic data traffic. More<br />
users want to send and receive a constantly increasing volume <strong>of</strong> data. A<br />
demand which <strong>of</strong>fers fertile grounds for <strong>the</strong> development <strong>of</strong> broadband technology.<br />
ADSL (Asymmetric Digital Subscriber Line) and <strong>the</strong> advanced ADSL2+ is a transmission<br />
technology which <strong>of</strong>fers genuine broadband communication to <strong>the</strong> user.<br />
The “last mile” connects <strong>the</strong> customer to <strong>the</strong> network via copper telephone lines.<br />
Because telephone lines are used to transmit data, <strong>the</strong> spread <strong>of</strong> this access<br />
technology has been relatively fast.<br />
Toge<strong>the</strong>r with <strong>the</strong> ADSL technology on <strong>the</strong> copper twin wire <strong>of</strong> <strong>the</strong> telephone<br />
lines, three differently large frequency ranges are used: Two for data communications<br />
and one for telephony. The term 'Asymmetric' indicates that <strong>the</strong> transmitting<br />
and receiving channels can carry different quantities <strong>of</strong> data:<br />
� When <strong>the</strong> user surfs <strong>the</strong> Internet, <strong>the</strong> data sent to <strong>the</strong> Internet service provider<br />
(ISP) tends to carry less information (e. g. addresses <strong>of</strong> web sites or emails).<br />
The transmission rate <strong>of</strong> up to 1 Mbps is generally sufficient for this<br />
purpose.<br />
� To load multimedia content (video sequences, animations, images etc.) onto<br />
<strong>the</strong> computer from <strong>the</strong> Internet at acceptable quality and speed, a transmission<br />
rate <strong>of</strong> up to 24 Mbps brings significant savings in terms <strong>of</strong> cost and<br />
time.
| Introduction 7<br />
1.2 What does <strong>the</strong> dsl + <strong>1100</strong> <strong>LAN</strong> have to <strong>of</strong>fer?<br />
The dsl + <strong>1100</strong> <strong>LAN</strong> is a DSL modem designed to provide easy, high-speed Internet<br />
access. The dsl + <strong>1100</strong> <strong>LAN</strong> features an E<strong>the</strong>rnet port for direct connection to<br />
your computer, or to a <strong>LAN</strong> router when integrating o<strong>the</strong>r network devices such<br />
as multiple computers, network printers or d<strong>LAN</strong> adapters. Every connected<br />
computer can thus access <strong>the</strong> Internet through <strong>the</strong> dsl + <strong>1100</strong> <strong>LAN</strong>.<br />
Quickly and simply online!<br />
� Connect <strong>the</strong> dsl + <strong>1100</strong> <strong>LAN</strong> to <strong>the</strong> power supply grid using <strong>the</strong> power<br />
adapter provided.<br />
� Connect <strong>the</strong> dsl + <strong>1100</strong> <strong>LAN</strong> to <strong>the</strong> existing DSL line using <strong>the</strong> gray DSL cable<br />
provided.<br />
� Connect <strong>the</strong> dsl + <strong>1100</strong> <strong>LAN</strong> to your computer, d<strong>LAN</strong> adapter or <strong>LAN</strong> router<br />
using <strong>the</strong> yellow network cable provided.<br />
� Setting up Internet access:<br />
� Windows users: insert <strong>the</strong> CD and use <strong>the</strong> setup wizard to configure<br />
Internet access.<br />
� Mac and Linux users: configure Internet access using your operating<br />
system.<br />
� That's it!<br />
Ideal for complex, fast Internet applications!<br />
Surf <strong>the</strong> Internet, download files, take part in online games, and much more at<br />
download rates <strong>of</strong> up to 24 Mbps with <strong>the</strong> dsl + <strong>1100</strong> <strong>LAN</strong>. The dsl + <strong>1100</strong> <strong>LAN</strong><br />
modem is also ideal for taking full advantage <strong>of</strong> modern applications such as<br />
voice over IP (VoIP), IP-TV or video on demand.<br />
Surf toge<strong>the</strong>r!<br />
Share your DSL line and have fun toge<strong>the</strong>r. Toge<strong>the</strong>r with a <strong>LAN</strong> router, <strong>the</strong> dsl +<br />
<strong>1100</strong> <strong>LAN</strong> can provide Internet access to multiple computers.<br />
Meets <strong>the</strong> highest quality standards!<br />
The products from <strong>devolo</strong> are subjected to thorough German quality assurance.<br />
In this way, <strong>devolo</strong> assures <strong>the</strong> optimal functionality with operating systems,<br />
international versions and protocols.<br />
| <strong>devolo</strong> <strong>dsl+</strong> <strong>1100</strong> <strong>LAN</strong> |
8<br />
Introduction |<br />
| <strong>devolo</strong> <strong>dsl+</strong> <strong>1100</strong> <strong>LAN</strong> |<br />
Flexible network integration<br />
The modem provides a direct connection for one computer via its E<strong>the</strong>rnet port.<br />
Alternatively, add a <strong>LAN</strong> router to integrate o<strong>the</strong>r network devices such as multiple<br />
computers, network printers or d<strong>LAN</strong> adapters.<br />
1.3 Firewall and virus scanner<br />
The dsl + <strong>1100</strong> <strong>LAN</strong> is supplied with <strong>the</strong> Norman Internet Control s<strong>of</strong>tware. Norman<br />
Internet Control is a firewall and anti-virus program that monitors your PC<br />
for malicious s<strong>of</strong>tware, also referred to as malware. The most common types <strong>of</strong><br />
malware are viruses, worms, and trojans. For <strong>the</strong> sake <strong>of</strong> simplicity, we <strong>of</strong>ten use<br />
<strong>the</strong> term virus as a collective description.<br />
Norman Internet Control can detect and remove known and unknown viruses<br />
from hard disks, floppy disks, e-mail attachments, etc. Norman Internet Control<br />
checks files when <strong>the</strong>y are accessed, and possible viruses are removed automatically.<br />
If Norman Internet Control is unable to clean an infected file, you will<br />
receive a warning and instructions on how to proceed.<br />
1.4 Protect your child in <strong>the</strong> Internet with<br />
OrangeBox Web Home<br />
The Internet has become an everyday tool for everybody: Large or small, young<br />
or old, for private use or for business—<strong>the</strong> whole <strong>world</strong> is using <strong>the</strong> <strong>world</strong>wide<br />
web as a platform for exchanging information. But <strong>the</strong>re are also potential<br />
threats which parents need to protect <strong>the</strong>ir children from.<br />
The OrangeBox Web Home s<strong>of</strong>tware, which is supplied with <strong>the</strong> dsl + <strong>1100</strong> <strong>LAN</strong>,<br />
provides more protection for your child in <strong>the</strong> Internet. It allows you to set filters<br />
that allow Internet pages to be accessed or blocked. Internet access can even be<br />
blocked completely.
2 Connection and installation<br />
| Connection and installation 9<br />
In this chapter, we will describe <strong>the</strong> displays and connections <strong>of</strong> <strong>the</strong> dsl + <strong>1100</strong><br />
<strong>LAN</strong> and explain how to set <strong>the</strong> device up for a single workstation or a network.<br />
We will also explain how to set up Internet access.<br />
2.1 Displays and connections<br />
Power Lit when <strong>the</strong> device is powered up.<br />
DSL DSL connection; flashes while connection is being established;<br />
lit while connected (please note: DSL connection<br />
does not refer to <strong>the</strong> Internet connection—in o<strong>the</strong>r words,<br />
<strong>the</strong> LED does not indicate whe<strong>the</strong>r a computer is actually<br />
online.).<br />
ETH Lit when a computer or ano<strong>the</strong>r network device is connected;<br />
flashes while data is being transferred.<br />
| <strong>devolo</strong> <strong>dsl+</strong> <strong>1100</strong> <strong>LAN</strong> |
10<br />
Connection and installation |<br />
2.2 Connecting <strong>the</strong> dsl + <strong>1100</strong> <strong>LAN</strong><br />
| <strong>devolo</strong> <strong>dsl+</strong> <strong>1100</strong> <strong>LAN</strong> |<br />
DSL RJ11 socket for included gray cable (modem to DSL line).<br />
ETH RJ45 socket for included yellow network cable (modem to<br />
computer or o<strong>the</strong>r network device).<br />
9V DC Socket for included AC adapter.<br />
Connecting one or more computers<br />
One computer can be connected directly to <strong>the</strong> network port <strong>of</strong> <strong>the</strong> dsl + <strong>1100</strong><br />
<strong>LAN</strong>. To connect multiple computers to <strong>the</strong> dsl + <strong>1100</strong> <strong>LAN</strong>, connect a <strong>LAN</strong> router<br />
to <strong>the</strong> network port <strong>of</strong> <strong>the</strong> dsl + <strong>1100</strong> <strong>LAN</strong> or use d<strong>LAN</strong> adapters.<br />
Technical requirements<br />
To use your dsl + <strong>1100</strong> <strong>LAN</strong>, you need a computer with an operating system that<br />
provides network support (e.g. Windows 2000, Windows XP (32-bit), Mac OS<br />
X, Linux) connected to <strong>the</strong> dsl + <strong>1100</strong> <strong>LAN</strong> via its network port.<br />
Internet access for all connected computers<br />
All <strong>of</strong> <strong>the</strong> computer connected to <strong>the</strong> dsl + <strong>1100</strong> <strong>LAN</strong> can access <strong>the</strong> Internet.<br />
For simultaneous Internet access, multiple computers must be connected via a<br />
<strong>LAN</strong> router. Computers connected to <strong>the</strong> modem without a router can only<br />
access <strong>the</strong> Internet individually.
2.2.1 Connecting a single computer<br />
� Remove <strong>the</strong> rear panel <strong>of</strong> <strong>the</strong> device.<br />
| Connection and installation 11<br />
� Use <strong>the</strong> included AC adapter to connect <strong>the</strong> dsl + <strong>1100</strong> <strong>LAN</strong> to a power outlet.<br />
� Use <strong>the</strong> included gray DSL cable to connect <strong>the</strong> 'DSL' port <strong>of</strong> <strong>the</strong> device to<br />
your Internet provider's DSL line.<br />
� Use <strong>the</strong> included yellow network cable to connect <strong>the</strong> 'ETH' port <strong>of</strong> your dsl +<br />
<strong>1100</strong> <strong>LAN</strong> to <strong>the</strong> network port <strong>of</strong> your computer. Boot <strong>the</strong> connected computer.<br />
The 'ETH' LED on <strong>the</strong> device should now be lit.<br />
� Continue by installing <strong>the</strong> Internet access s<strong>of</strong>tware and setting up Internet<br />
access in your operating system (see 'Installing Internet access s<strong>of</strong>tware and<br />
setting up Internet access').<br />
| <strong>devolo</strong> <strong>dsl+</strong> <strong>1100</strong> <strong>LAN</strong> |
12<br />
Connection and installation |<br />
2.2.2 Connecting to a network using d<strong>LAN</strong> adapters<br />
| <strong>devolo</strong> <strong>dsl+</strong> <strong>1100</strong> <strong>LAN</strong> |<br />
� Remove <strong>the</strong> rear panel <strong>of</strong> <strong>the</strong> device.<br />
� Use <strong>the</strong> included AC adapter to connect <strong>the</strong> dsl + <strong>1100</strong> <strong>LAN</strong> to a power outlet.<br />
� Use <strong>the</strong> included gray DSL cable to connect <strong>the</strong> 'DSL' port <strong>of</strong> <strong>the</strong> device to<br />
your Internet provider's DSL line.<br />
� Use <strong>the</strong> included yellow network cable to connect <strong>the</strong> 'ETH' port <strong>of</strong> your dsl +<br />
<strong>1100</strong> <strong>LAN</strong> to <strong>the</strong> network port <strong>of</strong> your d<strong>LAN</strong> adapter. The 'ETH' LED on <strong>the</strong><br />
device should now be lit.<br />
� Connect ano<strong>the</strong>r d<strong>LAN</strong> adapter to your computer. Boot <strong>the</strong> connected computer.<br />
� Naturally, you can connect multiple computers via your d<strong>LAN</strong>. Please note<br />
that only one computer at a time can access <strong>the</strong> Internet, however.<br />
For simultaneous Internet access, multiple computers must be connected via a<br />
<strong>LAN</strong> router (see 'Connecting to a network using a <strong>LAN</strong> router').
| Connection and installation 13<br />
Please ensure that all network devices to be added to your d<strong>LAN</strong> network are<br />
connected to d<strong>LAN</strong> adapters connected to your household power grid.<br />
For information on connecting d<strong>LAN</strong> adapters to your computer or to o<strong>the</strong>r network<br />
devices, please refer also to <strong>the</strong> corresponding documentation.<br />
� Continue by installing <strong>the</strong> Internet access s<strong>of</strong>tware and setting up Internet<br />
access on all <strong>of</strong> <strong>the</strong> computers in your network (see 'Installing Internet<br />
access s<strong>of</strong>tware and setting up Internet access').<br />
2.2.3 Connecting to a network using a <strong>LAN</strong> router<br />
� Use <strong>the</strong> included AC adapter to connect <strong>the</strong> dsl + <strong>1100</strong> <strong>LAN</strong> to a power outlet.<br />
� Use <strong>the</strong> included gray DSL cable to connect <strong>the</strong> 'DSL' port <strong>of</strong> <strong>the</strong> device to<br />
your Internet provider's DSL line.<br />
� Use <strong>the</strong> included yellow network cable to connect <strong>the</strong> 'ETH' port <strong>of</strong> your dsl +<br />
<strong>1100</strong> <strong>LAN</strong> to <strong>the</strong> Internet port (WAN) <strong>of</strong> your router. The 'ETH' LED on <strong>the</strong><br />
dsl + <strong>1100</strong> <strong>LAN</strong> should now be lit.<br />
� To connect computers to your router and set up Internet access, please refer<br />
to <strong>the</strong> documentation <strong>of</strong> <strong>the</strong> router.<br />
| <strong>devolo</strong> <strong>dsl+</strong> <strong>1100</strong> <strong>LAN</strong> |
14<br />
Connection and installation |<br />
2.3 Installing Internet access s<strong>of</strong>tware and setting up<br />
Internet access<br />
| <strong>devolo</strong> <strong>dsl+</strong> <strong>1100</strong> <strong>LAN</strong> |<br />
This section will show you how to install and set up <strong>the</strong> Internet access s<strong>of</strong>tware<br />
on various operating systems. To set up Internet access, you need <strong>the</strong> corresponding<br />
data (user name, password, call number) from your provider.<br />
Windows<br />
We recommend using <strong>the</strong> configuration wizard to correctly configure your network<br />
and set up Internet access. The wizard will assist you with <strong>the</strong> most important<br />
settings and will make suitable suggestions for <strong>the</strong> required configuration.<br />
When using a <strong>LAN</strong> router, Internet access is configured solely via your router (see<br />
'Connecting to a network using a <strong>LAN</strong> router'), not via <strong>the</strong> dsl + <strong>1100</strong> <strong>LAN</strong> Configuration<br />
Wizard. The dsl + <strong>1100</strong> <strong>LAN</strong> will not be found behind a router.<br />
� Insert <strong>the</strong> provided <strong>devolo</strong> product CD into <strong>the</strong> CD-ROM drive. The 'dsl +<br />
<strong>1100</strong> <strong>LAN</strong>' CD will start automatically.<br />
If <strong>the</strong> CD does not start automatically, please run 'autorun.exe’ in <strong>the</strong> root folder<br />
<strong>of</strong> <strong>the</strong> CD.<br />
� Select 'Install dsl + <strong>1100</strong> <strong>LAN</strong>'.<br />
� The wizard will now install <strong>the</strong> selected <strong>devolo</strong> s<strong>of</strong>tware on your computer.<br />
Next, <strong>the</strong> configuration wizard will start automatically. It will start by checking<br />
<strong>the</strong> computer's network settings and adjusting <strong>the</strong>m if necessary. Once<br />
<strong>the</strong> network settings are correct, <strong>the</strong> wizard will assist you in setting up<br />
Internet access.<br />
� A shortcut to a dial-up connection is created on your desktop, which you<br />
can use to connect to <strong>the</strong> Internet.<br />
� Finally, <strong>the</strong> wizard will call up our website, www.<strong>devolo</strong>.com, to test <strong>the</strong><br />
Internet connection.<br />
To change your Internet access information at a later date, start <strong>the</strong> configuration<br />
wizard by clicking Start � Programs � <strong>devolo</strong> � <strong>dsl+</strong> <strong>1100</strong> <strong>LAN</strong> Configuration<br />
Wizard.<br />
Notes for AOL users: To use AOL s<strong>of</strong>tware with a dsl + <strong>1100</strong> <strong>LAN</strong>, please follow<br />
<strong>the</strong>se steps:<br />
� Start <strong>the</strong> AOL s<strong>of</strong>tware. The log-in window will appear.
| Connection and installation 15<br />
� Use <strong>the</strong> shortcut on your desktop to connect to <strong>the</strong> Internet.<br />
� Once <strong>the</strong> Internet connection has been established, switch back to <strong>the</strong> AOL<br />
s<strong>of</strong>tware and log in. If you are starting <strong>the</strong> AOL s<strong>of</strong>tware for <strong>the</strong> first time,<br />
you may have to click Next to open <strong>the</strong> log-in window.<br />
Please note: you will remain connected even after you close <strong>the</strong> AOL s<strong>of</strong>tware.<br />
Please close <strong>the</strong> connection manually.<br />
Mac OS X<br />
� From <strong>the</strong> Apple menu, select 'System Preferences' and click Network.<br />
� Under 'Location', select 'Automatic', and under 'Configure', select 'Built-in<br />
E<strong>the</strong>rnet' or <strong>the</strong> network adapter connected to <strong>the</strong> dsl + <strong>1100</strong> <strong>LAN</strong>.<br />
� Click <strong>the</strong> PPPoE tab and check <strong>the</strong> 'Connect using PPPoE' box. Enter <strong>the</strong><br />
user information for your Internet access account into <strong>the</strong> following fields:<br />
� 'Service provider': This entry is optional, and you can enter anything you<br />
like. For example, you can enter <strong>the</strong> name <strong>of</strong> <strong>the</strong> provider.<br />
� 'Account Name': The user name assigned by your provider.<br />
� 'Password': The password associated with your user name.<br />
AOL users: AOL users have to configure a second AOL screen name. Use <strong>the</strong><br />
first screen name to log on to AOL and <strong>the</strong> o<strong>the</strong>r to dial in. O<strong>the</strong>rwise, AOL will<br />
disconnect you when it detects <strong>the</strong> duplicate use <strong>of</strong> <strong>the</strong> screen name when you<br />
log on to AOL.<br />
| <strong>devolo</strong> <strong>dsl+</strong> <strong>1100</strong> <strong>LAN</strong> |
16<br />
Starting and stopping<br />
<strong>the</strong> Internet<br />
connection<br />
Connection and installation |<br />
| <strong>devolo</strong> <strong>dsl+</strong> <strong>1100</strong> <strong>LAN</strong> |<br />
In this window, check <strong>the</strong> box to enable <strong>the</strong> 'Show PPPoE status in <strong>the</strong> menu<br />
bar' option. This allows you to connect and disconnect <strong>the</strong> Internet connection<br />
quickly.<br />
� Click PPPoE Options... and configure <strong>the</strong> settings as needed. The connection<br />
options have <strong>the</strong> following effects:<br />
� 'Connect automatically when needed': Dial-up networking connects<br />
you to <strong>the</strong> Internet automatically when a browser or o<strong>the</strong>r Internet program<br />
is launched.<br />
� 'Prompt every 30 minutes to maintain connection': The operating system<br />
will prompt you whe<strong>the</strong>r to remain online at a regular interval (e.g.<br />
every half hour). Here you can specify any amount <strong>of</strong> time you like.<br />
� 'Disconnect if idle for 10 minutes': So that you do not accidentally<br />
remain online longer than intended, <strong>the</strong> system prompts you every 10<br />
minutes if no Internet program is being used. Here, too, you can specify<br />
any amount <strong>of</strong> time you like.<br />
� 'Disconnect when user logs out': Selecting this option ensures that no<br />
one else can use <strong>the</strong> existing connection after <strong>the</strong> user has logged out.<br />
Confirm your settings with OK.<br />
� In <strong>the</strong> PPPoE window, confirm your changes by clicking Apply Now. This<br />
completes <strong>the</strong> configuration <strong>of</strong> <strong>the</strong> PPPoE driver.<br />
In <strong>the</strong> top right corner <strong>of</strong> <strong>the</strong> screen, <strong>the</strong>re is now a new icon for <strong>the</strong> integrated<br />
E<strong>the</strong>rnet network card . Start <strong>the</strong> Internet connection by clicking this icon
| Connection and installation 17<br />
and selecting Connect from <strong>the</strong> drop-down list. To end <strong>the</strong> connection, select<br />
Disconnect.<br />
If this icon does not appear on your screen, please open Network Preferences<br />
and make sure that <strong>the</strong> box next to 'Show PPPoE status in menu bar' is checked<br />
under <strong>the</strong> PPPoE tab.<br />
If you have problems with <strong>the</strong> connection, please check <strong>the</strong> settings <strong>of</strong> <strong>the</strong> firewall<br />
under System Preferences � Sharing � Firewall.<br />
| <strong>devolo</strong> <strong>dsl+</strong> <strong>1100</strong> <strong>LAN</strong> |
18<br />
Starting and stopping<br />
<strong>the</strong> Internet<br />
connection<br />
Connection and installation |<br />
| <strong>devolo</strong> <strong>dsl+</strong> <strong>1100</strong> <strong>LAN</strong> |<br />
Linux (SuSE 10.0)<br />
� In <strong>the</strong> K Menu, select System � YaST Control Center � Network<br />
Devices � DSL.<br />
� On <strong>the</strong> 'DSL Configuration Overview' tab, click Add.<br />
� In <strong>the</strong> following dialog box, select <strong>the</strong> correct network adapter under 'PPP<br />
Mode' 'PPP over E<strong>the</strong>rnet' and under 'E<strong>the</strong>rnet Card'. All o<strong>the</strong>r default settings<br />
can remain as <strong>the</strong>y are. Confirm your choice by clicking Next.<br />
� Please select your Internet provider if listed and click Next. If your Internet<br />
provider is not listed, click New to add <strong>the</strong> provider.<br />
� Enter <strong>the</strong> log-in information ('user name', 'password', 'provider name')<br />
given to you by your Internet provider and click Next.<br />
� The 'Connection Parameters' will be displayed in <strong>the</strong> next dialog box. The<br />
default settings are optimal for your connection and can be used as <strong>the</strong>y are.<br />
Confirm your choice by clicking Next.<br />
Please read <strong>the</strong> additional explanations provided in <strong>the</strong> menu.<br />
� Finally, complete <strong>the</strong> configuration <strong>of</strong> your Internet access by clicking Exit.<br />
� When using your Internet connection for <strong>the</strong> first time, click Internet �<br />
Dial-up in <strong>the</strong> K Menu. The 'KInternet – Internet-Tool' plug icon will<br />
appear in <strong>the</strong> lower right corner <strong>of</strong> <strong>the</strong> screen. Start <strong>the</strong> Internet connection<br />
by clicking this icon and selecting Dial-in from <strong>the</strong> drop-down list. To end<br />
<strong>the</strong> connection, select Hang-up.<br />
Dial-up on Demand: The set options for dial-up on demand and idle time do<br />
not function reliably in all distributions. Please test <strong>the</strong>se settings prior to use.<br />
Additional information: The “HowTos” section <strong>of</strong> http://www.adsl4linux.de<br />
provides lots <strong>of</strong> additional information and instructions to help you install and<br />
configure <strong>the</strong> driver.
Installing <strong>the</strong> PPPoE<br />
driver<br />
� - �<br />
Setting up <strong>the</strong><br />
PPPoE driver<br />
� - �<br />
Linux (Debian)<br />
� Open a console as 'root'.<br />
| Connection and installation 19<br />
� Run <strong>the</strong> commands 'apt-get update', 'apt-get install pppoe' and 'apt-get<br />
install pppoeconf' in that order. This installs <strong>the</strong> required driver.<br />
� Run <strong>the</strong> 'pppoeconf' command.<br />
� Enter <strong>the</strong> necessary data: For help, refer to <strong>the</strong> information provided by your<br />
Internet provider and <strong>the</strong> help included in <strong>the</strong> 'pppoeconf' program.<br />
� To dial in, enter <strong>the</strong> command 'pon PROVIDERFILE', for example as “pon<br />
dsl-provider”. You can disconnect using <strong>the</strong> 'p<strong>of</strong>f' command.<br />
O<strong>the</strong>r settings: In <strong>the</strong> '/etc/pppoe.conf' file, you can also configure some o<strong>the</strong>r<br />
settings. However, it is not absolutely necessary to do so prior to initial operation.<br />
You can find more information on <strong>the</strong>se settings in <strong>the</strong> main pages on<br />
'pppoe.conf' or on <strong>the</strong> Internet by entering 'pppoe.conf' into a search engine.<br />
If <strong>the</strong> connection is to remain open but should disconnect automatically after a<br />
certain time, certain requests must be filtered. O<strong>the</strong>rwise, requests from port<br />
scanners, worms, eMule and similar s<strong>of</strong>tware would be answered and thus disconnection<br />
would never occur.<br />
Additional information: The “HowTos” section <strong>of</strong> http://www.adsl4linux.de<br />
provides lots <strong>of</strong> additional information and instructions to help you install and<br />
configure <strong>the</strong> driver.<br />
| <strong>devolo</strong> <strong>dsl+</strong> <strong>1100</strong> <strong>LAN</strong> |
20<br />
<strong>devolo</strong> s<strong>of</strong>tware |<br />
3 <strong>devolo</strong> s<strong>of</strong>tware<br />
| <strong>devolo</strong> <strong>dsl+</strong> <strong>1100</strong> <strong>LAN</strong> |<br />
This chapter introduces you to <strong>the</strong> Informer, EasyShare and EasyClean s<strong>of</strong>tware.<br />
3.1 Overview <strong>of</strong> <strong>the</strong> <strong>devolo</strong> s<strong>of</strong>tware<br />
3.1.1 Informer<br />
3.1.2 EasyShare<br />
3.1.3 EasyClean<br />
The Informer shows you information about your dsl + <strong>1100</strong> <strong>LAN</strong>, such as <strong>the</strong> connection<br />
status as well as <strong>the</strong> version <strong>of</strong> <strong>the</strong> firmware.<br />
EasyShare is a file-sharing and chat tool for your local network. It allows you to<br />
exchange files easily between local Windows computers. The chat function<br />
allows instant communication between all network users.<br />
Micros<strong>of</strong>t Internet Explorer stores files in a cache on your hard drive while you<br />
surf <strong>the</strong> Internet. With EasyClean, you can determine which <strong>of</strong> <strong>the</strong>se unwanted<br />
files you would like to delete.<br />
3.2 Installing <strong>the</strong> <strong>devolo</strong> s<strong>of</strong>tware<br />
� The <strong>devolo</strong> s<strong>of</strong>tware is normally installed toge<strong>the</strong>r with <strong>the</strong> installation wizard.<br />
To install <strong>the</strong> <strong>devolo</strong> s<strong>of</strong>tware separately on a computer with a Windows<br />
operating system, follow <strong>the</strong> steps <strong>of</strong> <strong>the</strong> wizard (see 'Installing Internet<br />
access s<strong>of</strong>tware and setting up Internet access') and select 'Custom Installation'<br />
to choose <strong>the</strong> s<strong>of</strong>tware components you would like to be installed<br />
yourself.<br />
� After <strong>the</strong> installation has been completed successfully, start <strong>the</strong> <strong>devolo</strong><br />
s<strong>of</strong>tware by clicking Start � Programs � <strong>devolo</strong> � EasyClean,<br />
EasyShare, Informer or <strong>dsl+</strong> <strong>1100</strong> <strong>LAN</strong> Configuration Wizard.
| <strong>devolo</strong> s<strong>of</strong>tware 21<br />
3.3 Overview in <strong>the</strong> network with <strong>the</strong> Informer<br />
Due to <strong>the</strong> Informer you always have an overview <strong>of</strong> your dsl + <strong>1100</strong> <strong>LAN</strong>.<br />
The Informer shows you information about your dsl + <strong>1100</strong> <strong>LAN</strong>, such as <strong>the</strong> connection<br />
status as well as <strong>the</strong> version <strong>of</strong> <strong>the</strong> firmware.<br />
When using a <strong>LAN</strong> router, <strong>the</strong> dsl + <strong>1100</strong> <strong>LAN</strong> will not be found by <strong>the</strong> Informer.<br />
| <strong>devolo</strong> <strong>dsl+</strong> <strong>1100</strong> <strong>LAN</strong> |
22<br />
<strong>devolo</strong> s<strong>of</strong>tware |<br />
3.4 Communication in <strong>the</strong> network using EasyShare<br />
3.4.1 Configuration<br />
| <strong>devolo</strong> <strong>dsl+</strong> <strong>1100</strong> <strong>LAN</strong> |<br />
All users on <strong>the</strong> local network who have started EasyShare are automatically recognized<br />
by <strong>the</strong> program and listed:<br />
The EasyShare s<strong>of</strong>tware provides two easy wizards, which will guide you quickly<br />
and easily through <strong>the</strong> configuration process: <strong>the</strong> first setup wizard, which starts<br />
automatically <strong>the</strong> first time <strong>the</strong> program is started, and <strong>the</strong> sharing wizard,<br />
which allows you to add shared items at any time. The individual functions <strong>of</strong><br />
<strong>the</strong> EasyShare s<strong>of</strong>tware are described here:<br />
Folder sharing<br />
To share data with o<strong>the</strong>rs, a EasyShare network user has to make <strong>the</strong> data available<br />
in a shared folder. When a folder is shared, all <strong>of</strong> its files as well as <strong>the</strong> files<br />
<strong>of</strong> all its subdirectories become available to all users on <strong>the</strong> EasyShare network.<br />
Folders can be shared ei<strong>the</strong>r by using <strong>the</strong> initial setup wizard, which opens automatically<br />
<strong>the</strong> first time <strong>the</strong> EasyShare is started, or by using <strong>the</strong> sharing wizard.<br />
You can open <strong>the</strong> sharing wizard by clicking <strong>the</strong> Add share button, or by selecting<br />
File � Add share from <strong>the</strong> menu.
Options<br />
| <strong>devolo</strong> s<strong>of</strong>tware 23<br />
Every computer has a name. When EasyShare is first installed, you can assign a<br />
new name to your computer or use <strong>the</strong> default name suggested by <strong>the</strong> operating<br />
system. Your computer is visible by this name to all EasyShare users.<br />
The computer name can be changed at any time by clicking <strong>the</strong> Options button<br />
or by selecting Tools � Options from <strong>the</strong> menu.<br />
Refreshing shared folders<br />
To view (newly) shared folders <strong>of</strong> o<strong>the</strong>r EasyShare network users, select File �<br />
Refresh from <strong>the</strong> menu, or Refresh from <strong>the</strong> context menu (right mouse button).<br />
The contents <strong>of</strong> all shared folders will appear in <strong>the</strong> top right-hand window.<br />
Downloading files<br />
To download shared files from o<strong>the</strong>r EasyShare network users, select <strong>the</strong> computer<br />
belonging to <strong>the</strong> user and <strong>the</strong>n mark <strong>the</strong> shared folder for that user. The<br />
upper-right window <strong>the</strong>n lists all <strong>the</strong> contents <strong>of</strong> <strong>the</strong> folder. From <strong>the</strong> list, mark<br />
<strong>the</strong> files and/or folders that you want to download and <strong>the</strong>n select File �<br />
Download from <strong>the</strong> menu, or Download from <strong>the</strong> context menu (right mouse<br />
button). Choose a target folder on your computer and confirm by clicking OK.<br />
The files are now downloaded to your computer. The status <strong>of</strong> <strong>the</strong> download is<br />
displayed in <strong>the</strong> lower-right window entitled 'Data transfer in process'.<br />
Data transfer in process<br />
All 'Data transfer in process' are displayed in <strong>the</strong> lower right window and disappear<br />
from <strong>the</strong> screen once <strong>the</strong>y are finished.<br />
� The 'Name' column indicates <strong>the</strong> name <strong>of</strong> <strong>the</strong> file being downloaded.<br />
� The 'Status' column shows <strong>the</strong> current transfer progress and <strong>the</strong> transfer<br />
speed.<br />
� The 'Host' column shows <strong>the</strong> computer from which <strong>the</strong> file is being downloaded,<br />
or to which it is being uploaded from your computer.<br />
You can cancel <strong>the</strong> current download by clicking <strong>the</strong> file and selecting Cancel<br />
from <strong>the</strong> context menu (right mouse button).<br />
| <strong>devolo</strong> <strong>dsl+</strong> <strong>1100</strong> <strong>LAN</strong> |
24<br />
<strong>devolo</strong> s<strong>of</strong>tware |<br />
Chatting<br />
| <strong>devolo</strong> <strong>dsl+</strong> <strong>1100</strong> <strong>LAN</strong> |<br />
The lower left window functions as a chat room, which is visible and accessible<br />
to all EasyShare users on <strong>the</strong> local network. Users can "chat" by writing messages<br />
and clicking Send.<br />
3.5 Maintain your privacy with EasyClean<br />
With EasyClean, you can delete <strong>the</strong> cached files listed below. Select <strong>the</strong> checkboxes<br />
<strong>of</strong> <strong>the</strong> file types you would like to remove, <strong>the</strong>n click Delete.<br />
� Cookies—Many websites store small files on your computer, so-called<br />
cookies. These files may contain personal information such as log-in data,<br />
passwords or credit card numbers.<br />
� Temporary Internet files—Temporary files are stored on your hard drive<br />
while you surf <strong>the</strong> Net. Over time, <strong>the</strong>se files take up a considerable amount<br />
<strong>of</strong> space.
| <strong>devolo</strong> s<strong>of</strong>tware 25<br />
� History files—Internet Explorer records your surfing activity over a period<br />
<strong>of</strong> days or weeks. This can be practical, but it also takes up space and can<br />
be undesirable in many cases.<br />
� Stored form information—Internet Explorer stores information that you<br />
enter in forms and can auto-complete this information in <strong>the</strong> future.<br />
� Stored passwords—Passwords can also be stored and automatically<br />
inserted toge<strong>the</strong>r with usernames in subsequent log-in procedures. While<br />
this is convenient, it's also dangerous—especially in connection with bank<br />
transactions. Sensitive information such as this should only be stored locally<br />
in special programs designed for this purpose.<br />
� Document history—Internet Explorer maintains lists <strong>of</strong> open documents<br />
and visited websites. This information is generally no longer needed.<br />
Please note that EasyClean only supports Micros<strong>of</strong>t Internet Explorer.<br />
| <strong>devolo</strong> <strong>dsl+</strong> <strong>1100</strong> <strong>LAN</strong> |
26<br />
Appendix |<br />
4 Appendix<br />
4.1 Performance data and specifications<br />
| <strong>devolo</strong> <strong>dsl+</strong> <strong>1100</strong> <strong>LAN</strong> |<br />
dsl + <strong>1100</strong> <strong>LAN</strong><br />
<strong>LAN</strong> standards E<strong>the</strong>rnet specification IEEE 802.3<br />
Fast-E<strong>the</strong>rnet specification IEEE 802.3u<br />
Full duplex specification IEEE 802.3x<br />
ADSL standard ADSL over ISDN (Annex B [Germany])<br />
Telekom specification 1TR112 (U-R2)<br />
ITU G.992.1 (G.dmt)<br />
ITU G.992.3 (ADSL2)<br />
ITU G.992.5 (ADSL2+)<br />
ITU G.994.1 (G.hs)<br />
or:<br />
ADSL over POTS (Annex A)<br />
ANSI T1.413 Issue 2<br />
ITU G.992.1 (G.dmt)<br />
ITU G.992.2 (G.lite)<br />
ITU G.992.3 (ADSL2)<br />
ITU G.992.3 Annex L (RE-ADSL-2)<br />
ITU G.992.5 (ADSL2+)<br />
ITU G.994.1 (G.hs)<br />
ITU G.997.1 (G.ploam)<br />
Transfer throughput Download up to 24 Mbps<br />
Upload up to 1 Mbps<br />
Ports 1 E<strong>the</strong>rnet <strong>LAN</strong> with Auto MDI/MDI-X<br />
1 ADSL WAN<br />
WAN connection Connection type: RJ11<br />
<strong>LAN</strong> connection Connector Typ: RJ45 (E<strong>the</strong>rnet)<br />
LEDs Power<br />
DSL status<br />
Status LED for E<strong>the</strong>rnet connection<br />
Power supply Power adapter 9V DC, 500mA, EU<br />
Ambient conditions 0–40°C, 10–90% humidity (non-condensing)<br />
Protocols Bridged E<strong>the</strong>rnet/Routed IP (RFC 2225/2684)<br />
ATM AAL 5<br />
System requirements CD-ROM drive<br />
Computer interface: RJ45 (E<strong>the</strong>rnet)<br />
Windows 2000, Windows XP (32-bit), Mac OS X or Linux<br />
For Internet access: DSL connection
Miscellaneous Firmware upgrade via s<strong>of</strong>tware<br />
4.2 Care and maintenance <strong>of</strong> <strong>the</strong> device<br />
| Appendix 27<br />
CE conformity CE conformity in accordance with <strong>the</strong> technical requirements for<br />
all EU countries and Switzerland<br />
EN 60950x<br />
EN 55022x<br />
EN 55024x<br />
Warranty 3 years<br />
There are no user-serviceable parts inside <strong>the</strong> case. Do not open <strong>the</strong> case.<br />
Clean <strong>the</strong> unit by wiping dirt from <strong>the</strong> case using an eyeglasses cleaning cloth<br />
or o<strong>the</strong>r s<strong>of</strong>t cloth. Never use water, paint thinner, benzene, alcohol or o<strong>the</strong>r<br />
strong cleaning agents when cleaning <strong>the</strong> dsl + <strong>1100</strong> <strong>LAN</strong>, as <strong>the</strong>se could damage<br />
<strong>the</strong> case.<br />
4.3 CE conformity<br />
dsl + <strong>1100</strong> <strong>LAN</strong><br />
The product conforms to <strong>the</strong> basic requirements <strong>of</strong> Directive 1999/5/EC (R&TTE)<br />
and <strong>the</strong> o<strong>the</strong>r relevant provisions <strong>of</strong> <strong>the</strong> FTEG (Radio and Telecommunications<br />
Terminal Equipment Act), and is designed for use in <strong>the</strong> EU and Switzerland.<br />
This product is class B equipment. This equipment may cause interference with<br />
radio waves in home use; if this occurs <strong>the</strong> operator may be required to take corrective<br />
action.<br />
| <strong>devolo</strong> <strong>dsl+</strong> <strong>1100</strong> <strong>LAN</strong> |
28<br />
Appendix |<br />
4.4 Declaration <strong>of</strong> conformity<br />
| <strong>devolo</strong> <strong>dsl+</strong> <strong>1100</strong> <strong>LAN</strong> |<br />
KONFORMITÄTSERKLÄRUNG<br />
Die Firma: <strong>devolo</strong> <strong>AG</strong><br />
The Company: Sonnenweg 11<br />
52070 Aachen<br />
erklärt, dass das Produkt: dsl + <strong>1100</strong> <strong>LAN</strong><br />
declares that <strong>the</strong> product:<br />
EC DECLARATION OF CONFORMITY<br />
Verwendungszweck: ADSL E<strong>the</strong>rnet Bridge<br />
Intended purpose:<br />
den grundlegenden Anforderungen des § 3 und den übrigen einschlägigen Bestimmungen<br />
des FTEG (Artikel 3 der R&TTE) entspricht.<br />
complies with <strong>the</strong> appropriate essential requirements <strong>of</strong> <strong>the</strong> FTEG (Article 3 <strong>of</strong> R&TTE) and <strong>the</strong> o<strong>the</strong>r relevant<br />
provisions.<br />
Harmonisierte Normen: Gesundheit und Sicherheit gemäß §3 (1) 1. (Artikel 3 (1) a))<br />
Harmonised standards: Health and safety requirements contained in §3 (1) 1. (Article 3 (1) a))<br />
EN 60950:2000<br />
Harmonisierte Normen: Schutzanforderungen in Bezug auf die EMV §3 (1) 2, (Artikel 3<br />
(1) b)<br />
Harmonised standards: Protection requirements with respect to EMC §3 (1) 2, (Article 3 (1) b)<br />
EN 55024:1998+A1:2001+A2:2003<br />
EN 55022:1998+A1:2000+A2:2003 Class B<br />
Diese Erklärung wird verantwortlich abgegeben durch:<br />
This declaration is submitted by:<br />
Aachen, 2. August 2005<br />
Aachen, 2 nd August 2005 Heiko Harbers<br />
Vorstandsvorsitzender<br />
CEO
4.5 Warranty conditions<br />
| Appendix 29<br />
The <strong>devolo</strong> <strong>AG</strong> warranty is given to purchasers <strong>of</strong> <strong>devolo</strong> products in addition to <strong>the</strong> warranty conditions<br />
provided by law and in accordance with <strong>the</strong> following conditions:<br />
1 Warranty coverage<br />
a) The warranty covers <strong>the</strong> equipment delivered and all its parts. Parts will, at <strong>devolo</strong>'s sole discretion,<br />
be replaced or repaired free <strong>of</strong> charge if, despite proven proper handling and adherence<br />
to <strong>the</strong> operating instructions, <strong>the</strong>se parts became defective due to fabrication and/or<br />
material defects. Alternatively, <strong>devolo</strong> reserves <strong>the</strong> right to replace <strong>the</strong> defective product with<br />
a comparable product with <strong>the</strong> same specifications and features. Operating manuals and any<br />
supplied s<strong>of</strong>tware are excluded from <strong>the</strong> warranty.<br />
b) Material and service charges shall be covered by <strong>devolo</strong>, but not shipping and handling costs<br />
involved in transport from <strong>the</strong> buyer to <strong>the</strong> service station and/or to <strong>devolo</strong>.<br />
c) Replaced parts become property <strong>of</strong> <strong>devolo</strong>.<br />
d) <strong>devolo</strong> is authorized to carry out technical changes (e.g. firmware updates) beyond repair and<br />
replacement <strong>of</strong> defective parts in order to bring <strong>the</strong> equipment up to <strong>the</strong> current technical state.<br />
This does not result in any additional charge for <strong>the</strong> customer. A legal claim to this service does<br />
not exist.<br />
2 Warranty period<br />
The warranty period for this <strong>devolo</strong> product is three years. This period begins at <strong>the</strong> day <strong>of</strong> delivery<br />
from <strong>the</strong> <strong>devolo</strong> dealer. Warranty services rendered by <strong>devolo</strong> do not result in an extension <strong>of</strong> <strong>the</strong><br />
warranty period nor do <strong>the</strong>y initiate a new warranty period. The warranty period for installed<br />
replacement parts ends with <strong>the</strong> warranty period <strong>of</strong> <strong>the</strong> device as a whole.<br />
3 Warranty procedure<br />
a) If defects appear during <strong>the</strong> warranty period, <strong>the</strong> warranty claims must be made immediately,<br />
at <strong>the</strong> latest within a period <strong>of</strong> 7 days.<br />
b) In <strong>the</strong> case <strong>of</strong> any externally visible damage arising from transport (e.g. damage to <strong>the</strong> case),<br />
<strong>the</strong> person responsible for <strong>the</strong> transportation and <strong>the</strong> sender should be informed immediately.<br />
On discovery <strong>of</strong> damage which is not externally visible, <strong>the</strong> transport company and <strong>devolo</strong> are<br />
to be immediately informed in writing, at <strong>the</strong> latest within 3 days <strong>of</strong> delivery.<br />
c) Transport to and from <strong>the</strong> location where <strong>the</strong> warranty claim is accepted and/or <strong>the</strong> repaired<br />
device is exchanged, is at <strong>the</strong> purchaser's own risk and cost.<br />
d) Warranty claims are only valid if a copy <strong>of</strong> <strong>the</strong> original purchase receipt is returned with <strong>the</strong><br />
device. <strong>devolo</strong> reserves <strong>the</strong> right to require <strong>the</strong> submission <strong>of</strong> <strong>the</strong> original purchase receipt.<br />
4 Suspension <strong>of</strong> <strong>the</strong> warranty<br />
All warranty claims will be deemed invalid<br />
a) <strong>the</strong> label with <strong>the</strong> serial number has been removed from <strong>the</strong> device,<br />
b) <strong>the</strong> device is damaged or destroyed as a result <strong>of</strong> acts <strong>of</strong> nature or by environmental influences<br />
(moisture, electric shock, dust, etc.),<br />
c) <strong>the</strong> device was stored or operated under conditions not in compliance with <strong>the</strong> technical specifications,<br />
d) <strong>the</strong> damage occurred due to incorrect handling, especially due to non-observance <strong>of</strong> <strong>the</strong> system<br />
description and <strong>the</strong> operating instructions,<br />
e) <strong>the</strong> device was opened, repaired or modified by persons not authorized by <strong>devolo</strong>,<br />
f) <strong>the</strong> device shows any kind <strong>of</strong> mechanical damage,<br />
| <strong>devolo</strong> <strong>dsl+</strong> <strong>1100</strong> <strong>LAN</strong> |
30<br />
Appendix |<br />
| <strong>devolo</strong> <strong>dsl+</strong> <strong>1100</strong> <strong>LAN</strong> |<br />
g) <strong>the</strong> warranty claim has not been reported in accordance with 3a) or 3b).<br />
5 Operating mistakes<br />
If it becomes apparent that <strong>the</strong> reported malfunction <strong>of</strong> <strong>the</strong> device has been caused by unsuitable<br />
s<strong>of</strong>tware, hardware, installation or operation, <strong>devolo</strong> reserves <strong>the</strong> right to charge <strong>the</strong> purchaser for<br />
<strong>the</strong> resulting testing costs.<br />
6 Additional regulations<br />
a) The above conditions define <strong>the</strong> complete scope <strong>of</strong> <strong>devolo</strong>’s legal liability.<br />
b) The warranty gives no entitlement to additional claims, such as any refund in full or in part.<br />
Compensation claims, regardless <strong>of</strong> <strong>the</strong> legal basis, are excluded. This does not apply if e.g.<br />
injury to persons or damage to private property are specifically covered by <strong>the</strong> product liability<br />
law, or in cases <strong>of</strong> intentional act or culpable negligence.<br />
c) Claims for compensation <strong>of</strong> lost pr<strong>of</strong>its, indirect or consequential detriments, are excluded.<br />
d) <strong>devolo</strong> is not liable for lost data or retrieval <strong>of</strong> lost data in cases <strong>of</strong> slight and ordinary negligence.<br />
e) In <strong>the</strong> case that <strong>the</strong> intentional or culpable negligence <strong>of</strong> <strong>devolo</strong> employees has caused a loss<br />
<strong>of</strong> data, <strong>devolo</strong> will be liable for those costs typical to <strong>the</strong> recovery <strong>of</strong> data where periodic security<br />
data back-ups have been made.<br />
f) The warranty is valid only for <strong>the</strong> first purchaser and is not transferable.<br />
g) The court <strong>of</strong> jurisdiction is located in Aachen, Germany in <strong>the</strong> case that <strong>the</strong> purchaser is a merchant.<br />
If <strong>the</strong> purchaser does not have a court <strong>of</strong> jurisdiction in <strong>the</strong> Federal Republic <strong>of</strong> Germany<br />
or if he moves his domicile out <strong>of</strong> Germany after conclusion <strong>of</strong> <strong>the</strong> contract, <strong>devolo</strong>’s court <strong>of</strong><br />
jurisdiction applies. This is also applicable if <strong>the</strong> purchaser's domicile is not known at <strong>the</strong> time<br />
<strong>of</strong> institution <strong>of</strong> proceedings.<br />
h) The law <strong>of</strong> <strong>the</strong> Federal Republic <strong>of</strong> Germany is applicable. The UN commercial law does not<br />
apply to dealings between <strong>devolo</strong> and <strong>the</strong> purchaser.