instruction manual residential electric 2.5 Gallon 120 volt water heater
instruction manual residential electric 2.5 Gallon 120 volt water heater
instruction manual residential electric 2.5 Gallon 120 volt water heater

You also want an ePaper? Increase the reach of your titles
YUMPU automatically turns print PDFs into web optimized ePapers that Google loves.
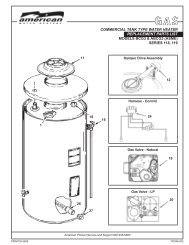
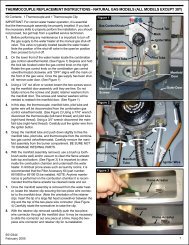
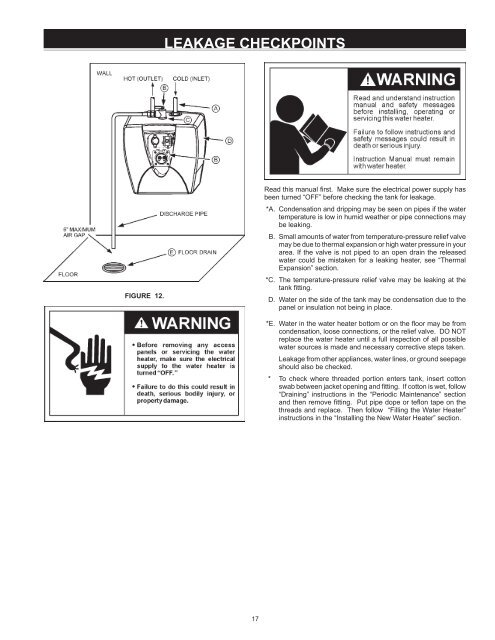
LEAKAGE CHECKPOINTS<br />
FIGURE 12.<br />
Read this <strong>manual</strong> first. Make sure the <strong>electric</strong>al power supply has<br />
been turned “OFF” before checking the tank for leakage.<br />
*A. Condensation and dripping may be seen on pipes if the <strong>water</strong><br />
temperature is low in humid weather or pipe connections may<br />
be leaking.<br />
B. Small amounts of <strong>water</strong> from temperature-pressure relief valve<br />
may be due to thermal expansion or high <strong>water</strong> pressure in your<br />
area. If the valve is not piped to an open drain the released<br />
<strong>water</strong> could be mistaken for a leaking <strong>heater</strong>, see “Thermal<br />
Expansion” section.<br />
*C. The temperature-pressure relief valve may be leaking at the<br />
tank fitting.<br />
D. Water on the side of the tank may be condensation due to the<br />
panel or insulation not being in place.<br />
*E. Water in the <strong>water</strong> <strong>heater</strong> bottom or on the floor may be from<br />
condensation, loose connections, or the relief valve. DO NOT<br />
replace the <strong>water</strong> <strong>heater</strong> until a full inspection of all possible<br />
<strong>water</strong> sources is made and necessary corrective steps taken.<br />
Leakage from other appliances, <strong>water</strong> lines, or ground seepage<br />
should also be checked.<br />
* To check where threaded portion enters tank, insert cotton<br />
swab between jacket opening and fitting. If cotton is wet, follow<br />
“Draining” <strong>instruction</strong>s in the “Periodic Maintenance” section<br />
and then remove fitting. Put pipe dope or teflon tape on the<br />
threads and replace. Then follow “Filling the Water Heater”<br />
<strong>instruction</strong>s in the “Installing the New Water Heater” section.<br />
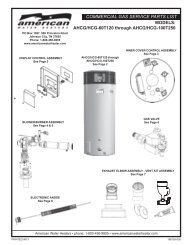
Key No. Part Description<br />
17