instruction manual residential electric 2.5 Gallon 120 volt water heater
instruction manual residential electric 2.5 Gallon 120 volt water heater
instruction manual residential electric 2.5 Gallon 120 volt water heater
You also want an ePaper? Increase the reach of your titles
YUMPU automatically turns print PDFs into web optimized ePapers that Google loves.
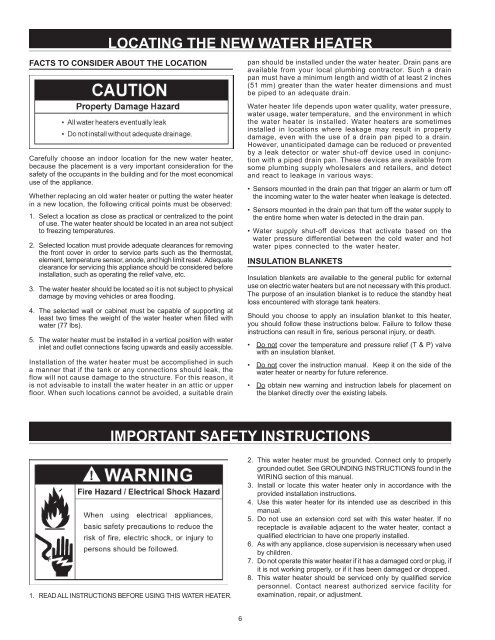
LOCATING THE NEW WATER HEATER<br />
Facts to Consider About the Location<br />
Carefully choose an indoor location for the new <strong>water</strong> <strong>heater</strong>,<br />
because the placement is a very important consideration for the<br />
safety of the occupants in the building and for the most economical<br />
use of the appliance.<br />
Whether replacing an old <strong>water</strong> <strong>heater</strong> or putting the <strong>water</strong> <strong>heater</strong><br />
in a new location, the following critical points must be observed:<br />
1. Select a location as close as practical or centralized to the point<br />
of use. The <strong>water</strong> <strong>heater</strong> should be located in an area not subject<br />
to freezing temperatures.<br />
2. Selected location must provide adequate clearances for removing<br />
the front cover in order to service parts such as the thermostat,<br />
element, temperature sensor, anode, and high limit reset. Adequate<br />
clearance for servicing this appliance should be considered before<br />
installation, such as operating the relief valve, etc.<br />
3. The <strong>water</strong> <strong>heater</strong> should be located so it is not subject to physical<br />
damage by moving vehicles or area flooding.<br />
4. The selected wall or cabinet must be capable of supporting at<br />
least two times the weight of the <strong>water</strong> <strong>heater</strong> when filled with<br />
<strong>water</strong> (77 lbs).<br />
5. The <strong>water</strong> <strong>heater</strong> must be installed in a vertical position with <strong>water</strong><br />
inlet and outlet connections facing upwards and easily accessible.<br />
Installation of the <strong>water</strong> <strong>heater</strong> must be accomplished in such<br />
a manner that if the tank or any connections should leak, the<br />
flow will not cause damage to the structure. For this reason, it<br />
is not advisable to install the <strong>water</strong> <strong>heater</strong> in an attic or upper<br />
floor. When such locations cannot be avoided, a suitable drain<br />
pan should be installed under the <strong>water</strong> <strong>heater</strong>. Drain pans are<br />
available from your local plumbing contractor. Such a drain<br />
pan must have a minimum length and width of at least 2 inches<br />
(51 mm) greater than the <strong>water</strong> <strong>heater</strong> dimensions and must<br />
be piped to an adequate drain.<br />
Water <strong>heater</strong> life depends upon <strong>water</strong> quality, <strong>water</strong> pressure,<br />
<strong>water</strong> usage, <strong>water</strong> temperature, and the environment in which<br />
the <strong>water</strong> <strong>heater</strong> is installed. Water <strong>heater</strong>s are sometimes<br />
installed in locations where leakage may result in property<br />
damage, even with the use of a drain pan piped to a drain.<br />
However, unanticipated damage can be reduced or prevented<br />
by a leak detector or <strong>water</strong> shut-off device used in conjunction<br />
with a piped drain pan. These devices are available from<br />
some plumbing supply wholesalers and retailers, and detect<br />
and react to leakage in various ways:<br />
• Sensors mounted in the drain pan that trigger an alarm or turn off<br />
the incoming <strong>water</strong> to the <strong>water</strong> <strong>heater</strong> when leakage is detected.<br />
• Sensors mounted in the drain pan that turn off the <strong>water</strong> supply to<br />
the entire home when <strong>water</strong> is detected in the drain pan.<br />
• Water supply shut-off devices that activate based on the<br />
<strong>water</strong> pressure differential between the cold <strong>water</strong> and hot<br />
<strong>water</strong> pipes connected to the <strong>water</strong> <strong>heater</strong>.<br />
INSULATION BLANKETS<br />
Insulation blankets are available to the general public for external<br />
use on <strong>electric</strong> <strong>water</strong> <strong>heater</strong>s but are not necessary with this product.<br />
The purpose of an insulation blanket is to reduce the standby heat<br />
loss encountered with storage tank <strong>heater</strong>s.<br />
Should you choose to apply an insulation blanket to this <strong>heater</strong>,<br />
you should follow these <strong>instruction</strong>s below. Failure to follow these<br />
<strong>instruction</strong>s can result in fire, serious personal injury, or death.<br />
• Do not cover the temperature and pressure relief (T & P) valve<br />
with an insulation blanket.<br />
• Do not cover the <strong>instruction</strong> <strong>manual</strong>. Keep it on the side of the<br />
<strong>water</strong> <strong>heater</strong> or nearby for future reference.<br />
• Do obtain new warning and <strong>instruction</strong> labels for placement on<br />
the blanket directly over the existing labels.<br />
important safety <strong>instruction</strong>s<br />
1. READ ALL INSTRUCTIONS BEFORE USING THIS WATER HEATER.<br />
2. This <strong>water</strong> <strong>heater</strong> must be grounded. Connect only to properly<br />
grounded outlet. See GROUNDING INSTRUCTIONS found in the<br />
WIRING section of this <strong>manual</strong>.<br />
3. Install or locate this <strong>water</strong> <strong>heater</strong> only in accordance with the<br />
provided installation <strong>instruction</strong>s.<br />
4. Use this <strong>water</strong> <strong>heater</strong> for its intended use as described in this<br />
<strong>manual</strong>.<br />
5. Do not use an extension cord set with this <strong>water</strong> <strong>heater</strong>. If no<br />
receptacle is available adjacent to the <strong>water</strong> <strong>heater</strong>, contact a<br />
qualified <strong>electric</strong>ian to have one properly installed.<br />
6. As with any appliance, close supervision is necessary when used<br />
by children.<br />
7. Do not operate this <strong>water</strong> <strong>heater</strong> if it has a damaged cord or plug, if<br />
it is not working properly, or if it has been damaged or dropped.<br />
8. This <strong>water</strong> <strong>heater</strong> should be serviced only by qualified service<br />
personnel. Contact nearest authorized service facility for<br />
examination, repair, or adjustment.


