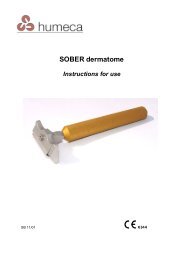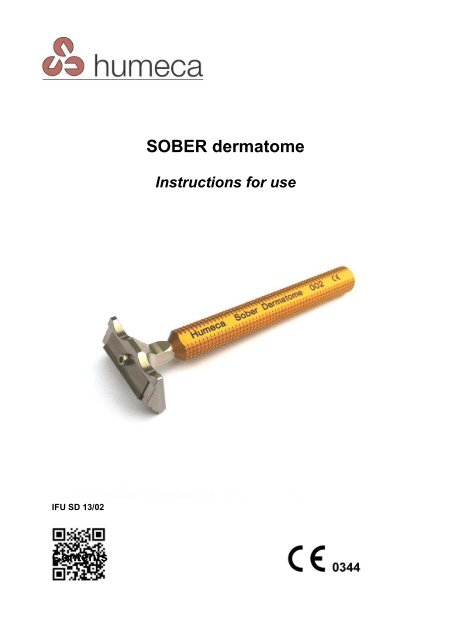
Instructions for use SOBER dermatome, version 2013 - Humeca
Instructions for use SOBER dermatome, version 2013 - Humeca
Instructions for use SOBER dermatome, version 2013 - Humeca

Create successful ePaper yourself
Turn your PDF publications into a flip-book with our unique Google optimized e-Paper software.
<strong>SOBER</strong> <strong>dermatome</strong><br />
<strong>Instructions</strong> <strong>for</strong> <strong>use</strong><br />
IFU SD 13/02<br />
Contents
2<br />
page<br />
1. Introduction 3<br />
2. The parts of the <strong>SOBER</strong> <strong>dermatome</strong> 4<br />
3. Cleaning and sterilization 6<br />
4. Inserting the blade 6<br />
5. Surgery 9<br />
6. Atmospheric conditions during <strong>use</strong> and storage 11<br />
7. Guarantee 11<br />
8. Rules, CE–hallmark, responsibilities 12<br />
9. Technical data 12<br />
10. Ordering info 13<br />
11. Contact address 13<br />
VIDEO:<br />
This booklet explains how to handle and <strong>use</strong> the <strong>SOBER</strong><br />
<strong>dermatome</strong>. We recommend to watch the video (DVD) provided with<br />
each set first. You can also watch the video on our website<br />
www.humeca.com (section ‘<strong>SOBER</strong> products’, sub ‘video <strong>SOBER</strong><br />
<strong>dermatome</strong>’) or scan the code below:<br />
Video <strong>SOBER</strong> <strong>dermatome</strong>’
3<br />
1. Introduction<br />
The ability to cut a split-thickness skin graft free-handedly has been<br />
regarded as a skill acquired only by long experience. Several devices<br />
have been improvised to simplify this task. However, the size and<br />
elaborate arrangements of <strong>dermatome</strong>s often preclude their <strong>use</strong>,<br />
especially if the need is in an emergency room, a clinic or at the patient’s<br />
bedside. Besides sophisticated <strong>dermatome</strong>s are costly and more<br />
adequate <strong>for</strong> harvesting larger skin grafts with precise thickness.<br />
In close co-operation with the Dutch surgeon dr. Willem Nugteren,<br />
<strong>Humeca</strong> developed a very simple <strong>dermatome</strong> <strong>for</strong> freehanded harvesting<br />
of a 30 mm (1¼ “) wide split skin graft with a pre-determined thickness of<br />
about 0.25 mm (0.001“)<br />
The new product is called the “<strong>SOBER</strong>” <strong>dermatome</strong>, from an English<br />
translation of the phonetic last name of the inventor, dr. Nugteren. Based<br />
on his experience with surgery in third world countries, it became clear<br />
that a portable, economical and simple, yet efficient <strong>dermatome</strong> would<br />
be a very <strong>use</strong>ful mechanical tool <strong>for</strong> skin grafting.<br />
We believe the <strong>SOBER</strong> <strong>dermatome</strong> offers the surgeon a low-cost<br />
alternative to the more elaborate mechanical <strong>dermatome</strong>s whenever<br />
small grafts are needed.<br />
REMARK:<br />
Be<strong>for</strong>e using the <strong>SOBER</strong> <strong>dermatome</strong>, we recommend to read this<br />
manual and to look at the DVD that was supplied with the instrument.<br />
Warning:<br />
Always pay attention to the presence of a very sharp blade in the<br />
<strong>SOBER</strong> <strong>dermatome</strong>. Remove it be<strong>for</strong>e cleaning and always handle it<br />
with care to prevent cutting accidents!
4<br />
2. The parts of the <strong>SOBER</strong> <strong>dermatome</strong><br />
The front- and backside of the <strong>SOBER</strong> <strong>dermatome</strong> are shown in the<br />
pictures below. Indicated are the following parts:<br />
1 Dermatome head 2 Blade cover<br />
3 Blade fixing screw 4 Deepened area <strong>for</strong> the blade<br />
5 Shaft 6 Area <strong>for</strong> finger positioning<br />
Fig. 1 Front side<br />
Fig. 2 Backside<br />
The little screw (3) cannot be separated from the blade cover (2) in order<br />
to prevent its loss.<br />
The <strong>dermatome</strong> is supplied with an extra stainless steel hexagonal tool<br />
<strong>for</strong> turning the blade fixing screw (3).
5<br />
However, such a hexagonal tool is also integrated in the shaft of the<br />
<strong>dermatome</strong>. Simply remove the shaft from the head by turning it counter<br />
clockwise while preventing the head from rotation (see fig. 3a and b).<br />
Fig. 3a and 3b. Removing the shaft from the head<br />
After the shaft (fig. 4) has been separated from the head, you can <strong>use</strong><br />
the hexagonal tip of the shaft as your tool, as shown in fig. 5.<br />
Fig. 4. The shaft with hexagonal tip can be <strong>use</strong>d as a tool<br />
Fig. 5. The shaft <strong>use</strong>d as a tool to fix or remove the blade cover
6<br />
3. Cleaning and sterilization<br />
All parts of the <strong>dermatome</strong> are made out of stainless steel, except <strong>for</strong> the<br />
shaft (anodized aluminium). Strong alkaline cleaning methods (pH>10)<br />
might ca<strong>use</strong> visible changes to the surface of the shaft, like stains and<br />
colour fading. The least damage to anodized aluminium and stainless<br />
steel surfaces will occur when a neutral cleaning agent is <strong>use</strong>d in<br />
combination with demineralised water. Don’t <strong>use</strong> H 2 O 2 (hydrogen<br />
peroxide) in the washing process; it will damage the shaft.<br />
For optimum cleaning results the cleaning solution should have access<br />
to all parts of the <strong>dermatome</strong>. For that reason either remove blade cover<br />
and clean them separately, or at least loosen the blade fixing screw<br />
some turns during cleaning. The instrument can be sterilized by any<br />
conventional method, suitable <strong>for</strong> sterilization of surgical instruments.<br />
Recommended is steam sterilization in an autoclave at a common<br />
temperature of 134 o C (=273 o F) <strong>for</strong> usually 5-10 minutes, or at 121 o C<br />
(=250 o F) <strong>for</strong> about 20 minutes).<br />
A suitable procedure <strong>for</strong> cleaning and sterilization and advisory on<br />
cleaning agents is presented in a joint publication of <strong>Humeca</strong> and<br />
Diversey. It is available on request. You can also download it from<br />
www.humeca.com<br />
4. Inserting the blade<br />
Warning:<br />
The blade of the <strong>SOBER</strong> <strong>dermatome</strong> is a single-<strong>use</strong> product. According<br />
to the amendment 2007/47/EC of the Medical Device Directive we want<br />
to point out that there are risks in using blades more than once. Persons<br />
involved in re-sterilizing the blades and others might cut themselves<br />
when handling and packaging the blades. Also packaging of the blades<br />
might be inappropriate to prevent accidental cutting by <strong>use</strong>r and/or<br />
damage of the sealed pouch that assures sterility. There<strong>for</strong>e <strong>Humeca</strong> will<br />
not accept any responsibility <strong>for</strong> second <strong>use</strong> of its <strong>dermatome</strong> blades.
7<br />
The following procedure describes how to insert the blade:<br />
- Replace the blade fixing screw with blade cover.<br />
- Turn the screw (3) a few turns counter clockwise to loosen the blade<br />
cover a little (do not remove the cover; just lift it a little).<br />
- Insert a sterile blade under the blade cover, as shown in fig. 6.<br />
Fig. 6 Inserting a blade in the <strong>SOBER</strong> <strong>dermatome</strong><br />
- Now find the correct position of the blade by assuring that the two<br />
holes in the blade match with the two little cams on the <strong>dermatome</strong><br />
head. This is shown in fig. 7-10 (here the blade cover is removed <strong>for</strong><br />
better explanation; in fact it only needs to be lifted a little).<br />
Fig. 7 There are two holes in the blade….<br />
Fig. 8 ….and two cams on the <strong>dermatome</strong> head
8<br />
Fig. 9 The cams should come into the two<br />
holes (red dots indicate position of cams)<br />
Fig. 10 Correct position of the blade<br />
- Finally fix the blade cover and check if the cams are still in the holes<br />
of the blade (fig. 11). Re-position if necessary.<br />
- After fixing the shaft to the head again, the <strong>SOBER</strong> <strong>dermatome</strong> is<br />
ready <strong>for</strong> <strong>use</strong><br />
Fig. 11 Final situation with the blade cover fixed
9<br />
5. Surgery<br />
- Be<strong>for</strong>e harvesting the skin, the donor site area of the patient is shaved<br />
and cleaned with a disinfectant. The skin is then smoothened with<br />
paraffin oil or some other lubricant.<br />
Note:<br />
In case the graft will be harvested prior to the application of the<br />
<strong>Humeca</strong> MEEK grafting method, please do not <strong>use</strong> any fatty<br />
substance to smoothen the skin, as this will prevent adherence<br />
of the MEEK grafts to the prefolded gauzes. You can <strong>use</strong><br />
sterile water or a buffered salt solution instead.<br />
- Stretch the skin to be harvested (preferably this is done by an<br />
assistant). No wrinkles or folds should be seen and the skin should be<br />
completely smooth.<br />
- Put the <strong>dermatome</strong> on the skin at the starting position <strong>for</strong> cutting under<br />
an angle of about 45 o , as shown in fig. 12.<br />
Fig. 12 Starting position of the <strong>dermatome</strong>
10<br />
- Put your index finger and middle finger in the areas <strong>for</strong> finger position,<br />
(no. 6 in fig. 2) as shown in fig. 13 and fig. 14.<br />
Fig. 13 Picture showing how to hold the <strong>SOBER</strong> <strong>dermatome</strong>; side view<br />
Fig. 14 Picture showing how to hold the <strong>SOBER</strong> <strong>dermatome</strong>; front view
11<br />
- Press the <strong>dermatome</strong> firmly to the skin and cut a stripe of graft by<br />
moving the instrument in a straight line over the donor site. Please do<br />
not make any lateral movements. See fig. 15.<br />
Fig. 15 Harvesting the graft; no lateral movements are made<br />
- Remove the graft from the <strong>dermatome</strong> by means of a <strong>for</strong>ceps.<br />
- After <strong>use</strong>, please remove the blade immediately to prevent possible<br />
danger at cleaning procedures to follow.<br />
6. Atmospheric conditions during <strong>use</strong> and storage<br />
When using and storing the instrument, please take care of the following<br />
atmospheric conditions:<br />
Ambient temperature 15-50 o C (59-122 o F) and rel. humidity 25-90%.<br />
7. Guarantee<br />
There is a two years guarantee on all parts of the <strong>dermatome</strong>, except <strong>for</strong><br />
the blades. This guarantee does not include repairs or replacements if:<br />
- other than original spare parts were <strong>use</strong>d <strong>for</strong> repair by <strong>use</strong>r,<br />
- the <strong>dermatome</strong> was <strong>use</strong>d <strong>for</strong> other applications than the ones<br />
mentioned in this manual.<br />
Guarantee includes free of charge repairs, if these are necessary as a<br />
result of trouble / defects that occurred during normal <strong>use</strong> of <strong>dermatome</strong>.<br />
In case of problems please contact <strong>Humeca</strong> or your local dealer.
12<br />
8. Rules, CE–hallmark, responsibilities<br />
S<br />
S<br />
S<br />
S<br />
S<br />
The management system of <strong>Humeca</strong> <strong>for</strong> design, production and<br />
sales has been certified according to EN ISO 13485:2003.<br />
According to the European Medical Device Directory 93/42/ EEC the<br />
<strong>SOBER</strong> <strong>dermatome</strong> comes under the head of class I products. The<br />
sterile blades come under the head of class IIA sterile products.<br />
The CE-hallmark is indicated on the <strong>dermatome</strong> and on the package<br />
of the blade.<br />
Do not <strong>use</strong> other than <strong>Humeca</strong> blades in the <strong>SOBER</strong> <strong>dermatome</strong> nor<br />
<strong>use</strong> <strong>Humeca</strong> blades in other <strong>dermatome</strong>s.<br />
Do not <strong>use</strong> a <strong>dermatome</strong> blade in case the package is damaged or<br />
previously opened.<br />
9. Technical data<br />
Dermatome<br />
Weight<br />
107 g (3.77 oz)<br />
Width <strong>dermatome</strong> head 46 mm (1.8”)<br />
Length 140 mm (5.5”)<br />
Max. diameter shaft 16 mm (0.63”)<br />
Cutting width 32 mm (1.26”)<br />
Graft thickness 0.25 mm (0.01”)<br />
Material shaft<br />
anodized aluminium<br />
Material head<br />
stainless steel<br />
Disposable blades<br />
Type<br />
double facet grinded<br />
Width / Thickness 8,0 / 0,254 mm (0.31 / 0.01”)<br />
Length D42 / D80 38 mm (1.5”)<br />
Material<br />
stainless steel
13<br />
10. Ordering info<br />
For ordering, please <strong>use</strong> the following article numbers:<br />
<strong>SOBER</strong> <strong>dermatome</strong>, set with 10 blades<br />
4.SB01<br />
Sterile blades <strong>for</strong> <strong>SOBER</strong> <strong>dermatome</strong>, box 10 pcs. 5.BLSB10<br />
Non-sterile blade <strong>for</strong> <strong>SOBER</strong> <strong>dermatome</strong> 5.011<br />
Spare parts:<br />
Hexagonal key, stainless steel 4.200<br />
Blade cover <strong>SOBER</strong> <strong>dermatome</strong> 4.202<br />
Shaft, anodized aluminium 4.206<br />
<strong>SOBER</strong> <strong>dermatome</strong> head 4.208<br />
Fig. 16 <strong>SOBER</strong> <strong>dermatome</strong> set in suitcase<br />
with a box of 10 sterile blades, as supplied by <strong>Humeca</strong><br />
11. Contact address<br />
For any assistance please contact your local dealer or:<br />
<strong>Humeca</strong> BV<br />
Het Bijvank 251-a<br />
7544 DB Enschede<br />
The Netherlands<br />
Phone: +31 53 4762619 Fax: +31 53 4771905<br />
Email: info@humeca.com Web: www.humeca.com