here - Humeca
here - Humeca
here - Humeca
- No tags were found...

You also want an ePaper? Increase the reach of your titles
YUMPU automatically turns print PDFs into web optimized ePapers that Google loves.
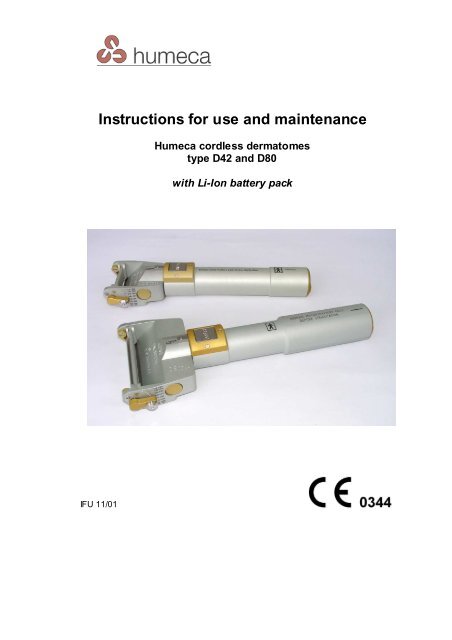
Instructions for use and maintenance<strong>Humeca</strong> cordless dermatomestype D42 and D80with Li-Ion battery packIFU 11/01
2ContentsPageSECTION I Instructions for use 3-261. Application 32. The main parts of the dermatome 33. Operation 34. Charging the batteries 34.1 Precautions 44.2 The charging procedure 45. Placing motor/battery cartridge in the dermatome 56. Inserting and removing the blade 67. Cutting skin or other tissue with the dermatome 77.1 Regular lubrication 77.2 Adjusting graft thickness 77.3 Adjusting graft width 77.4 Cutting 78. Cleaning 89. Sterilization 810. Atmospheric conditions during use and storage 911. Rules, CE–hallmark, responsibilities 1012. Trouble shooting 1113. Warranty 1214. Technical datasheet 1315. Ordering 14Images section I 15-26SECTION II Instructions for periodical maintenance 27-30
3SECTION IInstructions for use1. ApplicationThe dermatome has been designed for (split) skin harvesting anddebridement of open wounds.2. The main parts of the dermatomeThe dermatome and accessories are shown in pictures 1, 2 and 3.Reference is made to the following parts:1 Power shaft 10 Battery cartridge2 Cutting head 11 Disposable blades3 Power switch 12 Battery charger4 Graft thickness adjusting lever 13 Charger support unit5 Locking pin 14 Sterile clamp6 Locking cap 15 Width reducing clamp7 Button rings for opening cover 16 Autoclave case8 Blade compartment cover 17 Sterile funnel9 Motor cartridge 18 Lock-unlock switch3. OperationAfter the coupled motor- and battery cartridges (9 and 10) are inserted inthe power shaft (1) and when the locking cap (6) has been closed, themotor can be switched on by pressing the power switch (3) at the upperside of the shaft. The motor puts a rectangular blade in a reciprocatingmotion. The graft thickness is adjusted by the graft thickness-adjustinglever (4). The standard graft width can be reduced by placing a widthreducing clamp on the cutting head (2). A lock-unlock switch preventsaccidental run of the dermatome for safety reasons.4. Charging the batteriesAttention! Important security advice!Connect only Lithium-Ion or Lithium-Polymer battery packs with 2 cells.Never connect other battery types. Danger of explosion!
44.1 Precautions• Do not attempt to open or disassemble charger or batteries.• Keep the charger in a dry place (indoor use only).• For 1200 mAh battery use charger marked 9C94142/03 only.• For 2400 mAh battery use charger marked 9C94142/01 only.• Must not be operated under adverse circumstances (for example:inflammable gas, solvents, vapours, dust, humidity over 80% ortemperatures under 0°C or above 40°C)• In order to avoid risk of fire and/or electric shock, the chargermust be protected against high humidity and condensation.• Don’t short-circuit. Avoid contact of terminals with metal objects.• Keep out of reach of children and read instructions before use.• Charge only rechargeable Li-Ion or Li-Po batteries with an end ofcharge voltage of 4.2C per cell.Failure to comply with the safety instructions may lead to damage tothe charger and/or batteries and may cause serious injury to the user.4.2 The charging procedureA battery cartridge (10) is coupled to the motor cartridge (9), as shown infig. 4, steps 1, 2 and 3. Charging the batteries requires uncoupling ofboth cartridges. This is done by turning one of the cartridges a quarterturn, while holding the other one in position (fig. 4, steps 3, 2 and 1).For charging the batteries you proceed as follows:- Attach the right primary mains adapter to the charger (t<strong>here</strong> is a slideon the charger that allows change of the adapters, see fig. 7a)- Connect the charger to the mains socket. The green LED “Power”indicates the right connection and the yellow LED shortly lights up (forabout 2 seconds).- Insert the round power plug (12e) of the charger (12) into the femaleconnector of the charger support unit (13), as shown in fig. 5.- Put the battery cartridge in the round opening of the charger supportunit (note that it only fits one way). Secure with a quarter turn (fig. 6).When connecting the battery, the yellow “Charge” LED lights to indicatethe charging process. When the battery is fully charged, the chargerswitches off automatically and the yellow “Charge” LED is extinguished. Ifthe yellow LED flashes for a period of time, the charger is checking the
attery if it was deeply discharged. After checking, the charger switchesto the charge process and the yellow “CHARGE” LED lights continuouslyuntil the battery is fully charged. If the yellow LED flashes for a longperiod of time and does not switch to the charge process, the battery packmay be defective.The motor- and battery cartridges belong together. In order to prevent itsloss, you can place the motor cartridge in the groove of the chargersupport unit during charging, as shown in fig. 8.5. Placing the motor-/battery cartridge in the dermatomeThe dermatome can be sterilized in a steam sterilizer, but the motor- andbattery cartridges should not be sterilized, at no time !!- Couple the motor cartridge (9) to the battery cartridge (10) by slidingthem into each other, followed by a quarter turn. The marking lines onthe two cartridges should be in the same position (fig. 4).- A circulating nurse now holds the non-sterile motor-/battery cartridgewith the marked line (10a) showing upwards.- A second person inserts the sterile clamp (14) into the back of thecartridge and lifts it up a little, as shown in fig. 9. Now the motor-/battery cartridge can be handled without the risk of contamination.Attention: never hold the cartridge with the marking linedownwards: it might fall off from the sterile clamp!- Push the sterile funnel (17) over the backside of the dermatome, afterhaving removed the locking cap (6 in fig. 2). Now push the motor-/battery cartridge in the dermatome and see to it that the markinglines on the cartridge are in line with the marking 1a on the powershaft of the dermatome (see fig. 10).- Remove the funnel (fig. 10 picture 4).- Finally place the sterile cap at the end of the power shaft with one ofthe locking balls in line with the line on the power shaft and fix it with aquarter turn until it clicks (see fig. 11).- By pressing the power switch 3, with the lock-unlock switch 18 in theunlock position to check proper run of the motor (fig. 12).5
66. Inserting and removing the bladeWarnings:- Do not use other than <strong>Humeca</strong> blades in the D42 and D80dermatome and do not use <strong>Humeca</strong> blades in other dermatomes.- Always pay attention to the presence of a very sharp blade in thedermatome. Remove it before cleaning and maintenance andalways handle it with care to prevent cutting accidents!- The <strong>Humeca</strong> dermatome blades are single-use products.According to the amendment 2007/47/EC of the Medical DeviceDirective we want to point out that t<strong>here</strong> are risks in using bladesmore than once. Persons involved in re-sterilizing the blades andothers might cut themselves when handling and packaging theblades. Also packaging of the blades might be inappropriate toprevent accidental cutting by user and/or damage of the sealedpouch that assures sterility. T<strong>here</strong>fore <strong>Humeca</strong> will not accept anyresponsibility for second use of its dermatome blades.Inserting the blade:Hold the dermatome in one hand, the blade compartment cover (8)upwards. Press the round buttons (7) at both sides of the cutting head,using the thumb and index finger of the same hand and open the coverwith the other hand (fig. 13).Carefully put the blade (11) in the dermatome, the cutting edge to thefront, taking care that the three pins (2a) interlock with the slots in theblade, as shown in fig. 14. Close the cover.Removing the blade:First open the blade compartment cover (see fig. 13) and then remove theblade by lifting the backside with a scalpel or forceps (see fig. 15). Tofacilitate lifting of the blade, a cavity has been made at the backside foreasy access.Attention: Never try to lift the front (sharp) side of the blade (asshown in fig. 16) as this might seriously damage theinstrument! Always lift it at the backside.
77. Cutting skin or other tissue with the dermatome7.1 Regular lubricationBefore sterilization (after cleaning) put a drop of oil (<strong>Humeca</strong> suppliesAesculap STERILIT ® oil for this purpose) in the hole (1b) at the bottom ofthe shaft, situated closely behind the cutting head (Fig. 17). For smoothrun, spread a drop of sterile water or salt solution (PBS) over the surfaceof the blade (fig.16). For periodical maintenance, cleaning and lubrication,please read the instructions in section II of this booklet.7.2 Adjusting graft thicknessPull the disk at the locking pin (5) of the lever (4) and adjust the lever tothe desired graft thickness (Fig. 19). After releasing the locking pin thelever is fixed. Cutting thickness is indicated in mm and inches (Fig. 19)7.3 Adjusting graft widthThe standard graft width of the dermatome can be reduced by placing awidth-reducing clamp on the head of the dermatome. For that purposetake the dermatome upside down in your hand (blade compartment coverupwards). Fig. 20 shows how the width-reducing clamp (15) is put intoposition. Push the upright hooks (15a) of the clamp behind the cover (8).Now move the clamp little by little forward, until its front closes roundabout the cover hinge (Fig. 21).7.4 CuttingSwitch the motor on by pressing switch (3) at the upper side of the powershaft (fig. 12). When cutting, push the cutting head evenly forward underslight pressure over the tissue or skin, while keeping the switch pressed in(Fig. 22).For optimum cutting results and minimum resistance it is recommended tokeep the skin slightly tightened on the spot and moistened with water or(paraffin) oil. The cut off skin flap is gripped on the sloping side of thecutting head by hand or using forceps. Do not use force to grip skin withforceps, as it might damage the instrument. To cut the strip straight offfrom the body, move the cutting head upwards, while the motor is stillswitched on.
Remark:If the <strong>Humeca</strong> MEEK technique is applied for skin grafting on burns orother large skin defects, never - during cutting - use oil or any otherfatty substance as lubricant on the skin of the patient. This wouldstand in the way of a good tack of the adhesive used in the MEEKtechnique. You can use water instead of oil.8. CleaningImmediately after use, when the blade has been taken out, remove themotor- and battery cartridge from the instrument (these are not to becleaned) and clean from blood and tissue remnants with hot water andsoap by hand. Afterwards, the instrument is to be cleaned byconventional procedures for cleaning surgical instruments.Most parts of the dermatome are made out of anodised aluminium. Theleast damage to this material is observed when neutral cleaning agentsare used in combination with demineralised water. Strong alkalinecleaning agents (pH>10) will cause visible changes to the surface of thealuminium like stains and colour fading. Hot air drying temperatures >90 o C should be avoided. Do not use H 2 O 2 (hydrogen peroxide) in thewashing process, as it will damage the instrument.A recommended procedure for cleaning and sterilization and advisoryon cleaning agents to be used is presented in a publication of <strong>Humeca</strong>in cooperation with Johnson Diversey. It is provided with eachdermatome and available on request. You can also download it fromthe <strong>Humeca</strong> website www.humeca.nl/downloads.89. Sterilization!! Never sterilize the motor-/battery cartridge !!Accidental sterilization of motor and/or battery is prevented whenthe <strong>Humeca</strong> autoclave case is used, because the dermatome doesnot fit in this case when the motor-/ battery cartridge is still insidethe instrument. T<strong>here</strong>fore we strongly recommend the use of the<strong>Humeca</strong> autoclave case!
9For sterilization, proceed as follows (see the pictures of fig. 26):- Remove and discard the disposable blade.- Open the locking cap (6) (turn it a quarter and remove it) and take outthe motor-/battery cartridge from the dermatome. Put this cartridgeaside; it is not to be sterilized.- Open the autoclave case 16. Inside this case t<strong>here</strong> are some cams,as indicated in Fig. 26A.- Put the cap (6) between the two cams 16b and place the funnel (17)over the four cams 16d, as shown in Fig. 26B.- Put the dermatome, with the blade compartment cover (8) opened, inthe case in such a way that the security cam 16c comes in thebackside of the power shaft. The two cams 16b interlock with theslots, indicated as 2f in Fig. 26. For good cleaning we advise to putthe thickness adjustment lever (4) at maximum thickness position.- Put the width reduction clamps and the sterile clamp in the case.- All parts, except for the motor-/battery cartridge can be sterilized withsaturated steam using common and accepted procedures for surgicalinstruments in the hospital.- Close the cover of the autoclave case and sterilize it at the commontemperature of 134 o C (usually 5-10 minutes) or 121 o C (prolongedexposure time of approx. 20 minutes).Note: If by accident the battery cartridge was sterilized, replacement ofonly the battery pack inside (not the cartridge housing) ispossible. If the motor cartridge was sterilized, replacement of onlythe motor (not the cartridge housing) is possible. See chapter 15“Ordering” for the ordering numbers.10. Atmospheric conditions during use and storageFor use/storage of the instrument, please mind the following conditions:- Ambient temperature 15 - 45 o C- Relative humidity 35 - 80%- Atmospheric pressure 850 - 1070 hPa (640 - 800 mm Hg)
11. Rules, CE–hallmark, responsibilitiesS The management system of <strong>Humeca</strong> for design, production and saleshas been certified according to EN ISO 13485:2003.S EMC data of the <strong>Humeca</strong> dermatomes are included in a rational ofthe technical dossier. This record (Rational D003) may be seen at theoffice of <strong>Humeca</strong>. The device is electromagnetic compatible, whichmeans that it does not interfere with other equipment in itsenvironment.S According to the European Medical Device Directory 93 / 42 / EECdermatome and blades come under the head of Class IIa products.S According to IEC 601-1:1998, the <strong>Humeca</strong> dermatomes are classifiedas “Type BF Applied Part”.S The CE-hallmark is indicated on the dermatome and on the packageof the blade.S Do not use other than <strong>Humeca</strong> blades in the D42 and D80dermatome and do not use <strong>Humeca</strong> blades in other dermatomes.S Do not use a dermatome blade in case the package is damaged.S <strong>Humeca</strong> D42 and D80 dermatomes are not for use in the presence offlammable anaesthetics (AP/APG classification).S The manufacturer considers being only responsible for the safety andperformance of the dermatome and the battery charger, if these areused in the way as described in this manual. For replacements onlyoriginal spare parts have to be used. Replacements have to becarried out by the manufacturer or by his authorized localrepresentative. Repairs are only carried out if the product is carryingthe users official repair form. All repairs carried out will be specifiedon a delivery note. In connection with safety and performance it isonly allowed to charge the battery using the original charger.10
1112. Trouble shootingProblem Possible cause SolutionDermatome doesn’t run andmotor axis doesn’t run whenoutside the dermatome thebutton of the microswitch atthe coupled cartridge ispressedDermatome doesn’t run, butyou can hear the motorrunning in the power shaftDermatome doesn’t run andmotor doesn’t run, but motorruns when outside thedermatome the button of themicroswitch at the coupledcartridge is pressedDermatome runs, but theblade doesn’t move at allDermatome runs, but theblade hardly movesButton rings for opening thecover are stuckDermatome doesn’t cut atlow position of thicknessadjusting lever.Blade compartment covercannot be closedMotor/battery cartridgedoesn’t fit in the power shaftBattery not chargedBattery out of orderProblem with chargingMotor cartridge out oforderMicroswitch brokenMotor axis cross penbroken or lost or cylinderon axis looseSome moving part ismechanically blocked,probably caused by dirt orinferior lubricationPins on the lever brokenor lever worn outSlot-shaped hole in thelever worn outPersistent dirt on thebutton ringsThickness not correctlyadjusted or initialadjustment changedLocking mechanism stuckby dirtOne of the screws at theoutside of the motor- orbattery cartridge is looseSome other part of thecartridge stands outMarking line on thecartridge not in line withthe mark on thedermatomeCharge battery and tryagainCheck battery cartridge.See section 7. Repair orreplace if necessaryCheck charger and batterysupport. See section 9.Repair or replace ifnecessaryCheck motor cartridge.See section 8. Repair orreplace if necessarySend dermatome to dealerSend motor cartridge todealerClean and lubricate allparts of the cutting head.If this did not help, senddermatome to dealerReplace the leverReplace the leverClean button rings withfine-grain sandpaperSend dermatome tomanufacturerClean locking mechanisminside cutting hadFix screwsCarefully try to bend back.If not succeeded, replacecartridge housing(consult dealer)Take out cartridge andreposition correspondinglines and mark
12Trouble shooting (cont’d)Battery pack is connectedproperly but the charge LED“CHARGE“ doesn’t lightyellowCharger is connected butgreen LED doesn’t lightYellow charge LED remainsflashing and it doesn’tswitch to light continuouslyBatteries fully chargedBattery not connectedproperlyContacts are dirtyFaulty batteryNo current on mainsFaulty chargerWrong polarity of batterypackBattery cartridge notcorrectly connected to thecharger supportFaulty battery packDo not charge batteriesCheck all connectionsClean contactsReplace batteryCheck mains power supplyReplace chargerConsult dealerConnect correctlyReplace battery pack13. WarrantyT<strong>here</strong> is a two years guarantee on all parts of the dermatome. Thebatteries are under a one-year warranty.This guarantee does not include repairs or replacements if:- the batteries were charged using a different type of charger,- the motor- and/or battery cartridge was sterilized,- other than original spare parts were used for repair by user,- the dermatome was used for other applications than the onesmentioned in this manual.Guarantee includes free of charge repairs, if these are necessary as aresult of trouble / defects that occurred during normal use of dermatomeand charger. In case of problems please contact your local dealer.
1314. Technical datasheetDermatomeTotal weight D42, small / large grip985 / 1.115 gTotal weight D80, large grip1.330 gWeight motor cartridge325 gWeight battery cartr. 1200 / 2400 mAh149 / 240 gLength dermatome with small / large grip 272 / 295 mmWidth head type D42 / D8064 / 104 mmMaximum diameter small / large grip40 / 45 mmCutting width D42 / D8042 / 80 mmCutting width using clamps D4236 and 30 mmCutting width using clamps D8065, 50 and 35 mmGraft thickness / increments (mm)0.1-1.2 / 0.1 mmGraft thickness / increments (inches) 0.000 – 0.048 / 0.0004 “Stroke of blade3,0 mmMotor capacity / rpm 15 W / 7.030 min -1BatteryVoltage / capacity battery pack, smallVoltage / capacity battery pack, largeBattery chemistry7.4V / 1200 mAh7.4V / 2400 mAhLi-Ion (no memory effect)Charger for 2400 mAh batteryPower supply primaryNominal output voltageCharge currentTime to charge empty batteryCharger is supplied with international adaptersCharger for 1200 mAh batteryPower supply primaryNominal output voltageCharge currentTime to charge empty batteryCharger is supplied with international adaptersDisposable bladesTypeWidth / ThicknessLength D42 / D80Autoclave caseDimensions for D80 (lxwxh)Dimensions for D42 (lxwxh)Weight of case for D42 / D80100-240V / 50-60Hz7,4 VDC1200 mA2,0 h100-240V / 50-60Hz7,4 VDC400 mA3.0 hDouble facet grinded19 / 0,38 mm50 / 90 mm375x130x52 mm375x90x52 mm717 / 910 g
1415. OrderingEquipment4.D42STS D42 dermatome, complete set, 1200mAh Li-Ion battery (standard)4.D42STSx D42 dermatome, complete set, 2400mAh Li-Ion battery4.D80STS D80 dermatome, complete set, 2400mAh Li-Ion battery (standard)4.D42 D42 dermatome without battery- and motor with small grip for 1200mAh battery4.D42x D42 dermatome without battery- and motor with large grip for 2400mAh battery4.D80 D80 dermatome without battery- and motor with large grip for 2400mAh battery4.ANS-HC Charger for Li-Ion battery 2400 mAh4.ANS-LC Charger for Li-Ion battery 1200 mAh4.SU01 Dermatome charger support unit4.BC7.4V2400 Dermatome battery cartridge 7.4V, 2400 mAh4.BC7.4V1200 Dermatome battery cartridge 7.4V, 1200 mAh4.BF7.4V2400 Dermatome battery pack 7.4V, 2400 mAh (only pack, not cartridge)4.BF7.4V1200 Dermatome battery pack 7.4V, 1200 mAh (only pack, not cartridge)4.MCX15 Dermatome motor cartridge4.D42CL30 D42 width reducing clamp 30 mm.4.D42CL36 D42 width reducing clamp 36 mm.4.D80CL35 D80 width reducing clamp 35 mm.4.D80CL50 D80 width reducing clamp 50 mm.4.D80CL65 D80 width reducing clamp 65 mm.4.D42AC1 D42 sterilization case4.D80AC1 D80 sterilization case4.SCL Sterile clamp4.SF01 Sterile funnel for small diameter grip4.SF02 Sterile funnel for large diameter gripDisposables5.D42BL105.D80BL102.JG598D42 dermatome blades, box 10 pcs.D80 dermatome blades, box 10 pcs.STERILIT ® oil for surgical instruments, bottle 50 ml.For more information, please contact your local <strong>Humeca</strong> representative or:<strong>Humeca</strong> BVP.O. Box 40175 Het Bijvank 251-a7504 RD Enschede 7544 DB EnschedeThe NetherlandsThe Netherlandsphone: +31 53 4762619 e-mail: info@humeca.nlfax: +31 53 4771905 web: www.humeca.nl<strong>Humeca</strong> is an EN ISO 13485:2003 certified company.
15<strong>Humeca</strong> cordless dermatomestype D42 and D80Images
Fig. 1 The dermatome with accessories16
17Fig. 2 Upper sideFig. 3 Dermatome under side
18123Fig. 4 Coupling of motor- and battery pack of a D42 dermatomeFig. 5Connect charger tosupport unit
19Fig. 6 Putting the battery cartridge in the charger support unitFig. 7 ChargerFig. 7a Change of the power adapter of the charger
20Fig. 8 Charger connected to support unit for charging process(motor nearby to prevent loss)Fig. 9 The use of the sterile clamp to handle the motor-/battery cartridge
21Fig. 10 Placing the motor-/battery cartridge in the dermatome,using the sterile funnel1 2 3Fig. 11 Placing the sterile cap to close the shaft of the dermatomeFig. 12Switching on the dermatome
22Fig. 13 Opening the cover for access to the blade compartmentFig. 14. Inserting bladeFig. 15 Right way to remove bladeFig. 16 Wrong way to remove blade
23Fig. 17 External lubricationFig. 18 Smoothening the bladeFig. 19 Adjusting the graft thicknessFig. 20 Placing width reducing clamp (1)
24Fig. 21 Placing width reducing clamp (2)Fig. 22 Skin harvestingFig. 23 Removing the covering plate
25Fig. 24 internal lubrication and cleaning of the dermatomeFig. 25 Never sterilize the cartridges!
26Fig. 26. The use of the autoclave case for sterilizationof the dermatome and its accessories--------
27SECTION IIInstructions for periodical maintenanceTwice a year, or after about 25 cuttings, it is advised to clean andlubricate the internal of the cutting head to assure good operation andlong service life of the dermatome. The pictures below refer to the D42dermatome. T<strong>here</strong> are some differences with the D80 dermatome, but theprocedure is similar. Tools are in the suitcase of the dermatome.- Remove the covering plate by loosening thefour screws, indicated as 2b in fig. 3a, with aTorx 10 driver or L-key and clean it with a drycloth. If the plate sticks to the underground, itcan be lifted by putting a screw driver in thecavity shown in fig. 3b. Clean the plate with acloth and water. T<strong>here</strong> should be no dirt in thearea between the plate and the cutting head.Check the guiding pins (2m in fig. 1). If theyare worn out, the covering plate has to bereplaced. For ordering, please refer to orderno. P801501 for a D80 dermatome andP421501 for a D42 dermatome.- Take out the lever (2d), see fig. 3c and fig. 2.Clean it and check the pins 2d1 and 2d2 onwear. Also check the slot-shaped hole 2d3. Ifthis holes has become bigger due to wear, themovement of the blade (“stroke”) becomes lessand finally the lever has to be replaced. Ifnecessary replace the lever by a new one.Refer to ordering no. P421301.Fig. 1 Covering plateof a D42 dermatomeFig. 2 Lever- If possible take out the bearing 2g (fig. 3d) and clean it. If the bearingcannot be removed, clean the hole in it while the bearing remains inposition. Attention: the bearing consists of two parts, a stainless steelcylinder and a small brass plate. Be careful not to lose them.
28Fig. 3a Removing covering plateFig. 3b Cavity for lifting covering plateFig. 3c Removing the leverFig. 3d Removing bearingFig. 3e Removing hornFig. 3f Removing locking buttonsFig. 3g Cavity to be cleanedFig. 3h Gearwheel to be cleaned
29- Remove the horn (2i in fig. 3e) by lifting it after having removed thescrew, indicated by a red arrow in fig. 3e and clean it. In the D80dermatome the horn consists of two separated parts.- Take out the button rings (7) for opening the cover and the spring 2k(see fig. 3f) and clean them. In the D80 dermatome t<strong>here</strong> are twosprings. Please refer to order number P421405 for replacing springs.- Clean the interior of the cutting head (fig. 3g).- Clean the gearwheel 2l, shown in fig. 3h and check if the little pin on thegearwheel and the gearwheel itself on wear. If it has to be replaced,please consult <strong>Humeca</strong> or your dealer.Assembling after cleaningAfter cleaning, please use the following sequence for assembling:- Put some oil on the underside of the gearwheel 2l (fig. 3h) and turn thewheel round a couple of times. The wheel should run smoothly. If itdoesn’t, you are advised to consult your supplier.- Replace the two button rings 7 and the spring 2k in the cavity (in caseof the D80 dermatome t<strong>here</strong> are 2 springs). Please note that the springshould come over the cams on the rings (see fig. 4 below).Fig. 4 Correct orientation of the button rings and spring
- Replace the horn (2i in fig. 3e) while gently pressing the button rings 7and fix it with the screw. In the D80 dermatome the horn consists of twoparts that are fixed with two screws.- Check the smooth run of the locking mechanism. You may put some oilon the button rings if necessary.- Replace the bearing 2g (fig. 3d). First place the brass ring and then thecylinder in the hole and afterwards put some oil in it.- Replace the lever 2d (fig.3c). Lubricate the driving mechanism. Checksmooth run of the mechanism by turning it by hand.- Replace the covering plate (fig. 3a), after having cleaned the undersideof it (very important!). Fix it with the four screws.- After assembling check the dermatome for smooth run.In case of loss or damage of screws, please refer to the order numberslisted below:- ISO 14581 M3x10 – A2-70 (Torx): screws in the covering plate.- DIN 912 M3 x16: Screw(s) in the horn.30For any assistance please contact your local dealer or:<strong>Humeca</strong> BVHet Bijvank 251-a7544 DB EnschedeThe NetherlandsT: +31 53 4762619F: +31 53 4771905Email: info@humeca.nlWeb: www.humeca.nl-----------