T700 User Guide.pdf - 1 PC Network Inc
T700 User Guide.pdf - 1 PC Network Inc
T700 User Guide.pdf - 1 PC Network Inc

Create successful ePaper yourself
Turn your PDF publications into a flip-book with our unique Google optimized e-Paper software.
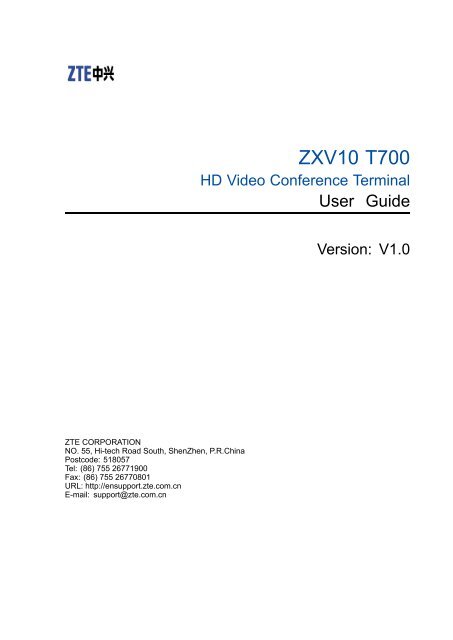
ZXV10 <strong>T700</strong><br />
HD Video Conference Terminal<br />
<strong>User</strong> <strong>Guide</strong><br />
Version: V1.0<br />
ZTE CORPORATION<br />
NO. 55, Hi-tech Road South, ShenZhen, P.R.China<br />
Postcode: 518057<br />
Tel: (86) 755 26771900<br />
Fax: (86) 755 26770801<br />
URL: http://ensupport.zte.com.cn<br />
E-mail: support@zte.com.cn
LEGAL INFORMATION<br />
Copyright © 2010 ZTE CORPORATION.<br />
The contents of this document are protected by copyright laws and international treaties. Any reproduction or<br />
distribution of this document or any portion of this document, in any form by any means, without the prior written<br />
consent of ZTE CORPORATION is prohibited. Additionally, the contents of this document are protected by<br />
contractual confidentiality obligations.<br />
All company, brand and product names are trade or service marks, or registered trade or service marks, of ZTE<br />
CORPORATION or of their respective owners.<br />
This document is provided “as is”, and all express, implied, or statutory warranties, representations or conditions<br />
are disclaimed, including without limitation any implied warranty of merchantability, fitness for a particular purpose,<br />
title or non-infringement. ZTE CORPORATION and its licensors shall not be liable for damages resulting from the<br />
use of or reliance on the information contained herein.<br />
ZTE CORPORATION or its licensors may have current or pending intellectual property rights or applications<br />
covering the subject matter of this document. Except as expressly provided in any written license between ZTE<br />
CORPORATION and its licensee, the user of this document shall not acquire any license to the subject matter<br />
herein.<br />
ZTE CORPORATION reserves the right to upgrade or make technical change to this product without further notice.<br />
<strong>User</strong>s may visit ZTE technical support website http://ensupport.zte.com.cn to inquire related information.<br />
The ultimate right to interpret this product resides in ZTE CORPORATION.<br />
Revision History<br />
Revision No. Revision Date Revision Reason<br />
R1.0 September 13, 2010 First Edition<br />
R1.1 November 23, 2010 UI Update<br />
Serial Number: SJ-20100910163147-003<br />
Publishing Date: 2010-11-23(R1.1)
Contents<br />
About This Manual ......................................................................................... I<br />
Chapter 1 Introduction............................................................................... 1-1<br />
1.1 Introduction........................................................................................................ 1-1<br />
1.2 Features ............................................................................................................ 1-1<br />
1.3 Components ...................................................................................................... 1-2<br />
1.4 Video Conference Unit........................................................................................ 1-3<br />
1.4.1 Introduction to Front Panel........................................................................ 1-3<br />
1.4.2 Introduction to Rear Panel ........................................................................ 1-3<br />
1.4.3 Connecting Cables ................................................................................... 1-3<br />
1.5 <strong>Network</strong> Application............................................................................................ 1-4<br />
1.5.1 Single MCU IP <strong>Network</strong>ing........................................................................ 1-4<br />
1.5.2 Multi-MCU Cascading <strong>Network</strong>ing ............................................................. 1-5<br />
Chapter 2 Hardware Installation................................................................ 2-1<br />
2.1 Installation Flow ................................................................................................. 2-1<br />
2.2 Installation ......................................................................................................... 2-1<br />
Chapter 3 Device Connection.................................................................... 3-1<br />
3.1 Connection of Typical ......................................................................................... 3-1<br />
3.2 Connection of Peripheral .................................................................................... 3-1<br />
Chapter 4 Device Operation ...................................................................... 4-1<br />
4.1 Power-on and Power-off ..................................................................................... 4-1<br />
4.1.1 Checking Before Power-On....................................................................... 4-1<br />
4.1.2 Turning on ............................................................................................... 4-1<br />
4.1.3 Turning off ............................................................................................... 4-2<br />
4.1.4 Checking after Power-on .......................................................................... 4-2<br />
4.2 Precautions........................................................................................................ 4-3<br />
Chapter 5 GUI Management and Control through the Remote<br />
Control .................................................................................................... 5-1<br />
5.1 Menu Navigation ................................................................................................ 5-1<br />
5.2 Menu Operation ................................................................................................. 5-3<br />
5.2.1 Description of GUI Menu Operation ........................................................... 5-3<br />
5.2.2 Operations about GUI Parameters............................................................. 5-4<br />
Chapter 6 General Configuration.............................................................. 6-1<br />
6.1 Display Settings ................................................................................................. 6-1<br />
I
6.2 Prompt Tone Settings ......................................................................................... 6-3<br />
6.3 Call Option Settings............................................................................................ 6-4<br />
6.4 Alert Tip Settings................................................................................................ 6-4<br />
Chapter 7 System Configuration............................................................... 7-1<br />
7.1 Video Configuration............................................................................................ 7-1<br />
7.1.1 Video Input Settings ................................................................................. 7-1<br />
7.1.2 Video Output Settings............................................................................... 7-4<br />
7.2 <strong>Network</strong> Configuration ........................................................................................ 7-7<br />
7.2.1 <strong>Network</strong> Connection Settings .................................................................... 7-7<br />
7.2.2 H.323 Settings ......................................................................................... 7-8<br />
7.2.3 Compatibility ............................................................................................ 7-9<br />
7.2.4 NAT Settings.......................................................................................... 7-13<br />
7.3 Mic/Line Input Settings ..................................................................................... 7-14<br />
7.4 Conference Capability Settings ......................................................................... 7-16<br />
7.5 Security Parameters Settings ............................................................................ 7-17<br />
7.6 Maintenance .................................................................................................... 7-18<br />
7.6.1 Software Update .................................................................................... 7-18<br />
7.6.2 Saving System Configuration .................................................................. 7-19<br />
7.6.3 Loading System Configuration ................................................................ 7-20<br />
Chapter 8 Services ..................................................................................... 8-1<br />
8.1 Caption.............................................................................................................. 8-1<br />
8.1.1 Setting Terminal Name Displaying Mode.................................................... 8-1<br />
8.1.2 Setting Banner ......................................................................................... 8-2<br />
8.1.3 Setting Horizontal Caption ........................................................................ 8-3<br />
8.1.4 Setting Vertical Caption ............................................................................ 8-4<br />
8.1.5 Setting Short Message ............................................................................. 8-6<br />
8.2 Calling for Conference ........................................................................................ 8-7<br />
Chapter 9 Diagnosis................................................................................... 9-1<br />
9.1 Checking System Status..................................................................................... 9-1<br />
9.2 Checking Call Information ................................................................................... 9-2<br />
9.3 Viewing Version Information................................................................................ 9-3<br />
9.4 Loopback Test.................................................................................................... 9-4<br />
9.5 Ping Test ........................................................................................................... 9-6<br />
9.6 Audio and Video Test.......................................................................................... 9-8<br />
9.7 System Self-diagnosis ........................................................................................ 9-9<br />
Chapter 10 Address Book........................................................................ 10-1<br />
10.1 Introduction of Address Book .......................................................................... 10-1<br />
II
10.2 Add Contact ................................................................................................... 10-2<br />
10.3 Editing A Contact............................................................................................ 10-3<br />
10.4 Deleting A Contact ......................................................................................... 10-3<br />
10.5 Calling Terminals in the Address Book ............................................................. 10-3<br />
Chapter 11 Call History ............................................................................ 11-1<br />
Chapter 12 Conference Operations in GUI............................................. 12-1<br />
12.1 System Control in Conference Mode................................................................ 12-1<br />
12.2 Non-Chairman Conference Control.................................................................. 12-2<br />
12.2.1 Introduction to Conference Control ........................................................ 12-2<br />
12.2.2 Applying Chairman ............................................................................... 12-3<br />
12.2.3 Self Broadcast (Non-Chair Terminal)...................................................... 12-4<br />
12.2.4 Apply Speech....................................................................................... 12-4<br />
12.2.5 Viewing Terminal List ............................................................................ 12-5<br />
12.3 Chairman Conference Control ......................................................................... 12-6<br />
12.3.1 Introduction to Conference Control ........................................................ 12-6<br />
12.3.2 Broadcasting By Chairman.................................................................... 12-8<br />
12.3.3 Browsing and Viewing..........................................................................12-10<br />
12.3.4 Sound Controlling................................................................................12-11<br />
12.3.5 Opening Voice Control.........................................................................12-14<br />
12.3.6 Releasing Chairman ............................................................................12-15<br />
12.3.7 Chairman Conference Management .....................................................12-15<br />
Chapter 13 WEB Management and Control ........................................... 13-1<br />
13.1 Logging In to the WEB Management Page....................................................... 13-1<br />
13.2 Re-logging Into Web Control Page................................................................... 13-3<br />
13.3 Introduction to the IE Web Page ...................................................................... 13-3<br />
13.4 System Control .............................................................................................. 13-5<br />
13.4.1 Video Control in WEB ........................................................................... 13-5<br />
13.5 Call Control...................................................................................................13-13<br />
13.5.1 Introduction of Address Book ...............................................................13-13<br />
13.5.2 Add Single ..........................................................................................13-13<br />
13.5.3 Calling In The Address Book ................................................................13-14<br />
13.5.4 Call History Setting ..............................................................................13-15<br />
13.5.5 Calling for a Conference ......................................................................13-15<br />
13.5.6 Hanging Up a Conference....................................................................13-17<br />
13.5.7 Calling Meeting ...................................................................................13-18<br />
13.6 General Configuration....................................................................................13-19<br />
13.6.1 Local Settings .....................................................................................13-19<br />
III
13.6.2 Prompt Volume Settings.......................................................................13-20<br />
13.6.3 Call Option Settings.............................................................................13-21<br />
13.6.4 Alarm Settings.....................................................................................13-21<br />
13.7 Video Configuration .......................................................................................13-22<br />
13.7.1 Video In Settings .................................................................................13-22<br />
13.7.2 Video Out Settings...............................................................................13-23<br />
13.8 Audio Settings...............................................................................................13-24<br />
13.9 <strong>Network</strong> Settings ...........................................................................................13-25<br />
13.10 SNMP Settings............................................................................................13-25<br />
13.11 H.323 Settings.............................................................................................13-26<br />
13.12 QoS Settings...............................................................................................13-27<br />
13.13 NAT Settings ...............................................................................................13-28<br />
13.14 FEC Settings...............................................................................................13-28<br />
13.15 IP Rate-down Settings .................................................................................13-29<br />
13.16 Capability Settings.......................................................................................13-30<br />
13.17 Caption .......................................................................................................13-31<br />
13.17.1 Setting Terminal Name Display...........................................................13-31<br />
13.17.2 Setting Banner ..................................................................................13-32<br />
13.17.3 Setting Horizontal Caption..................................................................13-33<br />
13.17.4 Setting Vertical Caption......................................................................13-34<br />
13.17.5 Setting Short Message.......................................................................13-36<br />
13.18 Security Settings .........................................................................................13-37<br />
13.19 USB Settings...............................................................................................13-37<br />
13.20 Configuration Settings..................................................................................13-37<br />
13.21 Upgrade Settings.........................................................................................13-38<br />
13.22 Advanced Settings.......................................................................................13-39<br />
13.23 Diagnosis....................................................................................................13-40<br />
13.23.1 System State Viewings ......................................................................13-40<br />
13.23.2 Version Viewings ...............................................................................13-40<br />
13.23.3 Statistics Viewings.............................................................................13-41<br />
13.23.4 Call Brief Information Viewings ...........................................................13-42<br />
13.23.5 Loopback Settings .............................................................................13-42<br />
13.23.6 Ping Test...........................................................................................13-43<br />
13.23.7 Audio and Video Testing.....................................................................13-44<br />
13.24 <strong>User</strong> Management Settings ..........................................................................13-44<br />
Chapter 14 Control in <strong>PC</strong> Console.......................................................... 14-1<br />
14.1 Installing <strong>PC</strong> Console ..................................................................................... 14-1<br />
IV
14.2 Logging in to <strong>PC</strong> Console ............................................................................... 14-3<br />
14.3 Common Control ............................................................................................ 14-4<br />
14.3.1 Introduction of Common Control Page ................................................... 14-4<br />
14.3.2 Video Control ....................................................................................... 14-5<br />
14.3.3 Common Control .................................................................................. 14-8<br />
14.3.4 Status Icon..........................................................................................14-15<br />
14.4 Conference Control in <strong>PC</strong> Console .................................................................14-17<br />
14.4.1 Display Settings ..................................................................................14-17<br />
14.4.2 Group Management.............................................................................14-19<br />
14.4.3 Non-chairman Conference Control........................................................14-24<br />
14.4.4 Chairman Conference Control ..............................................................14-27<br />
Appendix A Technical Specification for Interface .................................. A-1<br />
Appendix B Technical Specifications...................................................... B-1<br />
Appendix C Packing, Transportation and Storage................................. C-1<br />
C.1 Packing.............................................................................................................C-1<br />
C.2 Transportation ...................................................................................................C-1<br />
C.3 Storage.............................................................................................................C-1<br />
Appendix D Remote Control..................................................................... D-1<br />
D.1 Introduction of Remote Controller .......................................................................D-1<br />
D.2 Introduction to Remote Control Buttons ...............................................................D-2<br />
D.3 Input Method .....................................................................................................D-3<br />
Appendix E Introduction to Videoconferencing System ........................E-1<br />
E.1 Overview........................................................................................................... E-1<br />
E.2 Videoconference Modes..................................................................................... E-2<br />
E.3 Videoconference Modes..................................................................................... E-2<br />
E.3.1 Point-to-Point Videoconference................................................................. E-2<br />
E.3.2 Multipoint Videoconference....................................................................... E-3<br />
Appendix F Routine Maintenance.............................................................F-1<br />
F.1 Conference Room Maintenance .......................................................................... F-1<br />
F.2 Terminal Maintenance......................................................................................... F-1<br />
F.3 Test Maintenance ............................................................................................... F-2<br />
Appendix G Routine Troubleshooting..................................................... G-1<br />
G.1 Troubleshooting Flow........................................................................................ G-1<br />
G.2 Basic Thoughts About Troubleshooting .............................................................. G-2<br />
G.3 Common Troubleshooting Methods ................................................................... G-3<br />
Figures............................................................................................................. I<br />
V
Tables ...........................................................................................................VII<br />
VI
About This Manual<br />
Purpose<br />
At first, thank you for choosing ZXV10 <strong>T700</strong> HD Video terminal of ZTE Corporation!<br />
This manual provides the basic information you need for installing, configuring, controlling<br />
and maintaining the ZXV10 <strong>T700</strong> Video Conference Terminal with the remote control or<br />
the IE Web.<br />
Intended Audience<br />
This document is intended for:<br />
• Operation engineer<br />
• Installation engineer<br />
What Is in This Manual<br />
This manual contains the following chapters:<br />
Chapter<br />
Chapter 1, Introduction<br />
Chapter 2, Hardware Installation<br />
Chapter 3, Device Connection<br />
Chapter 4, Device Operation<br />
Summary<br />
Introduces the features and components of the<br />
ZXV10 <strong>T700</strong> as well as its typical applications<br />
Describes the installation<br />
Describes the connection of the ZXV10 <strong>T700</strong><br />
Describes the preparations before using it<br />
Chapter 5, GUI Management and Control<br />
through the Remote Control<br />
Chapter 6, General Configuration<br />
Chapter 7, System Configuration<br />
Chapter 8, Service<br />
Describes the remote control and related operations<br />
of the ZXV10 <strong>T700</strong> via the remote control<br />
Chapter 9, Diagnosis<br />
Chapter 10, Address Book<br />
Chapter 11, Call History<br />
Chapter 12, Conference Operations in GUI<br />
Chapter 13, WEB Management and Control<br />
Chapter 14, Control in <strong>PC</strong> Console<br />
Describes the call history and related operations<br />
Describes the operation of a conference via the<br />
remote control<br />
Covers the operations of the ZXV10 <strong>T700</strong> via the<br />
IE Web<br />
Describes the configuration of terminal and<br />
operation of a conference via the <strong>PC</strong> console<br />
I
Chapter<br />
Appendix A Technical Specification for<br />
Interface<br />
Appendix B Technical Specifications<br />
Appendix C Packing, Transportation and<br />
Storage<br />
Appendix D Remote Control<br />
Appendix E Introduction to Videoconference<br />
System<br />
Appendix F Routine Maintenance<br />
Appendix G Routine Troubleshoot ing<br />
Summary<br />
Describes the technical specification of interface<br />
Describes the technical specifications of the terminal<br />
Introduces the precautions during the packing,<br />
transportation and storage of the ZXV10 <strong>T700</strong><br />
Introduces the remote Control<br />
Introduces the basic architecture of videoconference<br />
system, videoconference modes<br />
Introduces the routine maintenance, troubleshooting<br />
flow and common troubleshooting methods of the<br />
ZXV10 <strong>T700</strong><br />
Conventions<br />
ZTE documents employ the following typographical conventions.<br />
Typeface<br />
Italics<br />
“Quotes”<br />
Bold<br />
CAPS<br />
Meaning<br />
References to other Manuals and documents.<br />
Links on screens.<br />
Menus, menu options, function names, input fields, radio button names, check<br />
boxes, drop-down lists, dialog box names, window names.<br />
Keys on the keyboard and buttons on screens and company name.<br />
Note: Provides additional information about a certain topic.<br />
Checkpoint: Indicates that a particular step needs to be checked before<br />
proceeding further.<br />
Tip: Indicates a suggestion or hint to make things easier or more productive<br />
for the reader.<br />
Mouse operation conventions are listed as follows:<br />
Typeface<br />
Click<br />
Double-click<br />
Right-click<br />
Meaning<br />
Refers to clicking the primary mouse button (usually the left mouse button) once.<br />
Refers to quickly clicking the primary mouse button (usually the left mouse button)<br />
twice.<br />
Refers to clicking the secondary mouse button (usually the right mouse button)<br />
once.<br />
II
FCC Exemption Announcement<br />
According to Article 15 of FCC Rules, this equipment is proved to be satisfied with<br />
the restrictions on A-class digital equipments through tests. These restrictions aim<br />
to provide reasonable protection, and prevent the current equipment from generating<br />
harmful interference during the operation in commercial environment. This equipment<br />
generates, uses and radiates radio frequency energy. If this equipment is not installed or<br />
used according to instructions in the manual, it may exert harmful interference to radio<br />
communication. If this equipment is applied in residential area, it may cause harmful<br />
interference. In this situation, users need to rectify the interference at their own expenses.<br />
According to Article 15 of FCC Rules, the user should not make any change or<br />
modification on the equipment without ZTE’s explicit approval. Otherwise, the user will<br />
not be authorized to operate the equipment.<br />
The electric socket for connection should be near the equipment, and convenient for<br />
connection at any time.<br />
III
Chapter 1<br />
Introduction<br />
Table of Contents<br />
Introduction ................................................................................................................1-1<br />
Features.....................................................................................................................1-1<br />
Components...............................................................................................................1-2<br />
Video Conference Unit ...............................................................................................1-3<br />
<strong>Network</strong> Application....................................................................................................1-4<br />
1.1 Introduction<br />
1.2 Features<br />
ZXV10 <strong>T700</strong> is one of the Tx series video conference terminals developed by ZTE<br />
CORPORATION. Its integrated design of camera and main unit makes installation more<br />
easy. The terminal can be placed on a flat surface or mounted in a rack. With high<br />
reliability and easy-to-use performance, it is suitable for large and medium scale business<br />
conferences and remote trainings.<br />
It has the following features:<br />
• Stable and reliable high-definition video/audio quality<br />
• 720p/1080i/1080p resolution<br />
• Supports H.323 protocol<br />
• Provide high-definition dual video<br />
• Better satisfies the requirements of business conferences.<br />
• High-definition images<br />
ZXV10 <strong>T700</strong> can provide 720p/1080i/1080p high-definition video within 1Mbps-8Mbps<br />
bandwidth. The terminal can provide high-definition image based on dynamic<br />
multi-frame engine with dual forecasting acceleration and multi-frame parallel coding<br />
technology. The patented frequency enhanced technology is helpful to provide<br />
smooth moving image. The Softview-HD technology can provide more colorful<br />
image, and it can remove mosaic to avoid screen twinkling; meanwhile it can enhance<br />
coding in key area to provide clearer image.<br />
• HiFi sound<br />
NaturalSound ultra broadband audio engine technology can provide HiFi sound.<br />
ZTE-BA broadband coding technology provides 96KHz sampling frequency<br />
broader range. AutoEnhance intelligent audio enhance technology supports audio<br />
identification, and it can distinguish between music and sound to avoid distortion<br />
1-1<br />
SJ-20100910163147-003|2010-11-23(R1.1)<br />
ZTE Proprietary and Confidential
ZXV10 <strong>T700</strong> <strong>User</strong> <strong>Guide</strong><br />
when playing music. B-AEC acoustics echo clear technology can be used for a huge<br />
conference room, supporting digital microphone array.<br />
• Multiple standard interfaces with flexible functionsn<br />
ZXV10 <strong>T700</strong> provides standard plug-in-play interfaces. Complying with H.239 HD dual<br />
stream protocol. ZXV10 <strong>T700</strong> has full-scale chairman control function, push-to-button,<br />
banner and short message function. ZXV10 <strong>T700</strong> also supports information browsing,<br />
live and on-demand broadcasting.<br />
• Intelligent and stable Uninterrupted Conference Service (UCS) system<br />
1.3 Components<br />
The multi-outlet UCS system can provide data backup, N+M backup of MCU,<br />
cascading channel backup, board backup.<br />
The ZXV10 <strong>T700</strong> consists of the main video conference unit, peripheral components,<br />
including the infrared remote control, microphone, and necessary connecting cables, as<br />
described in the table below.<br />
Table 1-1 Components of The ZXV10 <strong>T700</strong><br />
Component Appearance Function<br />
Video conference unit As the core of the ZXV10 <strong>T700</strong>,<br />
it codes the local image and<br />
voice and then sends them to the<br />
transmission network<br />
On the other hand, it receives the<br />
far-end image and voice, decodes<br />
them and then outputs them to<br />
video/audio peripheral devices<br />
connected to the unit<br />
It has integrated design of camera<br />
Infrared remote control<br />
Used to operate and control<br />
the ZXV10 <strong>T700</strong> to implement<br />
conference control functions<br />
Microphone<br />
It is the audio input device<br />
connected to the audio input<br />
interface of the video conference<br />
unit<br />
1-2<br />
SJ-20100910163147-003|2010-11-23(R1.1)<br />
ZTE Proprietary and Confidential
Chapter 1 Introduction<br />
1.4 Video Conference Unit<br />
1.4.1 Introduction to Front Panel<br />
The front panel is shown in the figure below.<br />
Figure 1-1 Front Panel<br />
ZXV10 <strong>T700</strong> has one status indicator ,It will be Continuously lit when the power is on.<br />
1.4.2 Introduction to Rear Panel<br />
The rear panel of the ZXV10 <strong>T700</strong> terminal is shown in the figure below.<br />
Figure 1-2 Rear Panel<br />
ZXV10 <strong>T700</strong> provides various interfaces on the rear panel, such as communication<br />
interfaces, audio interfaces, video interfaces, and network interfaces.<br />
1.4.3 Connecting Cables<br />
Different connecting cables are needed according to the actual networking mode of the<br />
terminal and optional equipment to be connected. It depends on the order contract which<br />
cables will be delivered with the ZXV10 <strong>T700</strong>.<br />
The table below describes the basic connecting cables.<br />
1-3<br />
SJ-20100910163147-003|2010-11-23(R1.1)<br />
ZTE Proprietary and Confidential
ZXV10 <strong>T700</strong> <strong>User</strong> <strong>Guide</strong><br />
Table 1-2 Basic Connecting Cables for the ZXV10 <strong>T700</strong><br />
Cable Line Signal Connector<br />
Core 1: TD+<br />
Category-A Ethernet cable<br />
VGA-YPbPr<br />
Core 2: TD-<br />
Core 3: RX+<br />
Core 6: RX-<br />
Red wire: analog video signal<br />
Blue wire: analog video signal<br />
Green wire: analog video signal<br />
RJ45 plug<br />
VGA and RAC<br />
— VGA<br />
Audio cable<br />
Red wire: analog audio signal<br />
(left audio track)<br />
White wire: analog audio signal<br />
(right audio track)<br />
RAC and stereo connector<br />
Digital Microphone cable — RJ45 plug<br />
HDMI cable — HDMI<br />
1.5 <strong>Network</strong> Application<br />
1.5.1 Single MCU IP <strong>Network</strong>ing<br />
The ZXMVC8900 Intelligent Multimedia Server is used as an IP mode MCU together with<br />
the ZXV10 <strong>T700</strong>, as shown in the Figure below.<br />
Figure 1-3 ZXMVC8900 and ZXV10 <strong>T700</strong> <strong>Network</strong>ing<br />
1-4<br />
SJ-20100910163147-003|2010-11-23(R1.1)<br />
ZTE Proprietary and Confidential
Chapter 1 Introduction<br />
The ZXV10 <strong>T700</strong> is used together with the ZXMVC8900 Intelligent Multimedia Server. As<br />
an IP mode MCU, ZXMVC8900 Intelligent Multimedia Server can support 256 IP (2M bit/s)<br />
terminals at most. In this networking mode, the ZXV10 <strong>T700</strong> is used as a terminal.<br />
The basic functions of GK includes address analysis, bandwidth control, admission control<br />
and zone management, and optional functions including bandwidth management, calling<br />
authentication, calling control routing and calling management and so on. Actually, GK<br />
and ZXMS80 network management system can be installed in a same <strong>PC</strong> or server.<br />
1.5.2 Multi-MCU Cascading <strong>Network</strong>ing<br />
Multiple ZXMVC8900 Intelligent Multimedia Servers are used as cascading IP mode MCUs<br />
to connect with the ZXV10 <strong>T700</strong>, as shown in the Figure below.<br />
Figure 1-4 Multiple MCUs Cascading IP <strong>Network</strong>ing<br />
Caution<br />
• ZXMVC8900 supports level-3 or above cascading.<br />
• The IP cascading bandwidth between MCUs can be shared.<br />
• In the system with multiple MCUs in IP cascading, you can use only one GK in<br />
the whole network, or you can configure a GK located at each MCU. For the latter<br />
method, the GKs can be configured in neighbourhood domain (or parent-child<br />
domain) relationship.<br />
• The cascading between MCUs will affect the MCU capability of initiating a conference.<br />
Example<br />
For instance, when one ZXMVC8900 server A is directly cascaded with two ZXMVC8900<br />
MCUs in IP mode, the server A can only be connected with 190(192-2) IP(768 kbit/s)<br />
terminals at most.<br />
1-5<br />
SJ-20100910163147-003|2010-11-23(R1.1)<br />
ZTE Proprietary and Confidential
ZXV10 <strong>T700</strong> <strong>User</strong> <strong>Guide</strong><br />
This page intentionally left blank.<br />
1-6<br />
SJ-20100910163147-003|2010-11-23(R1.1)<br />
ZTE Proprietary and Confidential
Chapter 2<br />
Hardware Installation<br />
Table of Contents<br />
Installation Flow .........................................................................................................2-1<br />
Installation..................................................................................................................2-1<br />
2.1 Installation Flow<br />
The operation flow of installing ZXV10 <strong>T700</strong> is shown in the figure below.<br />
Figure 2-1 Installation Flow<br />
2.2 Installation<br />
ZXV10 <strong>T700</strong> can be mounted on a standard 19-inch rack or placed on any flat platform.<br />
Installing the Terminal in a 19-inch Rack<br />
The steps are described as follows:<br />
2-1<br />
SJ-20100910163147-003|2010-11-23(R1.1)<br />
ZTE Proprietary and Confidential
ZXV10 <strong>T700</strong> <strong>User</strong> <strong>Guide</strong><br />
1. Remove the four plastic feet from the terminal.<br />
2. Mount the two mounting flanges on two sides of the terminal with four<br />
cross-recessed-countersunk-head screws.<br />
3. Install the terminal in the 19–inch rack, and fix the terminal with panel fastener.<br />
Note<br />
The panel fasteners are delivered with 19–inch rack.<br />
Placing the Terminal on a Flat Platform<br />
Place the on a flat and stable platform. Make sure that enough space are reserved for<br />
connecting cables.<br />
2-2<br />
SJ-20100910163147-003|2010-11-23(R1.1)<br />
ZTE Proprietary and Confidential
Chapter 3<br />
Device Connection<br />
Table of Contents<br />
Connection of Typical .................................................................................................3-1<br />
Connection of Peripheral ............................................................................................3-1<br />
3.1 Connection of Typical<br />
Typical connections refer to the connections between ZXV10 <strong>T700</strong> terminal and basic<br />
audio/video devices (including TV set and microphone), Ethernet and power supply<br />
interface. The connection between typical devices and ZXV10 <strong>T700</strong> is shown in the figure<br />
below.<br />
Figure 3-1 Connecting Typical Devices<br />
3.2 Connection of Peripheral<br />
The connection between the terminal and Peripheral devices is shown in the Figure below.<br />
3-1<br />
SJ-20100910163147-003|2010-11-23(R1.1)<br />
ZTE Proprietary and Confidential
ZXV10 <strong>T700</strong> <strong>User</strong> <strong>Guide</strong><br />
Figure 3-2 Connection of Peripheral Devices<br />
Caution<br />
The connection between a terminal and these peripheral devices may not be in sequence.<br />
Do not twist cables to make it more easily to move and dismantle the devices.<br />
• If the conference needs the access of a secondary video, or a projector to output the<br />
video, refer to the figure below for cable connection.<br />
• According to the actual configuration of peripheral devices, select analog or digital<br />
microphone for connection. That is, select either or both methods marked with and<br />
in the figure.<br />
• Select whether to connect the audio control device according to the actual<br />
configuration of devices (refer to the blue cable in the figure).<br />
• Standard definition (SD) camera can be accessed through the CVBS IN interface, yet<br />
the CVBS OUT interface can only output SD video.<br />
• According to the interface situation of the HDTV on-site, connect the TV through the<br />
HDMI OUT or VGA OUT interface. That is, select the method marked with either A or<br />
B in the figure.<br />
• The HDMI IN interface may select to connect the second HD camera or the HD DVD<br />
player according to the actual situation. Or, if files such as PPT need to be transmitted<br />
during the conference, refer to the red cable in the figure.<br />
3-2<br />
SJ-20100910163147-003|2010-11-23(R1.1)<br />
ZTE Proprietary and Confidential
Chapter 4<br />
Device Operation<br />
Table of Contents<br />
Power-on and Power-off.............................................................................................4-1<br />
Precautions ................................................................................................................4-3<br />
4.1 Power-on and Power-off<br />
4.1.1 Checking Before Power-On<br />
Prerequisites<br />
ZXV10 <strong>T700</strong> Terminal has already installed.<br />
Steps<br />
1. Check whether the video conference unit on the platform is stable, Avoid shaking so<br />
as to prevent it from falling off or influencing conference.<br />
2. Check whether the power supply voltage is within the allowable range.<br />
3. Check whether all cables are connected correctly and firmly, and aligned in order.<br />
4.1.2 Turning on<br />
– End of Steps –<br />
Prerequisites<br />
Make sure all items are checked before the terminal is switched on.<br />
Steps<br />
1. Power on the ZXV10 <strong>T700</strong> terminal.<br />
2. Turn on the TV set, power amplifier and other related devices.<br />
3. Turn on the ZXV10 <strong>T700</strong> terminal.<br />
– End of Steps –<br />
Follow-Up Action<br />
Check after the terminal is switched on.<br />
4-1<br />
SJ-20100910163147-003|2010-11-23(R1.1)<br />
ZTE Proprietary and Confidential
ZXV10 <strong>T700</strong> <strong>User</strong> <strong>Guide</strong><br />
4.1.3 Turning off<br />
Context<br />
Steps of turning off are reverse to those of turning on.<br />
Steps<br />
1. Turn off the ZXV10 <strong>T700</strong> terminal.<br />
2. Turn off the TV set, power amplifier and other related devices.<br />
3. Power off the ZXV10 <strong>T700</strong> terminal.<br />
– End of Steps –<br />
4.1.4 Checking after Power-on<br />
Prerequisites<br />
The video conference system has been turned on and not in a conference.<br />
Context<br />
After the terminal is powered on, check the video interfaces. If the video interfaces are<br />
normal, the TV connected to the terminal will display the main menu page. Otherwise, the<br />
terminal may have fault.<br />
Steps<br />
1. Press the button Menu on the remote control to display the main menu page.<br />
Figure 4-1 Main Menu Page<br />
4-2<br />
SJ-20100910163147-003|2010-11-23(R1.1)<br />
ZTE Proprietary and Confidential
Chapter 4 Device Operation<br />
2. If the main menu page is not displayed on the TV, it indicates that there may have<br />
faults. Please operate troubleshooting according to trouble processing flow.<br />
– End of Steps –<br />
4.2 Precautions<br />
Pay attention to the following items while using the ZXV10 <strong>T700</strong>:<br />
• Remove the protection cover of the camera before using the ZXV10 <strong>T700</strong>. Avoid<br />
touching the camera lens. Put on the protection cover in time when the camera is not<br />
used.<br />
• After a conference, switch off the ZXV10 <strong>T700</strong> first. Store the basic components as<br />
required. It is recommended to keep the established videoconferencing system for<br />
convenient use next time.<br />
• Avoid frequent plugging/unplugging of cable connectors.<br />
• Follow the specified sequence to turn on/off the ZXV10 <strong>T700</strong>.<br />
4-3<br />
SJ-20100910163147-003|2010-11-23(R1.1)<br />
ZTE Proprietary and Confidential
ZXV10 <strong>T700</strong> <strong>User</strong> <strong>Guide</strong><br />
This page intentionally left blank.<br />
4-4<br />
SJ-20100910163147-003|2010-11-23(R1.1)<br />
ZTE Proprietary and Confidential
Chapter 5<br />
GUI Management and Control<br />
through the Remote Control<br />
Table of Contents<br />
Menu Navigation ........................................................................................................5-1<br />
Menu Operation .........................................................................................................5-3<br />
5.1 Menu Navigation<br />
Press menu button of the remote control when the terminal is free, The main menu page<br />
is shown in the figure below.<br />
Figure 5-1 Main Menu Page<br />
The main menu and sub-menu are shown in the table below.<br />
Table 5-1 Menu List<br />
Menu First Second Third Forth<br />
Call History — — — —<br />
Address Book — — — —<br />
5-1<br />
SJ-20100910163147-003|2010-11-23(R1.1)<br />
ZTE Proprietary and Confidential
ZXV10 <strong>T700</strong> <strong>User</strong> <strong>Guide</strong><br />
Menu First Second Third Forth<br />
Banner —<br />
Terminal Name —<br />
Services<br />
Caption<br />
Convene a<br />
conference<br />
H Caption —<br />
V Caption —<br />
Message —<br />
— —<br />
Display — —<br />
General<br />
Tones — —<br />
Call Option — —<br />
Alert Tip — —<br />
Video<br />
Video In<br />
Video Out —<br />
internal camera<br />
IP —<br />
H.323 —<br />
Management<br />
<strong>Network</strong><br />
Compatibility<br />
QoS<br />
IP rate Ctrl.<br />
System<br />
Settings<br />
NAT —<br />
FEC<br />
Audio Mic/Line Input —<br />
Capability — —<br />
Security — —<br />
Upgrade —<br />
Maintenance<br />
Save Config. —<br />
Load Config. —<br />
Sys Status — —<br />
Call Info. — —<br />
Version Info — —<br />
Diagnosis<br />
Loopback Test — —<br />
Ping Test — —<br />
Audio & Video — —<br />
Self diagnosis — —<br />
During a conference, press the shortcut key Menu to display the system control interface.<br />
5-2<br />
SJ-20100910163147-003|2010-11-23(R1.1)<br />
ZTE Proprietary and Confidential
5.2 Menu Operation<br />
5.2.1 Description of GUI Menu Operation<br />
Chapter 5 GUI Management and Control through the Remote Control<br />
The user can press the direction buttons and OK of the remote control to select the<br />
corresponding menu and find the desired page.<br />
For instance: the procedure to enter the general setting page is described as follows:<br />
1. Turn on the terminal. The main menu page, as shown in the figure below.<br />
Figure 5-2 Main Menu Page<br />
2. Select Management, and then press OK to enter the Management page, as shown<br />
in the figure below.<br />
Figure 5-3 Management Menu Page<br />
5-3<br />
SJ-20100910163147-003|2010-11-23(R1.1)<br />
ZTE Proprietary and Confidential
ZXV10 <strong>T700</strong> <strong>User</strong> <strong>Guide</strong><br />
3. Select General, and then press OK to enter the General page, as shown in the figure<br />
below.<br />
Figure 5-4 General Menu Page<br />
4. Select Display, and then press OK to enter the Display page, as shown in the figure<br />
below.<br />
Figure 5-5 Display Menu Page<br />
In conclusion, the path to enter the display menu page is: Management > General ><br />
Display.<br />
5.2.2 Operations about GUI Parameters<br />
This section introduces how to modify a parameter, save settings, turn page, and return to<br />
the upper-level menu through the remote control.<br />
5-4<br />
SJ-20100910163147-003|2010-11-23(R1.1)<br />
ZTE Proprietary and Confidential
Chapter 5 GUI Management and Control through the Remote Control<br />
Modifying Menu Items<br />
The user can press the up/down/left/right button and the OK button to select the<br />
corresponding menu and find the desired item.<br />
Here take modifying language in the Local page as an example to introduce how to modify<br />
a parameter.<br />
1. In the Local page , press the down button to select Language, and then press OK.<br />
2. Press the up/down buttons to select the needed language, and then press OK.<br />
Save after Modification<br />
The modification is valid only after it is saved. Use the following steps to save the<br />
modification:<br />
1. Press Return of the remote control.<br />
2. <strong>User</strong> can perform the following operations:<br />
• Press the direction buttons to select the OK button, and then press OK of the<br />
remote control to save the modification.<br />
• Select the Cancel button to cancel the modification.<br />
3. If the selection or setting is wrong, the corresponding alert box will pop up. Press the<br />
OK button or wait for a moment, the cursor will return to the text box or check box.<br />
Now the user can modify or select the parameter again.<br />
Turning Page<br />
Some parameters will be displayed in multiple pages. The user needs to turn to the<br />
previous or next page. Use the following steps to turn pages.<br />
1. Take viewing the second page of NAT setup as the example, as shown in the figure<br />
below.<br />
Figure 5-6 NAT Setup 1<br />
2. Press the right button to move the cursor to , and then press OK of the remote<br />
control or the F1 button to go to the second page, as shown in the figure below.<br />
5-5<br />
SJ-20100910163147-003|2010-11-23(R1.1)<br />
ZTE Proprietary and Confidential
ZXV10 <strong>T700</strong> <strong>User</strong> <strong>Guide</strong><br />
Figure 5-7 NAT Setup 2<br />
3. Press the right button to move the cursor to , and then press OK of the remote<br />
control or the F2 button to go to the first page.<br />
Returning to the upper-level menu<br />
Press the Return button to return to the initial page.<br />
5-6<br />
SJ-20100910163147-003|2010-11-23(R1.1)<br />
ZTE Proprietary and Confidential
Chapter 6<br />
General Configuration<br />
Table of Contents<br />
Display Settings .........................................................................................................6-1<br />
Prompt Tone Settings .................................................................................................6-3<br />
Call Option Settings....................................................................................................6-4<br />
Alert Tip Settings ........................................................................................................6-4<br />
6.1 Display Settings<br />
In the main interface, select Management > General > Display to open the Display Setup<br />
configuration interfaces, as shown in the two figures below.<br />
Figure 6-1 Display Setup 1<br />
6-1<br />
SJ-20100910163147-003|2010-11-23(R1.1)<br />
ZTE Proprietary and Confidential
ZXV10 <strong>T700</strong> <strong>User</strong> <strong>Guide</strong><br />
Figure 6-2 Display Setup 2<br />
The description of the display setup is shown in the table below.<br />
Parameter Name<br />
Terminal Name<br />
Language<br />
PIP Position<br />
OSD Option<br />
Name Option<br />
Show MSG Box<br />
Standby Mode<br />
Date<br />
Time<br />
Description<br />
Input a name to identify different video conference terminals<br />
Select a displaying language of ZXV10 <strong>T700</strong>interfaces. There are two<br />
available languages, Chinese, English<br />
Select a displaying position for the PIP video. The available options are any<br />
one of the four corners of the TV set screen<br />
Select the displaying mode of system status icons:<br />
• always on: The system status icons are always displayed on the screen<br />
of the TV set<br />
• auto: The system determines whether to display the corresponding icons<br />
according to the operating status. If users do not perform any operation<br />
over 10 seconds, the status icons will be displayed automatically<br />
• always off: The system status icons are not displayed on the screen of<br />
the TV set<br />
Select the displaying mode of conference site name.<br />
• send terminal: Overlay the local site name on the local site image at<br />
the sending side<br />
• receive terminal: Overlay the remote site image and remote site name<br />
on the receiving side<br />
• close: The system does not overlay conference site name<br />
Setup whether to display the MSG box<br />
Not available currently<br />
Set the system date according to the date format<br />
Set the system time<br />
6-2<br />
SJ-20100910163147-003|2010-11-23(R1.1)<br />
ZTE Proprietary and Confidential
6.2 Prompt Tone Settings<br />
Chapter 6 General Configuration<br />
In the main interface, select Management > General > Tones to open the Tone<br />
configuration interface, as shown in the figure below.<br />
Figure 6-3 The Tone Configuration Page<br />
The descriptions of the tone parameters are shown in the table below.<br />
Parameter Name<br />
Enable Tone<br />
Dialling Tone<br />
<strong>Inc</strong>oming Tone<br />
Key Tone<br />
Warning Tone<br />
Description<br />
Select whether to enable prompt tone<br />
• There are five different tones available<br />
• There are six different volume levels available<br />
0 stands for the minimum level and 5 stands for the maximum level<br />
• There are five different tones available<br />
• There are six different volume levels available<br />
0 stands for the minimum level and 5 stands for the maximum level<br />
• There are five different tones available<br />
• There are six different volume levels available<br />
0 stands for the minimum level and 5 stands for the maximum level<br />
• There are five different tones available<br />
• There are six different volume levels available<br />
0 stands for the minimum level and 5 stands for the maximum level<br />
Caution<br />
This function is noneffective in this version.<br />
6-3<br />
SJ-20100910163147-003|2010-11-23(R1.1)<br />
ZTE Proprietary and Confidential
ZXV10 <strong>T700</strong> <strong>User</strong> <strong>Guide</strong><br />
6.3 Call Option Settings<br />
In the main interface, select Management > General > Call Option to open the Call<br />
Option configuration interface, as shown in the figure below.<br />
Figure 6-4 Call Option<br />
The descriptions of the call option parameters are shown in the table below.<br />
Parameter Name<br />
P2P Answer<br />
Dual-Video Bandwidth Allocation<br />
Enable Dual-Video<br />
Enable Busy-Reminder<br />
Description<br />
Select the answer mode for a point-to-point call. There are three<br />
modes available: Auto, Manual and No Disturb<br />
By default, the secondary video bandwidth is 50% of the main<br />
video bandwidth<br />
By adjusting dual-video bandwidth, the user can select the<br />
bandwidth of the secondary video bandwidth, ranging from 10%<br />
to 90%<br />
Select whether to enable dual-video<br />
Select whether to prompt the new call is received when the<br />
terminal is in the conference state<br />
6.4 Alert Tip Settings<br />
In the main interface, select Management > General > Alert Tip to open the Alert Tip<br />
configuration interface, as shown in the figure below.<br />
6-4<br />
SJ-20100910163147-003|2010-11-23(R1.1)<br />
ZTE Proprietary and Confidential
Chapter 6 General Configuration<br />
Figure 6-5 Alerting Tip<br />
Select a packet loss ratio threshold from the pull-down list. Once the packet loss ratio<br />
reaches this threshold, the alerting information will be displayed on the screen of the TV<br />
set.<br />
6-5<br />
SJ-20100910163147-003|2010-11-23(R1.1)<br />
ZTE Proprietary and Confidential
ZXV10 <strong>T700</strong> <strong>User</strong> <strong>Guide</strong><br />
This page intentionally left blank.<br />
6-6<br />
SJ-20100910163147-003|2010-11-23(R1.1)<br />
ZTE Proprietary and Confidential
Chapter 7<br />
System Configuration<br />
Table of Contents<br />
Video Configuration....................................................................................................7-1<br />
<strong>Network</strong> Configuration................................................................................................7-7<br />
Mic/Line Input Settings .............................................................................................7-14<br />
Conference Capability Settings ................................................................................7-16<br />
Security Parameters Settings ...................................................................................7-17<br />
Maintenance ............................................................................................................7-18<br />
7.1 Video Configuration<br />
7.1.1 Video Input Settings<br />
Context<br />
Usually, you can use the default video input settings. To modify the input source and port,<br />
do as follows:<br />
The following describes how to set video input by using the remote control. Alternatively,<br />
you can log in to the Web page and set video input by choosing System Settings > Video<br />
> Video In.<br />
Steps<br />
1. Choose Management > System Settings > Video > Video In by using the remote<br />
control. The Video In interface is displayed, as shown in the following figure.<br />
7-1<br />
SJ-20100910163147-003|2010-11-23(R1.1)<br />
ZTE Proprietary and Confidential
ZXV10 <strong>T700</strong> <strong>User</strong> <strong>Guide</strong><br />
Figure 7-1 Setting Video Input<br />
2. Refer to the following table to name each video source and configure information, such<br />
as port.<br />
Item<br />
Inner Camera<br />
External Video Source<br />
Video Input Port Inf. ID<br />
Default Main Video<br />
Default Second Video<br />
Configuration Method<br />
Name the inner camera. Such a name must be simple and easy to<br />
remember. It can consist of letters in upper cases, lower cases,<br />
digits or Chinese<br />
For example, Camera is the name of inner camera input<br />
Name a video source. Such a name must be simple and easy to<br />
remember. It can consist of letters in upper cases, lower cases,<br />
digits or Chinese<br />
For example, Computer/DVD is the name of external video source<br />
An input port can be bound to the video source. That is, you can<br />
specify the pictures input from a specified port as the images of<br />
the video source<br />
For example, you can specify the images input from the VGA/YPbPr<br />
port as the pictures of external video source<br />
Select a default main video source<br />
Select a default second video source<br />
3. After naming the video source and selecting a port, click Edit next to the video source.<br />
The following interface is displayed.<br />
7-2<br />
SJ-20100910163147-003|2010-11-23(R1.1)<br />
ZTE Proprietary and Confidential
Chapter 7 System Configuration<br />
Figure 7-2 Input Configuration Interface 1<br />
4. Press OK button or F1 button of the remote control to enter the next page of<br />
configuration as shown below.<br />
Figure 7-3 Input Configuration Interface 2<br />
5. Refer to the following table to configure the parameters displayed in the above figure.<br />
Note<br />
In this Version, Parameters of Input Configuration Interface of inner camera is<br />
noneffective.<br />
Item<br />
Enable Interface<br />
Type<br />
Description<br />
Only after a port is enabled, it can be displayed on the interface for<br />
selecting video source<br />
For example, after port YCbPr is enabled, the port is available on the<br />
interface when you select a video source<br />
Selects the type of the video input device connected to the port<br />
7-3<br />
SJ-20100910163147-003|2010-11-23(R1.1)<br />
ZTE Proprietary and Confidential
ZXV10 <strong>T700</strong> <strong>User</strong> <strong>Guide</strong><br />
Item<br />
Select Image<br />
Work Mode<br />
Resolution<br />
Serial Port<br />
Control Protocol<br />
Remote Control<br />
Camera Orientation<br />
Turn Speed<br />
Description<br />
Selects an image for the accessed device according to its type<br />
Selects a working mode for the accessed device<br />
Auto: Indicates the automatic selection mode. Alternatively, you can<br />
select the required mode from the drop-down list<br />
Selects the exactly resolution according to your connected devices<br />
The serial port is connected with the camera controlling cable to<br />
implement camera control<br />
If the camera of the terminal is used, the serial port is optional<br />
One serial port must be bound to one video input port to implement<br />
control over the camera<br />
To enable the Infrared remote control function of the camera, the<br />
configuration of the serial port must be consistent with that on the Local<br />
Setup interface<br />
Selects the control protocol for the accessed device<br />
For a SONY camera, set this parameter to SONY<br />
Specifies whether to enable the function of remote control. That is, the<br />
ZXV10 <strong>T700</strong> camera can be remotely controlled by other terminals<br />
(often the chairman terminal) with the function of remote control<br />
The options are Normal and Reverse<br />
Set this parameter according to requirements<br />
The options are Normal, Quick, and Slow<br />
Set this parameter according to requirements<br />
6. Save the settings and exit.<br />
– End of Steps –<br />
7.1.2 Video Output Settings<br />
Context<br />
Usually, you can use the default video output settings. To modify the output source and<br />
port, do as follows:<br />
The following describes how to set video output by using the remote control. Alternatively,<br />
you can log in to the Web page and set video output by choosing System Settings ><br />
Video > Video Out.<br />
Steps<br />
1. Choose Management > System Settings > Video > Video Out by using the remote<br />
control. The Video Out interface is displayed, as shown in the following figure.<br />
7-4<br />
SJ-20100910163147-003|2010-11-23(R1.1)<br />
ZTE Proprietary and Confidential
Chapter 7 System Configuration<br />
Figure 7-4 Setting Video Output<br />
2. According to requirements, select a port and click Config next to the port. The<br />
following interface is displayed.<br />
Caution<br />
The first monitor is mandatory. Therefore, the check box next to Display 1 grays out.<br />
In the above figure, two monitors are available. The following table lists the display<br />
differences when you select the check boxes next to the monitors.<br />
Monitor<br />
Selection<br />
Not in<br />
Conference<br />
Conference<br />
Without Dual<br />
Video<br />
Conference<br />
with Dual Video<br />
Transmitted<br />
Conference with<br />
Dual Video Received<br />
Case 1<br />
The displayed options<br />
Monitor<br />
1 (√)<br />
Displays local<br />
main video<br />
The displayed<br />
options are as<br />
follows:<br />
• Local main<br />
video<br />
• Remote main<br />
video<br />
• Combination<br />
of local main<br />
video and<br />
remote main<br />
video<br />
The displayed<br />
options are as<br />
follows:<br />
• Local second<br />
video<br />
• Remote main<br />
video<br />
• Combination<br />
of local second<br />
video and<br />
remote main<br />
video<br />
are as follows:<br />
• Local main video<br />
• Remote main<br />
video<br />
• Remote second<br />
video<br />
• Combination of<br />
remote main<br />
video and local<br />
main video<br />
• Combination of<br />
remote main<br />
video and remote<br />
second video<br />
7-5<br />
SJ-20100910163147-003|2010-11-23(R1.1)<br />
ZTE Proprietary and Confidential
ZXV10 <strong>T700</strong> <strong>User</strong> <strong>Guide</strong><br />
Monitor<br />
Selection<br />
Not in<br />
Conference<br />
Conference<br />
Without Dual<br />
Video<br />
Conference<br />
with Dual Video<br />
Transmitted<br />
Conference with<br />
Dual Video Received<br />
Case 1<br />
Monitor<br />
2 (X)<br />
- - - -<br />
Case 2<br />
The displayed options<br />
are as follows:<br />
• Remote main<br />
Monitor<br />
1 (√)<br />
Displays local<br />
main video<br />
Displays remote<br />
main video<br />
Displays remote<br />
main video<br />
video<br />
• Local main video<br />
• Combination of<br />
local main video<br />
and remote main<br />
video<br />
Monitor<br />
Displays local<br />
Displays local<br />
Displays local<br />
Displays remote<br />
2 (√)<br />
second video<br />
main video<br />
second video<br />
second video<br />
Figure 7-5 Setting Output Interface<br />
3. Refer to the following table to configure the parameters displayed in the above figure.<br />
Item<br />
Port<br />
Working Mode<br />
Resolution<br />
Description<br />
Selects the main output port, through which the monitor is connected<br />
with the ZXV10 <strong>T700</strong> terminal.<br />
Selects an output working mode.<br />
Selects an output resolution.<br />
7-6<br />
SJ-20100910163147-003|2010-11-23(R1.1)<br />
ZTE Proprietary and Confidential
Chapter 7 System Configuration<br />
4. Save the settings and exit.<br />
– End of Steps –<br />
7.2 <strong>Network</strong> Configuration<br />
7.2.1 <strong>Network</strong> Connection Settings<br />
Context<br />
This section introduces how to set IP network parameters by using the remote controller.<br />
Steps<br />
1. In the main interface, select Management > System Settings > <strong>Network</strong> > IP to open<br />
the IP configuration interface, as shown in the figure below.<br />
Figure 7-6 The Static IP Configuration Page<br />
2. Set the parameters according to the actual networking type.<br />
• If static IP mode is selected, set the parameters according to the description listed<br />
in the table below.<br />
Table 7-1 Static IP Parameters<br />
Parameter Name<br />
Work Mode<br />
Address Type<br />
IP Address<br />
Subnet Mask<br />
Description<br />
Select a exactly mode due to your network<br />
Select static IP<br />
Input the IP address allocated by the administrator of the video<br />
conference system<br />
Input the Subnet mask address allocated by the administrator of the<br />
video conference system<br />
7-7<br />
SJ-20100910163147-003|2010-11-23(R1.1)<br />
ZTE Proprietary and Confidential
ZXV10 <strong>T700</strong> <strong>User</strong> <strong>Guide</strong><br />
Parameter Name<br />
Gateway<br />
DNS<br />
Description<br />
Input the gateway address allocated by the administrator of the video<br />
conference system<br />
Input the DNS address allocated by the administrator of the video<br />
conference system<br />
• If DHCP is selected, every time ZXV10 <strong>T700</strong> reboots, it obtains a different IP<br />
address allocated by the DHCP server automatically. It adopts this IP address to<br />
set up calls before rebooting again. However, if the DHCP server is out of service,<br />
the ZXV10 <strong>T700</strong> terminal cannot achieve a new IP address after rebooting.<br />
• If PPPoE is selected, this mode is for ADSL access. Specify the user name,<br />
password and dialing mode of the PPPoE access.<br />
Note<br />
<strong>User</strong> Name and Password are assigned by the carrier.<br />
3. Press Return on the remote controller to save the configurations and exit.<br />
– End of Steps –<br />
7.2.2 H.323 Settings<br />
Gate Keeper (GK) is used to implement the address analysis, bandwidth management,<br />
calling control, security management, routing management and calling charge of the H.323<br />
videoconference system.<br />
In the main interface, select Management > System Settings > <strong>Network</strong> > H.323 to open<br />
the H.323 configuration interface, as shown in the figure below.<br />
Figure 7-7 H.323 Configuration Page<br />
The configuration items are listed in the table below.<br />
7-8<br />
SJ-20100910163147-003|2010-11-23(R1.1)<br />
ZTE Proprietary and Confidential
Chapter 7 System Configuration<br />
Table 7-2 H.323 Configuration Items<br />
Item Configuration Method Description<br />
GK mode<br />
GK address<br />
Off<br />
Auto<br />
Specify<br />
Do not use any GK<br />
The terminal searches a GK<br />
for use automatically<br />
The administrator will specify<br />
a GK for terminal registration<br />
Input the IP address of the<br />
specified GK server<br />
If off is selected, it is unable to set the GK<br />
Address, Terminal NO. and Terminal Pwd<br />
If auto is selected, it is unable to set the GK<br />
Address, Terminal NO. and Terminal Pwd<br />
If specify is selected, it is necessary to<br />
set the GK Address, Terminal NO. and<br />
Terminal Pwd<br />
The specify item is often selected when<br />
there is a GK in the system<br />
Ask the administrator for the GK server<br />
address<br />
RMS Port Default 1719<br />
Terminal No.<br />
Terminal Pwd<br />
Input the terminal number<br />
of the ZXV10 <strong>T700</strong> which is<br />
registered on the GK<br />
Input the GK password (any<br />
digits with the length of 1-6)<br />
The Terminal NO. is the unique identifier<br />
of a terminal in the whole network. It must<br />
be consistent with the number configured<br />
in the ZXMS80–CSS system. It is not only<br />
used to distinguish different terminals in the<br />
network, but also used as the addressing<br />
basis for a calling. Make sure that the input<br />
terminal number is correct. Otherwise, the<br />
terminal will fail to be called<br />
For the specified GK, it needs the password<br />
registration. Generally, it is unnecessary to<br />
set this item<br />
7.2.3 Compatibility<br />
7.2.3.1 QoS Settings<br />
In the main interface, select Management > System Settings > <strong>Network</strong> > Compatibility<br />
> QoS to open the QoS configuration interface, as shown in the figure below.<br />
7-9<br />
SJ-20100910163147-003|2010-11-23(R1.1)<br />
ZTE Proprietary and Confidential
ZXV10 <strong>T700</strong> <strong>User</strong> <strong>Guide</strong><br />
Figure 7-8 Setting QoS<br />
The table below describes the QoS setting parameters.<br />
Item<br />
Error Concealment<br />
Description<br />
Used to compensate packet loss in an unstable<br />
network, including Smart Video and Clear Video.<br />
QoS Mode<br />
Audio<br />
Video<br />
Data<br />
Signaling<br />
TOS<br />
Close<br />
IP priority<br />
DiffServ<br />
Disables the QoS mode. If this item is selected,<br />
there is no need to set the parameters below.<br />
IP priority information contained in an IP data<br />
packet. The next-level device processes data<br />
packets based on the priorities.<br />
Such parameters as Audio, Video, Data, TOS,<br />
Error Concealment, and MTU need to be<br />
configured.<br />
Differentiates priorities based on TOS.<br />
Such parameters as Audio, Video, Data, and<br />
Error Concealment need to be configured.<br />
<strong>Inc</strong>ludes 0 to 7. 0 is the lowest level and 7 is the<br />
highest.<br />
Select the service type from the drop-down list box.<br />
7.2.3.2 IP Rate Control Settings<br />
In the main interface, select Management > System Settings > <strong>Network</strong> > Compatibility<br />
> IP rate Ctrl to open the IP rate Ctrl configuration interface, as shown in the figure below.<br />
7-10<br />
SJ-20100910163147-003|2010-11-23(R1.1)<br />
ZTE Proprietary and Confidential
Chapter 7 System Configuration<br />
Figure 7-9 IP Rate Control<br />
The table below describes the related configuration items.<br />
Option<br />
IP Rate Control<br />
Lowest Tx<br />
Description<br />
<strong>Inc</strong>ludes Disable and Enable. If Enable is selected, the user needs to<br />
set Lowest Tx<br />
ZXV10 <strong>T700</strong>When the network quality deteriorates and the packet loss<br />
rate exceeds the threshold, the terminal will sends a IP rate control<br />
request to the MCU<br />
It means the lowest control rate<br />
The minimum value is 64 kbps and the maximum value is 1920 kbps<br />
7.2.3.3 FEC Settings<br />
Forward error correction (FEC) means that the terminal adopts the specified redundancy<br />
transmission policies so that it can guarantee clear and smooth video transmission under<br />
a specified packet loss rate. When a receiving end detects packet loss, it notifies the<br />
sending end to send all the code streams the preset number of times repeatedly based on<br />
the redundancy transmission policy described in the table below.<br />
Table 7-3 Description of Redundancy Transmission Policies<br />
Packet Loss Rate in <strong>Network</strong> Standard Redundancies Enhanced Redundancies<br />
System Settings > <strong>Network</strong> > Compatibility<br />
> FEC to open the FEC configuration interface, as shown in the figure below.<br />
7-11<br />
SJ-20100910163147-003|2010-11-23(R1.1)<br />
ZTE Proprietary and Confidential
ZXV10 <strong>T700</strong> <strong>User</strong> <strong>Guide</strong><br />
Figure 7-10 Configuring FEC 1<br />
Figure 7-11 Configuring FEC 2<br />
The table below describes the FEC configuration parameters.<br />
No.<br />
Enable FEC<br />
Description<br />
To enable this function, make sure that the IP Rate Control function is<br />
disabled. Otherwise the FEC function cannot be enabled<br />
Audio, Main Video, Second Video<br />
<strong>Network</strong> Lost Percent<br />
Indicates the packet loss rate at the peer end, including Auto, 1%, 3%, 5%,<br />
10%, 20%, and 30%. Auto means the packet loss rate is subject to the<br />
actual one at the peer end (not supported at present)<br />
Advanced settings<br />
Media Type<br />
FEC Algorithm<br />
Redundancy Mode<br />
<strong>Inc</strong>ludes Audio, Main Video, Second Video<br />
<strong>Inc</strong>ludes Auto, Simple, and VM, Auto by default<br />
<strong>Inc</strong>ludes Normal and Enhance. This parameter is valid when the FEC<br />
algorithm is Simple<br />
7-12<br />
SJ-20100910163147-003|2010-11-23(R1.1)<br />
ZTE Proprietary and Confidential
Chapter 7 System Configuration<br />
No.<br />
Redundancy Percent<br />
Keep Bandwidth<br />
Description<br />
<strong>Inc</strong>ludes Auto, 5%, 10%, 15%, 20%, 30%, 40%, 50%, and 100%, Auto<br />
by default<br />
Indicates whether to lower the code rate so as to keep the total bandwidth<br />
unchanged, Yes by default<br />
7.2.4 NAT Settings<br />
NAT is short for network address translation. Inside the Intranet, video conference<br />
terminals communicate with each other using private IP addresses. When the terminals<br />
inside the Intranet need to communicate with the Internet, the device with the NAT<br />
function translates private IP addresses into public network IP addresses.<br />
In the main interface, select Management > System Settings > <strong>Network</strong> > NAT to open<br />
the NAT configuration interface, as shown in the figure below.<br />
Figure 7-12 NAT Setup 1<br />
Figure 7-13 NAT Setup 2<br />
7-13<br />
SJ-20100910163147-003|2010-11-23(R1.1)<br />
ZTE Proprietary and Confidential
ZXV10 <strong>T700</strong> <strong>User</strong> <strong>Guide</strong><br />
The table below describes the NAT configuration items.<br />
Item<br />
NAT Mode<br />
NAT Address<br />
TCP Port Range<br />
UDP Port Range<br />
IP Addresses 1 to 6<br />
Subnet masks 1 to 6<br />
Keep-alive Period<br />
Description<br />
Selects whether to enable NAT, including Disabled, Static NAT, and<br />
H.460<br />
If Disabled is selected, there is no need to set other parameters.<br />
Static NAT means that a private IP address inside the Intranet is<br />
translated into the corresponding public IP address<br />
H.460 is a group of firewall transversal protocols. Using this protocol<br />
together with an external B200 gateway, the terminal can flexibly<br />
transverse firewalls<br />
Enters a public IP address<br />
Upper and lower limits of the TCP port range. It is recommended to use<br />
the default values<br />
Upper and lower limits of the UDP port range. It is recommended to<br />
use the default values<br />
ZXV10 <strong>T700</strong> Private IP addresses<br />
ZXV10 <strong>T700</strong> Enters corresponding subnet masks<br />
Sets the keep-alive period of the channel between the Intranet and the<br />
Internet<br />
The user can set this value based on the network access frequency,<br />
ranging from 5 to 30, in seconds<br />
7.3 Mic/Line Input Settings<br />
In the main interface, select Management > System Settings > Audio > Mic/Line Input<br />
to open the Mic/Line Input configuration interface, as shown in the figure below.<br />
Figure 7-14 Configuring Mic/Line Input 1<br />
7-14<br />
SJ-20100910163147-003|2010-11-23(R1.1)<br />
ZTE Proprietary and Confidential
Chapter 7 System Configuration<br />
Figure 7-15 Configuring Mic/Line Input 2<br />
The table below describes audio setting parameters.<br />
Option<br />
Description<br />
Line Input<br />
Input Gain<br />
Echo Control<br />
Sets the gain value of audio input, ranging from 0 to 16.<br />
When the remote end hears lower sound, increase the gain value; if<br />
it hears higher sound, decrease the gain value. The default value is<br />
recommended.<br />
Selects whether to cancel echo.<br />
Analog Mic<br />
Input Gain<br />
Echo Control<br />
Start ANS<br />
Start AGC<br />
Sets the gain value of audio input, ranging from 0 to 16.<br />
When the remote end hears lower sound, increase the gain value; if<br />
it hears higher sound, decrease the gain value. The default value is<br />
recommended.<br />
Selects whether to cancel echo.<br />
Selects whether to enable ANS.<br />
Selects whether to enable AGC. When AGC is enabled, the terminal<br />
adjusts the audio input gain automatically based on the strength of<br />
input signals. In this case, the sound will not be affected disregarding<br />
the distance between the speaker and the microphone as well as the<br />
volume of the speaker.<br />
If the users uses an omnidirectional microphone, it is recommended to<br />
enable this function.<br />
Advanced Option<br />
AEC Mode<br />
ANS<br />
The default value is recommended. This parameter is configurable.<br />
AGC<br />
7-15<br />
SJ-20100910163147-003|2010-11-23(R1.1)<br />
ZTE Proprietary and Confidential
ZXV10 <strong>T700</strong> <strong>User</strong> <strong>Guide</strong><br />
7.4 Conference Capability Settings<br />
In the main interface, select Management > System Settings > Capability to open the<br />
Capability configuration interface, as shown in the figure below.<br />
Figure 7-16 Capability Interface 1<br />
Press F1 on the remote control to enter the second page of capability settings, as shown<br />
in the figure below.<br />
Figure 7-17 Capability Interface 2<br />
The table below describes the call items.<br />
Option<br />
Audio<br />
Main Video<br />
Description<br />
Encoding/decoding capability of audio, Auto by default<br />
Generally this parameter should be consistent with that defined in the<br />
conference template<br />
Auto is recommended<br />
7-16<br />
SJ-20100910163147-003|2010-11-23(R1.1)<br />
ZTE Proprietary and Confidential
Chapter 7 System Configuration<br />
Option<br />
Main Video Effect<br />
Second Video<br />
Second Video Effect<br />
Description<br />
<strong>Inc</strong>ludes Auto, Clear, and Smooth<br />
The user can set it as required<br />
Auto is recommended<br />
Encoding/decoding capability of secondary video, including Auto, H.263,<br />
and H.264. Auto is recommended<br />
<strong>Inc</strong>ludes Auto, Clear, and Smooth<br />
The user can set it as required<br />
Auto is recommended<br />
Force Main Video<br />
Capability<br />
Force Main Video<br />
Format<br />
Forcing setup the Capability, Format, FPS of the Main Video<br />
Force Main Video FPS<br />
Force Second Video<br />
Capability<br />
Force Main Video<br />
Format<br />
Forcing setup the Capability, Format, FPS of the Second Video<br />
Force Main Video FPS<br />
Note<br />
The capability interface 2 is used to debug. Normal users don’t need to configure it.<br />
7.5 Security Parameters Settings<br />
In the main interface, select Management > System Settings > Security to open the<br />
Security configuration interface, as shown in the figure below.<br />
7-17<br />
SJ-20100910163147-003|2010-11-23(R1.1)<br />
ZTE Proprietary and Confidential
ZXV10 <strong>T700</strong> <strong>User</strong> <strong>Guide</strong><br />
Figure 7-18 Setting Security Parameters<br />
The table below describes the security parameters.<br />
Parameter<br />
Enable Admin Pwd<br />
Administrator Pwd<br />
AES Encryption<br />
Explanation<br />
If this function is enabled, the password is required to enter the system<br />
management menu<br />
If this function is enabled, the system administrator needs to set a<br />
password to ensure security<br />
To enter the system management menu, the user must input the preset<br />
password<br />
AES is a type of encryption algorithm. If it is enabled, the sending end<br />
encrypts the data packets. The receiving end can get the information only<br />
after decrypting the data packets.<br />
7.6 Maintenance<br />
7.6.1 Software Update<br />
Steps<br />
1. In the main interface, select Management > System Settings > Maintenance ><br />
Upgrade to open the Upgrade configuration interface, as shown in the figure below.<br />
7-18<br />
SJ-20100910163147-003|2010-11-23(R1.1)<br />
ZTE Proprietary and Confidential
Chapter 7 System Configuration<br />
Figure 7-19 Software Update Page<br />
2. Select the software update mode from the Auto Update drop-down list box. Three<br />
modes are optional:<br />
• Manual: In this mode, you can determine whether to update the terminal software<br />
once a new version is available.<br />
• Auto: In this mode, the terminal will detect whether there is new version software<br />
automatically and update the terminal software once a new version is found.<br />
• No: In this mode, it is not allowed to update the terminal software.<br />
3. Input the period in the Interval text box for detecting whether there is any new version<br />
software.<br />
For example, input “24” in the box. Then the terminal will detect whether there is new<br />
version software every 24 hours.<br />
4. Input the path where the new version software is stored in the File Path text box.<br />
5. Save and Exit.<br />
– End of Steps –<br />
7.6.2 Saving System Configuration<br />
Steps<br />
1. In the main interface, select Management > System Settings > Maintenance > Save<br />
Config. to open the Save Config. configuration interface, as shown in the figure<br />
below.<br />
7-19<br />
SJ-20100910163147-003|2010-11-23(R1.1)<br />
ZTE Proprietary and Confidential
ZXV10 <strong>T700</strong> <strong>User</strong> <strong>Guide</strong><br />
Figure 7-20 Save Config Page<br />
2. Input the name for the current configuration to be saved in the Setting Name text box.<br />
3. Select a serial number for the configuration from the Setting Number drop-down list<br />
box. Five numbers are optional: 1 to 5.<br />
4. Save and exit.<br />
– End of Steps –<br />
7.6.3 Loading System Configuration<br />
Steps<br />
1. In the main interface, select Management > System Settings > Maintenance > Load<br />
Config. to open the Load Config. configuration interface, as shown in the figure<br />
below.<br />
Figure 7-21 Load Config Page<br />
2. Highlight the drop-down list box on the page and select the configuration (settings) to<br />
be loaded from it. The default configuration or other configurations saved previously<br />
are optional.<br />
7-20<br />
SJ-20100910163147-003|2010-11-23(R1.1)<br />
ZTE Proprietary and Confidential
Chapter 7 System Configuration<br />
3. Highlight the Load button on the page.<br />
– End of Steps –<br />
7-21<br />
SJ-20100910163147-003|2010-11-23(R1.1)<br />
ZTE Proprietary and Confidential
ZXV10 <strong>T700</strong> <strong>User</strong> <strong>Guide</strong><br />
This page intentionally left blank.<br />
7-22<br />
SJ-20100910163147-003|2010-11-23(R1.1)<br />
ZTE Proprietary and Confidential
Chapter 8<br />
Services<br />
8.1 Caption<br />
Table of Contents<br />
Caption ......................................................................................................................8-1<br />
Calling for Conference................................................................................................8-7<br />
8.1.1 Setting Terminal Name Displaying Mode<br />
Steps<br />
1. In the main interface, select Management > Services > Caption > Terminal Name<br />
to open the configuration page shown in the figure below.<br />
Figure 8-1 The Terminal Name Configuration Page<br />
2. Set the parameters according to the descriptions of the table below.<br />
Table 8-1 Terminal Name Displaying Mode Parameters<br />
Parameter Name<br />
BG Color<br />
Position<br />
Description<br />
BG Color stands for the background color. There<br />
are 10 color options available: black, white, gray,<br />
red, orange, yellow, green, cyan and purple.<br />
There are four position options available: up left,<br />
down left, up right and down right.<br />
8-1<br />
SJ-20100910163147-003|2010-11-23(R1.1)<br />
ZTE Proprietary and Confidential
ZXV10 <strong>T700</strong> <strong>User</strong> <strong>Guide</strong><br />
Parameter Name<br />
Font Color<br />
Font Size<br />
Transprency<br />
Description<br />
F Color stands for the foreground color. There<br />
are 10 color options available: black, white, gray,<br />
red, orange, yellow, green, cyan and purple.<br />
There are three font options available: small,<br />
middle and large.<br />
There are five transparency options available:<br />
full Transparent, 70% Transparent,<br />
semi-transparent, 30% Transparent and<br />
Opacity.<br />
3. Select the Display button and press OK on the remote controller to display the terminal<br />
name on the local or remote TV set in the style set above.<br />
The Display button is a dual-state button. It switches between Display and Hide.<br />
– End of Steps –<br />
8.1.2 Setting Banner<br />
Steps<br />
1. In the main interface, select Management > Services > Caption > Banner to open<br />
the configuration page shown in the figure below.<br />
Figure 8-2 The Banner Configuration Page<br />
2. Set the parameters according to the descriptions of the table below.<br />
Table 8-2 Banner Parameters<br />
Parameter Name<br />
Caption<br />
Description<br />
Input the content of the banner.<br />
8-2<br />
SJ-20100910163147-003|2010-11-23(R1.1)<br />
ZTE Proprietary and Confidential
Chapter 8 Services<br />
Parameter Name<br />
BG Color<br />
Position<br />
Font Color<br />
Font Size<br />
Transparency<br />
Description<br />
BG Color stands for the background color. There are<br />
10 colors options available: black, white, gray, red,<br />
orange, yellow, green, cyan and purple.<br />
There are five position options available: –10, 0, 10,<br />
20 and 30.<br />
F Color stands for the foreground color. There are<br />
10 colors options available: black, white, gray, red,<br />
orange, yellow, green, cyan and purple.<br />
There are three font options available: small, middle<br />
and large.<br />
There are five transparency options available: full<br />
Transparent, 70% Transparent, semi-transparent,<br />
30% Transparent and Opacity.<br />
3. Select the Send button and press OK on the remote controller to send the banner to<br />
the screen of the remote side TV set.<br />
• The Send button is a dual-state button. It switches between Send and Stop.<br />
• To preview the content of the banner, select the Preview button and press OK on<br />
the remote controller.<br />
– End of Steps –<br />
8.1.3 Setting Horizontal Caption<br />
Steps<br />
1. In the main interface, select Management > Services > Caption > H Caption to open<br />
the configuration page shown in the figure below.<br />
Figure 8-3 The Horizontal Caption Configuration Page<br />
8-3<br />
SJ-20100910163147-003|2010-11-23(R1.1)<br />
ZTE Proprietary and Confidential
ZXV10 <strong>T700</strong> <strong>User</strong> <strong>Guide</strong><br />
2. Set the parameters according to the descriptions of the table below.<br />
Table 8-3 Horizontal Caption Parameters<br />
Parameter Name<br />
Caption<br />
Style<br />
Speed<br />
BG Color<br />
Position<br />
F Color<br />
Font Size<br />
Trans.<br />
Description<br />
Input the content of the horizontal subtitle.<br />
There are three movement style options: Fixed, left and right.<br />
There are three movement speed options: slow, normal and<br />
quick.<br />
BG Color stands for the background color. There are 10 color<br />
options available: black, white, gray, red, orange, yellow,<br />
green, cyan and purple.<br />
There are seven position options available: –30, –20, –10, 0,<br />
10, 20 and 30.<br />
F Color stands for the foreground color. There are 10 color<br />
options available: black, white, gray, red, orange, yellow,<br />
green, cyan and purple.<br />
There are three font options available: small, middle and large.<br />
There are five transparency options available: full Transparent,<br />
70% Transparent, semi-transparent, 30% Transparent and<br />
Opacity.<br />
3. Select the Send button and press OK on the remote controller to send the horizontal<br />
subtitle to the screen of the remote side TV set.<br />
• The Send button is a dual-state button. It switches between Send and Stop.<br />
• To preview the content of the horizontal subtitle, select the Preview button and<br />
press OK on the remote controller.<br />
– End of Steps –<br />
8.1.4 Setting Vertical Caption<br />
Steps<br />
1. In the main interface, select Management > Services > Caption > V Caption to open<br />
the configuration page shown in the figure below.<br />
8-4<br />
SJ-20100910163147-003|2010-11-23(R1.1)<br />
ZTE Proprietary and Confidential
Chapter 8 Services<br />
Figure 8-4 The Vertical Caption Configuration Page<br />
2. Set the parameters according to the descriptions of the table below.<br />
Table 8-4 Vertical Caption Parameters<br />
Parameter Name<br />
Caption<br />
Style<br />
Speed<br />
BG Color<br />
Position<br />
Font Color<br />
Font Size<br />
Transparency<br />
Description<br />
Input the content of the vertical subtitle.<br />
There are three movement style options: Fixed, left and right.<br />
There are three movement speed options: slow, normal and<br />
quick.<br />
BG Color stands for the background color. There are 10 color<br />
options available: black, white, gray, red, orange, yellow,<br />
green, cyan and purple.<br />
There are four position options available: up, middle, down<br />
and Full Screen.<br />
F Color stands for the foreground color. There are 10 color<br />
options available: black, white, gray, red, orange, yellow,<br />
green, cyan and purple.<br />
There are three font options available: small, middle and large.<br />
There are five transparency options available: full Transparent,<br />
70% Transparent, semi-transparent, 30% Transparent and<br />
Opacity.<br />
3. Select the Send button and press OK on the remote controller to send the vertical<br />
subtitle to the screen of the remote side TV set.<br />
• The Send button is a dual-state button. It switches between Send and Stop.<br />
• To preview the content of the vertical subtitle, select the Preview button and press<br />
OK on the remote controller.<br />
– End of Steps –<br />
8-5<br />
SJ-20100910163147-003|2010-11-23(R1.1)<br />
ZTE Proprietary and Confidential
ZXV10 <strong>T700</strong> <strong>User</strong> <strong>Guide</strong><br />
8.1.5 Setting Short Message<br />
Context<br />
• In P2P conference, the terminals can send messages to each other.<br />
• In multi-terminal conference, ZXV10 <strong>T700</strong> can send messages to one or all terminals.<br />
Steps<br />
1. In the main interface, select Management > Services > Caption > Message to open<br />
the configuration page shown in the figure below.<br />
Figure 8-5 The Short Message Configuration Page<br />
2. Set the parameters according to the descriptions of the table below.<br />
Table 8-5 Short Message Parameters<br />
Parameter Name<br />
Caption<br />
Terminal List<br />
BG Color<br />
Font Size<br />
Font Color<br />
Description<br />
Input the content of the short message to be sent.<br />
If the terminal is currently in a conference, all of the terminals<br />
in the conference are listed here. If the terminal is not in a<br />
conference, it displays No terminal to send.<br />
BG Color stands for the background color. There are 10 color<br />
options available: black, white, gray, red, orange, yellow,<br />
green, cyan and purple.<br />
There are three font options available: small, middle and large.<br />
F Color stands for the foreground color. There are 10 color<br />
options available: black, white, gray, red, orange, yellow,<br />
green, cyan and purple.<br />
– End of Steps –<br />
8-6<br />
SJ-20100910163147-003|2010-11-23(R1.1)<br />
ZTE Proprietary and Confidential
Chapter 8 Services<br />
8.2 Calling for Conference<br />
Prerequisites<br />
• The terminals in the address book can join a meeting only after they are configured<br />
with extension numbers, which are the numbers registered on GK.<br />
• Contact the ZXMS80 system administrator and check whether a proper conference<br />
template named with a rate is available in the system.<br />
Context<br />
The meeting function means that a terminal initiates a conference and makes a conference<br />
request to the MCU. The request contains terminal names, conference rate, conference<br />
password, conference special number, number of pictures, and duration. The specified<br />
MCU checks whether it can satisfy the request based on the board configuration and<br />
template configuration in the ZXMS80 system. If yes, the MCU will call the terminals for<br />
conference.<br />
The conference templates need to be configured on the conference administrator<br />
operation interface. The template of calling for a conference is different from that of a<br />
normal conference. In the template of calling for a conference, the conference name and<br />
terminal prefix are restricted.<br />
The following describes how to call for a conference by using the remote control.<br />
Alternatively, you can log in to the Web page and call for a conference by choosing Call<br />
Control > Call Meeting.<br />
Steps<br />
1. Choose Management > Services > Convene a conference. The Convene a<br />
conference interface is displayed.<br />
2. Click Address book to display the interface for selecting terminals. All the terminals<br />
that are registered in the GK are displayed on the interface.<br />
3. Select a terminal (after it is selected, the check box next to its name is selected), and<br />
the click OK. The selected terminal is displayed in the Meeting list box.<br />
4. Refer to the following table to configure the parameters , such as conference rate,<br />
number of pictures, service number, password, and duration.<br />
Item Configuration Method Description<br />
Conference Rate<br />
No. of Picture<br />
Service Num.<br />
Selects a conference rate.<br />
Selects the number of<br />
pictures.<br />
Usually, it is 198. It is<br />
recommended to use the<br />
default value.<br />
It must be consistent with the conference<br />
rate configured on the MCU.<br />
Up to 2 pictures can be provided by this<br />
version.<br />
Terminals can call the conference through<br />
the conference special number.<br />
8-7<br />
SJ-20100910163147-003|2010-11-23(R1.1)<br />
ZTE Proprietary and Confidential
ZXV10 <strong>T700</strong> <strong>User</strong> <strong>Guide</strong><br />
Password<br />
Min. (m)<br />
It can contain 1 to 6 Arabic<br />
numerals.<br />
Enters the conference<br />
duration.<br />
It is the password used by a terminal to<br />
actively join the conference.<br />
The unit is minute.<br />
5. After the settings, click Call to call for the conference.<br />
– End of Steps –<br />
Example<br />
For example, to call for a conference with the conference rate of 1920 kbit/s, the conference<br />
template named with 1920 must exist in the ZXMS80 system.<br />
Follow-Up Action<br />
If the conference is successfully called, the MCU calls all the terminals automatically.<br />
8-8<br />
SJ-20100910163147-003|2010-11-23(R1.1)<br />
ZTE Proprietary and Confidential
Chapter 9<br />
Diagnosis<br />
Table of Contents<br />
Checking System Status ............................................................................................9-1<br />
Checking Call Information ..........................................................................................9-2<br />
Viewing Version Information .......................................................................................9-3<br />
Loopback Test............................................................................................................9-4<br />
Ping Test ....................................................................................................................9-6<br />
Audio and Video Test .................................................................................................9-8<br />
System Self-diagnosis................................................................................................9-9<br />
9.1 Checking System Status<br />
Context<br />
The system status interface provides the terminal's system composition and configuration<br />
information for users to view. The information cannot be modified.<br />
Steps<br />
• When the terminal is in idle mode, press the Information shortcut button to access the<br />
system status interface directly, or select Management > Diagnosis > Sys. Status<br />
to access the System Status interface by using the remote controller, as shown in the<br />
figure below.<br />
Figure 9-1 System Status<br />
The items shown in the figure above are described in the table below.<br />
9-1<br />
SJ-20100910163147-003|2010-11-23(R1.1)<br />
ZTE Proprietary and Confidential
ZXV10 <strong>T700</strong> <strong>User</strong> <strong>Guide</strong><br />
Items<br />
Terminal Name<br />
IP Address<br />
MAC Address<br />
GK Status<br />
GK Address<br />
Main Video Source<br />
Second Video Source<br />
Conference Status<br />
Description<br />
The name of the terminal configured by the terminal administrator<br />
by accessing Management > General > Display<br />
The IP address of the terminal<br />
The MAC address of the terminal leaving factory<br />
Showing whether the GK is registered successfully<br />
If the GK is registered successfully, it will display the GK address<br />
Showing the main and second video source currently used by the<br />
terminal<br />
Showing if the terminal is in conference status<br />
9.2 Checking Call Information<br />
Prerequisites<br />
The data of call information is available only when the terminal is in conference.<br />
Context<br />
The user can view the parameters information when the terminal is in conference.<br />
Steps<br />
1. Select Management > Diagnosis > Call Info. to access the call statistics interface of<br />
call information by using the remote controller, as shown in the figure below.<br />
Figure 9-2 Call Statistics<br />
2. Press the F1 button on the remote controller to turn over page, or press the information<br />
shortcut button on the remote controller to turn over page to the call summary interface,<br />
as shown in the figure below.<br />
9-2<br />
SJ-20100910163147-003|2010-11-23(R1.1)<br />
ZTE Proprietary and Confidential
Chapter 9 Diagnosis<br />
Figure 9-3 Call Summary<br />
– End of Steps –<br />
Result<br />
The interface will show all the communication status of the local terminal and the peer<br />
terminal.<br />
9.3 Viewing Version Information<br />
Context<br />
In the version information interface, the user can view the software version, but cannot<br />
modify it.<br />
Steps<br />
1. Select Management > Diagnosis > Version Info with the remote control to enter the<br />
ping test interface, as shown in the figure below.<br />
Figure 9-4 Version Info 1<br />
9-3<br />
SJ-20100910163147-003|2010-11-23(R1.1)<br />
ZTE Proprietary and Confidential
ZXV10 <strong>T700</strong> <strong>User</strong> <strong>Guide</strong><br />
In the first interface, the user can view terminal model, software version, hardware<br />
version, boot software version, FPGA, and mainboard version.<br />
In the first interface, the user can view version number from Software Version.<br />
V1.0.0.3 indicates that the software version of the current terminal is V1.0.0.3 and<br />
this version was issued on 2010–08–25.<br />
The table below describes other terminal models for your reference.<br />
Model<br />
ZXV10 <strong>T700</strong> 2M<br />
ZXV10 <strong>T700</strong> 2MX<br />
ZXV10 <strong>T700</strong> 4M<br />
ZXV10 <strong>T700</strong> 4MX<br />
ZXV10 <strong>T700</strong> 8M<br />
ZXV10 <strong>T700</strong> 8MX<br />
ZXV10 <strong>T700</strong> 8MX-M<br />
Feature Description<br />
2M, IP, supports 720P high-definition image<br />
2M, IP, supports 1080P high-definition image<br />
4M, IP, supports 720P high-definition image<br />
4M, IP, supports 1080P high-definition image<br />
8M, IP, supports 720P high-definition image<br />
8M, IP, supports 1080P high-definition image<br />
8M, IP, supports 1080P high-definition image, Embedded<br />
MCU<br />
2. View the second and third version information interfaces, as shown in the figure below.<br />
Figure 9-5 Version Info 2<br />
It views the versions of all the media processor software, web server software version<br />
and other software versions<br />
– End of Steps –<br />
9.4 Loopback Test<br />
Select System > Diagnosis > Loopback Test via the remote controller to access the<br />
loopback test interface, as shown in the figure below.<br />
9-4<br />
SJ-20100910163147-003|2010-11-23(R1.1)<br />
ZTE Proprietary and Confidential
Chapter 9 Diagnosis<br />
Figure 9-6 Loopback Test<br />
Warning Loopback test is mainly used for locating fault and is provided to the<br />
commissioning personnel for testing and debugging. For ordinary users, please use it<br />
cautiously.<br />
In the drop-down menu, there are four kinds of loopback modes: audio hardware loopback,<br />
local loopback, loopback remote terminal, and local RTP loopback. Select one mode, and<br />
click the Start Loopback button to implement loopback. Click the Stop Loopback button<br />
to stop the loopback operation.<br />
Audio Hardware Loopback<br />
Audio hardware loopback refers to output the acquired audio signals directly without coding<br />
and decoding. After loopback, the TV set or sound box connected to the TV port of AUDIO<br />
OUT can hear the sound of the local terminal after loopback.<br />
This loopback is effective in both conference and non-conference status. This function is<br />
used to judge if the sound input and the terminal’s acquisition function are normal.<br />
Local Terminal Loopback<br />
Local terminal loopback refers to the direct loopback of the local terminal's media signal,<br />
including audio local terminal loopback and video local terminal loopback.<br />
It is only effective in non-conference status. If the user implements such operation in<br />
conference status, a prompt box pops up prompting that the loopback is only effective in<br />
non-conference status. This loopback is used to judge if the terminal's audio and video<br />
input and output, coding and decoding functions are normal, and to detect if the related<br />
audio and video peripherals work normally. In normal situation, the terminal can display<br />
its own image and broadcast its own sound.<br />
9-5<br />
SJ-20100910163147-003|2010-11-23(R1.1)<br />
ZTE Proprietary and Confidential
ZXV10 <strong>T700</strong> <strong>User</strong> <strong>Guide</strong><br />
Loopback to Remote Terminal<br />
The local terminal loops the media signal of the peer terminal back, and decodes the media<br />
signal of peer terminal. It can be classified as IP loopback to remote terminal and E1<br />
loopback to remote terminal. After loopback to remote terminal, the local terminal can<br />
display its own image and broadcast its own sound.<br />
This loopback is only effective in conference status. If the user implements such operation<br />
in non-conference status, a prompt box pops up prompting that the loopback is only<br />
effective in conference status. It is used to judge the terminal' coding and encoding<br />
capability and the network' function and status.<br />
Local RTP Full Loopback<br />
After the terminal is in conference status, it transmits the encoded data of the local<br />
terminal to the remote terminal, and sends the encoded data to the RTP receiving module<br />
simultaneously. It then decodes and output the signal. To use the local RTP loopback<br />
function, detect if the video/audio coding protocol is symmetric. If the video code is<br />
non-symmetric, the video will not loop back. If the audio code is non-symmetric, the<br />
audio will not loop back. If both the video and audio codes are non-symmetric, it directly<br />
prompts that the coding/decoding protocol is not matching and that it is unable to enter<br />
RTP loopback status.<br />
This loopback is only effective in conference status. If the user implements such operation<br />
in non-conference status, it prompts that the loopback is only effective in conference status.<br />
It is used to judge if the terminal's coding and decoding capability is normal.<br />
9.5 Ping Test<br />
Prerequisites<br />
The network is normally connected.<br />
Context<br />
The ping test is used to check whether the IP network connection between ZXV10 <strong>T700</strong><br />
and other devices (such as MCU, <strong>PC</strong>, and video conference terminal) is normal.<br />
Steps<br />
1. Select Management > Diagnosis > Ping Test with the remote control to enter the<br />
ping test interface, as shown in the figure below.<br />
9-6<br />
SJ-20100910163147-003|2010-11-23(R1.1)<br />
ZTE Proprietary and Confidential
Chapter 9 Diagnosis<br />
Figure 9-7 Ping Test<br />
2. Input the IP address of the destination device in the Remote Address.<br />
3. Move the cursor to the Ping button with the remote control, and then press the OK<br />
button to start the test.<br />
4. The test result is as follows:<br />
• If the remote device is successfully pinged, the system shows the corresponding<br />
test data, as shown in the figure below.<br />
Figure 9-8 Ping Test Result-Success<br />
• If the remote device is not successfully pinged, the system also gives the<br />
corresponding test data, as shown in the figure below.<br />
9-7<br />
SJ-20100910163147-003|2010-11-23(R1.1)<br />
ZTE Proprietary and Confidential
ZXV10 <strong>T700</strong> <strong>User</strong> <strong>Guide</strong><br />
Figure 9-9 Ping Test Result-Failure<br />
– End of Steps –<br />
9.6 Audio and Video Test<br />
Select Management > Diagnosis > Audio & Video to access the Audio & video test<br />
interface by using the remote controller, as shown in the figure below.<br />
Figure 9-10 Audio & Video Test<br />
During the test, the Start Test button is converted to the Stop Test button. Click the Stop<br />
Test button to stop the test.<br />
TV Test<br />
It is used to test if the components and interfaces related to the video in the terminal work<br />
normally.<br />
In the test interface, press the Start Test button of the color strip test interface by using<br />
the remote controller. In normal situation, the TV set connected with the terminal has even<br />
color stripe. Please check the TV output effect. If it is not satisfactory, please adjust the<br />
TV parameters.<br />
9-8<br />
SJ-20100910163147-003|2010-11-23(R1.1)<br />
ZTE Proprietary and Confidential
Chapter 9 Diagnosis<br />
Audio Input Test<br />
Audio input test is used to detect if the components and interfaces related to the audio<br />
input in the terminal work normally.<br />
In the test interface, press the Start Test button of the audio input test interface by using the<br />
remote controller. In normal situation, the audio input displaying bar changes according to<br />
the volume of the microphone. The numbers indicating volume size will also change along<br />
with it.<br />
Audio Output Test<br />
Audio output test is used to detect if the components and interfaces related to the audio<br />
output in the terminal work normally.<br />
In the test interface, press the Start Test button of the audio output test interface by using<br />
the remote controller. In normal situation, the TV set or sound box connected with the<br />
terminal will keep playing the startup tone of the terminal.<br />
9.7 System Self-diagnosis<br />
Select Management > Diagnosis > Self diagnosis to access the system Self diagnosis<br />
interface by using the remote controller, as shown in the figure below.<br />
Figure 9-11 System Self-diagnosis<br />
The diagnosis items in the figure above are described in the table below.<br />
Diagnosis Items<br />
PS Info<br />
System Info<br />
<strong>Network</strong> status<br />
ARP Info<br />
Descriptions<br />
Viewing the current process information<br />
Viewing the current usage of the system resources<br />
Indicating the current network status<br />
Indicating the current ARP information<br />
9-9<br />
SJ-20100910163147-003|2010-11-23(R1.1)<br />
ZTE Proprietary and Confidential
ZXV10 <strong>T700</strong> <strong>User</strong> <strong>Guide</strong><br />
Diagnosis Items<br />
UDP Info<br />
TCP Info<br />
Descriptions<br />
Indicating the UDP communication between the local terminal and remote<br />
terminal<br />
Indicating the TCP communication between the local terminal and remote<br />
terminal<br />
9-10<br />
SJ-20100910163147-003|2010-11-23(R1.1)<br />
ZTE Proprietary and Confidential
Chapter 10<br />
Address Book<br />
Table of Contents<br />
Introduction of Address Book....................................................................................10-1<br />
Add Contact .............................................................................................................10-2<br />
Editing A Contact .....................................................................................................10-3<br />
Deleting A Contact ...................................................................................................10-3<br />
Calling Terminals in the Address Book......................................................................10-3<br />
10.1 Introduction of Address Book<br />
Press the Address Book Button on the remote controlor select Address Book in the main<br />
page, as shown in the figure below.<br />
Figure 10-1 ADDRESS BOOK<br />
Add Contact<br />
Used to add a new contact information.<br />
Edit<br />
Used to edit the information of a selected terminal.<br />
Delete<br />
Used to delete a selected terminal.<br />
10-1<br />
SJ-20100910163147-003|2010-11-23(R1.1)<br />
ZTE Proprietary and Confidential
ZXV10 <strong>T700</strong> <strong>User</strong> <strong>Guide</strong><br />
Search Contact<br />
Used to search contact you want in the address Book.<br />
10.2 Add Contact<br />
Context<br />
There are a lot of terminals on the network, you can add the name and IP address of your<br />
contact into the address book, Next time you can call this contact directly.<br />
Steps<br />
1. In the Address Book page, select Add Contact to enter the corresponding interface,<br />
as shown in the figure below.<br />
Figure 10-2 Add Contact<br />
2. The related parameters are described in the table below.<br />
Item<br />
Name<br />
Call Type<br />
Call Rate<br />
IP Address<br />
NO.<br />
Configuration Method<br />
Enter the friend name. It can be digits, letters, and Chinese characters.<br />
Select the IP type.<br />
Set the maximum rate in the case of a point-to-point call.<br />
Enter the IP address of the friend.<br />
This number is configured on the terminal and then the terminal is registered<br />
in the GK by using this number. In addition, this number must be consistent<br />
with that configured in the ZXMS80 conference management system.<br />
3. Select the Save button with the remote control.<br />
– End of Steps –<br />
10-2<br />
SJ-20100910163147-003|2010-11-23(R1.1)<br />
ZTE Proprietary and Confidential
Chapter 10 Address Book<br />
10.3 Editing A Contact<br />
Steps<br />
1. Move the cursor to select a contact in the address list.<br />
2. Select Edit Button to enter the corresponding interface, as shown in the figure below.<br />
Figure 10-3 Contact Information Editing<br />
3. Modify the terminal name, call rate, IP address, extension number and alias on this<br />
page.<br />
4. After the modification, Press Save button to save the new information and return to<br />
the address book page.<br />
– End of Steps –<br />
10.4 Deleting A Contact<br />
Steps<br />
1. Move the cursor to select a contact in the address list.<br />
2. Highlight the Delete Button and then press OK button on the remote control, An alert<br />
box pops up.<br />
3. Highlight the OK Button to delete the selected terminal.<br />
– End of Steps –<br />
10.5 Calling Terminals in the Address Book<br />
Steps<br />
1. In the address book interface, move the cursor with the remote control to select a<br />
terminal. For a terminal with embedded MCU, the user can select multiple terminals.<br />
10-3<br />
SJ-20100910163147-003|2010-11-23(R1.1)<br />
ZTE Proprietary and Confidential
ZXV10 <strong>T700</strong> <strong>User</strong> <strong>Guide</strong><br />
2. Select the Call button to call the selected terminals.<br />
– End of Steps –<br />
10-4<br />
SJ-20100910163147-003|2010-11-23(R1.1)<br />
ZTE Proprietary and Confidential
Chapter 11<br />
Call History<br />
Select the Call History on the main interface by using the remote controller to access the<br />
call history interface, as shown in the figure below.<br />
Figure 11-1 Call History Interface<br />
The call history interface can be classified into two areas: display frame and function<br />
buttons area.<br />
The display frame lists out the contact person, call type, rate, begin time and duration of<br />
call.<br />
The function buttons area contains a type selection box and four function buttons, including<br />
Save Record, Save All, Delete Record, and Delete All.<br />
Type Selection Box<br />
In the call history interface, there are four types of call history for selection: All, Outgoing,<br />
<strong>Inc</strong>oming, and Missed.<br />
• Select All, and the display frame lists out all types of call history.<br />
• Select Outgoing, and the display frame lists out the history of all outgoing calls of the<br />
local terminal.<br />
• l Select <strong>Inc</strong>oming, and the display frame lists out the history of all incoming calls of<br />
the local terminal.<br />
• Select Missed, and the display frame lists out the history of all missed calls of the local<br />
terminal.<br />
11-1<br />
SJ-20100910163147-003|2010-11-23(R1.1)<br />
ZTE Proprietary and Confidential
ZXV10 <strong>T700</strong> <strong>User</strong> <strong>Guide</strong><br />
This page intentionally left blank.<br />
11-2<br />
SJ-20100910163147-003|2010-11-23(R1.1)<br />
ZTE Proprietary and Confidential
Chapter 12<br />
Conference Operations in<br />
GUI<br />
Table of Contents<br />
System Control in Conference Mode ........................................................................12-1<br />
Non-Chairman Conference Control ..........................................................................12-2<br />
Chairman Conference Control ..................................................................................12-6<br />
12.1 System Control in Conference Mode<br />
During a conference, press the shortcut key Menu to display the system control interface,<br />
as shown in the figure below.<br />
Figure 12-1 System Control Menu<br />
Note<br />
To select a function item, the user can press the number key of the remote control, which is<br />
consistent with the number before the function item. The user can also select the function<br />
item by pressing direction buttons on the remote control, and then press OK.<br />
Caption<br />
In the system control interface, select Caption to enter the Caption setting interface. There<br />
the user can set horizontal/vertical scrolling subtitle, short message, banner, and terminal<br />
name.<br />
12-1<br />
SJ-20100910163147-003|2010-11-23(R1.1)<br />
ZTE Proprietary and Confidential
ZXV10 <strong>T700</strong> <strong>User</strong> <strong>Guide</strong><br />
PIP<br />
In the system control interface, select PIP Position to enter the PIP position interface.<br />
Four PIP positions are availableTop Left, Bottom Left, Top Right, Bottom Right. The user<br />
can select the position as required.<br />
Main Menu<br />
In the system control interface, select Main Menu to return to the main menu. Select<br />
Return to return to the moving video picture.<br />
12.2 Non-Chairman Conference Control<br />
12.2.1 Introduction to Conference Control<br />
During a conference without a chairman, press the Conference Control button on the<br />
remote control to enter the conference control interface, as shown in the figure below.<br />
Figure 12-2 Non-Chairman Conference Control Interface-Without Chairman<br />
During a conference with a chairman, press the Conference Control button on the remote<br />
control to enter the corresponding interface, as shown in the figure below.<br />
Figure 12-3 Non-Chairman Conference Control Interface-With Chairman<br />
The table below describes the functions that can be implemented in the non-chairman<br />
conference control interface.<br />
12-2<br />
SJ-20100910163147-003|2010-11-23(R1.1)<br />
ZTE Proprietary and Confidential
Chapter 12 Conference Operations in GUI<br />
Table 12-1 List of the Functions in the Non-chairman Conference Control Interface<br />
No. Conference Control Description<br />
1 Apply Chairman Request to be the chairman of the conference.<br />
2 Self Broadcast The terminal broadcasts its video and audio to other<br />
terminals compulsively.<br />
In a multi-point conference, the terminal needs<br />
to request to be a chairman first and then it can<br />
broadcasts itself. In a conference with embedded<br />
MCU, only the terminal serving as the MCU can<br />
broadcast itself.<br />
3 Apply Speech A non-chairman terminal requests to speaking.<br />
After the request, the chairman terminal prompts<br />
which one will speak.<br />
4 Terminal List View the terminal list.<br />
12.2.2 Applying Chairman<br />
Context<br />
A non-chair terminal in a conference can request for the chair token. If there is no chair<br />
in the conference, it can get the chair token and become the chair in the conference.<br />
However, if there is already a chair terminal in the conference, it can not get the chair<br />
token until the chair terminal releases it.<br />
Steps<br />
1. Press the direction button (up arrow) to highlight the item Apply Chairman in the<br />
conference control menu.<br />
2. Press OK button on the remote control.<br />
– End of Steps –<br />
Result<br />
After the terminal gets the chair token successfully, the terminal becomes a chair-terminal<br />
and the conference control menu changes correspondingly, as shown in the figure below.<br />
12-3<br />
SJ-20100910163147-003|2010-11-23(R1.1)<br />
ZTE Proprietary and Confidential
ZXV10 <strong>T700</strong> <strong>User</strong> <strong>Guide</strong><br />
Figure 12-4 Conference Control Menu (Chair-Terminal)<br />
After successful applying, a chairman icon<br />
TV screen.<br />
appears on the right of the terminal’s<br />
12.2.3 Self Broadcast (Non-Chair Terminal)<br />
Context<br />
To broadcast the chair terminal’s video/audio to all the other terminals in the conference.<br />
Steps<br />
• Press direction button to highlight the item Self Broadcast in the conference control<br />
menu.<br />
Result<br />
After successful broadcast, a broadcast source icon<br />
appears on the right of the chair<br />
terminal’s TV screen.At the same time, the status icon appears in the terminal list,<br />
indicating the terminal is the broadcast source in the conference.<br />
12.2.4 Apply Speech<br />
Prerequisites<br />
Apply speech can be implemented only when there is presiding conference terminal in the<br />
conference.<br />
12-4<br />
SJ-20100910163147-003|2010-11-23(R1.1)<br />
ZTE Proprietary and Confidential
Chapter 12 Conference Operations in GUI<br />
Steps<br />
• In the conference control interface, just to select the Apply Speech button by using<br />
the remote controller.<br />
After the non-presiding conference terminal applies the speech, a prompt box pops up<br />
on the primary TV set of the presiding terminal, prompting that a terminal is to make a<br />
speech currently.<br />
12.2.5 Viewing Terminal List<br />
Context<br />
The user can view the terminal list in the current conference.<br />
Steps<br />
1. In the chairman conference control interface, select the Terminal List button. The<br />
corresponding terminal list appears, as shown in the figure below.<br />
Figure 12-5 Terminal List<br />
The terminal list lists all the attending terminals and their statuses. The table below<br />
describes the statuses.<br />
Table 12-2 Description of the Icons in the Terminal List<br />
No. Icon Description<br />
1 Indicates the speaker is on. The terminals with this icon<br />
can hear the speakers.<br />
2 Indicates the speaker is off. The terminals with this icon<br />
cannot hear the speakers.<br />
3 Indicates the mic is turned on. When the local terminal<br />
speaks, other terminals can hear it.<br />
4 Indicates the mic is turned off. When the local terminal<br />
speaks, other terminals cannot hear it.<br />
12-5<br />
SJ-20100910163147-003|2010-11-23(R1.1)<br />
ZTE Proprietary and Confidential
ZXV10 <strong>T700</strong> <strong>User</strong> <strong>Guide</strong><br />
No. Icon Description<br />
5 Indicates it is the broadcast source.<br />
– End of Steps –<br />
12.3 Chairman Conference Control<br />
12.3.1 Introduction to Conference Control<br />
During a conference, press the Conference Control button on the remote control of the<br />
chairman terminal. The conference control interface appears, as shown in the figure below.<br />
Figure 12-6 Chairman Conference Control Interface<br />
The table below describes the conference control functions.<br />
Table 12-3 List of Chairman Conference Control Functions<br />
Conference Control<br />
Self broadcast<br />
Broadcast Site<br />
Specify Speech<br />
Description<br />
Broadcast the video of chairman terminal and become the broadcast<br />
source in a conference.<br />
This function does not change the voice status of the conference.<br />
The chairman terminal broadcasts the video of a terminal and makes<br />
it become the broadcast source in a conference.<br />
This function does not change the voice status of the conference.<br />
The chairman terminal broadcasts the video of a specified terminal<br />
and makes it become the broadcast source in a conference.<br />
Except for the chairman terminal and the specified speaking terminal,<br />
the microphones of other terminals are off and their speakers are on.<br />
12-6<br />
SJ-20100910163147-003|2010-11-23(R1.1)<br />
ZTE Proprietary and Confidential
Chapter 12 Conference Operations in GUI<br />
Conference Control<br />
Open Voice Control<br />
Chairman View<br />
Chairman Browse<br />
Mute/Silent<br />
Conf. Management<br />
Release Chairman<br />
Free Talk<br />
Description<br />
When the voice control function is enabled, the conference enters<br />
the voice control mode.<br />
In this mode, the broadcast source is switched to the speaking<br />
terminal in turn. When several terminals speak at the same time, the<br />
terminal with the highest volume will be selected as the broadcast<br />
source.<br />
The chairman terminal selects a terminal and views the video of the<br />
specified terminal.<br />
To do it, the chairman terminal must be the broadcast source.<br />
The chairman should select the terminal manually.<br />
View the video of the specified terminal on the chairman’s screen.<br />
To do it, the chairman terminal must be the broadcast source.<br />
When the browsed terminal and time are specified, the video of the<br />
selected terminal will be displayed on the chairman's screen. It is<br />
unnecessary to perform manual settings.<br />
The chairman terminal can control the microphone and speaker<br />
status of other terminals.<br />
During a conference, the chairman terminal can add, call, hang up<br />
a terminal, force a terminal to leave the conference, prolong and<br />
terminate the conference.<br />
Release the chair token and become a non-chair terminal.<br />
The microphones and speakers of all the terminals are on.<br />
The table below describes the site status after the chairman terminal performs the<br />
corresponding operations.<br />
Table 12-4 Site Status after the Operations of Chairman Terminal<br />
Is It a<br />
Operation Item<br />
Broadcast<br />
Microphone<br />
Speaker<br />
Viewed Site<br />
Source<br />
Chairman<br />
terminal<br />
No Open Open Operated terminal<br />
Local terminal,<br />
Broadcast Site<br />
Operated<br />
terminal<br />
Yes Open Open<br />
chairman terminal,<br />
or the previous<br />
broadcast source<br />
Other terminals No No Open Operated terminal<br />
12-7<br />
SJ-20100910163147-003|2010-11-23(R1.1)<br />
ZTE Proprietary and Confidential
ZXV10 <strong>T700</strong> <strong>User</strong> <strong>Guide</strong><br />
Is It a<br />
Operation Item<br />
Broadcast<br />
Microphone<br />
Speaker<br />
Viewed Site<br />
Source<br />
Chairman<br />
terminal<br />
No Open Open Operated terminal<br />
Appointing<br />
Speech<br />
Operated<br />
terminal<br />
Yes Open Open<br />
Local terminal,<br />
chairman terminal,<br />
or the previous<br />
broadcast source<br />
Other terminals No Close Open Operated terminal<br />
Chairman<br />
terminal<br />
Yes<br />
Keep the<br />
original<br />
status<br />
Keep the<br />
original<br />
status<br />
Viewed terminal<br />
Chairman View<br />
Operated<br />
terminal<br />
No<br />
Keep the<br />
original<br />
status<br />
Keep the<br />
original<br />
status<br />
Chairman terminal<br />
Keep the<br />
Keep the<br />
Other terminals<br />
No<br />
original<br />
original<br />
Chairman terminal<br />
status<br />
status<br />
Chairman<br />
terminal<br />
Yes<br />
Keep the<br />
original<br />
status<br />
Keep the<br />
original<br />
status<br />
Operated terminal<br />
Browsing<br />
Operated<br />
terminal<br />
No<br />
Keep the<br />
original<br />
status<br />
Keep the<br />
original<br />
status<br />
Chairman terminal<br />
Keep the<br />
Keep the<br />
Other terminals<br />
No<br />
original<br />
original<br />
Chairman terminal<br />
status<br />
status<br />
12.3.2 Broadcasting By Chairman<br />
12.3.2.1 Self Broadcasting (Chair Terminal)<br />
Context<br />
To broadcast the chair terminal’s video/audio to all the other terminals in the conference.<br />
12-8<br />
SJ-20100910163147-003|2010-11-23(R1.1)<br />
ZTE Proprietary and Confidential
Chapter 12 Conference Operations in GUI<br />
Steps<br />
• Press direction button to highlight the item Self Broadcast in the conference control<br />
menu as shown in Figure 101and press OK button on the remote control.<br />
Result<br />
The video/audio of the conference site of the chair terminal is broadcasted to all terminals<br />
in the conference. After successful broadcast, a broadcast source icon<br />
the right of the chair terminal’s TV screen.<br />
appears on<br />
12.3.2.2 Broadcasting Site<br />
Steps<br />
1. Press direction button to highlight the item Broadcast Site in the conference control<br />
menu.<br />
2. Press OK button on the remote control to enter the Broadcast Sites dialog box as<br />
shown in the figure below.<br />
Figure 12-7 Broadcast Sites<br />
3. Press direction buttons to highlight a terminal to be broadcasted in the terminal list and<br />
then press OK button on the remote control.<br />
– End of Steps –<br />
Result<br />
Then the video of the selected terminal (conference site) will be shown on the screens of<br />
all the other terminals in the conference. The audio mixing status maintains unchanged.<br />
The screen of the broadcasted terminal still shows the video of the terminal previously<br />
broadcasted, Video of chairman or itself.<br />
12-9<br />
SJ-20100910163147-003|2010-11-23(R1.1)<br />
ZTE Proprietary and Confidential
ZXV10 <strong>T700</strong> <strong>User</strong> <strong>Guide</strong><br />
12.3.2.3 Specify Sspeaking<br />
Context<br />
The chair terminal can specify a non-chair terminal and allows it to speak in the conference.<br />
In other words, the chair terminal can broadcast both the audio and video of a selected<br />
terminal to all the other terminals in the conference.<br />
Steps<br />
1. Press direction button to highlight the item Specify Speak in the conference control<br />
menu.<br />
2. Press OK button on the remote control to enter the Specify Speak dialog box.<br />
3. Press direction buttons to highlight a terminal to be broadcasted in the terminal list and<br />
then press OK button on the remote control.<br />
– End of Steps –<br />
Result<br />
Then the audio and video of the selected terminal (conference site) will be broadcasted to<br />
all the other terminals in the conference.<br />
12.3.3 Browsing and Viewing<br />
12.3.3.1 Performing Chairman Browse Operation<br />
Prerequisites<br />
This operation can be performed only when the chairman terminal is the broadcast source<br />
in a conference. If the chairman terminal need to perform the chairman browse operation<br />
but it is not the broadcast source, the terminal needs to perform the self broadcast<br />
operation.<br />
Context<br />
The chairman terminal in a conference can browse the pictures of other conference sites in<br />
real time and set the interval of picture switching. The following describes how to browse<br />
the pictures of other conference sites by using the remote control. Alternatively, you can<br />
log in to the <strong>PC</strong> console and click Chairman Browse.<br />
Steps<br />
1. Press the Conference key on the remote control. On the page that is displayed,<br />
choose Chairman Browse to display the corresponding page.<br />
2. Select the required terminals by selecting the check boxes next to them. You can<br />
select a terminal, multiple terminals, or all terminals.<br />
3. After selecting terminals, set the interval. The unit is second.<br />
12-10<br />
SJ-20100910163147-003|2010-11-23(R1.1)<br />
ZTE Proprietary and Confidential
Chapter 12 Conference Operations in GUI<br />
4. Click Browse. Then, the TV screen of the chairman terminal plays the pictures of<br />
one, multiple, or all terminals in a continuous loop. In this case, the other terminals<br />
also view the picture of the chairman terminal.<br />
Meanwhile, the Browse option changes to Stop Browse. To stop browsing pictures,<br />
move the cursor to the Stop Browse option and press the OK key on the remote<br />
control.<br />
– End of Steps –<br />
12.3.3.2 Performing Chairman View Operation<br />
Prerequisites<br />
This operation can be performed only when the chairman terminal is the broadcast source<br />
in a conference. If the chairman terminal need to perform the chairman view operation but<br />
it is not the broadcast source, the terminal needs to perform the self broadcast operation.<br />
Context<br />
The chairman terminal in a conference can view the picture of any other conference site.<br />
The following describes how to view the pictures of other conference sites by using the<br />
remote control. Alternatively, you can log in to the <strong>PC</strong> console and click Quick view.<br />
Steps<br />
1. Press the Conference key on the remote control. On the page that is displayed,<br />
choose Chairman View to display the corresponding page.<br />
2. Move the cursor to the required terminal and press the OK key on the remote control.<br />
The video window of the chairman terminal shows the video of the specified terminal.<br />
– End of Steps –<br />
12.3.4 Sound Controlling<br />
12.3.4.1 Forbid/Allow Speaking<br />
Context<br />
To forbid / allow selected terminal(s) to speak in the conference.<br />
Steps<br />
1. Press direction button to highlight the item Mute/Silent in the conference menu to<br />
enter the Mute/Silent menu, as shown in the figure below.<br />
12-11<br />
SJ-20100910163147-003|2010-11-23(R1.1)<br />
ZTE Proprietary and Confidential
ZXV10 <strong>T700</strong> <strong>User</strong> <strong>Guide</strong><br />
Figure 12-8 Mute/ Silent Menu<br />
2. Press direction button to highlight the item Speech Control in the menu as shown in<br />
the figure above to enter the Speech Control page, as shown in the figure below.<br />
Figure 12-9 Speech Control Page<br />
3. Press direction buttons to select a terminal and then press OK button on the remote<br />
control to forbid / allow it to speak.<br />
4. Repeat Step 3 to forbid / allow other terminals as needed.<br />
You can forbid all terminals in the list at a time by highlighting the Forbid All To Speak<br />
/ Allow All To Speak button and press OK button on the remote control.<br />
– End of Steps –<br />
Result<br />
Other conference sites can / can not hear the voice of the selected terminal(s).<br />
12.3.4.2 Forbid / Allow Listening<br />
Context<br />
To forbid / allow selected terminal(s) to listen the voice of other conference sites.<br />
Steps<br />
1. Press direction button to highlight the item Mute/Silent in the conference menu to<br />
enter the Mute/Silent menu, as shown in the figure below.<br />
12-12<br />
SJ-20100910163147-003|2010-11-23(R1.1)<br />
ZTE Proprietary and Confidential
Chapter 12 Conference Operations in GUI<br />
Figure 12-10 Mute/ Silent Menu<br />
2. Press direction button to highlight the item Listening Control in the menu as shown<br />
in the figure above to enter the Listening Control page, as shown in the figure below.<br />
Figure 12-11 Listening Control Page<br />
3. Press direction buttons to select a terminal and then press OK button on the remote<br />
control to prevent / allow it from hearing the voice of other conference sites.<br />
4. Repeat Step 3 to forbid / allow other terminals as needed.<br />
You can forbid / allow all terminals the list at a time by highlighting the Forbid All To<br />
Listen / Allow All To Listen button and press OK button on the remote control.<br />
– End of Steps –<br />
12.3.4.3 Free Talk<br />
Result<br />
The selected terminal(s) can / can not hear the voice of other conference sites.<br />
Context<br />
To enable the free talk mode.<br />
Steps<br />
1. Press direction button to highlight the item Free Talk in the conference control menu.<br />
2. Press OK button on the remote control.<br />
– End of Steps –<br />
12-13<br />
SJ-20100910163147-003|2010-11-23(R1.1)<br />
ZTE Proprietary and Confidential
ZXV10 <strong>T700</strong> <strong>User</strong> <strong>Guide</strong><br />
Result<br />
After successful operation, the chair terminal will mix all voices in the conference. The<br />
videos of all terminals will be shown on the screen of each terminal in the conference and<br />
all terminals in the conference can hear the voices of each other.<br />
12.3.5 Opening Voice Control<br />
Context<br />
The chair terminal can enable the voice control mode. In this mode, if one terminal<br />
speaks, it will become the broadcast source in the conference. That means, the image of<br />
this terminal will be broadcasted to the other terminals in the conference. When several<br />
terminals in the conference speak at the same time, the broadcast source will be the one<br />
whose sound is the biggest.<br />
Steps<br />
1. Press direction button to highlight the item Open Voice Control in the conference<br />
control menuThe message box pops up.<br />
2. Wait for a while and then the message box disappears.<br />
– End of Steps –<br />
Result<br />
The voice control mode is enabled and the Open Voice Control item in the conference<br />
control menu changes as shown in the figure below.<br />
Figure 12-12 Conference Control Menu (Close Voice Control)<br />
12-14<br />
SJ-20100910163147-003|2010-11-23(R1.1)<br />
ZTE Proprietary and Confidential
Chapter 12 Conference Operations in GUI<br />
12.3.6 Releasing Chairman<br />
Context<br />
The chair terminal in the conference can release its chair token. After that, the chair<br />
terminal turns into a non-chair one. Then other terminals in the conference can apply<br />
for the chair token.<br />
Steps<br />
1. Highlight the item Release Chairman in the conference control menu.<br />
2. Press OK button on the remote control.<br />
– End of Steps –<br />
Result<br />
The conference control menu changes into the one for non-chair terminal.<br />
12.3.7 Chairman Conference Management<br />
12.3.7.1 Adding/Dropping a Terminal<br />
In a conference, the chairman can add one or more temrinals into the terminal list and<br />
let them attend the conference. It can also force one or more terminals attending the<br />
conference to exit. Then they are not conference members any more, so they will not be<br />
displayed in the terminal list. To let them attend the conference again, the chairman must<br />
add them into the terminal list.<br />
Add Terminal<br />
1. In the chairman conference control interface, select 8. Conf Management to enter the<br />
conference management interface, and then select 1. Add Terminal. The site name<br />
input text box appears, as shown in the figure below.<br />
Figure 12-13 Adding a Terminal<br />
2. Enter the number of the terminal to be added, and then select Add to add this terminal<br />
into the conference.<br />
After the terminal is successfully added, it will appear in the terminal list.<br />
12-15<br />
SJ-20100910163147-003|2010-11-23(R1.1)<br />
ZTE Proprietary and Confidential
ZXV10 <strong>T700</strong> <strong>User</strong> <strong>Guide</strong><br />
Dropping a Terminal<br />
1. In the chairman conference control interface, select 8. Conf Management to enter<br />
the conference management interface, and then select 4. Force Exiting. The<br />
corresponding prompt box appears, as shown in the figure below.<br />
Figure 12-14 Dropping a Terminal<br />
2. Select a terminal, and then press the OK button on the remote control to drop the<br />
terminal.<br />
12.3.7.2 Calling/Hanging Up a Terminal<br />
In a conference, the chairman can add one or more terminals that are supposed to join<br />
the conference or have hanged up due to network failure into the terminal list, letting them<br />
attend the conference. The chairman can also hang up one or more terminals attending<br />
the conference. The terminals hanged up are displayed in non-attending terminal list. To<br />
add them into the conference again, the chairman must call them again.<br />
Calling a Terminal<br />
1. In the chairman conference control interface, select 8. Conf Management to enter<br />
the conference management interface, and then select 2. Call Terminal to enter the<br />
corresponding interface.<br />
2. Select a terminal not in the conference with the remote control, and then press the OK<br />
button to call it. If it is successfully called, it will be displayed in the attending terminal<br />
list.<br />
Hanging up a terminal<br />
1. In the chairman conference control interface, select 8. Conf Management to enter<br />
the conference management interface, and then select 3. Hangup Terminal to enter<br />
the corresponding interface, as shown in the figure below.<br />
12-16<br />
SJ-20100910163147-003|2010-11-23(R1.1)<br />
ZTE Proprietary and Confidential
Chapter 12 Conference Operations in GUI<br />
Figure 12-15 Hanging up a Terminal<br />
2. Select a terminal with the remote control, and then press the OK button to hang it up.<br />
12.3.7.3 Prolonging the Conference<br />
Steps<br />
1. Press direction button to highlight the item Prolong Conference in the conference<br />
management menu, and press OK button on the remote control to enter the Prolong<br />
Conference dialog box as shown in the figure below.<br />
Figure 12-16 Prolong Conference<br />
2. Highlight Time text box and press OK button on the remote control.<br />
3. Input the time (unit: minutes) still needed for the conference in Time text box and press<br />
OK button on the remote control to confirm the input.<br />
4. Highlight Set button in the dialog box and press OK button on the remote control.<br />
– End of Steps –<br />
Example<br />
For example, Input 30 on the figure above, then the conference will be prolonged 30<br />
minutes.<br />
12.3.7.4 Ending the Conference<br />
Context<br />
The chair terminal can initiate to end the conference.<br />
12-17<br />
SJ-20100910163147-003|2010-11-23(R1.1)<br />
ZTE Proprietary and Confidential
ZXV10 <strong>T700</strong> <strong>User</strong> <strong>Guide</strong><br />
Steps<br />
1. Press direction button to highlight the item End Conference in the conference<br />
management menu, The screen pop up alert box as shown below.<br />
Figure 12-17 Ending conference alert<br />
2. Select OK and press OK button on the remote control to end the conference.<br />
– End of Steps –<br />
Result<br />
The conference in which the chair terminal participates will be ended.<br />
12-18<br />
SJ-20100910163147-003|2010-11-23(R1.1)<br />
ZTE Proprietary and Confidential
Chapter 13<br />
WEB Management and<br />
Control<br />
Table of Contents<br />
Logging In to the WEB Management Page...............................................................13-1<br />
Re-logging Into Web Control Page ...........................................................................13-3<br />
Introduction to the IE Web Page ...............................................................................13-3<br />
System Control.........................................................................................................13-5<br />
Call Control ............................................................................................................13-13<br />
General Configuration ............................................................................................13-19<br />
Video Configuration................................................................................................13-22<br />
Audio Settings........................................................................................................13-24<br />
<strong>Network</strong> Settings ....................................................................................................13-25<br />
SNMP Settings.......................................................................................................13-25<br />
H.323 Settings........................................................................................................13-26<br />
QoS Settings..........................................................................................................13-27<br />
NAT Settings ..........................................................................................................13-28<br />
FEC Settings..........................................................................................................13-28<br />
IP Rate-down Settings............................................................................................13-29<br />
Capability Settings..................................................................................................13-30<br />
Caption ..................................................................................................................13-31<br />
Security Settings ....................................................................................................13-37<br />
USB Settings..........................................................................................................13-37<br />
Configuration Settings ............................................................................................13-37<br />
Upgrade Settings ...................................................................................................13-38<br />
Advanced Settings .................................................................................................13-39<br />
Diagnosis ...............................................................................................................13-40<br />
<strong>User</strong> Management Settings ....................................................................................13-44<br />
13.1 Logging In to the WEB Management Page<br />
Prerequisites<br />
Make sure that the network is normal and WEB login is enabled in the terminal.<br />
Steps<br />
1. Open the IE browser and input the web address "http://IP address of terminal", and<br />
then press Enter of the keyboard to open the page, as shown in the figure below.<br />
13-1<br />
SJ-20100910163147-003|2010-11-23(R1.1)<br />
ZTE Proprietary and Confidential
ZXV10 <strong>T700</strong> <strong>User</strong> <strong>Guide</strong><br />
Figure 13-1 Selecting Language<br />
2. Select ENGLISH to open the WEB login page, as shown in the figure below.<br />
Figure 13-2 Login<br />
3. Input Login name and Password, and click the Login button to enter the WEB page.<br />
Note<br />
• The password for admin and user is 111111.<br />
• The admin is an administrator, and the user is an ordinary user.If the user logs in<br />
with admin, the user can modify and save the terminal settings. If the user logs in<br />
with user, the user cannot modify the terminal settings.<br />
• Please modify the password after login for security.<br />
– End of Steps –<br />
13-2<br />
SJ-20100910163147-003|2010-11-23(R1.1)<br />
ZTE Proprietary and Confidential
13.2 Re-logging Into Web Control Page<br />
Steps<br />
Chapter 13 WEB Management and Control<br />
1. Click the Relogin menu on the left of the Web page, and then the alert box pops up.<br />
2. Click OK button to exit the current page and enter the login page of ZXV10 <strong>T700</strong>. Input<br />
the user name and password to login to the terminal again.<br />
– End of Steps –<br />
13.3 Introduction to the IE Web Page<br />
After successful login, the video control page under the system control is displayed by<br />
default, as shown in the figure below.<br />
Figure 13-3 IE Web Page (System Control)<br />
The IE Web page of the ZXV10 <strong>T700</strong> is divided into two parts: menu pane on the left and<br />
operation area on the right of the page.<br />
In the menu pane, seven menus and corresponding items are provided, as listed in the<br />
table below, to access corresponding operation pages.<br />
Table 13-1 Menus and Menu Items in the Web Page<br />
Menu<br />
System control<br />
Menu Item<br />
Video control<br />
Address Book<br />
Call control<br />
Call History<br />
Call/Hang up<br />
Call Meeting<br />
13-3<br />
SJ-20100910163147-003|2010-11-23(R1.1)<br />
ZTE Proprietary and Confidential
ZXV10 <strong>T700</strong> <strong>User</strong> <strong>Guide</strong><br />
Menu<br />
Menu Item<br />
General<br />
Video<br />
Audio<br />
<strong>Network</strong><br />
SNMP<br />
H.323<br />
QoS<br />
NAT<br />
System Settings<br />
FEC<br />
IP Rate-down<br />
Capability<br />
Caption<br />
Security<br />
USB Record<br />
Configure<br />
Upgrade<br />
Advanced<br />
System State<br />
Versions<br />
Statistic<br />
System Diagnose<br />
Call Brief Info<br />
Loopback<br />
Ping<br />
Audio & Video Test<br />
<strong>User</strong> management<br />
admin<br />
Relogin -<br />
<strong>PC</strong> Console -<br />
The operation area varies with different menu items selected, providing corresponding<br />
man-machine interface for certain operations.<br />
13-4<br />
SJ-20100910163147-003|2010-11-23(R1.1)<br />
ZTE Proprietary and Confidential
Chapter 13 WEB Management and Control<br />
Caution<br />
To show the icons and options clearly, some pictures in this manual are part of the IE Web<br />
page without IE menus and tool bars.<br />
13.4 System Control<br />
13.4.1 Video Control in WEB<br />
13.4.1.1 Introduction to Video Control Page<br />
Select System control→Video control to enter the video control interface, as shown in<br />
the figure below.<br />
Figure 13-4 Video Control<br />
1. Video control area<br />
2. Control end<br />
3. Video control area<br />
4. Audio, PIP, and dual video<br />
control area<br />
5. Streaming control area<br />
6. Image display control area<br />
13.4.1.2 Switching Between Local and Remote Video<br />
Prerequisites<br />
A remote token is required for controlling the remote camera. Only the chairman terminal<br />
can apply for the remote token.<br />
13-5<br />
SJ-20100910163147-003|2010-11-23(R1.1)<br />
ZTE Proprietary and Confidential
ZXV10 <strong>T700</strong> <strong>User</strong> <strong>Guide</strong><br />
Steps<br />
1. In the video control main page, select the Local radio button to control the camera<br />
connected with the current video source.<br />
2. Click the Remote radio button to control the remote camera.<br />
3. To control the local camera, perform step 1 again.<br />
– End of Steps –<br />
13.4.1.3 Selecting a Main Video Source<br />
Prerequisites<br />
This option is displayed only after a video source is selected in video output settings.<br />
Context<br />
Main video is displayed on the main TV. The user can show the video input through other<br />
interfaces on the main TV through the operations below.<br />
Steps<br />
1. In the video control main page, click the Main Video to enter the corresponding<br />
interface, as shown in the figure below.<br />
Figure 13-5 Selecting a Main Video Source<br />
2. Select a video as the main video source, such as Camera. The icon becomes<br />
*Camera, indicating that Camera is selected. The image input through the Camera<br />
port is displayed on the main TV screen.<br />
– End of Steps –<br />
13.4.1.4 Selecting Secondary Video<br />
Prerequisites<br />
This option is displayed only after a video source is selected in video output settings.<br />
13-6<br />
SJ-20100910163147-003|2010-11-23(R1.1)<br />
ZTE Proprietary and Confidential
Chapter 13 WEB Management and Control<br />
Context<br />
Secondary video source refers to the video source except the main video. It can be<br />
displayed on the secondary TV screen and can also be displayed on the main TV screen by<br />
means of sending dual video. The user can enable video input through different interfaces<br />
to be the secondary video source through the operations below.<br />
Steps<br />
1. In the video control main page, click the Second Video to enter the corresponding<br />
interface, as shown in the figure below.<br />
Figure 13-6 Selecting a Secondary Video Source<br />
2. Select a video source as the secondary video source, such as Computer/DVD.<br />
Then the button becomes * Computer/DVD, which indicates that Computer/DVD<br />
is selected. The image input through Computer/DVD in the second channel of the<br />
secondary or main TV.<br />
– End of Steps –<br />
13.4.1.5 Adjusting The Camera<br />
Steps<br />
• Click the up/down/left/right arrows to move the camera.<br />
• Click or in the Zoom area to zoom out or zoom in the scene taken by the<br />
camera.<br />
• Click or in the Focus area to adjust the focus of the camera so as to get<br />
clear image.<br />
• Click or in the Aperture area to adjust the aperture of the camera.<br />
13-7<br />
SJ-20100910163147-003|2010-11-23(R1.1)<br />
ZTE Proprietary and Confidential
ZXV10 <strong>T700</strong> <strong>User</strong> <strong>Guide</strong><br />
13.4.1.6 Adjusting The Video Parameters<br />
Steps<br />
• This version does not supply this function.<br />
13.4.1.7 Presetting Camera Position<br />
Context<br />
Ten positions of the camera can be preset and saved, represented by the number 0 to 9.<br />
Steps<br />
1. Select a local camera to be preset.<br />
2. Preset the camera position by clicking direction buttons, zoom +/- buttons, focus +/-<br />
buttons and aperture +/- buttons.<br />
3. Click Preset Position button to pop up the Presetting dialog box as shown in the<br />
figure below.<br />
Figure 13-7 Presetting Dialog Box<br />
4. Click a number button and click Close button to save the preset.<br />
Caution<br />
If you want to delete all presets of the camera, click Clear All button in the dialog box.<br />
– End of Steps –<br />
13.4.1.8 Active Position<br />
Prerequisites<br />
Before using the preset position, make sure the position has been preset and saved.<br />
Context<br />
After presetting the camera, you can use the preset position directly later.<br />
Steps<br />
1. Select the camera (video) on the video/audio control page.<br />
13-8<br />
SJ-20100910163147-003|2010-11-23(R1.1)<br />
ZTE Proprietary and Confidential
Chapter 13 WEB Management and Control<br />
2. Click Active Position button to pop up the Positions dialog box, as shown in the<br />
figure below.<br />
Figure 13-8 Positions Dialog Box<br />
The grayed number buttons indicates that no preset positions have been saved to<br />
them. Therefore, only those activated buttons can be used to track the positions saved<br />
to them.<br />
3. Click the number button as needed to track corresponding position saved to it.<br />
4. Click Closebutton. Then the camera will move and adjust itself according to the preset<br />
position.<br />
– End of Steps –<br />
13.4.1.9 Controlling Audio<br />
Steps<br />
• To turn off the microphone, click button, which will turns into<br />
. To turn on the microphone, click button.<br />
• To turn off the sound box, click button, which will turns into . To turn<br />
on the sound box, click<br />
button.<br />
• Click button to decrease the volume. The minimum volume is 0, that is, no<br />
sound will be heard.<br />
• Click button to increase the volume. The maximum volume is 32.<br />
13.4.1.10 Setting PIP Position<br />
Prerequisites<br />
Only after the PIP function is enabled, will the PIP positionbutton on the video control<br />
page be activated.<br />
13-9<br />
SJ-20100910163147-003|2010-11-23(R1.1)<br />
ZTE Proprietary and Confidential
ZXV10 <strong>T700</strong> <strong>User</strong> <strong>Guide</strong><br />
Context<br />
Steps<br />
1. Click PIP position thebutton to pop up the PIP position dialog box, as shown in the<br />
figure below.<br />
Figure 13-9 PIP Position<br />
2. Select corresponding radio button as needed to set the position of small picture shown<br />
on the screen and click the closebutton on the right top corner to close the dialog box<br />
and return to the video control page.<br />
– End of Steps –<br />
13.4.1.11 Changing Display mode<br />
Prerequisites<br />
• Only when the ZXV10 <strong>T700</strong> has participated in a conference, you can switch the<br />
display mode.<br />
• The display mode switching is only valid for the first channel of output interface.<br />
Context<br />
The splitting screen means that two pictures with the same size are shown on the TV<br />
connected with the terminal. And it is called two splitting screens respectively.<br />
• The two splitting screens are shown in the figure below.<br />
13-10<br />
SJ-20100910163147-003|2010-11-23(R1.1)<br />
ZTE Proprietary and Confidential
Chapter 13 WEB Management and Control<br />
Figure 13-10 Two Splitting Screens<br />
1. Local Video 2. Remote Videot<br />
The main features of two splitting screens are: If the remote terminal only sends one<br />
channel of active video, the screen 1 shows local video and screen 2 shows remote<br />
video. If the remote terminal sends two channels of active video, the screen 1 shows<br />
local video and screen 2 shows main video of the remote site.<br />
• Picture-in-picture means that two pictures from two video sources with different sizes<br />
are overlapped on the TV screen. The display mode of picture-in-picture is shown in<br />
the figure below.<br />
Figure 13-11 Picture-in-Picture<br />
As shown in the figure above, the smaller picture is displayed at left top, left bottom,<br />
right top or right bottom. The screen 1 shows the picture with small size, and the<br />
screen 2 shows the picture with large size. In which the picture with large size can<br />
display the local, remote or secondary video, and you can switch among these videos.<br />
The picture with small size can display the local and remote video, and you can also<br />
switch between these videos.<br />
13-11<br />
SJ-20100910163147-003|2010-11-23(R1.1)<br />
ZTE Proprietary and Confidential
ZXV10 <strong>T700</strong> <strong>User</strong> <strong>Guide</strong><br />
Steps<br />
1. When the terminal has been participated in the conference, press the Change Display<br />
mode button . Then the remote video is first displayed on the screen.<br />
2. Repeat the step 1, namely to press the Change Display mode button on the remote<br />
control. Then the remote video, local video, splitting screen and picture-in-picture<br />
modes are switched in turn.<br />
3. Select your desired mode, and stop to press the button Change Display mode. Then<br />
the switching is completed.<br />
– End of Steps –<br />
13.4.1.12 Opening / Closing Dual Video<br />
Steps<br />
• Click the Open Dual video button to send the secondary video. Then the Open Dual<br />
video button becomes Close Dual video.<br />
• Click the Close Dual video button to stop sending dual video.<br />
13.4.1.13 Opening / Closing Streaming<br />
Context<br />
This version can not supply the function.<br />
13.4.1.14 Adjusting Dual-Video Bandwidth<br />
Prerequisites<br />
Dual video bandwidth can be adjusted only when the terminal starts sending dual video in<br />
a P2P conference.<br />
Context<br />
By default, the secondary video bandwidth is 50% of the main video bandwidth. By<br />
adjusting dual-video bandwidth, the user can select the bandwidth of the secondary video<br />
bandwidth, ranging from 10% to 90%.<br />
Steps<br />
1. In the WEB video control main page, click Dual-video dynamic rate. The percentage<br />
selection box appears.<br />
2. Set the percentage of the secondary video bandwidth. For example, if 30% is selected,<br />
the secondary video bandwidth will be 30% of the main video bandwidth.<br />
– End of Steps –<br />
13-12<br />
SJ-20100910163147-003|2010-11-23(R1.1)<br />
ZTE Proprietary and Confidential
13.4.1.15 Recovering The Default Video Parameters<br />
Steps<br />
• This version dose not supply this function.<br />
13.5 Call Control<br />
13.5.1 Introduction of Address Book<br />
Chapter 13 WEB Management and Control<br />
Select Call Control > Address Book to open the page shown below.<br />
Figure 13-12 Address Book<br />
For the introduction of Address Book, please refer to 10.1 Introduction of Address Book in<br />
this manual.<br />
13.5.2 Add Single<br />
Steps<br />
1. Select Call Control > Address Book > Add Single to enter the corresponding<br />
interface, as shown in the figure below.<br />
13-13<br />
SJ-20100910163147-003|2010-11-23(R1.1)<br />
ZTE Proprietary and Confidential
ZXV10 <strong>T700</strong> <strong>User</strong> <strong>Guide</strong><br />
Figure 13-13 Add Single<br />
2. For the details of how to add a single terminal, please refer to 10.2 Add Contact in this<br />
manual.<br />
– End of Steps –<br />
13.5.3 Calling In The Address Book<br />
Steps<br />
1. Select Call Control > Address Book to enter the corresponding interface, as shown<br />
in the figure below.<br />
Figure 13-14 Calling In The Address Book<br />
13-14<br />
SJ-20100910163147-003|2010-11-23(R1.1)<br />
ZTE Proprietary and Confidential
Chapter 13 WEB Management and Control<br />
2. For the details of how to calling from the Address Book, please refer to “10.5 Calling<br />
Terminals in the Address Book”in this manual.<br />
– End of Steps –<br />
13.5.4 Call History Setting<br />
Select Call Control > Call History to enter the corresponding interface, as shown in the<br />
figure below.<br />
Figure 13-15 Configuring Call History<br />
Click Go to view Configure Call History.<br />
13.5.5 Calling for a Conference<br />
Context<br />
Generally the MCU actively calls the terminals to attend the conference held by it. If a<br />
terminal cannot attend the conference due to some reason or is disconnected from the<br />
conference, it can call the MCU to attend the conference.<br />
Steps<br />
1. In the WEB page, select Call Control→Call/Hangup to open the Call/Hangup page,<br />
as shown in the figure below.<br />
13-15<br />
SJ-20100910163147-003|2010-11-23(R1.1)<br />
ZTE Proprietary and Confidential
ZXV10 <strong>T700</strong> <strong>User</strong> <strong>Guide</strong><br />
Figure 13-16 Call Page<br />
The table below describes the related parameters.<br />
Table 13-2 Description of Call/Hangup Parameters<br />
No. Parameter Description<br />
1 Address Registered number or IP address of the called party.<br />
2 Call Type IP<br />
3 Address Book<br />
The user can select the terminal number or address to be called<br />
from the address book.<br />
2. Select a required call type from the Call Type drop-down menu.<br />
3. Enter the corresponding terminal number based on the call type.<br />
• For a point-to-point conference, enter the terminal number or IP address of the<br />
peer end.<br />
• For a multipoint conference held by the MCU, enter the number or IP address of<br />
the MCU.<br />
• If the system supports the 198 special number, enter 198 directly.<br />
• To call a telephone terminal, enter the phone number to be called.<br />
• To call a terminal from the address book, refer to related introductions in the<br />
address book.<br />
4. Select the maximum call rate from the Call Rate drop-down menu.<br />
5. Click the Call button.<br />
– End of Steps –<br />
13-16<br />
SJ-20100910163147-003|2010-11-23(R1.1)<br />
ZTE Proprietary and Confidential
Chapter 13 WEB Management and Control<br />
13.5.6 Hanging Up a Conference<br />
Prerequisites<br />
A terminal can be hanged up only when the terminal is in a conference.<br />
Steps<br />
1. In the WEB page, select Call Control > Call/Hangup to open the page, as shown in<br />
the figure below.<br />
Figure 13-17 Call Hangup<br />
2. Click the Hangup button before a terminal. A dialog box appears.<br />
Note<br />
Click the Hangup All button to hang up all terminals and end the conference. This<br />
button is only available in the terminal serving as the MCU and in a conference initiated<br />
by an embedded MCU.<br />
3. Click the OK button to hang up this terminal.<br />
– End of Steps –<br />
13-17<br />
SJ-20100910163147-003|2010-11-23(R1.1)<br />
ZTE Proprietary and Confidential
ZXV10 <strong>T700</strong> <strong>User</strong> <strong>Guide</strong><br />
13.5.7 Calling Meeting<br />
Prerequisites<br />
Only an IP terminal has the call meeting function.<br />
The terminals in the address book can join a call meeting only after they are configured<br />
with extension numbers, which are the numbers registered on GK.<br />
Context<br />
Call meeting means that a terminal initiates a conference and makes a conference<br />
request to the MCU. The request contains terminal names, conference rate, conference<br />
password, conference special number, number of pictures, and duration. The specified<br />
MCU checks whether it can satisfy the request based on its board configuration and<br />
template configuration in the conference management system. If yes, MCU will call the<br />
terminals.<br />
The conference templates needs to be configured in the conference administrator<br />
operation interface. The template of call meeting is different from that of a normal<br />
conference. In the template of call meeting, conference name and terminal prefix are<br />
restricted. For more information, refer to ZXMS80 Multimedia Service Management<br />
System Operation Manual (System Administrator Volume).<br />
Steps<br />
1. Select Call Control→Call Meeting. The corresponding interface is shown below.<br />
Figure 13-18 Call Meeting Page<br />
2. Select terminals from the Available Terminal list box, and then click Select. The<br />
selected terminals are displayed in the Selected Terminal list box. If the user clicks<br />
Select all, all the terminals in the Available Terminal list box are selected and<br />
13-18<br />
SJ-20100910163147-003|2010-11-23(R1.1)<br />
ZTE Proprietary and Confidential
Chapter 13 WEB Management and Control<br />
displayed in the Selected Terminal list box. To delete a selected terminal, select it in<br />
the Selected Terminal list box, and then click Delete . To delete all the terminals,<br />
click Delete all.<br />
3. Configure the following parameters according to the description in the table below.<br />
Table 13-3 Settings of Call Setting Parameters<br />
Configuration Item Configuration Method Description<br />
Conference Rate<br />
Pictures number<br />
Conference Special No.<br />
Conference Password<br />
Selects a conference rate.<br />
Selects the number of pictures.<br />
Normally it is 198. It is<br />
recommended to use the<br />
default value.<br />
It can contain 1 to 6 Arabic<br />
numerals.<br />
It must be consistent with the<br />
conference rate configured on the<br />
MCU.<br />
Up to five pictures or 4+1 pictures<br />
can be provided.<br />
Terminals can call the conference<br />
through the conference special<br />
number.<br />
It is the password used by a<br />
terminal to actively join the<br />
conference.<br />
Duration Enters the conference duration. The unit is minute.<br />
4. After the settings, click Call to call the conference. To save the settings, click Save.<br />
– End of Steps –<br />
Follow-Up Action<br />
If the conference is successfully called, the MCU calls all the terminals automatically.<br />
13.6 General Configuration<br />
13.6.1 Local Settings<br />
Select System Settings > General > Local Setting to enter the corresponding interface,<br />
as shown in the figure below.<br />
13-19<br />
SJ-20100910163147-003|2010-11-23(R1.1)<br />
ZTE Proprietary and Confidential
ZXV10 <strong>T700</strong> <strong>User</strong> <strong>Guide</strong><br />
Figure 13-19 Local Setting<br />
For the details of how to configuring local information, please refer to “6.1 Display<br />
Settings”in this manual.<br />
13.6.2 Prompt Volume Settings<br />
Select System Settings > General > Prompt Volume to enter the corresponding<br />
interface, as shown in the figure below.<br />
Figure 13-20 Prompt Volume<br />
13-20<br />
SJ-20100910163147-003|2010-11-23(R1.1)<br />
ZTE Proprietary and Confidential
Chapter 13 WEB Management and Control<br />
For the details of how to configuring prompt volume, please refer to “6.2 Prompt Tone<br />
Settings”in this manual.<br />
13.6.3 Call Option Settings<br />
Select System Settings > General > Call Option to enter the corresponding interface, as<br />
shown in the figure below.<br />
Figure 13-21 Call Option<br />
For the details of how to configuring call option, please refer to “6.3 Call Option Settings”in<br />
this manual.<br />
13.6.4 Alarm Settings<br />
Select System Settings > General > Alarm Display to enter the corresponding interface,<br />
as shown in the figure below.<br />
13-21<br />
SJ-20100910163147-003|2010-11-23(R1.1)<br />
ZTE Proprietary and Confidential
ZXV10 <strong>T700</strong> <strong>User</strong> <strong>Guide</strong><br />
Figure 13-22 Alarm Setting<br />
For the details of how to configuring alarm, please refer to “6.4 Alert Tip Settings”in this<br />
manual.<br />
13.7 Video Configuration<br />
13.7.1 Video In Settings<br />
Steps<br />
1. Select System Settings > Video > Video In to enter the corresponding interface, as<br />
shown in the figure below.<br />
13-22<br />
SJ-20100910163147-003|2010-11-23(R1.1)<br />
ZTE Proprietary and Confidential
Chapter 13 WEB Management and Control<br />
Figure 13-23 Configuring VIDEO IN<br />
2. For the details of how to configuring alarm, please refer to “7.1.1 Video Input Settings”in<br />
this manual.<br />
– End of Steps –<br />
13.7.2 Video Out Settings<br />
Steps<br />
1. Select System Settings > Video > Video Out to enter the corresponding interface,<br />
as shown in the figure below.<br />
13-23<br />
SJ-20100910163147-003|2010-11-23(R1.1)<br />
ZTE Proprietary and Confidential
ZXV10 <strong>T700</strong> <strong>User</strong> <strong>Guide</strong><br />
Figure 13-24 Configuring VIDEO OUT<br />
2. For the details of how to configuring alarm, please refer to “7.1.2 Video Output<br />
Settings”in this manual.<br />
– End of Steps –<br />
13.8 Audio Settings<br />
Select System Settings > Audio to enter the corresponding interface, as shown in the<br />
figure below.<br />
Figure 13-25 Configuring Audio<br />
13-24<br />
SJ-20100910163147-003|2010-11-23(R1.1)<br />
ZTE Proprietary and Confidential
Chapter 13 WEB Management and Control<br />
For the details of how to configuring Audio, please refer to “7.3 Mic/Line Input Settings”in<br />
this manual.<br />
13.9 <strong>Network</strong> Settings<br />
Select System Settings > <strong>Network</strong> to enter the corresponding interface, as shown in the<br />
figure below.<br />
Figure 13-26 <strong>Network</strong> Connection Setting<br />
For the details of how to configuring network connection, please refer to “7.2.1 <strong>Network</strong><br />
Connection Settings”in this manual.<br />
13.10 SNMP Settings<br />
Select System Settings > SNMP to enter the corresponding interface, as shown in the<br />
figure below.<br />
13-25<br />
SJ-20100910163147-003|2010-11-23(R1.1)<br />
ZTE Proprietary and Confidential
ZXV10 <strong>T700</strong> <strong>User</strong> <strong>Guide</strong><br />
Figure 13-27 Configuring SNMP<br />
The table below describes the related configuration items.<br />
Option<br />
Enable SNMP<br />
NMS Address<br />
Description<br />
Enables SNMP<br />
Provided by the network administrator<br />
NMS Trap Port Use the default port 162<br />
Community, Contact, Location, System<br />
Description<br />
Define them by users<br />
13.11 H.323 Settings<br />
Select System Settings > H.323 to enter the corresponding interface, as shown in the<br />
figure below.<br />
13-26<br />
SJ-20100910163147-003|2010-11-23(R1.1)<br />
ZTE Proprietary and Confidential
Chapter 13 WEB Management and Control<br />
Figure 13-28 Configuring H.323<br />
For the details of how to Configuring H.323, please refer to 7.2.2 H.323 Settings in this<br />
manual.<br />
13.12 QoS Settings<br />
Select System Settings > QoS to enter the corresponding interface, as shown in the figure<br />
below.<br />
Figure 13-29 Configuring QoS<br />
13-27<br />
SJ-20100910163147-003|2010-11-23(R1.1)<br />
ZTE Proprietary and Confidential
ZXV10 <strong>T700</strong> <strong>User</strong> <strong>Guide</strong><br />
For the details of how to configuring QoS, please refer to 7.2.3.1 QoS Settings in this<br />
manual.<br />
13.13 NAT Settings<br />
Select System Settings > NAT to enter the corresponding interface, as shown in the figure<br />
below.<br />
Figure 13-30 NAT Settings<br />
For the details of how to Configuring NAT, please refer to 7.2.4 NAT Settings in this manual.<br />
13.14 FEC Settings<br />
Select System Settings > FEC to enter the corresponding interface, as shown in the figure<br />
below.<br />
13-28<br />
SJ-20100910163147-003|2010-11-23(R1.1)<br />
ZTE Proprietary and Confidential
Chapter 13 WEB Management and Control<br />
Figure 13-31 FEC Setting<br />
For the details of how to Configuring FEC, please refer to7.2.3.3 FEC Settings in this<br />
manual.<br />
13.15 IP Rate-down Settings<br />
Select System Settings > IP Rate-down to enter the corresponding interface, as shown<br />
in the figure below.<br />
13-29<br />
SJ-20100910163147-003|2010-11-23(R1.1)<br />
ZTE Proprietary and Confidential
ZXV10 <strong>T700</strong> <strong>User</strong> <strong>Guide</strong><br />
Figure 13-32 Configuring IP Rate-down<br />
For the details of how to Configuring IP Rate-down, please refer to 7.2.3.2 IP Rate Control<br />
Settings in this manual.<br />
13.16 Capability Settings<br />
Select System Settings > Capability to enter the corresponding interface, as shown in<br />
the figure below.<br />
Figure 13-33 Configuring Capability<br />
13-30<br />
SJ-20100910163147-003|2010-11-23(R1.1)<br />
ZTE Proprietary and Confidential
Chapter 13 WEB Management and Control<br />
For the details of how to configuring capability, please refer to 7.4 Conference Capability<br />
Settings in this manual.<br />
13.17 Caption<br />
13.17.1 Setting Terminal Name Display<br />
Steps<br />
1. Select System Settings > Caption > Terminal name to enter the terminal name<br />
settings page, as shown in the figure below.<br />
Figure 13-34 Terminal Name Settings<br />
2. The configuration items are listed in the table below.<br />
Table 13-4 Terminal Name Setting Items<br />
Configuration<br />
Item<br />
Font size<br />
Font color<br />
Background<br />
color<br />
Transparency<br />
mode<br />
Description<br />
Three sizes are optional: Small, Middle and Big<br />
Ten foreground colors are optional: black, white, gray, red, orange, yellow,<br />
green, cyan, blue and purple.<br />
Ten background colors are optional: black, white, gray, red, orange,<br />
yellow, green, cyan, blue and purple.<br />
Five modes are optional: full transparent, half transparent, 70%<br />
transparent, 30% transparent and not transparent.<br />
13-31<br />
SJ-20100910163147-003|2010-11-23(R1.1)<br />
ZTE Proprietary and Confidential
ZXV10 <strong>T700</strong> <strong>User</strong> <strong>Guide</strong><br />
Configuration<br />
Item<br />
Display position<br />
Description<br />
Four positions are optional: top left corner, below left corner, top right<br />
corner and below right corner.<br />
3. Click Display button to save the terminal name settings. And then the terminal name<br />
will be shown on the TV screen according to the settings. The Display button is a dual<br />
status button. It is hidden when pressed.<br />
– End of Steps –<br />
13.17.2 Setting Banner<br />
Steps<br />
1. Select System Settings > Caption > Banner to open the banner settings page, as<br />
shown in the figure below.<br />
Figure 13-35 Banner Settings Page<br />
2. The configuration items are listed in the table below.<br />
Table 13-5 Banner Setting Items<br />
Configuration Item<br />
Font size<br />
Font color<br />
Description<br />
Three size are optional: small, middle and big.<br />
Ten colors are optional: black, white, gray, red, orange, yellow, green,<br />
cyan, blue and purple.<br />
13-32<br />
SJ-20100910163147-003|2010-11-23(R1.1)<br />
ZTE Proprietary and Confidential
Chapter 13 WEB Management and Control<br />
Configuration Item<br />
Background color<br />
Description<br />
Ten background colors are optional: black, white, gray, red, orange,<br />
yellow, green, cyan, blue and purple.<br />
Show excursion Five excursions are optional: ‐10, 0, 10, 20 and 30.<br />
Transparency mode<br />
Content<br />
Five modes are optional: full transparent, half transparent, 70%<br />
transparent, 30% transparent and not transparent.<br />
Used to input the content of banner<br />
3. Click Send to display the banner on the screen.<br />
• The Send button changes to Stop button after it is clicked.<br />
• To preview the banner content on the screen, click Preview button.<br />
• To clear the banner content, click Clear button.<br />
– End of Steps –<br />
13.17.3 Setting Horizontal Caption<br />
Steps<br />
1. Select System Settings > Caption > H Caption to open the horizontal caption setting<br />
page, as shown in the figure below.<br />
Figure 13-36 Horizontal Caption Setting Page<br />
2. The horizontal subtitle setting items are listed in the table below.<br />
13-33<br />
SJ-20100910163147-003|2010-11-23(R1.1)<br />
ZTE Proprietary and Confidential
ZXV10 <strong>T700</strong> <strong>User</strong> <strong>Guide</strong><br />
Table 13-6 Horizontal Caption Setting Items<br />
Configuration Item<br />
Scroll mode<br />
Description<br />
Three modes are optional: Fixed, left and right.<br />
Show excursion Seven excursion positions are optional: –30, –20, –10, 0, 10, 20 and 30.<br />
Speed<br />
Font size<br />
Font color<br />
Background color<br />
Transparent mode<br />
Content<br />
Three moving speed is optional: slow, normal and fast.<br />
Three sizes are optional: small, middle and big.<br />
Ten colors are optional: black, white, gray, red, orange, yellow, green,<br />
cyan and purple.<br />
Ten background colors are optional: black, white, gray, red, orange,<br />
yellow, green, cyan and purple.<br />
Five modes are optional: full transparent, 70% transparent, half<br />
transparent, 30% transparent and not transparent.<br />
Input the content in the Content text box.<br />
3. Click Send button, and then the content of horizontal subtitle is displayed on the<br />
screen.<br />
• The Send button is a dual-state button. It switches between Send and Stop.<br />
• To preview the content of horizontal subtitle, click Preview button.<br />
• To clear the content, click Clear button.<br />
– End of Steps –<br />
13.17.4 Setting Vertical Caption<br />
Steps<br />
1. Select System Settings > Caption > V Caption to open the vertical caption setting<br />
page, as shown in the figure below.<br />
13-34<br />
SJ-20100910163147-003|2010-11-23(R1.1)<br />
ZTE Proprietary and Confidential
Chapter 13 WEB Management and Control<br />
Figure 13-37 Vertical Caption Setting Page<br />
2. The vertical subtitle setting items are listed in the table below.<br />
Table 13-7 Vertical Caption Setting Items<br />
Configuration Item<br />
Scroll mode<br />
Display position<br />
Speed<br />
Font size<br />
Font color<br />
Background color<br />
Transparency mode<br />
Content<br />
Description<br />
Three modes are optional: fixed, left and right.<br />
Four positions are optional: up, middle, down and full<br />
Three speed is optional: slow, normal and fast.<br />
Three sizes are optional: small, middle and big.<br />
Ten colors are optional: black, white, gray, red, orange, yellow, green,<br />
cyan and purple.<br />
Ten background colors are optional: black, white, gray, red, orange,<br />
yellow, green, cyan and purple.<br />
Five modes are optional: full transparent, 70% transparent, half<br />
transparent, 30% transparent and not transparent.<br />
Input the content of vertical subtitle.<br />
3. Click Send button, and then the content of vertical subtitle is displayed on the screen.<br />
• The Send button is a dual-state button. It switches between Send and Stop.<br />
• To preview the content of vertical subtitle, click Preview button.<br />
• To clear the content, click Clear button.<br />
– End of Steps –<br />
13-35<br />
SJ-20100910163147-003|2010-11-23(R1.1)<br />
ZTE Proprietary and Confidential
ZXV10 <strong>T700</strong> <strong>User</strong> <strong>Guide</strong><br />
13.17.5 Setting Short Message<br />
Steps<br />
1. Select System Settings > Caption > Message to open the short message setting<br />
page, as shown in the figure below.<br />
Figure 13-38 Message Setting Page<br />
2. The short message setting items are listed in the table below.<br />
Table 13-8 Short Message Setting Items<br />
Item<br />
Font size<br />
Font color<br />
Background color<br />
Content<br />
Description<br />
Three sizes are optional: Small, Middle and Big.<br />
Ten colors are optional: black, white, gray, red, orange, yellow, green,<br />
cyan and purple.<br />
Ten background colors are optional: black, white, gray, red, orange,<br />
yellow, green, cyan and purple.<br />
Input the message in the Content text box.<br />
3. Click Send to send the message to the terminal.<br />
To clear the message content on the page, click Clear button.<br />
– End of Steps –<br />
13-36<br />
SJ-20100910163147-003|2010-11-23(R1.1)<br />
ZTE Proprietary and Confidential
13.18 Security Settings<br />
Chapter 13 WEB Management and Control<br />
Select System Settings > Security to enter the corresponding interface, as shown in the<br />
figure below.<br />
Figure 13-39 Configuring Security<br />
For the details of how to Configuring Security, please refer to in this manual.<br />
13.19 USB Settings<br />
Context<br />
The function do not be offered in this version.<br />
13.20 Configuration Settings<br />
Select System Settings > Configure to enter the corresponding interface, as shown in<br />
the figure below.<br />
13-37<br />
SJ-20100910163147-003|2010-11-23(R1.1)<br />
ZTE Proprietary and Confidential
ZXV10 <strong>T700</strong> <strong>User</strong> <strong>Guide</strong><br />
Figure 13-40 Configuration<br />
For the details of how to Setting configuration, please refer to 7.6.2 Saving System<br />
Configuration in this manual.<br />
13.21 Upgrade Settings<br />
Select System Settings > Upgrade to enter the corresponding interface, as shown in the<br />
figure below.<br />
13-38<br />
SJ-20100910163147-003|2010-11-23(R1.1)<br />
ZTE Proprietary and Confidential
Chapter 13 WEB Management and Control<br />
Figure 13-41 Configuring Upgrade<br />
For the details of how to Configuring Upgrade, please refer to 7.6.1 Software Update in<br />
this manual.<br />
13.22 Advanced Settings<br />
Select System Settings > Advanced to enter the corresponding interface, as shown in<br />
the figure below.<br />
Figure 13-42 Configuring Advanced<br />
13-39<br />
SJ-20100910163147-003|2010-11-23(R1.1)<br />
ZTE Proprietary and Confidential
ZXV10 <strong>T700</strong> <strong>User</strong> <strong>Guide</strong><br />
Please choose if send dual-video automatic or not.<br />
13.23 Diagnosis<br />
13.23.1 System State Viewings<br />
Steps<br />
1. Select System Diagnose > System State to enter the corresponding interface, as<br />
shown in the figure below.<br />
Figure 13-43 System State<br />
2. For the details of how to viewing System State, please refer to“9.1 Checking System<br />
Status”in this manual.<br />
– End of Steps –<br />
13.23.2 Version Viewings<br />
Steps<br />
1. Select System Diagnose > Versions to enter the corresponding interface, as shown<br />
in the figure below.<br />
13-40<br />
SJ-20100910163147-003|2010-11-23(R1.1)<br />
ZTE Proprietary and Confidential
Chapter 13 WEB Management and Control<br />
Figure 13-44 viewing version<br />
2. For the details of how to viewing version, please refer to“9.3 Viewing Version<br />
Information”in this manual.<br />
– End of Steps –<br />
13.23.3 Statistics Viewings<br />
1. Select System Diagnose > Statistics to enter the corresponding interface, as shown<br />
in the figure below.<br />
Figure 13-45 Viewing Statistics<br />
13-41<br />
SJ-20100910163147-003|2010-11-23(R1.1)<br />
ZTE Proprietary and Confidential
ZXV10 <strong>T700</strong> <strong>User</strong> <strong>Guide</strong><br />
2. Click Go to Viewing Statistics, please refer to 9.2 Checking Call Information in this<br />
manual.<br />
13.23.4 Call Brief Information Viewings<br />
1. Select System Diagnose > Call Brief Information to enter the corresponding<br />
interface, as shown in the figure below.<br />
Figure 13-46 Viewing Call Brief Information<br />
Click Go to View Call Brief Information, please refer to 9.2 Checking Call Information in<br />
this manual.<br />
13.23.5 Loopback Settings<br />
Select System Diagnose > Loopback to enter the corresponding interface, as shown in<br />
the figure below.<br />
13-42<br />
SJ-20100910163147-003|2010-11-23(R1.1)<br />
ZTE Proprietary and Confidential
Chapter 13 WEB Management and Control<br />
Figure 13-47 Configuring Loopback<br />
For the details of how to Configuring Loopback, please refer to 9.4 Loopback Test in this<br />
manual.<br />
13.23.6 Ping Test<br />
1. Select System Diagnose > Ping to enter the corresponding interface, as shown in<br />
the figure below.<br />
Figure 13-48 Ping Test<br />
2. For the details of how to Configuring ping, please refer to 9.5 Ping Test in this manual.<br />
13-43<br />
SJ-20100910163147-003|2010-11-23(R1.1)<br />
ZTE Proprietary and Confidential
ZXV10 <strong>T700</strong> <strong>User</strong> <strong>Guide</strong><br />
13.23.7 Audio and Video Testing<br />
Select System Diagnose > Audio and Video Test to enter the corresponding interface,<br />
as shown in the figure below.<br />
Figure 13-49 Audio and Video Testing<br />
For the details of how to Test Audio and Video, please refer to“9.6 Audio and Video Test”in<br />
this manual.<br />
13.24 <strong>User</strong> Management Settings<br />
Context<br />
Through user management, the user can modify password.<br />
Steps<br />
1. Select <strong>User</strong> management→admin to enter the user management page, as shown in<br />
the figure below.<br />
13-44<br />
SJ-20100910163147-003|2010-11-23(R1.1)<br />
ZTE Proprietary and Confidential
Chapter 13 WEB Management and Control<br />
Figure 13-50 <strong>User</strong> Management<br />
2. Enter the old password in the Old Password text box, and then enter the new<br />
password in the New Password text box. Then enter the new password again in the<br />
Confirm Password text box.<br />
3. Click the Save button.<br />
– End of Steps –<br />
13-45<br />
SJ-20100910163147-003|2010-11-23(R1.1)<br />
ZTE Proprietary and Confidential
ZXV10 <strong>T700</strong> <strong>User</strong> <strong>Guide</strong><br />
This page intentionally left blank.<br />
13-46<br />
SJ-20100910163147-003|2010-11-23(R1.1)<br />
ZTE Proprietary and Confidential
Chapter 14<br />
Control in <strong>PC</strong> Console<br />
Table of Contents<br />
Installing <strong>PC</strong> Console ...............................................................................................14-1<br />
Logging in to <strong>PC</strong> Console.........................................................................................14-3<br />
Common Control ......................................................................................................14-4<br />
Conference Control in <strong>PC</strong> Console.........................................................................14-17<br />
14.1 Installing <strong>PC</strong> Console<br />
Prerequisites<br />
Before the <strong>PC</strong> console is installed, make sure that the security level of the Internet is low.<br />
Steps<br />
1. On the IE browser, choose Tools > Internet Options > Security > Local intranet.<br />
Then, set the security level to low, as shown in the figure below.<br />
Figure 14-1 Setting Security Level<br />
2. On the Web page of the terminal, click <strong>PC</strong> Console. The dialog box is displayed<br />
asking you whether to install the software, as shown in the figure below.<br />
14-1<br />
SJ-20100910163147-003|2010-11-23(R1.1)<br />
ZTE Proprietary and Confidential
ZXV10 <strong>T700</strong> <strong>User</strong> <strong>Guide</strong><br />
Figure 14-2 Installation Confirmation Dialog Box<br />
3. On the page as shown in the figure above, click Install to start installing the software.<br />
The setup program displays a process bar, as shown in the figure below.<br />
Figure 14-3 Displaying Installation Progress<br />
4. After the installation is complete, the system displays a dialog box, as shown in the<br />
figure below.<br />
Figure 14-4 Installation Completion Dialog Box<br />
14-2<br />
SJ-20100910163147-003|2010-11-23(R1.1)<br />
ZTE Proprietary and Confidential
Chapter 14 Control in <strong>PC</strong> Console<br />
5. In the dialog box as shown in the figure Above, click to complete the<br />
installation.<br />
– End of Steps –<br />
14.2 Logging in to <strong>PC</strong> Console<br />
Prerequisites<br />
The <strong>PC</strong> console plug-in has been installed in the user's computer.<br />
Steps<br />
• There are two ways to log in to <strong>PC</strong> console: one way is to log in to the <strong>PC</strong> console in<br />
the WEB page of a terminal, and the other way is to log in to with <strong>PC</strong> console software.<br />
The ways to log in to the <strong>PC</strong> console are described as follows:<br />
Log in to the WEB page:<br />
1. log in to the WEB page of a terminal:<br />
2. In the WEB page, click <strong>PC</strong> Console to directly enter the <strong>PC</strong> console page.<br />
log in with <strong>PC</strong> console software:<br />
1. Click Start > All programs > ZTE T Serial Terminal <strong>PC</strong> Console > Run ZTE<br />
T Serial Terminal <strong>PC</strong>Console or double-click the shortcut icon<br />
dialog box as shown in the figure below.<br />
to open the<br />
Figure 14-5 Logging in to the <strong>PC</strong> Console<br />
2. Input the local IP address, user name admin (it is also the name to log in to the<br />
WEB page ) and password 111111 (it is also the password to log in to the WEB<br />
page).<br />
3. After that, click the Login button to enter the <strong>PC</strong> console page.<br />
14-3<br />
SJ-20100910163147-003|2010-11-23(R1.1)<br />
ZTE Proprietary and Confidential
ZXV10 <strong>T700</strong> <strong>User</strong> <strong>Guide</strong><br />
14.3 Common Control<br />
14.3.1 Introduction of Common Control Page<br />
Run the <strong>PC</strong> console to open the default page, as shown in the figure below. The default<br />
page is the common control page.<br />
Figure 14-6 <strong>PC</strong> Console Page<br />
The page as shown in the figure above can be divided into six areas: terminal information,<br />
common control, general control, system main menu, history terminal list, status icon. The<br />
descriptions of each item is listed in the table below.<br />
Table 14-1 Introduction of <strong>PC</strong> console page<br />
NO. Column Used to<br />
1 Terminal information Display the terminal name, IP address, GK address, ISDN address<br />
2 Video control Control remote and local video, and display remote and local image<br />
3 General control Control microphone and speaker at local site, and operate general<br />
settings<br />
4 System main menu Display the main menu of <strong>PC</strong> console<br />
5 History terminal list Display the terminals that have been connected with the local<br />
terminal recently. The administrator can select a terminal in the list<br />
and click the button Connect to call the terminal again.<br />
6 Status icon Display the status of terminal<br />
In the figure above, click the button Status to display function options of main menu, as<br />
shown in the figure below.<br />
14-4<br />
SJ-20100910163147-003|2010-11-23(R1.1)<br />
ZTE Proprietary and Confidential
Chapter 14 Control in <strong>PC</strong> Console<br />
Figure 14-7 <strong>PC</strong> Console Main Menu<br />
You can also click the button Common control to open the page as shown in the figure<br />
above.<br />
14.3.2 Video Control<br />
In the video control column as shown in the figure below, users can control local and remote<br />
video.<br />
Figure 14-8 Video Control Page<br />
14-5<br />
SJ-20100910163147-003|2010-11-23(R1.1)<br />
ZTE Proprietary and Confidential
ZXV10 <strong>T700</strong> <strong>User</strong> <strong>Guide</strong><br />
Start/Stop video<br />
In the video control page, click the button Start, and then the local or remote video is<br />
displayed on the page. Now users can control the local or remote video. The button Start<br />
is changed to Stop. Click the button Stop to stop displaying video.<br />
Switch video source<br />
In the video control page, select the video source in the pull-down list box of Video channel<br />
select.<br />
After selecting, click the button Switch video source to switch the video source.<br />
Control camera<br />
In the video control page, press the , , or of to move the<br />
directions of camera. The buttons<br />
are used to adjust the focus of camera.<br />
Set image parameters<br />
In the video control page, click the button ImageSet to open the page, as shown in the<br />
figure below.<br />
Figure 14-9 Set Image Parameters<br />
In the figure above, , and are<br />
used to adjust the aperture, focus and zoom. , and<br />
are used to adjust the brightness, contrast and saturation.<br />
Click the button Default to reset the default settings of video. Click the button Close to<br />
quit the video setting page and return to the video control page.<br />
Preset camera<br />
Preset the angle of a camera. Next time, the camera can load and automatically adjust to<br />
the preset angle. A camera has 10 preset positions ranging from 0~9.<br />
14-6<br />
SJ-20100910163147-003|2010-11-23(R1.1)<br />
ZTE Proprietary and Confidential
Chapter 14 Control in <strong>PC</strong> Console<br />
Note<br />
Only the SONY series cameras support Preset camera and Get camera position<br />
functions.<br />
The method for presetting camera is as follows:<br />
1. Use the direction buttons and buttons and set the camera to desired position<br />
according to image changing on TV screen. For instance, set the camera to aim<br />
at the conference host.<br />
2. In the video control page, click the button Preset camera to open the page as shown<br />
in the figure below.<br />
Figure 14-10 Preset Camera<br />
3. In the figure above, select a position from 0~9 and click the button Save to save the<br />
position. Click the button Clear to clear all preset positions and return to video control<br />
page.<br />
Get camera position<br />
After the preset position is saved, the camera can load and automatically adjust to this<br />
position.<br />
1. In the video control page, click the button Get Camera Position to open the page as<br />
shown in the figure below.<br />
14-7<br />
SJ-20100910163147-003|2010-11-23(R1.1)<br />
ZTE Proprietary and Confidential
ZXV10 <strong>T700</strong> <strong>User</strong> <strong>Guide</strong><br />
Figure 14-11 Get camera position<br />
2. Select the needed preset position, and then the camera will aim at the corresponding<br />
position. Click the button Close to return to video control page.<br />
Switch to remote<br />
Each terminal can set the image parameters of itself. But in a conference, only the terminal<br />
with Low Speed Data (LSD) capability can own the token. Usually, only the chairman in a<br />
conference can own the LSD token and only when the terminal's LSD function is enabled,<br />
this terminal can be remotely controlled.<br />
In the video control page, click the button Set Remote to get LSD token at local site. Then<br />
a user can control the remote camera. Now the button Set Remote is changed to Set<br />
Local. Click the button Set Local to control local camera.<br />
Open sound<br />
In the video control page, click the button Sound Open, and then the remote voice can be<br />
heard from local <strong>PC</strong> console. The button Sound Open is changed to Sound Close. Click<br />
the button Sound Close to close sound.<br />
Note<br />
When opening sound, make sure that remote video is started. Namely, the remote video<br />
and audio are always sent together. There will be no sound if no video is displayed.<br />
14.3.3 Common Control<br />
In the page as shown in the figure below, the common control includes voice control,<br />
display mode selection, dual video control, conference lock and streaming control.<br />
Figure 14-12 Common Control<br />
14-8<br />
SJ-20100910163147-003|2010-11-23(R1.1)<br />
ZTE Proprietary and Confidential
Chapter 14 Control in <strong>PC</strong> Console<br />
Control voice<br />
In the common control page, click the icon and it is changed to the icon indicating<br />
that the microphone is turned off. And now the microphone icon in the status bar is changed<br />
to . The icon indicates that the microphone is turned on.<br />
In the common control page, click the icon and it is changed to the icon indicating<br />
that the speaker is turned off. And now the speaker icon in the status bar is changed to<br />
. The icon indicates that the speaker is turned on. The buttons and are<br />
used to adjust the audio volume.<br />
Select display mode<br />
In the common control page, click the button Display Style to open the page as shown in<br />
the figure below.<br />
Figure 14-13 Display Mode<br />
In the page as shown in the figure above, users can set the display mode of secondary<br />
video and remote video and select to display local or remote video.<br />
Select<br />
below.<br />
to open the picture-in-picture setting page, as shown in the figure<br />
14-9<br />
SJ-20100910163147-003|2010-11-23(R1.1)<br />
ZTE Proprietary and Confidential
ZXV10 <strong>T700</strong> <strong>User</strong> <strong>Guide</strong><br />
Figure 14-14 Picture-in-picture Setting Page<br />
In the page as shown in the figure above, users can select the display mode of images.<br />
There are two options: 1 Remote Video. 2 Local Main Video and 1 Second or Local. 2<br />
Remote<br />
Select<br />
below.<br />
to open the two splitting screen setting page, as shown in the figure<br />
Figure 14-15 Configure Two Splitting Screen<br />
If<br />
is selected, it indicates that the local and remote images will be displayed<br />
on the TV at the same time.<br />
Select needed item and click the button Apply to make the setting effective. Click the<br />
button Close to return to common control page.<br />
14-10<br />
SJ-20100910163147-003|2010-11-23(R1.1)<br />
ZTE Proprietary and Confidential
Chapter 14 Control in <strong>PC</strong> Console<br />
Send second video<br />
In the common control page, click the button Send second video to send secondary video.<br />
The button Send second video is changed to Stop second video. Click the button Stop<br />
second video to stop sending secondary video.<br />
Lock conference<br />
This version do not supply the function.<br />
Configure serial port<br />
In the common control page, click the button <strong>PC</strong>Com to open the page as shown in the<br />
figure below.<br />
Figure 14-16 Serial Port Configuration<br />
As shown in the figure above, the meanings of the items are described in the table below.<br />
Table 14-2 Serial Port Configuration<br />
NO. Item Description<br />
1 Camera control<br />
parameters<br />
Camera control Select whether to enable LSD, namely, the camera of<br />
the ZXV10 <strong>T700</strong> can be remotely controlled by other<br />
terminals (often the chairman terminal) with LSD function.<br />
Provide Enable remote control and Disable remote<br />
control for selection.<br />
2 Direction Provide General and Reverse for selection.<br />
3<br />
Speed<br />
Provide Auto, Slow and Fast for selection<br />
14-11<br />
SJ-20100910163147-003|2010-11-23(R1.1)<br />
ZTE Proprietary and Confidential
ZXV10 <strong>T700</strong> <strong>User</strong> <strong>Guide</strong><br />
NO. Item Description<br />
4 Camera sertial Video interface<br />
port config and control<br />
interface<br />
The serial port is connected with the camera controlling<br />
cable to implement the camera control.<br />
For instance, the video input cable of camera is<br />
connected to the video input interface 1 of the terminal,<br />
and the control cable is connected to the serial port 1,<br />
then users need to set the control interface as COM1<br />
for Camera 1 Video In 1<br />
5<br />
Type<br />
Provide SONY,Cradle V1.x, Cradle V2.x and none for<br />
selection.<br />
For SONY camera, set as SONY.<br />
Panasonic camera is connected with the ZXV10 <strong>T700</strong><br />
through the cradle head. Select Cradle V1.x or Cradle<br />
V2.x according to the actual PTZ configuration.<br />
14.3.3.1 Configuring a Serial Port<br />
In the common control page, click the Serial port config button to enter the corresponding<br />
interface, as shown in the figure below.<br />
Figure 14-17 Setting <strong>PC</strong> Expansion Serial Port<br />
Select <strong>PC</strong> serial ports.<br />
There are two control serial ports on the back of ZXV10 <strong>T700</strong>, so physically it can connect<br />
control cables of two cameras. By using <strong>PC</strong> expansion ports, six control ports can be<br />
got, including two physical control ports and four expansion control ports, thus facilitating<br />
the control of multiple cameras. Connect a camera to a serial port of the <strong>PC</strong> with the<br />
control cable. To connect multiple cameras, expand the serial ports of the <strong>PC</strong> first, and<br />
then connect cameras.<br />
For example, in the above figure, associate <strong>PC</strong>ExpCom1 with <strong>PC</strong>COM2. Associate the<br />
remaining expansion ports with other <strong>PC</strong> expansion ports. Then save the settings.<br />
14-12<br />
SJ-20100910163147-003|2010-11-23(R1.1)<br />
ZTE Proprietary and Confidential
Chapter 14 Control in <strong>PC</strong> Console<br />
14.3.3.2 Configuring a Shortcut Number<br />
Context<br />
A shortcut number enables the chairman to use the one key function.<br />
Steps<br />
1. In the main page of the <strong>PC</strong> console, click the Config shortcut number button to enter<br />
the corresponding configuration interface, as shown in the figure below.<br />
Figure 14-18 Configuring a Shortcut Number<br />
2. Right-click a blank area in the above interface, and then select Add from the shortcut<br />
menu. The serial number 1 is automatically generated, as shown in the figure below.<br />
14-13<br />
SJ-20100910163147-003|2010-11-23(R1.1)<br />
ZTE Proprietary and Confidential
ZXV10 <strong>T700</strong> <strong>User</strong> <strong>Guide</strong><br />
Figure 14-19 Generating a Serial Number<br />
3. Double-click the Terminal name column behind 1 to edit this column. Enter a terminal<br />
name, for example, Shanghai130.<br />
4. Double-click the Shortcut number column behind 1 to edit this column. Set a shortcut<br />
number for this terminal, for example, 3.<br />
5. To set other shortcut numbers, repeat steps 2 to 4.<br />
6. After all the shortcut numbers are set, click Save.<br />
7. To delete a shortcut number, move the cursor to this number. Right-click it, and then<br />
select Delete from the shortcut menu. To modify a shortcut number, move the cursor<br />
to this number, and then double-click it to modify it.<br />
– End of Steps –<br />
Example<br />
The figure below shows a finished shortcut number.<br />
14-14<br />
SJ-20100910163147-003|2010-11-23(R1.1)<br />
ZTE Proprietary and Confidential
Chapter 14 Control in <strong>PC</strong> Console<br />
Figure 14-20 Example<br />
14.3.4 Status Icon<br />
The table below describes the status icons of the <strong>PC</strong> console.<br />
Table 14-3 Description of Status Icons in <strong>PC</strong> Console<br />
N-<br />
o.<br />
1<br />
2<br />
Icon<br />
Description<br />
Alarm status icon<br />
When there is an alarm, click this icon to pop up the alarm information<br />
dialog box.<br />
Status icon of WAN network<br />
indicates the WAN network connection is normal;<br />
indicates the WAN network connection is abnormal.<br />
GK status icon<br />
3<br />
indicates the GK registration is normal;<br />
the GK registration is abnormal.<br />
indicates that<br />
14-15<br />
SJ-20100910163147-003|2010-11-23(R1.1)<br />
ZTE Proprietary and Confidential
ZXV10 <strong>T700</strong> <strong>User</strong> <strong>Guide</strong><br />
N-<br />
o.<br />
Icon<br />
Description<br />
Speaker status icon<br />
4<br />
indicates that the local audio output is open;<br />
that the local audio output is closed.<br />
Microphone status icon<br />
indicates<br />
5<br />
indicates that the local audio input is open;<br />
the local audio input is closed.<br />
Secondary video status icon<br />
indicates that<br />
6<br />
indicates that the secondary video is disabled;<br />
indicates<br />
that the secondary video is being sent now;<br />
secondary video is being received now.<br />
indicates that the<br />
Encryption status icon<br />
7<br />
indicates that the H.235 encryption method is adopted in the<br />
communication;<br />
indicates that no encryption method is adopted.<br />
Chairman status icon<br />
8<br />
indicates that the terminal is the chairman terminal;<br />
indicates that the terminal is a non-chairman terminal.<br />
9<br />
Embedded multi-terminals status icon<br />
indicates the terminal has embedded MCU;<br />
that the terminal has no embedded MCU.<br />
indicates<br />
Apply for speech icon, and it is only valid at the chairman terminal.<br />
10<br />
indicates that there is a terminal applying for speech;<br />
indicates that there is no terminal applying for speech.<br />
Streaming media status icon<br />
11<br />
indicates that the terminal is sending multi-cast streaming<br />
content;<br />
indicates that the streaming media function is disabled.<br />
14-16<br />
SJ-20100910163147-003|2010-11-23(R1.1)<br />
ZTE Proprietary and Confidential
Chapter 14 Control in <strong>PC</strong> Console<br />
N-<br />
o.<br />
12<br />
Icon<br />
Description<br />
Conference lock status icon. The conference lock function is only valid<br />
when calling multiple terminals.<br />
The bright icon indicates that the terminal is locked, and the other<br />
terminal cannot call this terminal. The grey icon indicates that the<br />
conference lock function is disabled.<br />
14.4 Conference Control in <strong>PC</strong> Console<br />
14.4.1 Display Settings<br />
In the conference control page, there are three display modes for selection. The default<br />
page corresponding to the button<br />
is shown in the figure below.<br />
Figure 14-21 Conference Control Interface 2<br />
As shown in the above figure, only the terminal list is displayed.<br />
Click the button<br />
to open the page, as shown in the figure below.<br />
14-17<br />
SJ-20100910163147-003|2010-11-23(R1.1)<br />
ZTE Proprietary and Confidential
ZXV10 <strong>T700</strong> <strong>User</strong> <strong>Guide</strong><br />
Figure 14-22 Conference Control Interface 1<br />
The table below describes the meanings of the items.<br />
Table 14-4 Display Description 1<br />
Icon or display<br />
Description<br />
Used to indicate that the terminal is in a conference.<br />
Used to indicate that the terminal is disconnected from the conference.<br />
Used to indicate that the terminal is the chairman of a conference.<br />
Used to indicate the status of speaker.<br />
Used to indicate the status of microphone.<br />
Broadcast source and remote<br />
site<br />
The top of conference control page displays the current broadcast<br />
source and situation of remote end.<br />
Click the button<br />
to open the page, as shown in the figure below.<br />
14-18<br />
SJ-20100910163147-003|2010-11-23(R1.1)<br />
ZTE Proprietary and Confidential
Chapter 14 Control in <strong>PC</strong> Console<br />
Figure 14-23 Conference Control Interface 3<br />
The table below describes the meanings of the items.<br />
Table 14-5 Display Description 2<br />
Icon<br />
Description<br />
Used to indicate that the terminal is in a conference.<br />
Used to indicate that the terminal is disconnected from the conference.<br />
Used to indicate that the terminal is the chairman of a conference.<br />
Used to indicate the status of speaker.<br />
Used to indicate the status of microphone.<br />
14.4.2 Group Management<br />
In a conference, the chairman end or non-chairman end can edit its local terminal list by<br />
group. By doing so, it is convenient for identification and management.<br />
Click the<br />
the figure below.<br />
button to enter the group management interface, as shown in<br />
14-19<br />
SJ-20100910163147-003|2010-11-23(R1.1)<br />
ZTE Proprietary and Confidential
ZXV10 <strong>T700</strong> <strong>User</strong> <strong>Guide</strong><br />
Figure 14-24 Group Management Interface<br />
Adding a group<br />
In the group management page,<br />
input a group name in the text box and click<br />
the<br />
below.<br />
button, then the group is added in the Group tree, as shown in the figure<br />
Figure 14-25 Adding a Group<br />
Note<br />
The newly added name cannot be the same with the existing group name.<br />
Input the terminal name in the terminal text box, and click the button<br />
the newly added terminal can be seen in the terminal group list.<br />
. Then<br />
14-20<br />
SJ-20100910163147-003|2010-11-23(R1.1)<br />
ZTE Proprietary and Confidential
Chapter 14 Control in <strong>PC</strong> Console<br />
Adding a sub-group<br />
In the group management page, input a sub-group name in the text box. Select a group<br />
in the group tree and click the button<br />
Group tree, as shown in the figure below.<br />
. Then the sub-group is added in the<br />
Figure 14-26 Adding a Sub-group<br />
Input the terminal name in the terminal text box, and click the button<br />
members in the sub-group.<br />
to add<br />
Deleting a group<br />
In the group management page, select a certain group in the Group tree and click the<br />
button<br />
to delete the group. The corresponding terminal list will be deleted<br />
simultaneously when a group is deleted.<br />
Modifying a group<br />
In the group management page, select a certain group in the Group tree and click the<br />
button<br />
. Then the selected group name can be modified.<br />
14-21<br />
SJ-20100910163147-003|2010-11-23(R1.1)<br />
ZTE Proprietary and Confidential
ZXV10 <strong>T700</strong> <strong>User</strong> <strong>Guide</strong><br />
Note<br />
The modified name cannot be the same with the existing group name.<br />
Arranging group sequence<br />
In the group management page, click the button , , , or or drag the group in<br />
the Group tree to arrange the group sequence.<br />
The button or is used to move the selected group up or down.<br />
The button or is used to move the selected group to the front or back.<br />
Adding a terminal<br />
In the group management page, input the terminal name in the text box and click the button<br />
, then the terminal is added in the terminal group list.<br />
Note<br />
The newly added terminal name cannot be the same with the existing one.<br />
Deleting a terminal<br />
In the group management page, select a certain terminal in the terminal group list and click<br />
the button<br />
to delete the terminal.<br />
Arranging terminal sequence<br />
In the group management page, click the button , , or or drag the terminals<br />
in the Terminal group list to arrange the terminal sequence.<br />
The button or is used to move the selected terminal up or down.<br />
The button or is used to move the selected terminal to the front or back.<br />
Setting a hot key<br />
Setting a hot key for a terminal is convenient for quickly finding this terminal. In the group<br />
management page, click the button<br />
as shown in the figure below.<br />
, then the hot key setting page appears,<br />
14-22<br />
SJ-20100910163147-003|2010-11-23(R1.1)<br />
ZTE Proprietary and Confidential
Chapter 14 Control in <strong>PC</strong> Console<br />
Figure 14-27 Setting a hot key<br />
Select a terminal in the page, input the hot key name.<br />
For example, select ZTE<br />
V10T600 and then enter a capitalized letter B, and then click the buttons<br />
and<br />
to finish the setting. In the hot key page, the added key is displayed.<br />
Note<br />
• The hot key can be a number or a letter, but it cannot consist of two or more than two<br />
letters, numbers, or the combination of number and letter.<br />
• The hot key is available only in the mode, instead of and modes.<br />
After the hot key is successfully set, the user can press the hot key in the keyboard, then<br />
the cursor can quickly move to the terminal in the terminal list of conference control main<br />
page.<br />
Setting group color<br />
In a conference with multiple terminals, the user can set group color to distinguish terminals<br />
of different groups in the conference.<br />
14-23<br />
SJ-20100910163147-003|2010-11-23(R1.1)<br />
ZTE Proprietary and Confidential
ZXV10 <strong>T700</strong> <strong>User</strong> <strong>Guide</strong><br />
Select a group and click the button<br />
as shown in the figure below.<br />
, and then the color selection box appears,<br />
Figure 14-28 Setting Group Color<br />
After that, click the button<br />
to save the setting. Then in the conference control<br />
page, the terminals in a group have the same color, which is different from other groups.<br />
14.4.3 Non-chairman Conference Control<br />
During a conference, if there is no chairman, a non-chairman terminal can operate<br />
functions including Request Chair, Request Floor , Floor to site and Group, as shown<br />
in Figure 14-29.<br />
14-24<br />
SJ-20100910163147-003|2010-11-23(R1.1)<br />
ZTE Proprietary and Confidential
Chapter 14 Control in <strong>PC</strong> Console<br />
Figure 14-29 Conference Control Page at Non-chairman End (no chairman in<br />
conference)<br />
During a conference, if there is a chairman, a non-chairman terminal can operate functions<br />
including Request Chair, Request Floor and Group, as shown in Figure 14-30.<br />
Figure 14-30 Conference Control Page at Non-chairman End (with chairman in<br />
conference)<br />
Functions of a non-chairman terminal (see Figure 14-29 and Figure 14-30) are described<br />
in Table 14-6.<br />
Table 14-6 Conference Control Functions of Non-chairman Terminal<br />
NO. Functions Used to<br />
1 Request Chair Request to be the chairman of the conference.<br />
14-25<br />
SJ-20100910163147-003|2010-11-23(R1.1)<br />
ZTE Proprietary and Confidential
ZXV10 <strong>T700</strong> <strong>User</strong> <strong>Guide</strong><br />
NO. Functions Used to<br />
2 Floor to site The terminal broadcasts its video and audio to other<br />
terminals compulsively.<br />
In a multi-point conference, the terminal needs to request<br />
to be a chairman first and then broadcasts itself. In<br />
a conference with embedded MCU, only the terminal<br />
acting as an MCU can broadcast itself.<br />
3 Request floor The non-chairman terminal requests to the chairman for<br />
speaking.<br />
After requesting, the chairman terminal prompts that one<br />
terminal will speak.<br />
4 Group Management Group the terminals in a conference.<br />
5 Quick shortcut number<br />
config<br />
Not available<br />
Request Chair<br />
If there is a chairman in a conference, click the button Request Chair, then the dialog box<br />
as shown in Figure 14-31 pops up, indicating the name of chairman terminal. Only one<br />
chairman is allowed in a conference. If the chairman token is obtained by one terminal,<br />
then the other terminals cannot apply for it.<br />
Figure 14-31 Has a Chairman in Conference<br />
If there is no chairman, click the button Request Chair to get the chairman token. And now<br />
the chairman icon in the status bar becomes brighter. After successfully requesting<br />
chairman, the available operation functions of a chairman terminal will be displayed on the<br />
conference control page, as shown in Figure 14-32.<br />
14-26<br />
SJ-20100910163147-003|2010-11-23(R1.1)<br />
ZTE Proprietary and Confidential
Chapter 14 Control in <strong>PC</strong> Console<br />
Figure 14-32 Functions for Chairman Terminal<br />
Floor to site<br />
Click the button Floor to site to broadcast the video and audio of local end to all terminals<br />
and become the broadcast source.<br />
Request floor<br />
Click the button Request Floor to request for speaking, and now the status icon<br />
the chairman terminal flashes continuously, indicating the terminal wants to speak.<br />
at<br />
14.4.4 Chairman Conference Control<br />
In a conference, the conference control functions of a chairman terminal are shown in<br />
Figure 14-33.<br />
14-27<br />
SJ-20100910163147-003|2010-11-23(R1.1)<br />
ZTE Proprietary and Confidential
ZXV10 <strong>T700</strong> <strong>User</strong> <strong>Guide</strong><br />
Figure 14-33 Conference Control Page (at chairman end)<br />
The control functions of a chairman terminal (see Figure 14-33) are shown in Table 14-7.<br />
Table 14-7 Conference Control Functions of Chairman Terminal<br />
NO. Functions Used to<br />
1 Basic conference<br />
control functions<br />
Release chair Release the chair token and become a non-chair<br />
terminal.<br />
2<br />
(the functions<br />
refer to those<br />
a chairman<br />
terminal have in<br />
a conference with<br />
an MCU or an<br />
Open voice<br />
control<br />
When the voice control is enabled, the conference<br />
is in voice control mode.<br />
In this mode, the broadcast source is switched to the<br />
speaking terminal in turn. When several terminals<br />
speak at the same time, the terminal with the highest<br />
volume will be selected as the broadcast source.<br />
3<br />
embedded MCU )<br />
Browsing View the video of the specified terminal on the<br />
chairman’s screen.<br />
When the browsed terminal and time are specified,<br />
the video of the selected terminal will be displayed on<br />
the chairman's screen automatically.<br />
4 Self broadcast Broadcast the video of chairman terminal and<br />
become the broadcast source in a conference.<br />
5 Quick broadcast The chairman terminal broadcasts the video of a<br />
terminal and make it become the broadcast source in<br />
a conference.<br />
And now the status of microphones and speakers of<br />
all terminals in the conference are not changed.<br />
6 Quick select The chairman terminal selects a terminal and views<br />
the video of this specified terminal.<br />
The chairman should select the terminal manually.<br />
14-28<br />
SJ-20100910163147-003|2010-11-23(R1.1)<br />
ZTE Proprietary and Confidential
Chapter 14 Control in <strong>PC</strong> Console<br />
NO. Functions Used to<br />
7 Quick speak The chairman terminal broadcasts the video and<br />
audio of the specified terminal, and makes it become<br />
the broadcast source in a conference.<br />
Only the local terminal and the broadcasted terminal<br />
can speak. The microphones of other terminals<br />
are closed, and the speakers are open. The other<br />
terminals can only view the video and hear the audio<br />
of the local terminal and the broadcasted terminal.<br />
8 Quick specify<br />
speech<br />
9 Quick shortcut<br />
number config<br />
The microphones of local terminal and specified<br />
terminal are open.<br />
When one terminal is specified to speak, the<br />
chairman terminal becomes the broadcast source<br />
automatically. At the same time, the video of specified<br />
terminal is displayed on the screen of the main TV at<br />
the chairman end.<br />
Not available<br />
10 Extended<br />
chairman<br />
Invite site During a conference, the chairman terminal initiates a<br />
call to invite a terminal into the conference.<br />
11<br />
functions (the<br />
Delay<br />
Prolong the conference time<br />
functions refer<br />
conference<br />
to those that<br />
12<br />
cannot be<br />
Allow all to speak Allow all terminals in the conference to speak.<br />
13 implemented at Forbid all to Forbid all terminals in the conference to speak.<br />
the chairman end speak<br />
14<br />
of a conference<br />
Allow all to listen Allow all terminals in the conference to listen.<br />
with embedded<br />
15<br />
MCU)<br />
Forbid all to listen Forbid all terminals in the conference to listen.<br />
16 Group<br />
Management<br />
Manage all terminals in the conference by group.<br />
17<br />
End meeting<br />
End a conference<br />
Release chair<br />
In the chairman conference control page, click the button Release chair to release the<br />
chair token and become a non-chair terminal in the conference.<br />
Open voice control<br />
In the conference control page, click the button Open Voice Control to enter the voice<br />
control mode, as shown in Figure 14-34.<br />
14-29<br />
SJ-20100910163147-003|2010-11-23(R1.1)<br />
ZTE Proprietary and Confidential
ZXV10 <strong>T700</strong> <strong>User</strong> <strong>Guide</strong><br />
Figure 14-34 Open Voice Control<br />
After entering the voice control mode, the chairman terminal cannot specify speak, speak<br />
or view other terminals. Now the button Open Voice Control is changed to Close Voice<br />
Control. Click the button Close Voice Control to stop voice control.<br />
Browsing<br />
In the chairman conference control page, click the button Browsing to open the chairman<br />
browsing page, as shown in Figure 14-35.<br />
Figure 14-35 Chairman Browsing<br />
As shown in Figure 14-35, select the Browse and all the terminals excepting chairman<br />
terminal are listed in the left list. The chairman selects the terminal(s) to be browsed. After<br />
14-30<br />
SJ-20100910163147-003|2010-11-23(R1.1)<br />
ZTE Proprietary and Confidential
Chapter 14 Control in <strong>PC</strong> Console<br />
selecting, set the Skip time and click the button OK. Then the video of selected terminals<br />
will be displayed on the TV screen of chairman terminal in turn, and other terminals view<br />
the video of the chairman terminal. And now the button Browsing is changed to Stop<br />
Browsing. During browsing, click the button Stop Browsing to end the browsing.<br />
As shown in Figure 14-35, select Broadcast and all the terminals including chairman<br />
terminal are listed in the left list. The chairman selects the terminal(s) to be broadcasted .<br />
After selecting, set the Skip time and click the button OK. Then the broadcast source will<br />
be switched to the selected terminals in turn. And now the button Broadcast is changed<br />
to Stop chair broadcast. During broadcasting, click the button Stop chair broadcast to<br />
end the broadcasting.<br />
As shown in Figure 14-35, the chairman terminal can select one or several terminals to<br />
view or broadcast and set the skip time. Click the button Save to save current information.<br />
Specify a name for the current information, and click the button Save. The list and skip<br />
time of selected terminals are saved with .ini format in your computer. For next time, the<br />
chairman terminal can directly load this file to view or broadcast these terminals. It is not<br />
necessary to set it again.<br />
Self broadcast<br />
In the chairman conference control page, click the button Self broadcast to broadcast<br />
video and audio of itself. The video of chairman terminal can be viewed by all terminals<br />
(excepting chairman terminal itself).<br />
Note<br />
The Self broadcast is compulsory to broadcast itself. Only the chairman terminal can<br />
perform this operation.<br />
Quick broadcast<br />
In the chairman conference control page, click the button Quick Broadcast to select a<br />
terminal. The video of selected terminal is broadcasted to all terminals by the chairman<br />
terminal in a conference. The broadcasted terminal can view the video of the previous<br />
broadcast, the chairman terminal or the local terminal. But which one to be viewed is set<br />
by the conference administrator in the conference template. And now the button Quick<br />
Broadcast is changed to Stop quick broadcast. Then select a terminal to speak. After<br />
speaking is finished, click the button Stop quick broadcast to end the quick broadcast.<br />
Quick select<br />
In the chairman conference control page, click the button Quick Select and select the<br />
terminal to be viewed. The video of the selected terminal will be displayed on the screen<br />
of the chairman terminal. And now the chairman terminal becomes the broadcast source<br />
automatically.<br />
14-31<br />
SJ-20100910163147-003|2010-11-23(R1.1)<br />
ZTE Proprietary and Confidential
ZXV10 <strong>T700</strong> <strong>User</strong> <strong>Guide</strong><br />
Quick speak<br />
In the chairman conference control page, click the button Quick Speak and select a<br />
terminal at the chairman end. Then the video and audio of the selected terminal will be<br />
broadcasted to all terminals. Only the chairman terminal and the selected terminal can<br />
speak. The microphones of other terminals are closed, and the speakers are open. The<br />
other terminals can only view the video and listen to the audio of the chairman terminal<br />
and the selected terminal. And now the button Quick Speak is changed to Stop quick<br />
speak. After speaking, click the button Stop quick speak to end the speaking.<br />
Quick specify speak<br />
In the chairman conference control page, click the button Quick Specify Speak. And now<br />
the button Quick Specify Speak is changed to Stop ck–specify–speak, then the selected<br />
terminal begins to speak. The broadcast source is switched to the chairman terminal. The<br />
chairman terminal can view the specified terminal. And only the chairman and the specified<br />
terminal can speak. After speaking is finished, click the button Stop ck–specify–speak<br />
to end the speaking.<br />
Note<br />
The difference between Quick specify speak and Quick speak is: after operating Quick<br />
speak, the speaking terminal becomes the broadcast source; after operating Quick<br />
specify speak, the chairman terminal becomes broadcast source.<br />
Note<br />
The difference of buttons Quick Broadcast and Quick Speak is: clicking the button Quick<br />
Broadcast to broadcast the video of the selected terminal, but not the audio; clicking the<br />
button Quick Speak to broadcast the video of the selected terminal, and operate audio<br />
mix.<br />
Invite site<br />
In the chairman conference control page, click the button Invite Site to open the dialog<br />
box, as shown in Figure 14-36.<br />
14-32<br />
SJ-20100910163147-003|2010-11-23(R1.1)<br />
ZTE Proprietary and Confidential
Chapter 14 Control in <strong>PC</strong> Console<br />
Figure 14-36 Add Terminal<br />
In the page as shown in Figure 14-36, input the name of a terminal and click the button OK<br />
to invite the terminal to be the participant in the conference. After successful operation,<br />
the invited terminal will be shown in the terminal list.<br />
Prolong conference<br />
When the status bar shows that there is no enough time left for the conference, the<br />
chairman terminal can request to prolong the conference. Input the prolong time and<br />
make sure that the total time should not exceed 72 hours. The conference resource is<br />
determined by the ZXMS80 Multimedia Service Management System. In the chairman<br />
conference control page, click the button Delay Conference to open the dialog box, as<br />
shown in Figure 14-37.<br />
Figure 14-37 Prolong Conference Time<br />
Input the prolong time and click the button Confirm to prolong the conference time.<br />
14-33<br />
SJ-20100910163147-003|2010-11-23(R1.1)<br />
ZTE Proprietary and Confidential
ZXV10 <strong>T700</strong> <strong>User</strong> <strong>Guide</strong><br />
Allow all to speak and forbid all to speak<br />
Click the button Forbid all to speak or the button Allow all to speak to forbid or allow all<br />
terminals to speak.<br />
In the chairman conference control page, click the button Forbid all to speak to forbid all<br />
terminals to speak. And now the microphones of all terminals including chairman terminal<br />
are closed. Click the button Allow all to speak to cancel the mute operation and allow all<br />
terminals to speak.<br />
Forbid all to listen and allow all to listen<br />
Click the button Forbid all to listen or the button Allow all to listen to forbid or allow all<br />
terminals to listen.<br />
In the chairman conference control page, click the button Forbid all to listen to forbid all<br />
terminals to listen. And now the speakers of all terminals including chairman terminal are<br />
closed. Click the button Allow all to listen to open the speakers and allow all terminals<br />
to listen.<br />
End a meeting<br />
During a conference, the chairman terminal can end the conference automatically.<br />
In the chairman conference control page, click the button End Meeting to end the<br />
conference.<br />
Group Management<br />
During a conference, any terminal can edit the list of participants shown at local end. For<br />
detailed operation, please refer to the exactly section.<br />
Other conference control functions at chairman end<br />
In the chairman conference control page, right-click one terminal in the conference,<br />
then the operation menu pops up. The operations include Close Mic, Close Speaker,<br />
Disconnect Terminal and Kick Terminal, as shown in Figure 14-38.<br />
Figure 14-38 Operations at Chairman End for Connected Terminal<br />
In the chairman conference control page, right-click one terminal in the conference, then<br />
the operation menu pops up. The operations include Call Terminal and Kick Terminal,<br />
as shown in Figure 14-39.<br />
14-34<br />
SJ-20100910163147-003|2010-11-23(R1.1)<br />
ZTE Proprietary and Confidential
Chapter 14 Control in <strong>PC</strong> Console<br />
Figure 14-39 Operations at Chairman End for Disconnected Terminal<br />
As shown in Figure 14-38, the Close Mic and Close Speaker buttons are used to control<br />
the microphone and speaker. When the Close Mic is selected, the microphone of the<br />
terminal is closed. The Close Mic is changed to Open Mic. Select Open Mic to open the<br />
microphone.<br />
In the conference control page, select a terminal and click Disconnect Terminal to<br />
disconnect a terminal. Then the terminal becomes gray, or , indicating<br />
that the terminal is successfully disconnected. When you call this terminal again, it will<br />
participate in the conference once again. The terminal name will be displayed in the<br />
terminal list.<br />
In the chairman conference control page, select one terminal and click Kick Terminal,<br />
then the selected terminal will exit the conference compulsively. After that, the terminal is<br />
not the participant in the conference, and its name will not be displayed in the Terminal<br />
list. The chairman can click the button Invite Site to add the compulsively exiting terminal<br />
into the conference.<br />
Note<br />
The Call Terminal function is contrary to that of Disconnect Terminal. The Kick Terminal<br />
function is contrary to that of Invite Site.<br />
14-35<br />
SJ-20100910163147-003|2010-11-23(R1.1)<br />
ZTE Proprietary and Confidential
ZXV10 <strong>T700</strong> <strong>User</strong> <strong>Guide</strong><br />
This page intentionally left blank.<br />
14-36<br />
SJ-20100910163147-003|2010-11-23(R1.1)<br />
ZTE Proprietary and Confidential
Appendix A<br />
Technical Specification for<br />
Interface<br />
Interface<br />
Interface Description and Quantity<br />
Compliant Specification and<br />
Protocol<br />
<strong>Network</strong> Interface IP: 10/100Base-T, 2 x RJ-45 IEEE 802.3<br />
Video Input Interface<br />
Video Output Interface<br />
HDMI x 1<br />
VGA/YPrPb x 1<br />
CVBS x 1<br />
HDMI x 1<br />
VGA/YPrPb x 1<br />
CVBS x 1<br />
HDMI1.3, DVI1.0<br />
VESA<br />
PAL/NTSC<br />
HDMI1.1, DVI1.0<br />
VESA<br />
PAL/NTSC<br />
1 x mic -<br />
Audio Input Interface<br />
1 x <strong>PC</strong> line interface -<br />
1 x LAN IEEE 802.3<br />
Audio Output Interface<br />
1 x <strong>PC</strong> line interface -<br />
HDMI OUT -<br />
USB Interface 2 x USB USB 2.0<br />
A-1<br />
SJ-20100910163147-003|2010-11-23(R1.1)<br />
ZTE Proprietary and Confidential
ZXV10 <strong>T700</strong> <strong>User</strong> <strong>Guide</strong><br />
This page intentionally left blank.<br />
A-2<br />
SJ-20100910163147-003|2010-11-23(R1.1)<br />
ZTE Proprietary and Confidential
Appendix B<br />
Technical Specifications<br />
Item Subitem Detailed Specifications<br />
Multimedia Framework<br />
Protocol<br />
ITU-T H.323/IETF SIP<br />
Video<br />
Encoding/Decoding<br />
Pro-<br />
H.264/H.263<br />
tocol<br />
Audio Encoding/Decoding<br />
Protocol<br />
G.711A, G.711U, G.722, G.728, G.729, G.723.1, AAC-LD,<br />
ZTE_BA, G.722.1, G.722.1C<br />
Dual Video Standard<br />
ITU-T H.239<br />
Other Communication<br />
Protocols<br />
H.224, H.225, H.241, H.243, H.245, H.281, H.283<br />
Compliant<br />
Standards<br />
<strong>Network</strong> Transmission<br />
Protocol<br />
Remote Camera<br />
Control<br />
TCP/IP, DHCP, SNMP, Telnet, HTTP, PPPoE<br />
H.281, H.224<br />
Call Bandwidth<br />
64 kbit/s to 8 Mbit/s<br />
Active Picture Res-<br />
1080P 25/30 fps, 1080i 50/60fps, 720P 50/60fps, 720P<br />
olution<br />
30fps, 4CIF 25fps, CIF 25fps<br />
640 x 480 (VGA)<br />
800 x 600 (SVGA)<br />
1024 x 768 (XGA)<br />
Data Content Res-<br />
1280 x 1024 (SXGA)<br />
olution<br />
1280 x 800 (WXGA)<br />
1366 x 768 (WXGA)<br />
1440 x 900 (WXGA+)<br />
720p<br />
B-1<br />
SJ-20100910163147-003|2010-11-23(R1.1)<br />
ZTE Proprietary and Confidential
ZXV10 <strong>T700</strong> <strong>User</strong> <strong>Guide</strong><br />
Item Subitem Detailed Specifications<br />
Media<br />
Protocol<br />
Encryption<br />
AES<br />
Encryption<br />
Standard<br />
H.235<br />
Electric Characteristic<br />
Working Voltage<br />
Power Consumption<br />
Working Status<br />
100 VAC to 240 VAC, 50 Hz to 60 Hz<br />
Maximum consumption: < 50 W<br />
Temperature 0 ℃ to 40 ℃<br />
Relative Humidity 10% to 90%<br />
Noise<br />
< 46 dBA SPL<br />
Environment<br />
Requirements<br />
Minimum Illumination<br />
Recommended Illumination<br />
15 lux<br />
> 300 lux<br />
Non-Working Status<br />
Temperature -40 ℃ to +70 ℃<br />
Humidity 10% to 90%<br />
Physical<br />
Parameters<br />
Dimensions<br />
Weight<br />
Package size: 580 mm x 235 mm x 235 mm<br />
Terminal size: 422 mm x 225 mm x 60.5 mm<br />
3 kg<br />
Power Interface 12 V/5 A -<br />
Infrared Remote<br />
Control Interface<br />
Video Input (HD-<br />
SDI/DVI)<br />
Infrared Remote<br />
Control Receiving<br />
Primary Camera<br />
Image Sensor<br />
Resolution<br />
Lens<br />
White Balance<br />
Horizontal Picture<br />
Angle<br />
NEC Code Standard<br />
Embedded<br />
5000,000 pixels, 1/2.5 inch CMOS<br />
1920 x 1080 (1080P), 1280 x 720 (720P)<br />
10 times optical zoom, f = 4.5 - 45.0 mm; maximum aperture:<br />
F1.8 to F2.2; auto focus<br />
Auto/Sunlight/Cloudy/Dark/Fluorescent lighting<br />
-100° to +100°<br />
Minimum<br />
Illumination<br />
SNR<br />
15 lux (50IRE, F1.8)<br />
50 dB<br />
B-2<br />
SJ-20100910163147-003|2010-11-23(R1.1)<br />
ZTE Proprietary and Confidential
Appendix B Technical Specifications<br />
Item Subitem Detailed Specifications<br />
Authentication<br />
CCC, CE, FCC, UL, ROHS<br />
B-3<br />
SJ-20100910163147-003|2010-11-23(R1.1)<br />
ZTE Proprietary and Confidential
ZXV10 <strong>T700</strong> <strong>User</strong> <strong>Guide</strong><br />
This page intentionally left blank.<br />
B-4<br />
SJ-20100910163147-003|2010-11-23(R1.1)<br />
ZTE Proprietary and Confidential
Appendix C<br />
Packing, Transportation and<br />
Storage<br />
Table of Contents<br />
C.1 Packing<br />
• Packing .................................................................................................................. C-1<br />
• Transportation ........................................................................................................ C-1<br />
• Storage................................................................................................................... C-1<br />
Each packing box is attached with a packing list for unpacking inspection. The packing<br />
box should be filled with anti-vibration plastic foam and dampproof plastic bag.<br />
Hold both sides of the terminal with both hands when taking the ZXV10 <strong>T700</strong> out of the<br />
packing box. Be careful not to touch and press the camera lens.<br />
C.2 Transportation<br />
C.3 Storage<br />
Pay attention to the following items during the transportation of the ZXV10 <strong>T700</strong>:<br />
• Handle the ZXV10 <strong>T700</strong> with care and protect it from sunshine and rain.<br />
• Transport the terminal and peripherals only after they are properly packed. Cover the<br />
products with canvas during transportation to protect them from moisture and rain.<br />
• In long-distance transportation, do not load the equipment in a ship or truck without any<br />
awning. During transshipment, do not place the equipment in an open-air warehouse.<br />
Do not put the equipment together with flammable, explosive and erosive goods. Take<br />
dampproof measures and protect the terminal and its peripherals from mechanical<br />
impairment.<br />
• Handle the cargo with care. Never topple the cargo or place it upside down.<br />
• Handle with care during unpacking inspection, to avoid damaging the equipment.<br />
• When the package is moved from a place of lower temperature and humidity to a<br />
place of higher temperature and humidity, wait for some time before unpacking, so as<br />
to avoid the damage to the terminal caused by sudden change of temperature and<br />
humidity.<br />
During storage, the ZXV10 <strong>T700</strong> and its peripherals should be placed in the original<br />
package. Keep and store the original protective package.<br />
C-1<br />
SJ-20100910163147-003|2010-11-23(R1.1)<br />
ZTE Proprietary and Confidential
ZXV10 <strong>T700</strong> <strong>User</strong> <strong>Guide</strong><br />
Dampproof, dustproof, shockproof and corrosion-proof facilities should be available<br />
in the warehouse for storing the equipment. Air conditioners and lighting facilities are<br />
recommended.<br />
The storage period should not exceed six months.<br />
C-2<br />
SJ-20100910163147-003|2010-11-23(R1.1)<br />
ZTE Proprietary and Confidential
Appendix D<br />
Remote Control<br />
Table of Contents<br />
• Introduction of Remote Controller ........................................................................... D-1<br />
• Introduction to Remote Control Buttons .................................................................. D-2<br />
• Input Method .......................................................................................................... D-3<br />
D.1 Introduction of Remote Controller<br />
Infrared remote controller (remote controller for short) is the main operation and control<br />
device of ZXV10 <strong>T700</strong>. The appearance of remote controller is shown in Figure D-1.<br />
D-1<br />
SJ-20100910163147-003|2010-11-23(R1.1)<br />
ZTE Proprietary and Confidential
ZXV10 <strong>T700</strong> <strong>User</strong> <strong>Guide</strong><br />
Figure D-1 ZXV10 <strong>T700</strong> Remote Controller<br />
Participants in the conference can operate the ZXV10 <strong>T700</strong> conveniently and easily with<br />
the remote controller. After the video conference unit is switched on, if the installation is<br />
successful, the main menu appears on the TV screen. Then the remote controller can be<br />
used to set ZXV10 <strong>T700</strong>.<br />
D.2 Introduction to Remote Control Buttons<br />
The infrared remote control (remote control for short) is the main operation and controlling<br />
device for the ZXV10 <strong>T700</strong> video conference system. It allows users to control a video<br />
conference system in short distance. The remote control and its buttons are shown in the<br />
figure below.<br />
D-2<br />
SJ-20100910163147-003|2010-11-23(R1.1)<br />
ZTE Proprietary and Confidential
Appendix D Remote Control<br />
Figure D-2 Description of Remote Control Buttons<br />
D.3 Input Method<br />
Switching Input Method<br />
In the text input mode, continuously press the input method switching button to switch<br />
between ABC (letter) .;(symbol), Pin (pinyin), En (English), and Number.<br />
Sequence: ABC(letter)→.;(symbol)→Pin (pinyin)→En (English)→Number<br />
D-3<br />
SJ-20100910163147-003|2010-11-23(R1.1)<br />
ZTE Proprietary and Confidential
ZXV10 <strong>T700</strong> <strong>User</strong> <strong>Guide</strong><br />
Letter Input Method<br />
In the text input mode, press the input method switching button to switch to the ABC (letter)<br />
mode, as shown in the figure below.<br />
Figure D-3 Inputting Letters<br />
In the interface as shown in the above figure, press the letter buttons<br />
to input capital or lower-case letters.<br />
Symbol Input Method<br />
The operation procedure for inputting the symbol is described as follows:<br />
1. In the text input mode, press the input method switching button to switch to the “.<br />
;(symbol)” mode, as shown in the figure below.<br />
Figure D-4 Inputting Symbols<br />
2. In the interface as shown in the above figure, press the down button to turn to the next<br />
page to find the symbol , as shown in the figure below.<br />
Figure D-5 Displaying Symbols<br />
3. In the interface as shown in the above figure, move the cursor to the symbol and press<br />
the OK button to input the symbol .<br />
Number Input Method<br />
In the text input mode, press the button<br />
to input numbers.<br />
Input the separator "." in IP address<br />
In the IP address input mode, press the symbol button to input the separator ".".<br />
Delete<br />
In the text input mode, press the DEL button to delete a character before the current cursor<br />
in the text box.<br />
D-4<br />
SJ-20100910163147-003|2010-11-23(R1.1)<br />
ZTE Proprietary and Confidential
Appendix E<br />
Introduction to<br />
Videoconferencing System<br />
Table of Contents<br />
E.1 Overview<br />
• Overview ................................................................................................................ E-1<br />
• Videoconference Modes ......................................................................................... E-2<br />
• Videoconference Modes ......................................................................................... E-2<br />
Videoconferencing employs both communication technology and network technology to<br />
implement the real-time, bidirectional and interactive remote communication between<br />
separate sites. It allows persons at two sites or more sites to exchange video images,<br />
voice, documents and charts in real time, just like in the same conference room.<br />
Videoconferencing provides a new tool to improve work efficiency and decrease cost for<br />
remote communication.<br />
The basic architecture of a videoconferencing system is shown in the figure below.<br />
Figure E-1 Basic Architecture of a Videoconferencing System<br />
As shown in the figure above, the videoconferencing system consists of three parts:<br />
video conference terminal, communication mediaand Multi-point Control Unit (MCU).<br />
Video conference terminaland MCU are special videoconference devices, while the<br />
communication media can be an existing transmission network.<br />
Video conference terminal<br />
Video conference terminal converts information in the conference room into transferable<br />
codes through video/audio processing and multiplexing/demultiplexing, and then sends<br />
them to an MCU or another video conference terminal through communication media. On<br />
E-1<br />
SJ-20100910163147-003|2010-11-23(R1.1)<br />
ZTE Proprietary and Confidential
ZXV10 <strong>T700</strong> <strong>User</strong> <strong>Guide</strong><br />
the other hand, it outputs conference information of other terminals received from the MCU<br />
and displays it through video/audio equipment connected to it.<br />
The type of video conference terminals in the same videoconferencing system may be<br />
different.<br />
Communication media<br />
Fiber, coaxial cable and satellite can be used as the communication media in<br />
videoconferencing systems. Moreover, the high speed digital subscriber line can be used<br />
for distance extension. Videoconferencing system usually uses integrated services digital<br />
network (ISDN), digital data network (DDN), asynchronous transmission mode network<br />
(ATM), local area network (LAN), Internet or fiber distributed data interface (FDDI) as its<br />
communication media, among which the LAN, ISDN, Internet, FDDI and ATM are mostly<br />
used.<br />
MCU<br />
MCU is used in a multi-point videoconference having multiple conference sites. It serves to<br />
distribute and switch images/voices. As the core of multi-point videoconferencing system<br />
widely used now, the MCU is usually located at a network node.<br />
E.2 Videoconference Modes<br />
In terms of the number of terminals in a conference, the videoconference is divided into<br />
two modes:<br />
• Point-to-point videoconference: two terminals without using MCU<br />
• Multipoint videoconference: three or more terminals controlled by MCU(s)<br />
E.3 Videoconference Modes<br />
E.3.1 Point-to-Point Videoconference<br />
A point-to-point videoconference is a conference between two terminals. No MCU is<br />
needed in a point-to-point videoconference. The figure below shows the system structure<br />
of a point-to-point conference. Either terminal can call the other party. The point-to-point<br />
conference begins once the other party accepts the call request.<br />
Figure E-2 Point-to-Point Videoconference System Structure<br />
E-2<br />
SJ-20100910163147-003|2010-11-23(R1.1)<br />
ZTE Proprietary and Confidential
E.3.2 Multipoint Videoconference<br />
Appendix E Introduction to Videoconferencing System<br />
One or multiple MCUs should be set in the multi-point conference. The multi-point<br />
conference networking architecture is rather complicated and can be divided into two<br />
categories according to MCU quantity: single MCU mode and multi-MCU mode.<br />
Single MCU mode<br />
The single MCU mode can be adopted for a few conference terminals distributed in<br />
adjacent area. When the conference terminals call to participate in the conference, they<br />
must get the confirmation from the MCU, and then the MCU will notify the conference<br />
participants.<br />
Figure E-3 Single MCU <strong>Network</strong>ing<br />
Multi-MCU mode<br />
There are two kinds of networking structure for multi-MCU mode videoconference system:<br />
star networking structure and layered networking structure.<br />
• Star networking structure<br />
The multi-MCU star networking structure is shown in the figure below.<br />
Figure E-4 Multi-MCU Star <strong>Network</strong>ing<br />
It is easy to add a new conference terminal in this star structure. The MCU has the<br />
function similar to a switch. Each MCU is equal in this networking structure. The<br />
E-3<br />
SJ-20100910163147-003|2010-11-23(R1.1)<br />
ZTE Proprietary and Confidential
ZXV10 <strong>T700</strong> <strong>User</strong> <strong>Guide</strong><br />
chair control is recommended as the conference control mode since there are many<br />
conference sites in this networking structure.<br />
• Layered networking structure<br />
The multi-MCU layered networking structure is suitable for the conference with widely<br />
distributed conference sites, using ISDN, B-ISDN, Internet or DDN communication<br />
channel. The networking structure is shown in the figure below.<br />
Figure E-5 Multi-MCU Layered <strong>Network</strong>ing<br />
This layered structure covers a wide area and supports international videoconference.<br />
It is easy to expand and manage. Each MCU is not equal in this networking structure<br />
and has a specific role. The lower-layer MCU is controlled and restricted by the<br />
upper-layer MCU. Most current videoconference systems work in this networking<br />
mode.<br />
E-4<br />
SJ-20100910163147-003|2010-11-23(R1.1)<br />
ZTE Proprietary and Confidential
Appendix F<br />
Routine Maintenance<br />
Table of Contents<br />
• Conference Room Maintenance ............................................................................. F-1<br />
• Terminal Maintenance............................................................................................. F-1<br />
• Test Maintenance ................................................................................................... F-2<br />
F.1 Conference Room Maintenance<br />
Maintenance personnel of the conference room should check the working environment<br />
of the ZXV10 <strong>T700</strong> terminal periodically. It is recommended to conduct the inspection<br />
focusing on the following items:<br />
• Check the temperature in the conference room and make sure it meets the operating<br />
requirement of the terminal. Avoid sudden ascending or descending of temperature.<br />
Prevent the terminal from direct sunshine.<br />
• Check the humidity in the conference room and make sure it meets the operating<br />
requirements of the terminal.<br />
• Take antistatic and dampproof measures when necessary to avoid damage to the<br />
terminal.<br />
• Keep the conference room clean without dust. Make cleaning schedules according to<br />
actual situations of the conference room.<br />
• Check the conference room periodically and make sure there is no rat or other<br />
problems which may damage the terminal.<br />
• Check the power supply of the conference room and make sure it is stable within<br />
the allowable range. And check whether the grounding of the terminal and other<br />
equipment is correct and in good condition.<br />
F.2 Terminal Maintenance<br />
Terminal maintenance personnel should make maintenance form and keep records of<br />
maintenance operations. If any problem is found, handle it in time. The maintenance<br />
form can be made according to the following requirements:<br />
• Clean the terminal periodically, preventing dust accumulation on it.<br />
• Power on the terminal and conduct the test once a week to ensure the video and audio<br />
functions of the terminal are normal.<br />
• Check input and output connectors once a month for any loose connection or contact.<br />
• Check all cables monthly for any damage. Replace it in time once any cable is found<br />
damaged or broken.<br />
F-1<br />
SJ-20100910163147-003|2010-11-23(R1.1)<br />
ZTE Proprietary and Confidential
ZXV10 <strong>T700</strong> <strong>User</strong> <strong>Guide</strong><br />
• Check and confirm all cables are connected correctly and firmly as soon as possible<br />
once the terminal and its peripheral equipment are moved to another place.<br />
F.3 Test Maintenance<br />
Test maintenance refers to conduct an overall system test before using the terminal. It is<br />
needed because the terminal is only used in conferences at times and the connections<br />
or functions may not meet requirements after long time. The test maintenance should be<br />
performed at least two or three hours before starting a conference.<br />
Test maintenance is to test the functions of the terminal and its peripheral equipment after<br />
power-on and measure each index of them, so as to ensure they can work normally and<br />
meet the requirements of the conference to be held.<br />
The requirements for test maintenance are as follows:<br />
• If the terminal will not be used for a long time (over a quarter), it is recommended to<br />
conduct the power-on test once in a week. Moreover, additional loopback test and joint<br />
debugging with MCU network should be performed three days before a conference.<br />
After the test, do not power off the terminal and other equipment immediately. Let<br />
them work continuously over three hours and make sure the image and voice are<br />
clear.<br />
• If the terminal is used frequently, it is recommended to perform loopback test before<br />
the day when the conference will be held, and conduct joint debugging with MCU<br />
network two hours before the conference starts.<br />
The test result should meet the following requirements at least:<br />
• Image and sound effect is good.<br />
• The terminal can establish a conference connection and exit the conference normally.<br />
• The terminal can apply for chair token and ask for speech as a non-chair terminal. It<br />
can implement control functions as a chair terminal.<br />
• In case of no chair in a conference, the terminal can get the LSD token and control<br />
far-end terminal remotely.<br />
• The terminal can control local camera(s).<br />
• The terminal can control the volume and implement the mute and dumb functions<br />
normally.<br />
F-2<br />
SJ-20100910163147-003|2010-11-23(R1.1)<br />
ZTE Proprietary and Confidential
Appendix G<br />
Routine Troubleshooting<br />
Table of Contents<br />
• Troubleshooting Flow .............................................................................................G-1<br />
• Basic Thoughts About Troubleshooting...................................................................G-2<br />
• Common Troubleshooting Methods ........................................................................G-3<br />
G.1 Troubleshooting Flow<br />
The troubleshooting flow is shown in the figure below.<br />
G-1<br />
SJ-20100910163147-003|2010-11-23(R1.1)<br />
ZTE Proprietary and Confidential
ZXV10 <strong>T700</strong> <strong>User</strong> <strong>Guide</strong><br />
Figure G-1 Troubleshooting Flowchart<br />
G.2 Basic Thoughts About Troubleshooting<br />
Context<br />
While handling faults, maintenance personnel must follow the basic train of thought: firstly<br />
observe, then think and finally take action.<br />
Steps<br />
1. Observing<br />
Observe the fault symptoms on the field, including generated alarms, the fault severity<br />
and impact on the terminal etc.<br />
2. Thinking<br />
Think and analyze the fault according to the symptoms and information from users to<br />
find possible causes of the fault.<br />
G-2<br />
SJ-20100910163147-003|2010-11-23(R1.1)<br />
ZTE Proprietary and Confidential
Appendix G Routine Troubleshooting<br />
3. Taking action<br />
According to the above steps, find the fault point and take actions to solve the problem.<br />
– End of Steps –<br />
G.3 Common Troubleshooting Methods<br />
When a fault of the ZXV10 <strong>T700</strong> occurs, use the methods introduced below to solve the<br />
problem.<br />
Observation method<br />
Observe the status of indicators on the front panel of the ZXV10 T502 and alarm<br />
information on corresponding IE Web pages to locate the faulty point.<br />
Unplugging/plugging method<br />
For connection problems, unplug related connectors and plug them again to find whether<br />
there is any loose contact. Be sure to power off the terminal and peripheral equipment<br />
before unplugging/plugging connectors.<br />
Self-test method<br />
Restart the terminal and find whether the fault still exits after self-test.<br />
Test method<br />
Test the terminal with the system diagnosis function available on corresponding Web pages<br />
to find the faulty point and fault type.<br />
Pressing method<br />
Secure cable connectors to try handling faults caused by loose contact.<br />
Combination method<br />
Combine two or more methods introduced above to handle faults.<br />
G-3<br />
SJ-20100910163147-003|2010-11-23(R1.1)<br />
ZTE Proprietary and Confidential
ZXV10 <strong>T700</strong> <strong>User</strong> <strong>Guide</strong><br />
This page intentionally left blank.<br />
G-4<br />
SJ-20100910163147-003|2010-11-23(R1.1)<br />
ZTE Proprietary and Confidential
Figures<br />
Figure 1-1 Front Panel .............................................................................................. 1-3<br />
Figure 1-2 Rear Panel............................................................................................... 1-3<br />
Figure 1-3 ZXMVC8900 and ZXV10 <strong>T700</strong> <strong>Network</strong>ing .............................................. 1-4<br />
Figure 1-4 Multiple MCUs Cascading IP <strong>Network</strong>ing ................................................. 1-5<br />
Figure 2-1 Installation Flow ....................................................................................... 2-1<br />
Figure 3-1 Connecting Typical Devices ..................................................................... 3-1<br />
Figure 3-2 Connection of Peripheral Devices ............................................................ 3-2<br />
Figure 4-1 Main Menu Page...................................................................................... 4-2<br />
Figure 5-1 Main Menu Page...................................................................................... 5-1<br />
Figure 5-2 Main Menu Page...................................................................................... 5-3<br />
Figure 5-3 Management Menu Page......................................................................... 5-3<br />
Figure 5-4 General Menu Page................................................................................. 5-4<br />
Figure 5-5 Display Menu Page.................................................................................. 5-4<br />
Figure 5-6 NAT Setup 1 ............................................................................................ 5-5<br />
Figure 5-7 NAT Setup 2 ............................................................................................ 5-6<br />
Figure 6-1 Display Setup 1........................................................................................ 6-1<br />
Figure 6-2 Display Setup 2........................................................................................ 6-2<br />
Figure 6-3 The Tone Configuration Page................................................................... 6-3<br />
Figure 6-4 Call Option............................................................................................... 6-4<br />
Figure 6-5 Alerting Tip .............................................................................................. 6-5<br />
Figure 7-1 Setting Video Input................................................................................... 7-2<br />
Figure 7-2 Input Configuration Interface 1 ................................................................. 7-3<br />
Figure 7-3 Input Configuration Interface 2 ................................................................. 7-3<br />
Figure 7-4 Setting Video Output................................................................................ 7-5<br />
Figure 7-5 Setting Output Interface ........................................................................... 7-6<br />
Figure 7-6 The Static IP Configuration Page ............................................................. 7-7<br />
Figure 7-7 H.323 Configuration Page........................................................................ 7-8<br />
Figure 7-8 Setting QoS ........................................................................................... 7-10<br />
Figure 7-9 IP Rate Control ...................................................................................... 7-11<br />
Figure 7-10 Configuring FEC 1 ............................................................................... 7-12<br />
Figure 7-11 Configuring FEC 2................................................................................ 7-12<br />
Figure 7-12 NAT Setup 1 ........................................................................................ 7-13<br />
I
ZXV10 <strong>T700</strong> <strong>User</strong> <strong>Guide</strong><br />
Figure 7-13 NAT Setup 2 ........................................................................................ 7-13<br />
Figure 7-14 Configuring Mic/Line Input 1................................................................. 7-14<br />
Figure 7-15 Configuring Mic/Line Input 2................................................................. 7-15<br />
Figure 7-16 Capability Interface 1 ........................................................................... 7-16<br />
Figure 7-17 Capability Interface 2 ........................................................................... 7-16<br />
Figure 7-18 Setting Security Parameters................................................................. 7-18<br />
Figure 7-19 Software Update Page......................................................................... 7-19<br />
Figure 7-20 Save Config Page................................................................................ 7-20<br />
Figure 7-21 Load Config Page ................................................................................ 7-20<br />
Figure 8-1 The Terminal Name Configuration Page................................................... 8-1<br />
Figure 8-2 The Banner Configuration Page............................................................... 8-2<br />
Figure 8-3 The Horizontal Caption Configuration Page ............................................. 8-3<br />
Figure 8-4 The Vertical Caption Configuration Page.................................................. 8-5<br />
Figure 8-5 The Short Message Configuration Page................................................... 8-6<br />
Figure 9-1 System Status ......................................................................................... 9-1<br />
Figure 9-2 Call Statistics ........................................................................................... 9-2<br />
Figure 9-3 Call Summary .......................................................................................... 9-3<br />
Figure 9-4 Version Info 1........................................................................................... 9-3<br />
Figure 9-5 Version Info 2........................................................................................... 9-4<br />
Figure 9-6 Loopback Test ......................................................................................... 9-5<br />
Figure 9-7 Ping Test.................................................................................................. 9-7<br />
Figure 9-8 Ping Test Result-Success ........................................................................ 9-7<br />
Figure 9-9 Ping Test Result-Failure........................................................................... 9-8<br />
Figure 9-10 Audio & Video Test................................................................................. 9-8<br />
Figure 9-11 System Self-diagnosis............................................................................ 9-9<br />
Figure 10-1 ADDRESS BOOK ................................................................................ 10-1<br />
Figure 10-2 Add Contact......................................................................................... 10-2<br />
Figure 10-3 Contact Information Editing.................................................................. 10-3<br />
Figure 11-1 Call History Interface............................................................................ 11-1<br />
Figure 12-1 System Control Menu .......................................................................... 12-1<br />
Figure 12-2 Non-Chairman Conference Control Interface-Without Chairman ........... 12-2<br />
Figure 12-3 Non-Chairman Conference Control Interface-With Chairman ............... 12-2<br />
Figure 12-4 Conference Control Menu (Chair-Terminal) .......................................... 12-4<br />
Figure 12-5 Terminal List ........................................................................................ 12-5<br />
Figure 12-6 Chairman Conference Control Interface ............................................... 12-6<br />
II
Figures<br />
Figure 12-7 Broadcast Sites.................................................................................... 12-9<br />
Figure 12-8 Mute/ Silent Menu.............................................................................. 12-12<br />
Figure 12-9 Speech Control Page......................................................................... 12-12<br />
Figure 12-10 Mute/ Silent Menu ............................................................................ 12-13<br />
Figure 12-11 Listening Control Page ..................................................................... 12-13<br />
Figure 12-12 Conference Control Menu (Close Voice Control) .............................. 12-14<br />
Figure 12-13 Adding a Terminal ............................................................................ 12-15<br />
Figure 12-14 Dropping a Terminal......................................................................... 12-16<br />
Figure 12-15 Hanging up a Terminal ..................................................................... 12-17<br />
Figure 12-16 Prolong Conference ......................................................................... 12-17<br />
Figure 12-17 Ending conference alert ................................................................... 12-18<br />
Figure 13-1 Selecting Language ............................................................................. 13-2<br />
Figure 13-2 Login.................................................................................................... 13-2<br />
Figure 13-3 IE Web Page (System Control) ............................................................ 13-3<br />
Figure 13-4 Video Control ...................................................................................... 13-5<br />
Figure 13-5 Selecting a Main Video Source ............................................................ 13-6<br />
Figure 13-6 Selecting a Secondary Video Source ................................................... 13-7<br />
Figure 13-7 Presetting Dialog Box .......................................................................... 13-8<br />
Figure 13-8 Positions Dialog Box ............................................................................ 13-9<br />
Figure 13-9 PIP Position ....................................................................................... 13-10<br />
Figure 13-10 Two Splitting Screens....................................................................... 13-11<br />
Figure 13-11 Picture-in-Picture.............................................................................. 13-11<br />
Figure 13-12 Address Book .................................................................................. 13-13<br />
Figure 13-13 Add Single ....................................................................................... 13-14<br />
Figure 13-14 Calling In The Address Book............................................................ 13-14<br />
Figure 13-15 Configuring Call History ................................................................... 13-15<br />
Figure 13-16 Call Page ......................................................................................... 13-16<br />
Figure 13-17 Call Hangup..................................................................................... 13-17<br />
Figure 13-18 Call Meeting Page............................................................................ 13-18<br />
Figure 13-19 Local Setting.................................................................................... 13-20<br />
Figure 13-20 Prompt Volume ................................................................................ 13-20<br />
Figure 13-21 Call Option....................................................................................... 13-21<br />
Figure 13-22 Alarm Setting ................................................................................... 13-22<br />
Figure 13-23 Configuring VIDEO IN...................................................................... 13-23<br />
Figure 13-24 Configuring VIDEO OUT .................................................................. 13-24<br />
III
ZXV10 <strong>T700</strong> <strong>User</strong> <strong>Guide</strong><br />
Figure 13-25 Configuring Audio ............................................................................ 13-24<br />
Figure 13-26 <strong>Network</strong> Connection Setting............................................................. 13-25<br />
Figure 13-27 Configuring SNMP ........................................................................... 13-26<br />
Figure 13-28 Configuring H.323 ............................................................................ 13-27<br />
Figure 13-29 Configuring QoS .............................................................................. 13-27<br />
Figure 13-30 NAT Settings.................................................................................... 13-28<br />
Figure 13-31 FEC Setting ..................................................................................... 13-29<br />
Figure 13-32 Configuring IP Rate-down ................................................................ 13-30<br />
Figure 13-33 Configuring Capability...................................................................... 13-30<br />
Figure 13-34 Terminal Name Settings ................................................................... 13-31<br />
Figure 13-35 Banner Settings Page ...................................................................... 13-32<br />
Figure 13-36 Horizontal Caption Setting Page ...................................................... 13-33<br />
Figure 13-37 Vertical Caption Setting Page........................................................... 13-35<br />
Figure 13-38 Message Setting Page ..................................................................... 13-36<br />
Figure 13-39 Configuring Security......................................................................... 13-37<br />
Figure 13-40 Configuration ................................................................................... 13-38<br />
Figure 13-41 Configuring Upgrade........................................................................ 13-39<br />
Figure 13-42 Configuring Advanced...................................................................... 13-39<br />
Figure 13-43 System State ................................................................................... 13-40<br />
Figure 13-44 viewing version ................................................................................ 13-41<br />
Figure 13-45 Viewing Statistics ............................................................................. 13-41<br />
Figure 13-46 Viewing Call Brief Information .......................................................... 13-42<br />
Figure 13-47 Configuring Loopback ...................................................................... 13-43<br />
Figure 13-48 Ping Test.......................................................................................... 13-43<br />
Figure 13-49 Audio and Video Testing .................................................................. 13-44<br />
Figure 13-50 <strong>User</strong> Management ........................................................................... 13-45<br />
Figure 14-1 Setting Security Level .......................................................................... 14-1<br />
Figure 14-2 Installation Confirmation Dialog Box..................................................... 14-2<br />
Figure 14-3 Displaying Installation Progress ........................................................... 14-2<br />
Figure 14-4 Installation Completion Dialog Box....................................................... 14-2<br />
Figure 14-5 Logging in to the <strong>PC</strong> Console............................................................... 14-3<br />
Figure 14-6 <strong>PC</strong> Console Page ................................................................................ 14-4<br />
Figure 14-7 <strong>PC</strong> Console Main Menu ....................................................................... 14-5<br />
Figure 14-8 Video Control Page.............................................................................. 14-5<br />
Figure 14-9 Set Image Parameters ........................................................................ 14-6<br />
IV
Figures<br />
Figure 14-10 Preset Camera................................................................................... 14-7<br />
Figure 14-11 Get camera position ........................................................................... 14-8<br />
Figure 14-12 Common Control................................................................................ 14-8<br />
Figure 14-13 Display Mode ..................................................................................... 14-9<br />
Figure 14-14 Picture-in-picture Setting Page......................................................... 14-10<br />
Figure 14-15 Configure Two Splitting Screen ........................................................ 14-10<br />
Figure 14-16 Serial Port Configuration .................................................................. 14-11<br />
Figure 14-17 Setting <strong>PC</strong> Expansion Serial Port..................................................... 14-12<br />
Figure 14-18 Configuring a Shortcut Number........................................................ 14-13<br />
Figure 14-19 Generating a Serial Number............................................................. 14-14<br />
Figure 14-20 Example........................................................................................... 14-15<br />
Figure 14-21 Conference Control Interface 2 ........................................................ 14-17<br />
Figure 14-22 Conference Control Interface 1 ........................................................ 14-18<br />
Figure 14-23 Conference Control Interface 3 ........................................................ 14-19<br />
Figure 14-24 Group Management Interface .......................................................... 14-20<br />
Figure 14-25 Adding a Group................................................................................ 14-20<br />
Figure 14-26 Adding a Sub-group ......................................................................... 14-21<br />
Figure 14-27 Setting a hot key .............................................................................. 14-23<br />
Figure 14-28 Setting Group Color ......................................................................... 14-24<br />
Figure 14-29<br />
Figure 14-30<br />
Conference Control Page at Non-chairman End (no chairman in<br />
conference) ....................................................................................... 14-25<br />
Conference Control Page at Non-chairman End (with chairman in<br />
conference) ....................................................................................... 14-25<br />
Figure 14-31 Has a Chairman in Conference ........................................................ 14-26<br />
Figure 14-32 Functions for Chairman Terminal...................................................... 14-27<br />
Figure 14-33 Conference Control Page (at chairman end) .................................... 14-28<br />
Figure 14-34 Open Voice Control.......................................................................... 14-30<br />
Figure 14-35 Chairman Browsing.......................................................................... 14-30<br />
Figure 14-36 Add Terminal.................................................................................... 14-33<br />
Figure 14-37 Prolong Conference Time ................................................................ 14-33<br />
Figure 14-38 Operations at Chairman End for Connected Terminal....................... 14-34<br />
Figure 14-39 Operations at Chairman End for Disconnected Terminal .................. 14-35<br />
Figure D-1 ZXV10 <strong>T700</strong> Remote Controller ............................................................. D-2<br />
Figure D-2 Description of Remote Control Buttons................................................... D-3<br />
Figure D-3 Inputting Letters ..................................................................................... D-4<br />
Figure D-4 Inputting Symbols................................................................................... D-4<br />
V
ZXV10 <strong>T700</strong> <strong>User</strong> <strong>Guide</strong><br />
Figure D-5 Displaying Symbols................................................................................ D-4<br />
Figure E-1 Basic Architecture of a Videoconferencing System ..................................E-1<br />
Figure E-2 Point-to-Point Videoconference System Structure ...................................E-2<br />
Figure E-3 Single MCU <strong>Network</strong>ing...........................................................................E-3<br />
Figure E-4 Multi-MCU Star <strong>Network</strong>ing .....................................................................E-3<br />
Figure E-5 Multi-MCU Layered <strong>Network</strong>ing ..............................................................E-4<br />
Figure G-1 Troubleshooting Flowchart ..................................................................... G-2<br />
VI
Tables<br />
Table 1-1 Components of The ZXV10 <strong>T700</strong> .............................................................. 1-2<br />
Table 1-2 Basic Connecting Cables for the ZXV10 <strong>T700</strong> .......................................... 1-4<br />
Table 5-1 Menu List .................................................................................................. 5-1<br />
Table 7-1 Static IP Parameters.................................................................................. 7-7<br />
Table 7-2 H.323 Configuration Items ......................................................................... 7-9<br />
Table 7-3 Description of Redundancy Transmission Policies................................... 7-11<br />
Table 8-1 Terminal Name Displaying Mode Parameters ............................................ 8-1<br />
Table 8-2 Banner Parameters ................................................................................... 8-2<br />
Table 8-3 Horizontal Caption Parameters.................................................................. 8-4<br />
Table 8-4 Vertical Caption Parameters ...................................................................... 8-5<br />
Table 8-5 Short Message Parameters ....................................................................... 8-6<br />
Table 12-1<br />
List of the Functions in the Non-chairman Conference Control<br />
Interface .............................................................................................. 12-3<br />
Table 12-2 Description of the Icons in the Terminal List........................................... 12-5<br />
Table 12-3 List of Chairman Conference Control Functions..................................... 12-6<br />
Table 12-4 Site Status after the Operations of Chairman Terminal........................... 12-7<br />
Table 13-1 Menus and Menu Items in the Web Page ............................................. 13-3<br />
Table 13-2 Description of Call/Hangup Parameters ............................................... 13-16<br />
Table 13-3 Settings of Call Setting Parameters ..................................................... 13-19<br />
Table 13-4 Terminal Name Setting Items............................................................... 13-31<br />
Table 13-5 Banner Setting Items ........................................................................... 13-32<br />
Table 13-6 Horizontal Caption Setting Items ......................................................... 13-34<br />
Table 13-7 Vertical Caption Setting Items.............................................................. 13-35<br />
Table 13-8 Short Message Setting Items............................................................... 13-36<br />
Table 14-1 Introduction of <strong>PC</strong> console page ........................................................... 14-4<br />
Table 14-2 Serial Port Configuration...................................................................... 14-11<br />
Table 14-3 Description of Status Icons in <strong>PC</strong> Console........................................... 14-15<br />
Table 14-4 Display Description 1........................................................................... 14-18<br />
Table 14-5 Display Description 2........................................................................... 14-19<br />
Table 14-6 Conference Control Functions of Non-chairman Terminal .................... 14-25<br />
Table 14-7 Conference Control Functions of Chairman Terminal........................... 14-28<br />
VII