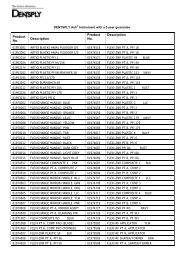
INSTRUmENTS - Dentsply
INSTRUmENTS - Dentsply
INSTRUmENTS - Dentsply

You also want an ePaper? Increase the reach of your titles
YUMPU automatically turns print PDFs into web optimized ePapers that Google loves.
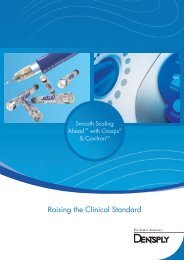
Small things. Big difference.<br />
STERILISATION<br />
burs from damage. Burs left standing wet may stain or corrode.<br />
Diamond/tungsten burs: Burs should be reprocessed as soon as is<br />
reasonably practical following use.<br />
PREPARATION FOR CLEANING: No specific requirements.<br />
Disassembly not required.<br />
AUTOMATIC CLEANING: Equipment: Use only validated washing<br />
machines (HTM 2030: UK only) and validated cleaning agents<br />
suitable for both devices and washing machine. Follow instructions<br />
issued by both the equipment and cleaning agent manufacturers.<br />
When unloading, inspect for complete removal of visible soil.<br />
If necessary, repeat cycle, or use manual cleaning before<br />
repeating cycle.<br />
MAINTENANCE: Discard damaged burs.<br />
INSPECTION AND ALL BURS: Visually inspect to ensure all<br />
contamination has been removed. Check for damage and wear.<br />
Cutting Function Testing: edges should be free of defects. Discard<br />
damaged or corroded burs. Check burs with long, slender features<br />
for distortion. Where burs form part of a larger assembly, check<br />
assembly with mating components. There may be evidence of<br />
discolouration or dulling after sterilisation. This is normal and will not<br />
affect performance.<br />
DRYING: Dry using paper towelling or dry heat not<br />
exceeding 140°C.<br />
PACKAGING FOR STERILISATION: The UK Dept. of Health<br />
recommends that validated, pre-vacuum autoclaves are used for<br />
sterilising wrapped burs Sterilisation: Autoclaves drawing only a<br />
post-sterilisation vacuum for drying purposes are not suitable for<br />
processing wrapped burs. Burs may be loaded into dedicated<br />
instrument trays or general-purpose sterilisation trays. Ensure that<br />
cutting edges are protected.<br />
STERILISATION: Use only validated vacuum autoclaves (Refer to<br />
HTM2010: UK only). Do not exceed 140°C.<br />
Sterilisation Temperature Range (°C) Nominal Pressure (MPa) Minimum Time at Temperature* (mins)<br />
Minimum<br />
Maximum<br />
134 137 0.225 3<br />
* Minimum holding time when nominal operating temperature and pressure have been reached.<br />
STORAGE: Avoid contamination.<br />
ADDITIONAL INFORMATION: When sterilising multiple burs in one<br />
autoclave cycle, ensure that the manufacturers stated maximum load<br />
is Information: not exceeded. Validated ultrasonic baths may be used<br />
with validated cleaning agents. Follow instructions for use issued by<br />
both the equipment and cleaning agent manufacturers.<br />
MANUFACTURER CONTACT: See brochure for telephone and<br />
address of local representative or telephone DENTSPLY Ash<br />
Instruments on +44 (0)1932 853422.<br />
normally determined by wear and damage due to use. Do not use<br />
chemical disinfectants prior to sterilisation or rapid deterioration of the<br />
material may occur. Cold liquid disinfection/sterilisation, chemical<br />
vapour sterilisation, and dry heat sterilisation methods have not been<br />
tested or validated for efficacy and are not recommended for use.<br />
INSTRUCTIONS<br />
POINT OF USE: Remove excess soil with disposable cloth or paper.<br />
CONTAINMENT AND TRANSPORTATION: Protect instruments from<br />
damage. Instruments should be reprocessed as soon as is reasonably<br />
practical following use. Instruments left standing wet may stain or<br />
corrode.<br />
CLEANING - Automated: May be cleaned using an ultrasonic water<br />
bath for 15 minutes.<br />
CLEANING: Manual: Rinse all instruments under running water to<br />
remove any gross debris.<br />
DISINFECTION: Additional disinfection is not necessary prior<br />
to sterilisation.<br />
PACKAGING: Place instrument in a paper or paper/plastic steam<br />
sterilisation pouch. Instruments may be loaded into dedicated<br />
instrument trays.<br />
STERILISATION: Use a steam autoclave. Place bagged instruments<br />
into the steam autoclave, paper side up when using a paper/<br />
plastic pouch. After warm-up is completed, operate at a sterilizing<br />
temperature and pressure of 273ºF/134ºC to 279ºF/137ºC and<br />
pressure of 31psi/216kPa for 6 to 12 minutes. Alternate method:<br />
Place non-bagged inserts into the steam autoclave. After warm-up<br />
is completed, operate at a sterilizing temperature and pressure of<br />
273ºF/134ºC to 279ºF/137ºC and pressure of 31psi/216kPa for<br />
3 to 4 minutes. Instrument should be used immediately.<br />
DRYING: To dry, use the drying cycle of the autoclave. Set cycle for<br />
20-30 minutes.<br />
MAINTENANCE, INSPECTION AND TESTING: Visually inspect<br />
to ensure all contamination is removed. Visually inspect all o-rings<br />
for wear. Replace worn o-rings (Refer to O-Ring Replacement Kit<br />
Instructions). Lubricate o-rings with water before use. Check for<br />
distortion, damage and wear (Refer to Efficiency Wear Indicator<br />
Instructions). Discard damaged, worn or corroded instruments.<br />
STORAGE: To maintain sterility, instruments should remain<br />
bagged until ready for use.<br />
CAVITRON INSERTS: INFECTION<br />
CONTROL PROCEDURES<br />
WARNINGS<br />
Instruments are not sterile upon receipt and must be sterilized prior to<br />
use in accordance with the following instructions. The use of cleaning<br />
and disinfectant solutions is not recommended.<br />
LIMITATIONS ON PROCESSING: Repeated cleaning and sterilisation<br />
cycles have minimum effect on these instruments. End of life is<br />
EARN REWARDS dentsplyrewards.co.uk<br />
CONTACT US dentsply.co.uk 0800 0723313<br />
LEARN ABOUT IT dentsplyacademy.co.uk<br />
207