ENGLISH - Dentsply
ENGLISH - Dentsply
ENGLISH - Dentsply
Create successful ePaper yourself
Turn your PDF publications into a flip-book with our unique Google optimized e-Paper software.
Section 1: IndicationsUltrasonic procedures:• All general supra and subgingival scaling applications.• Periodontal debridement for all types of periodontal diseases.• Endodontic procedures.Section 2: Contraindications and Warnings2.1 Contraindications• Ultrasonic Scalers should not be used for restorativedental procedures involving the condensation ofamalgam.• For optimum performance use only insertsmanufactured by DENTSPLY Professional.2.2 Warnings• Persons fitted with cardiac pacemakers, defibrillatorsand other active implanted medical devices, have beencautioned that some types of electronic equipment mightinterfere with the operation of the device. Although noinstance of interference has ever been reported toDENTSPLY, we recommend that the handpiece andcables be kept at least 6 to 9 inches (15 to 23 cm) awayfrom any device and their leads during use.• There are a variety of pacemakers and other medicallyimplanted devices on the market. Clinicians shouldcontact the device manufacturer or the patientʼsphysician for detailed information about the device.Section 3: Precautions3.1 Precautions for All Systems• Do not place the ultrasonic scaler on or next to aradiator or other heat source. Excessive heat maydamage the ultrasonic scalerʼs electronics. Place theultrasonic scaler where air is free to circulate on all sidesand beneath it. Do not cover vents on rear panel.• The ultrasonic scaler is portable, but must be handledwith care when moving.• Equipment flushing and dental water supply systemmaintenance are strongly recommended. See Section 9:System Care.• Close the water shut-off valve in the dental watersupply system every night before leaving the office.• The use of an in-line water filter is recommended.• Never operate the ultrasonic scaler without waterflowing through the handpiece.• Grounding reliability can only be achieved when theequipment is connected to an equivalent receptaclemarked “Hospital Only” or “Hospital Grade”.3.2 Precautions for Ultrasonic ProphylaxisProcedures• Like a toothbrush, ultrasonic inserts “wear” with use.Inserts with just 2 mm of wear lose about 50% of theirscaling efficiency. In general it is recommended thatultrasonic inserts be discarded and replaced after oneyear of use to maintain optimal efficiency and avoidbreakage. A DENTSPLY Insert Efficiency Indicator isenclosed for your use.• If excessive wear is noted, or the insert has beenbent, reshaped or otherwise damaged, discard theinsert immediately.• Ultrasonic insert tips that have been bent, damaged,or reshaped are susceptible to in-use breakage and shouldbe discarded and replaced immediately.• Retract the lips, cheeks and tongue to prevent contactwith the insert tip whenever it is placed in thepatientʼs mouth.<strong>ENGLISH</strong> • 3
Section 4: Infection Control4.1 Infection Control Information Reference BookletFor your convenience, an Infection Control Informationreference booklet has been included with your CavitronBOBCAT Pro Ultrasonic Scaler. Additional booklets canbe obtained by calling Customer Service at 1-800-989-8826 or717-767-8502 Monday through Friday, 8:00 A.M. to 5:00 P.M.(Eastern Time). For other areas, contact your local DENTSPLYrepresentative.4.2 General Infection Control Recommendations• As with all dental procedures, the use of universalprecautions (i.e., wearing a face mask, eyewear or faceshield, gloves and protective gown) is recommended.• For maximal operator and patient safety, carefullyfollow the Infection Control Information proceduresdetailed in the booklet accompanying your ultrasonicscaler.• As with high-speed handpieces, and other dentaldevices, the combination of water and ultrasonicvibration from your Cavitron BOBCAT Pro UltrasonicScaler, will create aerosols. With proper technique,much of the aerosol dispersion can be effectivelycontrolled and minimized. Please carefully follow theprocedural guidelines in this manual regarding the useof your ultrasonic scaler.• A 0.12% chlorhexidine pre-rinse (ORIS TM ) isrecommended prior to starting any dental procedure.4.3 Water Supply RecommendationsIt is highly recommended that all dental water supplysystems conform to applicable CDC (Centers for DiseaseControl and Prevention) and ADA (American DentalAssociation) standards, and that all recommendations befollowed in terms of flushing, chemical flushing, andgeneral infection control procedures. See sections 5.2 and 9.Section 5: Installation Instructions5.1 General InformationIf the installation of your Cavitron BOBCAT Pro UltrasonicScaler is performed by someone other than trainedDENTSPLY Distributor personnel or DENTSPLY ServiceTechnicians, care should be taken to observe the followingrequirements and recommendations.5.2 Water Line Requirements• The Systemʼs water supply line is factory installed.Do not disconnect it from the ultrasonic scaler.• Incoming water supply line pressure to the ultrasonicscaler must be 25 psi (172kPa) minimum to 60 psi(414kPa) maximum. If your dental water systemʼssupply line pressure is above 60 psi, install a waterpressure regulator on the water supply line to yourCavitron BOBCAT Pro Ultrasonic Scaler.• A manual shut-off valve on the dental water systemsupply line should be used so that the water can becompletely shut-off when the office is unoccupied.• A filter in the dental water system supply line isrecommended so that any particles in the water supplywill be trapped before reaching the ultrasonic scaler.• After the above installations are completed on thedental water supply system, the dental office water lineshould be thoroughly flushed prior to connection to theultrasonic system.• After flushing system verify there are no leaks.<strong>ENGLISH</strong> • 45.3 Electrical RequirementsRefer to Section 11: Specifications.5.4 Unpacking the SystemCarefully unpack your Cavitron BOBCAT Pro Ultrasonic Scalerand verify that all components and accessories are included:1. Cavitron BOBCAT Pro Ultrasonic Scaler with factoryinstalled water supply line, handpiece assembly andfoot control assembly.2. Detachable AC Power Cord set.3. Efficiency Indicators for Cavitron Inserts.4. Literature Packet.5. Cavitron Ultrasonic Inserts (quantity optional).5.5 System Installation• The BOBCAT Pro is designed for both horizontal andvertical placement on a level surface.• Be sure unit is stable and resting on four feet.• Placing unit in direct sunlight may discolor plastichousing.
Section 5: Installation Instructions cont’d5.6 Rear Panel Controls•The ON/OFF Control Switch is located on the RearPanel of the Cavitron BOBCAT Pro Ultrasonic Scaler.The POWER INDICATOR is located on the Front Panelof the Cavitron BOBCAT Pro Ultrasonic Scaler.(See Section 6.1)5.7 Power Cord/Power Connection•Verify the ON/OFF Control Switch located on the rearpanel of the ultrasonic scaler is in the OFF positionbefore proceeding.•Plug the detachable AC Cord into the back of theultrasonic scaler and into an approved outlet.ON/OFF Switch5.8 Water Supply Line Connection•Connect the free end of the ultrasonic scalerʼs watersupply line to the dental water supply line or a CavitronDualSelect TM Dispensing System. If your ultrasonicscalerʼs water supply line is provided with a quickdisconnect, connect the quick disconnect to the dentalwater supply line or a Cavitron DualSelect DispensingSystem.•Inspect all connections to make certain there areno leaks.<strong>ENGLISH</strong> • 5
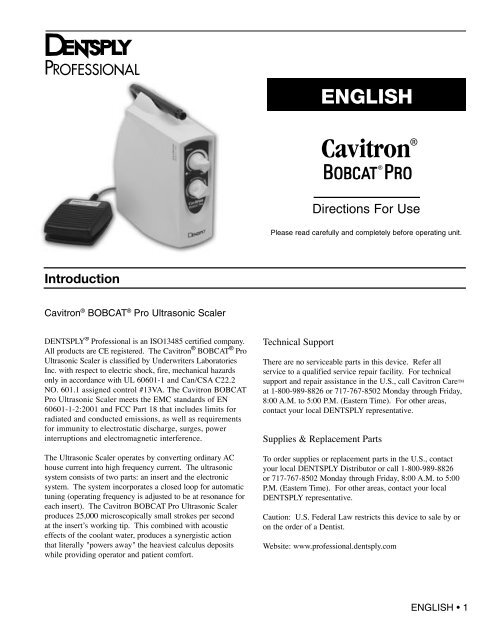
Section 6: BOBCAT ® Pro Ultrasonic Scaler Description6.1 System ControlsHandpiece HolderSafely holds the UltrasonicScaler’s Handpiece (with orwithout an insert) when theSystem is not being used.HandpieceHolds all Cavitron 25K Ultrasonic Insertsand transmits energy from the ultrasonicscaler to the insert.Power ControlTurn knob to select ultrasonicpower level for operation. Clockwiseincrease power and counterclockwisedecreases power.Power Indicator LightIlluminates whenPOWER ON/OFFControl Switch is ON.Foot ControlSee Section 6.4Water Flow AdjustmentTurn knob to select water flow level for operation. Clockwisedecreases water flow and counterclockwise increases waterflow. The water flow rate through the Handpiece also determinesthe temperature of the coolant water. Low flow ratesproduce warmer water. High flow rates produce cooler water.With experience, you will be able to determine the best settingbetween the minimum and maximum flow rates for optimumoperating efficiency and patient comfort.6.2 Handpiece HolderVertical OrientationSeat handpiece witha downward actionas shown.Horizontal OrientationSqueeze handpiece intoholder as shown.6.3 HandpieceThe Cavitron BOBCAT Pro Ultrasonic Scaler handpiece accepts all Cavitron 25K Ultrasonic Inserts.Note: Handpiece does not detach from the cable.Insert PortCableHandpiece<strong>ENGLISH</strong> • 6
Section 6: BOBCAT ® Pro Ultrasonic Scaler Description cont’d6.4 Cavitron ® 25K Ultrasonic InsertsThe many styles of Cavitron ® 25K TM Inserts are easily interchangeable for various procedures and applications.See enclosed booklet for specific information.O-RingProvides seal for handpiece coolant.O-Ring should be replaced when worn.Connecting BodyTransfers and amplifies mechanicalmotion of stack to insert tip.Insert TipShape and size of tipdetermines access andadaptation. Preheatedwater directed to tip.Finger GripInsert MarkingManufacturer, Date (YYMM),Frequency, Insert Type. Tip Shape,Tip Lot Number (if applicable)e.g. DENTSPLY 9608 25K FSI-SLI-10SMagnetostrictive StackConverts energy provided bythe handpiece into mechanicaloscillations used to activatethe ultrasonic insert tip.Hold the handpiece in an upright position. Activate the foot control to bleed with water any air bubbles that might be trappedinside the handpiece. Lubricate the rubber o-ring on the insert with water before placing it into the handpiece. Fully seat insertwith a gentle push-twist motion. DO NOT FORCE.6.5 Foot Control Information & OperationThe following operating characteristics apply when using your Cavitron BOBCAT Pro Ultrasonic Scaler with CavitronUltrasonic Scaling Inserts and the PEC-2 Endosonic Insert.Foot Controldepressed...Foot Controlreleased...The ultrasonic insert tip isactivated and irrigating water.Both ultrasonic activationand irrigating flow stop.NOTE: Water may drop from insert tip after deactivation of foot control frompressure in handpiece.<strong>ENGLISH</strong> • 7
Section 7: Accessories1. AC Power Cord set2. Cavitron ® Ultrasonic Inserts3. Cavitron ® DualSelect TM Dispensing systemFor detailed information, contact your local DENTSPLYrepresentative or authorized DENSTPLYdistributor.Section 8: Techniques for Use8.1 Patient Positioning• For optimal access to both the upper and lower arches,the backrest of the chair should be adjusted to a 45˚degree angle. This assures patient comfort andclinician visibility.• Hold the empty handpiece in an upright position over asink or drain. Activate the Foot Control until water exits.• Lubricate the rubber o-ring on the insert with waterbefore placing it into the handpiece. Fully seat insertwith a gentle push-twist motion. DO NOT FORCE.• Activate the System. Hold the handpiece over a sink ordrain. (Check spray to verify fluid is reaching the working end of the insert tip). Adjust the Water Control knobto ensure adequate flow. Greater flow settings providecooler irrigant.• In general, it is suggested that a "feather-light touch" beused for ultrasonic scaling. The motion of the activatedtip and acoustic effects of the water, in most cases, isadequate to remove even the most tenacious calculus.• Periodically check the Cavitron Ultrasonic Insert forwear with the Cavitron Insert Efficiency Indicator.• The use of a saliva ejector or High Volume Evacuator(HVE) is recommended during all procedures.• Set the ultrasonic scalerʼs Power Control knob to thelowest effective power setting for the application and theselected insert.• Have the patient turn his/her head to the right or left.Also position chin up or down depending upon thequadrant and surface being treated. Evacuate irrigantusing either a saliva ejector or High Volume Evacuator(HVE).8.2 Performing Ultrasonic Scaling Procedures• Note: Refer to the Infection Control InformationBooklet supplied with your system for generalprocedures to be followed at the beginning of each dayand between patients.• The edges of Cavitron® Ultrasonic Inserts are intentionallyrounded so there is little danger of tissue lacerationwith proper ultrasonic scaling technique. Wheneverthe insert tip is placed in the patientʼs mouth, the lips,cheek and tongue should be retracted to preventaccidental contact with the activated tip.8.3 Patient Comfort ConsiderationsReasons for sensitivity• Incorrect tip placement. The point should never bedirected toward tooth root surfaces.• Not keeping tip in motion on tooth. Do not allow theinsert to remain in a static position on any one area ofthe tooth. Change the insertʼs path of motion.• Applying excessive pressure. Use a very light graspand pressure, with a soft tissue fulcrum wheneverpossible, especially on exposed cementum.• If sensitivity persists, decrease power setting and/ormove from the sensitive tooth to another and then return.<strong>ENGLISH</strong> • 8
Section 9: System Care9.1 Daily MaintenanceIt is recommended that you perform the followingmaintenance procedures to help minimize bio-filmformation in the water path of your Cavitron BOBCAT Proultrasonic scaler which could affect the water flow to theultrasonic insert, and scaling performance.Start-Up Procedures at the beginning of the day:1. Open the manual shut-off valve on the dental officewater supply system.2. Turn the System ON using the ON/OFF control switch.(See illustration on page 5). Verify the Power IndicatorLight is lit.3. Set the Power Control knob to the minimum setting.4. Set the Water Control knob to maximum.5. Hold the Handpiece (without an insert installed) uprightover a sink or drain. Activate the Foot Control and flushthe water line for at least 2 minutes.6. Place a sterilized insert into the Handpiece and set theWater Control knob and Power Control knob to yourpreferred operating position.Between Patients:1. Remove ultrasonic insert used, clean and sterilize.2. Disinfect the surfaces of the cabinet, Power Cord,Handpiece and cable assembly and Foot Control andcable assembly by applying an approved non-immersiontype disinfectant solution* carefully following theinstructions provided by the disinfectant solutionmanufacturer. To clean system, generously spraydisinfectant solution on a clean towel and wipe allsurfaces. Discard used towel. To disinfect system,generously spray disinfectant on a clean towel andwipe all surfaces. Allow disinfectant solution to airdry. Never spray disinfectant solution directly on theultrasonic scaler.3. Set the power to minimum and hold the handpiece over asink or drain and flush the water line at maximum waterflow for 30 seconds.4. When ready, place a sterilized insert into the handpiece.Shut-Down Procedures at the end of the day:1. Remove ultrasonic insert used, clean and sterilize.2. Turn the System OFF.3. Disinfect the surfaces of the cabinet, Power Cord,Handpiece and cable assembly and Foot Control andcable assembly by applying an approved non-immersiontype disinfectant solution* carefully following theinstructions provided by the disinfectant solutionmanufacturer. To clean system, generously spraydisinfectant solution on a clean towel and wipe allsurfaces. Discard used towel. To disinfect system,generously spray disinfectant on a clean towel andwipe all surfaces. Allow disinfectant solution to airdry. Never spray disinfectant solution directly on theultrasonic scaler.4. Close the manual shut-off valve on the dental watersupply system.*NOTE: Water-based disinfectant solutions are preferred.Some alcohol-based disinfectant solutions may be harmfuland may discolor plastic materials.9.2 Weekly MaintenanceEnd of Week Procedures(when connected to a DualSelect TM Dispensing System).1. Follow the end of week procedures listed in theDualSelect TM Dispensing System manual.<strong>ENGLISH</strong> • 9
Section 11: Specifications cont’dOPERATING ENVIRONMENTTemperatureRelative Humidity10 to 25 degrees Celsius30 to 75 percent ( non-condensing)TRANSPORT AND STORAGE CONDITIONSTemperatureRelative HumidityAtmospheric Pressure0 to 70 degrees Celsius10 to 95 percent ( non-condensing)500 HPa to 1060 HPaSYMBOLOGYAC POWERIPX1TYPE B APPLIED PART EQUIPMENTPROTECTIVE EARTH (GROUND)Footswitch not for operating theatresProtection Class- IPX1IPX1 Classification of ingress of waterMEDICAL EQUIPMENTWITH RESPECT TO ELECTRIC SHOCK, FIRE ANDMECHANICAL HAZARDS ONLY IN ACCORDANCE WITHUL-2601-1/60601-1, CAN/CSA C22.2 NO.601.113VARefer to instructionmanual for informationThe International EMC-MarkProof of product compliancewith EMC directive (89/336/EEC)Section 12: Equipment Classifications• Type of protection against electric shock: Class 1• Degree of protection against electric shock:Type B• Degree of protection against the harmful ingress of water:Ordinary• Mode of operation:Continuous• Degree of safety of application in the presence of a flammable anaestheticmixture with air or with oxygen or nitrous oxide:Equipment not suitable for use in the presenceof flammable anaesthetic or oxygen.• According to medical device directive: IIA (rule 9)Section 13: Disposal of Unit• In accordance with local and state laws.<strong>ENGLISH</strong> • 11


