PatternMaker Garment Collection - PatternMaker Software
PatternMaker Garment Collection - PatternMaker Software
PatternMaker Garment Collection - PatternMaker Software

Create successful ePaper yourself
Turn your PDF publications into a flip-book with our unique Google optimized e-Paper software.
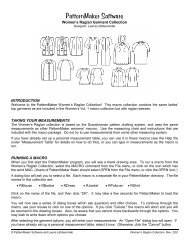
Men/Young Men’s <strong>Collection</strong><br />
3. Close zipper placket temporarily with pins on right side of garment (4). On wrong side pin other<br />
zipper edge flat on seam allowance (5). Make certain that the zipper is straight and lies flat at an<br />
even distance from edges of seam allowance. Remove pins from right side. Sew from wrong side<br />
through all thicknesses, across bottom and up the pinned edge of zipper near zipper teeth.<br />
If you want to, you can sew a second row of stitches one presser foot’s distance from the first one<br />
(7). If you are making jeans or other pants that need to be very strong, strengthen bottom of zipper<br />
placket with tight zigzag (bartack) on right side.<br />
For an unnoticeable zipper placket:<br />
Sew zipper directly onto garment seam, placing zipper upside down on a basted seam on wrong<br />
side of garment. The distance between the seam and the zipper stitching is the width of the<br />
presser foot. Basting is removed after sewing. This kind of a zipper is good for a dress back seam<br />
and is also widely used in skirts.<br />
HOW TO SEW COLLARS for shirts<br />
1. Iron interfacing to two under collar pieces (both collar band and collar) (1). Fold neckline seam<br />
allowance of collar band inwards and baste (2).<br />
2. Sew collar together at outer edges, leaving lower edge raw. Trim seam allowance at corners.<br />
3. Turn collar right side out, open seams well and press. Edgestitch.<br />
4. Sew upper collar band pieces together at upper seam, sandwiching collar between them. Leave<br />
neckline edge raw. Trim seam allowance at corners and at curves. Turn collar right side out, open<br />
seams well and press.<br />
5. Stitch collar assembly to shirt/blouse neck along raw edge, right side of collar against wrong side of<br />
shirt/blouse. Turn seam allowance up. Pin basted edge of collar on shirt’s/blouse’s neck to right<br />
side. Baste. Blindstitch or stitch. Edgestitch lower part of collar.<br />
6. Sew convertible collars accordingly (5). Notice that convertible collars are placed at front center of<br />
shirt/blouse and not over extension for buttons as for shirt collar.<br />
HOW TO ATTACH COLLARS<br />
1. For the collar, cut 2 pieces of fabric and 1 piece of interfacing. The under collar piece is on the<br />
inside, hidden by the upper piece, when the garment is completed.<br />
9